

Page 1
User’s Guide
SonicWALL CDP
SonicWALL CDP 6080/5040 Appliance 750GB Replacement Hard Drive Overview
The 750GB replacement hard drive can be inserted into any drive slot on your SonicWALL CDP 6080 or 5040
appliance. You can insert the drive while the SonicWALL CDP appliance is powered on.
The front bezel on the SonicWALL CDP appliance covers the drive slots. The bezel can be unlocked with the front
bezel security key supplied with the appliance.
The Web management interface provides a graphical view of the hard drive array on the SonicWALL CDP
appliance. The SonicWALL CDP 6080 has two arrays with four drive slots in each. The SonicWALL CDP 5040 has
a single array of four drives. The best practice is to view the array on the System > RAID page during the
replacement process.
Removing the Defective Hard Drive from the SonicWALL CDP Appliance
SonicWALL CDP 6080/5040 Drive Replacement User’s Guide
To view the hard drive arrays and remove the defective drive from the SonicWALL CDP appliance, perform the
following steps:
1. On your SonicWALL CDP appliance, use the front bezel key to unlock the front bezel, then remove the front
bezel to expose the hard drive array.
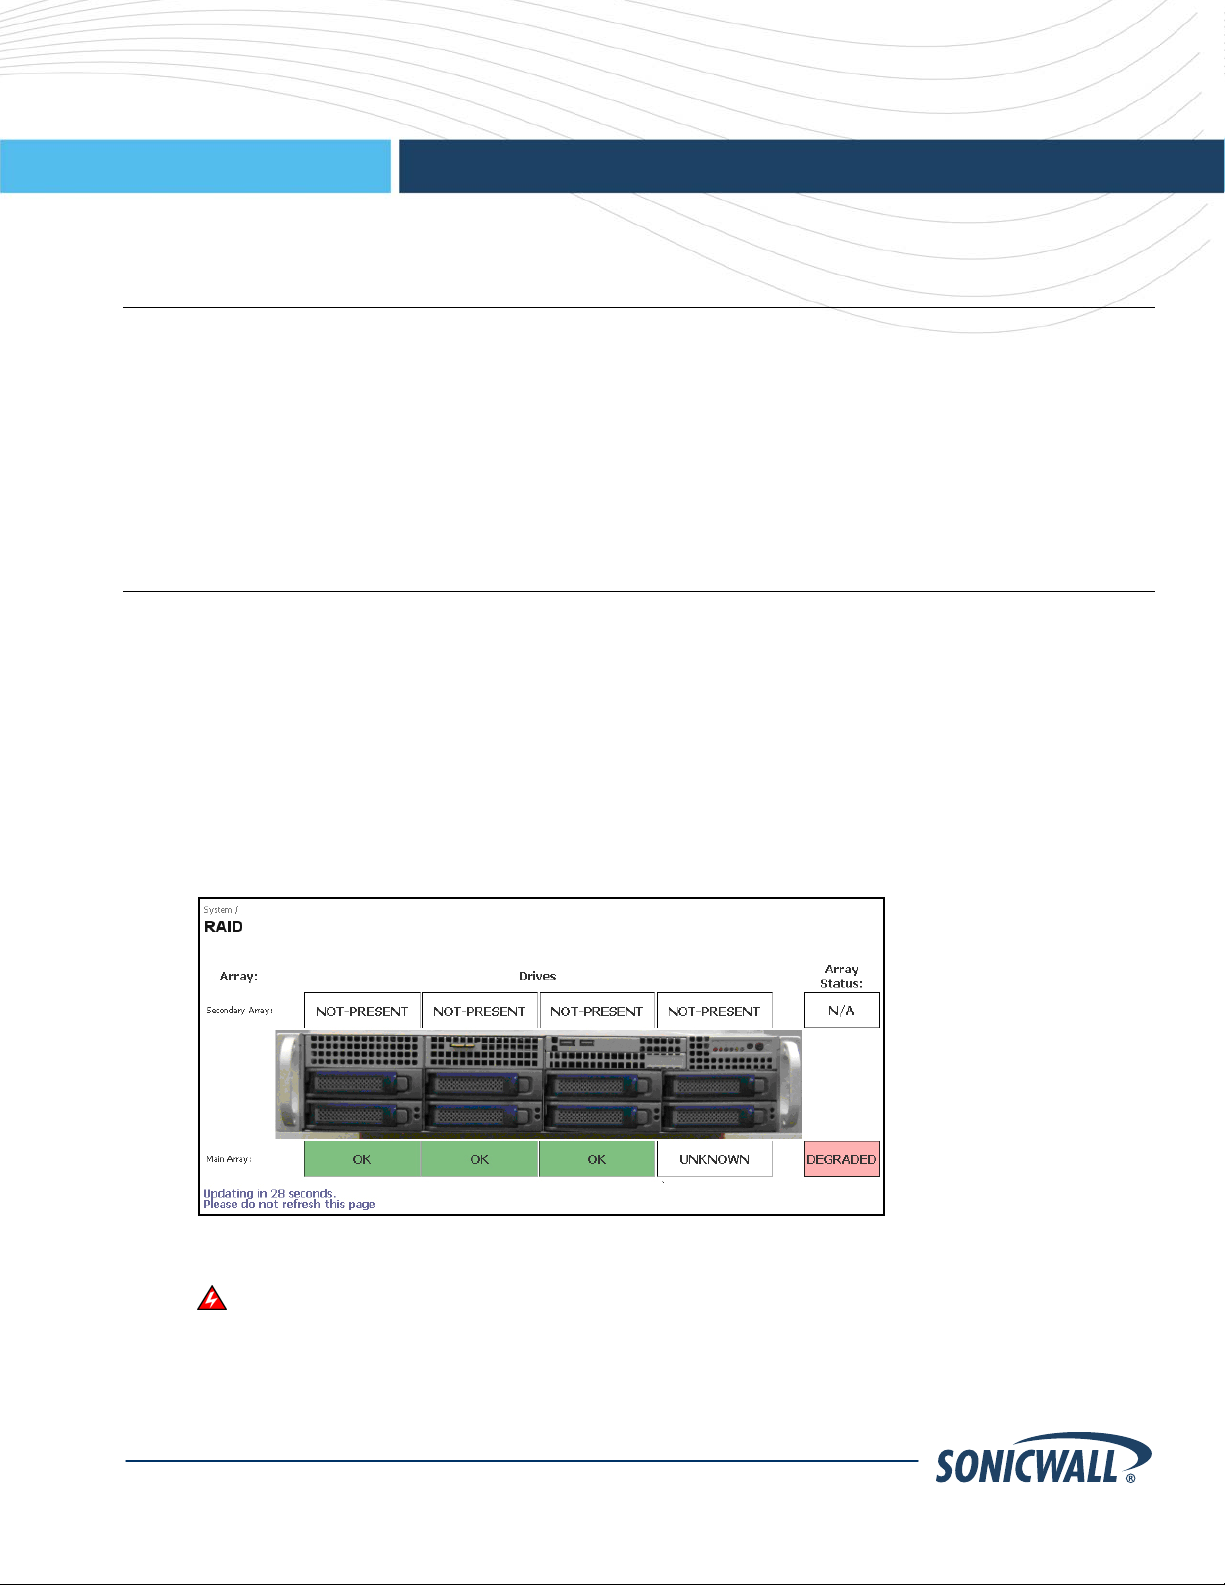
2. In the Web management interface, navigate to the System > RAID page. The defective drive is indicated
by a drive status box displaying a status such as:
• UNKNOWN
• NOT SUPPORTED
• NOT PRESENT
You might see a different status than those listed, depending on the condition of the drive as interpreted by
the RAID controller.
3. On the appliance, press the square button on the right side of the defective drive to pop out the drive
handle.
Warning: Be careful to remove only the defective drive from the drive array while the appliance is
powered on. Removing more than one drive from an active array will cause loss of data.
4. Grasp the drive handle and pull the drive straight out to remove it from the slot.
SonicWALL CDP 6080/5040 Drive Replacement User’s Guide
Page 2
User’s Guide
Inserting the Replacement Drive into the SonicWALL CDP Appliance
Warning: Do not insert anything other than the SonicWALL approved hard drive into the SonicWALL CDP
appliance.
To view the hard drive array and insert the replacement drive into the SonicWALL CDP appliance, perform the
following steps:
1. Remove the hard drive and the drive number stickers from the replacement drive shipping carton.
2. Depending on which drive you are replacing, apply the appropriate sticker to the drive handle. While holding
the drive with the label side up, place the sticker near the edge of the handle next to the square button.
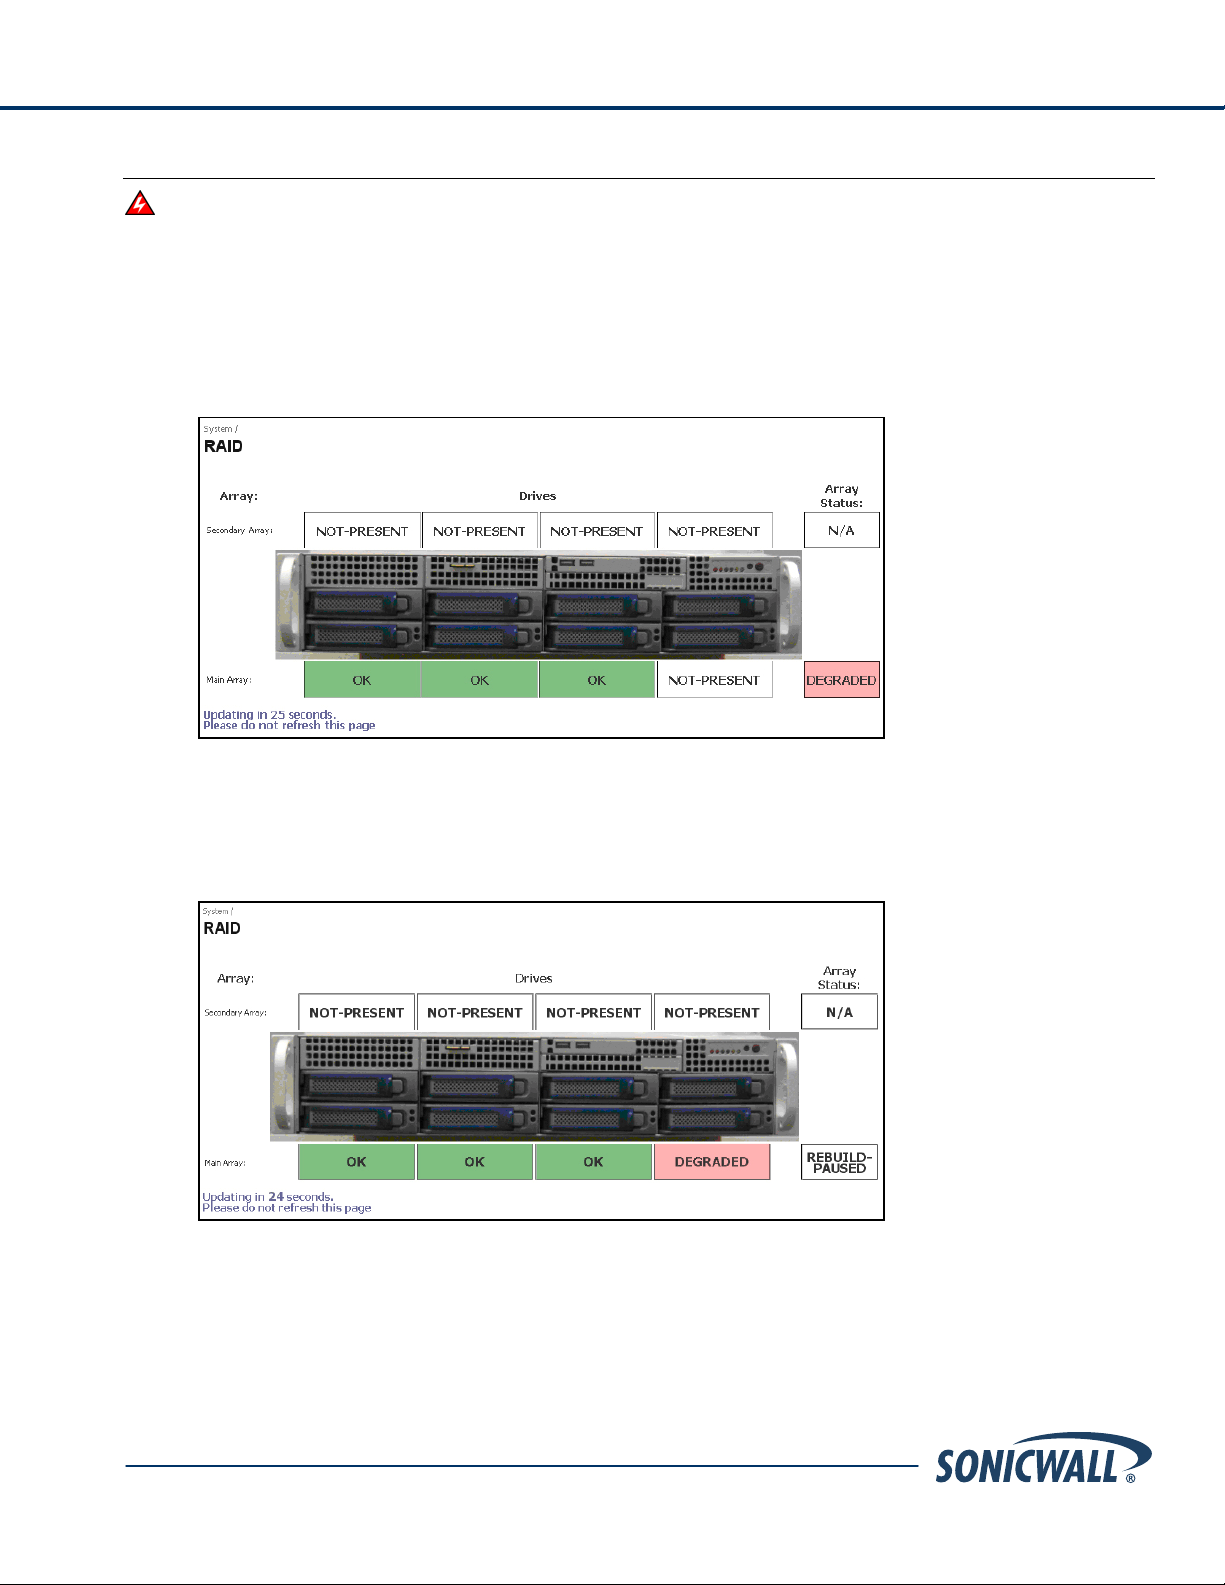
3. In the Web management interface, navigate to the System > RAID page.
4. Pop open the drive handle on the new hard drive by pressing the square button.
5. Insert the drive into the empty slot, label side up with the handle sticking out.
6. Press the drive firmly into place to seat the connectors, and then close the handle.
7. As the System > RAID screen refreshes (every 30 seconds), you will see the drive slot status change to
DEGRADED, and the Array Status change to
REBUILD-PAUSED.
SonicWALL CDP 6080/5040 Drive Replacement User’s Guide
2
Page 3

User’s Guide
The DEGRADED drive status indicates that the RAID controller senses that data is missing from the drive.
The Array Status will change to REBUILDING within a few minutes.
8. You may continue to use your SonicWALL CDP appliance while the RAID controller rebuilds the array with
the new drive. The rebuilding process requires at least three hours.
When finished rebuilding, the status for both the drive and the array changes to OK.
9. Re-install the front bezel, being sure to properly line up the LCD connectors. The best practice is to align
and seat the right side of the bezel (as you are facing the front of the SonicWALL CDP appliance), then
view the connectors from above as you carefully press the left side of the bezel into place.
10. Lock the bezel with the front bezel security key.
______________________
Last updated: 4/1/2009
Prepared by: sweigand
SonicWALL CDP 6080/5040 Drive Replacement User’s Guide
3
Page 4

User’s Guide
The replacement 750GB hard drive is for use only with approved SonicWALL appliances. Use of this drive with a SonicWALL appliance that is
not approved will void the warranty for that SonicWALL appliance. This drive is provided on an "as is" basis without warranty of any kind.
01-SSC-9310 SONICWALL APPLIANCE REPLACEMENT HD 750GB
For information and related documents, see the following Web site:
http://www.sonicwall.com/us/Support.html
SonicWALL, Inc.
1143 Borregas Drive
Sunnyvale, CA 94089-1306
T: +1.408.745.9600
F: +1.408.745.9300 P/N 232-001619-50
www.sonicwall.com Rev A 11/ 08
© 2009 SonicWALL, Inc. is a registered trademark of SonicWALL, Inc. Other product and company names mentioned herein may be trademarks
and/or registered trademarks of their respective companies. Specifications and descriptions subject to change without notice.
SonicWALL CDP 6080/5040 Drive Replacement User’s Guide
4
 Loading...