

Page 1
®
ReplayTV 4500
User’s Guide
Page 2

Package Contents
• ReplayTV Digital Video Recorder • Serial cable
• Coaxial cable • 9-15 pin serial cable adapter*
• Audio/Video c able • RJH-9 pin adapter*
• S-Video cable • Remote control
• Ethernet cable • Two AA batteries
• Telephone c able • Information Card
• Infrared (IR) blaster cable • Quick Setup Guide
*Use if the serial cable is not compatible with your satellite receiver.
Copyright/Trademarks
© 2002 SONICblue Incorporated. All rights reserved.
ReplayTV, ReplayTV Service, ReplayZones, QuickSkip, AutoSkip and Show Organizer are trademarks of SONICblue Incorporated. All other product or brand names asthey appear are trademarks or registered trademarks of their respective holders.
Thisdocumentcontainsproprietaryinformation ofSONICblueIncorporated (the “Company”).No partof this document may be copied, reproduced,transmitted, distributed, transcribed, stored in a retrieval
system, modifiedor translated into any o ther language or computer language,or sublicensed, in any form or byany means—electronic, mechanical, magnetic, optical, chemical, manual or otherwise—without the prior written consent of the Technical Support Manager at the Company, 2841 Mission College Blvd., Santa Clara, CA 95054. Further, this document may not be disseminated(or otherwise made
available) using telecommunications lines or frequencies except in a Limited Access Environment andonly to persons authorized by theCompany to receive and use th is document and the information contained ther ein. For purposes ofthis copyright, th e term “Limited Access Environment” shall mean a computer network(including, withoutlimitation, a local area network, a widearea network o r an intranet)
that restricts access to personnel in a reliable fashion (which, at a minimum, shall require each user to enter a uniquepassword in order to access the network) that can reasonably be expected to prevent
access to the document by persons other than authorized users. In addition the training and instructional procedures described in this document areconfidential and proprietary intelligence of the Company
and may notbe copied or used except as permitted by the Company.Any unauthorized or otherwiseimproper use of this document or any of its material byany person will subject that person to liability for
damages.
The Company shall not be liable for any errors contained herein or for any damages arising out of or related to this document or the information contained therein, even if the Company has been advised of
the possibility of such damages.
This document is intended for informational and instructional purposes only. The Company reserves the right tomake changes in the specifications and other information contained in this document without
prior notification.
It is the intent of SONICblue that this product be used in full compliance with the copyright laws of the United States. It is your responsibility to comply with such laws. Unauthorized recording of copyrighted television programs or providing copies o f such programs to others may, in certain circumstances, violatecopyright law and prior permission from copyright owners may be required for certain public performances andcertain commercial uses.
ReplayTV 4500
P/N 41005009B
ii
Page 3
Table of Contents
1 - Getting Started 1
• Before you Begin.........................................................................................................................................................1
• Feature Updates from the ReplayTV Service..............................................................................................................1
• Feature Highlights .......................................................................................................................................................2
• Turning on ReplayTV..................................................................................................................................................6
• Putting ReplayTV in Standby Mode ...........................................................................................................................6
2 - Connections 7
• Incorporating ReplayTV into your Entertainment System..........................................................................................9
• Checking your Satellite Receiver................................................................................................................................9
• Connecting ReplayTV to an A/V Receiver.................................................................................................................9
• Connecting ReplayTV to a VCR...............................................................................................................................10
• Connecting a Video Camera or VCR to ReplayTV ..................................................................................................10
• Connecting Cable Box and Satellite Receiver Controllers........................................................................................10
• Completing the On-screen Setup...............................................................................................................................12
• Connecting ReplayTV to an Existing Network.........................................................................................................12
• Router Setup ..............................................................................................................................................................15
• Using ReplayTV with Firewall Software..................................................................................................................17
• Entering Networking Information Manually on ReplayTV......................................................................................17
• Determining the ReplayTV IP Address.....................................................................................................................17
• Determining the ReplayTV MAC (Media Access Control)Address........................................................................18
• Finding the Router IP Address ..................................................................................................................................18
• Finding your Computer’s Network Information .......................................................................................................19
iii
Page 4
3 - Setup 21
• ReplayTV Name........................................................................................................................................................23
• Internet Identity and Address Book...........................................................................................................................23
• Default Record Options.............................................................................................................................................23
• Default Playback Options..........................................................................................................................................23
• Network and Input Settings.......................................................................................................................................23
• Video Output Settings ...............................................................................................................................................23
• Screen Saver and Pause Screen .................................................................................................................................23
• Parental Control.........................................................................................................................................................24
• Add or Remove Channels..........................................................................................................................................24
• MyReplayTV Registration ........................................................................................................................................24
• Privacy Policy............................................................................................................................................................24
• System Information ...................................................................................................................................................25
• Remote Control Setup ...............................................................................................................................................26
4 - Basic Operations 27
• Show Watching Options............................................................................................................................................27
• Show Recording Options...........................................................................................................................................27
• Pausing live TV and Recorded Shows ......................................................................................................................28
• Using Rewind and Fast Forward ...............................................................................................................................28
• Using Multispeed Slow Motion.................................................................................................................................29
• Using Frame Advance ...............................................................................................................................................29
• Using Instant Replay .................................................................................................................................................30
• Using QuickSkip .......................................................................................................................................................30
• Using Jump................................................................................................................................................................30
• Using the Channel Guide...........................................................................................................................................32
• Setting Record Options..............................................................................................................................................35
• To Record a Show from a Replay Zone:...................................................................................................................37
• Changing the Default Record Options ......................................................................................................................38
• Cancelling a Recording .............................................................................................................................................39
ReplayTV 4500
iv
Page 5

• Resolving Conflicting Recordings ............................................................................................................................40
• Replay Channels........................................................................................................................................................40
• Recording Tips ..........................................................................................................................................................42
• Navigating the Replay Guide ....................................................................................................................................44
• Category Options.......................................................................................................................................................44
• Replay Channel Options............................................................................................................................................44
• Replay Show Options................................................................................................................................................45
• Watching a Recorded Show ......................................................................................................................................45
• Preserving an Episode of a Show..............................................................................................................................45
• Saving Recordings to Videotape ...............................................................................................................................46
5 - Advanced Features 47
• Playing Shows from Another In-home ReplayTV....................................................................................................47
• Selecting Local/Remote Replay Guides....................................................................................................................48
• Adding other ReplayTV users to your Internet Address Book .................................................................................49
• Sending Shows ..........................................................................................................................................................49
• Using the Received Category....................................................................................................................................50
• Accessing the Internet Address Book........................................................................................................................50
• Setting COMMERCIAL ADVANCE Default..........................................................................................................51
• Turning COMMERCIAL ADVANCE on and off....................................................................................................51
• Installing ReplayTV Photo Transfer .........................................................................................................................52
• Using the Photo Viewer.............................................................................................................................................53
• Show-watching Shortcuts..........................................................................................................................................54
• Channel Guide Shortcuts...........................................................................................................................................54
• Replay Guide Shortcuts.............................................................................................................................................54
• Find Shows On-screen Keyboard Shortcuts..............................................................................................................55
• Slide Show Control Shortcuts ...................................................................................................................................55
• Channel Surfing Display Shortcuts ...........................................................................................................................55
• Record Options Screen Shortcuts..............................................................................................................................55
v
Page 6

6 - Help 57
• Customer Service Information ..................................................................................................................................57
• Frequently Asked Questions......................................................................................................................................57
• Warranty ....................................................................................................................................................................63
• Privacy Policy Q&A..................................................................................................................................................68
• Important Safety Instructions ....................................................................................................................................71
• Safety/Regulatory Information..................................................................................................................................73
• FCC Registration and Requirements.........................................................................................................................74
• FCC Rules, Part 15....................................................................................................................................................74
• FCC Rules, Part 68....................................................................................................................................................75
ReplayTV 4500
vi
Page 7
Chapter 1
:: Welcome
Getting Started
g
d
e
n
i
t
t
r
t
a
e
t
G
S
Congratulations on your purchase of the ReplayTV 4500. In case warranty service is required, please take a mom ent to attach your
receipt to this user’s guide and write down your Serial Number, located on the back panel of the ReplayTV 4500.
Serial Num ber: __________________________________.
Additional system information for your new ReplayTV 4500, including the Serial Number, can be found by performing the following steps:
1 Press Menu to display the ReplayTV Main Menu. 2 Select Setup.
3 Select S ystem Information.
Before you Begin
Make sure you have connected ReplayTV to your television and other components. Refer to the Quick Setup Guide or “Connections” on page 7 for instructions.
After you have experienced the exciting new wor ld of personal television, you will never watch plain old television again. No videotapes. No hassles. No compromises. Pause live television. With ReplayTV,it’s easy to quickly find and automatically record your
favorite television shows, so you can watch them whe never you want—on your schedule, not somebody else’s. Also, ReplayTV is
the first digital video recorder (DVR) that allows you to share content among multiple units in a home network. You can even send
your recordings over the Internet with friends and family who are using R eplayTV.
Feature Updates from the ReplayTV Service
New features are occasionally delivered through the Ethernet and telephone connections (whichever you use). When this occurs
you may encounter screens that look a little different from those in this guide or you may find differences in the features covered.A
message will be sent to your ReplayTV notifying you when new features are available. Choose Messages from the Main Menu to
read about the new features.
For the very latest user’s guide and new feature instructions, visit www.sonicblue.com/replaytv
s
n
o
i
t
c
e
n
n
o
C
p
u
t
e
S
s
n
o
c
i
i
t
s
a
a
r
B
e
p
O
d
s
e
e
c
r
n
u
t
a
a
v
e
d
F
A
p
l
e
H
1
Page 8

Feature Highlights
• Control live television. Pause, rewind, fast forward, play in slow motion, or watch an instant replay—all without missing a single scene. See “Controlling Live Television” on page 28.
• Automatically record every episode of your favorite shows, or constantly find and record shows that interest you. Schedule a
recording once and ReplayTV does the rest. See “Recording Shows” on page 34.
• Jump past commercials or recorded scenes you don’twanttowatchwithQuickSkip™.See“Using QuickSkip” on page 30.
• Watch your shows commercial free. Use the COMMERCIAL ADVANCE feature to skip commercial messages during play-
back of recorded and delayed shows. See “COMMERCIAL ADVANCE” on page 51.
• COMMERCIAL ADVANCE lets you decide whether or not to
watch commercial messages during playback of a recorded television broadcast. If you enable the feature it will skip most commercial messages. You can turn it off or on at any time by
pressing the button.
• Locate shows that you want to watch without searching through pages of program schedules. The Find Shows feature locates
shows based on specific titles, a ctors, directors, and topics that you choose. See “Find Shows” on page 36.
• Send recordings over the Internet. ReplayTV is broadband enabled, so you can send your recordings to other ReplayTV 4000s
and 4500s over the Internet by connecting ReplayTV to your home network. The Ethernet connection is also used to download
Channel Guide information via broadband. It must be connected at all times.See“Sending Recordings to other ReplayTVs” on
page 49.
• Watch shows recorded on other ReplayTVs. If you have more than one ReplayTV, you can watch shows in one room that were
recorded in a nother. S ee “Watching Shows Recorded on other ReplayTVs” on page 47.
• Transfer digital photos from your PC to your ReplayTV to create and view slide shows of your vacation or other photo collections. Additionally, you can display your photos when you press PAUSE or when the screen saver starts. See “Screen Saver and
Pause Screen” on page 52.
ReplayTV 4500
2
Page 9
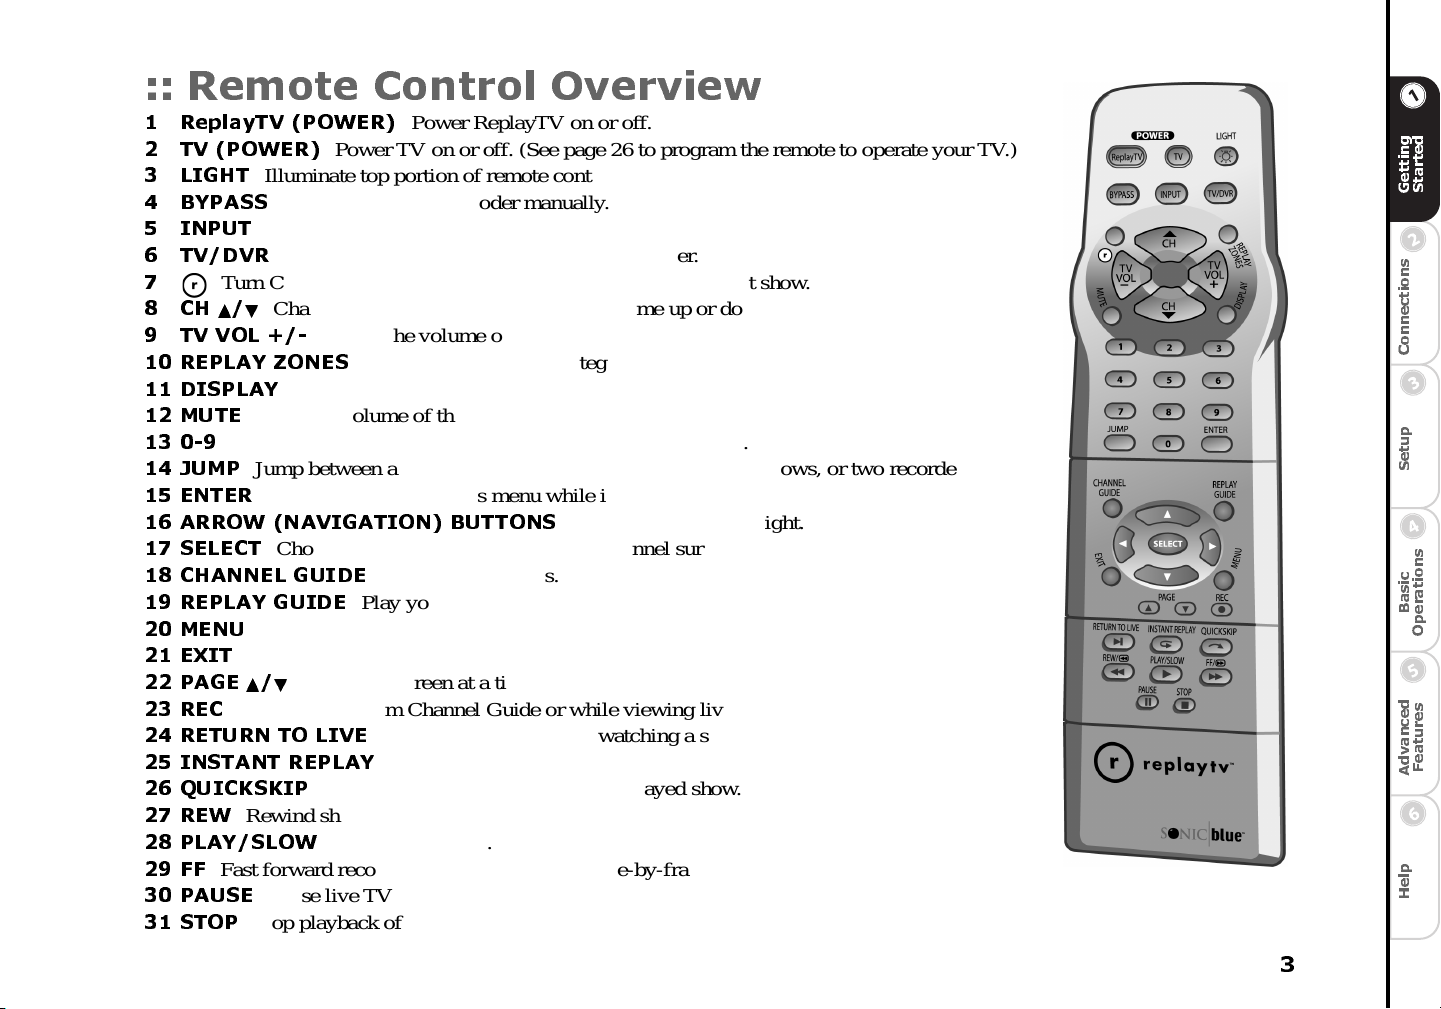
:: Remote Control Overview
1ReplayTV (POWER)
2TV (POWER)
3 LIGHT
Illuminate top portion of remote control.
4 BYPASS 5INPUT
Switch among ReplayTV inputs.
6 TV/DVR 7 8CH Y/B
Turn COMMERCIAL ADVANCE on and off for the current show.
Change channels; move one screen at a time up or down in guides and menus.
9 TV VOL +/-
Power TV on or off. (See page 26 to program the remote to operate your TV.)
Bypass R eplayTV encoder manually.
Switch between ReplayTV tuner and TV tuner.
Adjust the volume of the programmed TV.
10 REPLAY Z ONES 11 DISPLAY 12 MU TE 13 0-9
Tune to c hannels; jump to a channel in the C hannel G uide.
14 JU MP 15 ENTER
Program information about current show.
Mute the volume of the programmed TV.
Jump between a recorded show and live TV, two live TV shows, or two recorded shows.
Display a current show’s menu while in the Channel Guide.
16 ARROW (NAVIGATION) BUTTONS 17 SELECT
Choose an on-screen option; display channel surfing display while watching live TV.
18 CH ANNEL GUIDE 19 REPLAY GUIDE 20 MENU 21 EX IT 22 PAGE Y/B 23 REC
Display ReplayTV Main Menu.
Exit on-screen menus.
Move one screen at a time up or down in ReplayTV guides and m enus.
Record show from Channel Guide or while viewing live TV.
24 RE TURN TO LIVE 25 INSTANT REPLAY 26 QUICKSKIP 27 REW
Rewind show.
28 PLAY/SLOW 29 FF
Fast forward recorded or delayed show; frame-by-frame a dvance while paused.
30 PAUSE 31 STOP
Stop playback of show.
Skip 30 seconds of a recorded or delayed show.
Play/slow motion.
Pause live TV and recorded shows.
PowerReplayTVonoroff.
Search TV listings by category.
Move on-screen highlight.
Display TV listings.
Play your recorded shows.
Return to live TV while watching a show delayed.
Return 7 seconds and replay a segment.
g
d
e
n
i
t
t
r
t
a
e
t
G
S
s
n
o
i
t
c
e
n
n
o
C
p
u
t
e
S
s
n
o
c
i
i
t
s
a
a
r
B
e
p
O
d
s
e
e
c
r
n
u
t
a
a
v
e
d
F
A
p
l
e
H
3
Page 10
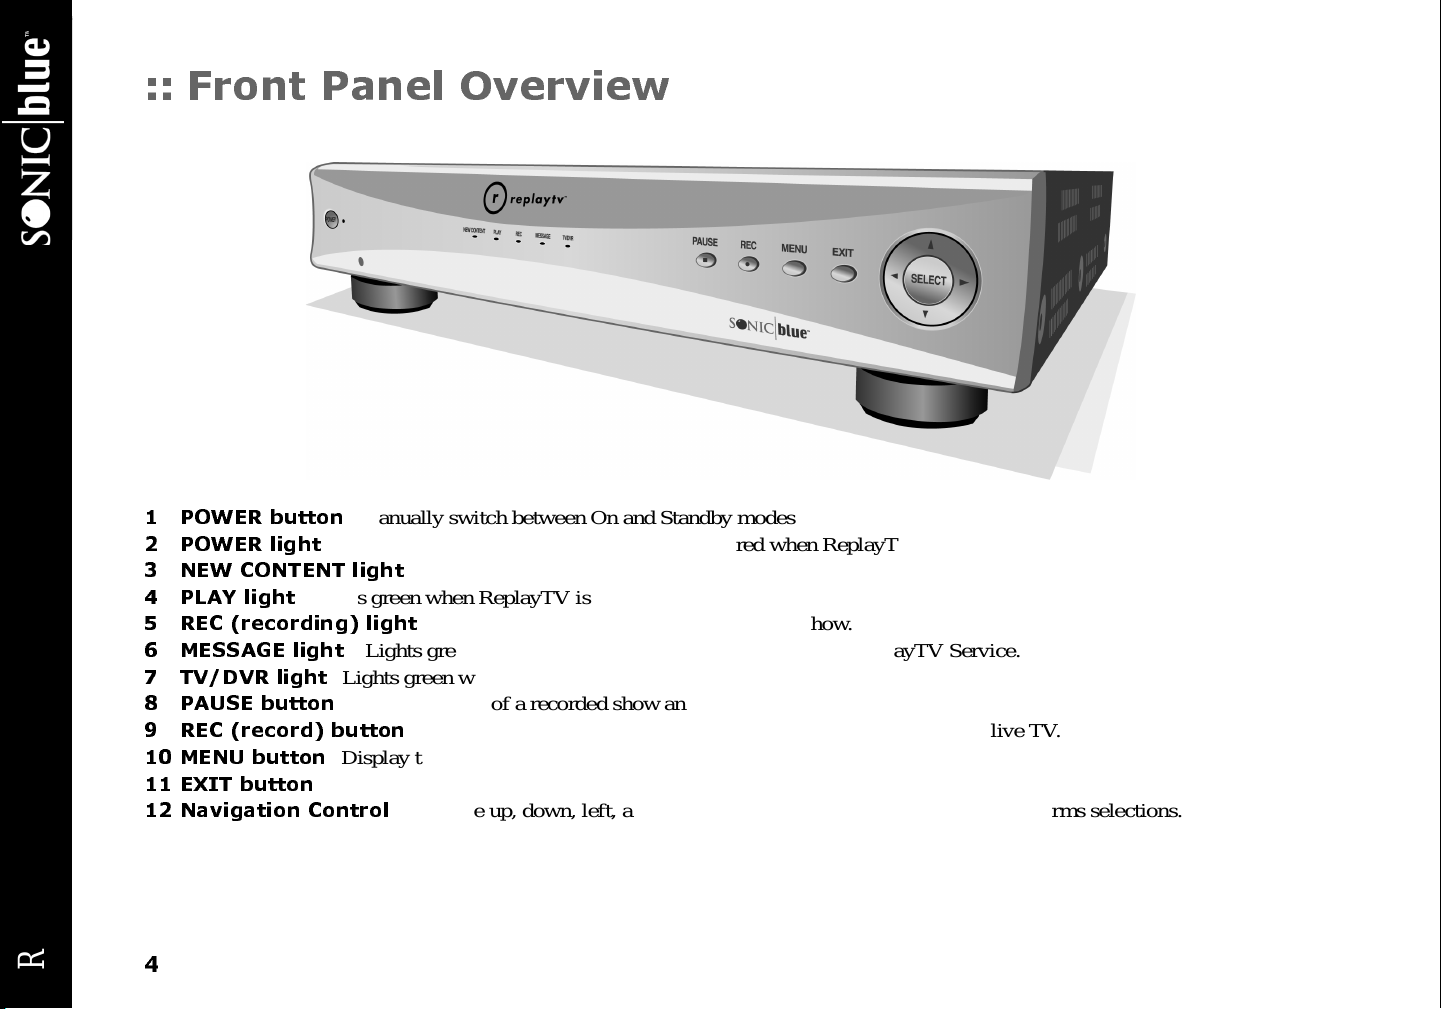
:: Front Panel Overview
ReplayTV 4500
1 POWER button 2 POWER light 3 NEW CONTENT light 4 PLAY light 5 REC (recording) light 6 MESSAGE light 7 TV/DVR light 8 PAUSE button 9 REC (record) button 10 MENU button 11 EX IT button 12 Navigation Control
4
Manually switch between On and Standby modes.
Blinks while ReplayTV is starting up. Lights red when ReplayTV is on.
Lights green whe n ReplayTV is playing a show.
Lights green when a new message is received from the ReplayTV Service.
Lights green when using the ReplayTV tuner.
Pause playback of a recorded show and live TV.
Display the Main Menu.
Exit on-screen m enus.
Navigate up, down, left, and right in the on-screen menus. SELECT confirms selections.
Lights gr een after ReplayTV finishes recording a show.
Lights red when ReplayTV is recording a show.
Record selected show from the Channel Guide or while viewing live TV.
Page 11
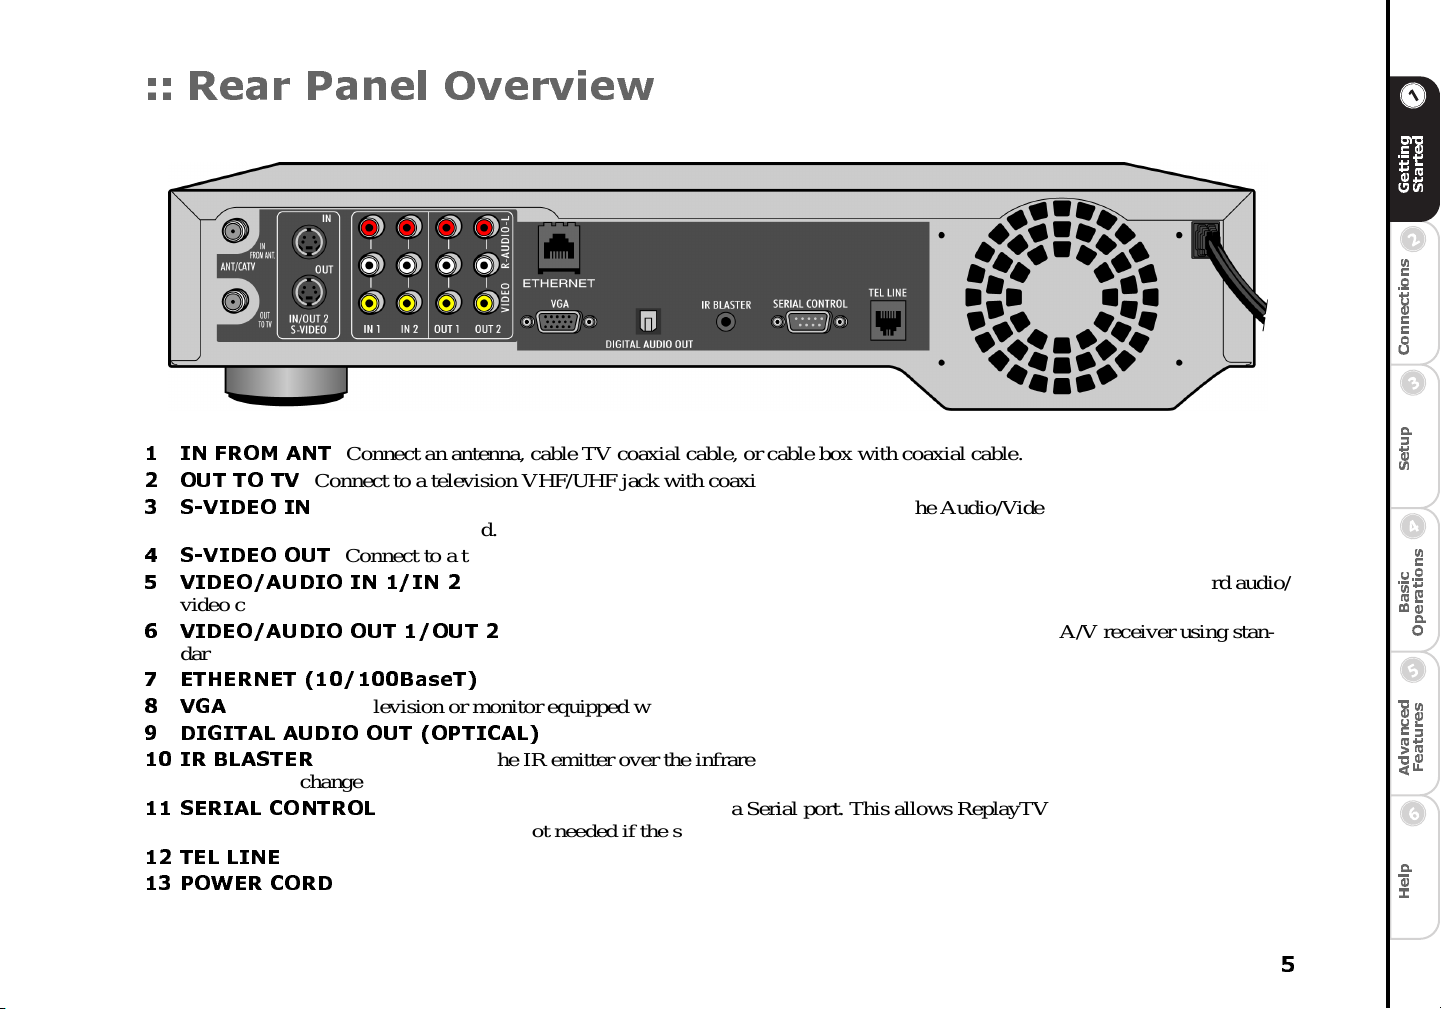
:: Rear Panel Overview
1 IN FROM ANT 2OUT TO TV 3S-VIDEO IN
used with S-Video to receive sound.
4S-VIDEO OUT
5 VIDEO/AUDIO IN 1/IN 2
video cables.
6 VIDEO/AUDIO OUT 1/OUT 2
dard audio/video cables.
7 ETHERNET (10/100BaseT) 8VGA
Connect to a television or monitor equipped with a VGA input connector.
9 DIGITAL AUDIO OUT (OPTICAL) 10 I R BLAST ER
ReplayTV to change the channels on these devices.
11 SERIAL CON TROL
the satellite receiver. The IR Blaster is not needed if the satellite receiver has Serial Out.
12 TEL LINE 13 PO WER COR D
Connect an antenna, cable TV coaxial cable, or cable box with coaxial cable.
Connect to a television VHF/UHF jack with coaxial cable.
Connect to a cable box or satellite receiver that has S-Video Out. The Audio/Video IN 2 connectors must be
Connect to a television, m onitor or A/V receiver that has S-Video In.
Connect to the Audio/Video outputs of a cable box or satellite receiver using standard audio/
Connect to the Audio/Video inputs of a television, monitor or A/V receiver using stan-
Connect to a broadband home network, including a router, hub or switch.
Connect to an audio/video receiver equipped with an optical input.
Connect and affix the IR emitter over the infrared detector on a cable box or satellite receiver.This allows
Connect to a satellite receiver that has a Serial port. This allows ReplayTV to change the channels on
Connect directly to a wall jack.
Connect to an electrical outlet.
g
d
e
n
i
t
t
r
t
a
e
t
G
S
s
n
o
i
t
c
e
n
n
o
C
p
u
t
e
S
s
n
o
c
i
i
t
s
a
a
r
B
e
p
O
d
s
e
e
c
r
n
u
t
a
a
v
e
d
F
A
p
l
e
H
5
Page 12
Turning on ReplayTV
1 Press the ReplayTV POWER button on the R eplayTV remote control.
Or
2 Press the POWER button on the ReplayTV front panel.
Putting ReplayTV in Standby Mode
ReplayTV is in standby mode when it is plugged in with the power turned off. ReplayTV will record even if it is in standby mode. 1 Press the ReplayTV POWER button on the remote control.
Or
2 Press the POWER button on ReplayTV front panel.
:: About Service Activation
There is a one-time service activation fee f or you to use your new ReplayTV 4500 Series Digital Video Recorder (“ReplayTV”).
Only the ReplayTV unit containing the serial number that you register is paid for and activated through this process. Other
ReplayTV units will require separate activation fee payments.
There is a grace period after your initial connection to the ReplayTV Service, during which time you can use ReplayTV without
having to activate the service. If you do not complete the service activation process and pay the service activation fee, your
ReplayTV will cease to operate until the service is activated and the fee is paid. Please activate your service before the grace period
expires.
ReplayTV 4500
An activation key for your ReplayTV will be displayed during the on-screen setup process. To activate the service and pay the activation fee, ha ve the activation key ready and call 1-800-480-7149, or go to our Web site: www.sonicblue.com/replaytv
6
Page 13
Chapter 2
:: Basic Connections
Connections
g
d
e
n
i
t
t
r
t
a
e
t
G
S
This chapter describes how to connect ReplayTV to your TV and other devices, including your home network. You will find
detailed connection options not found on the Quick Setup Guide. If you have not already, take a look at the Quick Setup Guide
before reading this chapter.
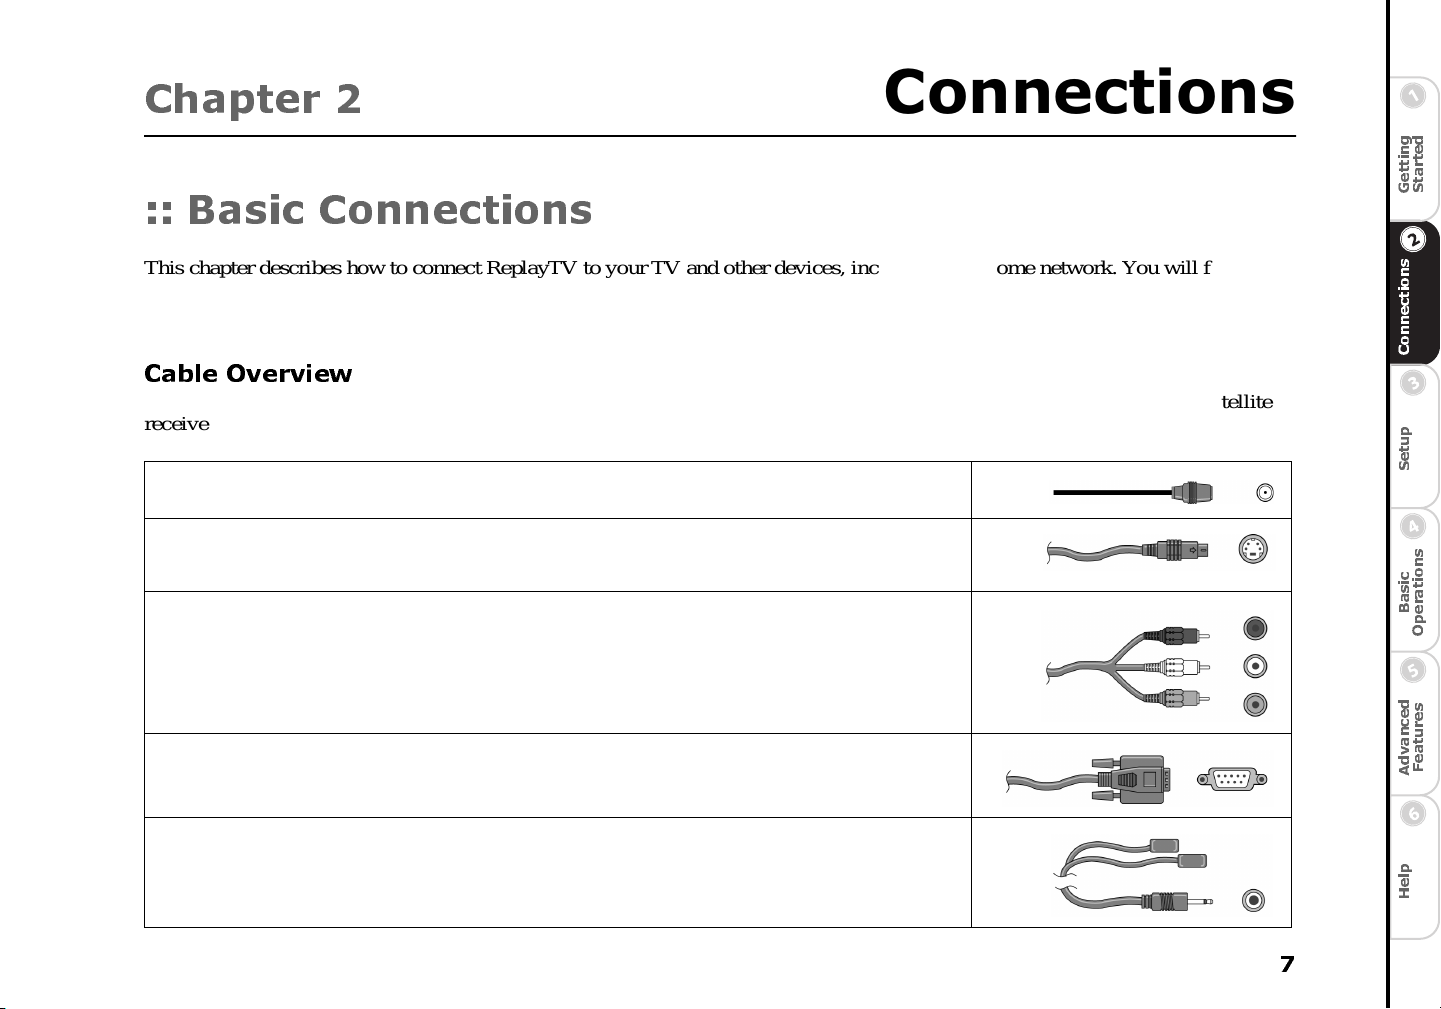
Cable Overview
You m ay not need to use all the cables provided with ReplayTV. Your setup will depend on the c omponents (Cable box, satellite
receiver, VCR, home network, etc.) you use. During setup, you may be called upon to identify one or more of the f ollowing cables:
Coaxial cable can deliver the signals broadcast by your cable TV company, or local stations. You can also use
this supplied cable to connect ReplayTV directly to your television.
S-Videocable delivers high quality video s ignals between ReplayTV and your television or monitor. Oldermodel TVs may not supportS-Video. Because S-Video cable only provides the video signal, it m ust be used in
combination with both of the audio plugs (red and white) on an A/V cable.
A/V cable deliversaudio and video signals between ReplayTV and your television or monitor. The red and
white plugs deliver stereo audio. The yellow plug delivers video.
Many satellite receivers use serial cables for communication.The Serial cable lets ReplayTV change the channels on satellite receivers. (The RJH to 9-pin adapter connects to this cable, if it is used.)
The IR blaster cable lets ReplayTV change the channels on your cable box or satellite receiver (if it does not
supportserial cable). The IR blaster emittersneed to be affixed directly over the IR detector on your satellite
receiver or cable box. “Connecting the IR Blaster” on page 10.
s
n
o
i
t
c
e
n
n
o
C
p
u
t
e
S
s
n
o
c
i
i
t
s
a
a
r
B
e
p
O
d
s
e
e
c
r
n
u
t
a
a
v
e
d
F
A
p
l
e
H
7
Page 14

If your satellite receiver uses a 15-pin serial cable, you will need to use the 9-pin to 15-pin adapter to connect
the satellite receiver to ReplayTV.
If you have a satellite receiverthat uses telephone cable in place of serialcable,you will need to use the
RJH to 9-pin adapter to connect t he satellitereceiver to ReplayTV. RCA models DRD221RD, DRD222RD,
DRD223RD, and DS2122RD will all require this adapter.
The Ethernet cable connects to the ETHERNET jack on ReplayTV, allowingyou to connect ReplayTV to a
broadbandnetwork. If you have a home network, you should leave ReplayTV connected to it at all times,
because ReplayTVwill use it to receiveChannelGuidelistings.
The telephone cable connects fromthe TEL LINE jack on ReplayTV to a wall jack. Leave the cable connected
to ReplayTV at all times to receive the daily Channel Guide listings.
A VGA cable (not included)delivers the best picturequality,if supported by your television or monitor.
ReplayTV currently supports RGB (VGA) and YPbPr (component) progressive video formats. If your television or monitor has a VGA input connector,use a standard VGA cable.
Macrovision protected programming will be recorded if you use the YPbPr video setting but cannot be vi ewed
using this setting.You must change the video setting to “RGB” or “None” to view Macrovisionprotected programming.Select VideoOutput Settingsfrom the Setup screen to change the setting.
ReplayTV 4500
8
Page 15

:: Plannin g your Setup
Read this section before incorporating ReplayTV into your entertainment system.
Incorporating ReplayTV into your Entertainment System
ReplayTV controls and r ecords the television signals you receive (satellite, c able, antenna, or a combination of all three). The signal(s) connect directly to the R eplayTV inputs. The outputs from ReplayTV connect to a television, monitor, or A/V receiver. You
can also connect a VCR to R eplayTV and save shows you have recorded to videotape. See “Saving Recordings to Videotape” on
page 46 for more information. ReplayTV is not intended to record signals sent by DVD players and video game systems. Connect
DVD players and video game systems directly to your television, not to ReplayTV.
Checking your Satellite Receiver
ReplayTV receives broadcast signals from satellite receivers through S-Videoor A/V cables. ReplayTV c an send channel-changing
signals to your satellite receiver through the supplied serial cable or IR blaster.It is recommended that you connect your ReplayTV
to your satellite receiver using a serial cable. Use the IR blaster if your satellite receiver does not have a serial port.
If the remote control for your satellite receiver has a “UHF” label, or if your satellite receiver uses a small antenna, your satellite
receiver is radio controlled. ReplayTV does not support radio-controlled receivers. Check your receiver ’sowner’s m anual to see if
serial or infrared controls are supported.
Connecting ReplayTV to an A/V Receiver
1 Connect the incoming television signal to ReplayTV. Refer to the
Quick Setup Guide for detailed instructions.
2 Connect an A/V cable from the OUTP UT jacks on ReplayTV to the
AUDIO/VIDEO IN jacks on your A/V receiver, matching like colors. Use an S-Video cable if your receiver has S-Video In.
3 Refer to the Quick Setup Guide to complete the remaining connec-
tions.
g
d
e
n
i
t
t
r
t
a
e
t
G
S
s
n
o
i
t
c
e
n
n
o
C
p
u
t
e
S
s
n
o
c
i
i
t
s
a
a
r
B
e
p
O
d
s
e
e
c
r
n
u
t
a
a
v
e
d
F
A
p
l
e
H
9
Page 16
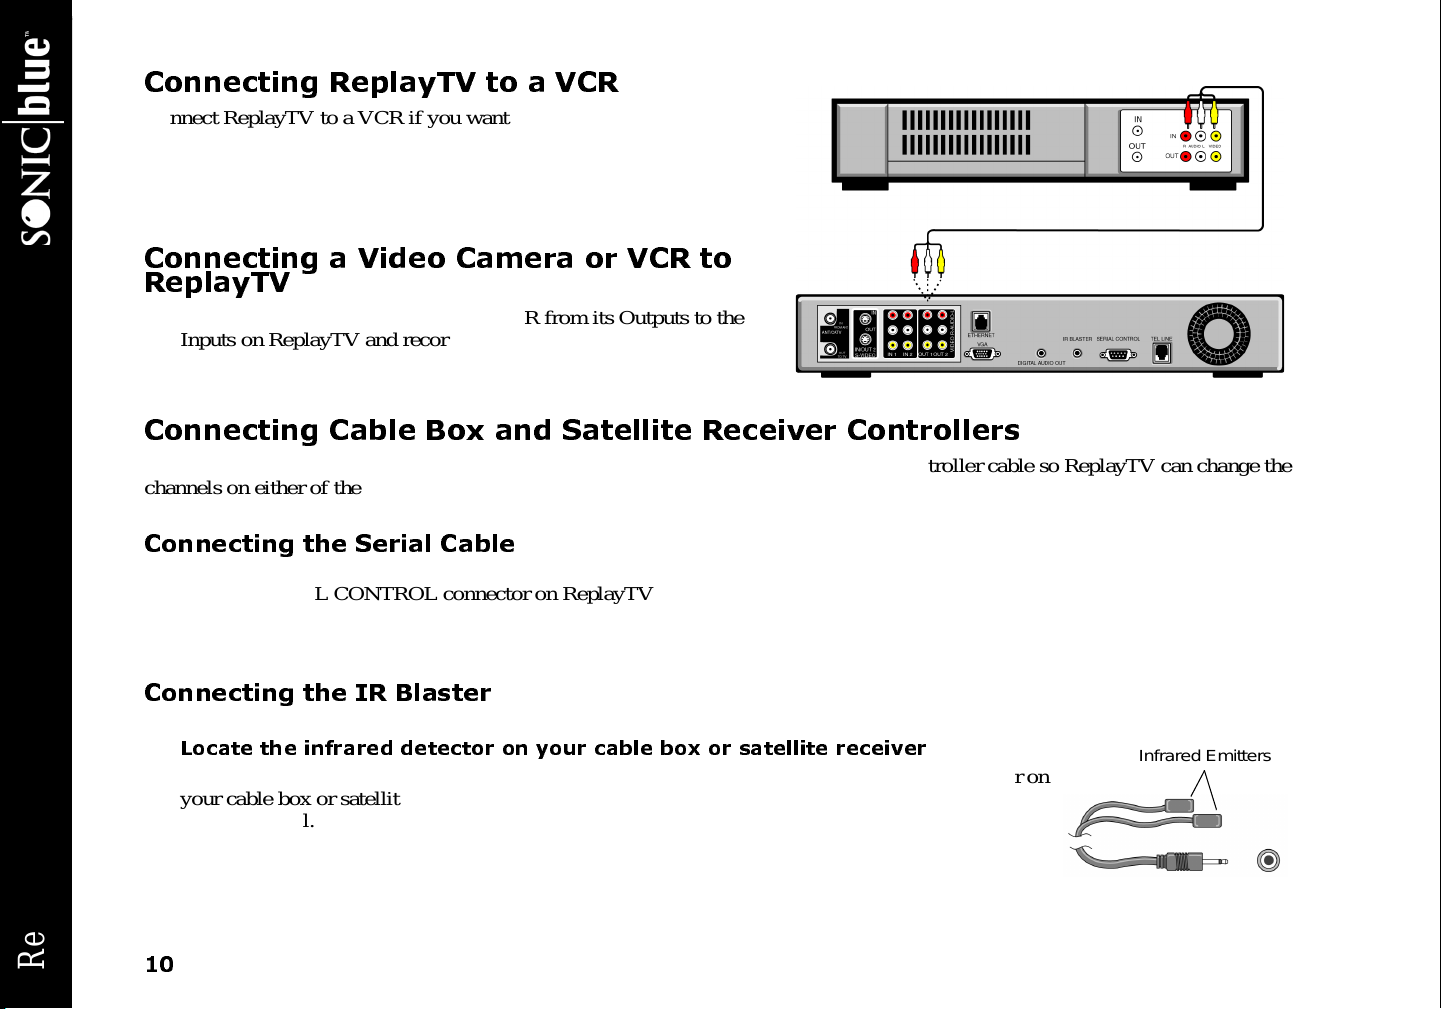
Connecting ReplayTV to a VCR
Connect ReplayTV to a VCR if you want to watch or save your recordings on videotape. Deleting recordings from the Replay Guide will preserve hard drive space.
• Connect an A/V cable from the OUTP UT jacks on ReplayTV to the
AUDIO/VIDEO IN jacks on your VCR, matching like colors.
Connecting a Video Camera or VCR to ReplayTV
• You c an c onnect a video camera or VCR from its Outputs to the
Inputs on ReplayTV and record the content onto ReplayTV using
the Manual Record feature. See “Using Manual Record” on
page 38.
Connecting Cable Box and Satellite Receiver Controllers
If you connect a cable box or satellite receiver to ReplayTV, you will need to attach a controller cable so ReplayTV can change the
channels on either of these components. The controller, either a serial cable or an IR blaster cable, will act as a remote control for
these c omponents.
Connecting the Serial Cable
If your satellite receiver or cable box supports serial cable, use the provided serial cable as a controlling cable. Connect the serial
cable to the SERIAL CONTROL connector on ReplayTV and to the serial port on your c able box or satellite receiver. If your
receiver uses a 15-pin serial connector, use the supplied 15-pin to 9-pin adapter. If you ha ve a satellite receiver that uses telephone
cable in place of serial cable, you will need to use the RJH to 9-pin adapter to connect the satellite receiver to ReplayTV. RCA models DRD221RD, DRD222RD, DRD223RD, and DS2122RD will all require this adapter.
ReplayTV 4500
Connecting the IR Blaster
Use the IR blaster if your satellite receiver or cable box does not support serial cable.
Locate the infrared detector on your cable box or satellite receiver
The infrared emitter at the end of the IR blaster m ust be placed directly over the infrared detector on
your cable box or satellite receiver. The infrared detector receives the signals from the ReplayTV
remote control.
10
Infrared Emitters
Page 17
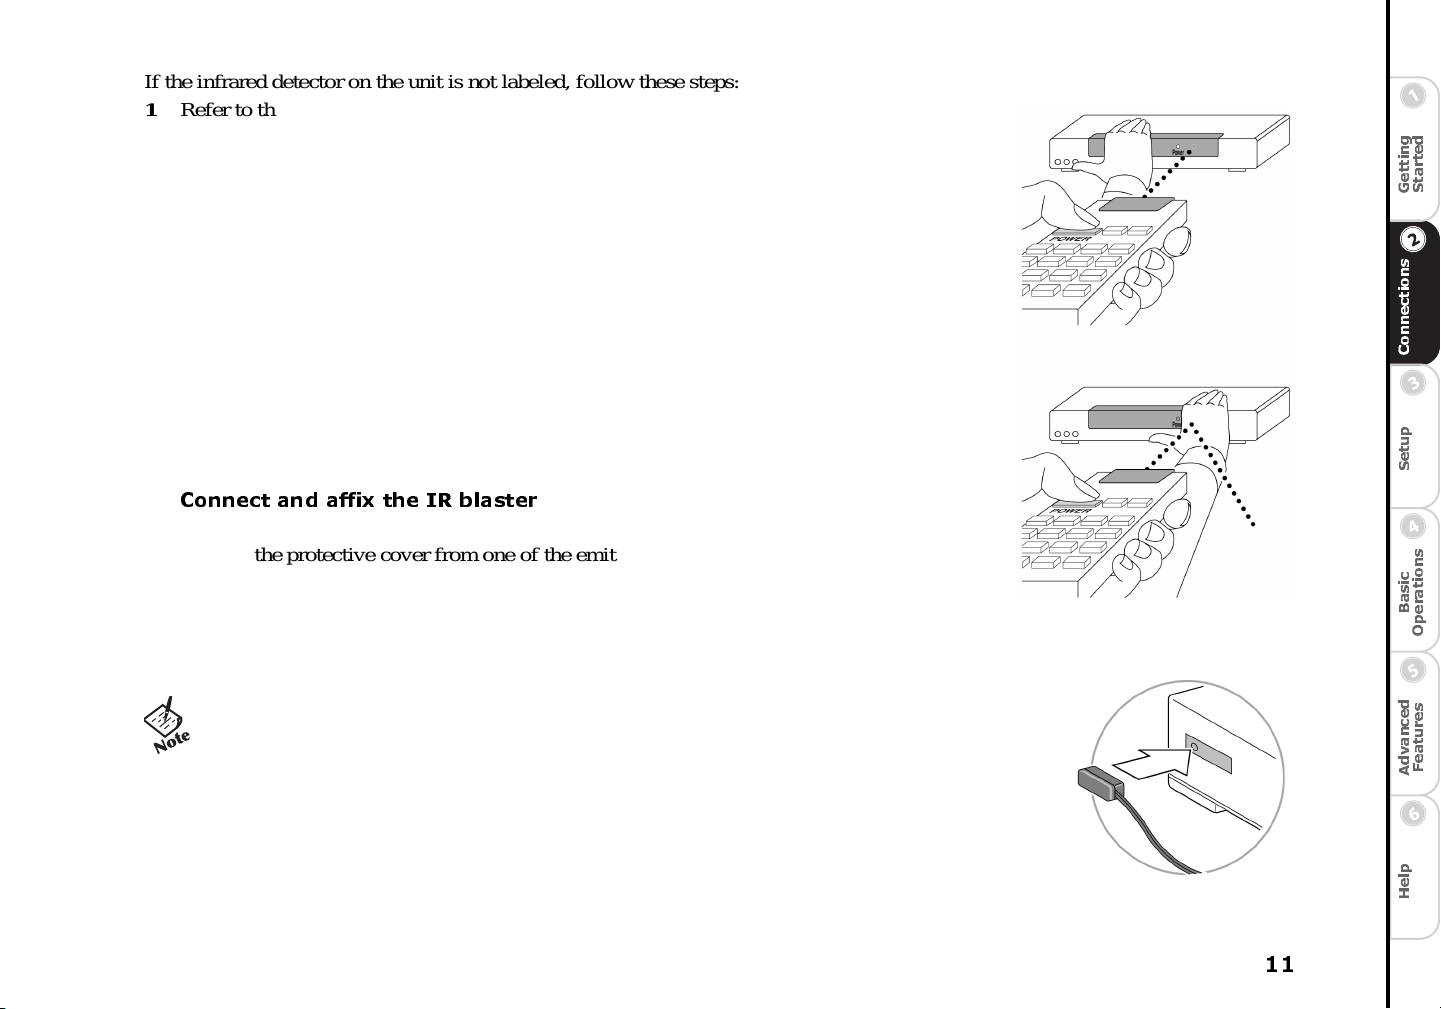
If the infrared de tector on the unit is not labeled, follow these steps:
1 Refer to the owner’s manual of your cable box or satellite receiver. It may be shown there. 2 Look for an area of dark, nearly opaque plastic on the front of the unit. If you f ind this area,
look c losely into it. You may be able to see the infrared detector behind it. If it is visible, you
should see a small square frame with a reddish area in the center. This is the infrared detector.
Skip to “Connect and affix the IR blaster.”
3 Shine a f lashlight through the dark plastic area on the front of the unit. If you see the infrared
detector, skip to “Connect and affix the IR blaster.”
4 Using the remote control for your cable box or satellite receiver, turn the power on and off.
Do not use the ReplayTV remote control.
5 With the remote control in one hand, place the other hand over one section of the front of the
unit.
6 Try to turn the power on and off. If you succeed, your hand is not covering the infrared detec-
tor.
7 Move your hand to a different place on the front of the unit and repeat steps 5 and 6. Keep
repeating in this manner until you cannot turn the power on and off. At this point, your hand
is covering the infrared detector.
Connect and affix the IR blaster
1 Plug the IR blaster into the IR BLASTER c onnector on the back of R eplayTV. 2 Peel off the pr otective cover from one of the emitters on the IR blaster. This will expose the
adhesive material on the infrared emitter for placement onto your cable box or satellite
receiver.
3 Affix the adhesive side of the infrared emitter to the dark plastic area directly over the center
of the infrared detector.
Locating the infrared detector
g
d
e
n
i
t
t
r
t
a
e
t
G
S
s
n
o
i
t
c
e
n
n
o
C
p
u
t
e
S
s
n
o
c
i
i
t
s
a
a
r
B
e
p
O
• If you only want ReplayTV to control one device, hide the
unused emitter behind the equipment, away from any detectors.
After you have connected the IR blaster, you will need to provide ReplayTV with the setup code number for your cable box or satellite receiver. You will do this during the on-screen Quick Setup process.
Affixing the IR blaster
11
d
s
e
e
c
r
n
u
t
a
a
v
e
d
F
A
p
l
e
H
Page 18
Completing the On-screen Setup
After completing all the connections to your components and home network (if you chose to do so), you will need to complete
ReplayTV’s on-screen setup process. The setup process requires you to indicate the following:
• If you are using a broadband or modem connection
• Your Zip code so ReplayTV will receive the correct channels for your area
• The components connected and the cables used to c omplete the connections
• The setup code for your cable box or satellite receiver, if used, so ReplayTV can change the channels on these components
:: Home Network Connections
If you have a home network, you can connect ReplayTV to it using the ETHERNET connection. This connection will allow you to
send recordings to other ReplayTV 4000 and 4500 users, watch shows recorded on another ReplayTV in your home, and transfer
photos f rom your PC to ReplayTV. The following sections provide instructions for setting up ReplayTV to use the networking features. Refer to “Advanced Features” on page 47 to learn how to use the features.
ReplayTV needs its own IP address to communicate with other devices on your network. It will automatically search f or an IP
address during the first-time Quick Setup process. If an IP address is not automatically found, you will have to e nter it m anually.
• If you connect ReplayTV directly to the phone jack in your
home, the photo, send show, and in-home networking features
are not available.
Connecting ReplayTV to an Existing Network
1 If you are connecting ReplayTV to a broadband network, plug the supplied Ethernet cable into the ETHERNET jack on
ReplayTV and to an available Ethernet jack on your network (on a wa ll, hub, switch, or router).
2 Turn ReplayTV on. It will automatically request an IP address from the network. You will see the Quick Setup screen.
If ReplayTV does not find a DHCP server, it will present you with a screen to manually configure the network connection.
• You will need to enter the IP a ddress, Subnet M a sk, Gateway address and DNS Server address. It is recommended that you
use the DNS entries provided by your ISP and not the IP address of your router. See “Entering Networking Information
Manually on ReplayTV” on page 17 if necessary.
3 After a successful test, you will be asked to enter your ZIP c ode and continue with setup. 4 If you have firewall software installed or a router with a built-in firewall, you should verify the router is configured properly.
See “Configuring Ports for Sending Recordings” on page 16.
ReplayTV 4500
12
Page 19

Connecting ReplayTV to a Cable Modem
Using a router to connect ReplayTV to your cable modem is recommended. The router will allow you to share your cable modem
without needing additional IP addresses from your Internet Service Provider (ISP). Also, your ISP may require that you log on or
use special software on your PC in order to access the Internet. Consult your ISP for requirements. Refer to the following connectionexamples for details.
Connecting to a router
1 Use a recommended router that your ISP supports and
connect it directly to your cable modem. (See “Recommended Routers” on page 15.) If you have a single-port
router, you will also need a hub or a switch to connect
more than one device to the router. Verify that the router
is configured properly for ReplayTV. See “Configuring
Ports f or S ending Recordings” on page 16.
2 Turn on your router. Refer to the router’s user guide to
set up the router. The default configuration of the router
is normally sufficient. By default, most routers have
DHCP (Dynamic Host Configuration Protocol) enabled
for automatically assigning IP addresses.
3 You can connect ReplayTV directly to the router, or to a
hub or switch that is connected to the router. Refer to
“Connecting ReplayTV to an Existing Network” on
page 12 to complete the setup.
g
d
e
n
i
t
t
r
t
a
e
t
G
S
s
n
o
i
t
c
e
n
n
o
C
p
u
t
e
S
s
n
o
c
i
i
t
s
a
a
r
B
e
p
O
13
d
s
e
e
c
r
n
u
t
a
a
v
e
d
F
A
p
l
e
H
Page 20
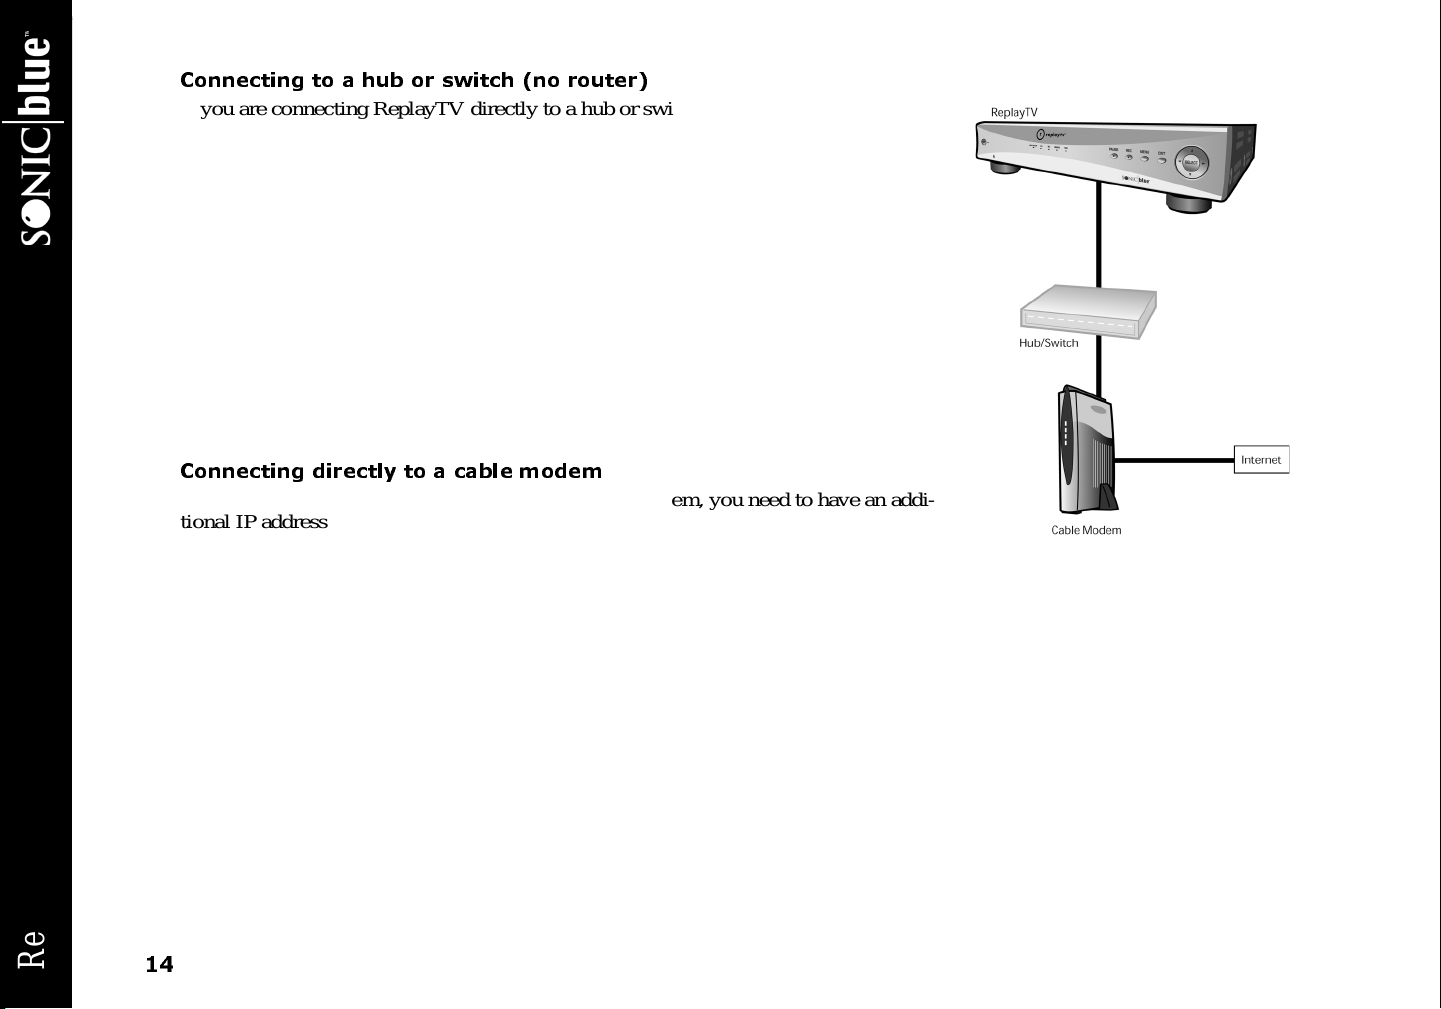
Connecting to a hub or switch (no router)
If you are connecting ReplayTV directly to a hub or switch that is connected to your
cable modem, you will need an IP a ddress from your ISP forReplayTV. Before setting
up R eplayTV, you should verify with your ISP that a device like ReplayTV is supported.
You may need to specify the IP address on ReplayTV.
1 Verify that there is no special software or log on required for Internet access. 2 Verify that no settings other than the IP address, Subnet Mask, Gateway address, and
DNS Server address are required. (For example, som e broadband connections require
that a DNS suffix be entered on your PC for Internet access to work.)
3 Check to see if your ISP requires the MAC address of devices like ReplayTV for Internet
connectivity. (Some ISPs r equire the M AC address of a network device in order to a utomatically assign it an IP address. See “Determining the ReplayTV MAC (Media Access
Control) Address” on pa ge 18.)
4 Refer to “Connecting ReplayTV to an Existing Network” on page 12 to complete the
setup.
Connecting directly to a cable modem
If you are connecting ReplayTV directly to a cable modem, you need to have an additional IP address from your ISP for ReplayTV. Before setting up R eplayTV, you should
verify with your ISP that a device like ReplayTV is supported. You may need to specify
the IP address on ReplayTV.
1 Verify that there is no special software or log on required for Internet access. 2 Verify that no settings other than the IP address, Subnet Mask, Gateway address, and DNS Server address are required. (For
example, some broadband connections require that a DNS suffix be entered on your PC for Internet access to work.)
3 Check to see if your ISP requires the MAC address of devices like ReplayTV for Internet connectivity. (Some ISPs require the
MAC address of network devices in order to automatically assign it an IP address. See “Determining the ReplayTV MAC
(Media Access Control) Address” on page 18.)
4 Refer to “Connecting ReplayTV to an Existing Network” on page 12 to complete the setup.
ReplayTV 4500
14
Page 21
Connecting ReplayTV to a DSL Modem
Connecting ReplayTV to a DSL modem is the same as connecting it to a cable modem with a few exceptions. R efer to “Connecting
ReplayTV to a Cable Modem” on page 13 with the following additions.
• The DSL modem you own might be a DSL router. If you are not sure, contact your ISP or DSL modem provider. If it is a router,
it can automatically assign an IP address to ReplayTV. I f you have PPPoE (Point-to-Point Protocol over Ethernet) DSL (you
have to log on through software before you can access the Internet), you cannot connect ReplayTV directly to your DSL
modem unless it is also a router. PPPoE accounts require that the user log on with a username and password. Software is normally pr ovided for your computer to do this. If you purchase a router to use with your PPPoE account, verify that it supports
PPPoE.
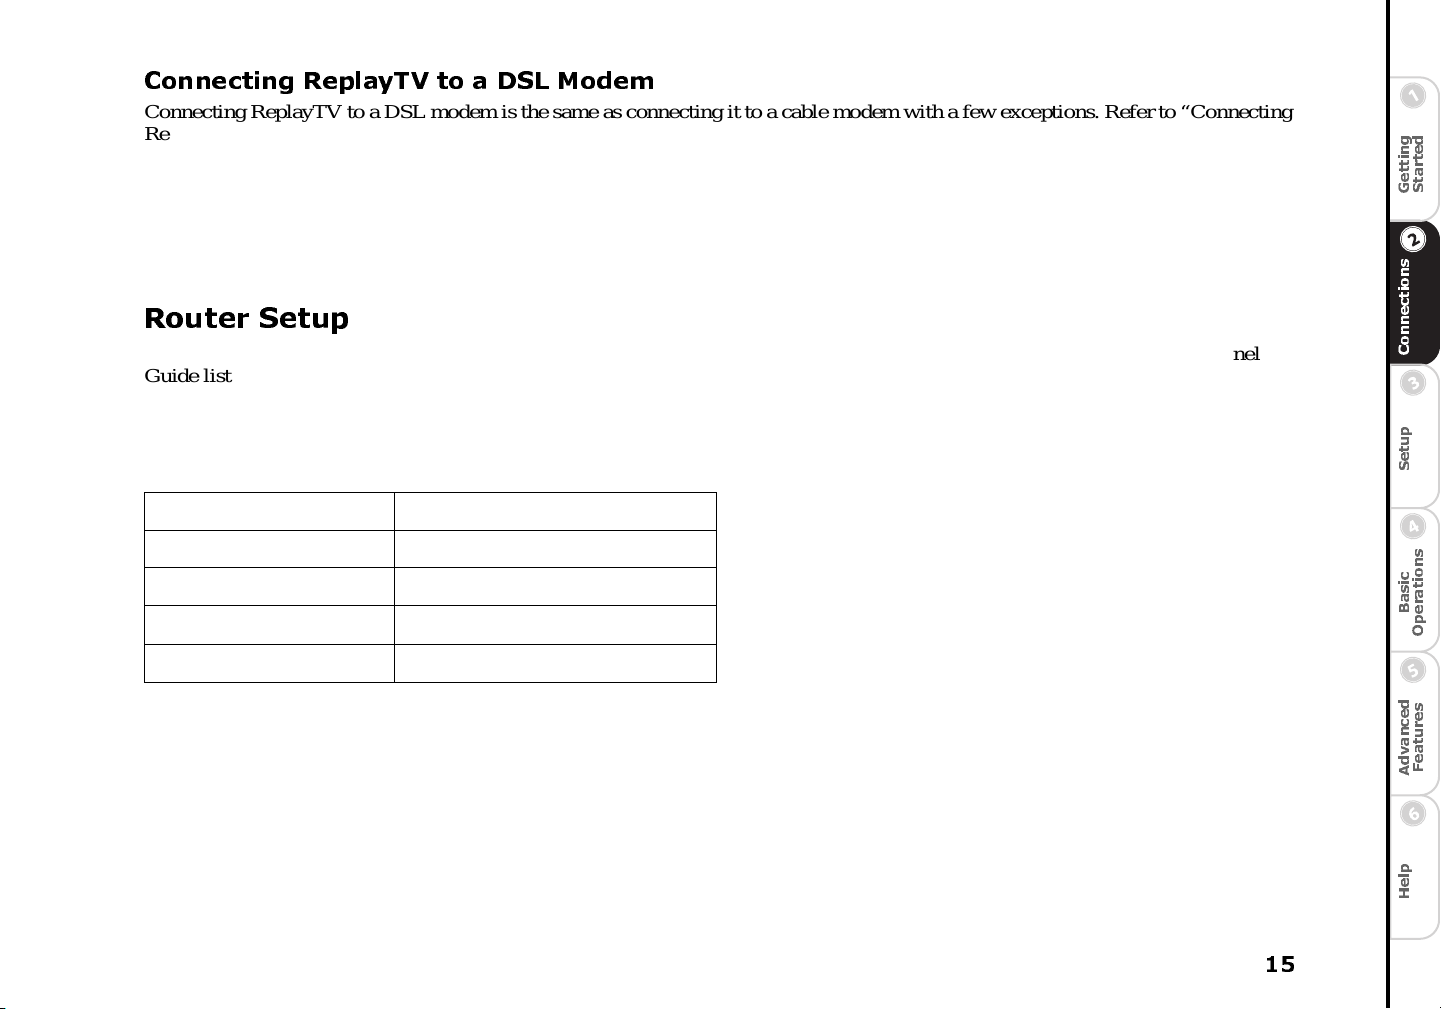
Router Setup
The default settings for routers are normally sufficient for ReplayTV to connect to the ReplayTV Service for the daily Channel
Guide listings and oc casional software updates. Follow the instructions below if you are experiencing connection issues or if you
intend to share your recordings with other ReplayTVs.
Recommended Routers
Make Model
g
d
e
n
i
t
t
r
t
a
e
t
G
S
s
n
o
i
t
c
e
n
n
o
C
p
u
t
e
S
Netgear RT311
Netgear RP114
SMC Barricade SMC7004BR
Linksys BEFW11S4
1 If you are not m anually specifying the IP address on ReplayTV, verify that DHCP is enabled on your router.You should specify
the IP address of ReplayTV if you are sharing recordings. Some routers will allow you to automatically assign the same IP
address to devices like ReplayTV. It is recommended that you enable this feature for ReplayTV, if it is available to you.
2 Verify that DNS is enabled on your router and the proper DNS entries have been added. These would have been provided by
your ISP. If the I P address of the router is specified (this is the external IP address), double-check the DNS entries from your
ISP.
3 Verify that the router does not block ReplayTV’s IP address. This setting can normally be found in the advanced section under
“access” controls. Some routers have a table listing which IP addresses are allowed to use the r outer for Internet access.
4 Verify that TCP ports 53 ( DNS), 123 (NTP), 80 (HTTP) are open. Your router documentation should indicate whe ther or not
those ports are blocked by default.
15
s
n
o
c
i
i
t
s
a
a
r
B
e
p
O
d
s
e
e
c
r
n
u
t
a
a
v
e
d
F
A
p
l
e
H
Page 22
5 When you first go to the ReplayTV InternetAddress Book, you are asked to open a port number on your router. This is only
required if you will be sending recordings to other ReplayTVs. The port number must be a ssociated with the IP a ddress of
ReplayTV. If you have multiple ReplayTVs, each must use a different port to share recordings.
Configuring Ports for Sending Recordings
Sending r ecording to other ReplayTVs requires a port to be forwarded through your router (or firewall) for incoming network connections. You can normally specify the incoming port number, port type, destination IP address, and port status when configuring a
port. The following are example configuration settings. Refer to your router documentation for more complete instructions.
• Incoming Port Number: This can be any port that is not in use by another application. It is recommended that you choose a
high port number like 29000.
• Port Type: your choices are normally Both, TCP,and UDP. Choose TCP.
• Destination IP address: Enter the IP address that the port should be a ssociated with or mapped to. This will be the IP address
of ReplayTV. It is recommended that you specify the IP address of ReplayTV for sending recordings.
• Port Status: Enable or Disable. Choose Enable.
In the Advanced section of your router setup software, you may find either a P ort Forwarding or Virtual Server section. On this
page, you will need to enter the port information described above.
Filters and Rules
Some routers allow you to create filters and define rules for opening ports and forwarding IP information. Within these rules
and filters, you would enter the same information as you would on a Port Forwarding or Virtual Server page.
Depending on your router, it might be necessary to add the IP address of ReplayTV to the DM Z host page. This will place
ReplayTV outside of the firewall. This may be necessary if the router is not properly routing the information it receives to
ReplayTV. Check your router manual for more details on when using DMZ is appropriate.
ReplayTV 4500
16
Page 23
Using ReplayTV with Firewall Software
Sending r ecording to other ReplayTVs requires a port to be forwarded through your router (or firewall) for incoming network connections. If you have a firewall on your c omputer or network, it needs to be configured properly or ReplayTV w ill not be able to
receive Channel Guide listings and software updates from the ReplayTV Service. If you do not know how to open ports on your
firewall software, refer to the documentation that shipped with the software.
1 Verify that TCP ports 53 (DNS), 123 (NTP), 80 (HTTP) a re open. Your firewall documentation should indicate whether or not
those ports are blocked by default.
2 Verify that the IP address that ReplayTV uses is not blocked. 3 If you are sharing recordings with other ReplayTVs, you will need to open a port to receive shows. When you first go to the
ReplayTV Internet Address Book, you are asked to open a port number on your router. This is the port that needs to be open
on your firewall software. It is recommended that you use a high port number like 29000.
Entering Networking Information Manually on ReplayTV
1 Press MENU on the remote control and choose Setup. 2 Choose Network and InputSettings from the Setup menu.
3 Choose Change Network. 4 Choose Change from Automated to Manual and enter the information.
g
d
e
n
i
t
t
r
t
a
e
t
G
S
s
n
o
i
t
c
e
n
n
o
C
p
u
t
e
S
Determining the ReplayTV IP Address
The IP address you specify on ReplayTV must be in the same range as the IP addresses of other computers or devices on the same
network, but not identical. For example, if the IP address of your computer is 192.168.0.1 with a Subnet Mask of 255.255.255.0,
then the ReplayTV IP a ddress may be 192. 168.0.x, where x can be any number from 2 to 254. No other device on your network can
use the same IP address as ReplayTV.
What you base the ReplayTV information on depends on the configuration of your network.
• If ReplayTV is connected to a router, then you need to collect the network information from the router or a PC connected to the
router. It does not matter if there is a hub between ReplayTV and the router.
• If ReplayTV is connected to a Cable Modem or DSL M odem, then the network information you need is provided by your ISP.
You will need to purchase a separate IP address for ReplayTV.
• If ReplayTV is connected directly to your PC or through a hub, then you need the ne twork information from the network card.
17
s
n
o
c
i
i
t
s
a
a
r
B
e
p
O
d
s
e
e
c
r
n
u
t
a
a
v
e
d
F
A
p
l
e
H
Page 24
Determining the ReplayTV MAC (Media Access Control) Address
Every Ethernet device has a unique hardware number. F ollow these steps to find the ReplayTV Mac address.
1 Go to the DOS or Command pr ompt on your PC. 2 Type “Ping (ReplayTV’s IP address)” and pressEnter. 3 Type “Arp -a” and press Enter.
You will see a list of hardware addresses and associated IP addresses. Look for the hardware address associated with
ReplayTV’s IP address.
Finding the Router IP Address
Your router will have both a WAN (External) and LAN (Internal) IP address. If you are specifying the IP address on ReplayTV, the
information you w ill use to set up R eplayTV will come from the LAN settings.
• Check the documentation that shipped with your router. It normally has the default IP settings.
• If supported, use Netscape or Internet Explorer to look at the configuration settings on your router. For most routers, all you
need to do is enter the IP a ddress of the router into your Web browser.
• Use the included software that shipped with your router to check its IP settings.
• If you have a PC connected to the router, you can use IPCONFIG or WINIPCFG on your PC to get the IP information you will
need. See “Finding your Computer’s Network Information” on pa ge 19 for further details.
ReplayTV 4500
18
Page 25
Finding your Computer’s Network Information
If your home network does not have a DHCP server (a r outer, for example), you will need to manually set the IP address on
ReplayTV. You can use the network information from your computer to determine what the IP address should be. Following are
steps to find this information for common computer systems.
Windows 9x or Millennium
1 Go to the Start menu on your PC and select Run. 2 Type WINIPCFG and select OK. 3 Select the c orrect network adapter from the menu.
The network adapter from which you collect information must be connected to ReplayTV or to the sa me network (e.g., hub or
router) as R eplayTV.
Windows 2000
• Go to the Command prompt on your PC and type IPCONFIG /all.
The network adapter from which you collect information must be connected to ReplayTV or to the sa me network (e.g., hub or
router) as R eplayTV.
Windows XP
1 Go to the network and dialup connections folder. 2 Select the a ppropriate LAN connection. 3 Double-click on the LAN connection. 4 Click on the Support button. The information for that adapter will display in the window.
The network adapter from which you collect information must be connected to ReplayTV or to the sa me network (e.g., hub or
router) as R eplayTV.
Windows NT
• Go to the Command prompt on your PC and type IPCONFIG /all
The network adapter from which you collect information must be connected to ReplayTV or to the sa me network (e.g., hub or
router) as R eplayTV.
Macintosh
These instructions do not apply to Mac OS X.
1 Go to the Apple menu. 2 Select Control Panels. 3 Select TCP/IP. The information you need is located here: IP address, Subnet Mask, Gateway address (router), DNS address.
Some older Macintosh computers may have a MacTCP control panel instead of a TCP/IP control panel.
19
Page 26

ReplayTV 4500
20
Page 27
Chapter 3
:: About Menu Navigation
Setup
g
d
e
n
i
t
t
r
t
a
e
t
G
S
The following keys are used to display and navigate ReplayTV menus:
Y
Press to move up the list of menu items.
B
Press to move down the list of menu items.
"
Press to move right and to change m enu options.
A
Press to move backward through menu options.
SELECT
EXIT
Press to display a menu or option and confirm menu settings.
Press to dismiss a menu or screen.
• You can also navigate menus using the buttons on the ReplayTV
front panel.
s
n
o
i
t
c
e
n
n
o
C
p
u
t
e
S
s
n
o
c
i
i
t
s
a
a
r
B
e
p
O
d
s
e
e
c
r
n
u
t
a
a
v
e
d
F
A
21
p
l
e
H
Page 28

:: Main Menu
Use the Main Menu to access ReplayTV’smainfeatures. Press the MENU button to display the Main
Menu.
Channel Guide: The Channel Guide is R eplayTV’s
on-screenprogramguide. The Channel Guide provides
12 days of current television listings for all of the TV
channels you r eceive. See “Accessing the Channel
Guide” on page 31 for more information on the Channel Guide.
Replay Guide: Every show you schedule to record
and every recorded show is stored in the Replay Guide.
The Replay Guide is where to go to play, and delete
recorded programs. See “Using the R eplay Guide” on
page 43 for more information.
Photo Viewer: Use the Photo Viewer to view digital
photos c opied from your PC to ReplayTV. See “Using the Photo Viewer” on page 53 for m ore information.
Find Shows: Use Find Shows to quickly locate shows that you would like to record using keywords. See “Find Shows” on page 36
for more information.
ManualRecord: Set up time-based recordings that are independent of Channel Guide programming using Manual Record. See
“Using Manual Record” on page 38 f or m ore information.
Replay Zones: Use Replay Zones to quickly find shows within specific categories, such as movies, sports, and sitcoms. See
“Replay Zones” on page 37 for more information.
Messages: The ReplayTV Service will send messages about important news, and the latest features and enhancements as soon as
they become available. You will receive a welcome message after you complete the on-screen setup of ReplayTV.
Setup:UseSetuptocustomizeReplayTV.See“Setup Menu” on page 23 for more information.
ReplayTV 4500
22
Page 29
:: Setup Menu
ReplayTV Name
Change the name of your local R eplayTV. Naming your R eplayTV is only necessary if you have more than one ReplayTV on your
home network. You may name each ReplayTV a name of your choice.
g
d
e
n
i
t
t
r
t
a
e
t
G
S
Internet Identity and Address Book
Change your local ReplayTV’s Internet identity and manage Address Book entries. See “Accessing the Internet Address Book” on
page 50.
Default Record Options
Change the current recording options. This includes the quality at which shows are recorded, how many episodes of a show are kept
before being r eplaced by the ne xt episode, and in which c ategory a show is stored.
Default Playback Options
Set default f or every recorded show to play back with or without commercials using COMMERCIAL ADVANCE. See “COMMERCIAL ADVANCE” on page 51.
Network and Input Settings
Update the A/V and networking information you provided during the on-screen setup process, or if you later add or remove A/V or
networking equipment.
You c an a lso choose this option to change between use of a phone line and Ethernet connection. (For example, if you purchased
your ReplayTV 4500 and use the telephone line to receive Channel G uide listings and then later add a broadband network to your
home.) Choose Switch Connection from the Setup Summary screen if you switch from modem to Ethernet use.
Video Output Settings
Select the TV channel to use for viewing ReplayTV video output if you c onnect ReplayTV to your TV using the OUT TO TV connector. If you use the VG A connector, select the video format supported by your television or monitor.
s
n
o
i
t
c
e
n
n
o
C
p
u
t
e
S
s
n
o
c
i
i
t
s
a
a
r
B
e
p
O
d
s
e
e
c
r
n
u
t
a
a
v
e
d
F
A
Screen Saver and Pause Screen
Choose which photos are used when the screen saver is displayed and when you press the PAUSE button. See “Screen Saver and Pause Screen” on page 52 for more information.
23
p
l
e
H
Page 30

Parental Control
Parental Control offers you the ability to block video and audio of live TV shows or recorded shows based on the show rating or
content. In addition, it allows blocking of specific channels. Once you access Parental Control, a screen will be displayed where
you will be able to create or edit your 4-digit PIN (Personal Identification Number). Once you have created a ne w PIN or entered
the correct PIN a new screen will be displayed with the following options:
• Ratings and Content Settings
Choose which movie ratings, TV ratings, and content to block. Unrated shows can also be blocked. Info Screens with definitions of all movie and TV ratings are easily acces sible.
• Change Channel Restrictions
Block spe cific channels. Channel blocks have priority over “rating” and “content” blocks. If, for example, you unblock a channel, you remove all blocks until you change to another channel. All blocks would again be a ctive when you return to the channel.
• Turn On/Off Parental Control
Turn Parental Control on/off.
•ChangePIN
Display a screen where the PIN can be edited.
•Exit
Exit the Parental Control screen.
• When Parental Controls are enabled on ReplayTV, the settings
override the settings on y our TV.
ReplayTV 4500
Add or Remove Channels
Add or remove channels from ReplayTV’s Channel Guide. This feature is handy for removing channels that you do not subscribe to
or channels that are inappropriate for some viewers.
MyReplayTV Registration
Sign up to use MyReplayTV, which allows you to schedule recordings from the Web.
Privacy Policy
View the current Privacy Policy.
24
Page 31
System Information
View the system information for your ReplayTV. This screen lists:
• the version of software your ReplayTV is using
• the Serial Num ber of your ReplayTV
• the Internet Serial Number of your ReplayTV
• the Inbound Port Number, if set
• the ReplayTV Service Key for Service Activation
g
d
e
n
i
t
t
r
t
a
e
t
G
S
s
n
o
i
t
c
e
n
n
o
C
p
u
t
e
S
s
n
o
c
i
i
t
s
a
a
r
B
e
p
O
25
d
s
e
e
c
r
n
u
t
a
a
v
e
d
F
A
p
l
e
H
Page 32
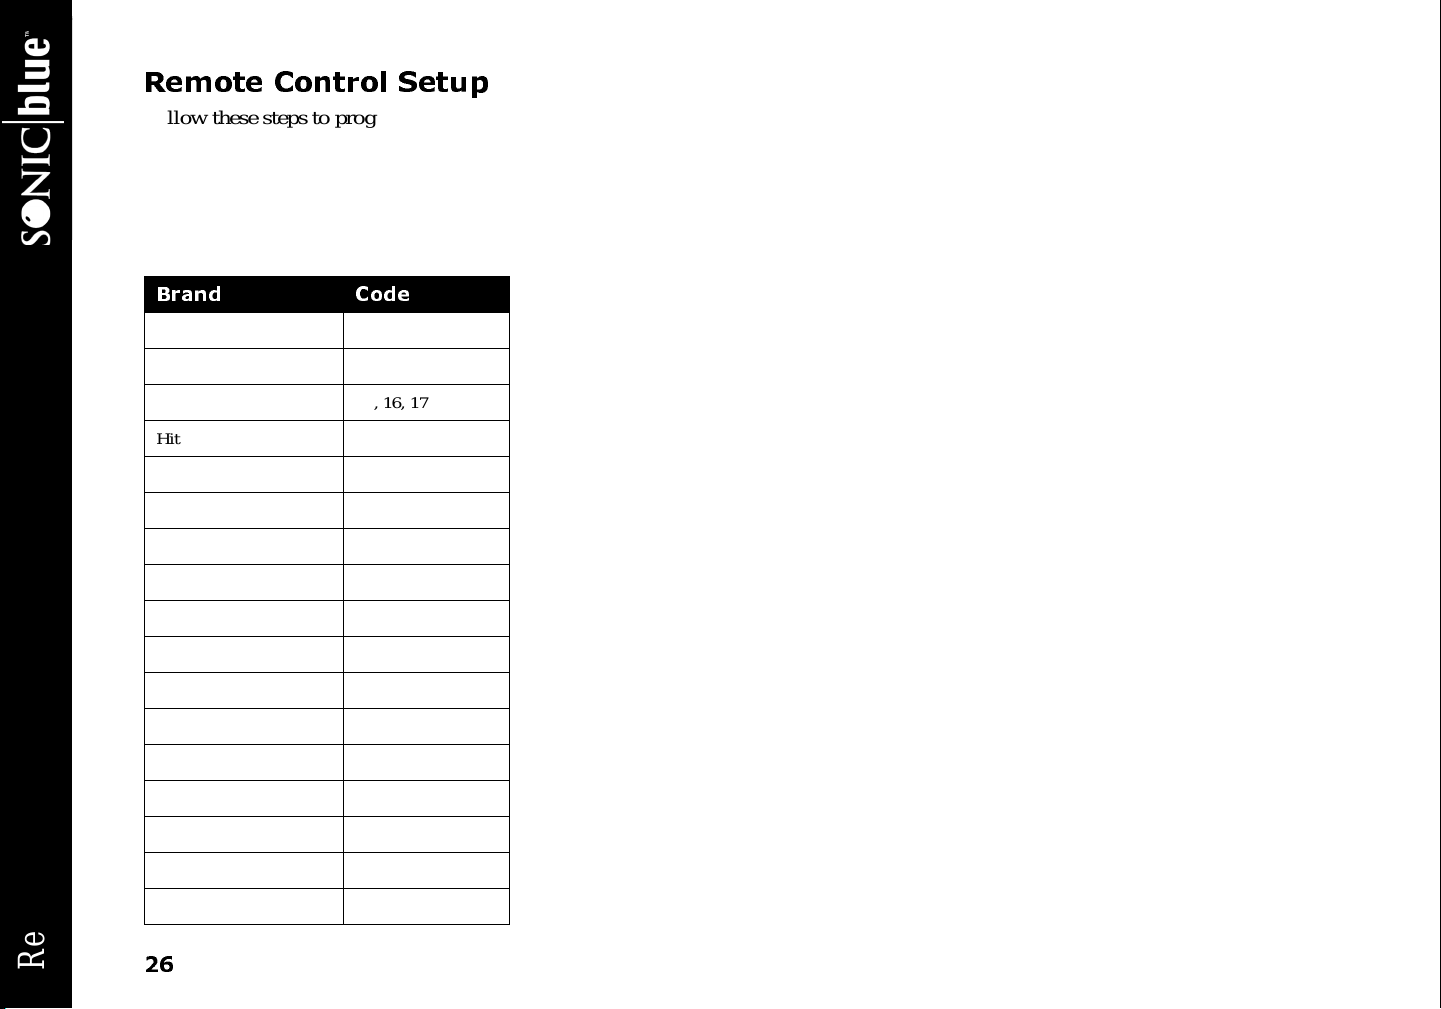
Remote Control Setup
Follow these steps to program the remote control to operate your television. The ReplayTV remote will only control your TV’s
power a nd volume. Even if your television is not listed, try the codes anyway. You should be able to turn your TV on and off when
the correct code is used.
1 Press and hold down the TV P OWER button. 2 While still holding down the TV POWER button, enter the 2-digit code for your brand of television (see table below). If there
is more than one code for your brand of television, try them all until one works.
Brand Code
Fisher 10
GE 03
Gold Star 15, 16, 17
Hitachi 12
JVC 11
Magnavox 05
Mitsubishi 07, 13
Panasonic 01, 02
Quasar 01, 02
RCA 03
ReplayTV 4500
Samsung 14
Sanyo 10
Sharp 06, 07
Sony 08
Sylvania 05
Toshiba 09
Zenith 04, 17
26
Page 33
Chapter 4
:: Basic Operations
Basic Operations
g
d
e
n
i
t
t
r
t
a
e
t
G
S
ReplayTV gives you the power to watch television the way you have always wanted. Create your own channels, watch only what
you want to watch, and do it a ll on your own schedule–not someone else’s. You can also control what you are watching like never
before.
Show Watching Options
• Pauselivetelevision
• Rewind and fast forward
• Create slow-motion replays
• Bypass unwa nted programming 30 seconds at a time using QuickSkip
• See an instant replay with the press of a button
Show Recording Options
• Record wha t you are currently watching
• Record e very episode of your favorite shows
• Find shows to record based on a keyword
• Record from categories
• Record segments of shows
ReplayTV makes recording your favorite shows easy. ReplayTV lets you quickly find and record single shows, continuously record
every episode of your favorite shows, and record shows based on themes you create or from Replay Zones–categories of shows
organized and updated by the R eplayTV Service.
If you have more than one ReplayTV on your local network, you can watch a show in one room that was recorded in another room.
s
n
o
i
t
c
e
n
n
o
C
p
u
t
e
S
s
n
o
c
i
i
t
s
a
a
r
B
e
p
O
d
s
e
e
c
r
n
u
t
a
a
v
e
d
F
A
• Although ReplayTV does not need to be on to record television,
your cable box and/or satellite receiver must remain on.
27
p
l
e
H
Page 34
::
Controlling Live Television
The moment you turn on ReplayTV and your TV, ReplayTV automatically begins recording and temporarily preserves the recording on its hard drive. ReplayTV will continue to record even if you delay the broadcast by using the pause, rewind, or Instant
Replay features. Recording only stops when you change channels and begin watching a different show.
Pausing live TV and Recorded Shows
ReplayTV’s pause feature lets you attend to interruptions without missing a moment of your favorite show. You can pause whatever
you’re watching, whether it’s a live television broadcast or a recorded show in theReplay Guide. When you pause a live broadcast,
ReplayTV will continue recording it on the hard drive, so you won’t miss a singlemoment.
1 PressPAUSE on the ReplayTV remote control.
After you press PAUSE, an on-screen message will appear to indicate the remaining pause time available.
2 Press PLAY to continue playing the program from the point you paused.
or
3 Press RETURN TO LIVE to return to the live broadcast. Pause options include:
• Press DISPLAY to view program information.
• Press EXIT to remove the on-screen display.
• Press FAST FORWA RD to use the frame advance feature.
Using Rewind and Fast Forward
ReplayTV gives you the power to Rewind or Fast Forward through both live a nd recorded programs. When using Rewind and Fast
Forward, remember how ReplayTV works: ReplayTV is always recording, but recording will stop, and then start again, whenever
you change channels. You cannot rewind a program to a point before you started watching it, nor can you fast forward a program to
a point beyond the live broadcast.
To use Rewind while watching a show: 1 Press REW (Rewind) for 1x rewind.
2 Press REW again for 2x rewind. 3 Press REW again for 4x rewind. 4 Press REW again for 16x rewind. 5 Press REW again for 20x rewind. 6 Press PLAY, S TOP, or FF (Fast Forward) to stop rewinding.
ReplayTV 4500
28
Page 35

To use Fast Forward while watching a show: 1 PressFF (FastForward) for 1x fast forward. 2 Press FF again for 2x fast forward. 3 Press FF again for 4x fast forward. 4 Press FF again for 16x fast forward. 5 Press FF again for 20x fast forward. 6 Press PLAY, STOP, or REW (Rewind) to stop fast forwarding.
Using Multispeed Slow Motion
ReplayTV lets you watch both live and recorded programs in multispeed slow motion.
To use Multispeed Slow Motion while watching a show: 1 Press PLAY for 1x slow motion. 2 Press FF for 2x slow motion. 3 Press FF again for 3x slow motion. 4 Press REW (if in 2x or 3x slow motion) to m ove ba ck one slow motion speed.
To stop Multispeed S low Motion: 1 PressPLAY to playback at normalspeed.
Or
2 Press RETURN TO LIVE to return to the live broadcast.
Using Frame Advance
Frame Advance lets you watch live or recorded programs a single frame at a time. This is a great feature for fast-moving scenes,
such as sporting events, when you want to slow things down and see every frame.
To use Frame Advance while watching a show: 1 Press PAUSE.
2 PressFF to advance a single frame. 3 Repeatedly press FF to advance frame-by-frame.
g
d
e
n
i
t
t
r
t
a
e
t
G
S
s
n
o
i
t
c
e
n
n
o
C
p
u
t
e
S
s
n
o
c
i
i
t
s
a
a
r
B
e
p
O
d
s
e
e
c
r
n
u
t
a
a
v
e
d
F
A
29
p
l
e
H
Page 36

To stop Frame Advance: 1 Press PLAY to resume playback at normal speed.
Or
2 Press RETURN TO LIVE to return to the live broadcast.
Using Instant Replay
The Instant R eplay feature lets you jump back seven seconds during a live or recorded show. I t’s the perfect way to ensure you
don’t miss a single wor d of dialogue in your favorite movie, or if you want to watch a great play over again at the touch of a button.
You c an a lso use the number buttons to jump back a specific number of minutes. For example, pressing the numbers 1-0 and then
the INSTANT REPLAY button will jump back exactly 10 minutes.
To use Instant Replay while watching a show: 1 Press INSTANT REPLAY on the ReplayTV remote control. 2 Press RETURN TO LIVE if you want to return to the live broadcast.
Using QuickSkip
You can use the QuickSkip feature to quickly jump 30 se conds ahead during live or recorded shows. QuickSkip is perfect for jumping past commercials a nd undesired scenes without having to watch them a s you would using fast forward. QuickSkip can only be
used during live broadcasts if you are watching the show de layed by more than 30 seconds.
You c an a lso use the number buttons to jump ahead a specific number of minutes. For example, pressing the numbers 1-0 and then
the QUICKSKIP button will jump ahead exactly 10 minutes.
1 Press QUICKSKIP. 2 If you skip forward too far, simply press INSTANT REPLAY to jump back.
ReplayTV 4500
Using Jump
Use Jump to move quickly between the channel you a re currently watching and the last channel displayed. This includes jumping
between two recorded shows and a recorded show and a live show.
To use Jump while watching a show: 1 Press JUMP to move to the last channel displayed. 2 Press JUMP again to return to the channel you were watching.
You c an a lso go to an exact point in a show using JUMP. For example, to go to the ten minute mark in a show, press the numbers
1-0 and then the JUMP button.
30
Page 37

:: Accessing the Channel Guide
The Channel Guide is an interactive, on-screen program guide that lists 12 days of television programming for all of the channels
you receive. ReplayTV receives the latestChannel Guide information from the ReplayTV Service each day. As long as you keep a n
active Ethernet or telephone line plugged into ReplayTV, you will always have 12 days of the most current listings available.
g
d
e
n
i
t
t
r
t
a
e
t
G
S
Program
information
Channels
Currently selected
show
Shows on now
(blue)
Shows on later
(green)
Program information:When
available, program information
can include show title, scheduled
airtime, e pisode title, FCC rating,
episode de scription, and actors’
names.
Program information includes the
time the show ended. ReplayTV
will display up to 24 hours of previouslybroadcastprogramming. If
you missed a show, you can select
it in the Channel Guide and
instruct ReplayTV to search for all
the episodes that are scheduled to
air. Then, you c an schedule
ReplayTV to record a future airing
of the show.
Channels:Indicatesthe broadcast
station for each particular channel.
Shows: Shows that have been
broadcastappear grey. Shows that
are on now are blue. Shows that
are airing in the future are green.
s
n
o
i
t
c
e
n
n
o
C
p
u
t
e
S
s
n
o
c
i
i
t
s
a
a
r
B
e
p
O
d
s
e
e
c
r
n
u
t
a
a
v
e
d
F
A
31
p
l
e
H
Page 38

Using the Channel Guide
1 Press CHANNEL GUIDE on the R eplayTV remote control.
Or
2 Press MENU, then select Channel Guide. Navigate through the Channel Guide by pressing the UP, DOWN, LEFT and RIGHT ARROW buttons. Notice the program infor-
mation c hanges to display the information for the c urrently highlighted show.
• To go to a channel, enter the channel number and press the SELECT button.
• To tune to a channel, highlight the channel and press the SELECT button.
• To jump ahead 12 hours, press the F F button.
• To go back 12 hours, press the REW button.
#/$
• To move one screen at a time, press the PAGE
See “Channel Guide Shortcuts” on page 54.
Watching a Show that is Currently Airing
1 Press CHANNEL GUIDE. 2 Highlight a blue show. 3 Press SELECT.
ReplayTV will tune directly to the channel you selected unless another channel is currently recording.
buttons or the CHANNEL#/$buttons.
ReplayTV 4500
32
Page 39
Channel Guide Options
Depending on the type of channel you have selected, the following options may be available when you press SELECT with a future
show (green) highlighted:
Record this show: Schedule the selected show to record.
Change record options: Adjust the recording options.
Turn off record: Turn off a scheduled recording.
Find all episodes: Locate all episodes of the show that are sc heduled to air in the next 12 days.
Tune to channel “X”: Tune your television to the highlighted channel.
Exit: Exit the Channel G uide pop-up m enu.
Viewing Other Show Information
You c an se e wha t is showing later on a cha nnel you are currently watching, and see what is on other channels while watching live
TV by doing the following:
• Press any of the ARROW buttons or the SELECT button to see information about the show you a re currently watching. Press
the RIGHT ARROW button repeatedly to view information about future shows on the c urrent channel.
• Press the UP ARROW button to see what’s on the next channel and the DOWN ARROW button to see what’s on the previous
channel.
Watching Shows Blocked by V-Chip Technology
Although ReplayTV supports V-Chip technology,your TV controls the actual V-Chipsettings. Your TV may display a message that
the current program is blocked. If you want to watch or record a show that is blocked, you will need to unlock the parental control
on your TV. Refer to your television owner’s manual for more information.
g
d
e
n
i
t
t
r
t
a
e
t
G
S
s
n
o
i
t
c
e
n
n
o
C
p
u
t
e
S
s
n
o
c
i
i
t
s
a
a
r
B
e
p
O
Watching Shows with Closed-Captioning
ReplayTV records closed caption information. To view the closed captioning for a live or recorded show, enable the feature as you
normally would on your TV.
33
d
s
e
e
c
r
n
u
t
a
a
v
e
d
F
A
p
l
e
H
Page 40

:: Recording Shows
To record the live show you are watching
1 Press RECORD on the ReplayTV remote control. 2 Set the Record Options. See “Setting Record Options” on page 35 f or m ore information on the Record Options.
:
To record a single episode of a show:
1 Press CHANNEL GUIDE. 2 Highlight an upcoming show (green). 3 Press RECORD.
To record multiple episodes of a show
1 Press CHANNEL GUIDE. 2 Highlight a show.
3 Press RECORD. 4 Press RECORD again.
See “Resolving Conflicting Recordings” on page 40 if you see a Record Conflict message when setting up a r ecording.
• Solid red dots represent guaranteed recordings.
• Hollow dots represent non-guaranteed recordings.
• One red dot appears next to a show if ReplayTV is scheduled to
record a single episode; two red dots appear if ReplayTV is
scheduled to record all episodes.
• Gray dots represent suspended recordings (another show will
record in its place).
See “Recording Tips” on page 42 for more information.
:
ReplayTV 4500
34
Page 41
Setting Record Options
There may be times when you want to adjust the Record Options for a specific show. For example, you might want to record action
movies or sporting events at higher quality than television shows.
When you record a show while watching it, or select a show to record in the Channel Guide, you will need to set the Record
Options. See “Changing the Default Record Options” on page 38 for more information on ReplayTV’s DefaultRecord Options.
To change Record Options, highlight the setting and press SELECT or the LEFT or RIGHT AR ROW buttons on the r emote control.
g
d
e
n
i
t
t
r
t
a
e
t
G
S
Record Options Settings
Record Quality: Choose among Standard, Medium,andHigh.
• Standard: Uses the least amount of recording space, but records at a level that is not recommended for fast-action shows.
• Medium: Offers excellent picture quality but uses m ore recording space than Standard quality recordings.
• High: Provides the highest quality recording but uses the most recording space. Notice that the recording space (hours and min-
utes available) changes as you a djust the recording quality. The higher the recording quality is set, the less recording space is
available for recording. To conserve space, use High sparingly, for example to record fast-action shows where quality is vital.
• Guaranteed: Choose Yes or No. Yes means space will be reserved for this show. No means the show will record only if space
is available and it does not c onflict with a guaranteed show.
• Store in Category: Select a category, either predefined or that you create, to store the recorded show.
• Create new Category: Create a new category for storing recorded shows.
• Record All Episodes: Choose Yes or No. Yes will set ReplayTV to record the show every time it is broadcast. No will set
ReplayTV to record only one episode.
• Keep: If you selectRecord All Episodes (Yes), you can set how many episodes ReplayTV should keep before the most current
episode is recorded over the oldest episode.
More Options
Access More Options from the Record Options screen to ensure a program will be recorded in its entirety, even if it runs be fore or
after its scheduled time, or if the broadcaster’s schedule does not match perfectly with ReplayTV’s Channel Guide. You can also
choose which days a show will record to m inimize conflicts.
Extending recording time: Some shows do not always start and e nd at their scheduled times. Set the amount of time you want
ReplayTV to record before or after the scheduled show airs. Options range from one minute to 240 minutes.
Adjustable Recording Days: Set recording days. Checked boxes indicate the days of the week the show will be recorded.
To change More Options settings:
1 Highlight a R eplay channel in the Replay Guide a nd press the SELECT button. 2 Select Record Options then choose More Options. 3 Adjust the settingsand select Don e.
s
n
o
i
t
c
e
n
n
o
C
p
u
t
e
S
s
n
o
c
i
i
t
s
a
a
r
B
e
p
O
d
s
e
e
c
r
n
u
t
a
a
v
e
d
F
A
p
l
e
H
35
Page 42

:: Find Shows
ReplayTV can search through the Channel Guide for shows so you don’t have to. Find Shows is the perfect feature for those times
when there is a show you want to record, but don’t know what time or channel it is on. You can also use it to find whe n your favorite show will air next. You can also use Find Shows to search for a show based on a topic, interest, hobby, show title, or favorite
actor or director. Theme-based channels record a specificamount of programming (1/2 hour, 2 hours, etc.) based on keywords that
you choose.
1 Press MENU on the ReplayTV remote control. 2 Select Find Shows. 3 Enter one or more keywords. 4 Select Done. 5 Set Find Shows options. 6 Select Done.
ReplayTV will search through your channel listings for shows matching the keyword. If you use m ultiple keywords, only
shows appropriate to both keywords will be listed.Select Change search options if you want to change the keyword or search
criteria.
7 Select Create the “Keyword(s)” Theme Channel. You can also highlight an individual show and press REC once to record
just this show, or twice to record all episodes of the show.
8 Set Record Options. See “Setting Record Options” on page 35 for more information.
9 Select Done. Your show will be recorded at the scheduled time.
ReplayTV 4500
36
Page 43
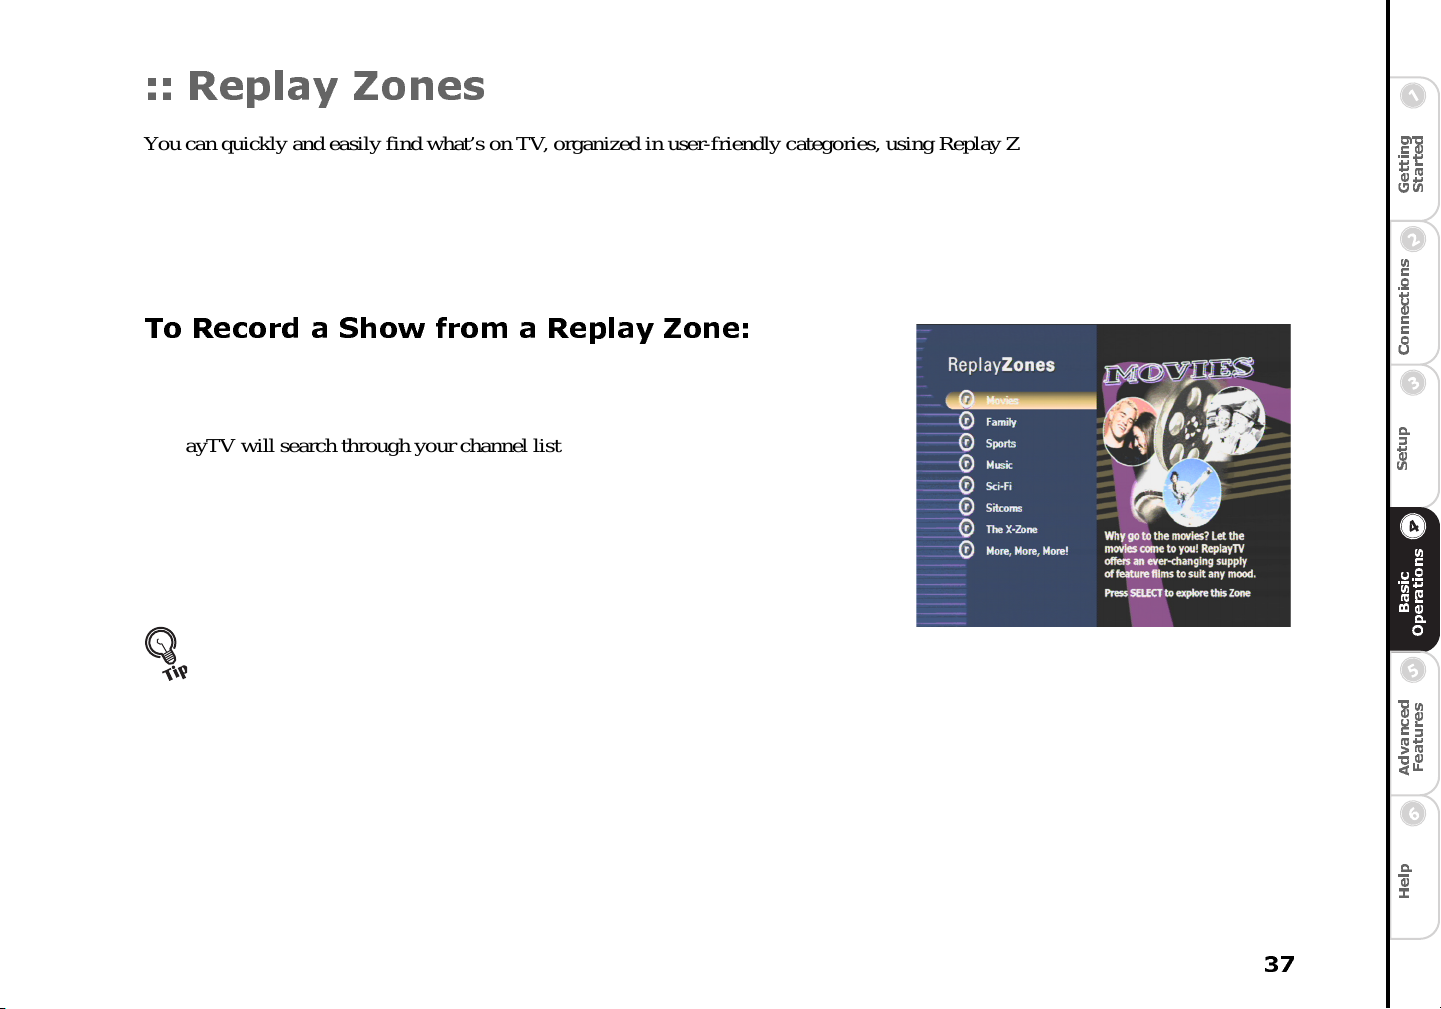
:: Replay Zones
You can quickly and easily find what’s on TV, organized in user-friendly categories, using Replay Zones. Zone-based channels can
hold a specific amount of programming (1/2 hour, 2 hours, etc.).
Non-guaranteed Zone-based channels behave exactly like guaranteed Zone-based channels except:
• Non-guaranteed Zone-based channels will not record if recording space does not permit.
• Non-guaranteed Zone-based channels will be recorded over if a guaranteed recording needs space.
See “Guaranteed and Non-guaranteed Recordings” on page 40 for more information.
To Record a Show from a Replay Zone:
1 Press REPLAY ZONES on the ReplayTV remote control. 2 Select a Replay Zone.
3 Select a category.
ReplayTV will search through your channel listingsfor shows appropriate to the channel.
4 Select Create the “Zone Channel.” 5 Set Record Options. Refer to “Setting Record Options” on page 35 for more infor-
mation.
6 Select Done. Your show will be recorded at the scheduled time.
When setting Zone-based Record Options, be sure to Keep enough
time to record the shows you expect the Zone to find. For example,
if you only keep 30 minutes in the Sc ience Fiction Zone channel,
the channel will never record a two hour movie.
g
d
e
n
i
t
t
r
t
a
e
t
G
S
s
n
o
i
t
c
e
n
n
o
C
p
u
t
e
S
s
n
o
c
i
i
t
s
a
a
r
B
e
p
O
d
s
e
e
c
r
n
u
t
a
a
v
e
d
F
A
37
p
l
e
H
Page 44

:: Using Manual Record
With Manual Record, you can r ecord shows that do not fit into normal programming
blocks, such as sporting events, music videos, 24-hour news streams, or when you only
want to record a few minutes of a show. This feature also a llows you to record your
home videos from a video camera or V CR so you c an wa tch them using ReplayTV.
Recording by date, time and channel
Select Manual Record from the Main Menu and follow the on-screen instructions.
Choose single or repeat recording, date, time, and channel. You will also be able to
record from an input other than the current input.
Recording and sharing home videos from a video camera or VCR
1 Select Manual Record from the Main Menu and choose Single Recording. 2 Set the date and time you want the r ecording to begin. Continue to the screen where you choose which channel to record from,
and press DISPLAY.
3 Choose the input source to which the video camera or VCR is connected. See “Connecting a Video Camera or VCR to
ReplayTV” on pa ge 10 for more information.
4 Turn on your video c amera or VCR before the scheduled recording time you set up. 5 ReplayTV will begin recording at the scheduled time you set up. Once the recording is completed, go to the Replay Guide to
watch your video. See “Sending Recordings to other ReplayTVs” on page 49 to send your home videos to other ReplayTV
4000 and 4500 owners.
Changing the Default Record Options
If R eplayTV does not require you to set record options when you schedule a show recording, the show will be recorded using your
Default Record Options.
1 Press the MENU button on the ReplayTV remote control. 2 Select Setup. 3 Select Default Record Options. 4 Adjust the options.
5 Select Done.
ReplayTV 4500
38
Page 45

Cancelling a Recording
To cancel a recording before it starts: 1 Press CHANNEL GUIDE on the R eplayTV remote. 2 Highlight the show you want to cancel. 3 You will know it’s set to record because at least one red dot will appear next to the show. 4 Press SELECT. 5 Select Turn off record from the on-screen menu.
To cancel a recording in progress:
• Press STOP on the R eplayTV remote and f ollow the on-screen instructions.
To delete a recorded show in the Replay Guide: 1 Press REPLAY GUIDE on the ReplayTV remote. 2 Highlight the show you want to delete. 3 Press SELECT. 4 Select Delete.
Temporarily Stopping a Recording
Follow these steps if you have a recurring theme, zone, or non-guaranteed show-based recording that you would like to temporarily
disable so you can record another show.
1 Press CHANNEL GUIDE on the r emote control. 2 Highlight the show you wish to record and press the REC (record) button once.
Follow these steps if the show you want to temporarily disable is a guaranteed show-based recording.
1 Press the REPLAY GUIDE button. 2 Select the R eplay channel of the recording you wish to disable. 3 Choose Change record options.
4 Change the Guaranteed or Record All Episodes settings from “Yes” to “No.”
g
d
e
n
i
t
t
r
t
a
e
t
G
S
s
n
o
i
t
c
e
n
n
o
C
p
u
t
e
S
s
n
o
c
i
i
t
s
a
a
r
B
e
p
O
d
s
e
e
c
r
n
u
t
a
a
v
e
d
F
A
p
l
e
H
39
Page 46

Resolving Conflicting Recordings
ReplayTV allows you to choose what will be recorded when attempting to record a show at the same time as a previously scheduled
recording.
When recordings conflict, a Record Conflict screen will indicate that a conflict has been detected between a currently scheduled
recording and the new recording you are setting up. If you choose to record the new recording, the previously scheduled recording(s) will be cancelled based on the following rules:
• New single recording/Scheduled single recording: In this case, the scheduled recording will be cancelled, removing it from
the Replay Guide.
• New single recording/Scheduled repeating recording: In this case, only one instance of the repeating recording will be can-
celled.
• New repeating recording/Scheduled single recording: In this case, the scheduled recording will be cancelled, removing it
from the Replay Guide.
• New repeating recording/Scheduled repeating recording: In this case, the scheduled repeating recording will be cancelled
for the remaining days currently in the Channel Guide and the conflict will reappear. You may want to see if one of the shows is
on at another time.
• Gray dots represent suspended repeating recordings.
5
Replay Channels
Every show you record becomes a Replay channel and is stored in a category you c hoose. Show-based and single-record channels
store recordings of specific shows. Zone- and Theme-based channels store recordings based on common Zone or keyword themes.
Understanding the difference between Show-based recordings and Zone or Theme-based recordings is the key to making sure your
ReplayTV records what you want to see most.
ReplayTV 4500
Guaranteed and Non-guaranteed Recordings
Think of recording space on ReplayTV like parking spaces. Guaranteed recordings are given reserved parking spaces as soon as
they are scheduled. Non-guaranteed recordings do not get reserved spaces and have to find a place to park. Non-guaranteed record-
40
Page 47

ings park in reserved spots, but they will be promptly towed if a guar anteed recording needs to park. After all, the non-guaranteed
recording was parking in the guaranteed recording’s spot.
Recording Priorities
If you have created many Replay channels, it is possible that eventually two scheduled recordings will conflict with e ach other. The following recording priorities are numbered from highest priority to lowest: 1 Guaranteed Single-record and Show-based recordings
If a change in television schedules puts guaranteed Show-based channels into a recording conflict with each other, the Replay
channel created first will be recorded.
2 Guaranteed Zone- and Theme-based recordings
If two or more Guaranteed Zone- or Theme-based recordings start at the same time, the show airing on the lowest-numbered
Channel Guide channel will be recorded.
3 All non-guaranteed recordings
If two or more non-guaranteed recordings overlap r ecording times, the show that starts first will be recorded.
If two or more non-guaranteed recordings start at the same time, Show-based recordings take priority over Zone- and Theme-
based r ecordings.
4 Non-guaranteed Single-record and Show-based recordings
If two or more non-guaranteed Show-based recordings start at the same time, the show a iring on the Replay channel created
first will be recorded.
5 Non-guaranteed Zone- and Theme-based recordings
If two or more non-guaranteed Zone- or Theme-based recordings start a t the same time, the show airing on the lowest-numbered Channel Guide channel will be recorded.
Show-based and Single-record Channels
Guaranteed Show-based channels record every time a show is on a t or near the time you specified, on the channel you specified.
Recorded Show-based episodes will be recycled to make room for a new episode when the channel is full.
Single-record channels will not be recycled until you delete them.
Non-guaranteed Show-based channels behave exactly like guaranteed Show-based channels except:
1 Non-guaranteed Show-based channels will not record if recording space does not permit. 2 Non-guaranteed Show-based channels will be recycled if a guaranteed recording needs space.
g
d
e
n
i
t
t
r
t
a
e
t
G
S
s
n
o
i
t
c
e
n
n
o
C
p
u
t
e
S
s
n
o
c
i
i
t
s
a
a
r
B
e
p
O
d
s
e
e
c
r
n
u
t
a
a
v
e
d
F
A
41
p
l
e
H
Page 48

If you set a Show-based channel to record all episodes, the oldest episode will be recycled to make room for a new episode when
the channel is full.
Theme-based Channels
Guaranteed Theme-based channels are designed to hold a specific amount of programming (1/2 hour, 2 hours, etc.). Twenty-four
hours after being r ecorded, the oldest program will be r ecycled to m ake room for a new program when the channel is full.
Non-guaranteed Theme-based channels behave exactly like guaranteed Theme-based channels except:
1 Non-guaranteed Theme-based channels will not record if recording space does not permit. 2 Non-guaranteed Theme-based channels will be recycled if a guaranteed recording needs space.
Zone-based Channels
Guaranteed Zone-based channels are designed to hold a specific amount of programming (1/2 hour, 2 hours, etc.). Twenty-four
hours after being r ecorded, the oldest program will be r ecycled to m ake room for a new program when the channel is full.
Non-guaranteed Zone-based channels behave exactly like guaranteed Zone-based channels except:
1 Non-guaranteed Zone-based channels will not record if recording space does not permit. 2 Non-guaranteed Zone-based channels will be recycled if a guaranteed recording needs space.
Recording Tips
To get the most out of ReplayTV, follow these recording tips:
• Guarantee shows you don’twanttomiss
If you absolutely do not want to miss a show, make sure it is scheduled as a guaranteed Single-record or guaranteed Showbased r ecording.
• Record in High quality sparingly
The High quality setting provides the highest quality picture, but uses the most recording space. Recording in Medium quality
should be adequate for most of your recording needs. The High quality setting is best used for sporting events, fast-action movies, and other shows where picture quality is vital.
• Delete shows after you watch them
To increase the likelihood of your non-guaranteed shows being recorded, delete shows from the Replay Guide after you wa tch
them. The more available space, the more shows ReplayTV can record.
ReplayTV 4500
42
Page 49

:: Using the Replay Guide
Think of the Replay Guide as your personal television station, broadcasting only the shows you want to watch. You can find every
show that ReplayTV has recorded in the Replay Guide. From the Replay Guide, you can schedule, play, and delete recorded programs. ReplayTV also allows you to place your recorded shows into Categories, either predefined or that you create, for easy ma nagement.
g
d
e
n
i
t
t
r
t
a
e
t
G
S
Program
Information
Categories
Replay
Channels
Recorded Shows
Remote ReplayTV Finder
Available Recording Time
Remote ReplayTV Finder:View
and play shows from other inhome networked ReplayTVs. This
is only available if more than one
ReplayTV is on your network. See
page 47.
Program Information:When
available, program information
about the show is displayed.
Categories: Choose from provided C ategories or create your
own to store and organize your
recorded shows. See page 44.
Replay Channels: T he c hannel
associated with scheduled and
recorded shows. Replay channels
control how shows are recorded.
See page 44.
Recorded Shows: Shows that have
been recorded. Ev ery show that
ReplayTV records or has scheduled to record can be found in the
Replay Guide. See page 27.
Available Recording Time:Displays the amount of recording time
currently available at the current
default record quality.
s
n
o
i
t
c
e
n
n
o
C
p
u
t
e
S
s
n
o
c
i
i
t
s
a
a
r
B
e
p
O
d
s
e
e
c
r
n
u
t
a
a
v
e
d
F
A
p
l
e
H
43
Page 50
Navigating the Replay Guide
1 Press REPLAY GUIDE on the ReplayTV remote control.
Or
2 Press MENU, then select ReplayGuide. Navigate through the Replay Guide by pressing the UP, DOWN, LEFT and RIGHT ARROW buttons. Press the FF and REW but-
tons from anywhere within the Replay Guide to view the next or previous category. When navigating through shows within a category, notice the program information c hanges to display the information for the currently highlighted show.
Use the UP and DOWN ARROW buttons to move among Channels and Shows, Categories,andtheRemote ReplayTV Finder.
You can also use the JUMP button to quickly go to and from each area within the Replay Guide.
• If there is only one ReplayTV on the network, the Remote
ReplayTV Finder will be inaccessible.
Category Options
Rename category: C hange the name of a category.
Create new category: Add a new category to the Replay Guide.
Move left: Move the category to the left.
Move right: Move the category to the right.
The All Shows category contains every show ReplayTV records
and cannot be deleted.
Replay Channel Options
Depending on the type of channel you have selected, the following options may be available.
Change record options: Adjust the recording options.
Rename channel: Create a new name for the c hannel.
Change category: Move the selected Replay channel to another category.
Find all episodes: Locate all episodes of the show associated with the Replay channel.
Find matching shows: Find shows that match the theme.
Delete: Delete the selected Replay channel.
Exit: Exit the Replay channel pop-up menu.
ReplayTV 4500
44
Page 51

Replay Show Options
Play: P lay the show from its current point.
Play from beginning: Play the show from the start.
Preserve this episode: Save the show in the Replay Guide. See “Preserving an Episodeof a Show” below.
Save to VCR: Save the show to a videotape. See “Saving Recordings to Videotape” on page 46.
Find all episodes: Find upcoming episodes of the show.
Rename show: Change the name of the show. This is beneficial for shows recorded using Manual Record.
Delete: Delete the show.
Exit: Exit the Replay show pop-up menu.
Watching a Recorded Show
1 Press REPLAY GUIDE on the remote control. 2 Select a category. 3 Highlight the show you want to watch.
4 Press SELECT. 5 Select Play or Play from beginning.
g
d
e
n
i
t
t
r
t
a
e
t
G
S
s
n
o
i
t
c
e
n
n
o
C
p
u
t
e
S
Preserving an Episode of a Show
If you have scheduled ReplayTV to record all episodes of a particular show or to record a Zone- or Theme-based channel, eventually the most current episode will be recorded over the oldest episode. ReplayTV lets you preserve episodes to prevent them from
being recorded over be fore you watch them.
To preserve a recording:
1 Press REPLAY GUIDE on the ReplayTV remote. 2 Highlight the show you want to preserve.
3 Press SELECT. 4 Select Preserve this episode.
If recording space permits, the show will be moved from its current Replay channel and saved in the Replay Guide.
45
s
n
o
c
i
i
t
s
a
a
r
B
e
p
O
d
s
e
e
c
r
n
u
t
a
a
v
e
d
F
A
p
l
e
H
Page 52
Saving Recordings to Videotape
ReplayTV is not intended to be used as a long-term storage device. You can free up more recording space by transferring your
recordings to videotape and w atching them on your VCR.
Before saving a recording to videotape, make sure your VCR is connected properly to ReplayTV. See “Connecting ReplayTV to a
VCR” on page 10 for more information.
• To save a recording to videotape:
1. Turn on your VC R.
2. Insert a videotape into your VCR.
3. Press REPLAY GUIDE.
4. Highlight the recording you want to save to videotape.
5. Press SELECT.
6. Select S ave to VCR.
7. Select Continue to start the countdown.
8. Press Record on your VCR.
• While the recording is being saved to videotape, do not press
any buttons on the ReplayTV remote c ontrol. On-screen displays will be recorded if they appear.
ReplayTV 4500
46
Page 53

Chapter 5
Advanced Features
:: Watching Show s Recor ded on othe r Repl ay TVs
g
d
e
n
i
t
t
r
t
a
e
t
G
S
By connecting ReplayTV to your home network, you can watch a show in the bedroom that was recorded in the living room. You
can also transfer digital photos from your PC to R eplayTV by installing the ReplayTV Photo Transfer Software available at
www.sonicblue.com/replaytv. See “Installing ReplayTV Photo Transfer” on page 52.
• You might need to set an IP Address manually for ReplayTV if
you do not have a router.
Playing Shows from Another In-home ReplayTV
If you have more than one R eplayTV in your home on your network, you can play shows from another ReplayTV by remotely
accessing its Replay G uide. Each R eplayTV on the network must have a unique name (Living Room, Kid’s Room, Master Bedroom, etc.). You can choose from the list of default names or create your own. Select ReplayTV Name from the Setup menu if you
want to rename your ReplayTV.
• Although it is technically possible to watch a show from one
ReplayTV on multiple remote units at the same time, for best
results it is recommended that you watch a remote show from
only one ReplayTV.
In addition to browsing remote Replay Guides, you will be able to:
• Play a show on a r emote R eplayTV from your local ReplayTV.
• Delete a show on a remote ReplayTV from your local ReplayTV.
s
n
o
i
t
c
e
n
n
o
C
p
u
t
e
S
s
n
o
c
i
i
t
s
a
a
r
B
e
p
O
d
s
e
e
c
r
n
u
t
a
a
v
e
d
F
A
47
p
l
e
H
Page 54

Selecting Local/Remote Replay Guides
If more than one ReplayTV exists on the network, you will see left and right arrows next to the ReplayTV name in the upper right
hand corner of the R eplay Guide. This is called the RemoteReplayTV Finder. From here, you can access other networked Replay-
TVs in your home.
• If there is only one ReplayTV on the network, the left and right
arrows will not be displayed next to the ReplayTV name.
To Access a Remote ReplayTV
1 Use the UP ARROW or JUMP button to move to the
Remote ReplayTV Finder. You can also press the
QUICKSKIP button from a nywhere within the Replay
Guide to immediately access a remote Replay Guide.
Press QUICKSKIP repeatedly to continue through all
networked ReplayTVs.
2 Use the RIGHT and LEF T ARROW buttons to choose
a remote ReplayTV that is connected to the network.
3 Access the category you want to browse. 4 Use the DOWN ARROW or JUMP button to access
the shows in the category.
5 Highlight a show you want to watch and press
SELECT.
:
Operations on Remote Shows
Play: P lay the selected show from its current point.
Play from beginning: Play the selected show from the
beginning. This option will only be a vailable for remote
shows that have already been played on the remote ReplayTV.
Delete: Delete the selected show.
• If the selected show is currently recording or being played by
another viewer, you cannot delete the show. Pressing STOP
while watching a remote show that is currently recording will
stop playback but not stop the recording.
Remote ReplayTV Finder
Categories
Replay
Channels
and t heir
recorded
shows
ReplayTV 4500
48
Page 55
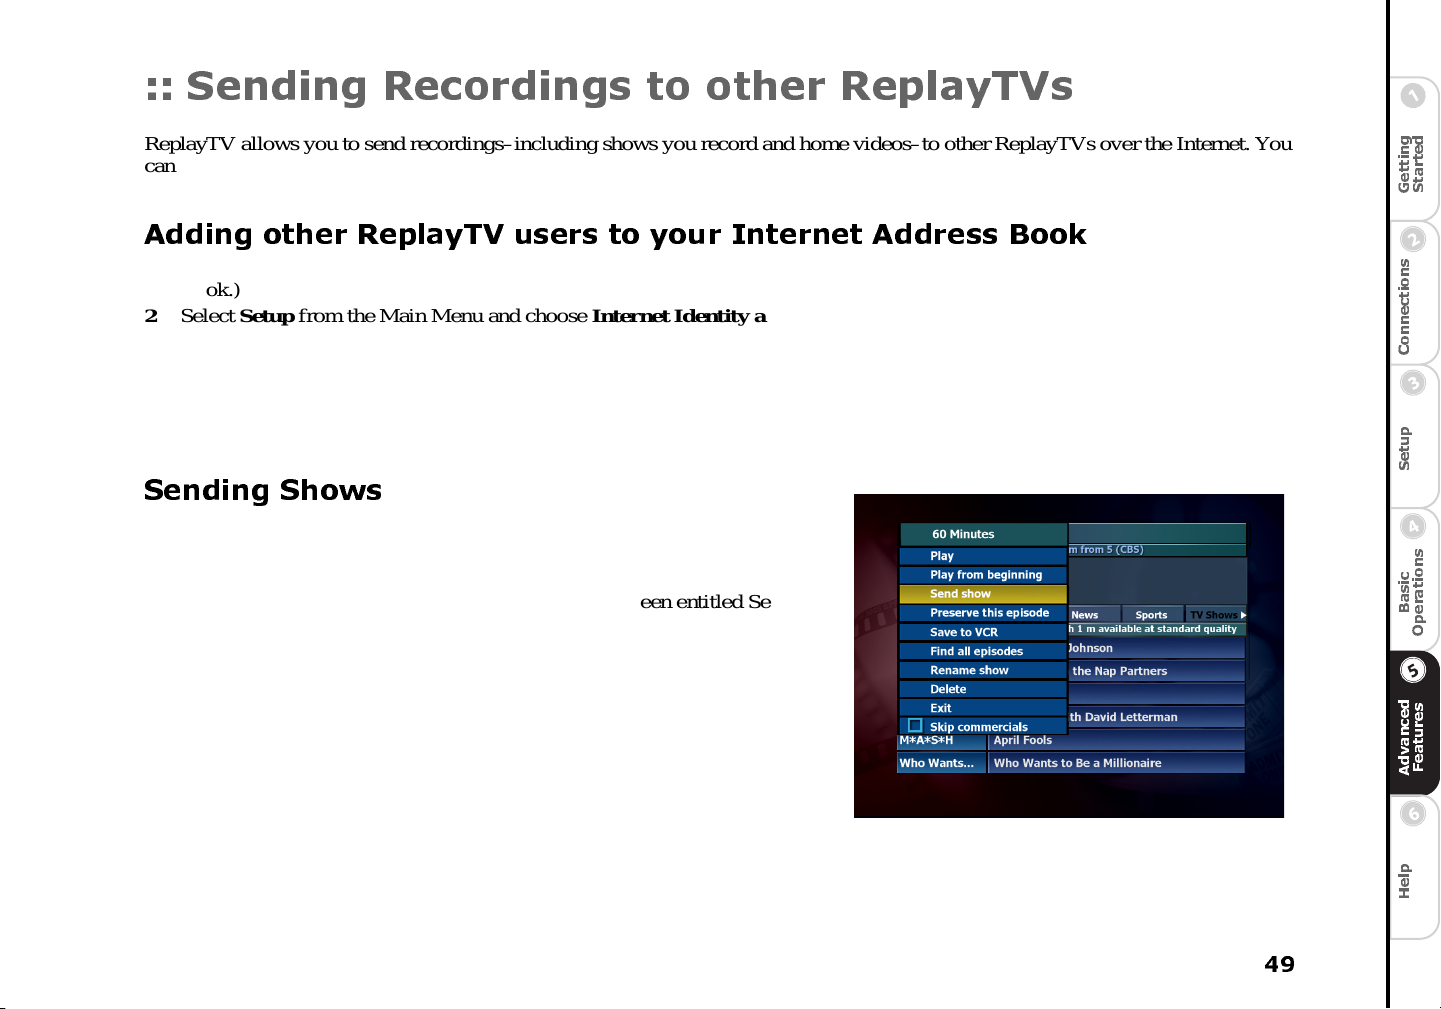
:: Sending Recordings to other ReplayTVs
ReplayTV allows you to send recordings–including shows you record and home videos–to other ReplayTVs ove r the Internet. You
can send a recording to a maximum of 15 ReplayTVs. To send a recording to another ReplayTV user you must first enter their
Internet Serial Number in your Internet Address Book.
Adding other ReplayTV users to your Internet Address Book
1 Get the Internet Serial Number from the other user. (The Internet Serial Number is the 15-digit number on the Internet Address
Book.)
2 Select Setup from the Main Menu and choose Internet Identity and Address Book from the Setup screen.
3 Select Ad d E ntry f rom your Internet Address Book.
4 Using the number buttons on the remote control, enter the Internet Serial Number of the other ReplayTV on the Ad d E ntry t o
Internet Address Book screen, then select OK.
The remote Replay will be contacted, followed by a screen confirming the addition. If successful, you can now send your
recordings to the added ReplayTV.
Sending Shows
The Send show option on a show’s pop up menu will be available after a show
has completed recording.
1 Highlight the show you want to send and press SELECT. 2 Select Send show from the pop up menu. A new screen entitled Select
Show Recipients will appear. This screen contains a list of all users in
your Address Book. The list will contain the names of other ReplayTVs
you have added to your Internet Address Book and their ReplayTV name
and Internet S erial Number.
3 Check the box next to the user you want to send the show to. 4 Select Send. If all information is correct, confirm the send.
g
d
e
n
i
t
t
r
t
a
e
t
G
S
s
n
o
i
t
c
e
n
n
o
C
p
u
t
e
S
s
n
o
c
i
i
t
s
a
a
r
B
e
p
O
d
s
e
e
c
r
n
u
t
a
a
v
e
d
F
A
49
p
l
e
H
Page 56

Using the Received Category
Shows that have been sent to you from other users are stored in the Received category. Selecting a show will display the sender’s
name and information about the show. You cannot view the show until you c hoose to accept it.
1 To accept a show, highlight the show and press SELECT. 2 Select Accept sh ow to initiate transmission to you.
If the sender has deleted the show, a message will be displayed stating that the show is not available. If the sender deletes the
show while it is being transmitted, the transmission will be cancelled. The show title bar will be a different color when the
transmission is complete.
• The standard show menu options will be available after the
download starts.
Accessing the Internet Address Book
1 Press MENU. 2 Select Setup from the Main Menu. 3 Select Internet Identity and Address Book from the Setup screen.
The first time you enter the Internet Address Book you will be prompted to nameyour ReplayTV. This screen will display your
ReplayTVs Internet S erial Number and prompt you to enter a name to identify your ReplayTV on the Internet. This name is different than its in-home network name. After entering a name, the Internet Address Book will open.
The Internet Address Book has the following options:
Add Entry: This option lets you add a friend’s Internet Serial Number to your Address Book so you can send recordings to each
other. Selecting this option displays a new screen where you will be prompted to enter the Internet Serial Number of the entry y ou
wish to add. Once entered, your ReplayTV will contact the remote ReplayTV to retrieve its name and the entry will be added to
your Address Book.
Change Internet Identity: Selecting this option lets you change the name of your ReplayTV and specify the port number of your
router’s firewall that will allow others to send you shows.
To change the ReplayTV name:
• Type in a new name for your ReplayTV using the on-screen keyboard. Your ReplayTV’s name will not be updated in a r emote
ReplayTV’s Address Book until the next time that unit is contacted.
• The port number is one that you have programmed on your router to open and allows access to your R eplayTV so f riends can
send you shows directly. Please refer to your router manual for instructions on Port Routing.
• The available range of port numbers must be 00000 or within 01024 and 65535.
ReplayTV 4500
50
Page 57

:: COMMERCIAL ADVANCE
If you ever wanted to watch TV without commercials, then COMMERCIAL
ADVANC E is what you’ve been waiting for. COMMERCIAL ADVANCE is a
feature that allows you to choose whether to skip most commercial messages during playback of recorded shows. Commercials are still recorded with C OM MERCIAL ADVANCE e nabled, though you now have the choice to watch them or
not—automatically.
Commercials will not be skipped during the first a nd last two minutes when playing back recorded shows. This is to prevent confusion when playback is first
started. Additionally, shows delayed within a few minutes of the live broadcast
will not skip commercials, even if COMMERCIAL ADVANCE is e nabled. You
can still watch recorded shows with com mercials by turning COMMERCIAL
ADVANC E off.
• Due to variations in the video stream w hile using a standard
antenna, there may be instances when the COMMERCIAL
ADVANCE feature will not properly detect commercials.
g
d
e
n
i
t
t
r
t
a
e
t
G
S
s
n
o
i
t
c
e
n
n
o
C
p
u
t
e
S
Setting COMMERCIAL ADVANCE Default
Follow these steps to set your default to play back each show commercial free. If you do this, you won’t have to enable COMMERCIAL ADVANCE f or each individual show.
1 Press MENU on the ReplayTV remote control. 2 Select Setup. 3 Select Default Playback Options. 4 Set the Skip commercials option to Yes to enable the COMMERCIAL ADVANCE feature.
Turning COMMERCIAL ADVANCE on and off
Follow these steps to turn COMM ERCIAL ADVANCE on and off for individual recorded shows.
1 Highlight a show in the Replay Guide and press SELECT to display the show’s pop up menu. 2 Highlight the Skip commercials option and press SELECT to check or un-check the show. 3 Select Play or Play from beginning and the show will be played with or without commercials, depending on the setting you
chose.
51
s
n
o
c
i
i
t
s
a
a
r
B
e
p
O
d
s
e
e
c
r
n
u
t
a
a
v
e
d
F
A
p
l
e
H
Page 58
To switch between skipping and viewing commercials while watching a show, press the button on the remote control. Keep in
mind that the following still apply:
Commercials will not be skipped during the first and last two min-
utes when playing back a recorded show.
Shows delayed within a few minutes of the live broadcast will not
skip commercials.
:: Screen Saver and Pause Screen
The screen saver and pause screen feature on the Setup menu allows you to display your digital photos when the screen saver is activated or when you press the PAUSE button. To use your photos, you need to copy them from your PC to your ReplayTV through your LAN (Local Area Network) using the ReplayTV Photo Transfer software. See “Installing ReplayTV Photo Transfer” below. The photos are stored in the Photo Viewer once you have copied them to ReplayTV.
ReplayTV is equipped with an Ethernet port to connect to your LAN. There is a default screen saver if you do not want to use your
own photos. The screen saver will be activated if there is no input from the ReplayTV remote control or front panel and the following circumstances apply:
1 Live TV is stopped or paused for 10 minutes. 2 A ReplayTV screen (Main Menu, Channel Guide, etc.) is displayed on the screen for 10 m inutes.
Installing ReplayTV Photo Transfer
ReplayTV Photo Transfer is compatible with Windows 98, 98SE, ME, and 2000 and can be downloaded from www.sonicblue.com/
replaytv.
1 Go to www.sonicblue.com/replaytv to install the Photo Transfer software. 2 The installation process will place a ReplayTV icon on your Window’s desktop. Double-click the icon to open a window where
all ReplayTVs on the network will be listed. At the end of the installation, you will be able to view and print a “readme” file,
which explains how the ReplayTV photo hierarchy works.
ReplayTV 4500
• You can create folders inside the “Photos” folder but not inside
of those folders. Each folder can hold a maximum of 200 jpeg
photos. You must copy photo files into the folders you create.
52
Page 59
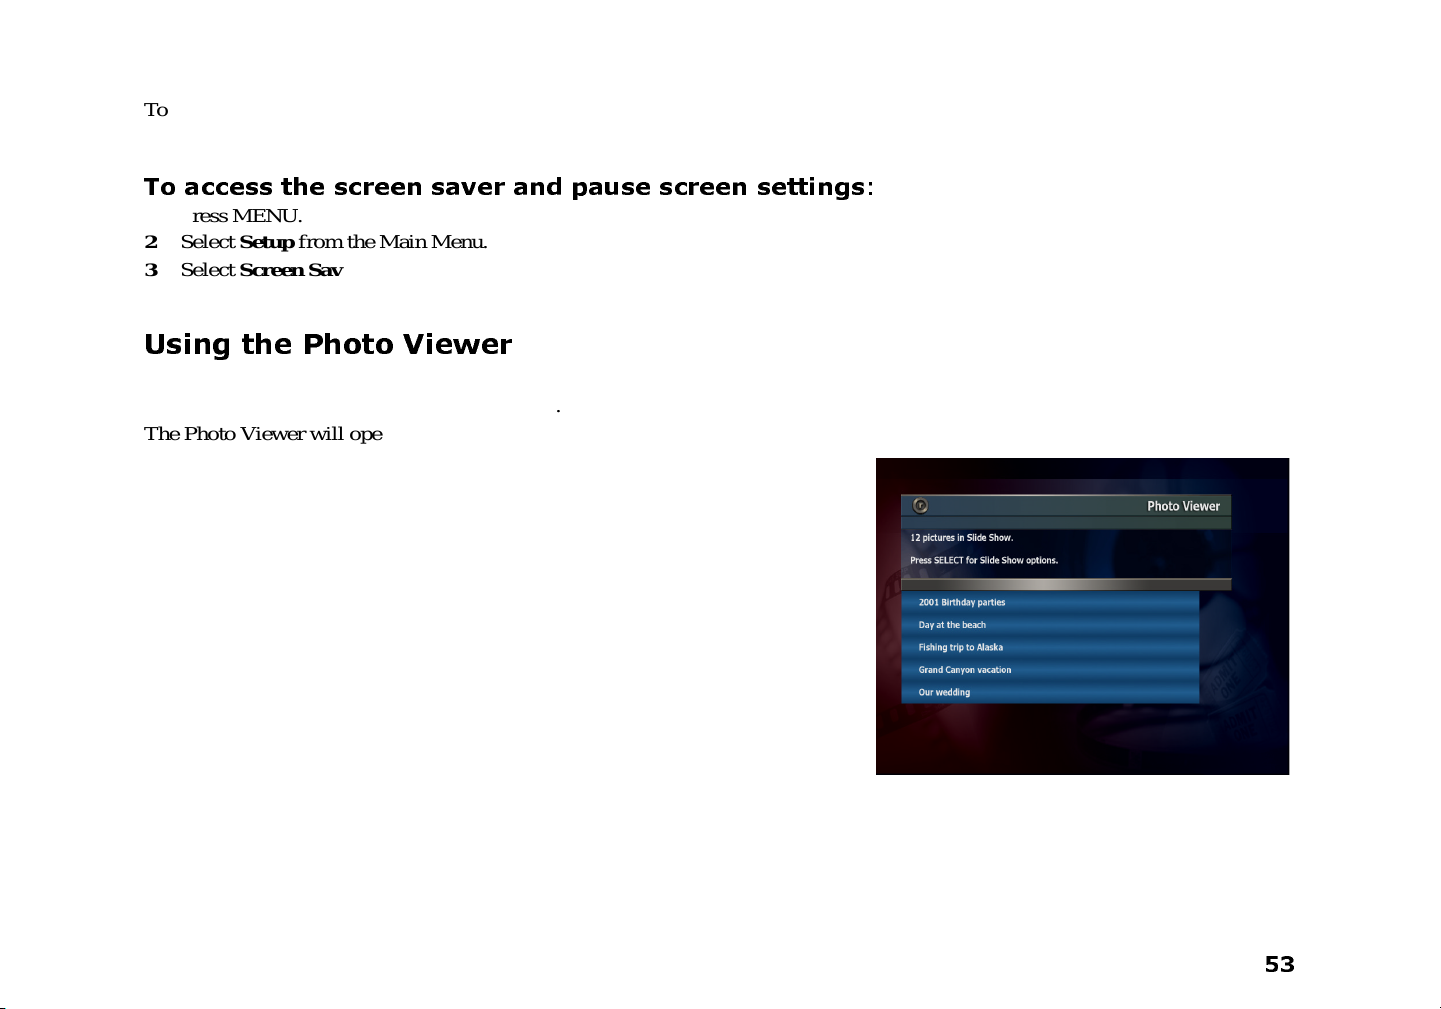
To transfer your photos to ReplayTV, simply copy your photos into the folders that you havecreated. Each folder (and its accompanying photos) is considered a separate slide show and can be named appropriately: f or example, “Fishing” or “Vacation.” The slide
show feature is controlled with the Photo Viewer, accessed from the Main Menu. S ee “Using the Photo Viewer” on page 53.
To access the screen saver and pause screen settings
1 Press MENU. 2 Select Setup from the Main Menu. 3 Select Screen Saver and Pause Screen from the Setup menu.
4 Choose which screen saver or pause screen you would like to use, then select Done.
:
Using the Photo Viewer
1 Press MENU on the remote. 2 Select Ph oto Viewer from the Main Menu.
The Photo Viewer will open, listing your available slide shows.
Select the slide show you want to play and press the SELECT or PLAY button on
the remote to start playback. The photos in the slide show will be displayed in
alphabetical order. The slide show can be controlled by the remote control functions listed below.
• REW and FF: Speed up and slow down the presentation.
• QUICKSKIP: Move to the next slide.
• INSTANT REPLAY: Go back to the previous slide.
• PAUSE: Pause the slide show.
• STOP: R eturn to the Photo Viewer.
• EXIT: Return to the Photo Viewer.
If PLAY is pressed after STOP, the slide show will begin again from the stopping
point.
53
Page 60

:: Remote Control Shortcuts
Show-watching Shortcuts
• To skip ahead a specific amount of time, enter the time in minutes then press QUICKSKIP.
• To go back a specific amount of time, enter the time in minutes then press INSTANT REPLAY.
• To go to a specific time within a recorded show, enter the time (for example, 02 to go to the second minute in the show), then
press the JUMP button.
• To skip to a certain time from the end of a show, enter the time in minutes then press RETURN TO LIVE.
Channel Guide Shortcuts
• To jump ahead 12 hours, press the F F button.
• To go back 12 hours, press the REW button.
#/$
• To move one screen at a time, press the PAGE
• To go to a channel, enter the channel number and press the SELECT button.
• To tune to a current show, highlight the show and press the SELECT button.
• To display a current show’s pop-up m enu, highlight the show and press ENTER.
• To go to a certain day, enter the number of days you wish to skip, then press FF.
• To go back to a certain day, enter the num ber of days you w ish to r eturn, then press REW.
• To go to a specific hour in the day, enter the hour (0-23), then press JUMP.
• To return to the current time, press RETURN TO LIVE.
buttons or the CHANNEL#/$buttons.
ReplayTV 4500
Replay Guide Shortcuts
• To view the Replay Guide of the next ReplayTV on the network, press QUICKSKIP.
• To view the Replay Guide of the previous ReplayTV on the network, press INSTANT R EPLAY.
• To return to viewing the local Replay Guide, highlight the Remote ReplayTV Finder and press RETURN TO LIVE.
• Press JUMP to go from the show content area to the categories to the Remote R eplayTV Finder.
• Press RETURN TO LIVE with a c ategory highlighted to go to the All S hows category.
54
Page 61

Find Shows On-screen Keyboard Shortcuts
• To move to the next screen after typing a keyword, press the REC button.
• To erase a character, press the REW button.
• To insert a space, press the FF button.
Slide Show Control Shortcuts
• SELECT or PLAY: Start slide show playback.
• REW and FF: Speed up and slow down the presentation.
• QUICKSKIP: Move to the next slide.
• INSTANT REPLAY: Go back to the previous slide.
• PAUSE: Pause the slide show.
• STOP: R eturn to the Photo Viewer. If PLAY is pressed after STOP the slide show will begin again from the stopping point.
• EXIT: Return to the Photo Viewer.
Channel Surfing Display Shortcuts
• To return to the current time, press RETURN TO LIVE.
Record Options Screen Shortcuts
• To confirm the settings without scrolling down to “Done,” press REC.
• To return to the Find Shows keyboard, press REW.
55
Page 62

ReplayTV 4500
56
Page 63
Chapter 6
Help
:: Troubleshooting
Customer Service Information
The FAQs below will help you solve common issues with your ReplayTV 4500. If you do not find the answers you need here, you
can contact our Customer Service Department as follows:
Phone
E-Mail
Web
Frequently Asked Questions
Problem Solution
ReplayTVis connected to my TV,
but I do not see the Quick Setup
screen.
When setting up ReplayTV, the correct cable company does not appear
asamenuiteminSetup.
(800) 933-5899
customerservice@sonicblue.com
www.sonicblue.com/support/replaytv
• Confirmthatthe correct line inputisselected on your TV. (PresstheTV/Videobutton on your TV to cycle through
inputs.)
• ConfirmthatReplayTV is not in standbymode by pressing the ReplayTVbutton on the remotecontrol. Verify that
the red POWER light on the unit is illuminated.
• If you are using the VGA connectoron ReplayTV, you need to connect theyellowvideo cable from the A/V cable
during the first-time Quick Setup process.
• If you are using an A/V receiver in your setup, verify that the input source is the s ame as the output source going
to your television. For example, if you are using an S-Videooutputto connect ReplayTVto an A/V receiver, you
will need to use an S-Videooutput to connect your A/V receiver to your TV. This is a limitation of most A/V
receivers.
• Contact ReplayTV Customer Care by phone at (800) 933-5899. Pleaseprovidethe followinginformation: 1)
Complex name (if applicable), 2) City,3) State,4)ZIP code,5)CableProvider’s Name, 6) Cable Provider contact
information, and 7) Problemdescription.In mostcases, the correct information can be added to the ReplayTVService database within 48 hours.
g
d
e
n
i
t
t
r
t
a
e
t
G
S
s
n
o
i
t
c
e
n
n
o
C
p
u
t
e
S
s
n
o
c
i
i
t
s
a
a
r
B
e
p
O
d
s
e
e
c
r
n
u
t
a
a
v
e
d
F
A
The ReplayTV remote does not
respond when I press a button.
• Replace the batteriesin the remote control with 2 new AA batteries.
57
p
l
e
H
Page 64

When I select a channel in the Channel Guide, the channel number does
not change on my satellite receiver
or cable box.
• If you are using an IR blaster connection to control channel changing,verifythat the IR blaster cable is securely
attachedto the IR BLASTER jack on ReplayTV, and that you have affixed the IR emitterdirectly over the IR
detectoron your cable box or satellite receiver.
• Confirm that you have selected the correct IR code for your cable box or satellite receiver.
• Try a different IR code, even it is not the exact code for your cable box or satellitereceiver.
When I select a channel in the Channel Guide, I see a blue screen that
states “no video source.”
When selecting a channel in the
Channel Guide, I see a solid blue
screen.
When selecting a show from the
Channel Guide, I see a screen that
fades to black.
The channels are not changing. • If your original remote control requiredan Enter button press when changing channels,press the ENTER button
My cable box sometimes failsto
change channels when using the
ReplayTV remote control.
The IR blaster occasionally misses
channel changecommands.
ReplayTV does not respond when I
press buttons on the remote control.
Or,the image on my television
screen is “frozen.”
• Confirm that you subscribe to the channel in question.
• VerifythattheA/V connections from your cable box/satellite receiver to ReplayTVare correct.
• Verifythatthe correct inputs to ReplayTV are selectedi n Setup. Also, if using S-Video, verify that IN 2 is chosen.
• Verifythatall your componentsare turned on.
• Try different cables. Poor quality cablesmay cause this to occur.
• Confirm that you have the correct input source specified in Setup. Press MENU. Highlight Setup and press
SELECT. Choose Network and Input Settings.
• Typically, this is caused by a weak video source.Contact Customer Care for further suggestions at (800) 933-
5899.
• Try changing cables. Poor quality cables may cause this to occur.
on the ReplayTV remote control after you enter the channel number.
• If you are using the IR blaster, your cable box receives IR commands from both the ReplayTV remote and the IR
blaster. Some cable boxes can be confused by this. You can block the commands from the ReplayTV remote control by affixing an opaque covering around the area where you have placed the IR emitter on your cable box. Do
not cover the IR emitter.
Sometimes the IR blaster sends too strong of a signal to your cable box or satellitereceiver, causing it to miss a digit
in the channel-change sequence.
• Affix the IR emitter next to or 1/2 inch away from the IR detector on your cable box or satellite receiver instead of
directly over it.
• Press and hold the POWER button on the front of ReplayTV for 10 seconds, then release. ReplayTV will restart
in a few mo ment s.
• Unplug the power cord from the electrical outlet for 15 seconds then plug it back in. ReplayTV will restart and
power on in a few moments.
ReplayTV 4500
58
Page 65

A “Please Wait” message displays
more than 2-5 minutes during first
time Quick Setup.
ReplayTVmightnot be communicatingwith your network.Thismay be caused by ReplayTVreceiving non-standard
DHCP information.
• Unplug ReplayTV from both your network and electrical outlet.
•
Disable DHCP on your network.
• Plug ReplayTV back in to an electrical outlet and complete the Quick Setup screens.
• Manuallyenter your NetworkInformation: IP Address, Subnet Mask, Gateway, DNS Server 1, DNS Server 2
(optional).
g
d
e
n
i
t
t
r
t
a
e
t
G
S
When I select a channel in the Channel Guide, the channel number does
not change.
Some of my jpeg photos do not display.
My DHCP server is not found during setup and I am forced to enter
the information manually.
Replay is connected to my Cable or
DSL modem and it can’t connect.
My ReplayTV 4500s are not communicating properly on the network.
• If you are using a serial connection to control channelchanging, verify that you have securelyconnected the serial
cable to ReplayTV and your satellite receiver.
• Open the jpeg file in another program and save it again.
• Verifythatthe jpeg is not progressive jpeg. This format is not supported.
• If you know you have a DHCP server on your network and it is not recognized by ReplayTV, make sure your net-
work is connected to the ETHERNET jack on ReplayTV.
• If you are connecting ReplayTV to a hub, switch, or router, check to see that the link light comes on when the
Ethernetcable is properly connected.Then try restarting ReplayTV by removing the power cord from the wall,
waiting several seconds, and then pluggingit back into the wall.
If Replay is using an IP address provided by your ISP, you may have connection issues if your ISP does not support
deviceslike ReplayTV.
Contact your ISP and verify the IP settings. You must have an IP address, a subnet mask a gateway and at least one
DNS. See “Home Network Connections” on page 12.
If the ReplayTV 4500s do not “see” each other, some piece of network hardware might not be propagating
ReplayTV’s network discovery packets properly.
• Verifythatyour ReplayTVs are on and connected to your network.
• Verifythatyour ReplayTVs have an IP address entered manually or automatically.I n general, the IP addresses
should be identical except for the last number.
• Restart each unit, one at a time.
• Rename each unit.
• If there is a firewall monitoring your local network, disable it temporarily to see if it is preventing the ReplayTVs
from communicating with each other.
• If the ReplayTVs must communicate through a router, try connecting them directly to the same hub or switch.
s
n
o
i
t
c
e
n
n
o
C
p
u
t
e
S
s
n
o
c
i
i
t
s
a
a
r
B
e
p
O
d
s
e
e
c
r
n
u
t
a
a
v
e
d
F
A
59
p
l
e
H
Page 66

:: Glossary
Bridge - A Bridge allows the free flow of data from one type of physical medium to another. For e xample, a bridge is required to
connect a phoneline ne twork to an Ethernet network.
DHCP (Dynamic Host Configuration Protocol) - This is the method by which computers, and ReplayTV, automatically get IP
addresses. By default, the ReplayTV 4500 will attempt to get its IP address automatically when it’s starting up. It will attempt to
renew this IP address every 24hrs. ReplayTV is considered a DHCP client. The router that automatically assigns the IP address to
ReplayTV is considered a DHCP server.
DMZ Host Page - A host on a network that prevents outside users from accessing data on your network. Depending on your router,
it might be necessary to add the IP address of R eplayTV to the DMZ host page. This will place ReplayTV outside of the firewall.
This may be necessary if the router is not properly routing the information it receives to ReplayTV. Check your r outer manual for
more details on when using DMZ is appropriate.
DNS (Domain Name System) - A DNS server translates domain names like www.sonicblue.com into their corresponding IP
addresses.
DSL Rou ter - A DSL router is simply a router that also functions as an external DS L modem.This DSL router would function as a
DHCP server.
Gateway - Thegateway a ddress is the I P address of the computer or device on a local network that gives you access to the Internet.
If you are using a router, it’s the internal (LAN) IP address of the router.
ReplayTV 4500
Hub - A hub is like a splitter. It turns one port into 4, 8, 16, etc. The hub provides more physical ports and nothing else. The hub has
an uplink port that sometimes can be switched to a standard port. You would normally connect your Cable or DSL modem to the
uplink port. Your PCs or devices like ReplayTV would plug into the non-uplink ports.
IP Address - This is a unique address that all computers and devices require to communicate over the Internet. Computers on corporate and home networks most likely use IP addresses to communicate with each other. ReplayTV a lso requires an IP address to
communicate. This address can be set manually or provided automatically. Depending on your setup, this IP address might come
from a router, or your I SP (Internet Service Provider).
ISP (Internet Service Provider) -
60
A company that provides Internet access through telecommunications lines.
Page 67
MAC Address (Media Access Control) - The unique hardware number of devices on a network. Some ISPs require the MAC
address of a network device in order to automatically assign it an IP address.
Router - In order for you computer to communicate to the Internet using a broadband connection, it not only requires a physical
connection but also a n IP address. The router not only lets you share a physical connection (like a hub or switch), it also lets you
share a single Internet IP address with more than one computer or device. Instead of needing three I P addresses for three computers
in your home, you can purchase one for the router and the router will allow all three computers in your home to share your C able,
DSL, ISDN, or Satellite connection. Some routers allow you to share a modem connection in this way.If you purchase a single port
router, you will also need a hub or switch to c onnect more than one device to the router. If connecting a PC or ReplayTV directly to
a single port router, you must use a crossover cable.
If you have PPPoE DSL (requires that you use software to login for Internet access),you need to verify that any router you purchase
also supports PPPoE.
g
d
e
n
i
t
t
r
t
a
e
t
G
S
s
n
o
i
t
c
e
n
n
o
C
Subnet Mask - This address is a filter that determines what part of the network your computer or ReplayTV is on. For example,
many routers use 192.168.0.1 for an IP address and 255.255.255.0 for a subnet mask. Any computers or devices on your local network that has an IP address that matches 192.168.0.x will be able to communicate with each other.
Switch - If you have a mix of 10 a nd 100Mbps devices or computers on your network, upgrading from a hub to a switch can greatly
improve performance. Also, if you have many devices on your network, the switch will give you better performance than the hub.
61
p
u
t
e
S
s
n
o
c
i
i
t
s
a
a
r
B
e
p
O
d
s
e
e
c
r
n
u
t
a
a
v
e
d
F
A
p
l
e
H
Page 68

:: Technical Specifications
VHF/UHF IN/OUT (RF) IN(1)/OUT(1)
VIDEO/AUDIO IN ( STEREO) (RCA) 2 LINE
VIDEO/AUDIO OUT (STEREO) (RCA) 2 LINE
S-VHS IN/OUT (S-JACK) IN(1)/OUT(1)
TELEPHONE JACK (RJ-11) YES
IR BLASTER PORT YES
ETHERNET PORT YES
IR BLASTER YES
SERIAL PORT (9 PIN) YES
DIGITAL AUDIO PORT YES
VGA PORT (480 P) YES
POWER 120V/60Hz
DIMENSIONS 430mm x 88mm x 353mm
ReplayTV 4500
62
Page 69

:: Limited Warranty and Software License
• For your c onvenience, SONICblue has established a frequently
asked questions section at: http://www.sonicblue.com/replaytv.
For service assistance or resolution of a service problem, product information or operation help, please contact the
SONICblue Customer Care Department:
• By phone: 1-800-933-5899
By email: techsupport@replaytv.com
Warranty
SONICblue I ncorporated (“SONICblue”) warrants your 4500 series ReplayTV (the “ReplayTV”) and any included ReplayTV
accessories against defects in material or workmanship as follows:
LABOR: For a period of one (1) year from the date of purchase ( “Warranty Period”), if the ReplayTV is determined to be defective,
SONICblue will repair or replace the unit, at its option, at no charge, or pay the labor charges to any ReplayTV authorized service
facility. After the Warranty Period, the customer must pay for all labor charges.
PARTS: In a ddition, during the Warranty Period, SONICblue will supply, at no charge, a new or rebuilt R eplayTV unit in exchange
for a defective unit. Af ter the Warranty Period, parts are available from SONICblue authorized service facilities or a ReplayTV Service C enter at your expense.
In addition, your ReplayTV carries a 30-day satisfaction guarantee for units purchased at the SONICblue E-store. It may be
returned within 30 da ys of purchase for a full refund (minus any shipping charges). Your ReplayTV must be returned in warranty
condition with all original accessories included, in order to receive a refund. Other terms may be offered by c ertain retailers. Check
with your retailer for details.
Warranty Service
To obtain warranty service, you must first obtain an RMA number (Return Merchandise Authorization) from a Technical Support
Representative at SONICblue. A Technical Support Representative may be reached at (800) 933-5899. Once an RMA number is
obtained, your ReplayTV must be shipped freight prepaid, in either its original packaging or packaging affording an equal degree of
protection, to the ReplayTV authorized distribution facility. In order to r eceive an advance replacement ReplayTV, the customer
g
d
e
n
i
t
t
r
t
a
e
t
G
S
s
n
o
i
t
c
e
n
n
o
C
p
u
t
e
S
s
n
o
c
i
i
t
s
a
a
r
B
e
p
O
d
s
e
e
c
r
n
u
t
a
a
v
e
d
F
A
63
p
l
e
H
Page 70
must furnish a valid credit card number and expiration date. Otherwise, a replacement ReplayTV will be shipped upon receipt of
the defective unit.
In addition, a ll accessories must be returned with the defective ReplayTV. A n ew or factory refurbished set of accessories will be
furnished with the replacement ReplayTV. Failure to return any of the accessory items could result in a delay in receiving the
replacement ReplayTV, and/or result in an invoice for the missing accessories.
Important: When c alling for an RMA number,please be prepared to answer some basic troubleshooting/setup related questions. It
is helpful for you to call when you are in front of your ReplayTV so that you can r espond to operational instructions from a
ReplayTV Technical Support Representative.
Scope of and Limitation on Warranty
This warranty does not cover customer instruction, installation,set up adjustments or signal reception problems. This warranty does
not cover cosmetic damage due to acts of God, a ccident, misuse, abuse, negligence, commercial use, or modification of, or to any
part of your ReplayTV. This warranty does not cover damage due to improper operation or maintenance, connection to improper
voltage supply, or attempted repair by anyone other than a facility authorized by SONICblue to service your ReplayTV. This warranty does not cover consumables (such as fuses and batteries). This warranty is valid only in the United States and is non-transferable. This warranty is invalid if the factory-applied serial number has been altered or removed from the ReplayTV.
REPAIR OR REPLACEMENT AS P ROVIDED UNDER THIS WARRANTY IS THE EXCLUSIVE REMEDY OF THE CONSUMER. SONICblue SHALL NOT BE LIABLE FOR ANY INCIDENTAL OR CONSEQUENTIAL DAMAGES FOR BREACH
OF ANY EXPRESS OR IMPLIED WARRANTY ON THIS PRODUCT. EXCEPT TO THE EXTENT PROHIBITED BY APPLICABLE LAW, ANY IMPLIED WARRANTY OF MERCHANTABILITY OR FITNESS FOR A PARTICULAR PURPOSE ON
THIS PRODUCT IS LIMITED IN DURATION TO THE DURATION OF THIS WARRANTY.
Some states do not allow the exclusion or limitation of incidental or consequential damages, or allow limitations on how long a n
implied warranty lasts, so the above limitations or exclusions may not apply to you. This warranty gives you specific legal rights,
and you may have other rights which vary from state to state.
Software License
IMPORTANT -- READ CAREFULLY: By pressing “PLAY” and accepting to continue with the setup process to begin using the
software in your ReplayTV, you agree to be bound by this agreement, including the terms that apply to the software license. If you
do not agree to the terms of this agreement, you may promptly return your ReplayTV to the point of purchase for a refund of your
purchase price, or you may contact SONICblue for instructions on where to ship the ReplayTV, at S ONICblue’s cost, for a full
refund of the purchase price after inspection.
ReplayTV 4500
Software License Grant; Restrictions
Subject to the terms of this agreement, SONICblue grants you a non-exclusive license, without the right to sublicense, to use all
software included with the ReplayTV or subsequently provided to you, and related documentation (together, “Software”) solely for
your internal, noncommercial use and solely in connection with your use of the ReplayTV and access to the R eplayTV Service
(“RTVS”). The license may only be transferred with the transfer of the ReplayTV on which SONICblue has installed the software
and any transferee will be subject to the terms and conditions of this license. Youacknowledge and agree that SONICblue may peri-
64
Page 71

odically update, modify or enhance the Software remotely through the RTVS, and that any registration or other information provided by you may be used or disclosed by SONICblue pursuant to the terms of SONICblue’s ReplayTV Privacy Policy, as that
policy may be modified by SONICblue from time to time. You further agree that: (a) if you use of the Software or the ReplayTV
with a ny third party service that is competitive with the RTVS, your product warranty under this agreement will terminate; (b) you
will not attempt to modify, enhance, disassemble, decompile, reverse engineer or otherwise attempt to gain access to the source
code to the Software; and (c) you will not attempt to remove or unbundle the S oftware from the ReplayTV.
Ownership
SONICblue and its licensors own and retain all proprietary rights, including all patent, copyright, trade secret, trademark and other
intellectual property rights, in and to the S oftware and any corrections, bug fixes, enhancements, updates or other modifications to
the Software. Youacknowledge that the license granted under this agreement does not provide you with title to or ownership of the
Software, but only a r ight of limited use under the terms and conditions of this agreement.
Limitation of Liability
THE ENTIRE RISK ARISING OUT OF THE USE OR PERFO RMANCE OF THE SOFTWARE AND THE PRODUCT
REMAINS WITH YOU. TO THE MAXIMUM EXTENT PERMITTED BY APPLICABLE LAW, SONICBLUE AND ITS SUPPLIERS OR LICENSORS WILL NO T BE LIABLE FOR ANY CONSEQUENTIAL, INCIDENTAL, INDIRECT, SPECIAL,
PUNITIVE, OR OTHER DAMAGES WHATSOEVER (INCLUDING, WITHOUT LIMITATION, DAMAGES FOR LOSS OF
PROFITS, BUSINESS INTERRUPTION, LOSS OF INFORMATION OR DATA, OR OTHER PECUNIARY LOSS) ARISING
OUT OF THIS AGREEM ENT OR THE USE O F OR INABILITY TO USE THE S OFTWARE OR THE RTVS, EVEN IF SONICBLUE OR ITS SUPPLIERS OR LICENSORS HAVE BEEN ADVISED OF THE POSSIBILITY OF SUCH DAMAGES.
BECAUSE SOME STATES/ JURISDICTIONS DO NOT ALLOW THE EXCLUSION OR LIMITATION OF LIABILITY FOR
CONSEQUENTIAL OR INCIDENTAL DAMAGES, THE ABOVE LI MITATION MAY NOT AP PLY TO YOU.
Termination of Software License
The licenses for the Software granted under this agreement shall terminate automatically if you fail to comply with the limitations
described in this agreement. No notice will be required from SONICblue to effectuate such termination. On termination of the
licenses, SONICblue may e rase or destroy all copies of the S oftware on your ReplayTV and you agreed to destroy all accompanying documentation. The obligations (other than the license) of SONICblue and you in this agreement shall survive termination of
this a greement. Nothing in this section shall limit any other remedies that SONICblue may have for your breach of this agreement.
Export Controls; Government Restricted Rights
You a cknowledge and agree that none of the Software or underlying information or technology may be downloaded or otherwise
exported or re-exported (i) into (or to a na tional or resident of) Angola, Cuba, Iran, Iraq, Libya, North Korea, Sudan, Syria, or any
other c ountry to which the U.S. has embargoed goods; or anyone on the U.S. Treasury De partment’s list of Specially Designated
Nationals or the U.S. Commerce Department’s Table of Denial Orders. By using the Software, you represent and warrant that you
are not a national or resident of any such country or on any such list.
The Software is a commercial product, developed at private expense, and provided with restrictedrights.Use, reproduction, release,
modification or disclosure of the Software, or any part thereof, including technical data, by the Government is restricted in accor-
g
d
e
n
i
t
t
r
t
a
e
t
G
S
s
n
o
i
t
c
e
n
n
o
C
p
u
t
e
S
s
n
o
c
i
i
t
s
a
a
r
B
e
p
O
d
s
e
e
c
r
n
u
t
a
a
v
e
d
F
A
p
l
e
H
65
Page 72

dance with Federal Acquisition Regulation (“FAR”) 12.212 for civilian agencies and Defense Federal Acquisition R egulation Supplement (“DFARS”) 227.7202 for military agencies.
Miscellaneous
This agreement shall in all respects be governed by the laws of the State of California without reference to its principles of conflicts
of laws. The United Nations Convention on Contracts for the International Sales of Goods shall not apply to this agreement. You
hereby agree that a ll disputes arising out of this agreement shall be subject to the exclusive jurisdiction of and venue in the federal
and state courts within Santa Clara County,California, and you hereby c onsent to the personal and exclusive jurisdictionand venue
of these courts.
If any of the provisions of this agreement are held to be invalid under any applicable statute or rule of law, they are, to that extent,
deemed om itted. The w aiver of any breach or default, or any delay in exercising any rights shall not constitute a waiver of any subsequent breach or default. This agreement constitutes the complete and exclusive agreement between you and SONICblue with
respect to the subject matter hereof, and supersedes all prior oral or written understandings, communications or agreements. This
agreement may not be modified except in writing duly signed by a n authorized representative of S ONICblue.
This product incorporates copyright protection technology that is protected by method claims of certain U.S. patents and other
intellectual property rights owne d by Macrovision Corporation and other rights owners. Use of this copyright protectiontechnology
must be authorized by Macrovision Corporation, and is intended f or home and other limited viewing uses only unless otherwise
authorized by Macrovision Corporation. Reverse engineering or disassembly is prohibited.
Macrovision U.S. patent nos. 4,631,603; 4,577,216; 4,819,098 and 4,907,093.
COMMERCIAL ADVANCE patent nos. 5,333,091; 5,692,093 and 5,696,866. Other patents pending.
is a registered trademark of SRT, Inc. A Jerry Iggulden invention licensed in association with Arthur D. Little
Enterprises, Inc.
ReplayTV 4500
66
Page 73

:: Privacy Policy
Your Privacy is Important to us
Personal television and digital video recording are radically improving the way you watch TV. You are now in charge of your own
television viewing experience.
Along with that, we want you to know how important your privacy is to us.
At SONICblue, we believe pr ivacy is a right, not a privilege. In other words, you should expect us to protect your privacy, and you
should never have to worry a bout it. Webelieve that a strict and clear-cutprivacy policy is a key ingredient in growing our co m pany
and the personal television industry. This Privacy Policy is our pledge to safeguard your privacy while providing you with the best
television viewing experience possible.
This is our Privacy Credo
1 We see your privacy as a r ight and not just a privilege. 2 We respect your privacy and are committed to maintaining the privacy of your personal information.
3 We will tell you what information we collect about you and how we use that information. 4 We will give you a choice as to how your personal information will be used.
Sources of Information
To best understand this Privacy Policy, please keep in mind that we gather information from three different sources:
1 Our Web site: www.sonicblue.com/replaytv 2 Digital video recorders featuring the ReplayTV Service. These recorders are sold under brand names like Panasonic and also
under the ReplayTV brand. All of these recorders feature our ReplayTV Service.
3 Telephone. You m ay call us and provide us with information.
Types of Information
It is important to know that we collect different types of information. We use each in a different way, as explained below in the
Q&A section of our Privacy Policy. The terms defined below a re used throughout our Privacy Policy:
1 “Personally Identifiable Information” is private data about you as an individual. Examples of this data would be your name,
address, telephone number, e ma il address, and other personal information that identifies you as you. We call this “Personal
Information” for short.
2 “Technical Status Data” can be classified either a s error events and maintenance status events.
:
g
d
e
n
i
t
t
r
t
a
e
t
G
S
s
n
o
i
t
c
e
n
n
o
C
p
u
t
e
S
s
n
o
c
i
i
t
s
a
a
r
B
e
p
O
d
s
e
e
c
r
n
u
t
a
a
v
e
d
F
A
67
p
l
e
H
Page 74

Privacy Policy Q&A
Q: What information does SONICblue collect from the www.sonicblue.com/replaytv Web site?
A: When you visit certain areas of www.sonicblue.com/replaytv, we may ask you to register by providing Personal Information. For
example, if you buy a product,enter a contest, or subscribe to a mailing list from our site, we will ask you f or certain Personal Information in connection with that transaction.
We also collect Anonymous Information from the Web site, including which pages you look at and other similar data. As do most
Web sites, www.sonicblue.com/replaytv uses “cookies.” A cookie is a small data file that a Website can send to your browser to be
stored automatically on your computer. Cookies are c ommonly used to track your visits to a site so you don’t have to log in on
every page and to analyze how you use the site. This allows Web site operators to serve you be tter.
When you register your ReplayTV unit at www.sonicblue.com/replaytv, we collect Personal I nformation. Our practices regarding
the collection and use of this information are described below in the sections about your digital video recorder usage.
Q: How does SONICblue use the information it collects from the www.sonicblue.com/replaytv Web site?
A: Wemay use Personal Information collected through the Web site to complete a transaction you request. If you purchase a
ReplayTV product, the Personal Information collected for that transaction will be used to fillyour order,get the product to you and
bill you correctly.SONICblue may also use your mailing address, telephone number or email address to alert you to special offers,
updated information and new services. If you don’t want SONICblue to contact you, you may opt-out as discussed in the next question a nd answer below.
Anonymous Information collected through our Web site is used for maintenance, monitoring and marketing uses, but Anonymous
Information will not be linked to you without your permission.
Q: What choices do I have regarding the collection and use of information from the www.sonicblue.com/replaytv Web site?
A: When you submit Personal Information at our Web site, you can opt-out of receiving information from SONICblue about
ReplayTV and related products, promotions, and services. You may also set your Internet browser to reject cookies to limit the collection of Anonym ous Information from our Web site, but this m ay a ffect your ability to use some parts of our Web site.
Q: What information does SONICblue collect about my digital video recorder use?
A: When you purchase a ReplayTV digital video recorder, we ask you to register the product so we can provide you with the best
possible service. You may r egister online at the www.sonicblue.com/replaytvWeb site or by telephone. During registration, we ask
you for Personal Information, including your name, address, phone number,email address, and the serial number of your ReplayTV
digital video recorder.
The ReplayTV digital video recorder is connected to your television and an Ethernet or telephone connection. During system setup
and registration, we learn about how you have connected your ReplayTV digital video recorder to your entertainment system and
the programming signal sources available to you (antenna, cable, and/or satellite). We also learn about where you are located, and
ReplayTV 4500
68
Page 75
use this information to determine what television channels a nd schedule are available to you. Each day, the ReplayTV digital video
recorder contacts SONICblue to download a current TV schedule for you.
Q: How does SONICblue use the information it collects about my digital video recorder use?
A: Personal Information collected during registrationof your ReplayTV digital video recorder may be used for diagnostic purposes.
We can use it, for example, to see if your ReplayTV unit is working properly. We can also use it when you contact our Customer
Care agents so they can help you with any service-related problems, and for warranty eligibility a nd fulfillment purposes. Again,
this information is not linked to Anonymous Information without your permission.
Anonymous Viewing Data is used to tailor the ReplayTV Service to your preferences, including providing you with advertisements
that may be of interest to you, and to provide service enhancements to you. With your permission, we may also use Anonymous
Viewing Data to diagnose and correct problems with your digital video recorder or your ReplayTV Service. In keeping with this
Privacy P olicy, Anonymous Viewing Data is not linked to you, and will not be linked to you without your express permission.
Q: What choices do I have regarding the collection and use of information about my digital video recorder use?
A: Registration of your ReplayTV digital video recorder is not required to use the unit.
From time to time, we may send all of our customers information about our products and services that we consider essential to pro-
viding you the ReplayTV Service, including information about software upgra des, changes to the service, technical or administrative issues, legal ma tters, or other similar information. Users of our products and services are not able to opt-out of these
announcements. At present, users also cannot opt-out of the collection of Anonymous Viewing Data.
Q: Does S ONICblue share my information (gathered from either my use of the www.sonicblue.com/replaytv Web site or digital
video recorder) with any third pa rties?
A: SONICblue will not share your Personal Information with third parties without your consent, except in the very limited circumstances outlined in the ne xt question and answer below. Your Personal Information is not otherwise sold, m arketed or shared with
third parties without your permission.
Anonymous Information, including Anonymous ViewingData, may be shared with third parties for analysis or m arketing purposes.
For example, this information m ay be provided to advertisers or marketers who may use it to target advertisements to your particular interests. Because it’s anonymous, this information is not linked to you, and will not be linked to you without your express permission.
Q: Are there any special circumstances that may require my information (gathered from either my use of www.sonicblue.com/
replaytv Web site or its digital video recorder) to be shared with third parties?
A: SONICblue may disclose Personal or Anonymous Information if required to do so by law or in the good faith belief that such
action is necessary or appropriate to conform to the law or comply with a legal process served on SONICblue, to protect and defend
the rights or property of SONICblue, the ReplayTV Service or our viewers, whether or not required to do so by law,or to protect the
personal safety of our viewers or the public. SONICblue reserves the right to contact appropriate authorities and disclose Personal
g
d
e
n
i
t
t
r
t
a
e
t
G
S
s
n
o
i
t
c
e
n
n
o
C
p
u
t
e
S
s
n
o
c
i
i
t
s
a
a
r
B
e
p
O
d
s
e
e
c
r
n
u
t
a
a
v
e
d
F
A
69
p
l
e
H
Page 76

or Anonymous Information to them at its discretion when it appears that individuals using our products or services are engaged in
activities that are illegal or violate the ReplayTV Service Terms of Service.
Should SONICblue merge with or be acquired by another company, or if the business unit providing your service were sold to
another company, then customer information maintained by SONICblue, including Personal and Anonymous Information, may be
transferred to and used by the resulting combined company.
From time to time we m ay a lso share Personal Information with third parties who perform certain services and functions on our
behalf. These parties only have access to the Personal Information they need to perform their functions and we require them to use
the information only in connection with the services they provide for us.
Q: Can I correct the information collected about me?
A: SONICblue believes in and supports your right to access and edit the Personal Information you have provided us. To do so, simply contact S ONICblue at 800-933-5899 and we will make changes that you request.
Q: Is all of my information kept securely?
A: SONICblue has security measures in place that are designed to protect your information. All Personal and Anonymous Informa-
tion is stored on physically secured servers. Access to this information is strictly limited to individuals with a legitimate reason to
have access and who have signed a greements that prohibit the unauthorized use or disclosure of such information.In addition, all of
SONICblue’s stored information is firewall protected against unauthorized “hacks” into our systems. W hile we c annot guarantee
that loss, m isuse or a lteration of your data will not occur, we work hard to prevent such occurrences.
Q: Does S ONICblue collect personal information about children?
A: Weare very concerned about the safety and privacy of children. Therefore, SONICblue will not knowingly collect Personal
Information from anyone under the age of 13.
Q: How can I find out about changes to this Privacy Policy?
A: We will update this policy as our business and services expand and change. We will update this policy to provide you with infor-
mation a bout how we treat Personal Information collected through this new service.
Updates to this policy will be posted on our Web site, and sent to your ReplayTV digital video recorder, but in most cases will not
be sent to you directly. We encourage you to review this policy periodically to review any changes that have been posted.
One thing that will never change at SONICblue is our commitment to your privacy.
Q: What if I have other questions?
A: If you have any questions or comments about our use of Personal Information, Anonymous Information or about this Privacy
Policy, please contact us at 800-933-5899 or via e-mail at privacy@replaytv.com. We will be happy to give you more information.
If you have a complaint about our use of Personal or Anonymous Information, please let us know. Wewill promptly investigate and
will c omply fully with the legal and regulatory supervisory authorities responsible for enforcing our adherence to the privacy principles stated above.
ReplayTV 4500
70
Page 77
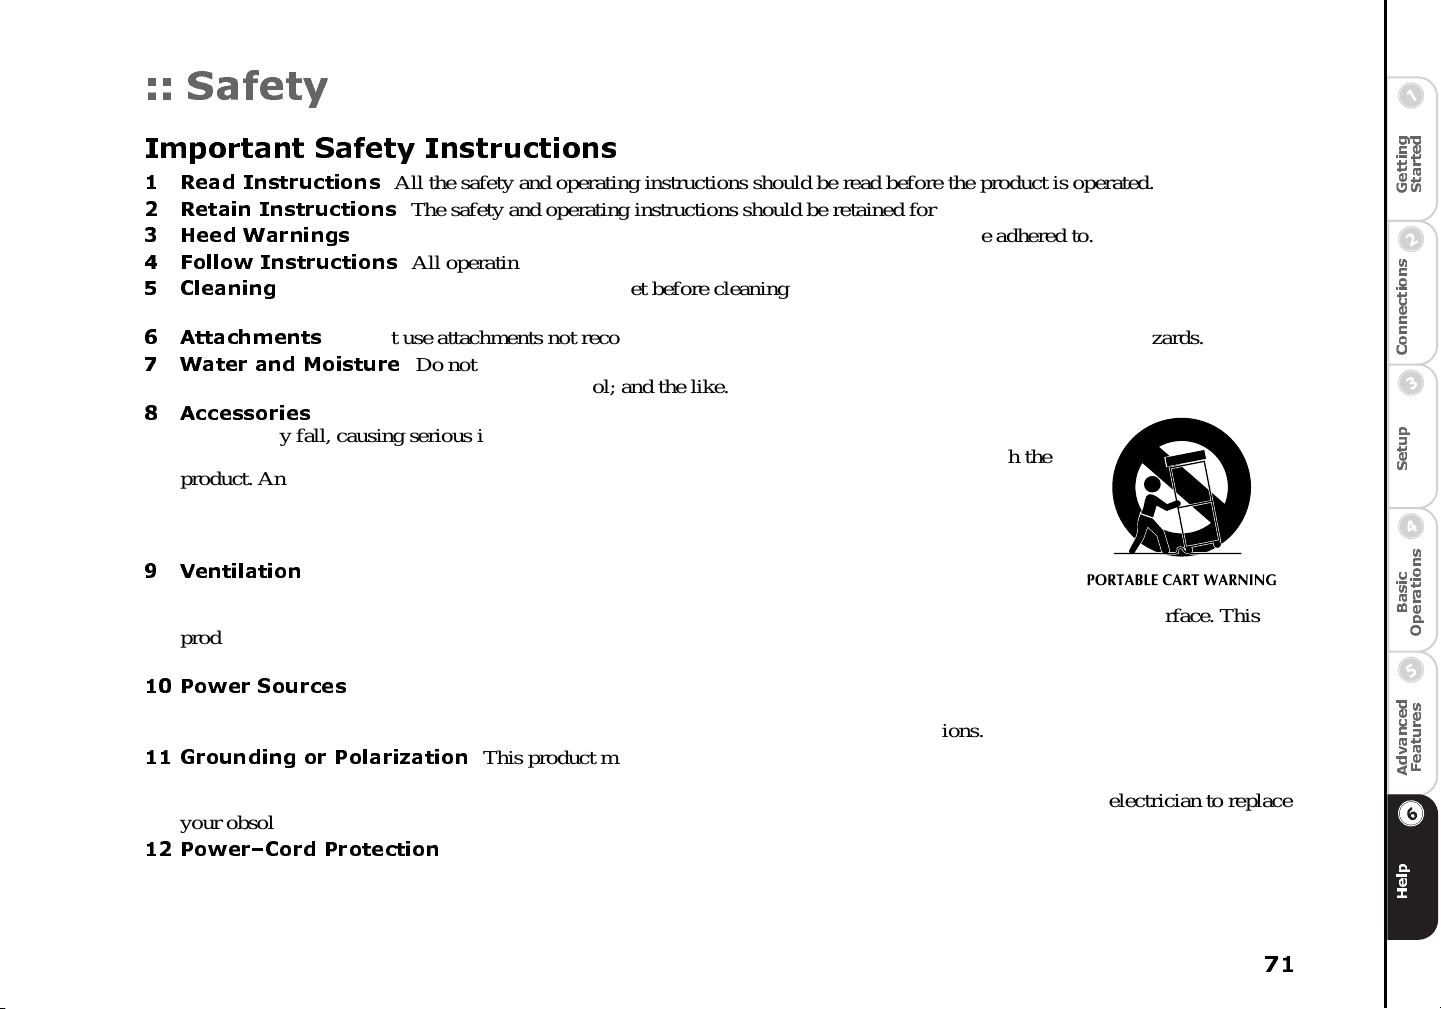
:: Safety
Important Safety Instructions
1 Read Instructions 2 Retain Instructions 3 Heed Warnings 4 Follow Instructions 5 Cleaning
Unplug this product f rom the wall outlet before cleaning. Do not use liquid cleaners or aerosol cleaners. Use a
damp cloth for cleaning.
6 Attachments 7 Water and Moisture
tub; in a we t basement; or near a swim ming pool; and the like.
8 Accessories
Do not place this product on an unstable cart, stand, tripod, bracket, or table. The
product m ay f all, causing serious injury to a c hild or adult, and serious damage to the product. Use
only with a cart, stand, tripod, bracket, or table recommended by the manufacturer, or sold with the
product. Any mounting of the product should follow the manufacturer’s instructions, and should use
a mounting accessory recommended by the manufacturer.
A product and cart combination should be moved with care. Quick stops, excessive force, and
uneven surfaces may cause the product and cart combination to overturn.
9 Ventilation
Slots and openings in the cabinet are provided for ventilation and to ensure reliable
operation of the product and to protect it from overheating, and these openings must not be blocked
or covered. The openings should never be blocked by placing the product on a be d, sofa, rug, or other similar surface. This
product should not be placed in a built-in installation such as a bookcase or rack unless proper ventilation is provided or the
manufacturer’s instructions have been adhered to.
10 Power Sources
are not sure of the type of power supply to your home, consult your product dealer or local power company. For products
intended to operate from battery power, or other sources, refer to the operating instructions.
11 G rounding or Polarization
one blade wider than the other). This plug will fit into the power outlet only one way. This is a safety feature. If you are unable
to insert the plug fully into the outlet, try reversing the plug. If the plug should still fail to fit, contact your electrician to replace
your obsolete outlet. Do not defeat the safety purpose of the polarized plug.
12 Power–Cord Protection
items placed upon or against them, paying particular attention to cords at plugs, convenience receptacles, and the point where
they exit from the product.
All the safety and operating instructions should be read before the product is operated.
The safety and operating instructions should be retained for future reference.
All warnings on the product and in the operating instructions should be adhered to.
All operating a nd use instructions should be followed.
Do not use attachments not recommended by the product manufacturer as they may cause hazards.
Do not use this product near water–for example, near a bathtub, wash bowl, kitchen sink, or laundry
This product should be operated only from the type of power source indicated on the m arking label. If you
This product may be equipped with a polarized alternating-current line plug (a plug having
Power-supply cords should be routed so that they are not likely to be walked on or pinched by
g
d
e
n
i
t
t
r
t
a
e
t
G
S
s
n
o
i
t
c
e
n
n
o
C
p
u
t
e
S
s
n
o
c
i
i
t
s
a
a
r
B
e
p
O
d
s
e
e
c
r
n
u
t
a
a
v
e
d
F
A
p
l
e
H
71
Page 78
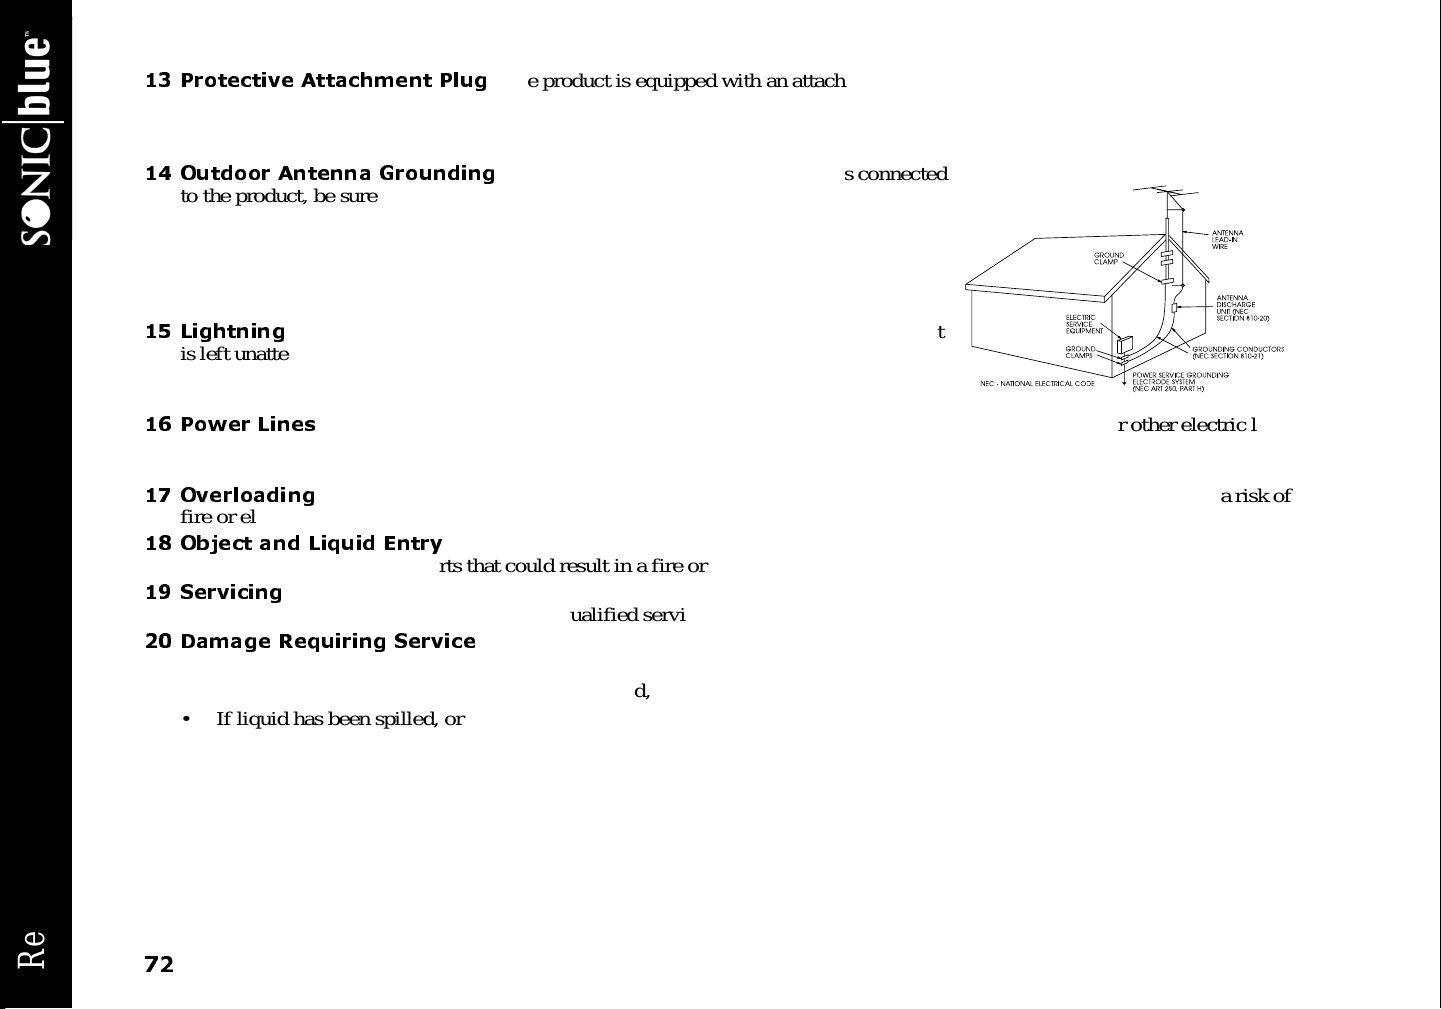
13 Protective Attachm ent Plug
The product is equipped with an attachment plug having overload protection. This is a
safety feature. See Instruction Manual for replacement or resetting of protective device. If replacement of the plug is required,
be sure the service technician has used a re placement plug specified by the manufacturer that has the same overload protection
as the original plug.
14 Outdoor Antenna Grounding
If an outside antenna or cable system is connected
to the product, be sure the antenna or cable system is grounded so as to provide some
protection against voltage surges and built-up static charges. Ar ticle 810 of the National
Electrical Code, ANSI/NFPA 70, provides information with r egard to proper grounding
of the mast and supporting structure, grounding of the lead-in wire to an a ntenna discharge unit, size of grounding conductors, location of antenna-dischargeunit, connection to grounding electrodes, and requirements for the grounding electrode.
15 Lightning
For added protection for this product during a lightning storm, or when it
is left unattended and unused fo r long periods of time, unplug it from the wall outlet and
disconnect the antenna or cable system. This will prevent damage to the pr oduct due to
lightning and power lines surges.
16 Power Lines
An outside antenna system should not be located in the vicinity of overhead power lines or other electric light
or power circuits, or where it can fall into such power lines or c ircuits. When installing an outside antenna system, extreme care
should be taken to keep from touching such power lines or c ircuits as contact with them might be fatal.
17 Overloading
Do not overload wall outlets, extension cords, or integral convenience receptacles as this c an result in a r isk of
fire or electric shock.
18 Obje ct and L iquid Entr y
Never push objects of any kind into this product through openings as they may touch dangerous
voltage points or short-out parts that could result in a fire or electric shock. Never spill liquid of any kind on the product.
19 Servicing
Do not attempt to service this product yourself as opening or removing covers may expose you to dangerous volt-
age or other hazards. Refer all servicing to qualified se rvice personnel.
20 Da mage Requiring Service
Unplug this product from the wall outlet and refer servicing to qualified service personnel
under the following conditions:
• When the power-supply cord or plug is damaged,
• If liquid has been spilled, or objects have fallen into the product,
• If the product has been exposed to rain or w ater,
• If the product does not operate normally by following the operating instructions.Adjust only those controls that are covered
by the operating instructions as an improper adjustment of other controls may result in damage and will often require e xtensive work by a qualified technician to restore the product to its normal operation,
• If the product has been dropped or damaged in any way, and
• When the product exhibits a distinct change in performance–this indicates a need for service.
ReplayTV 4500
72
Page 79
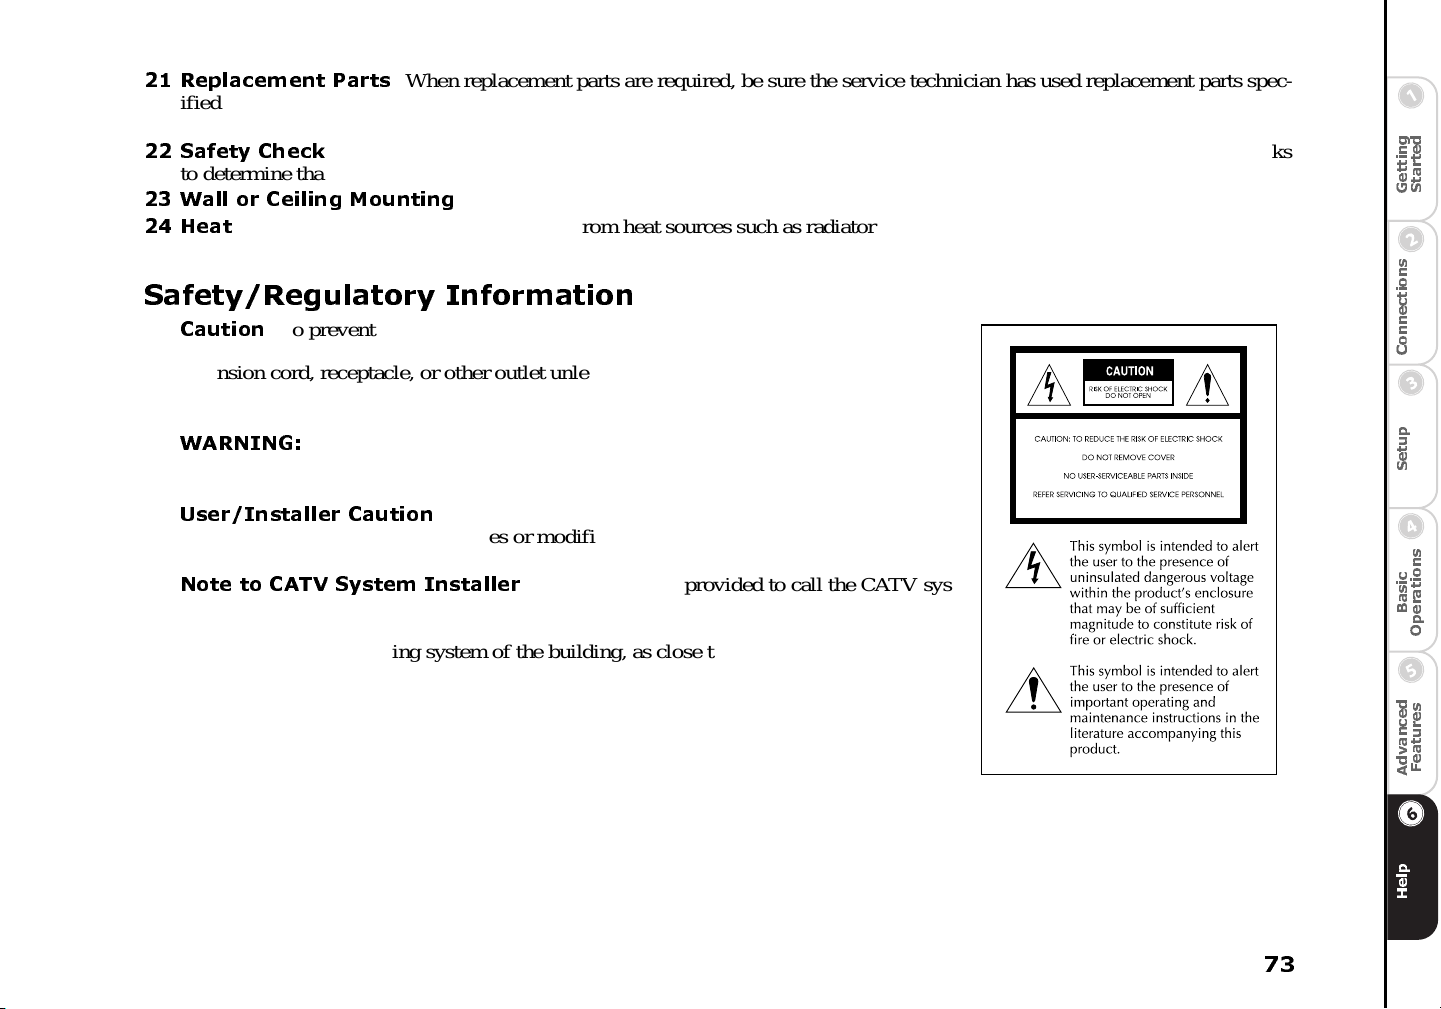
21 Replacem ent Parts
When replacement parts are required, be sure the service technician has used replacement parts specified by the manufacturer or have the same characteristics as the original part. Unauthorized substitutions may result in fire,
electric shock, or other hazards.
22 Sa fety Check
Upon completion of any service or repairs to this product, ask the service technician to perform safety checks
to determine that the product is in proper operating condition.
23 Wall or Ceiling Mounting 24 H eat
The product should be situated away from heat sources such as radiators, heat registers, stoves, or other products
The product should be mounted to a wall or ceiling only as recommended by the manufacturer.
(including amplifiers) that produce heat.
Safety/Regulatory Information
Caution
mended accessories. To prevent electric shock, do not use this (polarized) plug with an
extension cord, receptacle, or other outlet unless the blades can be f ully inserted to prevent blade exposure. To reduce the risk of electric shock, do not remove the unit cover or
back. There are no serviceable parts inside. Refer servicing to qualified personnel only.
WARNING:
RADIATION, DO NOT OPEN OR REMOVE/DEFEAT LASER TRANSPORT PROTECTIVE HOUSING.
User/Installer Caution
could be voided if you make changes or m odifications not expressly approved by the
manufacturer, who is responsible for compliance with Part 15 FCC rules.
Note to CATV System Installer
tem installer’s attention to Article 820-40 of the National Electronic Code that provides
guidelinesfor proper grounding a nd, in particular, specifies that the cable gr ound shall be
connected to the grounding system of the building, as close to the point of cable entry as
practical.
To prevent fire, shock hazard, or annoying interference, use only the recom-
TO AVOID HAZARDOUS EXP OSURE TO INVISIBLE LASER
Your authority to operate this FCC certified equipment
This reminder is provided to call the CATV sys-
g
d
e
n
i
t
t
r
t
a
e
t
G
S
s
n
o
i
t
c
e
n
n
o
C
p
u
t
e
S
s
n
o
c
i
i
t
s
a
a
r
B
e
p
O
d
s
e
e
c
r
n
u
t
a
a
v
e
d
F
A
73
p
l
e
H
Page 80

:: FCC and Industry Canada Compliance
This section describes the requirements for compliance with F ederal Communications Commission (FCC) Rules and Industry Canada CS-03 standard.
FCC Registration and Requirements
The following paragraphs describe requirements and information based on FCC rules.
FCC Rules, Part 15
This equipment has been tested and found to comply with the limits for a class B digital device, pursuant to Part 15 of the FCC
Rules. These limits a re designed to provide reasonable protection against harmful interference in a residential installation. This
equipment generates, uses, and can r adiate radio frequency energy and, if not installed a nd used in accordance with the instructions,
may cause harmful interference to radio communications. However, there is no guarantee that interference will not occur in a particular installation. If this equipment does cause harmful interference to radio or television r eception, which can be determined by
turning the equipment off and on, the user is encouraged to try to correct the interference by one or more of the following measures:
• Reorient or r elocate the receiving antenna;
• Increase the separation between the equipment and receiver;
• Connect the equipment into an outlet on a circuit different from that to which the receiver is connected;
• Consult the dealer or an experienced radio/TV technician for help.
This device complies with Part 15 of the FCC Rules. Operation is subject to the following two conditions:
1 This device may not cause harmful interference, and 2 This device must accept any interference received, including interference that m ay cause undesired operation.
Company Name: SONICblue, Inc.
Address: 2841 Mission College Blvd., Santa Clara, CA 95054-1838
Telephone: 800-933-5899
ReplayTV 4500
CHANGES OR MODIFICATIONS NOT EXPRESSLY APPROVED BY THE PARTY RESPONSIBLE FOR COMPLIANCE
COULD VOID THE US ER’S AUTHORITY TO OPERATE THE EQUIPM ENT.
74
Page 81

FCC Rules, Part 68
1 This equipment c omplies with FCC Rules, Part 68. On this equipment is a label which contains, among other information, the
FCC Part 68 registration number.
2 The Federal Communications Commission (FCC) has established Rules which permit this device to be directly connected to
the telephone network. Standardized jacks are used for these connections. This equipment should not be used on party lines or
coin phones.
3 If this device is malfunctioning, it may also be causing harm to the telephone network; this de vice should be disconnected until
the source of the problem can be determined and until repair has been made. If this is not done, the telephone company may
temporarily disconnect service. All repairs should be performed by SONICblue, Inc. or an authorized agent. It is the responsibility of users requiring service to report the need for se rvice to SONICblue, Inc. or to one of our authorizedagents. Service can
be facilitated through SONICblue Customer Care.
4 The telephone company may make changes in its technical operation and procedures; if such changes affect the compatibility
or use of this device, the telephone company is required to give adequate notice of the changes. You will be advised of your
right to file a complaint with the FCC.
5 If the telephone company requests information on what equipment is connected to their lines, inform them of:
a. The telephone number to which this unit is connected.
b. The ringer equivalence number: REN: 0.01B
c. The USOC jack required: RJ11C.
d. The FCC Registration Number: MKAUSA-42040-DT-T
Items (b) and (d) are indicated on the label. The Ringer Equivalence Number (REN) is used to determine how many devices can be
connected to your telephone line. In most areas, the sum of the REN’s of all devices on any one line should not exceed five (5.0). If
too many devices are attached, they may not ring properly.
75
Page 82

ReplayTV 4500
76
Page 83

Index
A
Add or Remove Channels
24
B
Basic operations 27
C
Cable overview 7
Cancel recording 39
Category options 44
Channel Guide 31
Closed c aptioning 33
COMMERCIAL ADVANCE 51
Connecting a Video Camera or VCR 10
Connecting ReplayTV to a
cable modem 13
Connecting ReplayTV to a
DSL Modem 15
Connecting ReplayTV to a
hub or switch 14
Connecting ReplayTV to a
router 13
Connecting ReplayTV to a
VCR 10
Connecting ReplayTV to an
A/V receiver 9
Connecting ReplayTV to an
existing network 12
Connecting the IR blaster
10
Connecting the serial c able
10
Customer Service Information 57
D
Default Record Options 23,
38
F
Fast forward 28
Feature highlights 2
Feature updates 1
Find Shows 36
Frame Advance 29
Frequently Asked Q uestions
57
Front pa nel 4
H
Home networking 12
I
Instant Replay 30
Internet Address Book 50
IP address, ReplayTV 17
J
Jump 30
M
Main Menu 22
Manual Record 38
MyReplayTV 24
N
Navigation 21
Network and Input Settings
23
Networking information,
manual entry 17
O
On-screen setup 12
P
Package contents ii
Parental Control 24
Pause 28
Pause screen 23, 52
Photo Viewer 53
Play show from another ReplayTV
Ports, configuring 16
Preserve an episode 45
Privacy P olicy 67
47
Q
QuickSkip 30
R
Rear panel 5
Received category 50
Record options 35
Recording 34
Recording conflicts 40
Recording priorities 41
Remote control 3
Remote control setup 26
Remote control shortcuts
54
Remote Replay Guide access 48
Replay channel options 44
Replay channels 40
Replay Guide 43
Replay show options 45
Replay Zones 37
ReplayTV Name 23
ReplayTV Photo Transfer
software 52
Rewind 28
Router setup 15
S
Safety 71
77
Page 84

Save to videotape 46
Screen saver 23, 52
Sending Recordings 49
Service Activation 6
Setup Menu 23
Show-based recording 41
Single recording 41
Slow Motion 29
System Information 25
T
Technical specifications 60
Theme-based channels 42
Troubleshooting 57
Turning on ReplayTV 6
V
V-Chip 33
Video Output Settings 23
W,X,Y,Z
Watch a recorded show 45
Zone-based channels 42
ReplayTV 4500
78
Page 85

Page 86

2841 Mission College Blvd.
Santa Clara, CA 95054-1838
 Loading...