

SOMFY Telis 5 Modulis RTS Silver 1810663, Telis 5 Modulis RTS Lounge 1810664 Instructions Manual
SOMFY INSTRUCTIONS
TELIS RTS MODULIS
REMOTE CONTROLS
Part #’s
1810663 Telis 5 Modulis RTS Silver
1810664 Telis 5 Modulis RTS Lounge
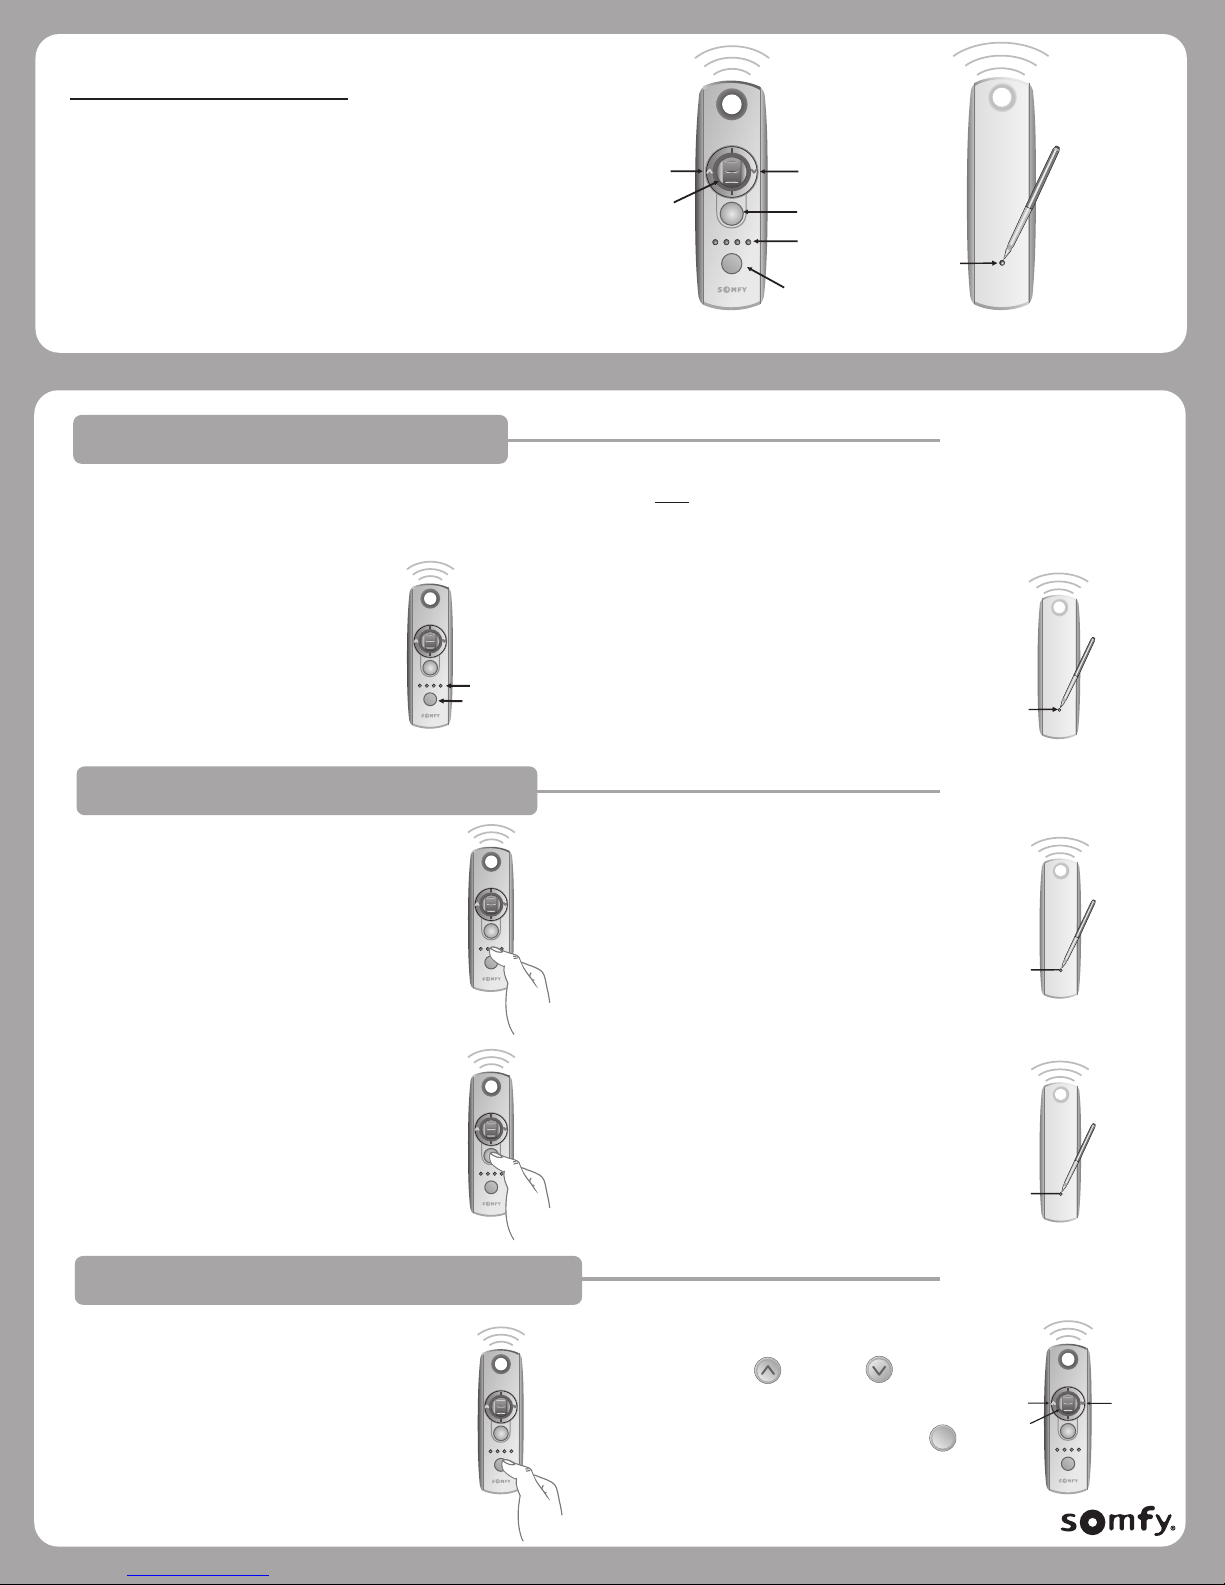
Up
Tilt
Scroll
Wheel
my
Down
Stop
LED
Channel
Indicator
Channel
Selector
Programming
Button
BACK
Pen
PROGRAMMING – INITIAL INSTALLATION
Note: During initial programming it is recommended to provide power only to the motor or RTS receiver being programmed.
1. Set the RTS motor or receiver in Programming Mode. (Refer to the installation instruction of the relevant RTS motor or receiver for this procedure.)
2. Select a channel to be memorized
by pressing the Channel Selector
button. The LED lights will illuminate
up each time the Channel Selector
Button is pressed to show what
channel is being operated.
my
LED Lights
Channel
Selector
3. Using a paper clip, pen or similar
device, briefly press the Programming
Button (for 1 second) located on
the back of the remote. The RTS
motor or receiver will confirm the
addition of the remote in their
respective manners.
Programming
Button
Pen
BACK
PROGRAMMING - ADDING A NEW REMOTE
1. With your current remote, select the shade
to operate by pressing the Channel Selector
Button. The LED lights will illuminate
my
each time the Channel Selector Button is
pressed to show what channel is being
operated.
3. Get the new remote and select the
new channel.
my
PROGRAMMING - SETTING FAVORITE POSITION
1. Select the shade to operate by pressing the
Channel Selector Button. The LED lights will
illuminate each time the Channel Selector
Button is pressed to show what channel is
being operated.
my
2. Using a paper clip, pen or similar device,
press and hold the Programming Button
on the back of the remote until your
window shade jogs up then down.
4. Using a paper clip, pen or similar device,
press and hold the Programming Button
on the back. The window shade will jog.
This remote will now operate your shade
or awning.
2. Using the up ( ) or down ( ) buttons
or the scroll wheel, bring the window to
your favorite position, for example halfway
down or slats open. Press the center ( )
my
button to stop movement at the desired
location.
Programming
Button
Programming
Button
UP
TILT
SCROLL
WHEEL
Pen
BACK
Pen
BACK
DOWN
my
© Copyright SOMFY SYSTEMS, INC. 7/2009 PAGE1 REV 1
C - 0002
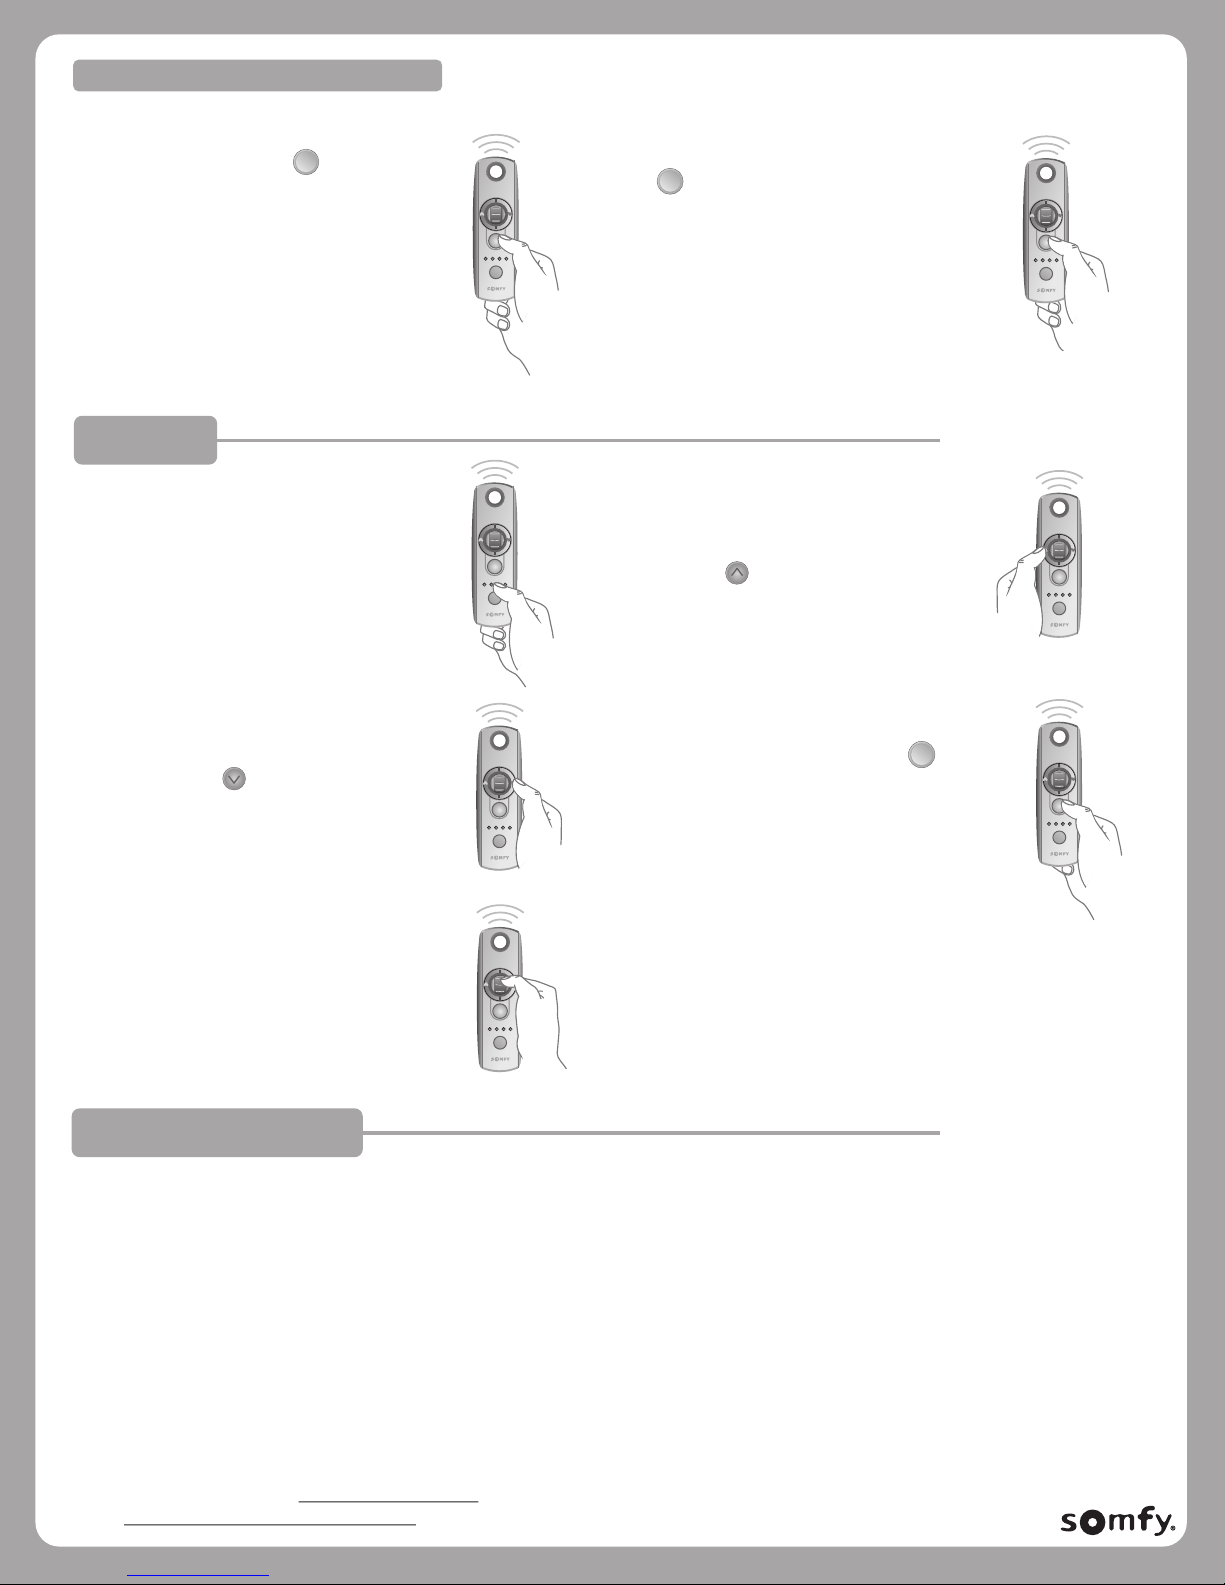
cont’d PROGRAMMING - SETTING FAVORITE POSITION
3. Press and hold the center ( ) button until
my
the window shade jogs. The new position
is now recorded.
OPERATING
1. Select the blind to operate by pressing
the Channel Select Button. The LED
lights will illuminate each time the
Channel Select Button is pressed to
show what channel is being operated.
3. To lower or tilt the slats downward
of your horizontal blind, simply
press the down ( ) button.
4. To reach your favorite position, press the center
my
( ) button whenever the blind is already
stopped. The window blind will automatically
my
go to that position.
my
2. To raise or tilt the slats upward on
my
your horizontal blind, simply press
the up ( ) button.
my
4. If you want to stop your blind while
it is moving, press the center ( )
my
button.
my
my
5. To precisely adjust the slats of your
horizontal blind, roll the scroll wheel
up or down. Stop scrolling once the
slats reach the desired angle.
my
REPLACING THE BATTERY
1. Using a small screwdriver loosen the
screws on the reverse side of the remote
control and remove the back cover.
2. Replace the battery with one
2430 Lithium 3V battery.
NOTE: IN CASE OF A LOST TRANSMITTER, PROFESSIONAL PROGRAMMING ASSISTANCE IS REQUIRED.
PLEASE CONTACT SOMFY AT somfytech@somfy.com OR YOUR LOCAL DEALER
AT www.somfysystems.com/locatedealer.
C - 0002© Copyright SOMFY SYSTEMS, INC. 7/2009 PAGE2 REV1
 Loading...