

SOMFY ST50 Mounting Instruction

Somfy ST50 Motorized Shade Mounting Instructions
www.AVOutlet.com
AVOUTLET.com
Please read installation instructions and programming instructions completely prior to
proceeding with installation and programming. Failure to do so can result in damage to the
motor and/or the shade and void the warranty.
Items & Tools Required
- Roller Shade
- ST50 Motor with crown and drive pre-installed on motor (Includes 3 Screws)
- Idler end cap with crown and drive pre-installed on motor (Includes 3 Screws)
- Idler Retraction Tool (Included)
- Roller Shade Brackets
- Screws – Appropriate for brackets and mounting surface. (Provided by installer -Not
included)
- Tape Measure – Typically only needed for outside mount shades.
- Drill (Optional)
- Pencil
- Masking Tape (Might be needed)
- Level (Depending on installation type)
- 2 people for long or heavy shades.
www.AVOutlet.com
AVOUTLET.com
Installation and Preparation
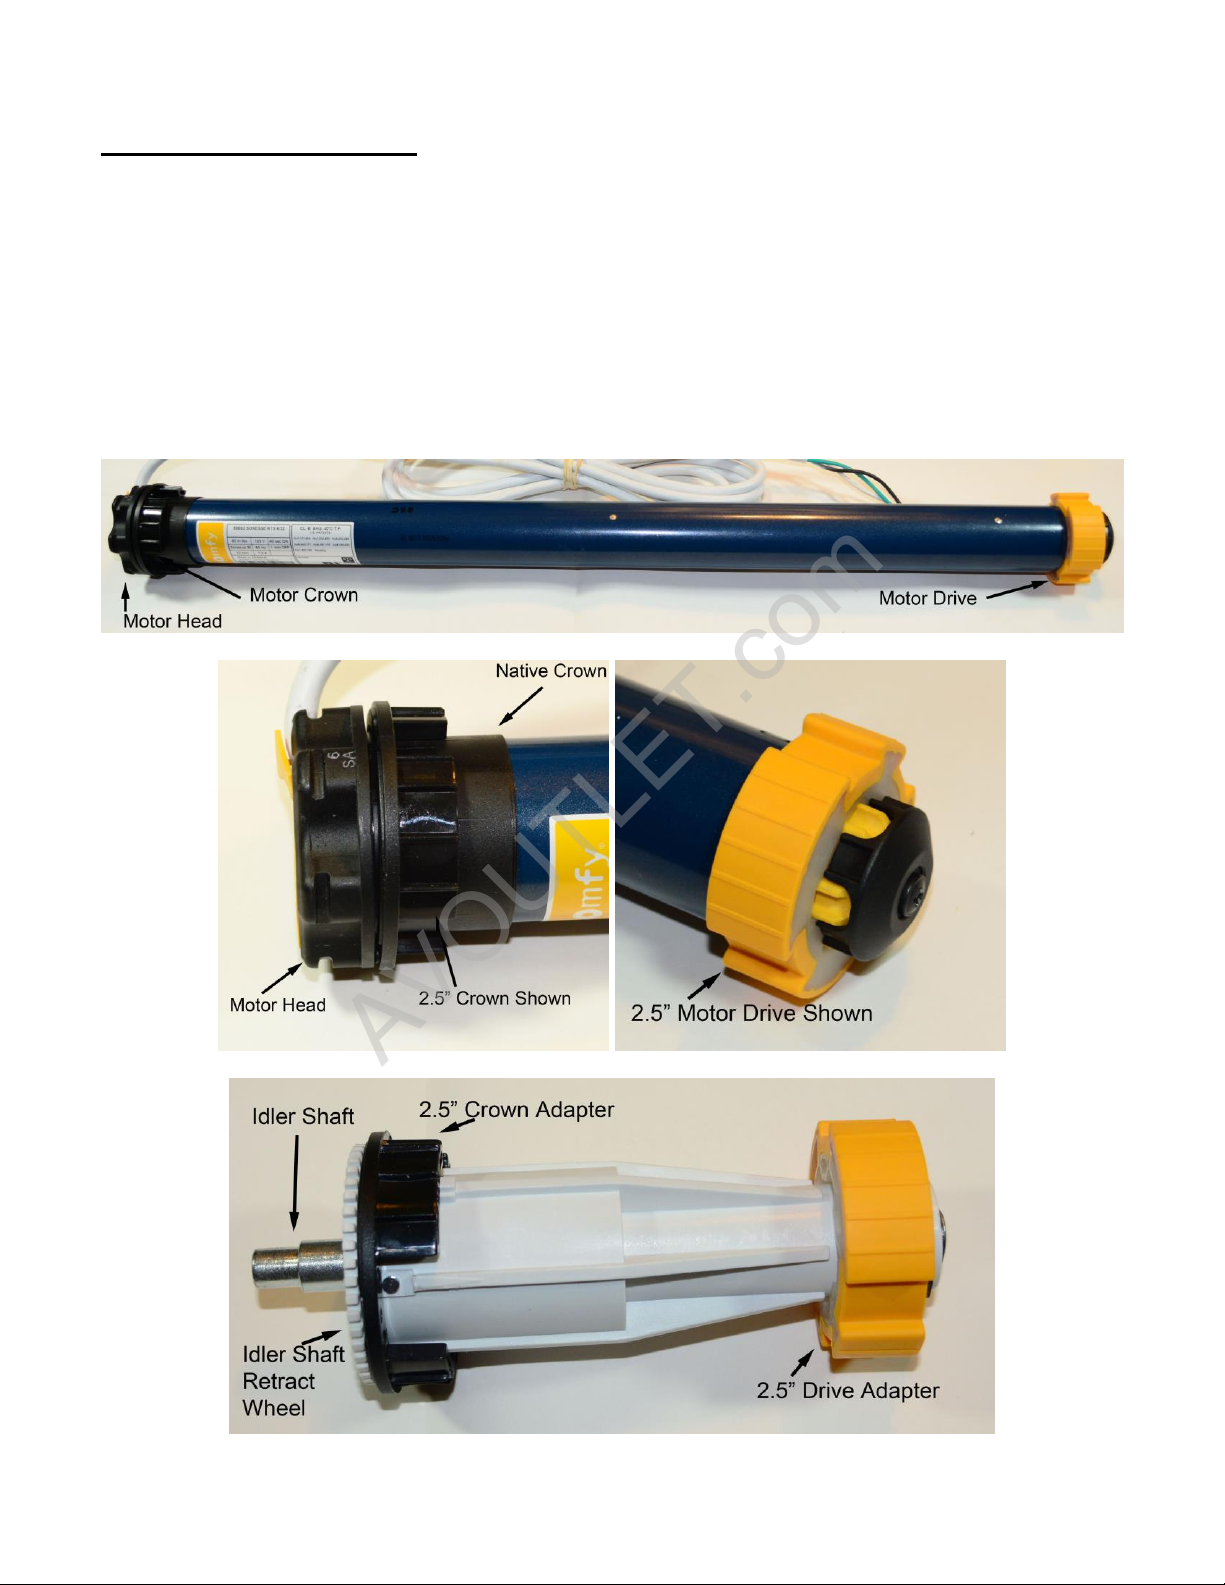
1) Inspect Motor and Idler
Shade motors and idlers are shipped outside of the tube to protect the them from damage. The
ST50 motor and idler should have the crown and drive preinstalled as shown.
Note: The crown can slide on the motor and idler. During installation, the motor crown should be
next to the motor head and the idler crown should be next to the idler retract wheel. If you need
to reposition the crown observe and align the keyways next to the motor/idler head and in the ID
of the crown (not shown) when repositioning.
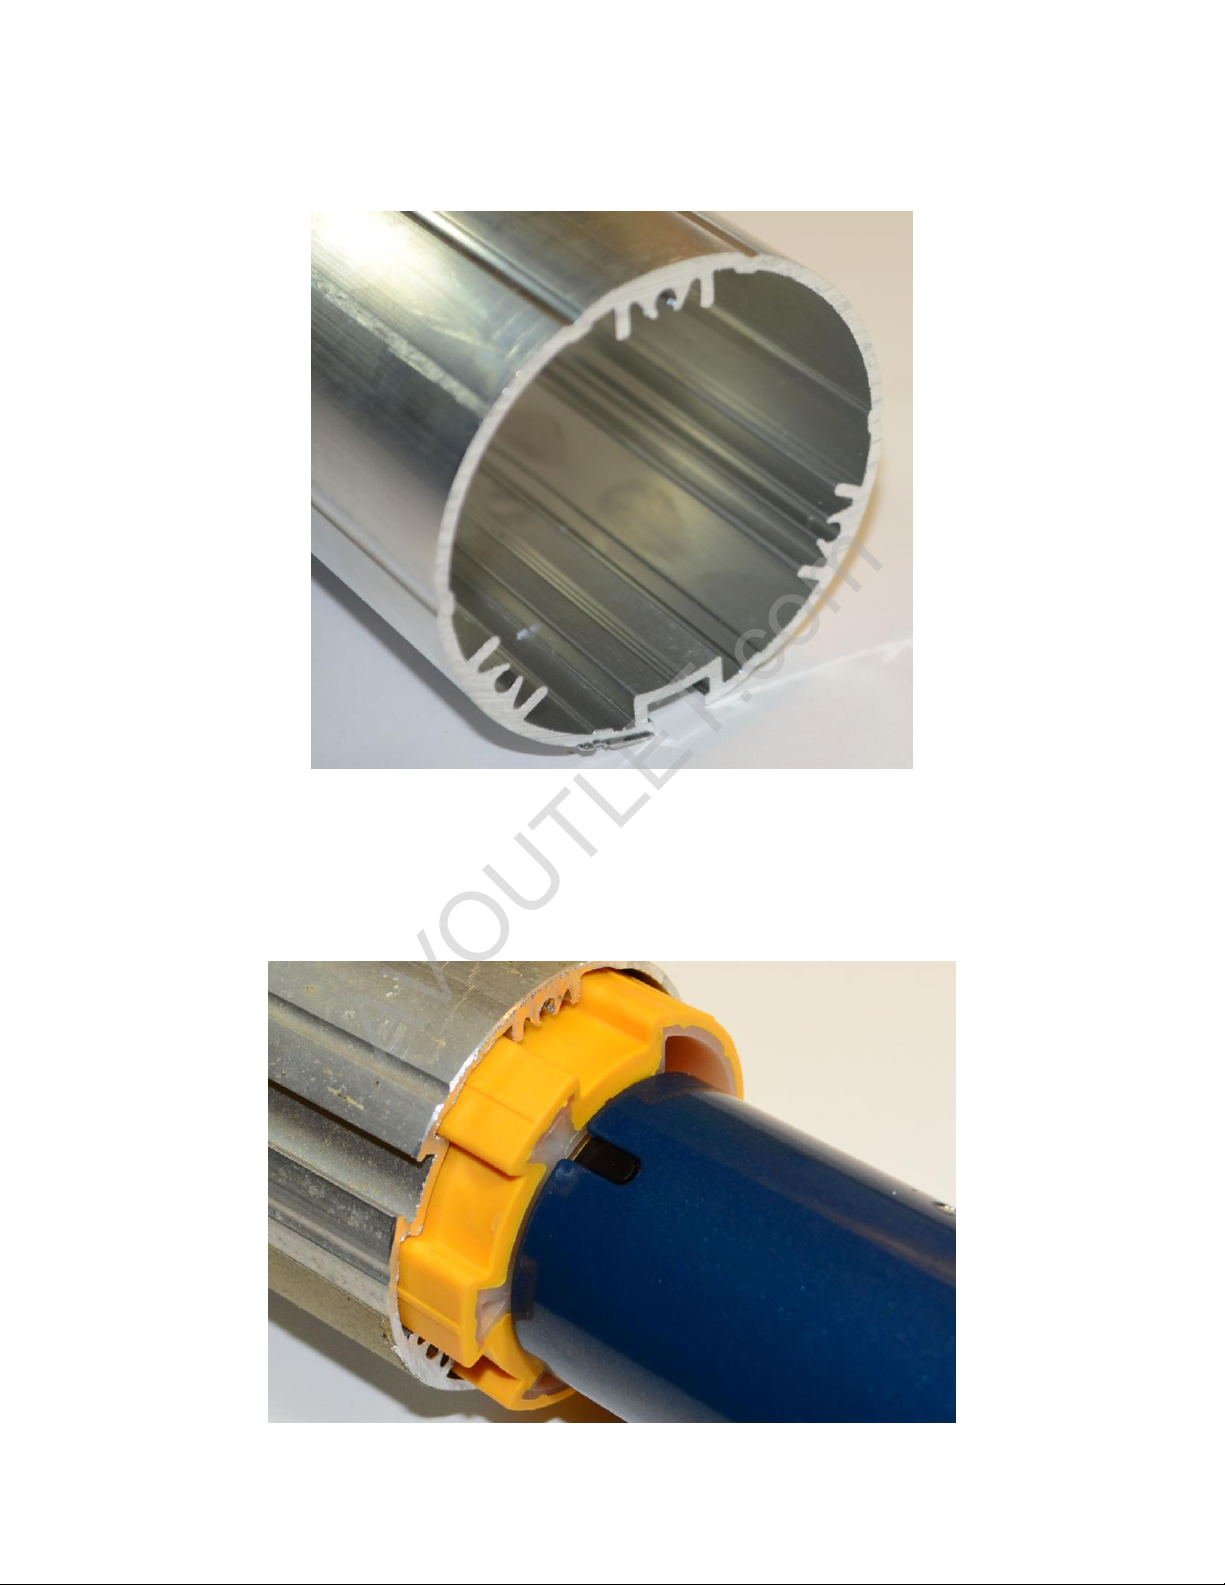
3) Inspect Shade Tube
www.AVOutlet.com
AVOUTLET.com
The shade tube will have internal ribs/keys that will match the motor crown and drives.
3) Install Motor
a) Align the motor drive to the internal ribs and slide the motor approximately half way into the
tube.
 Loading...