

SOMFY SONESSE 30 WF RTS LI-ION Instructions Manual
Instructions
Instrucciones
Notice
инструкции
EN
ES
FR
RU
SONESSE 30 WF RTS
LI-)ON

2
Copyright © 2017 SOMFY ACTIVITES SA. All rights reserved
EN
SONESSE 30 WF RTS LI-ION
1. PRIOR INFORMATION
1. 1. SPHERE OF APPLICATION
SONESSE drive are designed to drive most types of interior roller and roman blinds.
The installer, a home motorisation or home automation professional, must ensure that once the driven product
is installed, it respects the current standards in the country of installation, notably standard EN 13120 relative to
interior blinds.
1. 2. LIABILITY
Before installing and using the drive, please read these instructions carefully. In addition to the instructions provided
in this guide, please also comply with the instructions set out in the enclosed Safety instructions document.
The drive must be installed by a home motorisation and automation professional, in accordance with Somfy’s
instructions and the applicable regulations in the country of installation.
Any operation of the drive outside the sphere of application described above is prohibited. Such operation
shall exclude Somfy from all liability and invalidate the Somfy warranty, as will any failure to comply with the
instructions given herein and in the enclosed Safety instructions document.
Aer installing the drive, the installer must inform his customers of the operating and maintenance conditions
for the drive and must pass the operating and maintenance instructions on to them, as well as the enclosed
Safety instructions document. Any Aer-Sales Service operation on the drive requires intervention by a home
motorisation and automation professional.
Should any doubt arise during installation of the drive or for additional information, consult a Somfy contact or
visit www.somfy.com.
!
Safety Warning !
1
Warning !
"
Information
ORIGINAL INSTRUCTIONS
CONTENTS
1. Prior information 2
1. 1. Sphere of application 2
1. 2. Liability 2
2. Installation 3
2. 1. Assembly 3
2. 2. Wiring 4
2. 3. Commissioning 4
2. 4. Tips and advice on installation 6
3. Operation and maintenance 9
3. 1. Mode selection: Roller or Tilting mode 9
3. 2. Controlling Up, Down, My: In roller mode 9
3. 3. Controlling Up, Down, My: In Tilting mode 9
3. 4. Adjusting the tilting speed 10
3. 5. Favorite (my) position 10
3. 6. Adjusting the speed 11
3. 7. Tips and advice on operation 11
4. TECHNICAL DATA 12
These instructions apply to all SONESSE 30 WF RTS LI-ION drive, the different versions of which are available in
the current catalogue.
1
1
1
3
Copyright © 2017 SOMFY ACTIVITES SA. All rights reserved
EN
SONESSE 30 WF RTS LI-ION
2. INSTALLATION
1
These instructions are mandatory for the home motorisation and automation professional installing
the drive.
1
Never drop, knock or puncture the drive or immerse it in liquid.
1
Install an individual control point for each drive.
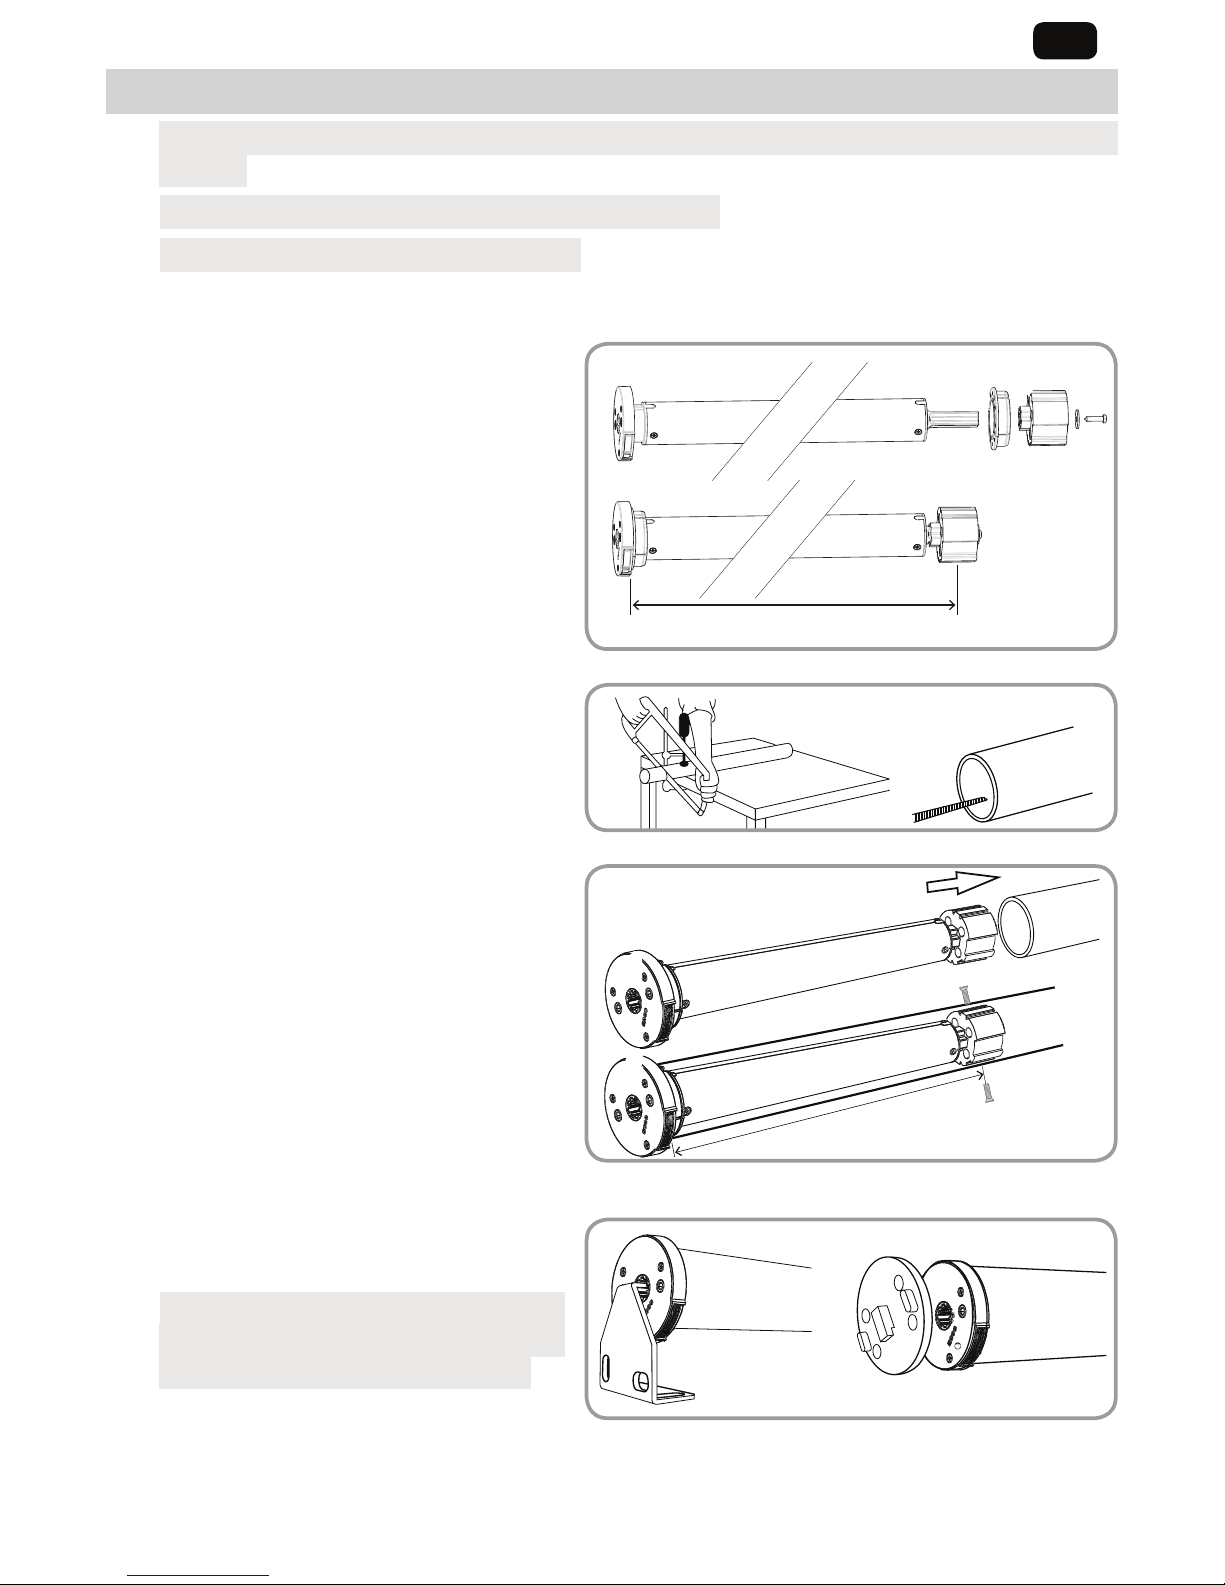
2. 1. ASSEMBLY
2. 1. 1. Drive preparation
1) Fit the crown (a) and drive wheel (b) to the
motor.
2) Measure the length (L) between the end of the
drive wheel and the head end.
2. 1. 2. Tube preparation
Cut the tube to the required length.
Deburr the tube and remove the debris.
2. 1. 3. Drive/tube assembly
1) Slide the drive into the tube. Insert the wheel
by aligning the wheel to the tube profile. Insert
the drive half way and then slide the crown
down the drive and insert it in the tube. Finally,
push the motor inside the tube.
2) Not required, but if needed, fix the tube to the
drive with self-tapping screws or steel pop
rivets depending on the dimension (L).
2. 1. 4. Mounting the tube-drive assembly on the brackets
a) Standard bracket
b) Drive
plate for specific bracket
!
For optimal radio reception, the motor
antenna should be kept straight and should
be positioned outside of headrail (if used).
L
1
2
a b
L
1
2
a b
4
Copyright © 2017 SOMFY ACTIVITES SA. All rights reserved
EN
SONESSE 30 WF RTS LI-ION
2. 2. WIRING
!
To ensure electrical safety, this Class III motor must be powered by a «SELV» voltage source (Safety Extra
Low Voltage).
1
Use power charger (recommended by Somfy) to charge the drive battery. Ensure battery is fully charged
prior to installation.
1) Connect the charger to the cable attached to drive.
2) LED on charger will illuminate as follows:
• Solid Red = Charging
• Solid Orange = Charging is near completion
• Solid Green = Charging is complete
3) When charging is complete, disconnect and store charger for later use.
"
The drive will go back to sleep if le untouched for 15 minutes.
2. 3. COMMISSIONING
2. 3. 1. wake up the drive
For initial unpacking of drive, wake up the drive by briefly
pressing the motor head programming button or plugging
in the charger.
The driven product briefly moves Up and Down 3 times.
1
To avoid accidental programming of drive(s) once awake, follow section “Activate/Deactivate “RTS”
radio technology when control point is temporarily preprogrammed (not paired) to the driven product”
to deactivate RTS.
2. 3. 2. Preprogramming the control point
Press the UP and DOWN buttons simultaneously on the control point:
the driven product moves Up and Down and the control point is temporarily programmed to driven product.
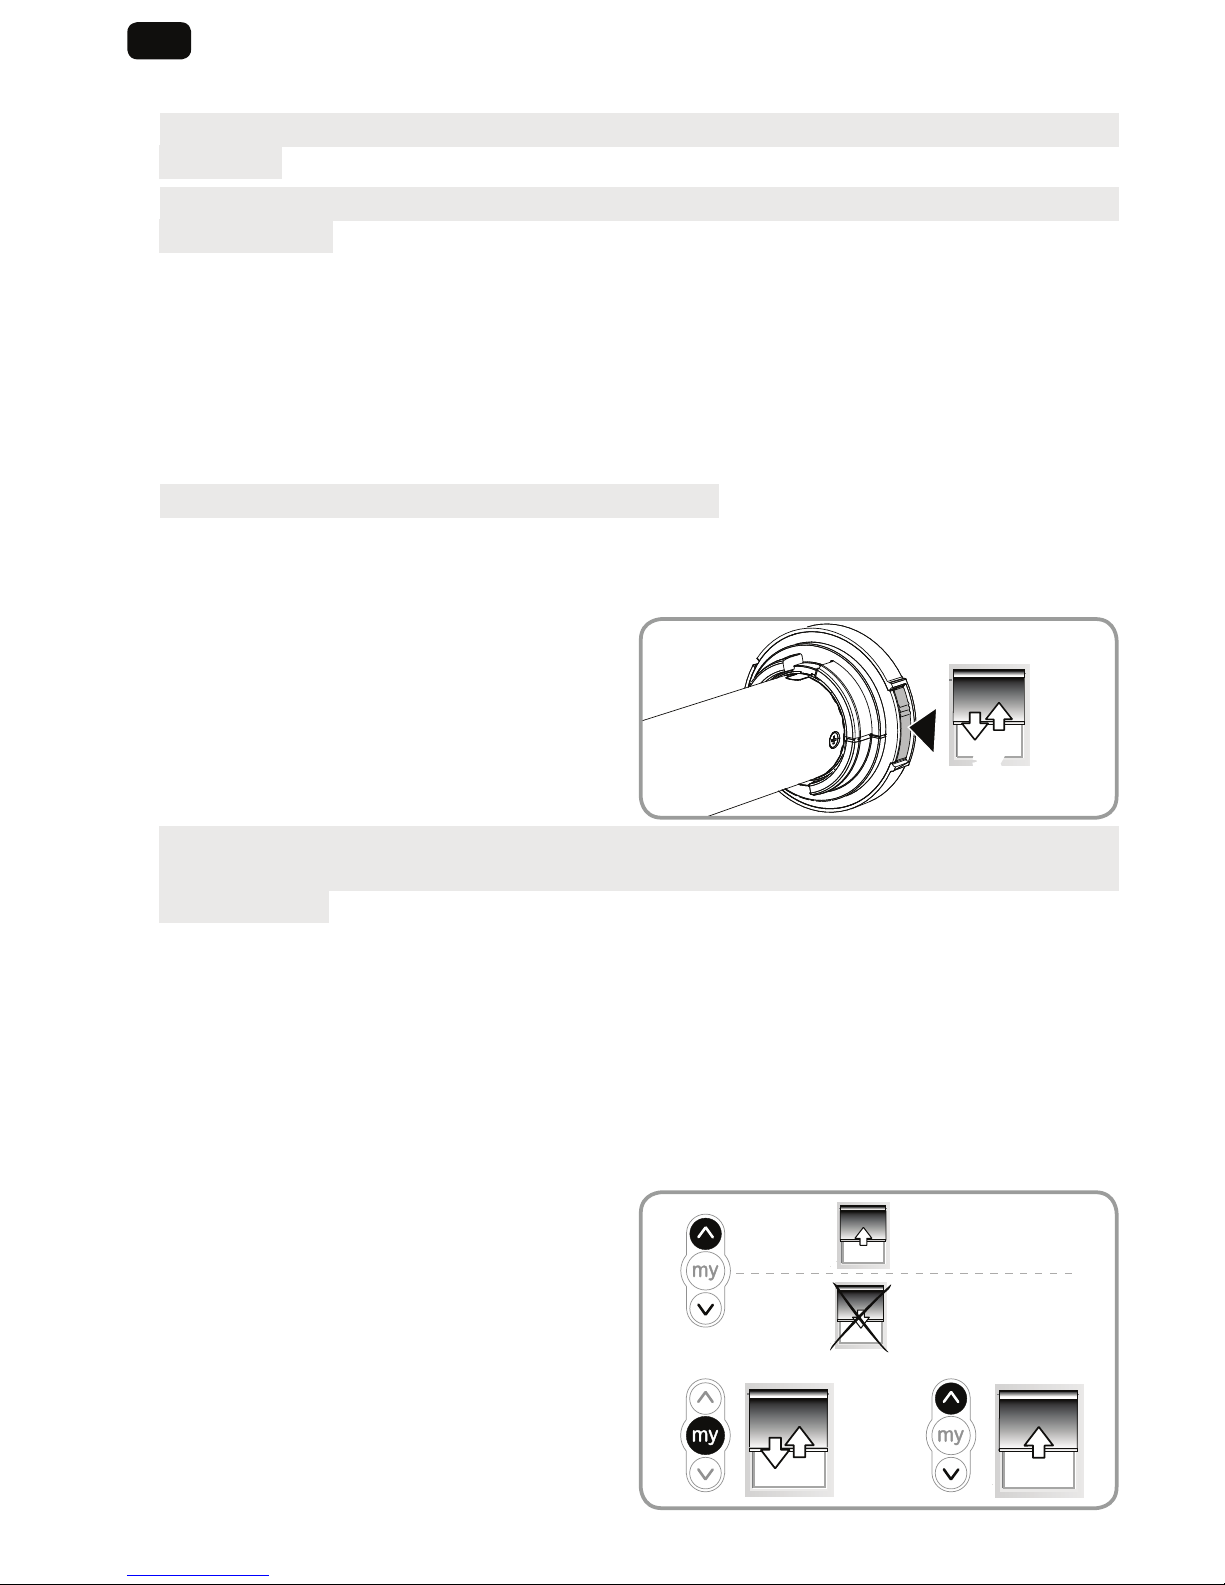
2. 3. 3. Checking the rotation direction
Press the control point UP button:
a) If the driven product raises (a), the rotation direction
is correct: proceed to section “Setting the end limits”.
b) If the driven product is lowers (b), the rotation
direction is incorrect: move to the next step.
• b1) Press the control point MY button until the
driven product moves Up and Down: the rotation
direction has been modified.
• b2) Press the control point UP button to confirm the
rotation direction.
3x
a
b
=
=
b2b1
 Loading...