

SOMFY Solar Pack Installation Instructions Manual

Solar Pack
Ref. 5118727B
EN
Installation instructions
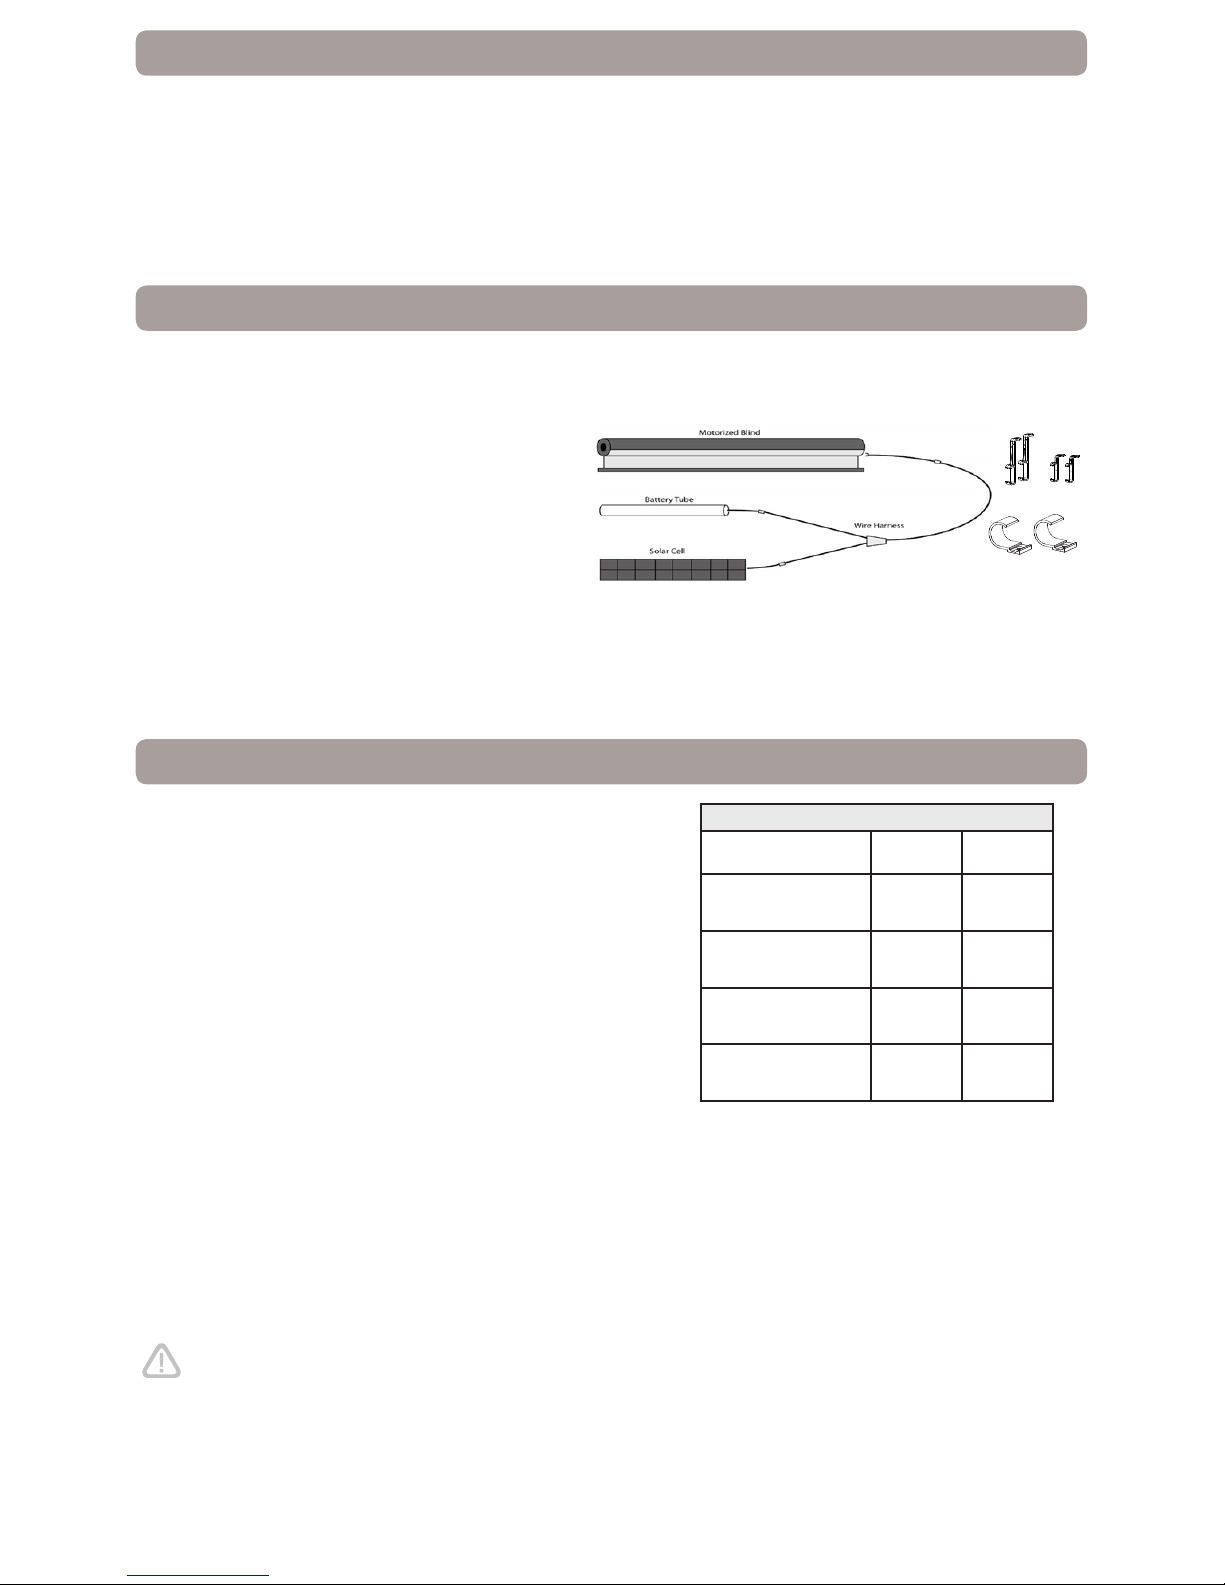
The Solar Pack is a group of components that work in unison as a long life energy source for Somfy 12 Volt WireFree™ motors.
This Product is designed for indoor use only.
Contents of the Pack include:
(1) Solar Panel in Bezel
(1) Empty Battery Tube (for 10AA NiMH batteries #9018621
sold separately)
(1) Wire Harness
(1) Glass-Mount Adhesive
(1) Alcohol wipe
(1) Instructions
(1) Solar Panel Mounting Brackets (2” & 4”)
(1) Wall Mount Clips For Battery Tube (set of 2)
(1) Motor cable for connection to motors
referenced (#1001683, #1000494, #1000678)
Note: This product is designed to meet the energy requirements of Somfy 12 Volt WireFree™ Motor applications.This Solar Pack
should be used for «single motor shades», meaning that two (2) or more motors should never be connected to one (1) solar pack
source. Please reference the Solar Pack performance tables for recommended usage.
CONTENTS
1. Introduction
2. Safety
2.1 Safety and Responsibility
2.2 Specic Safety Advice
3. Installation
3.1 Determine Location of Solar Panel
3.2 Mounting the Solar Panel
3.2.1 Glass Mounting
3.3 Battery State of Charge
3.3.1 Battery Preparation
3.4 Battery Tube Install Location
4. Connections
5. Commissioning
5.1 Activation of Motor
6. Product In Use
6.1 Normal Operation
6.2 Excessive Energy Use
7. Window Application Tables & Guidelines
8. Tips and Recommendations For Use
1. INTRODUCTION
2. SAFETY
2.1 Safety and Responsibility
Before installing and using this product, please read the installation guide
carefully.
It is recommended that Solar Pack be installed by a professional motor installer,
for whom these instructions are intended.
Care must be taken for both new and existing installations due to the physical
mounting location of the motorized window covering - likely at the top of an
interior window.
Consequently, pay attention to your personal safety in regards to proper use of
ladders.
Care must also be taken to not drop hand tools or Solar Pack components from
an extended height.
Any usage outside of applications dened by Somfy constitutes noncompliance,
and is therefore not covered by the warranty. In this event, as for all usage not
consistent with the instructions given herein, Somfy accepts no responsibility
for harm or damage.
Never begin installing without rst checking the compatibility of this product
with the associated equipment and accessories.
2.2 Specic Safety Advice
1) Never pierce the solar panel or its bezel frame.
2) Never put anything onto the solar panel (risk of scratching or breakage), especially during installation.
3) Once installed, never subject the wire harness or other components to strain, pinching, or cutting caused by moving objects.
4) Dispose of electronic components and batteries in accordance with local laws. Do not incinerate.
5) Never immerse this product in liquid (s).
6) Avoid Impacts
7) Do not recharge the batteries with any charger other than a Somfy Solar Charger #9018620.
The solar panel is a fragile part. Do not drop it. If Dropped, do not install as damage may not be visibly detectable and reduced
performance may occur.
Refer to the Instruction Manual or Contact your Somfy Representative.
Power Sources for 12 Volt WireFree™ Motors
WireFree™
Motor
Battery
Tube
Solar Pack
Roll Up WireFree
√ √
Cord Lift WireFree
√ √
Tilt WireFree
√ √
Tilt&Lift WireFree
√ √
Motor side
Battery Tube:
Located near the
top of the window
frame and near the
motor side. May be
hidden from view.
Panel:
Located near
the top of the
window frame and
near the motor
side. When fully
open, shade or
fascia may help
conceal panel
from inside view.
Installed:
When fully open,
shade or fascia
may help conceal
Solar Pack from
inside view. Wire
Harness is tucked
away.
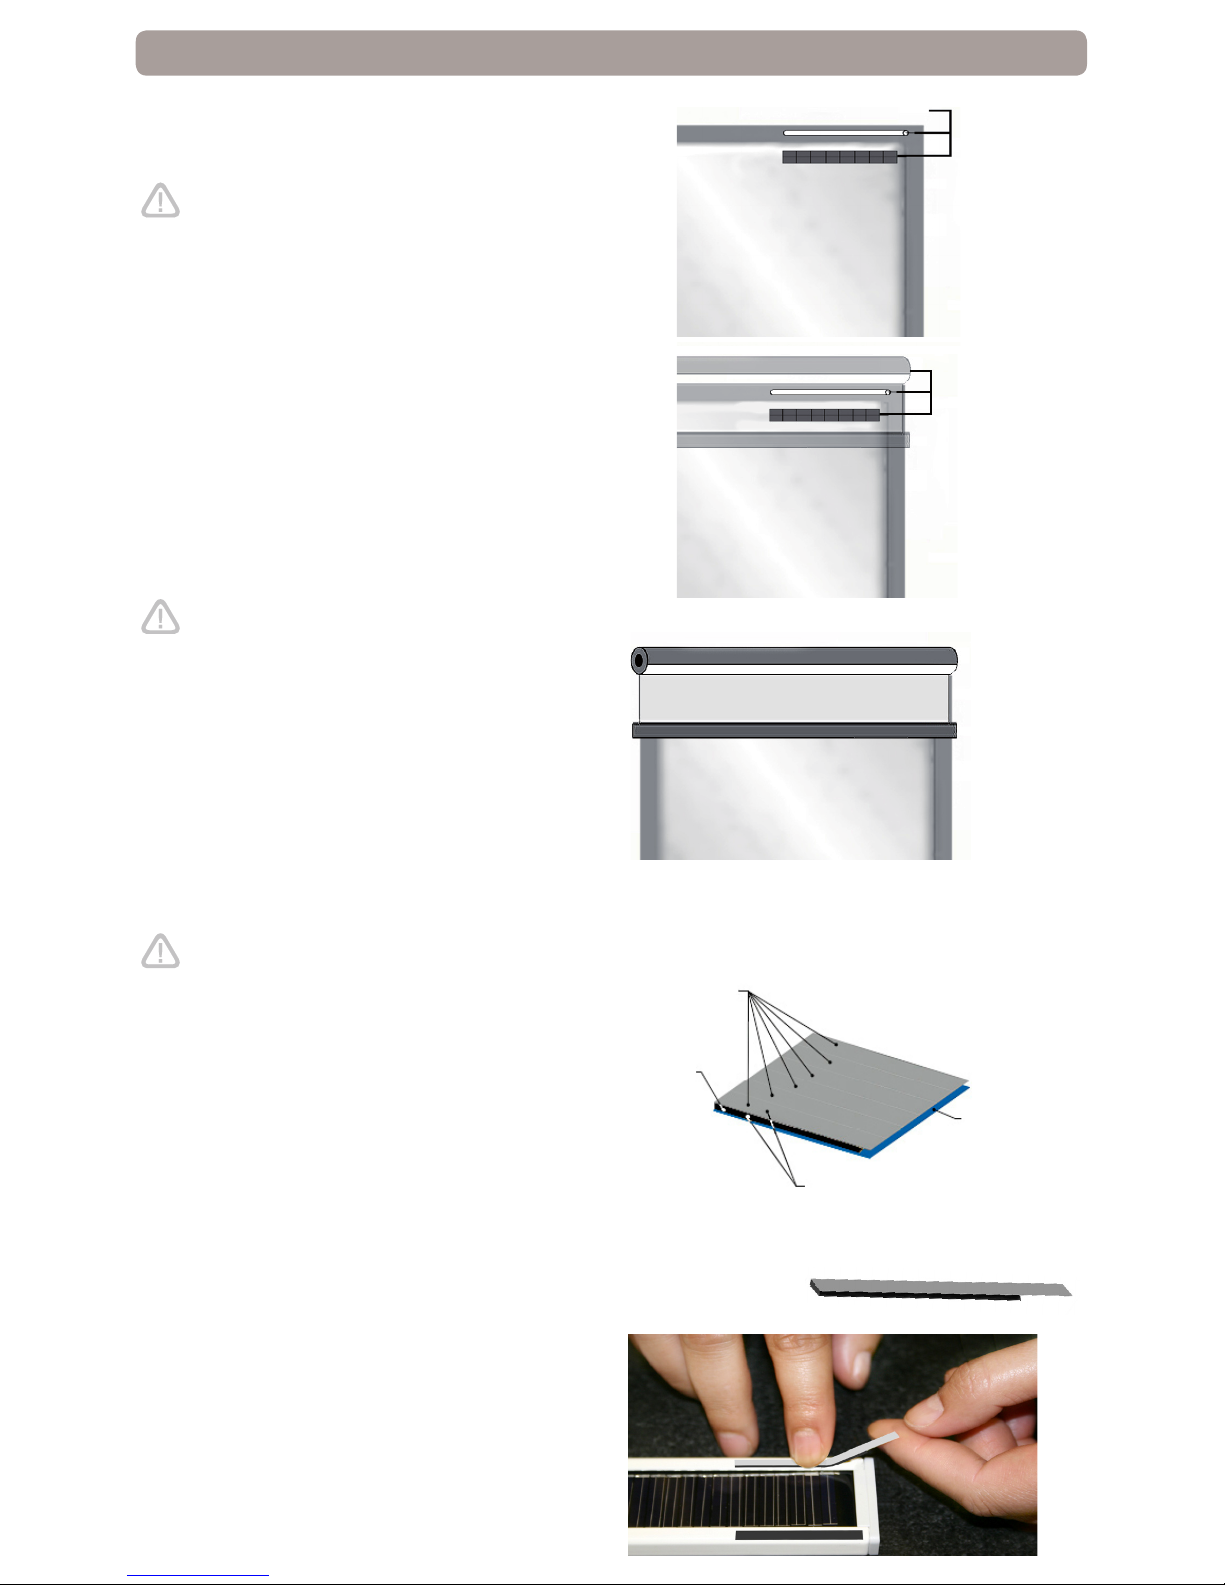
Upper Liner
Master Liner
Adhesive must stay with upper liner
when peeled away from master liner
Figure 1.
Glass Mount Adhesive
Figure 2.
Apply to all 4 corners
Adhesive
3. INSTALLATION
3.1 Determine Location of Solar Panel
The solar panel must always be installed indoors, and should be
positioned to allow as much natural light as possible to reach the panel.
Caution! Never install the solar panel on any window glass allowing
less than 65% light transmission (including Low E glass and/or
window tinting), or obstructed by a window pane or bug screen.
Always leave the photovoltaic cells unobstructed, do not put anything
in front of them.
The three components which make up the Solar Pack must be installed on
the same side as the WireFree™ motor.
Somfy recommends that all components be tted systematically in order
that all components may be connected to the wire harness easily, and that
the wire harness does not interfere with the free movement of the interior
window covering.
3.2 Mounting the Solar Panel.
Caution! It is imperative that window hardware or framing does not
collide with the solar panel!
Careful! Do not damage the wire harness cables during installation.
Determined the position of the solar panel (against window, within
reach of wire harness) prior to application of 2-sided tape to
insure proper adhesion the rst time. Use brackets when direct-to-glass
mounting is not advisable (see section 3.2.2)
Please refer to the corresponding instructions.
3.2.1 Glass Mounting
Caution! To insure a secure adhesive hold over a long
period, prepare the inside window glass prior to mounting
the solar panel.
Important! The adhesive tape should never be touched directly
with ngers (or other contaminates) prior to adhesion.
1) Clean solar panel bezel corners and window area with alcohol
prep pad. Let dry for two minutes.
2) On a table, with the solar panel facing up, apply the 2-sided
adhesive to four corners of the solar panel bezel.
Note: The tape is precut for your convenience in between the top
(facer) and bottom (backer) liners. With your ngers, lift off each
precut adhesive piece so that it remains attached to the “facer”
material and the opposite side of the tape should then be released
from the back liner. See Photo in Figure 1 and Figure 2.
3) Remove the “facers” of the applied adhesive.
Position the bezel with solar panel facing to outdoors , then press
entire panel with rm, even pressure into the glass for 10- 15
seconds. The panel is now supported by the adhesive to glass
bond but will require 24 hours of cure time to allow full strength
characteristics. Do not disturb during this period.
 Loading...