

Page 1
TI N
BY
DESCRIPTION
R IO
1 V / 0
O
NTRO
LINTEO AD C
6 H
z20 AC
Catalog No: 6301023
CENTRALIS RECEIVER
Inteo Remote Control
Installation and Operating Instructions
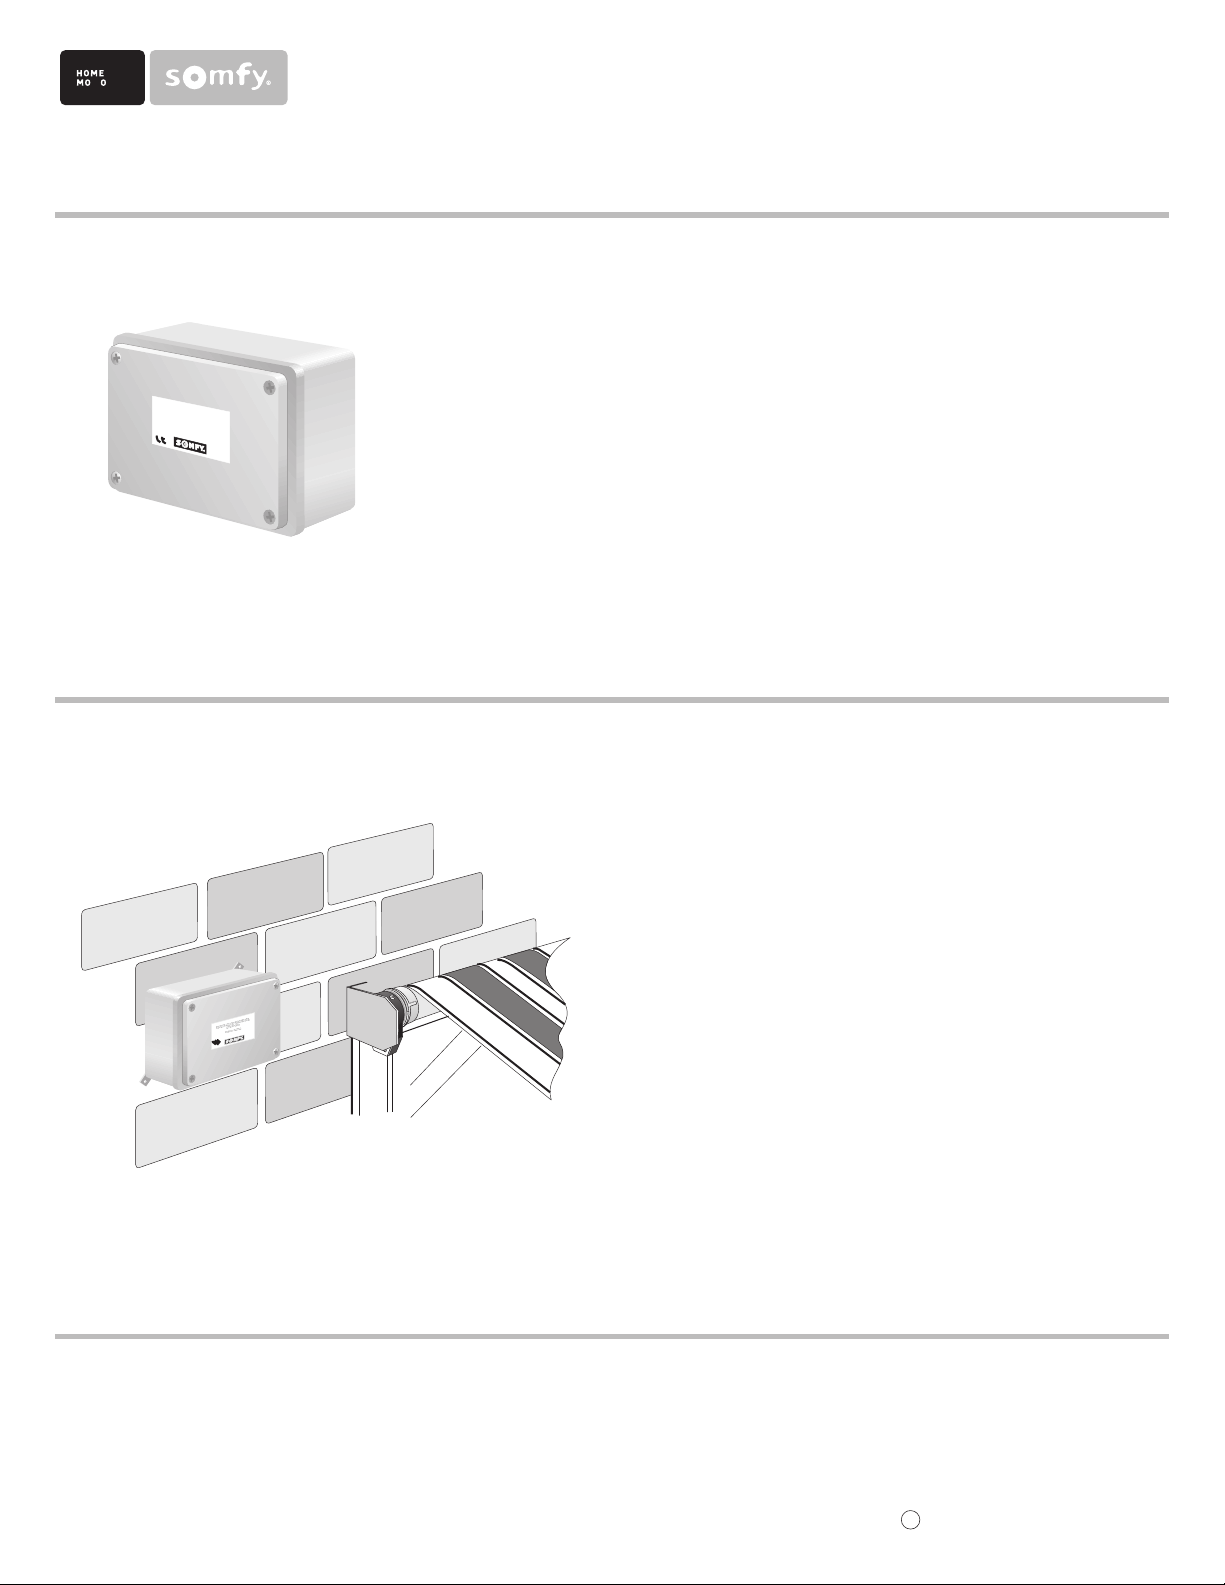
The Somfy Centralis Receiver is a single motor control designed for
residential use. It includes an integrated radio receiver, plus input
terminals for an optional low voltage switch. Using the Telis
Transmitters, it is possible to operate the controls individually or in
groups. Two user-defined intermediate positions can be programmed.
This new control is packaged in a weatherproof enclosure and includes
watertight strain-relief fittings for wires entering the box.
INSTALLATION PROCEDURES
1. The Centralis Receiver should be mounted as close to the motor as
possible. If mounted outside, ensure that the connections are facing
down to avoid rain seepage. Avoid mounting the control against any
metallic surface, as this may affect the radio reception.
2. Connect high and low voltage wires according to the wiring diagram
on the next page. It is recommended that the low voltage wiring is
done first, for easier access to the terminals. Make sure to use included
watertight strain relief fittings to maintain the weatherproofing of the
enclosure.
3. When using a low voltage switch, it should be located no more than
100 feet from the Centralis Receiver.
SOMFY SYSTEMS, INC.
47 Commerce Drive
Cranbury, NJ 08512
SOMFY SYSTEMS, INC. reserves the right to change,
update or improve this document without prior notice.
SOMFY CANADA
6315 Shawson Drive, Unit #1
Mississauga, Ontario L5T1J2
CAT. NO: 2500023
SOMFY MEXICO S.A. De C.V.
Calle 3 No.47, Loc.E-5
Fracc Ind. Alce Blanco
Nau.,Edo. de Mex C.P. 53370,Mex
C
SOMFY SYSTEMS, INC. 5/03
Page 2
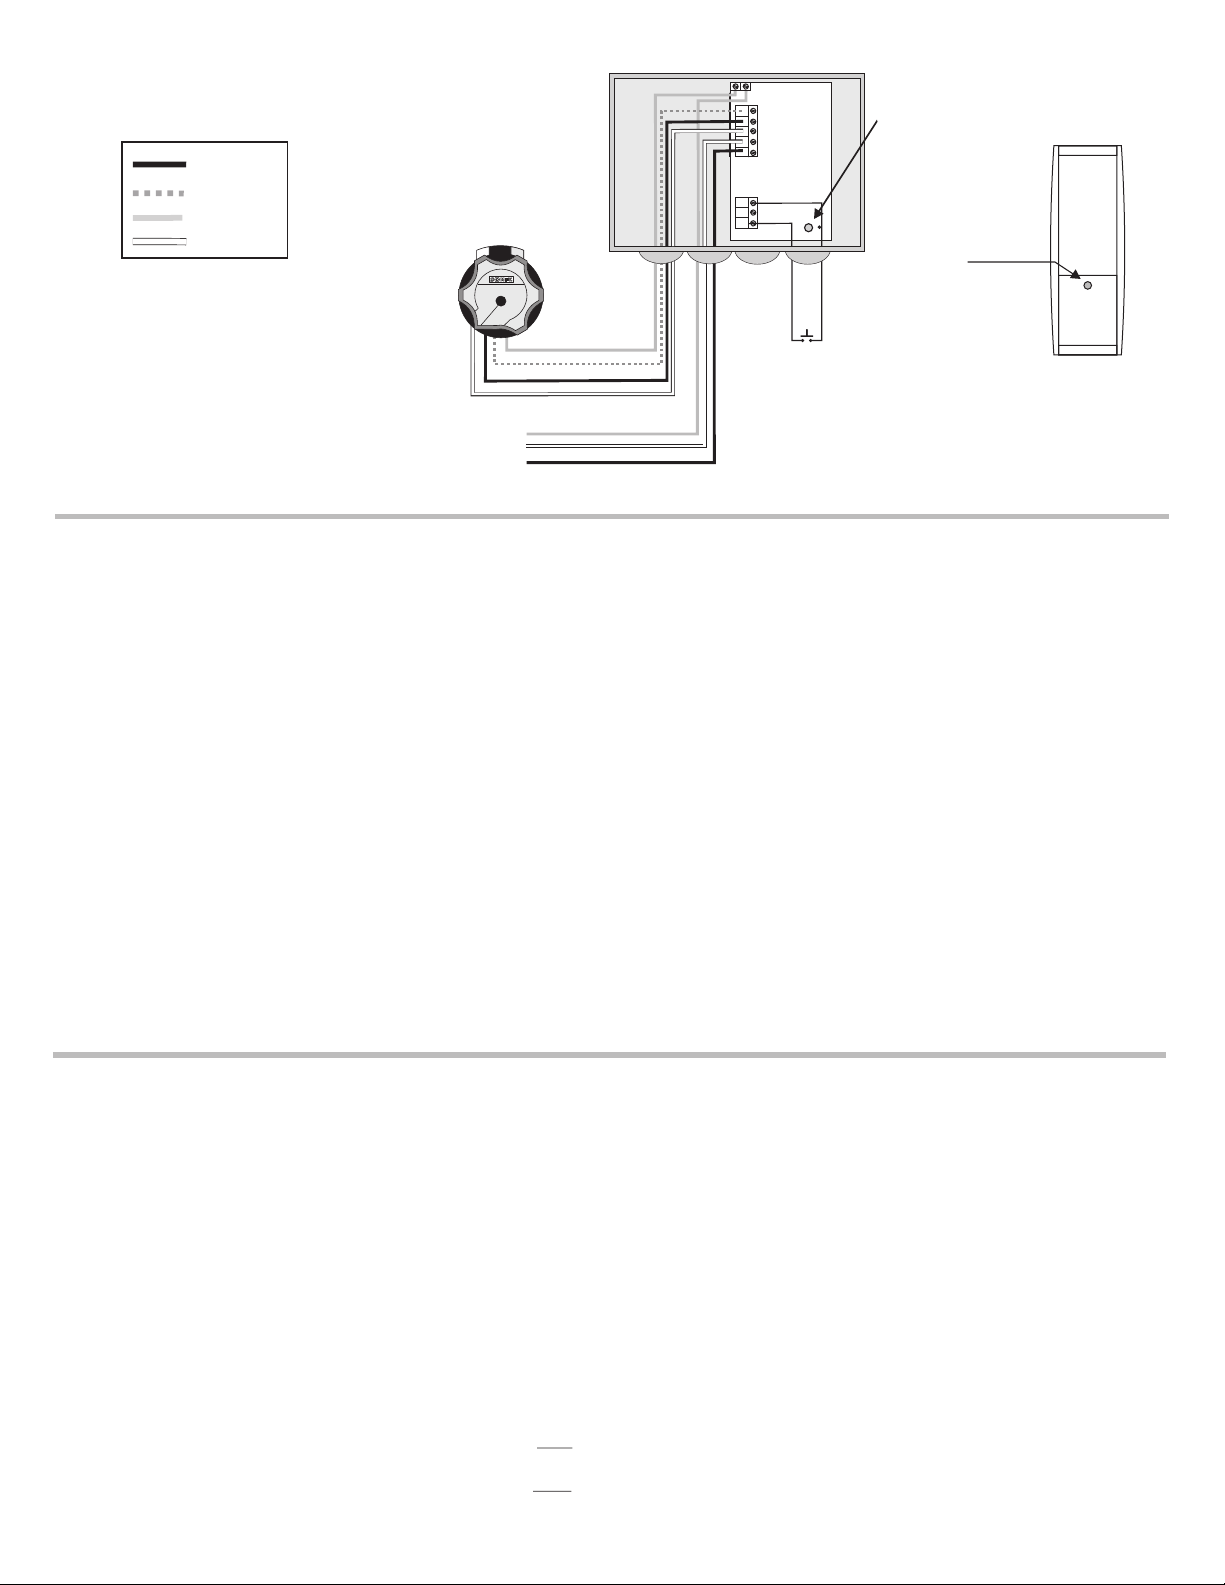
WIRING DIAGRAM
UP
COLOR CODE
BLACK
RED
GREEN
WHITE
NOTE:
MOTOR
R
DOWN
MTR COM
NEUT
HOT
To Optional
Low Voltage Switch
Mount control with
fittings facing downward!
GROUND
NEUTRAL
HOT
OPERATING INSTRUCTIONS
System Set Up Operating Procedures
1. With power off, wire Centralis as indicated above. Turn all circuit
breakers on (motors should not move).
2. Set the Centralis Receiver into programming mode by pressing the
programming button on the receiver until the LED lights (about 5
seconds).
3. Press the programming button on the Telis1 or Telis4 transmitter. Make
sure the desired channel is selected on the Telis4 before programming.
The programming LED on the Centralis will blink indicating the
transmitter has been memorized.
4. Operate each motor in the DOWN direction using the radio transmitter.
5. The motorized treatment should move down or out. If this is incorrect,
turn off the circuit breakers and reverse the red and black wires of the
motor.
TRANSMITTER
1. Pressing the UP button on the Telis transmitter will move the window
treatment up or in. The DOWN button will move the treatment down or
out.
2. To stop the motorized treatment at any time, press the CENTER button
on the transmitter.
3. To reach one of the intermediate positions, the awning or rolling shutter
must first be at the upper or lower limit, and stopped. Pressing the
center button on the transmitter will move the window treatment to the
dedicated position.
LOW VOLTAGE SWITCH
4. If desired, a single pole, single throw switch can be connected to the
low voltage terminals as indicated above. Each press of the switch will
sequence through the directions as follows;
DEPRESS 1 UP DIRECTION
DEPRESS 2 STOP
DEPRESS 3 DOWN DIRECTION
DEPRESS 4 STOP
Programming Button & LED
Programming
Button
Telis Transmitter
PROGRAMMING PROCEDURES
RECORDING THE INTERMEDIATE POSITION FROM THE TOP OF THE WINDOW TREATMENT
- Bring the window treatment to its upper limit using the Telis transmitter. Press the DOWN and CENTER buttons simultaneously until the awning begins to move,
then release.
- Stop the window treatment at the intermediate position desired. Press the CENTER button for 2 seconds to memorize that position.
RECORDING THE INTERMEDIATE POSITION FROM THE BOTTOM OF THE WINDOW TREATMENT
- Bring the motorized treatment to its lower limit. Press the UP and CENTER buttons simultaneously until the awning begins to move, then release.
- Stop the window treatment at the position desired. Press the CENTER button for 2 seconds to memorize that position.
DELETING AN INTERMEDIATE POSITION
- Briefly press the CENTER button of the Telis transmitter to reach the desired intermediate position.
- Continue to press the CENTER button for 10 seconds until the programming LED on the Centralis Receiver stops blinking. That position is now deleted.
TO ADD A NEW TRANSMITTER TO THE MEMORY OF THE RECEIVER
- Press the programming button, for more than 2 seconds, on a transmitter that is already memorized by the Centralis Receiver to wake up the receiver. The
programming LED on the Centralis will light. Press the programming button on the new transmitter to attach it to the Centralis Receiver.
TO REMOVE A TRANSMITTER FROM THE MEMORY OF THE RECEIVER
- Press the programming button on the Centralis Receiver until the LED lights. Quickly press the programming button on the transmitter you want to remove.
TO REMOVE ALL TRANSMITTERS FROM THE MEMORY OF THE RECEIVER (Resetting of the Centralis Receiver)
- Press the programming button of the Centralis Receiver until the LED blinks. This removes ALL memorized transmitters.
 Loading...