

Page 1
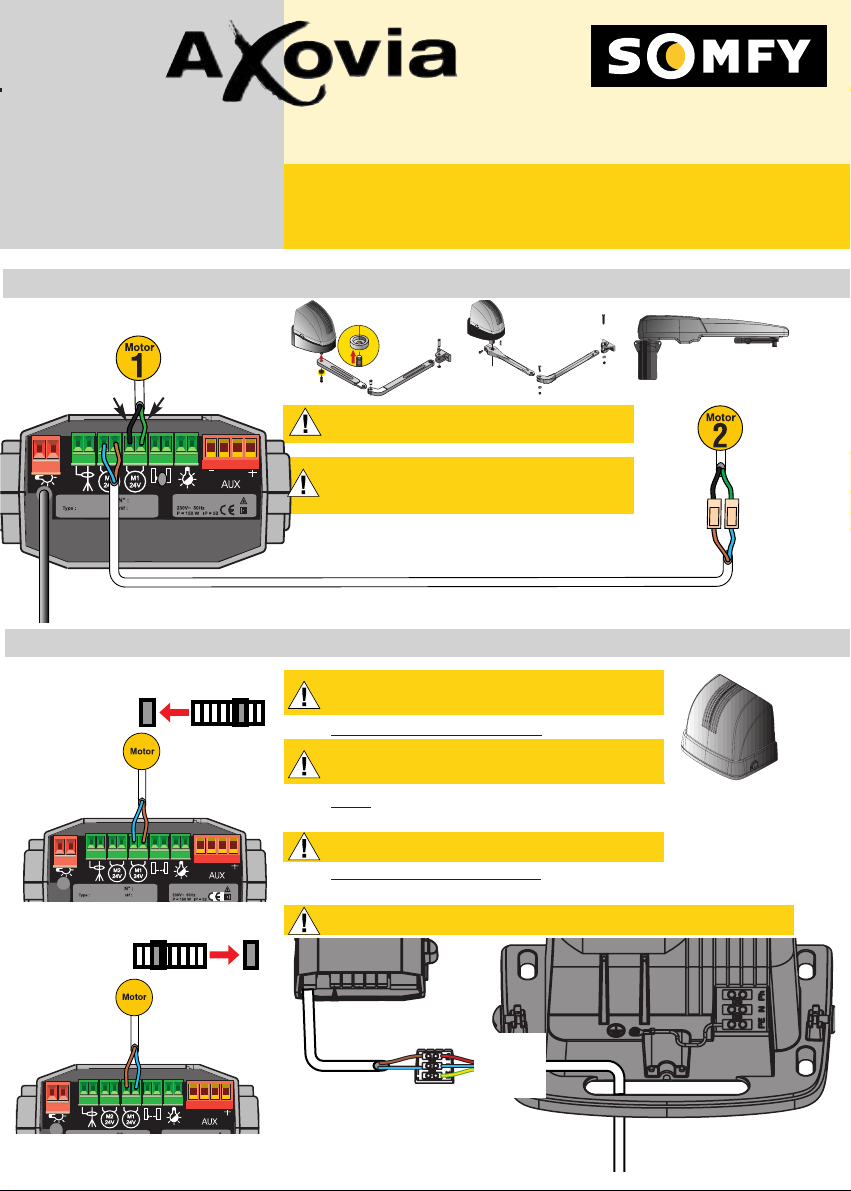
M1 is always the motors who start the first.
Screw the wires of the motor cable onto the
connector, comply with the colors.
2 x 1 mm2mini - 7m maxi
Power supply 230V
black green
black green
brown blue
Blue Brown
Connecting motors Axovia 200A, 250A, 150S.
®
AXOVIA 150S AXOVIA 200A
AXOVIA 250A AXOVIA 400C
It’s essential to turn off the power supply at
the circuit breaker before working on the AXOVIA
Internal manual unlocking:
Open the cover, disconnect the motor M1 from the
electronics pull on the gate to open it.
Motor
Click the motor into slot M1
Comply with the colors
Electronic / main power supply
Connect the mains power supply wires to the connection bar.
Comply with the phase, neutral and earth configurations.
Blue or black Brown or
green
Blue or
black
Brown or
Green
Motor on the right seen from inside.
Motor on the left seen from inside.
Connecting motors Axovia 400C
Brown or
Green
Blue or
Black
Phase
Neutral
Earth
Programmation tips
Page 2
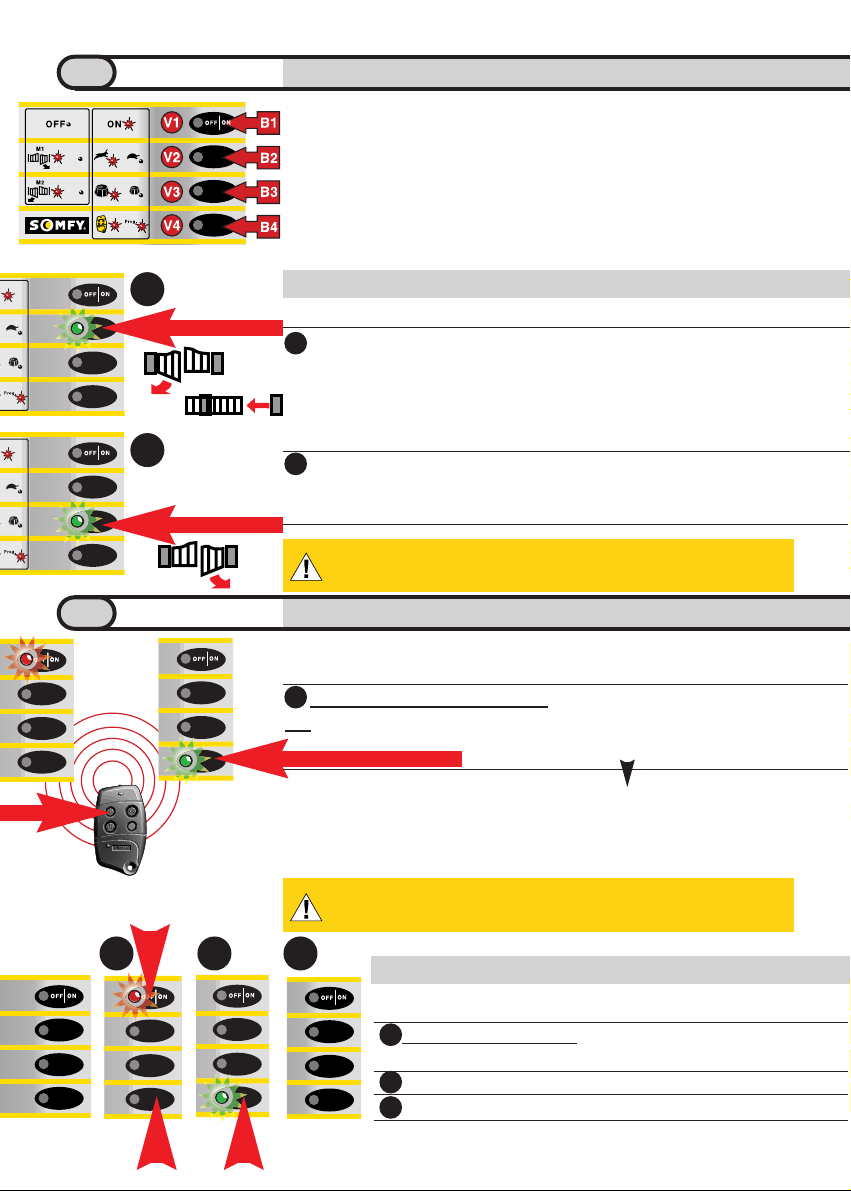
Check manual operation of gates
B1 is OFF
Press and Hold B2
Press and hold B3
V1 is off
V2 is on, the gate will open when you
release B2 the gate will stop and the led
will go out. If you press B2 again the
LED will light and the gate will close.
(Open-stop-close-stop)
As Above with other gate.
Programming transmitters
B1 is on
Press and hold button on transmit-
ters, and
V1 is on
V4 flashes
V4 stays on for 2 seconds and
the starts flashing again.
The button is programming
Deletion of a remote control
B1 is OFF
Press and hold B4 and B1
release B1
When V4 is off, release B4
V1 is off
V1 is on
V4 is on
When the remote control are programming, don’t operate the gate
before the self-learning.
If gates opening in opposit way after the first pressing, check motors
connecting.
B : buttons V : LED
Functions B1 : ON/OFF
B2 : Manual + Fast/slow approch adjustement
B3 : adjustement of manual + heavy/light gate
B4 : Parameters setting: memorizable codes + Self learning
Presentation of unit
maintaining pressure
maintaining pressure
maintaining
pressure
1
1 2 3
2
1
2
1
2
3
1
The first button programming will control the total opening of the gate.
The second button programming will control pedestrian opening.
1
2
maintaining pressure on B4
Page 3
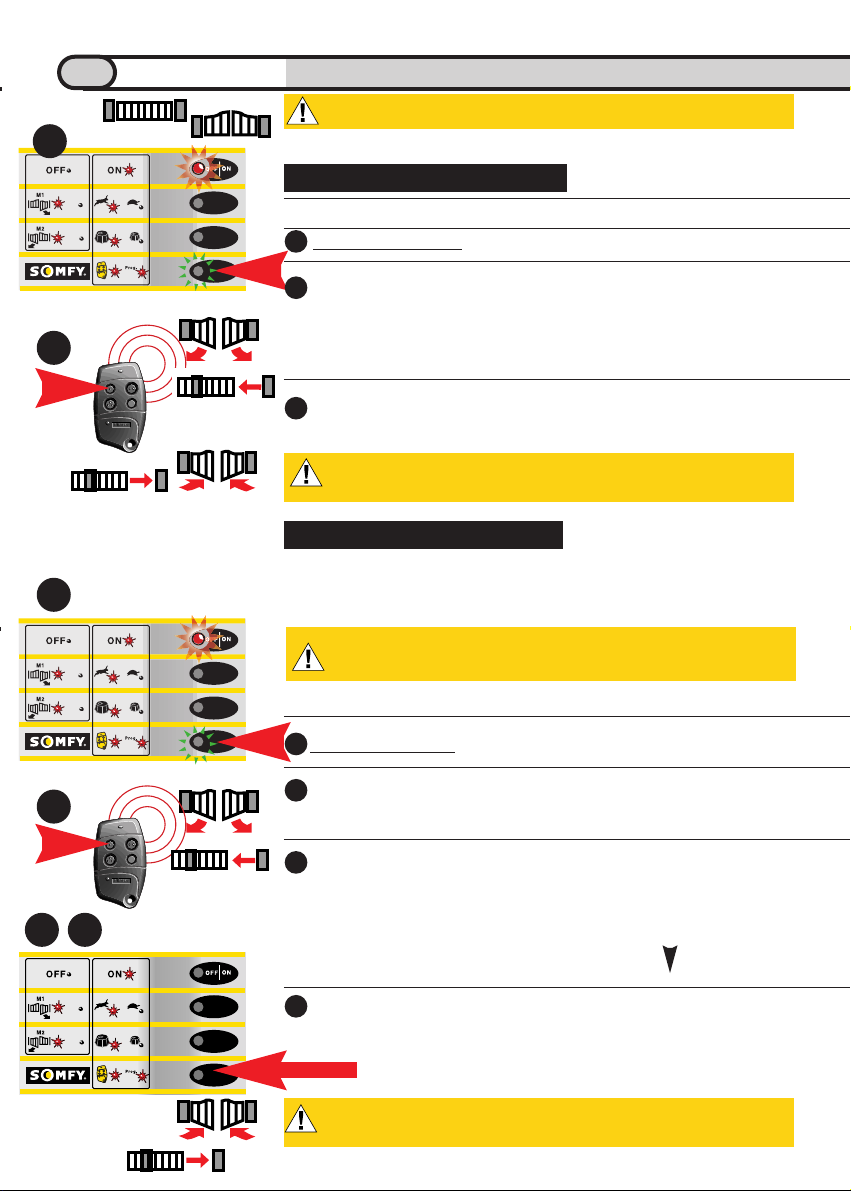
You need to choose between the two operating modes :
Semi automatic mode
Self-learning phase
B1 is ON
Press and release B4
Press button on the transmitter
Press the button on the transmitter
again
V1 is on
V4 flashes
Gates open slowly to end stops
Gates close quickly then slow
down as they reach end stops
B1 is ON
1 - Press and release B4
2 - Press button on the transmitter
3 - Press and hold B4
The time between you pressing button
B4 to the time it is released, is the time
the gates will stay open during a normal
operating cycle.
Release B4
V1 is on
V4 flashes
Gates open slowly to end stops
V4 stays on for 5 seconds and
then starts flashing indicating the
change to automatic mode.
The gates will (after the time
delay you have just set), close
quickly then slow down as the
reach the end stops.
The set of cells is mandatory in automatic mode.
If the electronic unit doesn’t found end stops, do the self learning
phase again.
Fully automatic
(Pressing transmitter key, gates open
and after the time delay, the gates will close automatically.)
If the changing to automatic mode is not coorctly make, look the
connecting of the photocells.
1 sec
1 sec
1 sec
1 sec
mini 5 secondes
1
1
2
3 4
2
1
2
3
1
2
3
4
Gates must be closed to make the self-learning
3
Page 4
Non-binding document. products and references in this document are subject to change without prior notice.
Somfy S.A.S. - Capital de 20 millions d'Euros - RCS Bonneville 303 970 230.
© SOMFY 04 / 2002
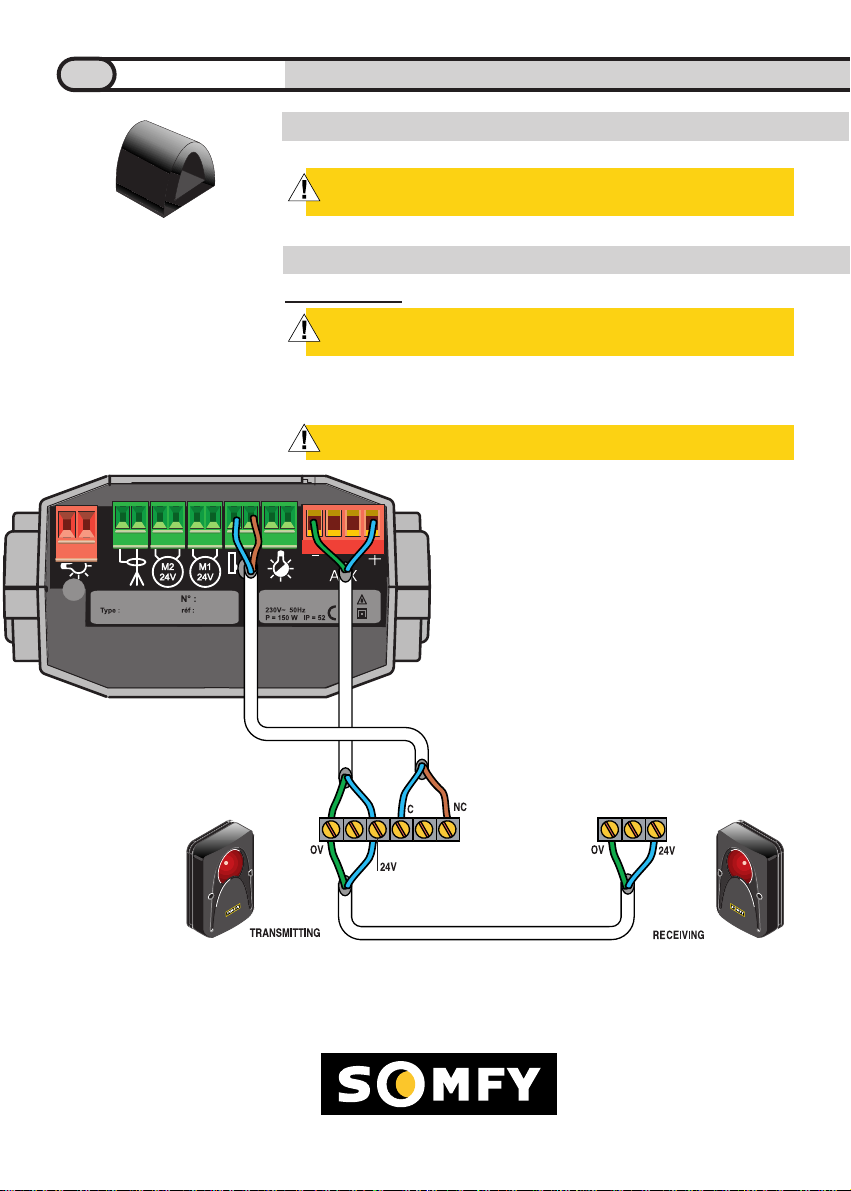
Connect the cells
Transmitting cell 2 x 0,6 mm
2
Receiving cell 4 x 0,6 mm
2
Align transmitting and receiving to have a good beam.
Connecting cells
®
®
Installation
Stops
your gates must have end stops to limit their travel and their position
caused by the opening angle.
Useful reminder
4
®
 Loading...