

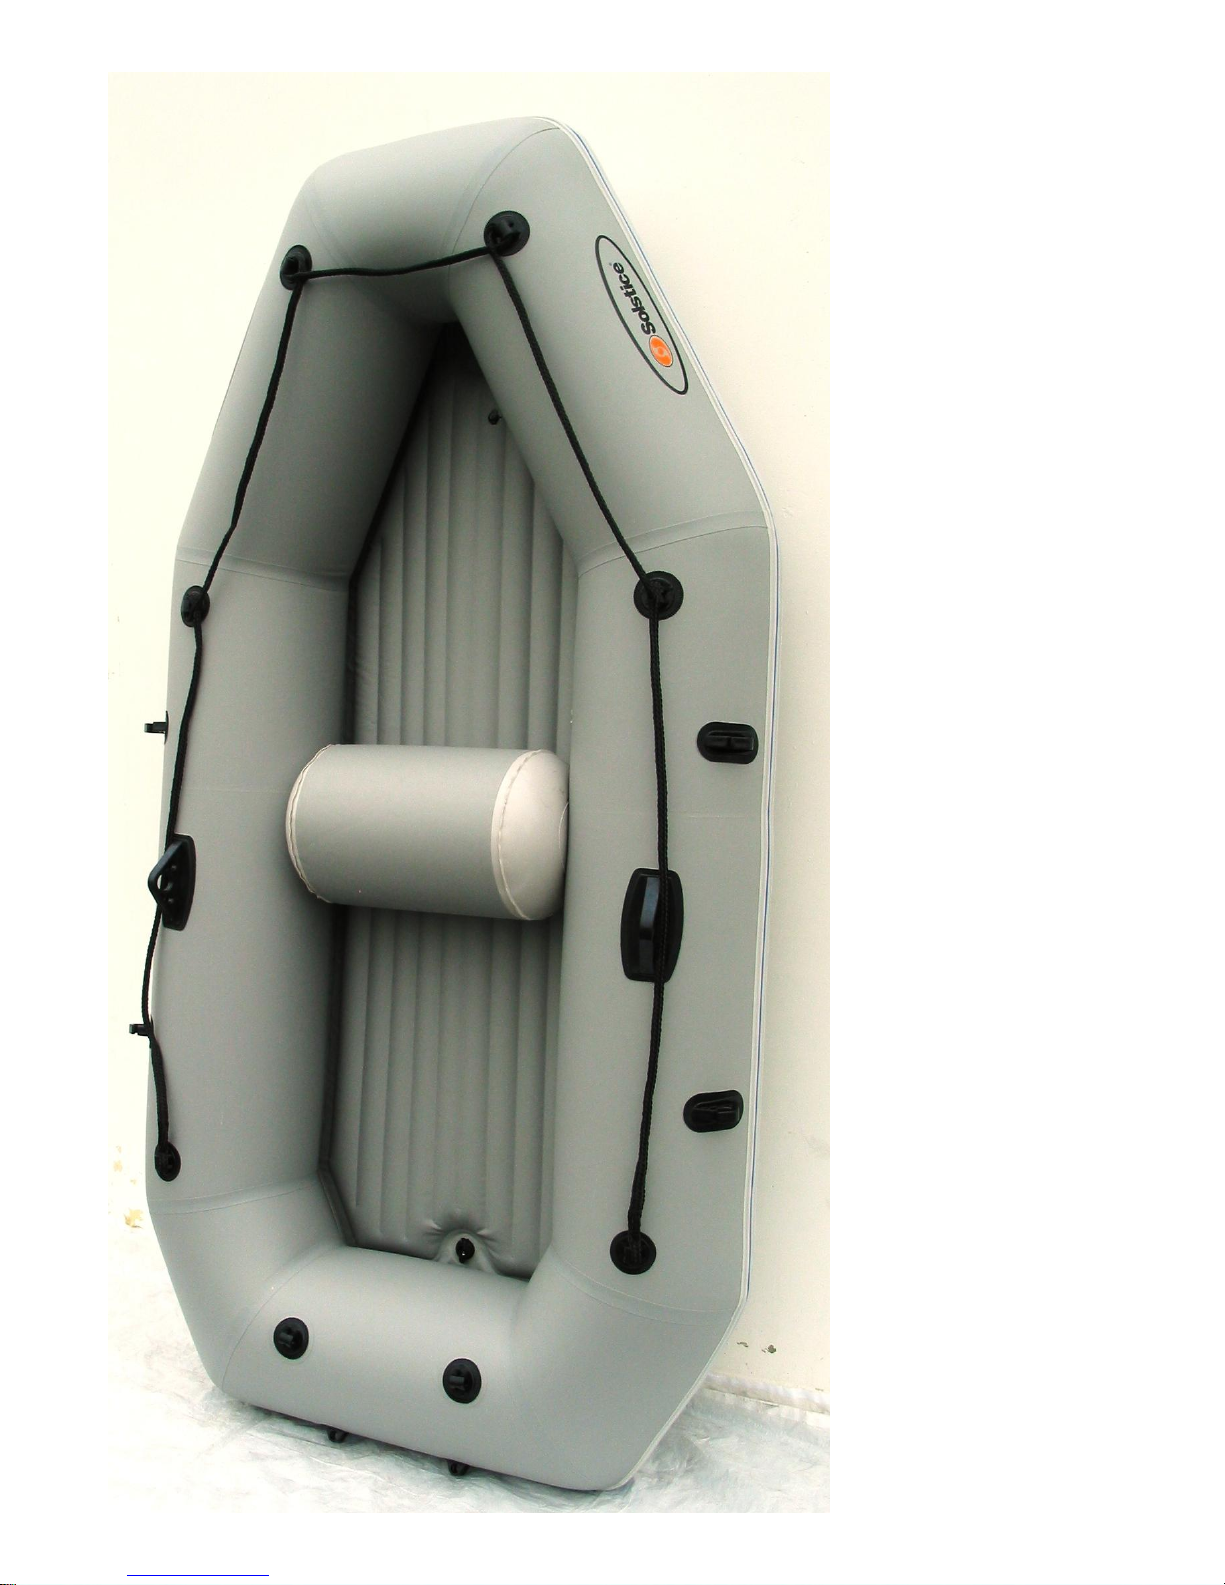
1
SOLSTICETM
International Leisure
Products, Inc.
191 Rodeo Drive
Edgewood, NY 11717
Tel (631)254-2155

2
Introduction
We thank you for your purchase of our SOLSTICE IB series Boat. Please read the following
instructions carefully before using this inflatable boat and keep the instructions for future reference. If
you re-sell the craft, please hand this manual over to the buyer.
This SOLSTICE IB inflatable boat has been manufactured to the highest quality standards.
Features:
Designed for inshore use
Easy assembly and maintenance
Low cost on maintenance and operation
High quality performance
Quality certified construction
Reliable, corrosion-proof, reinforced material
Easy to store and carry
GS, CE and NMMA certificated boat
This SOLSTICE IB inflatable boat manual will provide you with all of the easy instructions you need to
follow in order to set up and operate this boat efficiently. If this is your first craft, or you are not
familiar with this type of boat, please ensure that you obtain handling and operating experience before
driving the craft. Your dealer or national sailing federation or yacht club will be pleased to advise you
where to get training.
In addition to set-up instructions and operational guidelines, we have also included several very
important Warning and Caution statements that pertain to the safe use and enjoyment of this new
SOLSTICE IB inflatable boat. It is very important that you take the time to read them all. Please make
certain that you understand the information contained in this Manual prior to initial use.
Please retain this manual for future reference!

3
Important Safety Guidelines
Please read & understand prior to using boat
To enhance the enjoyment of your boat and protect the safety of the operator using the product,
ALWAYS STRICTLY OBSERVE the following important safety points.
1. WARNING: Boat designed for use in sheltered water only.
2. WARNING: This in not a life saving device. Use only under competent supervision. Never
allow diving or jumping into this product. Never leave in or near the water when not in use.
Never tow from any vehicle. Adult assembly and operation required.
3. WARNING: Inflating the product’s chambers should be done in numbered sequence, do not
over inflate. Excessive inflation of the product can cause the chambers to burst or cause damage
to the seams. It is crucial that the boat’s pressure be reduced during prolonged use in direct sun.
Also, in cold conditions, the pressure my decrease and more air will need to be added to ensure
proper inflation.
4. WARNING: Take a boating safety course and get hands-on training from your boat dealer or
local boating authorities. Review all safety requirements regularly. Never navigate alone.
5. WARNING: A Personal Floatation Device (PFD) is required for each passenger. It is especially
important that children and non-swimmers wear a Personal Floatation Device at all times.
Children and non-swimmers need special instruction in the use of the Personal Floatation
Device.
6. WARNING: Use caution when stepping or climbing aboard the boat. Step into the center of the
boat for maximum stability. Distribute the weight of load and accessories evenly so that the boat
sits level fore to aft and side to side.
7. WARNING: Do not use your boat if you suspect a puncture or leak. It may be unsafe.
8. WARNING: Beware of offshore winds and under-currents.
9. WARNING: The total number of persons and total weight shall not exceed the information
printed on the boat. Do not exceed the maximum recommended capacities. Overloading
violates regulations.
10. WARNING: It is the responsibility of the boat owner to identify and obey all local and state
laws pertaining to boat safety PRIOR to use. Please consult your local authorities to ensure
compliance.
11. Do not allow unattended children in the boat. Always make sure that at least one responsible
adult is supervising all children and those who do not know how to swim AT ALL TIMES.
12. Always maintain the proper boat safety equipment.

4
13. Your boat is designed to be a storable, seasonal boat. If the boat will not be in use year-round, it
is STRONGLY RECOMMENDED that you deflate the boat and dry it thoroughly, and store it in
a protected area for the off-season. This will help extend your boats life and prevent a safety
hazard from developing while the boat is not in use.
14. WARNING: Certain household cleaning solvents, chemicals and other liquids (such as
battery acid, oil and gasoline) could damage the PVC fabric. In the event of spill or
mishandling, you should check for leaks and inspect for structural integrity. Use a mild
soap to clean the boat, rinse thoroughly.
ASSEMBLY
1. Find a flat field and make sure that the area you have selected to set up the boat is completely
free of stones, sticks, sharp objects or other foreign debris.
2. Carefully unfold the boat, spreading out the tubes and floor to make them as smooth as possible.
NOTE: For ease of assembly, it is preferable to set up the boat on a warm and sunny day. If time
permits, expose the unrolled boat to direct sunlight for 1 hour or more, so that the boat material
will be more flexible during assembly. CAUTION: DO NOT DRAG THE BOAT, AS IT MAY
TEAR THE BOAT OR CAUSE OTHER DAMAGE. We will not be held responsible for
damage caused to the boat due to mishandling or failure to follow these instructions.
3. Inflate the boat’s chambers in numbered sequences that are printed next to the valves. It is very
important to follow the numbered sequence: Failure to do so will result in an improperly inflated
boat. You can use a hand or foot operated air pump to inflate the boat. Do not use high-pressure
air compressors. Inflate each air chamber in the number sequence until all chambers are full.
WARNING: Do not over inflate. Maximum pressure for air chambers 1 and 2 should be
0.15bar (2.17PSI). And the maximum pressure for air chambers 3 and 4 should be 0.10bar
(1.45PSI).
A1 B A2
DIAGRAM #1

5
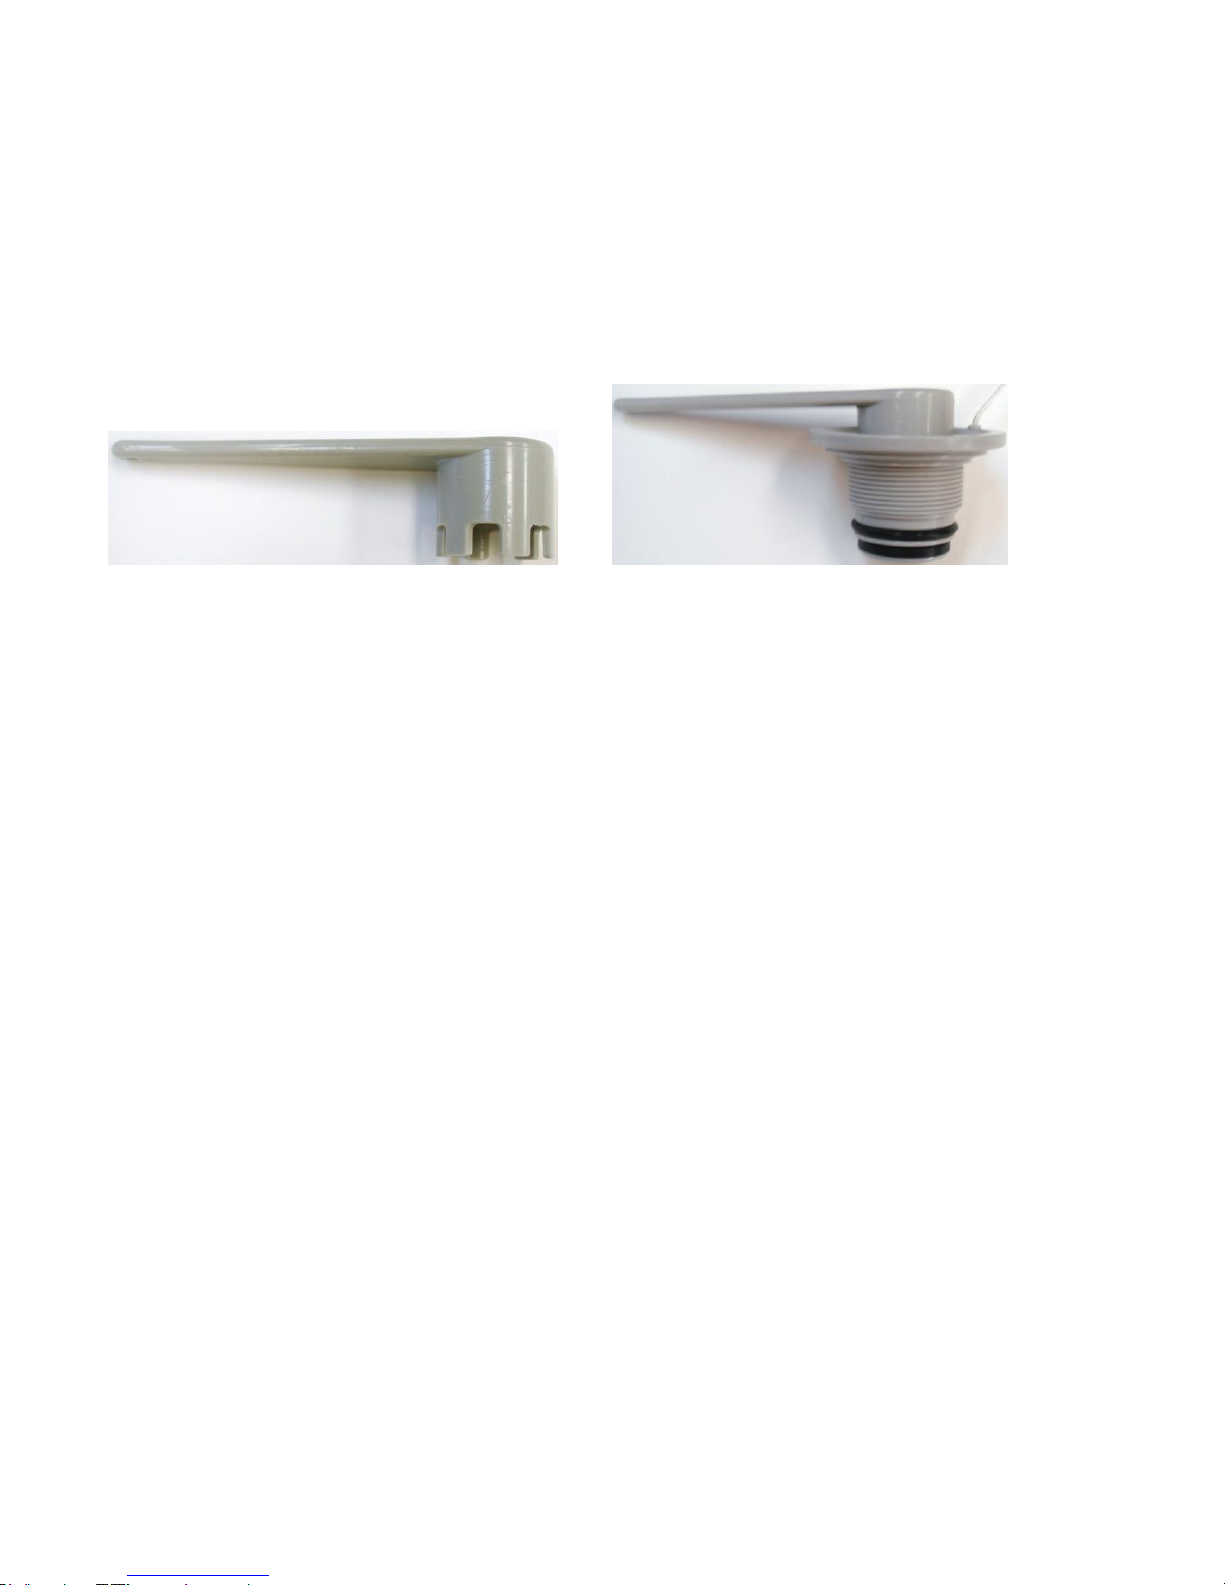
4. Please see the Safety Valve Diagram #1. Inflation: Unscrew the valve cap (A1). Attach the air
pump hose nozzle and twist to lock the hose to the valve. As each chamber is inflated detach the
hose and screw in the valve cap (A2).
5. Deflation: Remove the Valve Cap (A1) push down the Deflation Button (B) and turn the valve
clockwise by 90 degrees until it is locked. Release the valve and the air will flow out. If you
want to stop deflation push down the Deflation Button (B) and turn it counter-clockwise by 90
degrees. The deflation will stop when the valve pops up. To fully deflate the boat for storage,
use the deflation feature on your pump (inflator).
Operating Instructions
Preparation before departing:
1. Acquire necessary information and inform other passengers:
A. Get information on local laws, regulation and hazards related to water activities and boat
operation.
B. Check weather forecast, local currents, tides and wind conditions.
C. Advise someone on land of the time you plan to be back
D. Explain basic boat operation to all passengers.
E. Be sure that at least one of your passengers can operated the boat in case of emergency.
F. Learn how to determine the distance you can cover, and remember that bad weather
conditions can alter this.
2. Check the working condition of the boat and equipment:
A. Check inflation pressure.
B. Inspect all safety valves.
C. Check the load is evenly distributed on deck of boat; bow to stern and side to side.
D. Only motor powered lower than the number of the table is recommended for this boat.
3. Check that required safety equipment is on board (check the laws and regulations of the country
or locality in which you are boating):
A. One personal floatation device (PFD) for each passenger.
B. The air pump, oars, & repair kit.
C. The boat papers and your boating license (if applicable).
D. Lights are required if operating after dark.
Disassembly
1. Remove all accessories (seats, oars, motor mount, etc.).
2. Clean and dry the boat as previously instructed.
3. Open all valves and deflate boat completely.
4. Fold the boat. Fold port and starboard sides in towards middle. Fold the boat from stern to bow.
5. Place boat and all accessories in carry bag for storage.
6
Trouble Shooting
• If your boat appears to have lost air, first check that all valves are tightly shit. Also, notice if the
temperature has cooled. As stated before, this may cause the pressure to decrease. If either of these has
occurred, add air to return the boat to pressure.
• Sometimes the high pressure valve may become loose. To check this, use the supplied valve
wrench in the repair kit to tighten the valve. Turn lightly in clockwise direction. (See diagram #2)
Diagram #2
• If you suspect a leak, visually inspect the boat. Some punctures are obvious. If you cannot easily
detect any leaks, apply mildly soapy water around the boat and valve areas. Any leak will produce
bubbles.
Repairs
Small holes and punctures can be repaired with the provided repair kit.
1. Find the leak.
2. Deflate the boat.
3. Thoroughly clean and dry the surrounding area of dirt and grime.
4. Cut a piece of repair material in a round shape larger than the damaged area.
5. Use a pencil to lightly trace the outline of the patch over the damaged area.
6. Apply adhesive to the underneath side of the patch and the area to be repaired. Coat both lightly
but completely.
7. Put the repair patch on the damaged area and press down firmly.
8. Allow 12 hours to dry. After repair patch has dried, apply glue around the edges of the patch for
a complete seal. Allow to dry 4 more hours.
After completing steps 1 through 8, the boat is ready to use.
7
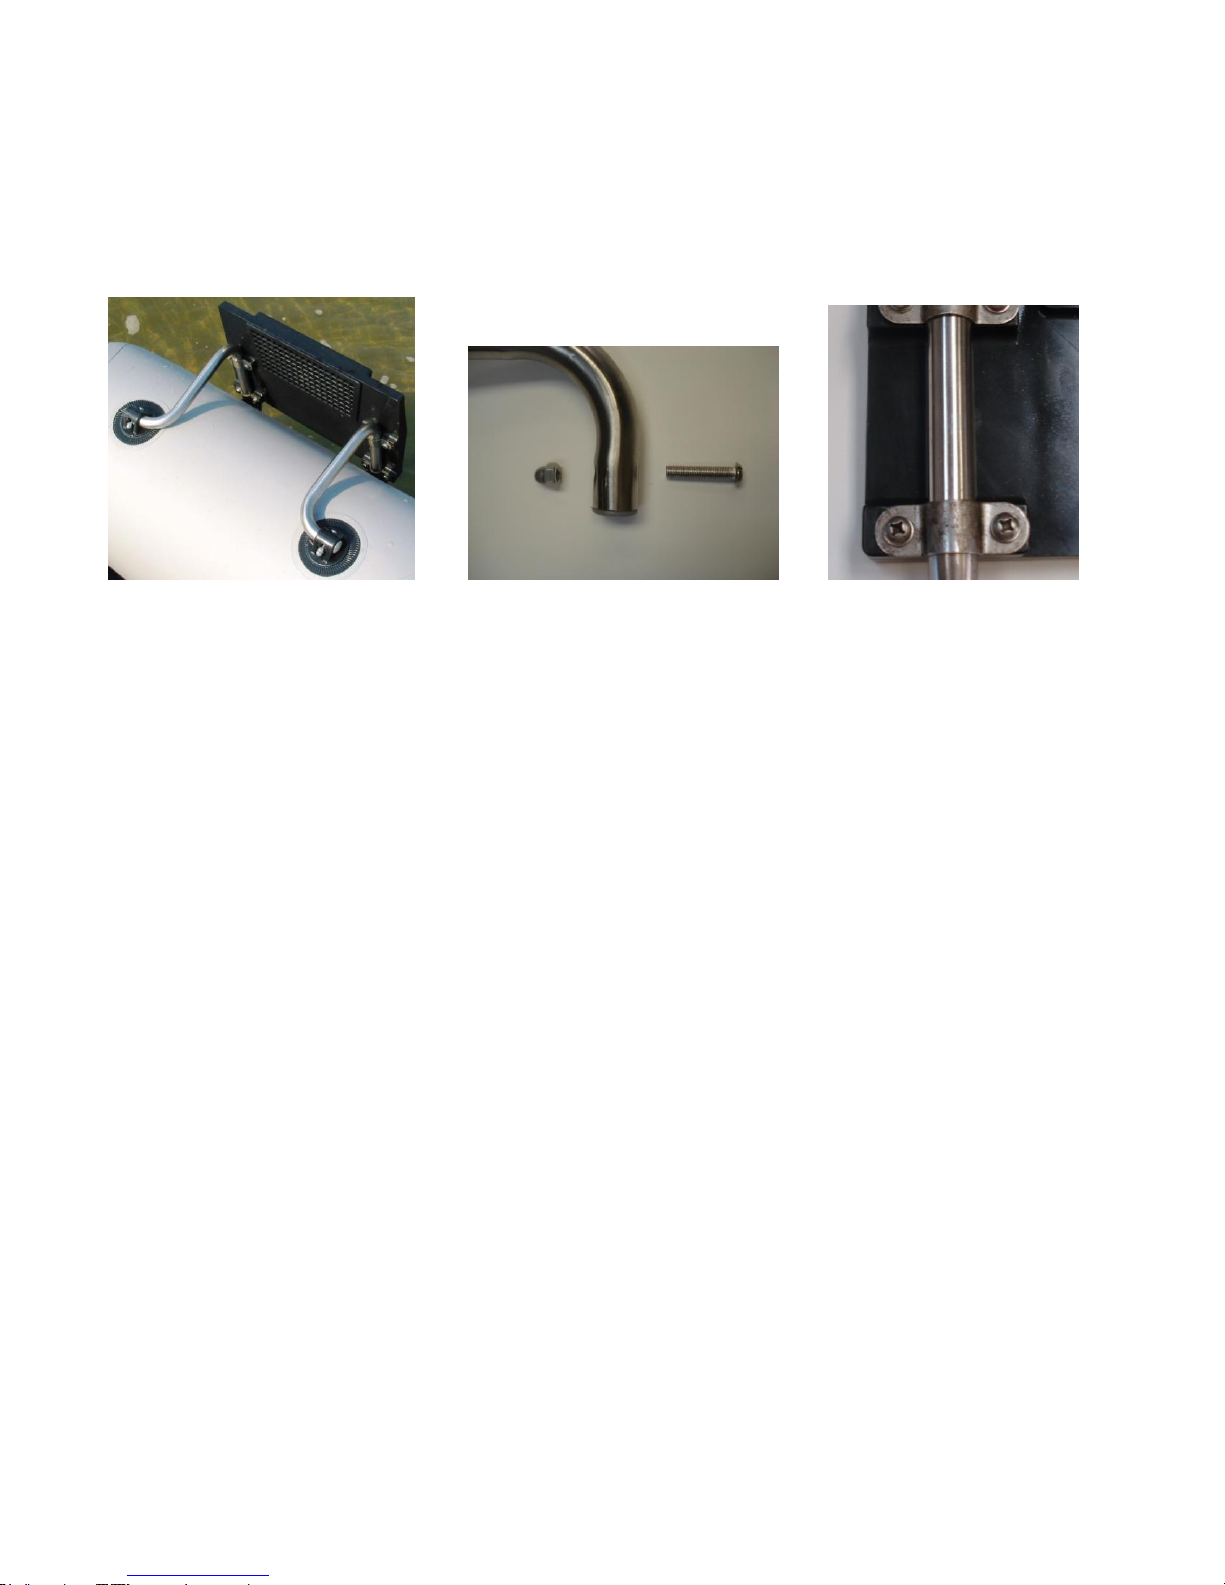
Motor Mount Assembly
Your Quest or Sportsman boat can accept an MMIB Motor Mount. The assembly and installation is very
fast and simple.
It is easiest to attach the motor mount with the boat slightly deflated. Simply attach the motor mount to
the steel support bars with the 8 provided screws and bolts. Next, slide the support bars in to the 4
eyelets on the boat. Finally, secure the support bars in to the top eyelets with the 2 provided nuts and
bolts.
 Loading...