

Solo SLC-1G, SLC-2G, SLC-3G Operator's Manual & Spare Parts List
Operator’s Manual &
Spare Parts List
SLC-1G, SLC-2G, SLC-3G
USSLC0809 (08-09)
STOP!
WARNING!!! THIS PRODUCT IS DESIGNED TO SPRAY CHEMICALS THAT MAY BE HARMFUL AND
COULD CAUSE SERIOUS PERSONAL INJURY IF INHALED OR BROUGHT INTO CONTACT WITH
THE USER. FAILURE TO READ AND FOLLOW OPERATOR’S MANUAL / INSTRUCTIONS BEFORE
USE AND/OR MISUSE OF THIS PRODUCT COULD RESULT IN EXPLOSIVE FAILURE WITH MAJOR
INJURIES.
ALWAYS water test sprayer before each use.
•
ALWAYS wear long sleeve shirts, long pants, goggles, gloves and durable shoes.
•
ALWAYS READ AND FOLLOW label instructions for the chemicals to be applied.
•
AFTER USE release pressure and clean the sprayer.
•
ALWAYS RELEASE pressure in sprayer before servicing.
•
DO NOT alter the sprayer or any components.
•
DO NOT spray ammable, caustic (i.e. acids, chlorines and bleach), corrosive, heated or self-heating solu-
•
tions with this sprayer.
DO NOT store liquids in the sprayer.
•
NEVER ll tank above the “MAX FILL LINE” on the tank.
•
If you are missing parts, instructions or have questions, DO NOT take this unit back to the
store. Call 1-800-SOLO-INC. Solo will send the missing parts/information to you promptly.
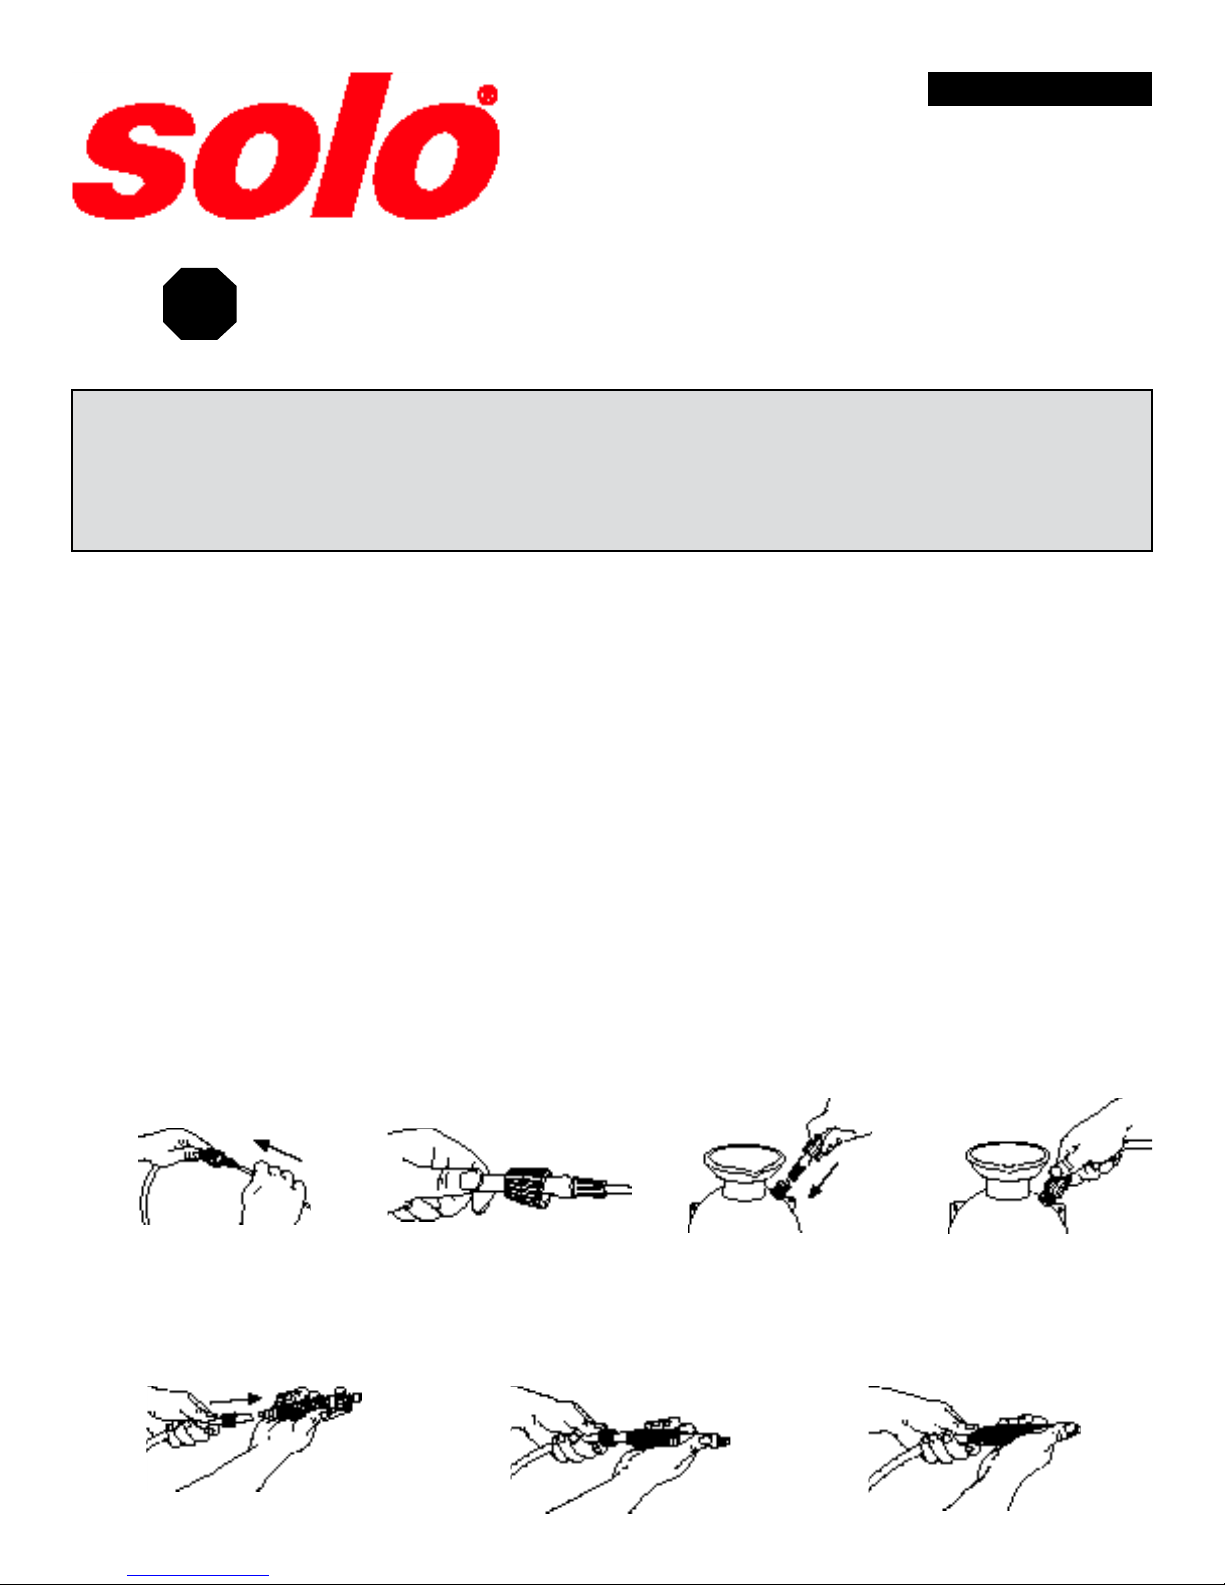
ASSEMBLY INSTRUCTIONS
A. HOSE TO TANK ASSEMBLY
Insert the pink siphon tube approximately ½” into the pink hose insert; otherwise sprayer will spray only air.
1.
Lubricate the black o-ring on the pink hose insert and then push (2a) into the threaded tank nipple until fully
2.
seated.
Screw hose nut onto threaded tank nipple. Firmly hand tighten.
3.
1 2 2a 3
B. FLOW CONTROL TO HOSE
Remove the ow control hose nut from the ow control and slide over the hose.
1.
Push the hose over the pointed end of the ow control until it touches the threads.
2.
Screw the ow control hose nut onto the ow control. Firmly hand tighten.
3.
1
2
3
1
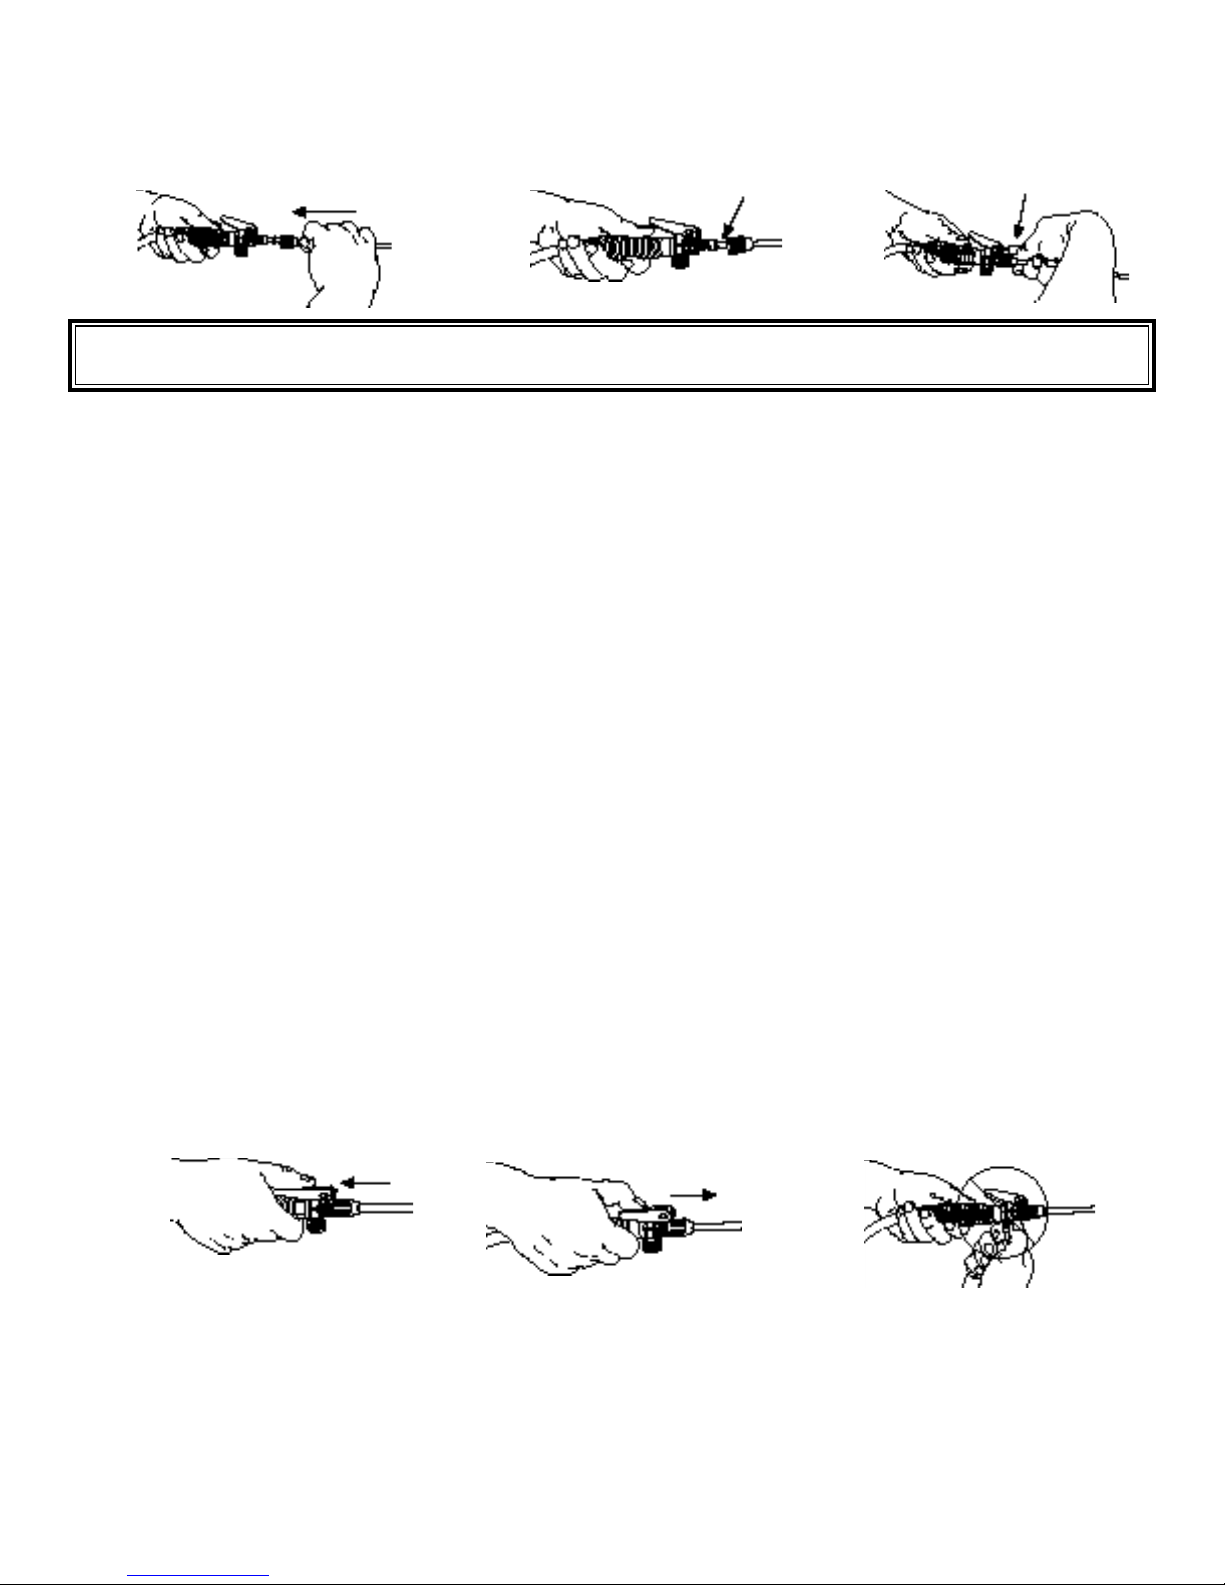
C. WAND TO FLOW CONTROL
Push the wand into the ow control until it stops.
1.
Slide the o-ring down until it touches the ow control.
2.
Screw the wand nut onto the ow control. Firmly hand tighten.
3.
1 2 3
TO ENSURE CORRECT ASSEMBLY, TEST SPRAYER WITH WATER BEFORE USING.
OPERATING INSTRUCTIONS
A. FILLING THE SPRAYER
Remove the pump assembly from the tank by turning counter-clockwise.
1.
Prepare the spray solution following the instructions listed on the chemical manufacturers’ label. Mix only
2.
the amount of solution to be sprayed.
DO NOT spray ammable, caustic (i.e. acids, chlorines and bleach), corrosive, heated or self-heating solu-
3.
tions with this sprayer.
Screw the pump assembly back into the tank by turning clockwise. Firmly hand tighten.
4.
NEVER ll tank above the “MAX FILL LINE” on the tank.
5.
B. PRESSURIZING THE SPRAYER
To operate the pump, unlock the pump handle by turning counter-clockwise. Be careful not to loosen the
1.
pump from the tank.
To create pressure, stroke up and down.
2.
Lock the pump handle back into the pump assembly by turning clockwise.
3.
WARNING!!! To prevent ejected pump assembly and/or solution from striking and injuring you, never
stand with your face or body directly over the top of the tanks when pumping or loosening the pump.
C. SPRAYING
To start spraying, squeeze the ow control lever.
1.
To stop spraying, release the ow control lever while pulling back on the lever.
2.
To spray continuously, squeeze the ow control lever and slide forward to lock on.
3.
If your sprayer has an adjustable cone nozzle, screw it clockwise for a ne mist and counter-clockwise for a
4.
coarse stream. Flat fan nozzles are not adjustable.
DO NOT remove ow control cap while spraying.
5.
ALWAYS wear long sleeve shirts, long pants, goggles, gloves and durable shoes.
6.
2 3 5
D. RELEASING PRESSURE
To release pressure from the tank, turn the tank upside down, and then squeeze the ow control lever until
1.
all the air pressure is gone. If your sprayer has a pressure relief valve, turn yellow knob clockwise until all
air pressure is gone.
If your sprayer is clogged and the pressure will not release using the ow control, do the following:
2.
a. Place a rag over the top of the sprayer and pump.
b. While rmly pushing down on the pump handle, slowly turn counter-clockwise.
ALWAYS RELEASE pressure in sprayer before servicing.
3.
NEVER leave pressurized sprayer unattended.
4.
2
 Loading...