

Page 1
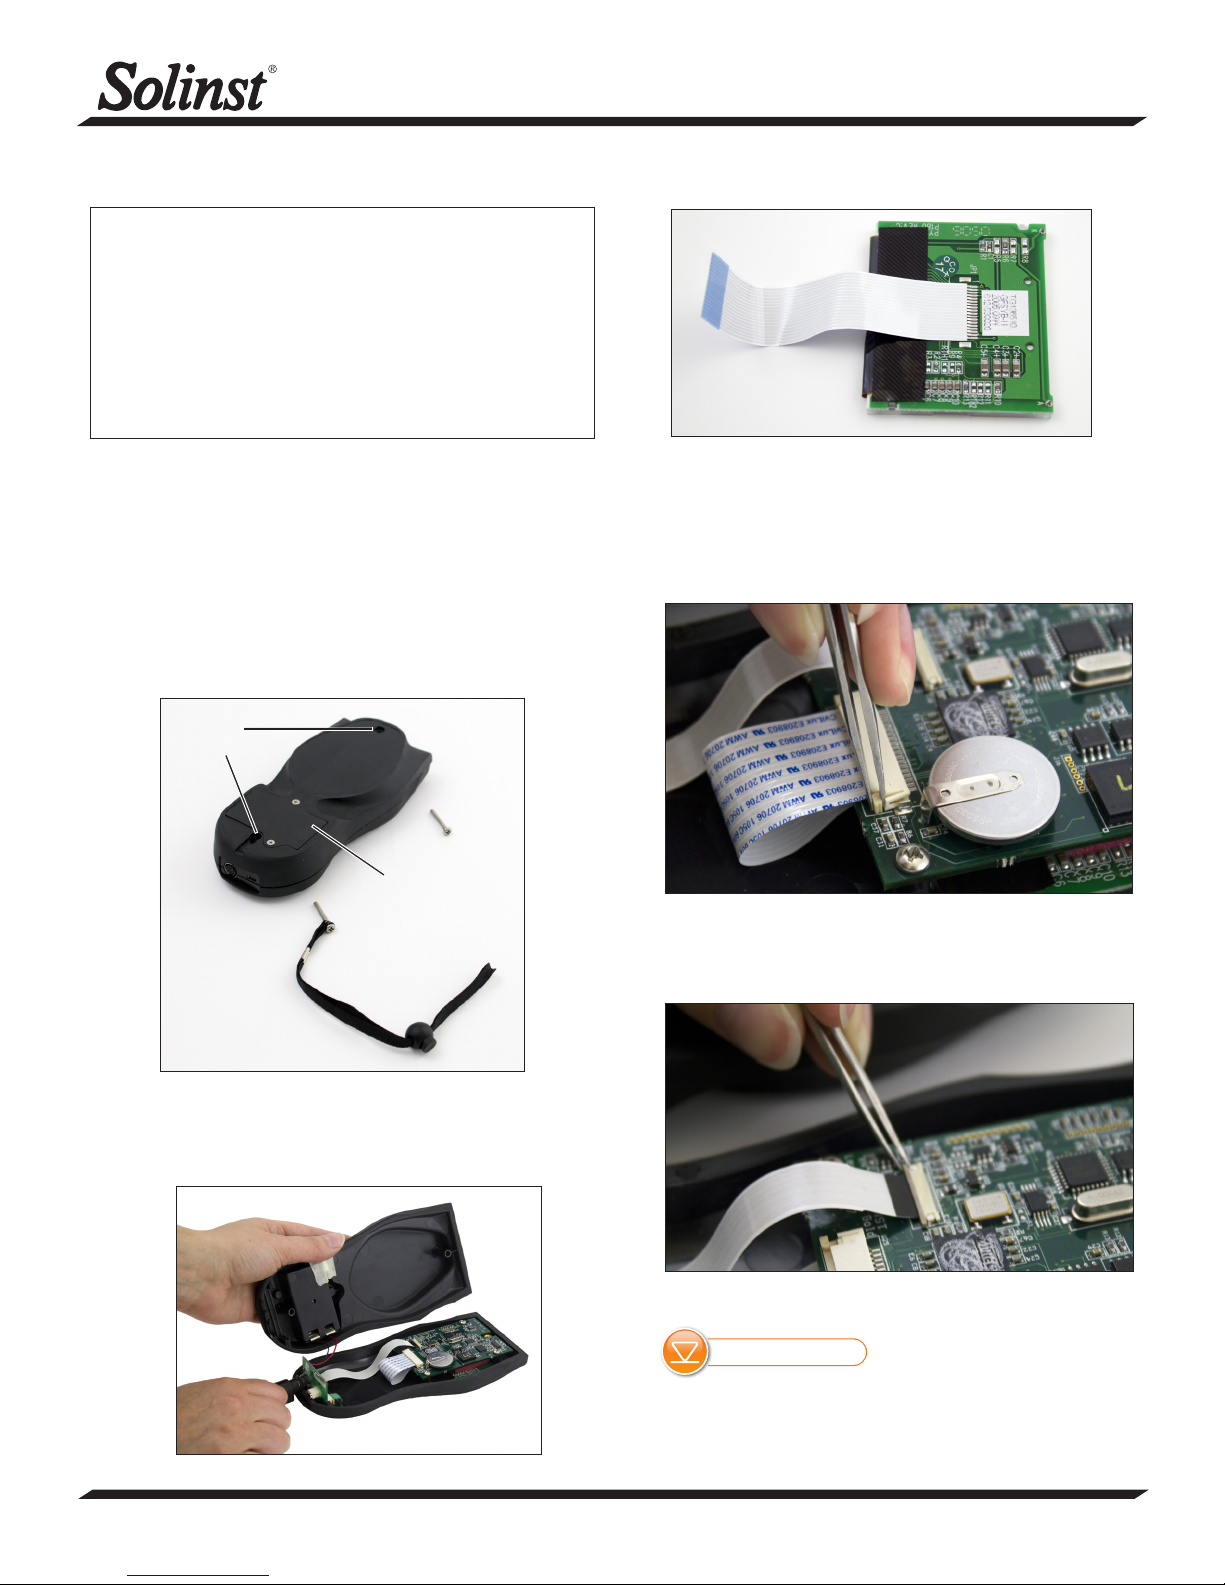
Tools and Materials Needed
1. Leveloader Gold/STS Gold Controller LCD (Spare) (#110740)
2. Screwdriver using Phillips Security Bit
3. Small Phillips Screwdriver
4. Tweezers
5. Anti-static Wrist Strap and Table-top Mat
Instructions
1. Place the Leveloader/Controller device on an anti-static
table-top mat, and ensure you are wearing an anti-static
wrist strap.
2. Use the small screwdriver to remove the battery panel on
the back of the device, and remove the battery.
3. Use the Phillips security bit to undo the two security screws
on the back of the device.
LCD Replacement Instructions
Model 3001 Leveloader Gold/9100 STS Gold
Leveloader Gold/STS Gold Controller LCD (Spare) (#110740)
5. Use the tweezers to carefully pull the tabs on either side of
the wider ribbon cable connector, towards the bottom of
the device, to release the ribbon cable from the connector.
Security
Screws
Battery
Panel
4. Connect a cable (with MD8 end) to the bottom of the
device, and hold onto the cable for stability, as you pull the
back housing from the front housing of the device.
6. Use the tweezers to carefully pull the darker section of the
narrower ribbon cable connector towards the bottom of the
device to release the ribbon cable.
(Page 1 of 2)
High Quality Groundwater and Surface Water Monitoring Instrumentation
Get Quote | More Info
Continued overleaf...
Page 2
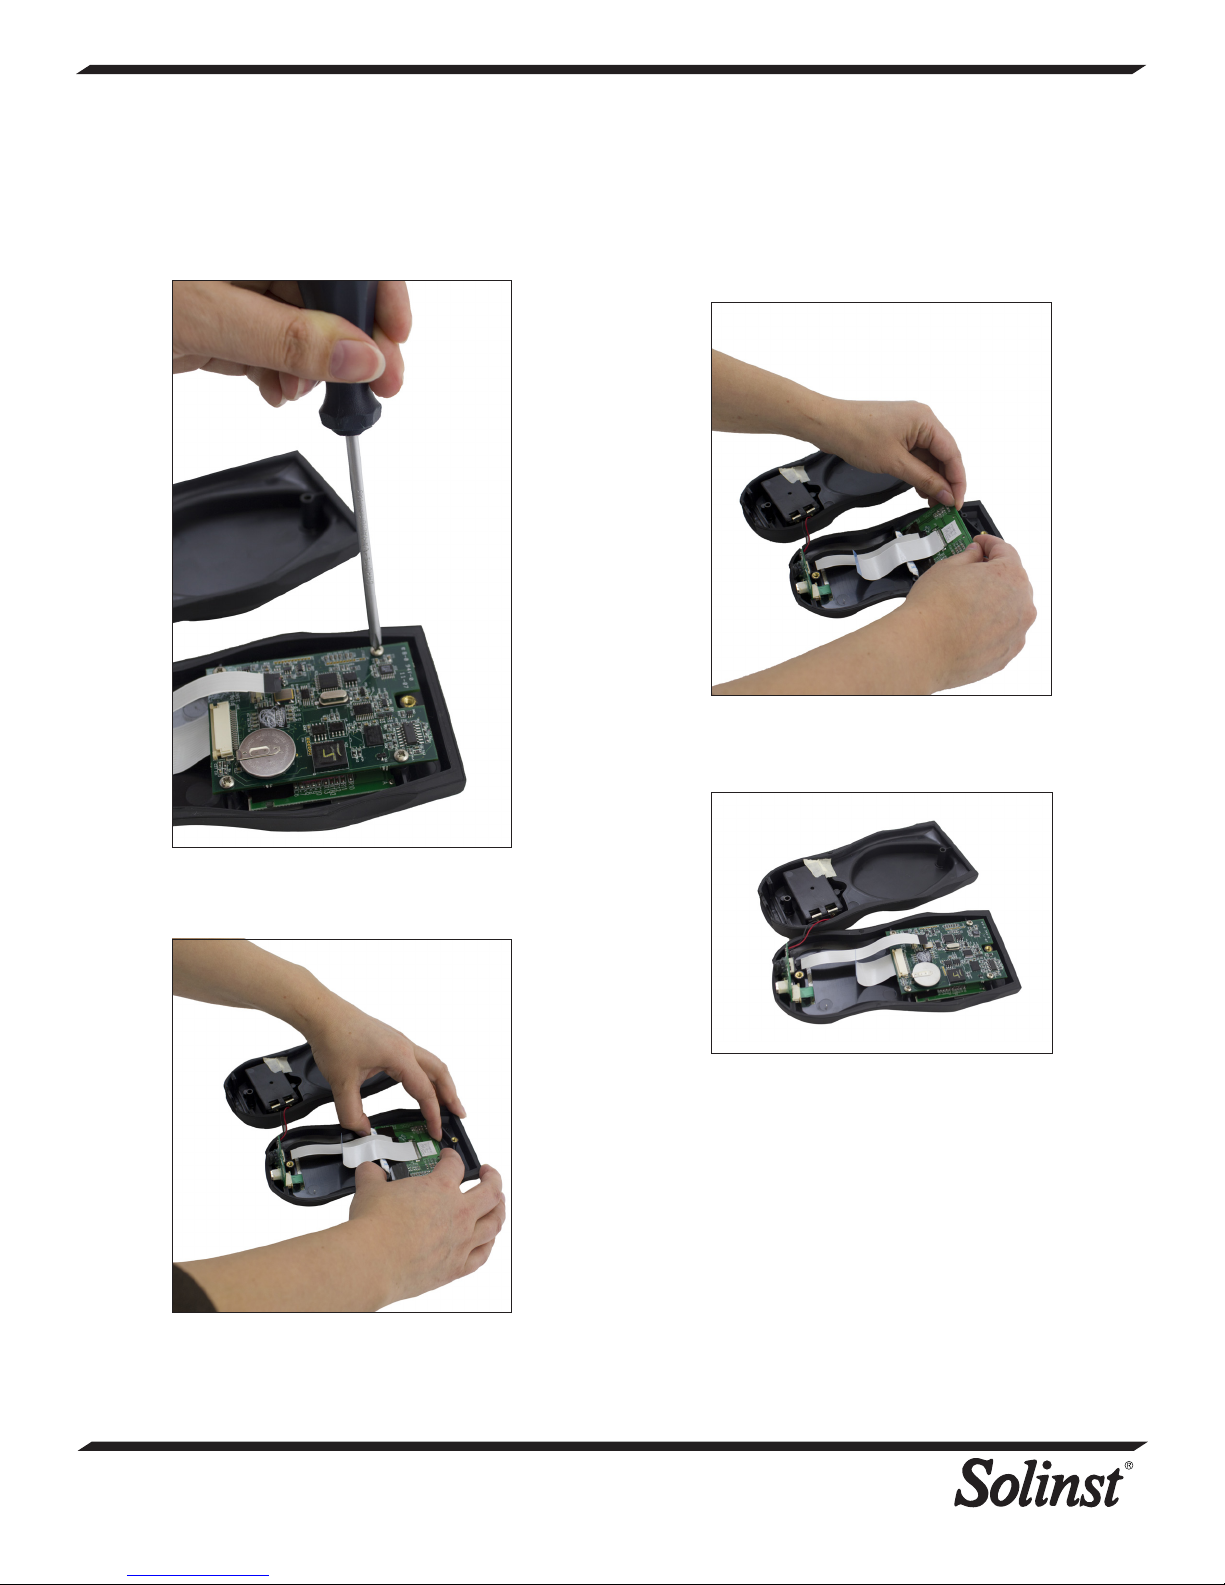
7. Use the small screwdriver to undo the four screws from the
circuit board. Remove the circuit board to access the LCD.
9. Insert the new LCD with the ribbon cable on top and
leading towards the bottom of the device. Pull downward,
then push the LCD down, flat into place.
10. Re-secure the circuit board over the new LCD using the
four screws. Ensure proper orientation.
8. Push the LCD towards the bottom of the device, then pull
up to remove.
®
Solinst is a registered trademark of Solinst Canada Ltd.
Printed in Canada
May 29, 2012
(#110671)
(Page 2 of 2)
35 Todd Road, Georgetown, Ontario Canada L7G 4R8
Web Site: www.solinst.com E-mail: [email protected]
For further information contact: Solinst Canada Ltd.
Fax: +1 (905) 873-1992; (800) 516-9081 Tel: +1 (905) 873-2255; (800) 661-2023
11. Insert the ribbon cables back into the connectors on the
circuit board and use the tweezers to lock the connectors.
12. Ensure the back housing and front housing of the Leveloader
are lined up, and carefully re-connect.
13. Use the two screws to ensure the Leveloader housing is
secured shut.
14. Replace the battery, and secure the panel with the screws.
 Loading...