

Page 1
www.solidstatelogic.com
Nucleus
Reason Profile User Guide
Nucleus. This is SSL.
Page 2

Document History
December 2011 Initial Release
Page 3
Nucleus Daw Control - Default Reason Profile
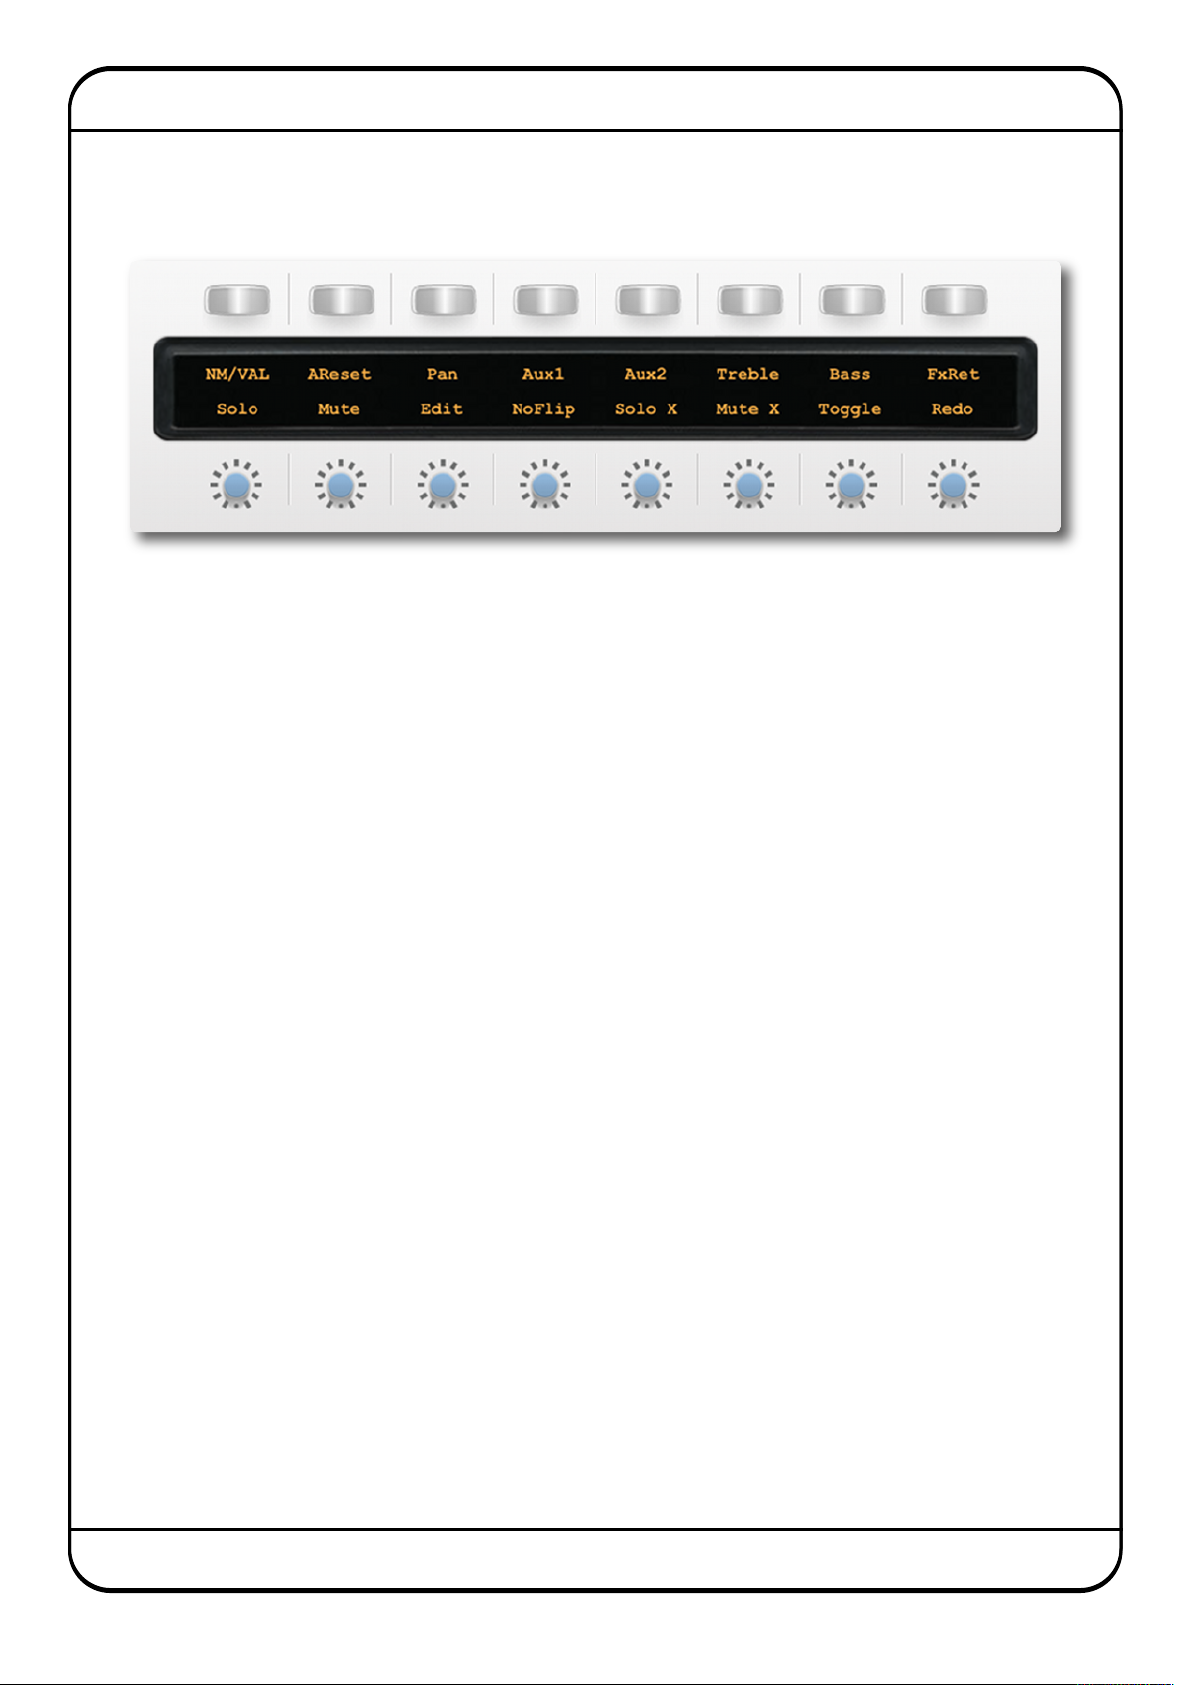
Main Soft Key Page
The Reason Soft Key set contains 14 MCU commands together with 2 USB keyboard short cuts, Edit and Tools, to switch Menu
displays.
Above you can see the assignments for the Nucleus’ Left Hand Soft keys.
NM/VAL (NAME/VALUE) flips the lower row of the channel encoder displays to show the names of the Reason parameters
controlled by the faders instead of the name of the Reason Device assigned to the faders (with the exception of
the 14:2 mixer where the channel (fader) labels are displayed in the upper row and the function of the encoder is
shown in the lower row when NM/VAL is active). The UP/DOWN cursor keys select next/previous track in the
Reason Sequencer, which automatically assign the track’s instrument/device to the faders and encoders. The
encoder parameter name is only displayed when the encoder is turned. The FLIP command interchanges the fader
and encoder parameters and displays the names if NM/VAL has been selected.
AReset activates the Reset Automation Override function.
Pan, Aux 1, Aux 2, Treble Bass and FxRet
assign the named mixer function to the channel encoders when a 14:2 Mixer is the target track device. When
Malström is the target track device, Aux 1 and Aux 2 toggle the channel controls between Oscillator A + Modulator
A and Oscillator B + Modulator B.
SOLO acts as Solo ON/OFF for the target track
MUTE acts as Mute ON/OFF for the target track
EDIT switches the Sequencer to Edit Mode on the target track
NoFlip cancels the FLIP status (operating the FLIP key a second time will not cancel the FLIP function) and is illuminated
when FLIP is not active.
SOLO-X cancels all active track Solos.
MUTE-X cancels all active track Mutes.
Toggle Rotates the Reason Rack (Front/Rear).
Redo everses a change caused by the UNDO function. It illuminates whenever there is a valid REDO option.
Nucleus Reason Profile Guide Page 1
Page 4

SING THE REASON 6 MIXER
U
Reason 6 adds a more comprehensive mixer than the standard 14:2 previously used.
To control the Reason 6 mixer with the Nucleus, the 1st thing you need to do is right click on the master section in the rack
view and select 'create track for master section'.
ith this new track selected in sequencer, the Nucleus faders now control the Reason mixer's faders, and you can bank left
W
nd right to access all available tracks.
a
The VPots can control many different things depending on what mode they are in, which is set by the buttons above the left
hand display.
Working through the options from left to right:
With the Instrument button selected, the VPots 1-8 control the FX Returns 1-8 levels and VPots 9-16 control FX Returns 1-8 Pans.
With the Plugin button selected VPots 1-5 control the master compressor, VPots 9-12 control the master inserts, and VPots
14-16 control the Control Room section.
With the EQ button selected the Vpots control the channel input gain, which if you then hit a channel select button, VPots 18 toggle to controlling the selected channel's dynamic section.
With the Pan button selected the VPots control Pan, which if you then hit a channel select button, VPots 1-8 toggle to
controlling the selected channel's filters, rotaries, width and pan.
With the Send button selected the VPots control FX1 send level, which if you then hit a channel select button, VPots 1-16
toggle to controlling the selected channel's FX sends, Rotaries, width and Pan.
With the Track button selected the VPots control FX2 send level, which if you then hit a channel select button, VPots toggle
to controlling the selected channel's Filters and EQ.
Once you get used to this control methodology, it becomes very quick and easy to control the entire Reason 6 mixer, toggling
between seeing one parameter for ever channel (e.g. Pan) to having total control of an entire mixer section for the selected
channel, (e.g. EQ).
Hopefully this makes sense, and should increase your enjoyment of Nucleus within the Reason environment even more.
Once you have mastered controlling the mixer, if you want to get really advanced it is also possible to set up 2 Nucleus layers
to both control Reason simultaneously. Then, by using surface locking, DAW layer 1 can be set to always control the Reason
mixer and DAW layer 2 can be used to control the rest of the rack, edit all your devices etc...
Nucleus’ User definition and Reason’s creative habitat make for a powerful combination.
Page 2 Nucleus Reason Profile Guide
Page 5
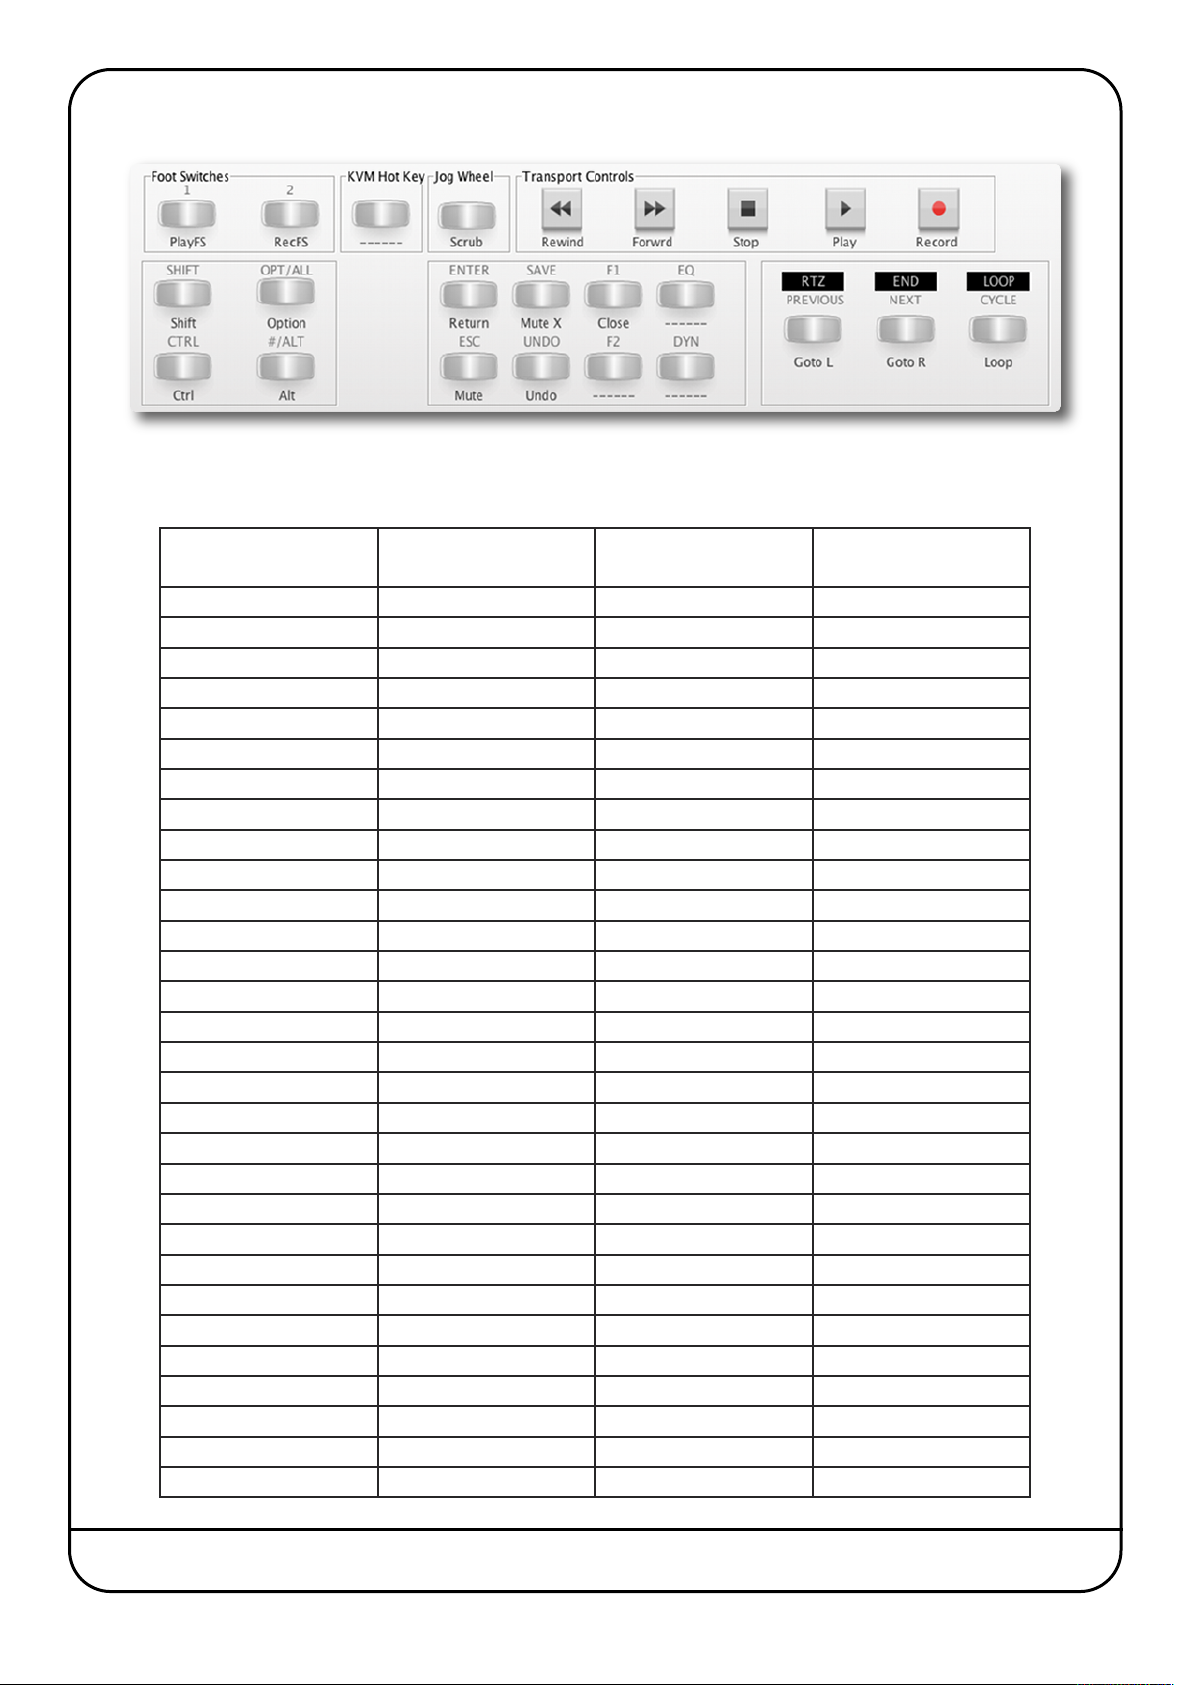
TRANSPORT/UTILITY KEYS
Below is a list of DAW commands supported by Reason:
DAW CMND SOFTKEY LABEL REASON FUNCTION NOTES
Keyboad ID KeybdID N/A Identifies Keyboard
Aux1 Aux1 Aux Send 1 on 14:2
Pan Pan Pan on 14:2
Treble Treble Treble EQ on 14:2
Aux2 Aux2 Aux Send 2 on 14:2
FX Rtn FX Ret FX Return 1-4 on 14:2
Flip Flip FLIP Intercancels with UNFLIP
No Flip NoFlip UNFLIP Intercancels with FLIP
Name/Value NM/VAL Name/Value Shows function/Value
Bass Bass Bass EQ on the 14:2
SMPTE/Beats SMPTE N/A
Busses Busses Accesses Busses
Outputs Outpts Accesses Outputs
User User
Shift Shift
Option Option
Control Ctrl
Alt Alt
Reset Automation AReset Resets Automation
Undo Undo Undo
Mute Off MuteX Turns Mutes Off
Solo Off SoloX Turns Solos Off
Redo Redo Redo
Track Mute Mute Mute Selected
Track Solo Solo Solo Selected
Goto L Goto L Locates to L
Goto R Goto R Locates to R
Cycle Cycle Cycle
Drop Drop
Replace Rplace
Nucleus Reason Profile Guide Page 3
Page 6
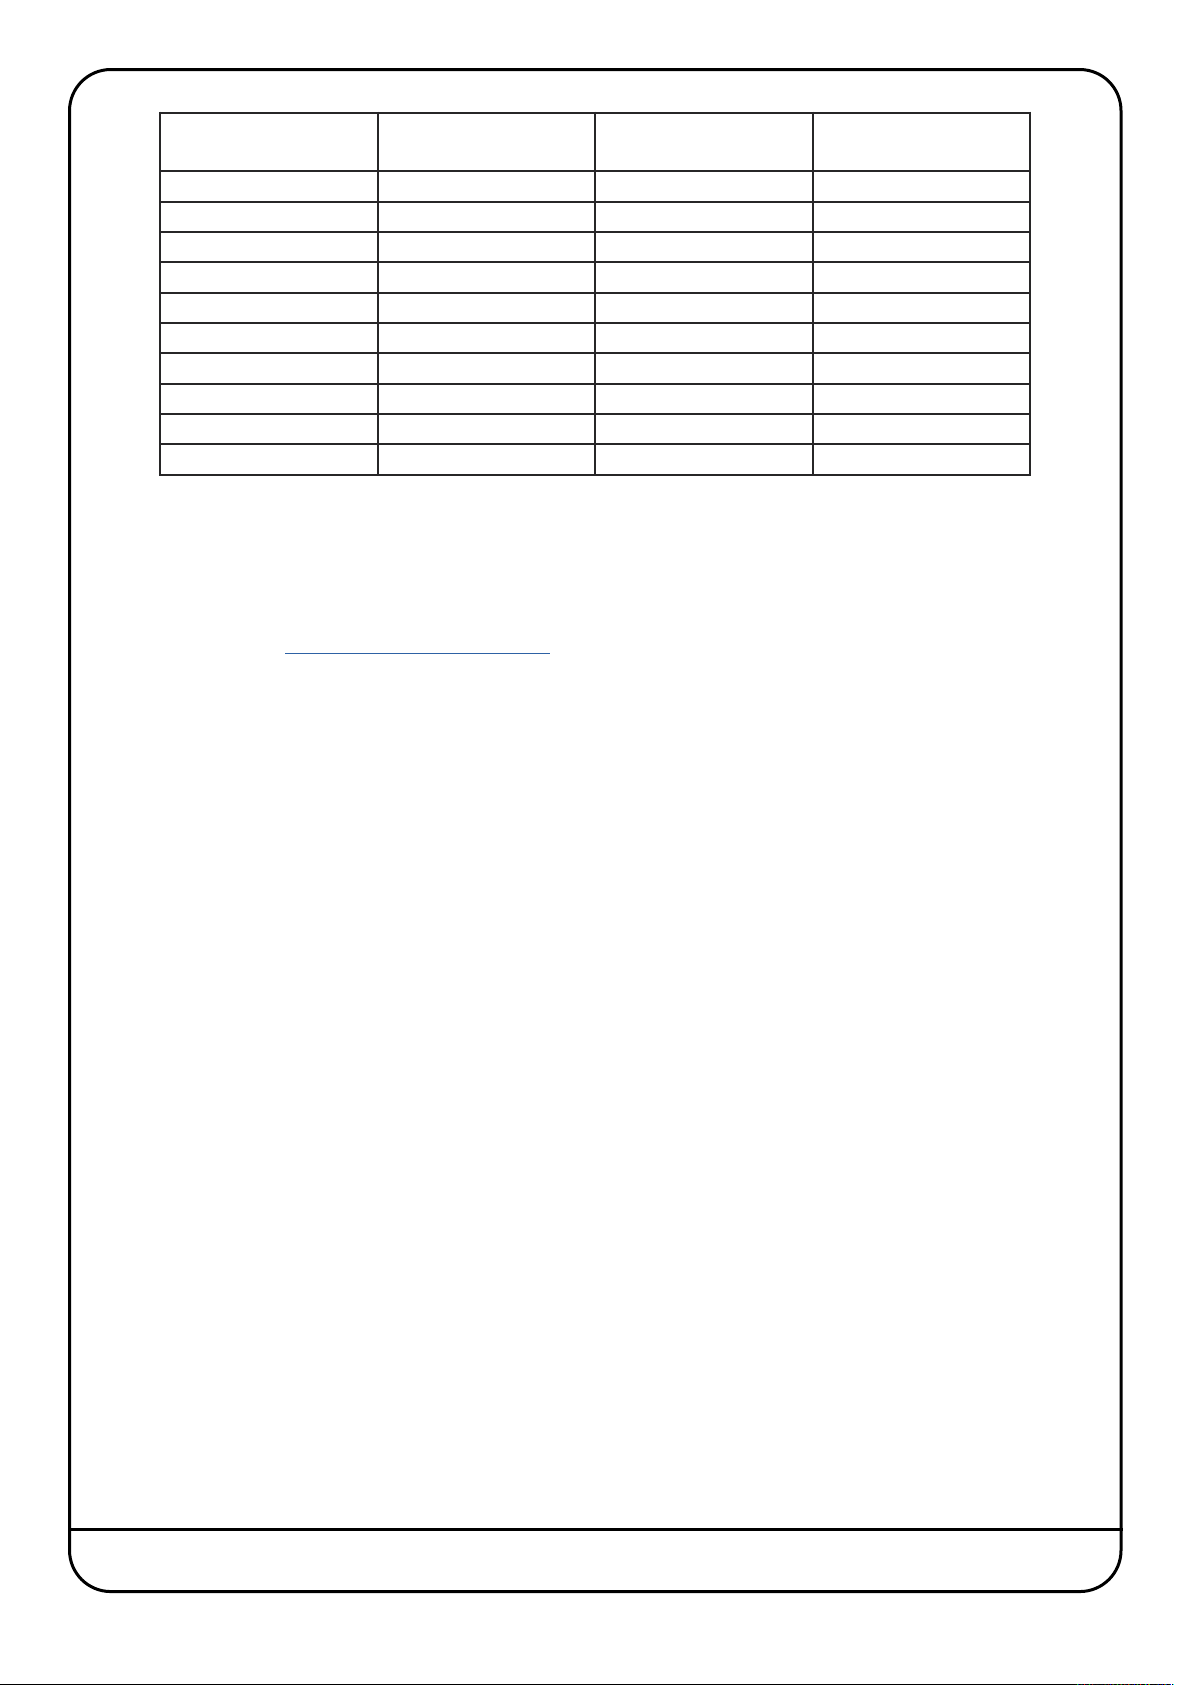
DAW CMND SOFTKEY LABEL REASON FUNCTION NOTES
Loop Loop Loop
lick
C
Forward Forwrd Transport
ewind
R
top
S
Play Play Transport
ecord
R
Play footswitch PlayFS Transport External Footswitch
Record RecFS Transport External Footswitch
Scrub Scrub
Once a command has been assigned to a Soft Key, it can be renamed via the Browser with any label you wish.
Additional useful information for controlling Reason can be found in the Reason Control Surface Details Manual which
describes MCU operation and general MIDI control, as well as in the Reason Key Commands manual available on the
Propellerhead website - http://www.propellerheads.se/
lick
C
ewind
R
top
S
ecord
R
etronome
M
ransport
T
ransport
T
ransport
T
Page 4 Nucleus Reason Profile Guide
Page 7
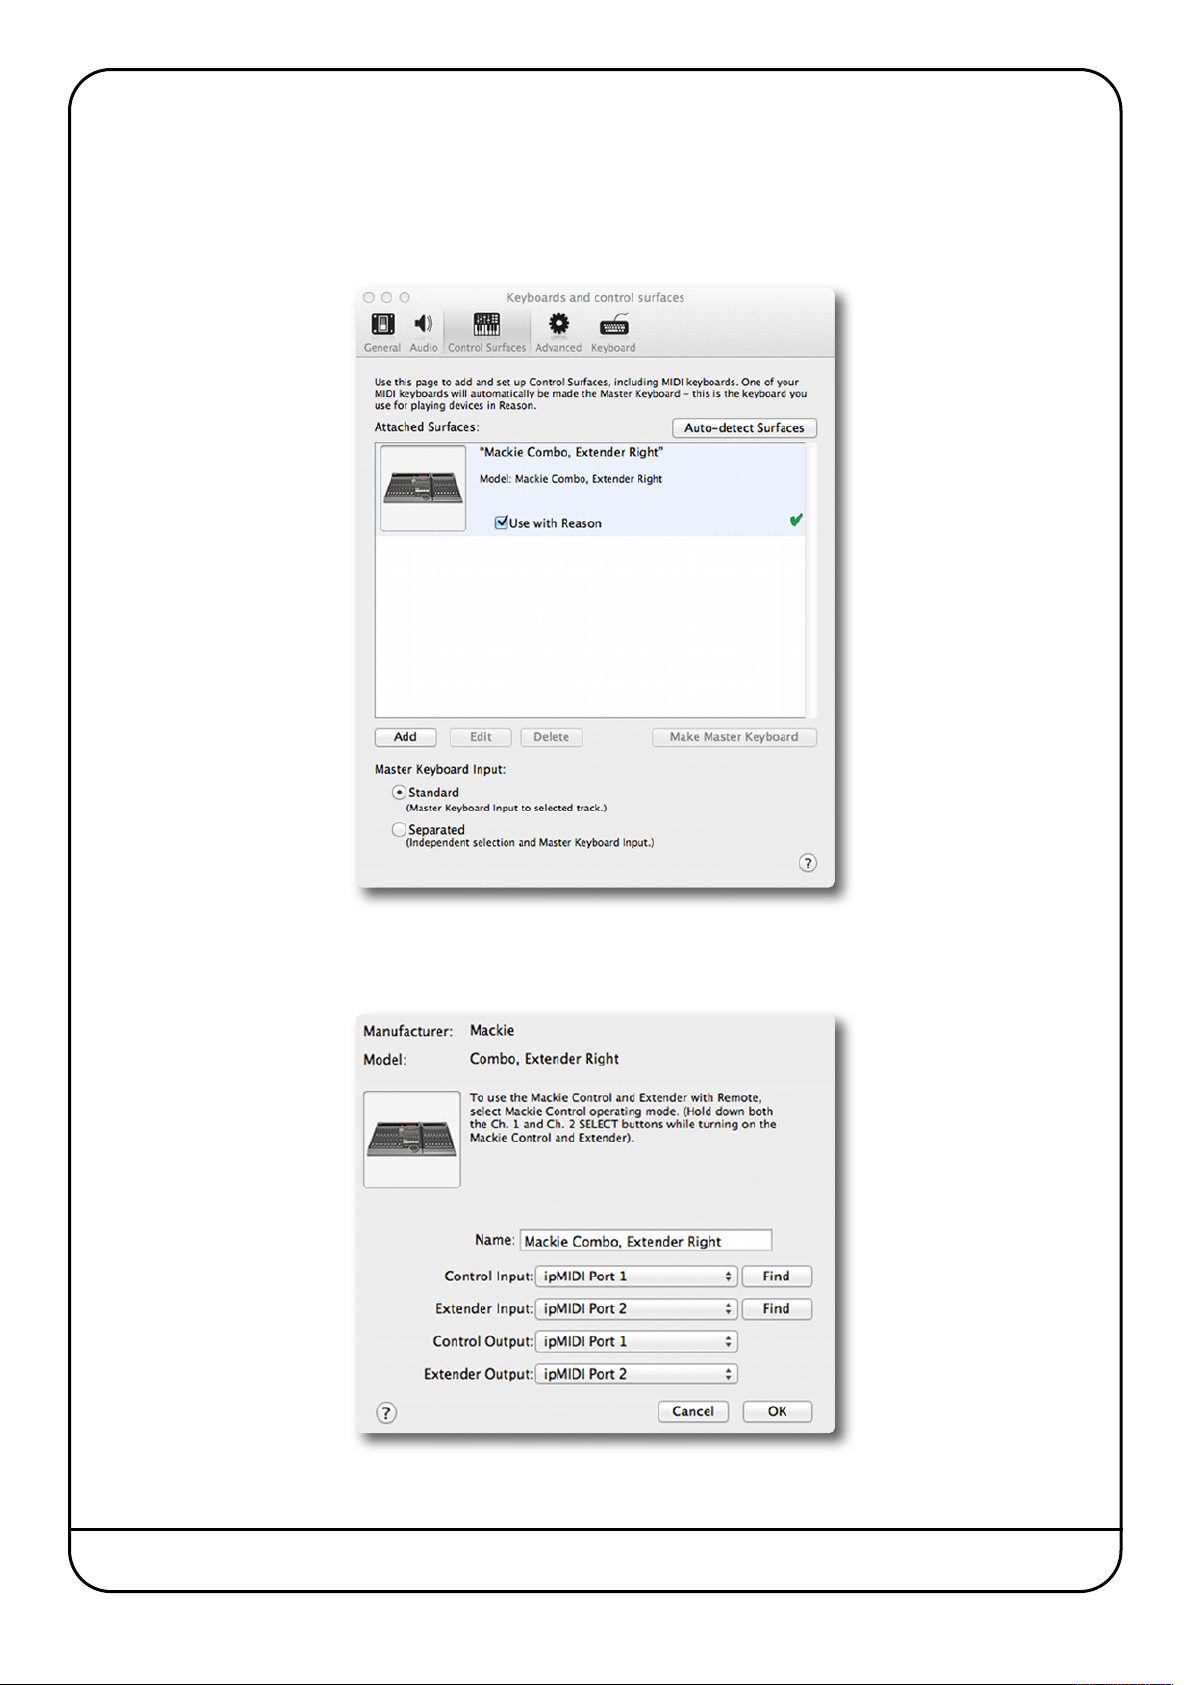
onfiguring Reason for NUCLEUS Control
C
In the Reason Preferences menu, select the Keyboard and Control Surfaces page and use the Add command to select a Mackie
Combo, Extender Right option. Enter ipMIDI Ports according to the Nucleus DAW layer that will be controlling reason. In the
example below, Reason will be controlled from Nucleus DAW Layer 1.
Click on Edit to define the iPMidi ports. In this example Reason is being controlled via the Nucleus DAW layer 1.
Click on OK to finish the Set Up.
Nucleus Reason Profile Guide Page 5
Page 8

Visit SSL at: www.solidstatelogic.com
www.solidstatelogic.com
© Solid State Logic
All Rights reserved under International and Pan-American Copyright Conventions
Nucleus is a trademark of Solid State Logic
All other product names and trademarks are the property of their respective owners and are hereby
acknowledged
No part of this publication may be reproduced in any form or by any means, whether mechanical or
electronic, without the written permission of Solid State Logic, Oxford, OX5 1RU, England
As research and development is a continual process, Solid State Logic reserves the right to change the
features and specifications described herein without notice or obligation
Solid State Logic cannot be held responsible for any loss or damage arising directly or indirectly from
any error or omission in this manual
E&OE
 Loading...