

Soleus Air KY-101 Operating Instructions Manual
Model No. SG-PAC-10E2 (KY-101)
10,000 BTU Portable Air Conditioner
Operating Instructions

Thank you for choosing a Sole
us Air Powered by Gree Portable Air Conditioner. This owner’s manual will provide you with valuable information necessary for the proper care and maintenance of your
new product. Please take a few moments to thoroughly read the instructions and familiarize yourself
with all the operational aspects of your new Portable Air Conditioner.
For your own records, please attach a copy of your sales receipt to this manual. Also, write the store
name/location, date purchased, and serial number below:
Store Name: ____________________________________________________
Location: ______________________________________________________
Date Purchased: _________________________________________________
Serial Number (located on back of unit): ______________________________
IMPORTANT INSTRUCTIONS
Before installing and using your portable air conditioner, please read this owner’s man
manual in a safe place for future reference.
1) Always place the unit on a level surface.
2) Never use or store gasoline or other flammable vapor or liquid near this unit unless instructed by this
manual.
3) Maintain at least 10 inches (25 cm) clearance space around this unit. Do not block or cover air inlet or
outlet grilles.
4) The unit must be connected to a correctly grounded power supply.
5) Do not start or stop the unit by inserting or pulling out the power plug.
6) Do not use an adapter plug or extension cord.
ual carefully. Store this
7) Do not use the unit in the immediate surroundings of a bath, a shower or a swimming pool.
8) Do not insert anything into the air outlet. Do not obstruct air inlet or outlet grills unless instructed by this
manual.
9) Do not let children play near this unit.
10) Always inspect the cord for signs of damage before use. If the power cord is damaged, it must be replaced
by the manufacturer or a qualified service technician.
11) When cleaning the unit, always turn the unit off and unplug the power cord.
12) Avoid using heating appliance near the air conditioner.
2
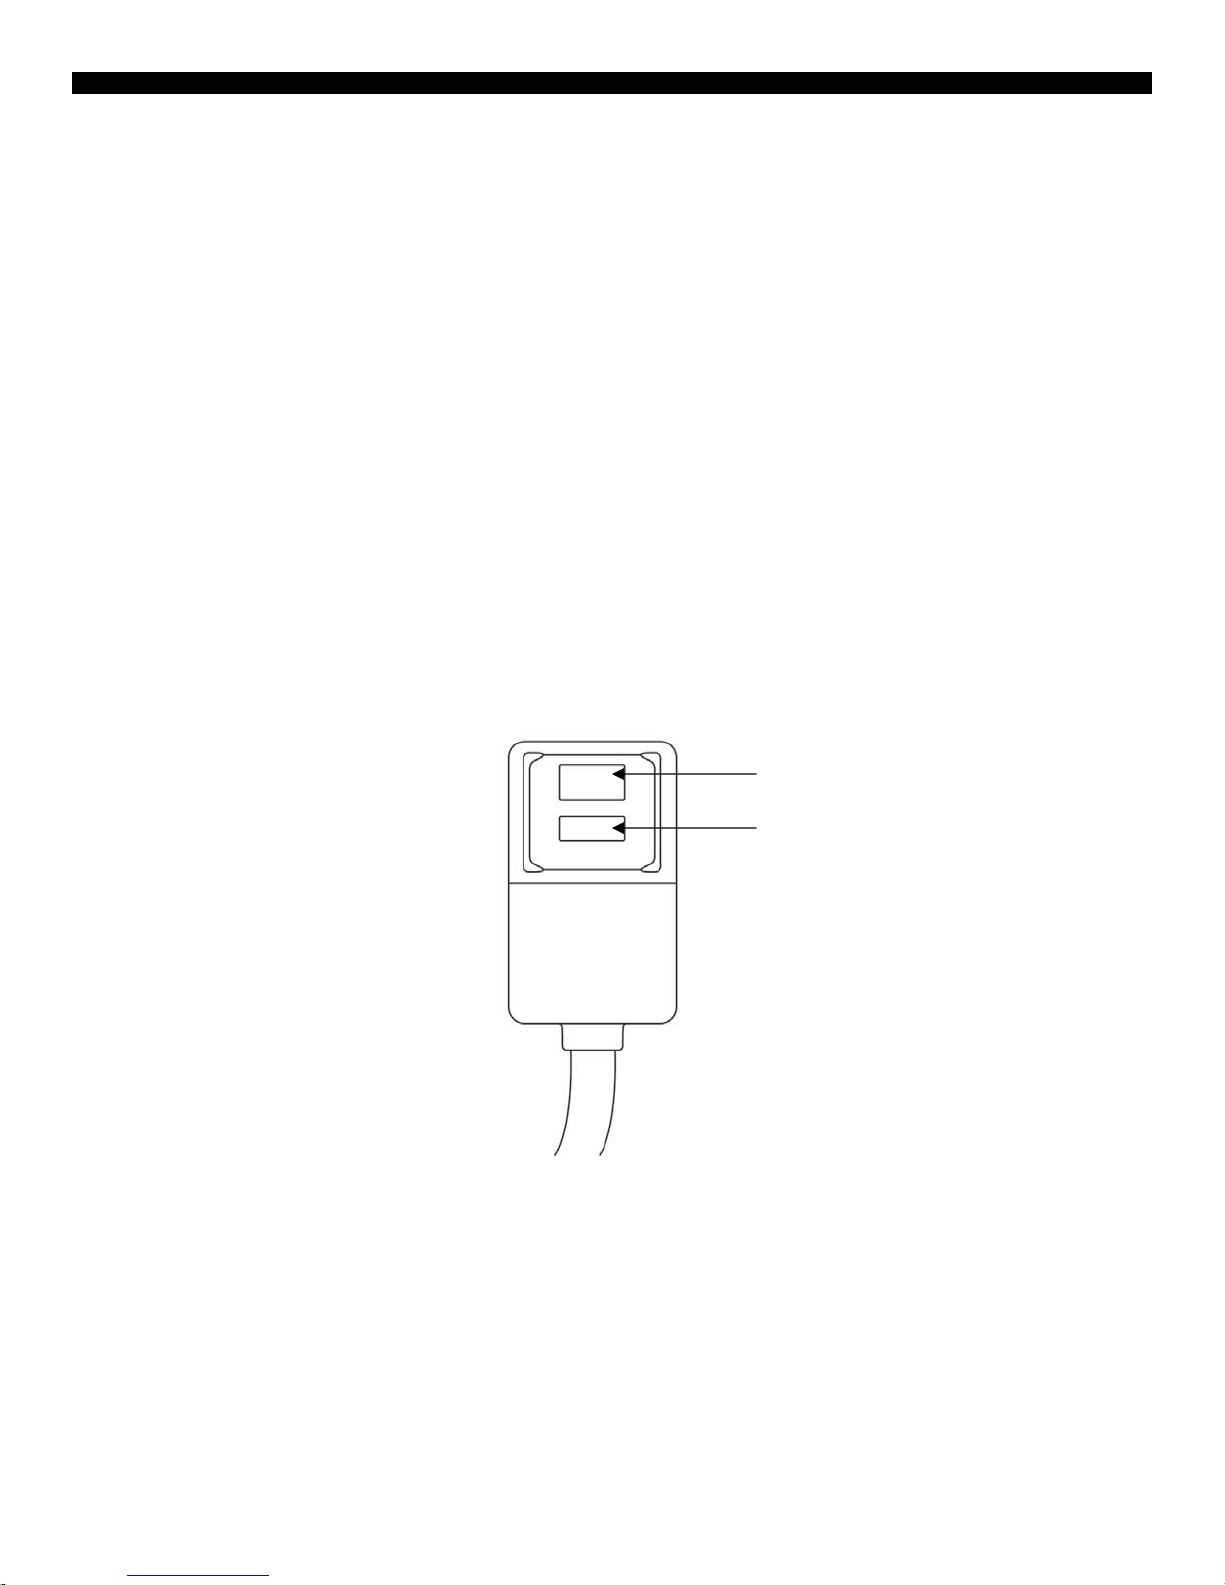
LCDI POWER CORD AND PLUG
This air conditioner is equipped with an LCDI (Leakage Current Detection and Interruption) power cord and
plug as required by US National Electric Code 440.65. This cord consists of a length of shielded flexible cord
with no termination on the load side and a LCDI attachment plug on the line side.
The LCDI power cord and plug will remove the supply source via electrical disconnect (circuit trip) if the
nominal current leakage between the cord shield and either load conductor exceeds a predetermined value.
The cord will remain de-energized until the devise has been manually reset. This is intended to reduce the risk
of a fire in the power cord or combustible materials nearby. The cord shields are not grounded and they must
be considered a shock hazards if exposed. The cord shield must not be connected to ground or to any exposed
metal.
The test and reset buttons on the LCDI Plug are used to check if the plug is functioning properly. To test:
1. Plug power cord into wall outlet
2. Press TEST Button, circuit should trip, cutting power to the air conditioner
3. Press RESET button for use
If a test is performed and the indicator light remains ON, current leakage has been detected. Do not use the air
conditioner or attempt to reset the LCDI Plug. Contact Soleus Air Powered by Gree Customer Service for troubleshooting recommendations.
WARNING:
1. DO NOT press the TEST button while the air conditioner is operating.
2. The TEST and RESET buttons should not be used as ĀONāand ĀOFFāswitches.
3. The cord and plug are not intended to offer protection to externally connected loads or supply circuits.
4. The cord and plug are intended for indoor use only.
RESET
TEST
NOTE: Your units power cord and plug may differ from the one shown.
3
INCLUDE
INCLUDE
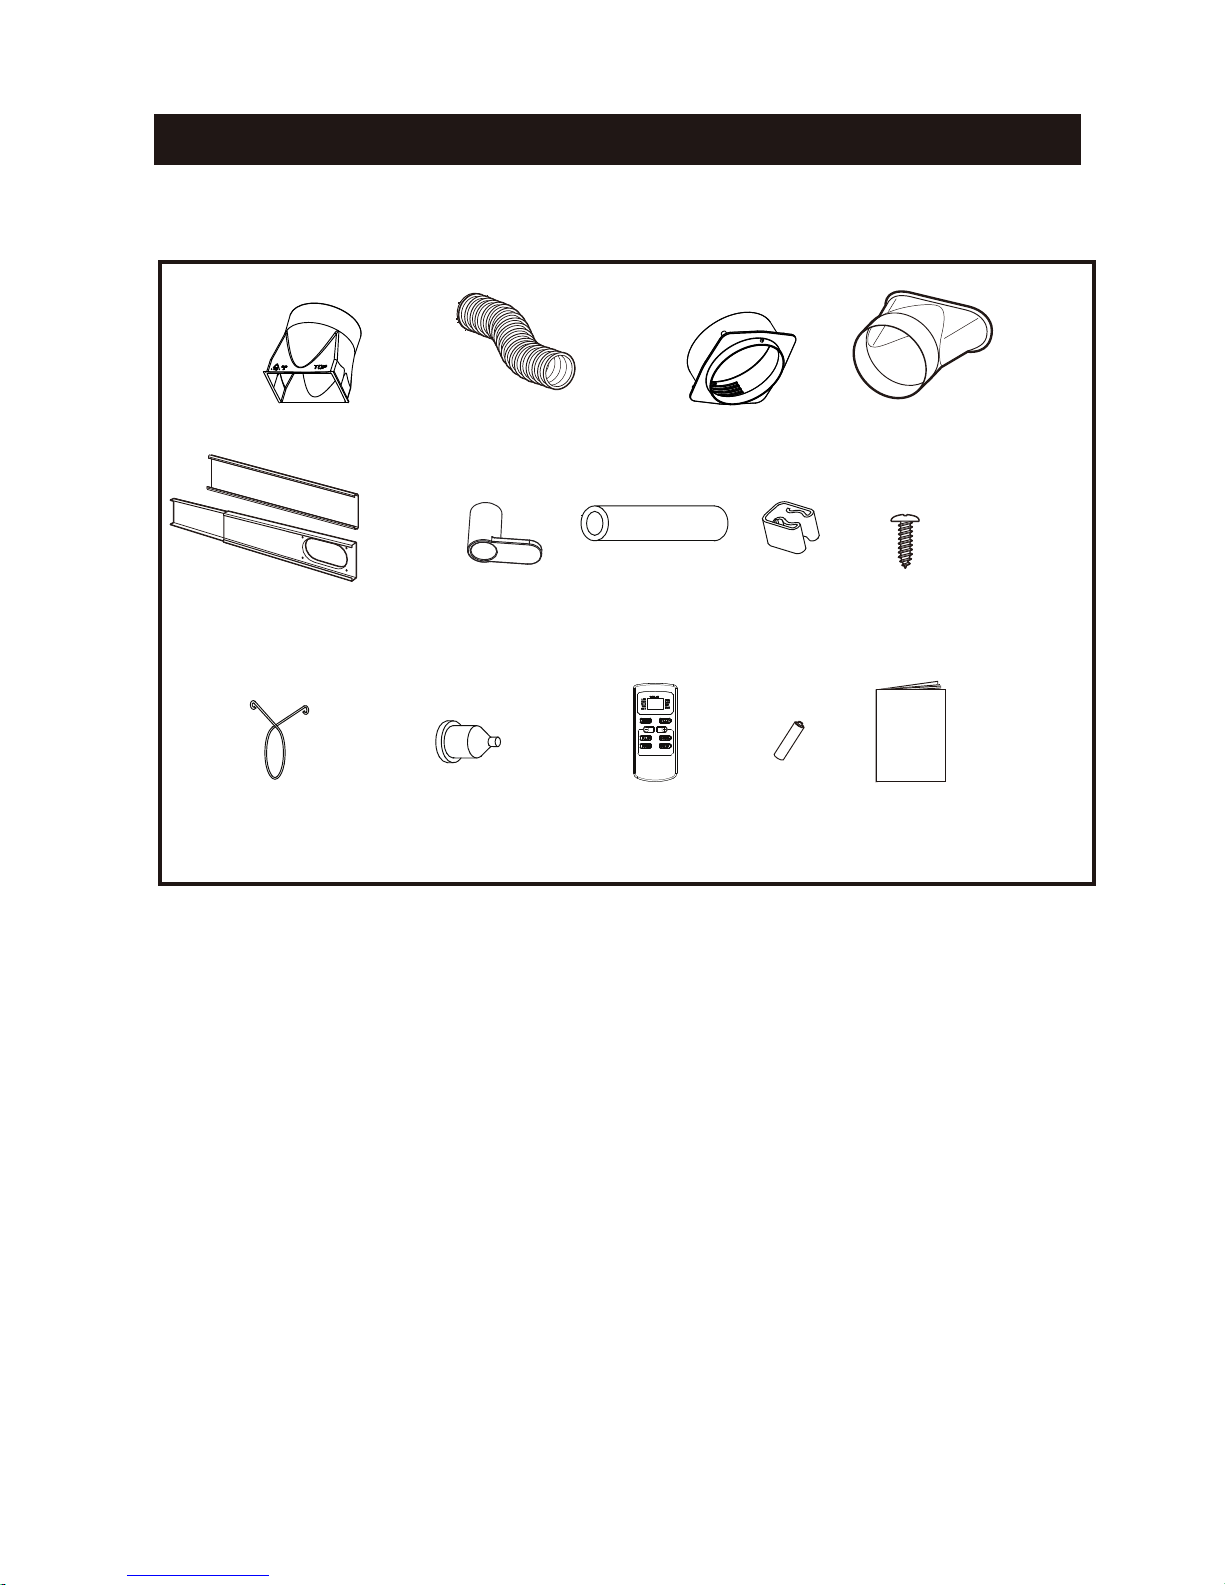
PAR
TS INCLUDED
Window Exhaust Adapter A
Adjustable Window
Slider
(3)
Ho
se clip(2) Rubber plug
SUGGESTED TOOLS FOR WINDOW P
1. Screwdriver(medium size Phillips) 2.
4. Saw (In the event that the window panel needs to be cut down in size because the window is too narrow for
direct installation.)
Exhaust Hose
Power cord
ho
ok( 2 )
ANEL
Tape measure or ruler 3. Knife or scissors
Window Exhaust
Drain hose Hose Clamp
Remote control
INSTALLA
TION
Adapter
Battery
(AAA.1.5V)
B
2 )
(
Window
Exhaust
crew (7 )
S
Manual
Adapter C
4
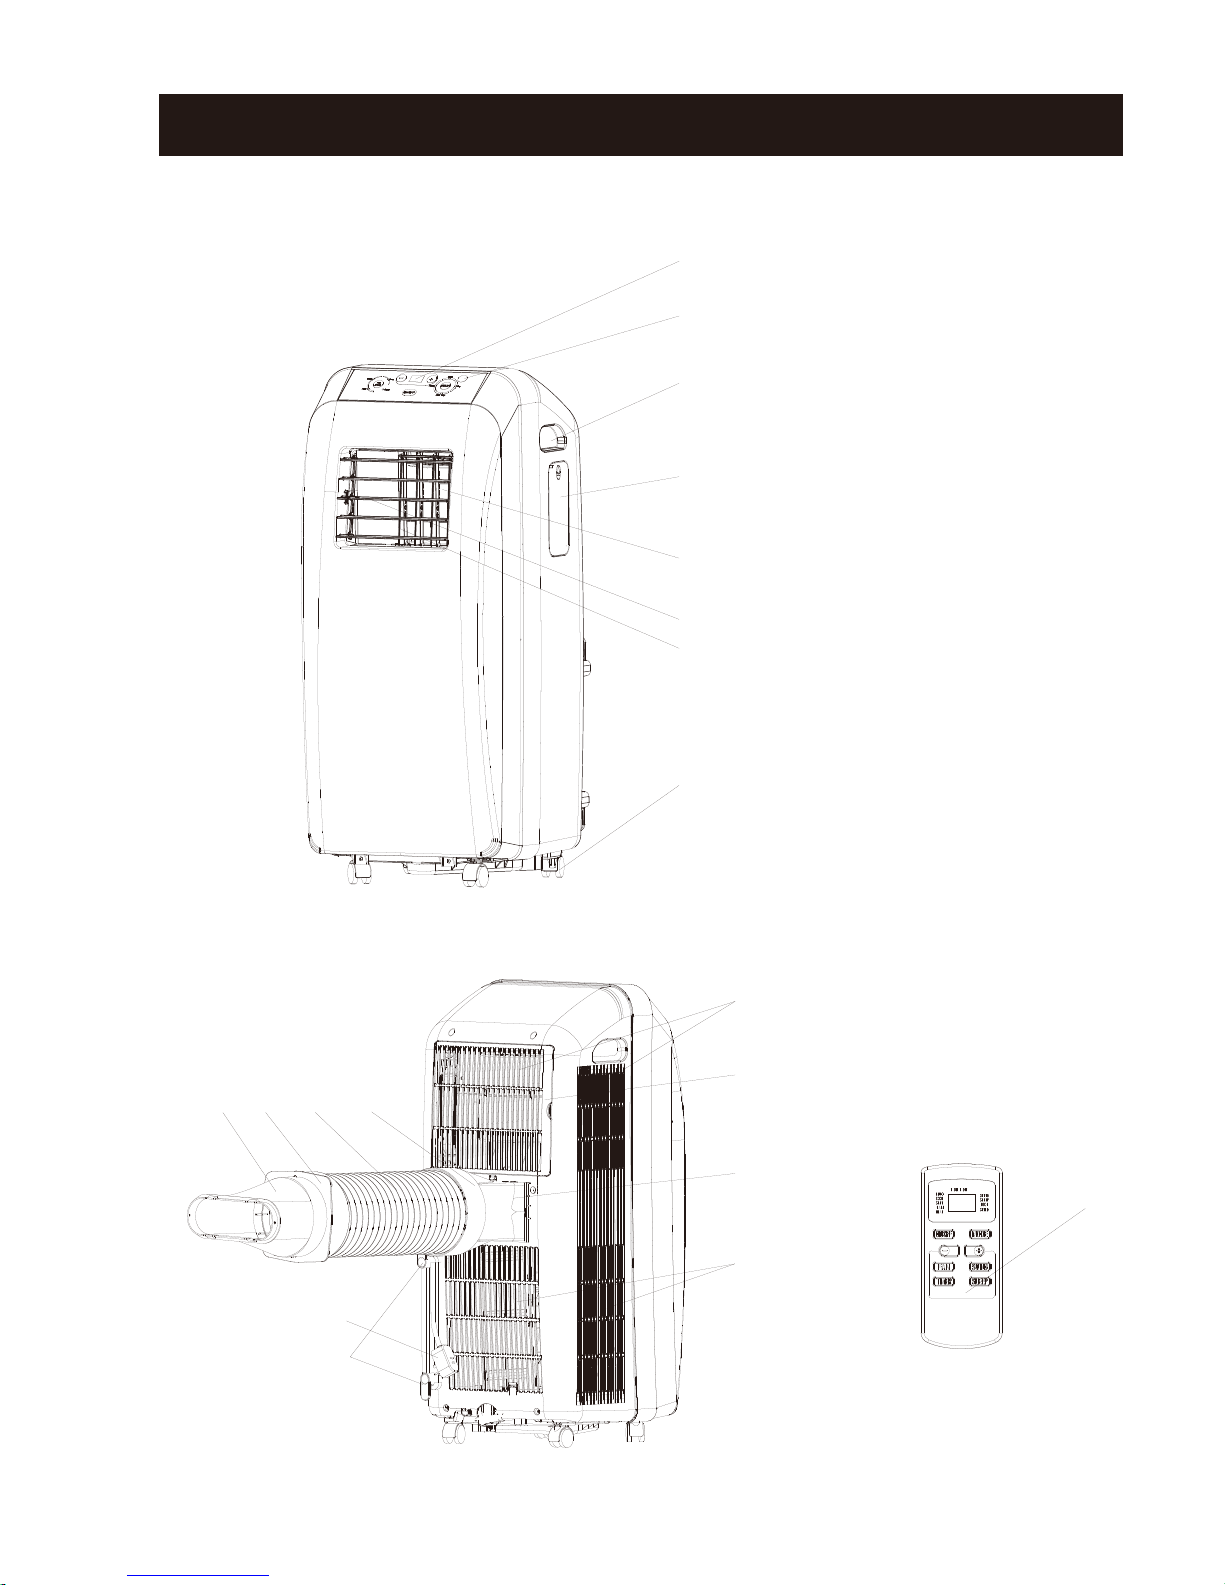
1, Control panel and display light
2, Remote control signal receiver window
3, Handle
4, Remote controller box
5,
Air outlet
6, Vertical louvers
7, Horizontal louvers
8, Wheel
9, Air inlet
10, Grille
11, Air outlet
12,
Air inlet
13,Power cord hook
14, Power cord
15, Window exhaust adapter A
16, Exhaust hose
17, Window exhaust adapter
18, Window exhaust adapter
19, Remote control
STRUCTURE
Front
Rear
19
1
2
3
4
5
6
7
8
9
10
11
12
13
14
15
16
17
18
B
C
5
PA
CKAGE CONTENTS
Portable Air Conditioner
Exhaust Hose (1)
Window Exhaust Adapter A (1)
Window Exhaust Adapter B (1)
Window Exhaust Adapter C (1)
Remote Control & AAA Batteries (2 batteries)
Window Kit - 3 Sliding Panels (1 single hose panel, 2 extension panels)
Drain Hose Assembly (drain pipe, hose clamp, hose clip, rubber plug, & screw)
Power cord hooks (2hooks & screws)
Owner’s Manual
SP
ECIFICATIONS
The cooling ca
x
Noise level is measured at a distance of 3.28 ft away from
x
pacity is measured at an ambient temperature of DB 95 °F, WB 83 °F.
the front of the unit, when the unit is in cooling mode.
x
Power consumption is m
These specifications are for reference only. For actual
x
If the environment temperature is higher
x
easured when the fan runs at the highest speed setting.
than the max operating temperature or lower than the minimum operating
temperature, the air conditioner may not work properly.
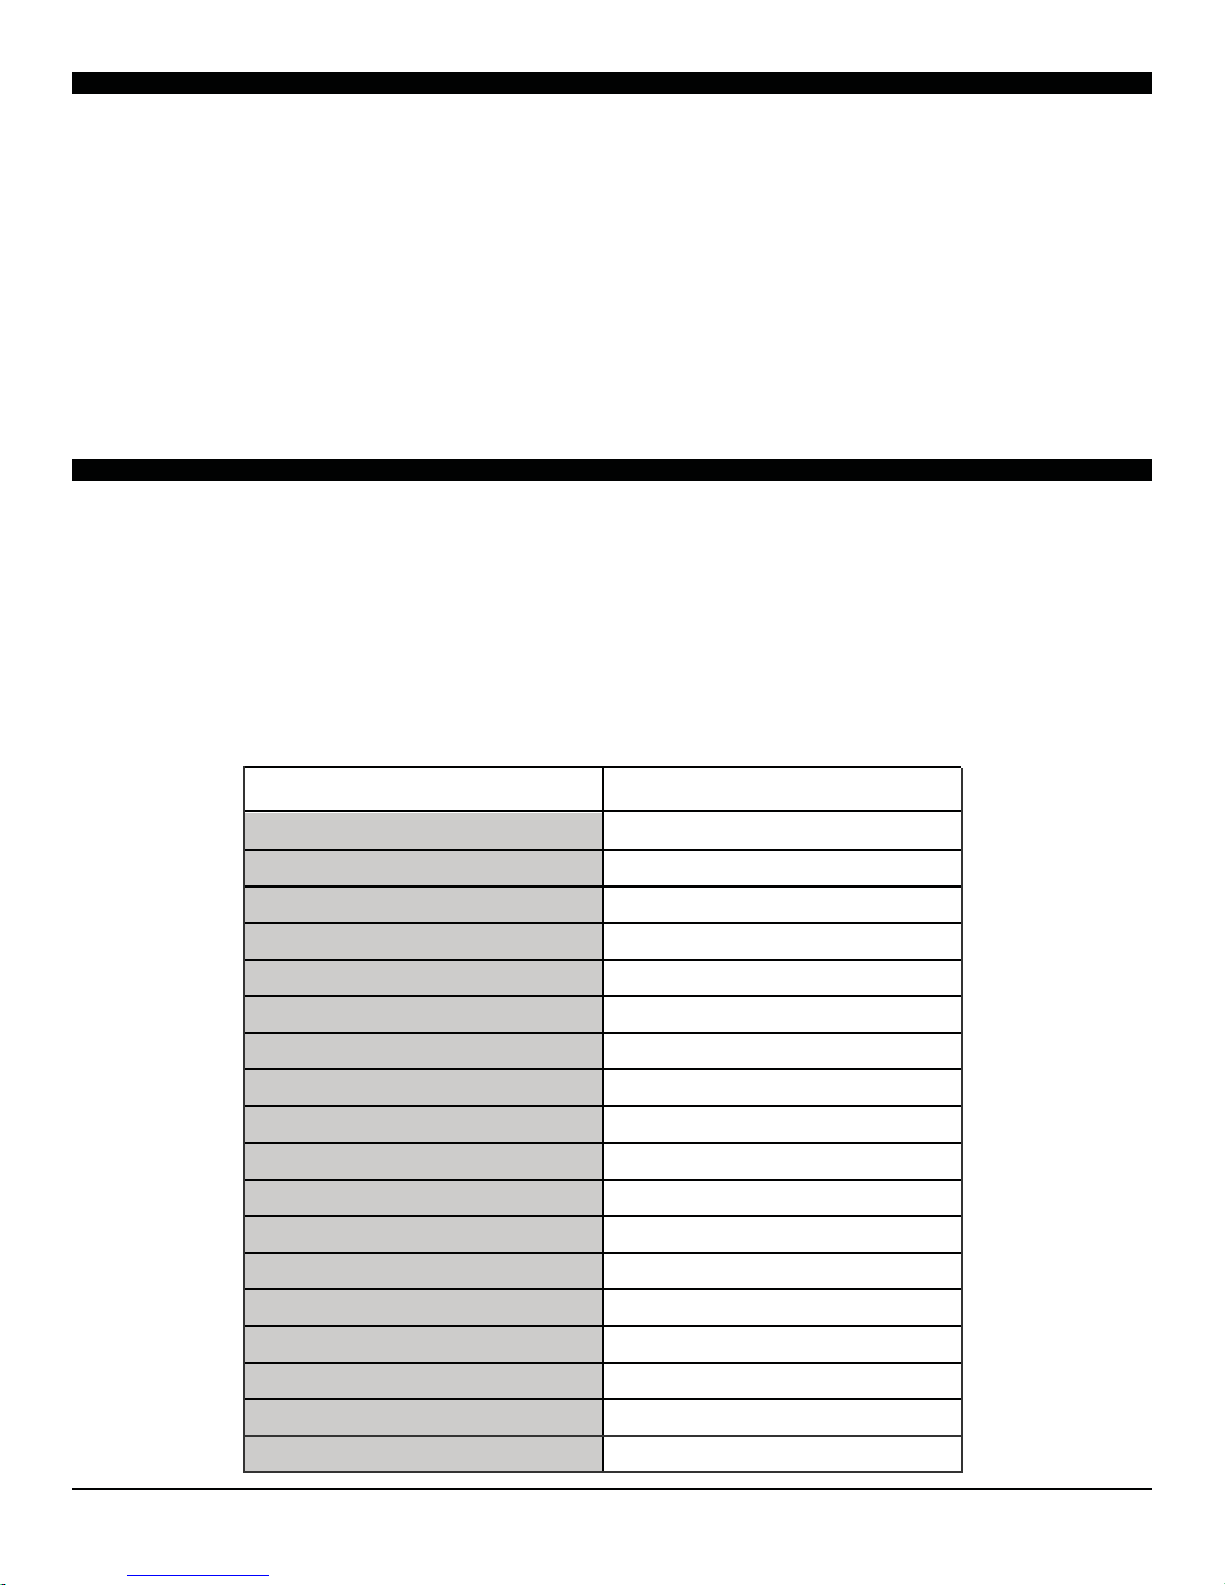
Model Number
Reference Number
Power Supply (Ph/V/Hz) 1/115/60Hz
Dehumidifying Capacity (Pints/Day) 60
Rated
Cooling Capacity (B
Rated Heating Capacity (B
Cooling Power Input (Watts) 1120
Heating Power Input (Watts) /
Rated Curre
Rated Curre
EER/C.O.P /
Noise Level d
nt Cooling (Amperage) 9.9
nt Heating (Amperage) /
B(A) <=53
SG-PAC-10E2
TU/h) 10
TU/h) /
data, please refer to the rating label on the back of the unit.
KY-101
,000
Air Flow
Design Pressure (PSIG) (H/L) /
Dimensions (W” x
Package Dim
Net/Gross Weight (Lbs) 53/66
Refrigerant Type R-410A
Refrigerant Charge (Oz) 16.9
ensions (W” x D” x H”)
CFM
176
D” x H”) 13.375X15.5X30.75
21.75X15.75X32
6
 Loading...