

Page 1
Undermount Stainless Steel Sink
Undermount Stainless Steel Sink
Installation Instructions
FOR MODELS: SS604016, SS4060 RV16, SS604018, SS4060 RV18, SS505016, SS505018, SS703016, SS3070 RV16, SS703018, SS3070 RV18, SSSB301816, SSSB301818, SSSDB18,
SSSBL18, SSSBR18, SSSBMB18, SSSBSB18, SSRASB321916, SSRA604016, SS RA505016, SSRASB231916, SS RASB152016, SSSLB18, SSLD505018, SSSBE18
SS50516, SS505018 SSAPLG16
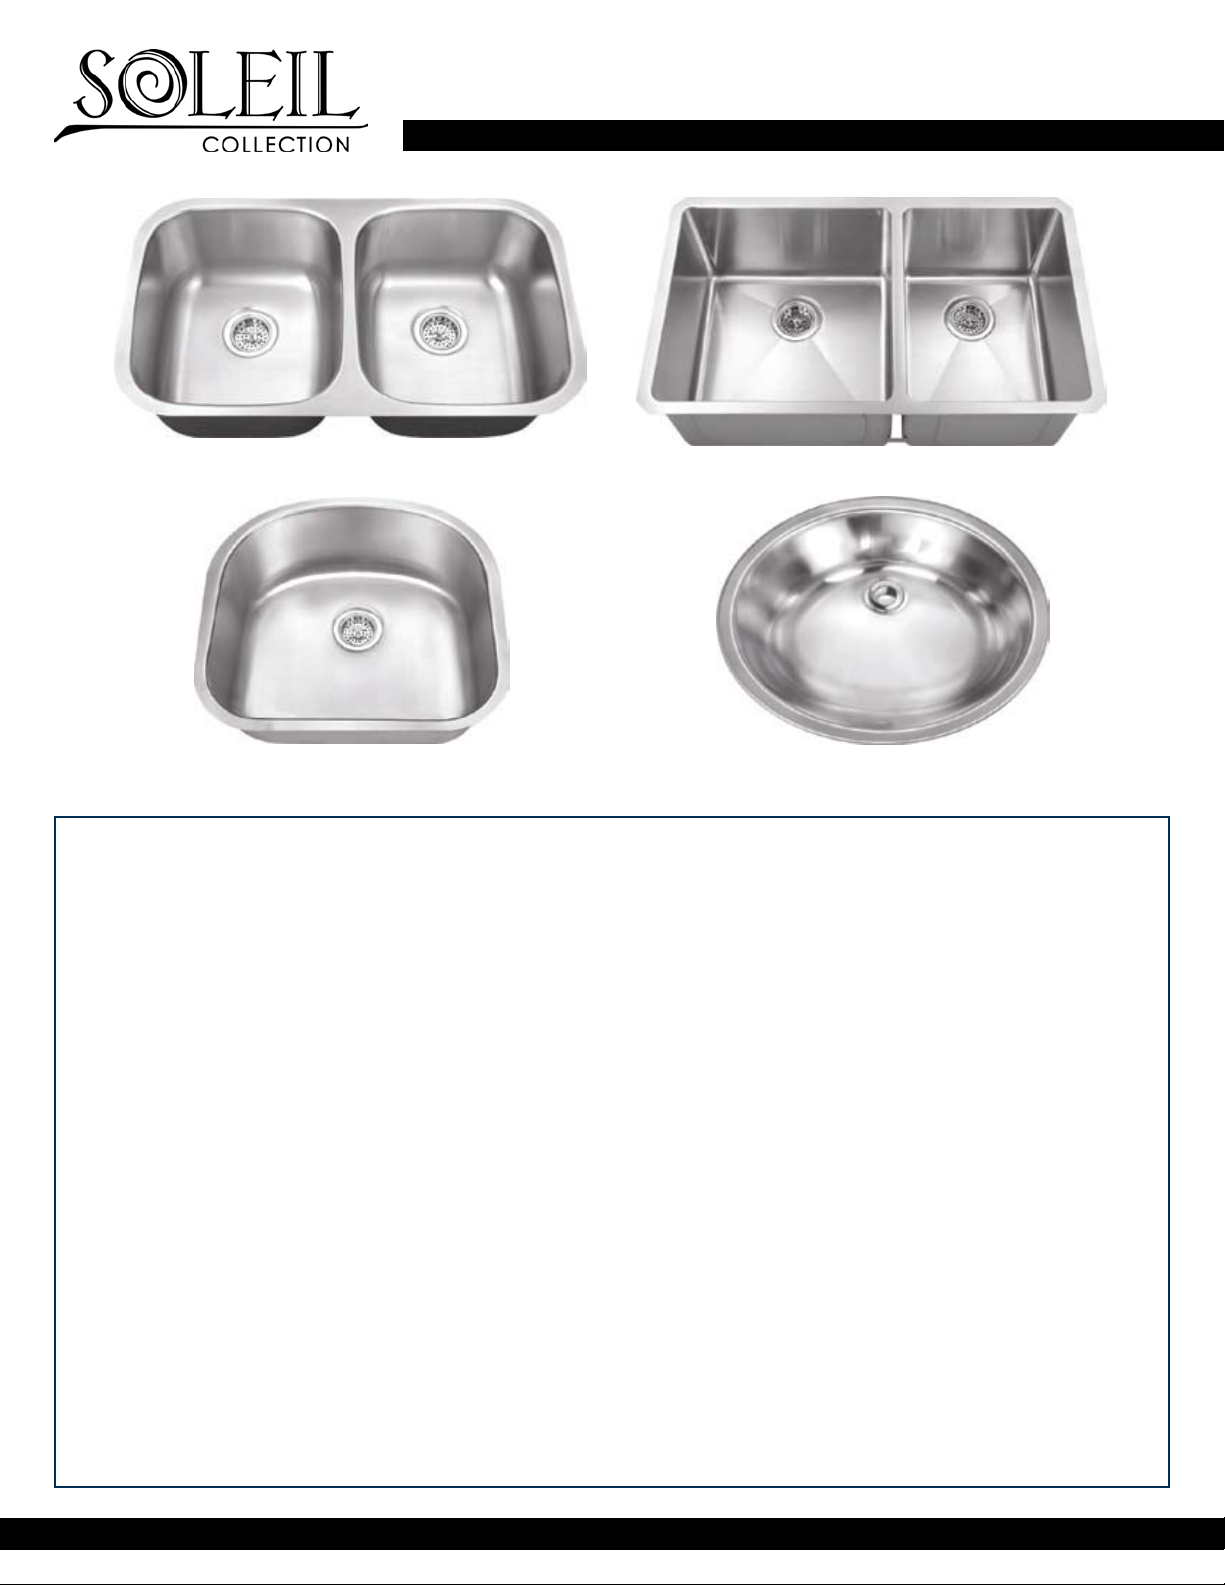
50/50 Double Bowl Kitchen Sink 60/40 Double Bowl Kitchen Sink
Installation Instructions
D-Shaped Single Bowl Kitchen Sink Single Bowl Vanity Sink
Before You Start
• Soleil recommends that all undermount sinks be installed by an experienced, professional installer.
• IMPORTANT: The enclosed cutout template will create a countertop opening with a minimal (1/8” or less) reveal. It is
recommended that you discuss with your installer and agree that the nished appearance is the desired effect. Soleil is not
responsible for improper sink or countertop installations.
• IMPORTANT: The cabinet must be installed, secured, plumb, and level. Failure of this step can lead to product damage.
• Soleil undermount sinks should only be fastened to a solid surface countertop (i.e. granite, Corian® or Silestone®).
• Soleil is not responsible for sink or countertop if damaged during installation. Be sure to inspect the sink for damage prior to
beginning installation.
• Metal edges may be sharp – use caution when handling.
• Follow all local plumbing and building codes.
Recommended Tools & Materials (Not Included)
Tape Measure
Safety Glasses
Painter’s Tape
Level
Framing Square
Pencil (not permanent marker)
Shims or Cabinet Fillers
Denatured Alcohol
Clamps
Construction Adhesive
Silicone Sealant
Screws (recommended by countertop manufacturer)
PAGE 1
Contact Soleil Sinks at (687) 445-4638 or visit www.soleilsinks.com. Copyright ©2015, Soleil Sink Company Inc. All rights reserved.
Page 2
Undermount Stainless Steel Sink
Undermount Stainless Steel Sink
Installation Instructions
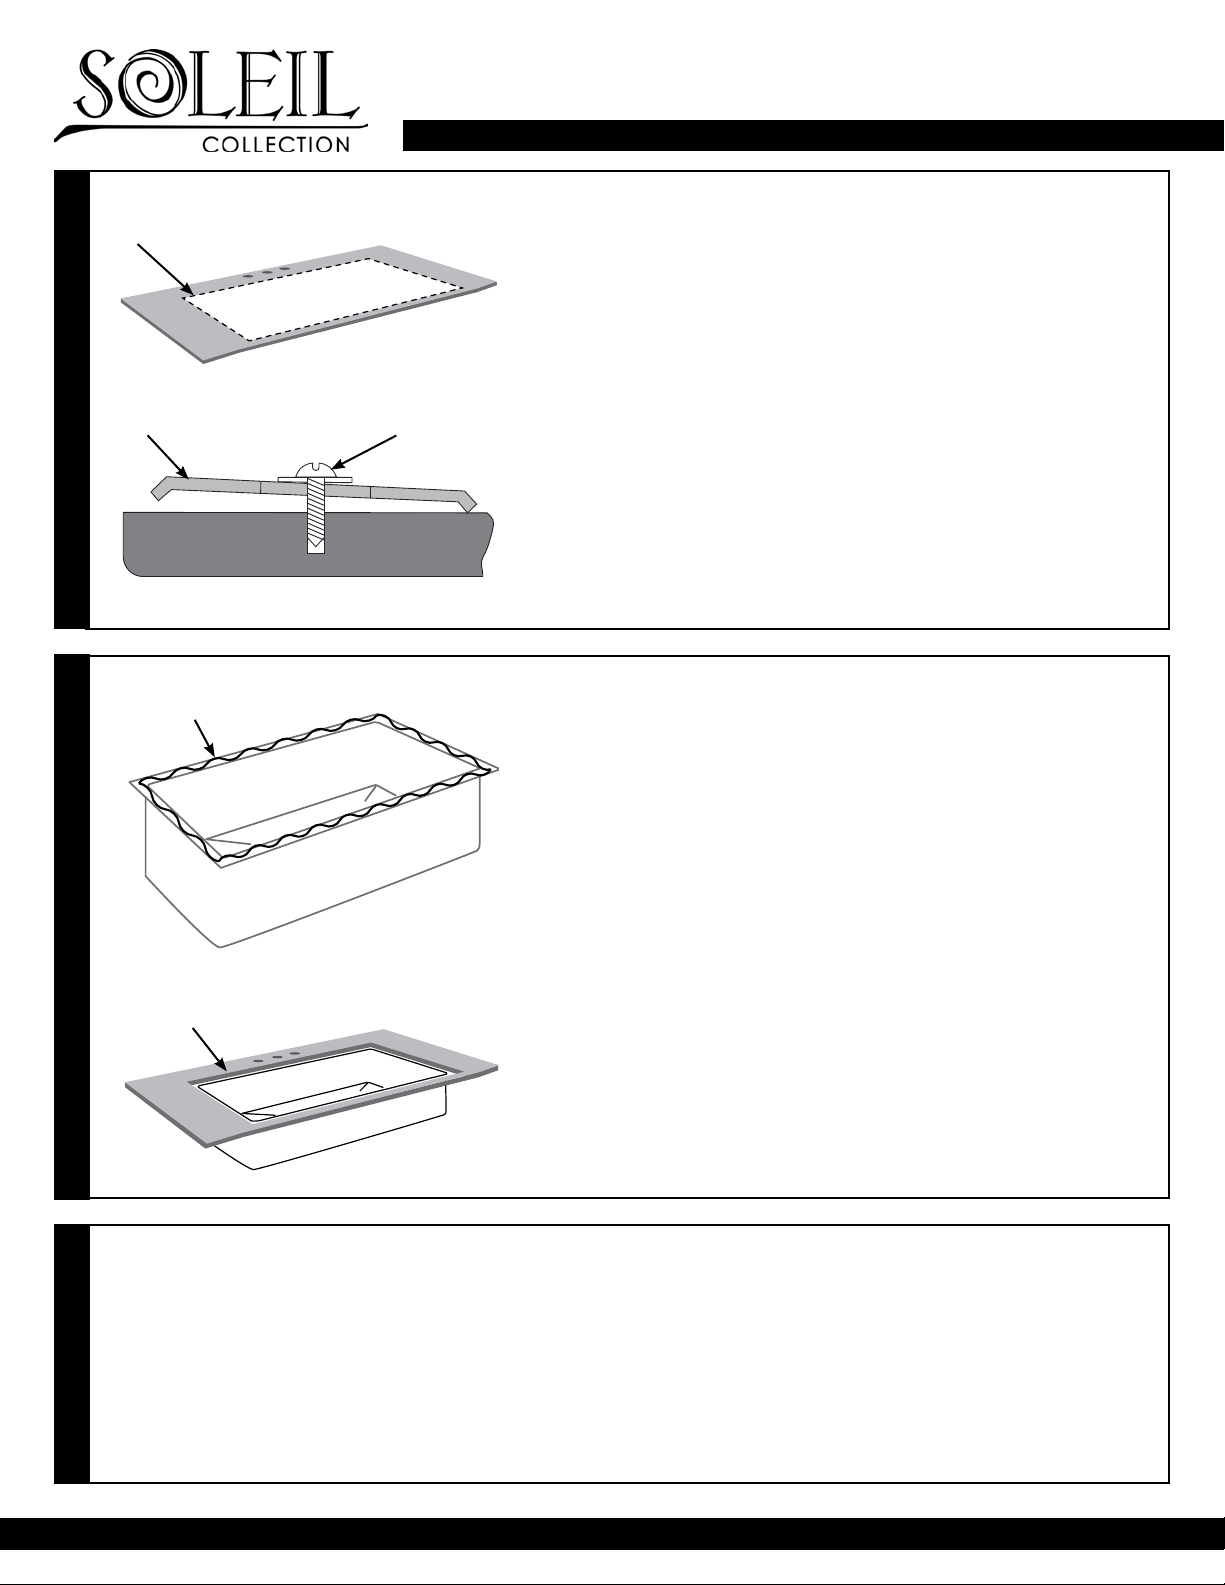
1. Position the template (provided with your sink) front to rear so the sink
will not interfere with the cabinet; secure with tape.
2.
measurements.
4. Following the countertop manufacturer’s instructions, carefully cut the
countertop on the inside of the traced line.
5. Locate and drill the mounting holes, following the countertop
manufacturer’s instructions. Holes should allow even spacing of
mounting brackets around the sink.
6. With the countertop inverted (upside down), fasten the mounting
brackets to the countertop loosely.
IMPORTANT: The cabinet must be installed, secured, plumb, and level BEFORE
installing the sink.
OUTLINE FOR UNDERMOUNT
SINK CUTOUT
MOUNTING BRACKET
INVERTED COUNTERTOP
FASTENER
Undermount Stainless Steel Sink
Installation Instructions
1. Position the template (provided with your sink) front to rear so the sink
will not interfere with the cabinet; secure with tape.
2.
measurements.
4. Following the countertop manufacturer’s instructions, carefully cut the
countertop on the inside of the traced line.
5. Locate and drill the mounting holes, following the countertop
manufacturer’s instructions. Holes should allow even spacing of
mounting brackets around the sink.
6. With the countertop inverted (upside down), fasten the mounting
brackets to the countertop loosely.
IMPORTANT: The cabinet must be installed, secured, plumb, and level BEFORE
installing the sink.
IMPORTANT: Soleil undermount sinks should only be fastened to a solid
surface countertop (i.e. granite, Corian® or Silestone®).
1.
sink with denatured alcohol.
2. Apply a narrow bead of silicone adhesive sealant evenly all around the
3. Position and align the sink over the countertop opening. Press silicone
onto countertop.
4. Tighten fasteners until mounting brackets are snug against sink. Check
alignment of sink to the countertop opening.
5. Tighten down fasteners evenly. Be careful not to over-tighten.
6. Immediately remove excess sealant.
IMPORTANT: The enclosed cutout template will create a countertop opening
with a minimal (1/8” or less) reveal. It is recommended that you discuss this
Soleil is not responsible for improper sink or countertop installations.
IMPORTANT: Soleil is not responsible for sink or countertop if damaged
during installation. Be sure to inspect the sink for damage prior to beginning
installation.
OUTLINE FOR UNDERMOUNT
SINK CUTOUT
MOUNTING BRACKET
INVERTED COUNTERTOP
FASTENER
APPLY SILICONE SEALANT AFTER CLEANING THE
SINK EDGE AND COUNTERTOP
VERIFY SINK IS CENTERED WITHIN THE COUNTERTOP
OPENING BEFORE TIGHTENING FASTENERS.
Installation Instructions
1. Position the template (provided with your sink) front to rear so the sink
will not interfere with the cabinet; secure with tape.
2. Trace the template and remove. Dry t the sink to verify the
measurements.
3. Following the countertop manufacturer’s instructions, carefully cut the
countertop on the inside of the traced line.
4. Locate and drill the mounting holes, following the countertop
manufacturer’s instructions. Holes should allow even spacing of
mounting brackets around the sink.
5. With the countertop inverted (upside down), fasten the mounting
1: PREP COUNTERTOP
brackets to the countertop loosely.
IMPORTANT: The cabinet must be installed, secured, plumb, and level BEFORE
installing the sink.
2: INSTALL COUNTERTOP
1. Following all local plumbing and building codes, install the faucet according to the manufacturer’s instructions.
2. Connect the drain and piping.
3. Run water into the sink and check all connections for leaks.
IMPORTANT: For additional information or warranty issues visit www.soleilsinks.com or contact Soleil directly at:
Soleil Sink Company Inc.
820 Shallowford Rd
3: FINAL STEPS
Kennesaw, GA 30144
(678) 445-4638
Contact Soleil Sinks at (687) 445-4638 or visit www.soleilsinks.com. Copyright ©2015, Soleil Sink Company Inc. All rights reserved.
IMPORTANT: Soleil undermount sinks should only be fastened to a solid
surface countertop (i.e. granite, Corian® or Silestone®).
1. Clean the bottom of the countertop and the top ange (or lip) of the sink
with denatured alcohol.
2. Apply a narrow bead of silicone adhesive sealant evenly all around the
top of the sink anges.
3. Position and align the sink over the countertop opening. Press silicone
onto countertop.
4. Tighten fasteners until mounting brackets are snug against sink. Check
alignment of sink to the countertop opening.
5. Tighten down fasteners evenly. Be careful not to over-tighten.
6. Immediately remove excess sealant.
IMPORTANT: The enclosed cutout template will create a countertop opening
with a minimal (1/8” or less) reveal. It is recommended that you discuss this
with your installer and agree that this nished appearance is the desired effect.
Soleil is not responsible for improper sink or countertop installations.
IMPORTANT: Soleil is not responsible for sink or countertop if damaged
during installation. Be sure to inspect the sink for damage prior to beginning
installation.
PAGE 2
Page 3

Limited Lifetime Sink Warranty
This product has been manufactured and tested to the highest quality standards by SOLEIL Sinks. We offer
our customers thoughtfully crafted xtures & accessories, engineered for enduring performance over years
of use.
WHO IS COVERED BY THE WARRANTY
This warranty extends to the original purchaser only. This warranty is not transferable, between homes or
owners and is only applicable to residential use.
WHAT IS COVERED BY THE WARRANTY
SOLEIL warranties this product against defects due to material or craftsmanship error during the warranty
period: SOLEIL will provide replacement parts at no charge, or at its option, replace any product or part of
the product that is deemed defective, under normal installation, use, service and maintenance. If
SOLEIL is unable to provide a replacement and repair is not practical or cannot be made in timely
fashion, SOLEIL may elect to refund the purchase price in exchange for the return of the product.
CONDITIONS AND EXCLUSIONS
Like other home xtures, SOLEIL products will require light maintenance to ensure proper function. We
provide you with complete knowledge to perform this maintenance and can also recommend resources if
you are unable to fulll this service.
A. SOLEIL will not be responsible for product failures due to lack of maintenance or proper use. Please read
your care and maintenance documentation to determine the limits of proper use.
B. The original sales receipt, order number, and/or proof of purchase must be presented at the time of the
warranty claim, without exception, for this warranty to be applied to all SOLEIL products.
C. SOLEIL recommends installing all SOLEIL products with a licensed, professional plumber. SOLEIL will not
be held responsible for any damage or product failure due to improper installation, misuse, or
failure to use a licensed professional. Please read your care and maintenance documentation to
determine the limits of proper use.
D. Commercial use will automatically void this warranty.
NON-APPLICABILITY OF THIS WARRANTY
By the purchase and use of our products, you agree that SOLEIL is not liable for incidental, consequential or
special damages associated with the return, replacement, installation or use of your product. This includes
freight costs, cartridge replacement, labor, travel time, lost prot, home damages and other contingent
liabilities and costs (including, without limitation, costs associated with experts, investigations, analyses,
attorneys and other professionals and services). The SOLEIL warranty is a comprehensive and explicit limit
of liability and all items outside of it are not addressable by or the responsibility of SOLEIL. Certain states
have variances regarding implied warranties and in those situations we remain fully compliant.
SOLEIL Sinks makes no implication that products comply with any or all local building or plumbing codes. It
is the consumer’s responsibility to determine local code compliance. This warranty extends to the original
purchaser and rst consumer.
For additional information or warranty issues visit www.soleilsinks.com or contact SOLEIL Sinks
directly: PHONE (678) 445-4638
PAGE 3
Contact Soleil Sinks at (687) 445-4638 or visit www.soleilsinks.com. Copyright ©2015, Soleil Sink Company Inc. All rights reserved.
 Loading...