


THANK YOU FCC WARNING STATEMENT
Dear Customer,
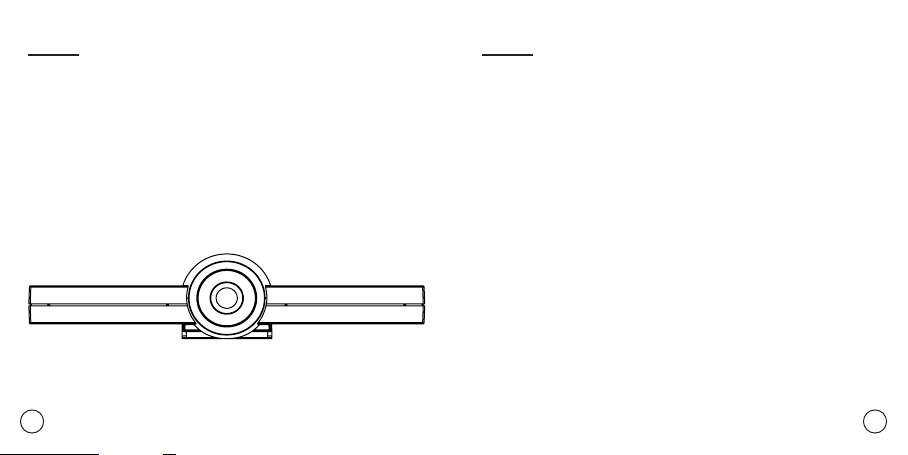
Thank you for purchasing HELLO 2 — An all-in-one communication
device for Video Conferencing, Camera Feed with Voice and Motion
detection, Night Vision, Alexa, and Google Assistant Integration,
Home Automation, Wireless Screencasting, Screen Sharing, TV
Streaming, Gaming, and more.
02 19
Changes or modifications not expressly approved by the party responsible for
compliance could void the user’s authority to operate the equipment. This equipment
has been tested and found to comply with the limits for a Class B digital device,
pursuant to Part 15 of the FCC Rules. These limits are designed to provide reasonable
protection against harmful interference in a residential installation.
This equipment generates uses and can radiate radio frequency energy and, if
not installed and used in accordance with the instructions, may cause harmful
interference to radio communications. However, there is no guarantee that
interference will not occur in a particular installation. If this equipment does cause
harmful interference to radio or television reception, which can be determined
by turning the equipment off and on, the user is encouraged to try to correct the
interference by one or more of the following measures:
• Reorient or relocate the receiving antenna
• Increase the separation between the equipment and receiver
• Connect the equipment into an outlet on a circuit different from that to
which the receiver is connected
• Consult the dealer or an experienced radio/TV technician for help
FCC Radiation Exposure Statement
The antennas used for this transmitter must be installed to provide a separation
distance of at least 20 cm from all persons and must not be co-located for
operating in conjunction with any other antenna or transmitte

PRODUCT INFO AND TERMS OF USE WHAT’S IN THE BOX
• For safety, compliance, recycling, and other important information regarding
your HELLO 2 device, please refer to the Legal & Compliance section under
Terms of Use at solaborate.com/termsofuse
• Before using HELLO 2--, please read the terms of use of Solaborate LLC at
the link above. All terms of use of Solaborate LLC apply to HELLO 2 as well.
Please read all three sections of Terms & Policies; Terms of Use, Privacy
Policies and Cookie Use
• By using HELLO 2 you agree to the terms of use of Solaborate LLC
• Your HELLO 2 is covered by a 1-Year Limited Hardware Warranty. You can find
more details at: http://help.solaborate.com/
Important notice
For any info regarding product technical documentation, user guide, “How To”
videos, and more, go to https://help.solaborate.com/
For technical support, you can reach out to our live support chat by using our app
or by going to www.solaborate.com/hellotwo and clicking on the ‘live support chat’
button. Our team is available to help and assist you with anything you need 24/7.
HELLO 2 AND MANUAL
ONE HDMI CABLE ONE GLOBAL
POWER ADAPTER
ONE REMOTE CONTROL
18
03

CONNECTING HELLO 2 TO YOUR TV
WI-FI AND TROUBLESHOOTING
Once you unbox the HELLO 2 device, follow these steps to connect
HELLO 2 to your TV:
1. Place the HELLO 2 device on top or bottom of your TV. Use the
hinge to clamp the HELLO 2 to the TV
2. Plug in the power adapter on the back of the HELLO 2 device
3. Connect the HELLO 2 to your TV via the HDMI cable
NOTE: In case you are not using WiFi, make sure to connect a LAN/
Ethernet cable on the back of the HELLO 2 device
04 17
• If the dot starts blinking (in the HELLO 2 home screen, under your HELLO 2’s
name), HELLO 2 is trying to reconnect to the Internet. Wait until your HELLO
is connected.
• If the dot is gray/transparent, HELLO 2 is not able to connect to Solaborate
due to bad internet connection
• If the dot is fully white, HELLO 2 is connected and ready to be used
• When you are connected through Wi-Fi, the Wi-Fi icon appears. If you are
connected to Ethernet, the Ethernet icon appears
Tips to troubleshoot your HELLO 2:
Reconnect to the internet
If the Wi-Fi or the password changes, you can go to HELLO 2 Settings and click on
Wi-Fi to reconfigure your network settings. Once you make the changes, HELLO 2
should be reconnected to the internet.
If your HELLO 2 is already connected to a network and you want to change it to
another one, you can just follow the same steps by going to HELLO 2 Settings,
navigating to the Wi-Fi section and connecting to another one.
HELLO 2 is not showing on the app but it’s setup on the TV
Make sure you’ve registered the HELLO 2 device with the same user account as you’re
logged in or try to log in/log out again.
TIPS ON USING HELLO 2 FEATURES DOWNLOAD THE APP
1. Before starting a video call:
• Make sure your HELLO 2 is registered and you can see the same name on
HELLO 2 and in your app
• The small connection circle is fully visible on HELLO 2 and your app
• Make sure your device of choice is connected to the same network as HELLO
2 to use Airplay and other screen sharing features*
2
1. Deactivate the Movement Detection feature when family members or pets
are around so the HELLO 2 doesn’t send out notifications needlessly
*Not needed if you’re doing screen sharing from the web on HELLO 2
16
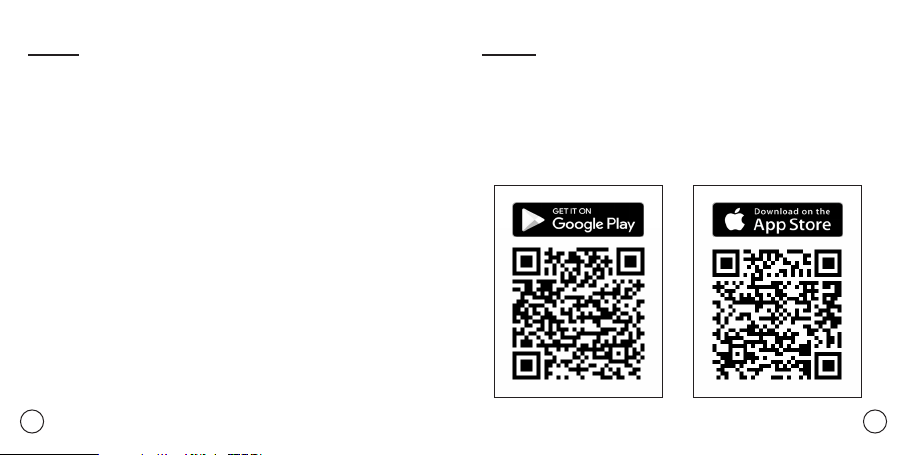
To download our Solaborate Messenger app, visit:
www.solaborate.com/messenger
Or scan the right QR code, go to our store, and download
the app on:
05

SETTING UP HELLO 2 HELLO 2 SETTINGS
After you have successfully connected the HELLO 2 to your TV it’s time to setup the
device by following these steps:
1. After installing the HELLO 2 Solaborate Messenger, sign up via phone number,
email, Facebook, LinkedIn or Gmail
2. Go to the HELLO 2 Tab and click on Setup HELLO 2 button
3. Set a name for your HELLO 2 device
4. Connect HELLO 2 via WiFi, Ethernet or Advanced Network Configurations
5. Show the generated QR Code to the HELLO 2 camera to pass the setup
information to it
Setup instructions (both through Voice and Text) will pop up on your screen once
HELLO 2 is booted.
If you face any issues contact our 24/7 live support chat on the app or web.
06 15
Under the settings button on the Solaborate Messenger App, you can view or edit the
information about the HELLO 2 device, choose your Wi-Fi, add admins, change user
permissions, and delete the device.
View or edit information
• Click on the settings button of the device you want to view or edit
• You can now change the device’s name and network
• Add admins
• View logs
Set user permissions
• Click on the settings button of the device if you want to set or change user
permissions.
• Click on the admin* to change the user permissions
• Activate or deactivate the features the admin can use and save to confirm
Delete device
• Select the device you want to delete on the settings button
• Scroll down until you reach the end and press the ‘delete’ button
*Admins have the rights to use certain HELLO 2 features. Owners can control which
features the admins can use.

HOW TO USE VOICE ASSISTANTS HOW TO USE THE REMOTE CONTROL
How to use Alexa?
1. Go to your Solaborate Messenger App on your phone
2. Click on HELLO 2 tab
3. On the HELLO 2 tab you will find Alexa
4. Click the Alexa icon (It will prompt a request to open your browser)
5. Sign in/Sign up on Amazon
6. Once you’ve signed in to your Amazon account on the screen you will see a
confirmation message saying Alexa has been successfully set up
7. You can now use Alexa by asking any questions you might have by calling
“Alexa…”
Note: You have to have a Google Account in order to use Google Assistant
How to use Google Assistant?
1. Go to your Solaborate Messenger App on your phone
2. Click on HELLO 2 tab
3. On the HELLO 2 tab you will find Google Assistant
4. Click the Google Assistant icon (It will prompt a request to open your
browser)
5. Sign in/Sign up on Google
6. Once you’ve signed in to your Google account on the screen you will see a
confirmation message saying Google Assistant has been successfully set up
7. You can now use Google Assistant by asking any questions you might have
by calling “Ok Google”
14
In the box with the HELLO 2 device, you will find a remote control you can use to
operate the applications on the HELLO 2.
Here is how to use the remote control buttons:
1. Power Button (hold this for 3 seconds to reboot HELLO 2)
2. Voice Assistant button (use this button to activate the smart assistant after
you’ve set it up)
3. Mute button (use this to mute microphones during a call on HELLO 2)
4. Arrow Keys (use them to navigate menus)
5. OK key (use this button to select or click)
6. Mouse button (use this to enable or disable the air mouse)
7. Home button (use this to go to the previous screen or the HELLO 2 thome
screen)
8. Accept/Decline (use the green button to answer calls and the red button to
decline calls)
07

SETTING UP HELLO 2
Power Button
Mute Button
Voice Assistant
Arrow Key
OK Button
Home Button
Mouse Button
Decline Call
Accept Call
08 13

BASIC FUNCTIONS OF HELLO 2
HOW TO PAIR THE REMOTE CONTROL
Video/Audio Calls
Make direct video/audio calls to HELLO 2 whenever you want to get a hold of
someone or a group of people who are in the same room as the HELLO 2 device. You
can do this only if you are the owner of HELLO 2 or have admin permissions to that
specific device.
Wireless Screencasting
Besides allowing you to wirelessly share content, photos, files, videos, advanced
device HELLO 2 allows you to also cast your phone screen to HELLO 2 so that
everyone in the room can easily follow what you’re doing on your phone in real time.
Screen sharing
HELLO 2 allows you to wirelessly share your screen from the web to HELLO 2 to keep
everyone in the room involved. By sharing your screen wirelessly, you’ll save time and
effort. Besides, it will guarantee an easy-going meeting that focuses on increasing
productivity instead of setting up the equipment.
Camera Feed with Motion Detection and Night Vision
The Camera Feed of HELLO 2 is packed with motion detection as well as infrared
night vision features which offer you full power and let you know whenever someone
moves in front of your HELLO 2 at home or even office so you will be alerted at all
times and take the necessary measures. Camera Feed also offers you the option to
talk through your HELLO 2 device or simply mute it, to mute or unmute the HELLO
Microphones, as well as take a screenshot of your feed whenever you need to.
12
• Ensure that the batteries are inserted into the remote control
• Turn off HELLO 2 by unplugging it and keep the remote control close to it
• Press and hold the voice assistant and OK buttons, the red
LED on the front of the remote will flash three times. After that release
the buttons.
• Plug-in HELLO 2 again, the red LED will flash three times to indicate
pairing process finished successfully
Press and Hold
09

NEW HELLO 2 FEATURES
PRIVACY BUTTONS
To ensure your absolute privacy we’ve designed two hardware switches into the
HELLO 2 to physically connect and disconnect the camera and microphones from
the system. This will guarantee your privacy with no hacking risks.
Digital
Whiteboarding
Gaming
10 11
Dual-Screen
TV Streaming
HELLO Rooms
SIP Client
Home Automation
Note: To ensure these buttons are un-hackable, their function cannot be controlled
from the remote or any software (including the HELLO Solaborate messenger app)
Mute Video
Mute Audio

FCC Statement
1. This device complies with Part 15 of the FCC Rules. Operation is subject to the following two
conditions:
(1) This device may not cause harmful interference.
(2) This device must accept any interference received, including interference that may cause
undesired operation.
2. Changes or modifications not expressly approved by the party responsible for compliance could
void the user's authority to operate the equipment.
NOTE:
This equipment has been tested and found to comply with the limits for a Class B digital device,
pursuant to Part 15 of the FCC Rules. These limits are designed to provide reasonable protection
against harmful interference in a residential installation.
This equipment generates uses and can radiate radio frequency energy and, if not installed and used
in accordance with the instructions, may cause harmful interference to radio communications.
However, there is no guarantee that interference will not occur in a particular installation. If this
equipment does cause harmful interference to radio or television reception, which can be determined
by turning the equipment off and on, the user is encouraged to try to correct the interference by one
or more of the following measures:
Reorient or relocate the receiving antenna.
Increase the separation between the equipment and receiver.
Connect the equipment into an outlet on a circuit different from that to which the receiver is
connected.
Consult the dealer or an experienced radio/TV technician for help.
IC STATEMENT
This device complies with Industry Canada licence-exempt RSS standard(s)
Operation is subject to the following two conditions:
(1) This device may not cause interference, and
(2) This device must accept any interference, including interference that may cause undesired
operation of the device.
This equipment complies with IC radiation exposure limits set forth for an uncontrolled
environment. End user must follow the specific operating instructions for satisfying RF
exposure compliance. This transmitter must not be co-located or operating in conjunction with
any other antenna or transmitter.
Ce dispositif est conforme aux normes autoriser-exemptes du Canada RSS d'industrie
L'exploitation est autorisée aux deux conditions suivantes :
(1) l'appareil ne doit pas produire de brouillage, et
(2) l'utilisateur de l'appareil doit accepter tout brouillage radioélectrique subi, même si le
brouillage est susceptible d'en compromettre le fonctionnement.Cet équipement
est conforme avec l'exposition aux radiations IC définies pour un environnement
non contr . L'utilisateur final doit respecter les instructio ns de fonctionnement spécifiques
pour satisfaire la conformité aux expositions RF.
 Loading...