


T-5000
Mega Evaporative Snow Machine
M•A•S•T•E•R•S
S P E C I A L E F F E C T S
www.snowmasters.com
©2008 Snowmasters, Inc.

WELCOME
Important Information About your T-5000 Snow Machine
THE T-5000 Mega Evaporative Snow Machine Manual
Congratulations on your purchase of this SnowMasters snow machine. With
your snow machine you will dazzle and entertain audiences in large or small
venues. Your T-5000 snow machine is loaded with advanced features, but at
the same time it is very easy to use.
The T-5000 “Mega Evaporative Snow Machine” is a modernized design in a family of special effects
Snow Machines used for years in Movie Productions, Theatres, Malls, and Presentations. This futuristic
modeled “work-horse” sprays evaporative snow out from its nozzle section and creates a realistic
snowfall effect without residue or cold air. With its reliable, efcient and low-volume design, the T5000 is a marvel for stage productions, fancy presentations or unique weddings. The tethered remote
and the DMX give the user control over snowake size and instant activation.
IMPORTANT PRODUCT AND SAFETY INFORMATION
Failure to follow these instructions can cause serious bodily injury or property damage.
CAUTION: YOU MUST READ THE FOLLOWING BEFORE
OPERATING THE T-5000 MEGA EVAPORATIVE SNOW
MACHINE
General Information
The T-5000 is an Electric Product -not a Toy. To avoid the risk of re, burns, personal injury, and
electric shock, it should not be played with and should be placed out of the reach of
small children. Adult Supervision is Continuously Necessary to Avoid the Risk of Electric Shock or
Personal Injury. Never remove the covers or open the enclosures.
The T-5000 “ Mega Evaporative Snow Machine” generates evaporative snow that normally dissipates
completely when dispensed from 20-30 ft in the air. Mounting the T-5000 at the specied elevation,
relative to the generated ake size is key to creating a “residue free” oor below the snow machine
(See Chart 2). A wet oor or incorrectly mounted snow machine could allow a build-up of snow
residue. Since the residue is slippery, it is important to follow all the directions in this manual to avoid
this type of problem.
Never operate the T-5000 without liquid solution or water in the solution bottle. Do not run the T5000 when the Gallon Solution bottle is holding less than a pint of solution. If you do not follow these
directions, the T-5000 can be damaged.
Always mount the T-5000 using the secured span set or chain that is attached to the four pick points
or secure it on a at stable platform. Wrap a safety chain around the yoke brackets for secondary
protection.
Never leave the T-5000 unattended while operating. Do not operate it in the rain or near standing water.
Always use an outlet with an earth grounding receptacle and a Ground Fault Circuit Interrupt (GFCI).
Never use this product for any activity other than for what it is intended.
Never add flammable liquids (oil, gas, alcohol, perfume) to the snow solution.
1

T-5000 Snow Machine Features and Specifications
Features
The best Evaporative Snow Machine in the world.
f 4-channel DMX control
f Remote control (rented/sold separately)
f Variable stand alone features
f Lifetime warranty
f 24-Hour Technical Service
Features and Specifications
Specifications
f Repeat Cycle Timer (5 min. and 15 min. cycles)
Voltage: Two Individual 110V 60 Hz Circuits
Current: Two 15 Amps Circuits
Size: 19” Wide, 30” Long and 23” Tall
Weight: 110lbs
Materials: Predominately: wood and carpet exterior with steel covers,
bracket and hanging hardware.
Color: Black
(other colors are optional)
Snow Solution 1 oz Solution Mixture per
minute (approximate)
Usage Rate or 1 to 1.5 hrs per gallon
of solution.
Power Cable 7 ft
Length
Tether Length 24 ft
To Remote
2
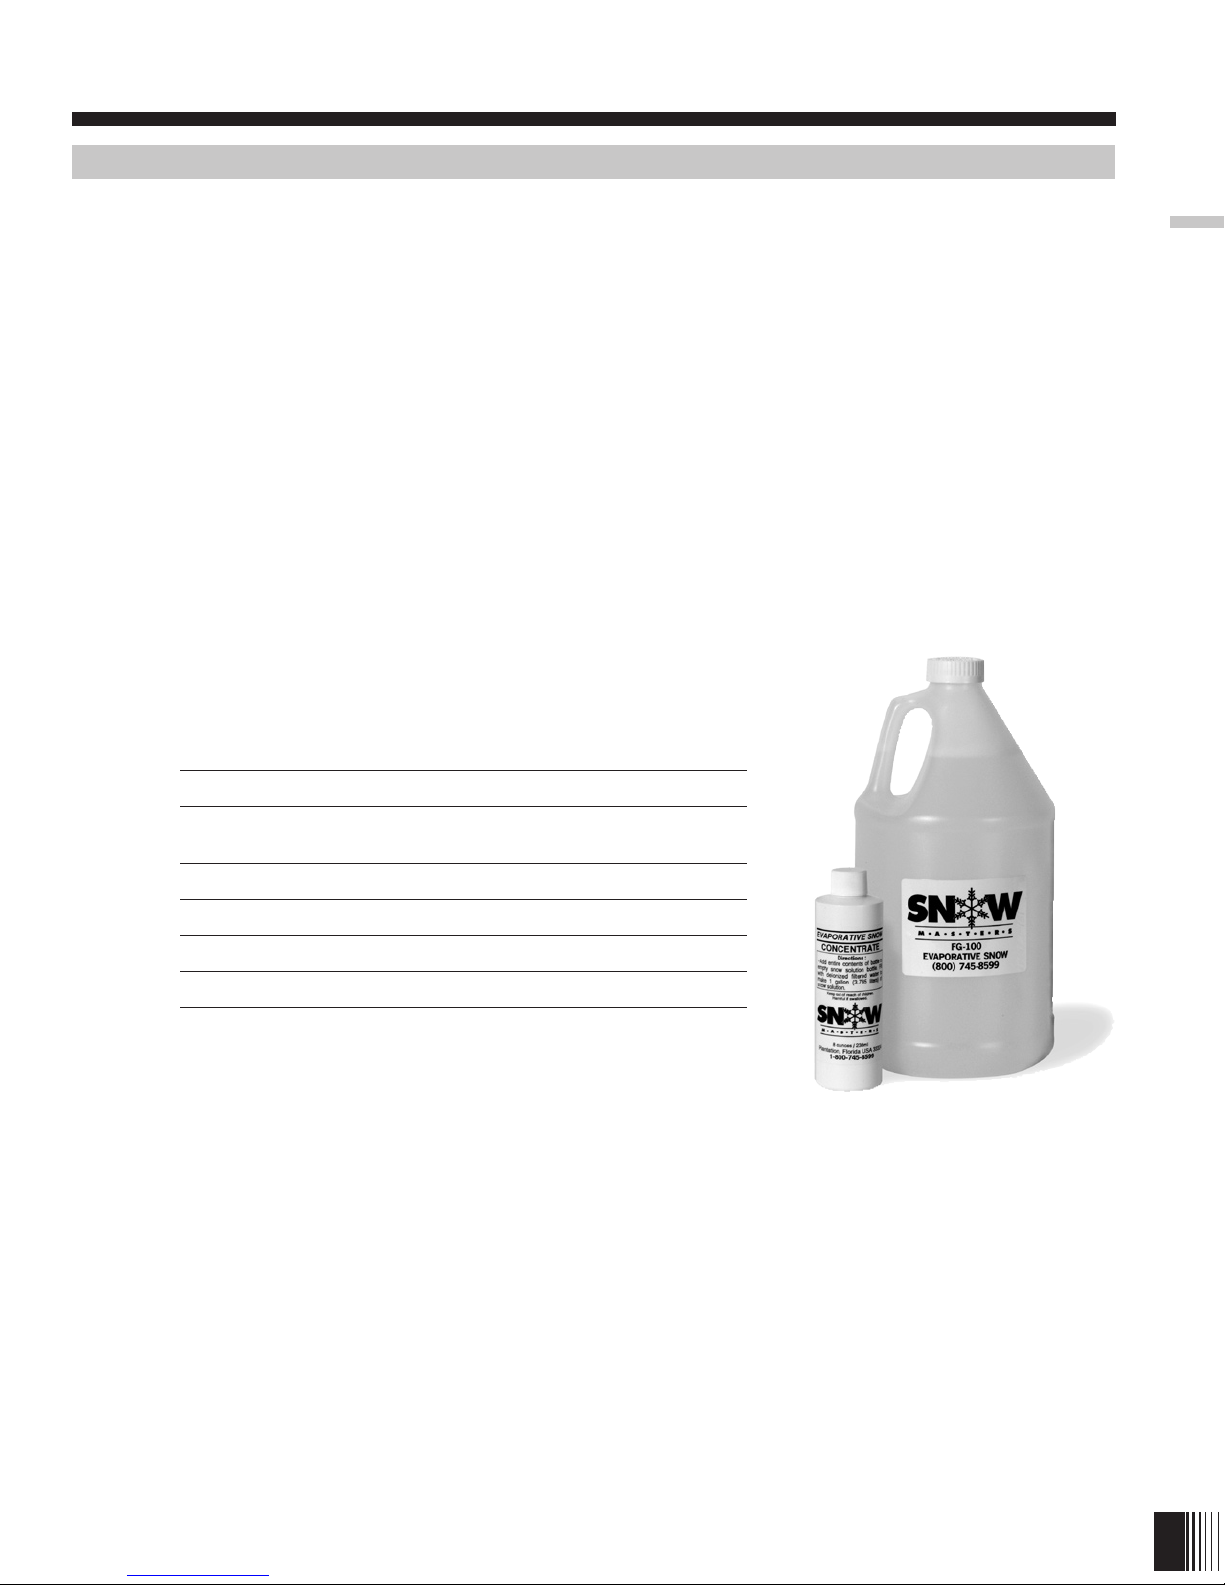
Evaporative Snow™ Solution Mixture
Solution Mixture:
Snow Masters Labs are constantly inventing and reformulating solutions in order to improve the snow
from the T-5000 “Mega Evaporative Snow Machine”. Please contact Snow Masters at 800-745-8599
for more information. In order to prevent operation problems and observe the Warranty guidelines,
always use a Snow Masters approved solution. The FG-100 Snow Solution comes premixed and ready
to use. You will have to pour the solution into the plastic bottle that comes with the T-5000, if the
solution bottle does not t into the well on the T-5000.
Evaporative Snow Concentrate Solution Only.
The ratio mix for this snow solution is 8 oz of solution per 1 gallon of distilled water. See the chart
below (Chart 1) for some examples of common water/solution ratios. Warning: If you mix water
with the standard FG-100 Solution (non-concentrate), you will not be able to generate
snow.
Mix Water and Concentrate Solution as Shown Below:
Chart 1
WATER FG-100 CONCENTRATE
Solution Mixture
Tablespoons or Pints or Fluid Ounces
½ gallon 8 ¼ 4
1 gallon 16 ½ 8
2 gallons 32 1 16
5 gallons 80 2 ½ 40
Lightly Shake or Stir the solution in the container
before operating the T-5000.
3

General Operating Instructions
Operating Instructions:
The T-5000 has some simple instructions that must be followed carefully in order to create the desired
evaporative snowfall, ensure the safety of the operators/participants, and to protect the equipment from
damage.
PLEASE FOLLOW THESE INSTRUCTIONS CAREFULLY.
1) Prepare the area you intend to direct your snowfall. Review “Diagram 1” which shows approximate
spread of the evaporative snow. Always prepare your snowfall area; making sure it is dry and free of
obstructions. Note that if the snowfall surface area is linoleum or smooth, some akes can create a
slippery oor, if the T-5000 is mounted too low
Operating Instructions
(See Chart 2). Always locate the T-5000 in a well-ventilated area. Never block or cover the
intake or nozzle discharge of the T-5000 or the internal Blower can be damaged.
2) Mount the T-5000 on a secure, dry, and level platform. Since the larger the ake sizes are slower
to evaporate, Chart 2 recommends DMX or Remote settings to minimize residue on the ground. You
can still play with the adjustments to optimize your snow. For safety reasons, the T-5000 should be
unplugged from the electrical outlet while placing it in your desired location. The Nozzle should
be pointed in the direction you want it to spray snow. Hang or route the 30 ft. tethered remote
as required to the desired operating location, without pinching the wire. Do not operate the
T-5000 in the rain. The T-5000 is not waterproof. If it gets wet, unplug the snow
machine and contact “Snow Masters” technical support.
Chart 2
Approximate DMX or Dial Remote Settings
Relative to Mounting Height to Minimize Residue
DMX
Setting
880-899 5 1/4 - 1/2 inch 30 ft
879-860 4 3/16 - 3/8 inch 25 ft
859-840 3 1/8 - 1/4 inch 20 ft
839-820 2 1/16 - 3/16 inch 15 ft
819-800 1 0 - 3/16 inch 10 ft*
* 10 ft is probably too low to prevent some residue on the ground.
or Remote
Setting
DMX 900s
4
Snowflake
Size
Mounting
Height
3) If the snow solution is a
concentrate, prepare the snow
solution in the empty plastic
gallon bottle provided (located in
the T-5000 solution bottle well)
per the “Solution Mixture” section
of this manual (See Chart 1). If
the correct water/concentrate
mix is not blended properly, the
T-5000 may not create the ideal
evaporative snowakes. Place
the clear tube in the container
with the “Solution Mixture” and
push it down, so that the open
end reaches the bottom of the
lled container. The pump in the
T-5000 is self-priming.

General Operating Instructions
Operating Instructions:
4) In order to start the T-5000, plug the Snow Machine power cord into an outlet with a 3rd lead
grounded conductor (preferably a Ground Fault Circuit Interrupt -GFCI). Next, turn the power switch
“ON” in the back of the T-5000. If you are using the DMX features, read the section on DMX settings
to get the proper response. If you are using the remote, set the DMX display on back of the T-5000
unit to any number between 900-999. Press “ON” the switch on the tethered remote to start the
snowfall. Adjust the dial on the remote to set the desired snowake size (See Chart 2). Rotate the
dial clockwise to obtain larger akes and counterclockwise for smaller akes. If the akes are sticking
to the ground during an initial run, then adjust the dial counterclockwise after drying off the ground
surface (snowakes accumulate more easily on a wet surface). Press “OFF” to turn off the snow on
the tethered remote. Do not operate the T-5000 without the clear tube submerged in the lled solution
container.
5) If the solution has drained out of the clear tube during a rest period for the T-5000, it may take a
minute or two for the pump to self-prime itself from the solution container liquid.
6) On the tethered remote, a blinking light signies that the Power is “ON” in the T-5000 unit. A
constant light from the LED signies that the T-5000 is blowing evaporative snow. If the light on the
remote is completely off, the T-5000 is not powered up and cannot be controlled from the remote.
7) To turn the power OFF on the T-5000, push down on the red “O” button on the back of the T-
5000.
Operating Instructions
DMX Settings T-5000 Mega Evaporative Snow Machine
The DMX settings are key to the operation of the T-5000. The three-digit number on back of the
T-5000 panel determines the operation mode for the T-5000. Warning: there are DMX settings where
the T-5000 will appear not to operate, so always review the tables below during setup and operation.
8 9 6
RANGE ACTIVITY
000 508 DMX Address- Outside Interface
509 599 Standby- No Activity
600 699 Short Cycles of ON/OFF Activity
700 799 Long Cycles of ON/OFF Activity
800 849 Zero to Minimal Snow-Blower Operates
850 859 Snow Flurry- Lowest Outputs
860 879 Light Snowfall- Smallest Flakes
880 889 Sub-Blizzard- Larger Snow Flakes
890 895 Ideal Range of Operation at 30 ft height
896 899 Maximum Snow Output- Largest Flakes
900 999
Remote Control Activated (Note: 5 Pin DMX
must be disconneted.)
See Chart 2 for Remote Controlled Flake Size
5

Using the Controller
Snow Machine Controller
The snow machine controller consists of two fan relays, a pump controller and control interface
capable of receiving a DMX signal or a proprietary remote control signal. The DMX address is set via
a three digit rotary switch located on the back of the device. The DMX address is set in a decimal
fashion.
*SELECTED START ADDRESS
Cycle
Time
100 100 100 100
Using the Controller
: : : :
0 0 0 0
Flake
Size
The DMX interface is compliant with DMX-512
standards and electrically isolated to 1000VAC. The start
address can be set from 1 to 509. The DMX protocol
requires 4 dimmers dened as Mode, Cycle Time,
Duration, and Flake Size. The Mode dimmer denes the
overall operation of the snow machine - Off, On, and
Momentary. The Mode dimmer will correspond to the
selected start address, with the Cycle Time, Duration, and
Flake Size dimmers in the following order.
DMX Mode Channel Level
When the mode dimmer is set to one of the Momentary
positions (either 5 or 15 min cycle), the Cycle Time
100
: Always On
75
74
: 15 Min Cycle
51
50
: 5 Min Cycle
25
24
: Off
0
and Duration dimmers become active. The cycle time
dimmer establishes the time it takes for the entire event.
Duration dimmer is the length of time of snow output.
The minimum time of one cycle is 18 seconds with a ten
second ON time, a four second SNEEZE, and a 4 second
WAIT. A sneeze is when the blower remains on without
the pump and dries the sock, preventing postnasal drip.
The following tables show all the settings that can be
attained with the use of the three digit rotary switch
located on the back of the device. An ‘X’ in a position indicates that the number in that position does
not matter for the required result to be attained. Switch A is in the hundreds position, Switch B is in
the tens position, and Switch C is in the ones position.
Table 1- Mode Settings
A B C
Mode
0 0 0 Idle
0
0
1
: : : DMX
5
5 1
0
9
0
: : : Idle
5
9
9
6 X X 5 Min Cycle
7
8
9
X X
X X Always On
X X
15 Min
Cycle
Remote
Table 1 shows that there are six modes in which the
device may operate: Idle, DMX, 5 minute cycle, 15
minute cycle, always on, and remote.
6

Using the Controller
Snow Machine Controller
Table 2 – 5 Minute Cycle
A B C ON Time WAIT Time
6 0 X 15 Seconds 4 Minutes 45 Seconds
6 1 X 30 Seconds 4 Minutes 30 Seconds
6 2 X 1 Minute 4 Minutes
6 3 X 1 Minute 30 Seconds 3 Minutes 30 Seconds
6 4 X 2 Minutes 3 Minutes
6 5 X 2 Minute 30 Seconds 2 Minutes 30 Seconds
6 6 X 3 Minutes 2 Minutes
6 7 X 3 Minute 30 Seconds 1 Minute 30 Seconds
6 8 X 4 Minutes 1 Minute
6 9 X 4 Minute 30 Seconds 30 Seconds
Table 3 – 15 Minute Cycle
A B C ON Time WAIT Time
7 0 X 45 Seconds 14 Minutes 15 Seconds
7 1 X 1 Minute 30 Seconds 13 Minutes 30 Seconds
7 2 X 3 Minutes 12 Minutes
7 3 X 4 Minutes 30 Seconds 10 Minutes 30 Seconds
7 4 X 6 Minutes 9 Minutes
7 5 X 7 Minute 30 Seconds 7 Minutes 30 Seconds
7 6 X 9 Minutes 6 Minutes
Table 2 displays the settings
for the 5-minute cycle. Within
this mode the device cycles
on depending on the B switch
setting. The cycle time is the
total time of the event and the
“on time” is the length of time
of snow output, similar to the
duration in the “DMX mode”.
Otherwise the machine is in a
WAIT state
Table 3 displays the settings
for the 15-minute cycle.
Within this mode the device
cycles on depending on the
B switch setting. The cycle
time is the total time of the
event and the “on time” is the
length of time of snow output,
similar to the duration in the
“DMX mode”. Otherwise the
machine is in a WAIT state
Using the Controller
7 7 X 10 Minute 30 Seconds 4 Minute 30 Seconds
7 8 X 12 Minutes 3 Minutes
7 9 X 13 Minute 30 Seconds 1 Minute 30 Seconds
Table 4 – Flake Size Settings
A B C Flake Size
6/7 X 0 1
6/7 X 1 2
6/7 X 2 3
6/7 X 3 4
6/7 X 4 5
6/7 X 5 6
6/7 X 6 7
6/7 X 7 8
6/7 X 8 9
6/7 X 9 10
Table 4 shows the use of
switch C during 5 minute
or 15-minute cycle modes
(Switch A is 6 or 7). Switch C
controls the ake size.
7

Using the Controller and the Remote
Snow Machine Controller
Table 5 shows the use of switches B and C when switch A is set to 8 (Always on state). Switches B
and C work similarly to Switch C when in the 5 minute and 15 minute cycle modes, it controls the
ake size. The user then has 100 choices of ake size.
Using the Controller and the Remote
Remote Control
Table 5 -Always on Flake size setting.
A B C Flake Size
8 0 0 1%
8 : : :
8 9 9 100%
Note: The user should avoid conguring the A selector to the 9 position while a DMX connection is
being used.
There is a provision on the controller board for an additional fan control relay rated at 10 amps. This
relay has a completely separate power interface.
The DMX interface is also provided as a pass
through connection. The remote interface
utilizes standard pins 4 and 5 of the 5 pin
XLR connector to supply power to the remote
control. Pins 4 and 5 are pass through when
used in a DMX conguration. Pins 4 and 5 have
power applied to them only when the DMX
selector is set to the 900s and this power is used
to power the remote.
The remote control provides a tethered, remote control connection to the snow machine. The 3 rotary
switches must be at 900 or greater for remote function to be enabled. The remote has control over the
on/off and ake size functions. The ake size knob provides variable settings from small (0) to large (5)
akes. There is also a status LED to inform the user that the unit is on and powered.
When the unit is powered and the power switch on the remote is set to the off position the red LED on
the remote will slowly pulse to inform the user that the unit is in standby. When the user changes the
switch to on the LED will go to a solid red.
While in “remote mode” the unit
will act as it would in the
“always on” mode, except
now the user may use the
flake size knob to control
the flake size rather than
the rotary switches. The
“remote mode” also allows
for the use of a quick on/
off switch located on the
remote control.
8

Maintenance Information and Precautions
Cleaning and Storing the T-5000 “Mega Evaporative Snow Machine”
In order to clean the T-5000, ll another plastic container ½ full with water and run the T-5000 for 3-5
minutes with the nozzle tilted downward into another container (if possible). You may clean the plastic
exterior of the T-5000 with detergent and water. Dry off the T-5000 and store it in a plastic bag and
box, if possible. Do not stack other boxes or items on top of the T-5000. Store the T-5000 in a cool,
dry environment between 40-80 degrees F. If electrical wires are frayed, contact the factory at 800745-8599 for service. Never operate the T-5000 with a frayed electrical wire.
Maintenance:
The T-5000 is a low maintenance unit.
Caution: Never remove the cover or housing screws on the Snow Machine. This action will nullify the
warranty. Contact customer service at 800-745-8599.
General Repair: The T-5000 Snow Machine has a lifetime warranty and should never require
you to disassemble the unit. Please contact Snow Masters service at 800-745-8599 if you have
questions on its operation or warranty.
Always use SnowMasters™ approved snow solutions or the Lifetime
Warranty will be nullified.
Maintenance
9

Types of Trouble and Their Solutions
Symptoms and Cause and/or Corrective Actions
If the T-5000 does not generate snow, review the following checklist.
1
a) When turned “ON”, is the Fan Operating? (Air is shooting out the nozzle of the T-5000).
Yes: Move on to (b)
No: Check the electric plug interface to the outlet connection and make sure the remote connector
is connected to the main unit. Then, check to see if the power switch is “ON” on the main unit. A red
Troubleshooting
LED light should be illuminating on the back of the T-5000 when power is “ON”. Make sure that
the DMX settings meet your desired criteria (see the DMX section of this manual-the unit should
always be operating with settings between 880-899) Also, the LED light on the remote should be
illuminating (blinking) if the main power is “ON” in the T-5000 and the DMX setting are in the
900s. A constant light will illuminate on the remote if snow is being generated. If the lights are not
illuminating, call customer service at 800-745-8599 or the 24 hr tech line at 888-391-SNOW.
b) Is the Pump Operating?
Yes: If you feel the clear plastic tube vibrating, then the pump is operating.
Go to (c)
No: Recheck the DMX settings per the DMX settings in the manual. The unit should always
operate and blow snow with settings between 880 and 899.
Contact customer service at 800-745-8599 or 888-391 SNOW.
c) Check to see if the tube is fully submerged in solution and is not pinched. A hole in the hose
would require replacement. It sometimes takes up to 2 minutes for the self-priming pump to
saturate the nozzle sock with liquid.
d) Set the DMX between 880 and 899 to prove that the unit operates.
e) Create a new “Solution Mixture”, per the instructions, if the nozzle sock is saturated with liquid
but no snow is being made.
Is the Snow generated very wet or light in volume? Always allow two minutes or so for the T-5000 to
2
come to full operation after an extended storage or for the rst time operating.
f) Remake another batch of your recipe solution, and check your water to solution ratio carefully.
g) Make sure the clear tube is completely submerged in the solution.
h) Contact customer service at 800-745-8599, or call the 24 hr tech line at 888-391-SNOW.
Technical Service or Purchasing SnowMasters™ Liquid Solutions:
3
Use customer service at 800-745-8599
24 Hour Technical Service - Off Hours 888-391-SNOW (7669)
10

What is Evaporative Snow
™
Incorporating Evaporative Snow™ In Your Production Design
SnowMasters is a pioneer of the “evaporative snow” proccess. In order to help you incorporate
“evaporative snow” in your production design, we are providing you the following explanation as to
exactly what it is and how a snow machine works.
The “snow ake” starts as a clear uid in a reservoir or bottle usually found at the back of the
machine. A small plastic feed tube takes the uid from the reservoir to a small nylon sock at the
front of the machine by means of a pump. The sock is mounted to the front end of a high output
blower. The sock material is a very ne mesh weave and acts like hundreds of very tiny bubble
wands, producing clusters of bubbles appearing as “akes”. The “ake” size varies according to the
speed of the pump, and the amount of uid reaching the sock. More uid results in more and larger
clusters of bubbles or “akes”.
The “ake” size is the key to making any evaporative snow truly evaporative and residue
free. Ideally you want to set the ake size so that the snow evaporates just as the snow hits the
ground. Imagine for a moment blowing a traditional soap and water bubble with a bubble wand.
The air pressure in the bubble is greater than the surrounding air pressure, and keeps the bubble
inated, much like a latex balloon. As air currents keep it aloft, it will remain intact until enough
water evaporates from it’s surface, the thinned lm can no longer maintain surface cohesion and
the bubble’s internal air pressure causes it to burst. Evaporative snow uid contains an advanced
evaporative solution to make the “akes” disintegrate more rapidly. The combination of air presure
and solution mixture produces a very esthetically pleasing, moderate snow fall. While you can
certainly create a blizzard effect with these machines, additional safety precautions must be
considered, as the snow will build up on the oor or stage, resulting in a slippery surface.
What is Evaporative Snow™
Air ow and evaporative snow in your production design. First, all snow machines produce a
“cone” of snow which is smallest near the machine and disperses as you get farther away creating a
“curtain effect” (see the Overhead View diagram next page). You can increase the overall effected
area through the use of judiciously placed fans, both near the machine and on the ground. Fans
near the machine (some larger machines have these incorporated into their design) will help disperse
the snow into a larger area. Fans on the ground will also help with dispersion, as well as provide
beautiful updrafts and swirls. Often these machines are used in ballrooms for holiday parties and
occasionally in arenas. The key to coverage in a larger venue (or when you want to make it snow on
the audience at a theatre) is not determined as much by the number of machines as it is by the air
handler’s circulation in the room itself. Air handlers in arenas and many modern ballroom facilities
are designed to re-circulate thousands of cubic feet of air per minute. Experiment with air handler’s
currents to circulate snow around the venue. Staggering the placement and alternating the direction
of the snow machines so that the edges of the air streams from the machines interact in opposing
directions is another technique for creating a swirling effect.
Back lighting and to some extent side lighting is vital to the audience’s visual experience.
If lit from the front only, the effect’s visibility will be poor at best. Lighting can be especially
challenging in a ballroom or other “total environment” setting or venue, when your audience will be
viewing the snow from multiple angles and positions. Ideally you want your lighting to come from
above, yet below the snow machines. Obscuring the snow machines in the dark above the light
sources allows the snow to capture light, adding a sense of wonder to your event.
Noise reduction is another factor to be considered in your production design. To a large
extent it can be covered with music. SnowMasters engineers have developed the quietest snow
machines using better sound insulation, and quieter blowers such as the T-1600 Snow Machines series.
11

Limited Lifetime Warranty
Snow Masters provides a limited lifetime warranty for the T-5000 Mega
Evaporative Snow Machine any manufacturing defects. Any misuse, abuse,
or negligence automatically voids our warranty. Running any other liquids/
materials other than
the pump automatically voids our warranty. Snow Masters is not responsible for
loss of income, labor, or business as a result of a T-5000’s malfunction. Snow
Masters is not responsible for physical damage, scratching, tube damage, after
shipping from Snow Masters’ Manufacturing facility. For safety reasons, Snow
Masters will repair damaged electrical wires per the warranty. There is a lifetime
warranty on the circuit board and other electronics to the fan or pump. Direct
all questions and claims to the Snow Masters customer service at 800-745-8599
from 8-5 Central time or the 24 hr tech support line at 888-391-SNOW.
distilled
water and the Snow Masters’ solutions through
M•A•S•T•E•R•S
S P E C I A L E F F E C T S
M•A•S•T•E•R•S
S P E C I A L E F F E C T S
11054 County Road 71
Lexington, AL 35648
www.snowmasters.com
AUSTRALIA • NASHVILLE
LOS ANGELES • FORT LAUDERDALE
Sales: 256-229-5551
Fax: 256-229-5552
24 Hour Tech Support
1-888-391-7669
 Loading...