

Page 1

Snow Thrower
Snow Thrower
Model No. 322PRM
Form No. 7322PRM-880E
A Division of Snow Joe, LLC
IMPORTANT!
Safety Instructions
All Operators Must Read These
Instructions Before Use
ny electrical appliance can be dangerous if used incorrectly.
A
Some of the safety precautions given in this manual apply
generally to many appliances. Other warnings are specific to
the use of this snow thrower.
General Safety WARNINGS!
You and any other operator of this snow thrower must read,
understand and follow these instructions in their entirety, and
should re-read them at the start of each snow season. Failure
to follow any instruction may result in BODILY INJURY (including
electric shock) or possible FIRE.
Notice the personal safety alert symbol m used in this
manual to draw your attention to a WARNING given
along with the particular operating instruction. This
means that an operation requires special ATTENTION,
CAUTION, and AWARENESS.
1. Keep children, pets, and others away from the work
area: Be aware that the normal noise of the machine
when turned on may make it difficult for you to hear
approaching people.
2. Use the electric cord and extension cord safely:
A. Keep cord away from heat sources and sharp objects.
B. Prevent oil or other fluids from spilling onto snow thrower
or cord.
C. Never carry the snow thrower by cord or yank it to
disconnect from electrical outlet. Keep cord away
from heat, oil, and sharp edges.
D. Replace or properly repair damaged cords. If cord is
damaged in any manner while plugged in, pull extension
cord from wall receptacle.
E.
Extension Cord: WARNING – Only use a UL rated
extension cord for OUTDOOR, all-weather use (usually
orange color). To prevent the disconnection of the
snow thrower from the extension cord during operation,
make a knot as shown on page 5; see WARNING box
on page 5 for more cord information.
OPERATOR’S MANUAL
operator. Shut off and disconnect cord before touching
any parts other than the handles and switch.
5. Hand-held operating position: Operating this snow
thrower in the hand held position is unsafe.
6. Surfaces: This snow thrower is intended for use on paved
surfaces. The unit should not be used on gravel or
stone surfaces.
7. Unintentional operation: Do not carry plugged-in
snow thrower with finger on switch. Be sure that the
switch is off when plugging in.
8. Body position: Be aware of your footing and body
positioning to maintain proper balance at all times; watch
for uneven surfaces and don’t overreach.
9. Excessive force: The snow thrower was designed to
respond at a certain rate for various snow conditions for
optimum safety and performance. Don’t force it; keep
pressure constant.
10. Hitting an object: If the snow thrower accidentally
strikes an object, first stop; remove key then plug.
Inspect for damage; repair or replace part before using
the snow thrower again.
11. When work is completed: Disconnect from the power
source when not in use, when changing accessories, and
before performing any maintenance function.
12. Store safely: Store indoors in a dry area between uses.
Store in a locked area, where children and unauthorized
people cannot gain access.
13. Maintain for safety and longevity: See instructions in
this operator’s manual for proper maintenance. Use only
those replacement parts made for your model.
14. The use of any other accessory or attachment might
increase the risk of injury.
3. Wear proper clothing: Wearing rubber boots offers
additional protection from electric shock when operating
this snow thrower. Do not wear loose clothing that may
become caught in the machine.
4. Moving parts present risks: Keep hands away from
moving parts. Guards must be properly placed to protect
© 2010 by Snow Joe, LLC
All rights reserved. Original instructions.
Save These Instructions
1
Page 2
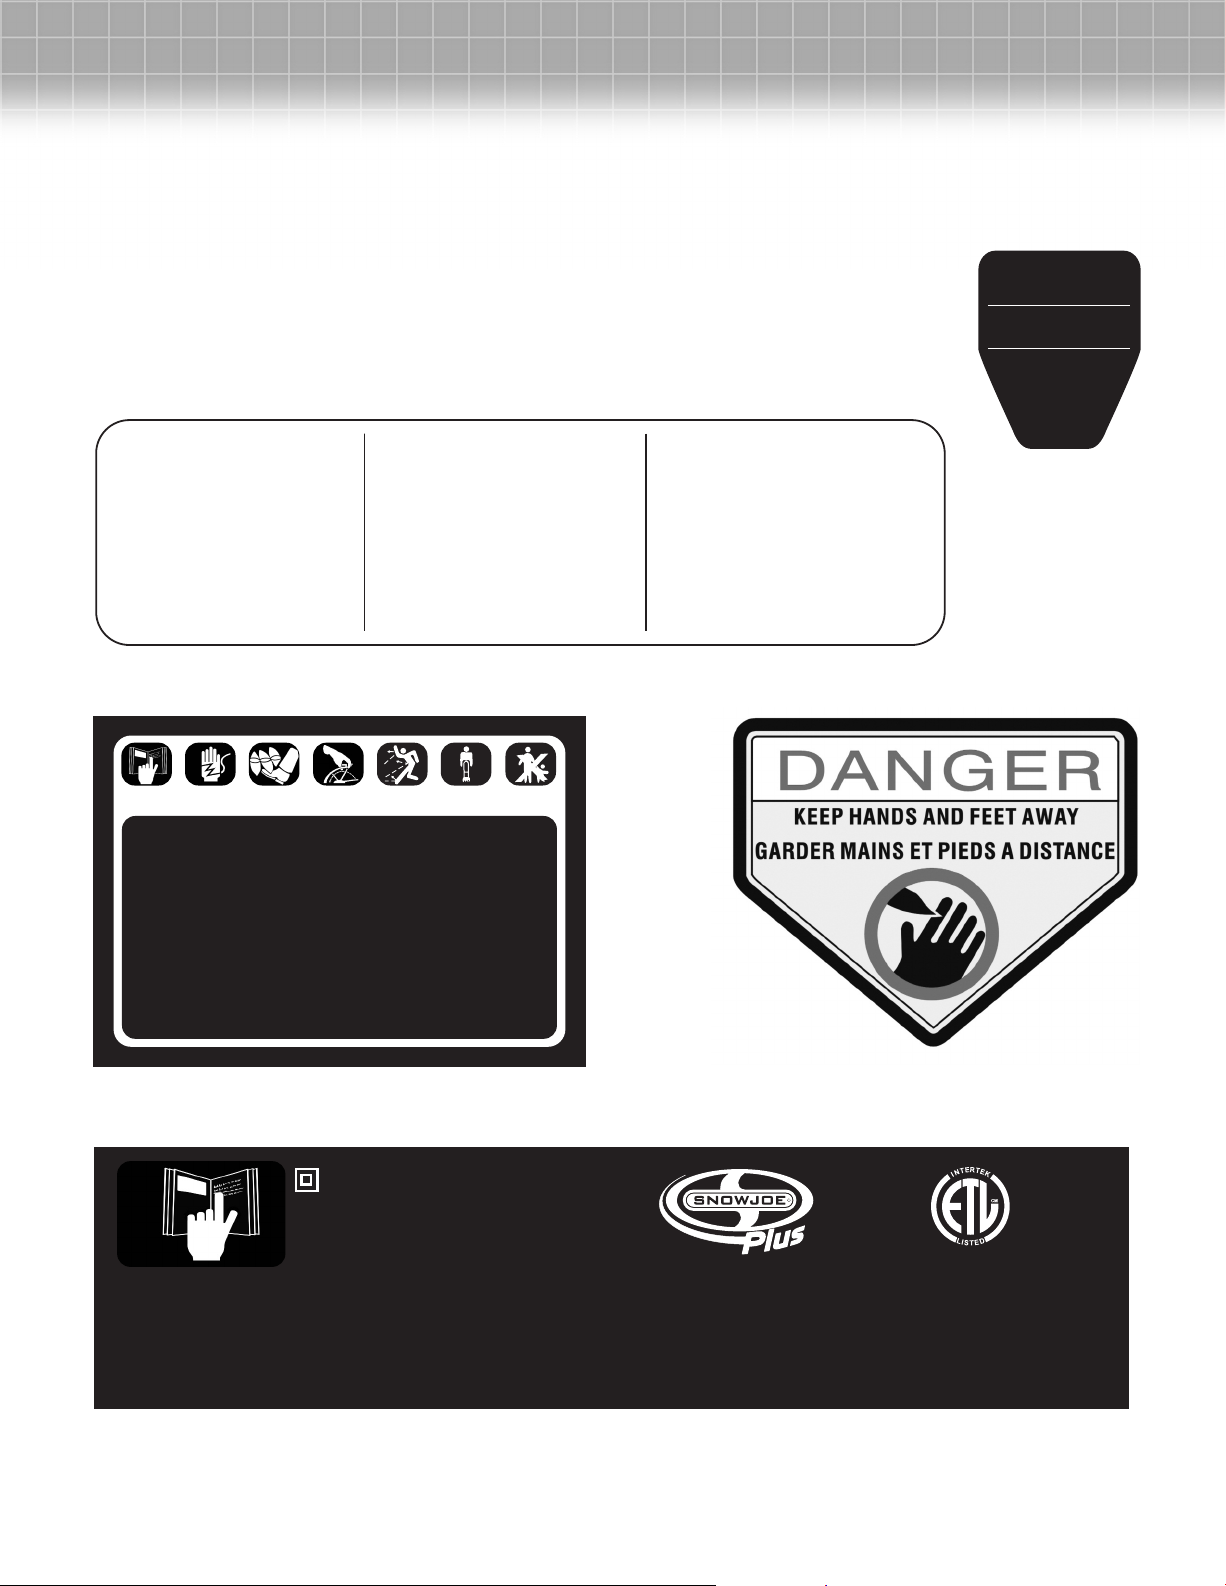
Safety and Instruction Decals
C
US
R
Safety decals and instructions are easily visible
to the operator and are located near areas of
potential danger. Lost or damaged decals should
m
be replaced.
TO OPERATE
INSERT KEY
EPRESS BAR
D
PARA ENCENDER
INTRODUZCA LA LLAVE
PRESIONE LA BARRA
POUR LE
FONCTIONNEMENT
INSÉREZ LA CLÉ
ABAISSEZ LA BARRE
W A R N I N G !
Electric shock can cause serious injury or death.
o avoid electric shock: REMOVE SHIPPING PIN
T
ABOVE BEFORE REMOVING THIS LABEL AND
TTEMPTING TO SEPARATE TUBES.
A
DO NOT USE SNOW THROWER IF WIRE
INSULATION INSIDE OF TUBE IS DAMAGED.
READ ASSEMBLY INSTRUCTIONS AND
OPERATOR’S MANUAL.
¡
ADVERTENCIA!
Una descarga eléctrica puede causar lesiones
raves o la muerte. Para evitarla: RETIRAR EL
g
PASADOR DE EMBALAJE DE ARRIBA ANTES
DE QUITAR ESTA ETIQUETA E INTENTAR
SEPARAR LOS TU BOS. NO UTILIZAR EL
LANZADOR DE NIEVE SI EL AISLANTE DEL
ABLE DENTRO DEL TUBO ESTÁ DAÑADO.
C
LEER LAS INSTRUCCIONES DE ENSAMBLAJE
EL MANUAL DEL OPERARI O.
Y
322P-2135
m
D A N G E R
DANGER Do not use hands to unclog chute. Stop motor before removing debris.
Do not walk in front of running machine. Do not direct discharge at bystander.
CAUTION Use for snow removal only.
ARNING To reduce the risk of electric shock, replace damaged cord immediately.
W
PELIGRO No emplee las manos para desatascar la tolva. Pare el motor antes de sacar el material
atascado. No camine delante de la máquina en funcionamiento. No descargue directamente sobre
los transeúntes.
DVERTENCIA De uso exclusivo para remover la nieve.
A
ADVERTENCIA Para prevenir el riesgo de una descarga eléctrica, cambie el cable dañado
inmediatamente.
DANGER Ne pas déboucher le conduit d’éjection à la main. Arrêter le moteur avant d’ôter
tout debris.
Ne pas se mettre devant une machine en marche. Ne pas diriger le jet d’éjection de neige vers
quelqu’un.
ATTENTION N’utiliser que pour ôter la neige.
AVERTISSEMENT Afin de prévenir le risque d’électrocution, remplacer immédiatement le cordon
électrique abîmé.
MISE EN GARDE!
Les chocs électriques peuvent causer de graves
lessures, voire la mort. Pour éviter les chocs
b
électriques : RETIREZ LA FICHE D'EXPÉDITION
CI-DESSUS AVANT DE RETIRER CETTE ÉTIQUETTE
ET DE SÉPARER LES TUBES. N'UTILISEZ PAS LE
CHASSE-NEIGE SI L'ISOLANT DES FILS À
'INTÉRIEUR DU TUBE EST ENDOMMAGÉ. LISEZ
L
LES INSTRUCT IONS D'ASSEMBLAGE ET LE
ANUEL DE L'UTILISATEUR.
M
322P-2134
322P-2136
DOUBLE INSULATED: When servicing, use only
identical replacement parts.
DOBLE AISLAMIENTO:
piezas idénticas.
DOUBLE ISOLATION:
que des pièces de rechange identiques.
Read operator’s manual for operating and safety instructions.
Replacement manual available by sending model and serial numbers to:
Snow Joe, LLC, 86 Executive Avenue, Edison, NJ 08817, or visit www.snowjoe.com
Lea el manual de instrucciones de seguridad y operación.
Tenemos disponible manuales de reemplazo si envía el número de modelo y número de serie a:
Snow Joe, LLC, 86 Executive Avenue, Edison, NJ 08817, o visite www.snowjoe.com
Lire le manuel pour connaître le mode d’emploi et les prescriptions de sécurité.
Manuel de rechange disponible sur envoi du numéro de modèle et du numéro de série à :
Snow Joe, LLC, 86 Executive Avenue, Edison, NJ 08817, ou visiter le site www.snowjoe.com
Al darle servicio, use solo
lors de l’entretien, n’employer
MODEL NO. 322P
120 VAC 60 HZ 7.5 AMP
Made in China
MODEL NO. 322P
120 VAC 60 HZ 7.5 AMP
Fabricado en China
MODEL NO. 322P
120 VCA 60 HZ 7,5 AMP
Fabriqué en Chine
322P-2137
3153923
CONFORMS TO UL STD.1090
CERTIFIED TO CAN/CSA
STANDARD C22.2 NO. 147-M90
CONFORME A LA NORMA UL 1090
CERTIFICADO POR CAN/CSA
NORMA C22.2 NO. 147-M90
CONFORME À LA NORME UL 1090
CERTIFIÉ POUR CAN/CSA
STANDARD C22.2 NO. 147-M90
322P-2138
2
Page 3
Assembly
2. Slide the lower tube (B) into the upper tube (A) (Figure 2).
Note: Before you connect the tubes, you may find it easier to
remove the slack in the wire. Slightly pull the wire from the
bottom of the lower tube (B) before you join the tubes together.
m
Inspect wiring, which, if damaged during shipping,
may cause serious bodily injury during equipment
use. If any damage is seen or suspected, do not
assemble. Instead, contact Snow Joe customer service
(1-866-SNOWJOE) for assistance.
Handle with care during assembly so that electrical
wiring does not become damaged.
CAUTION
m
Upper and Lower Tube Assembly
1. To secure parts during shipping, a wire is wrapped
around the upper and lower tube sections. Remove it, but
don’t discard (Figure 1).
A
Adjustable handle
A
Figure 1
A. Shipping wire
B
Figure 2
A. Upper tube
B. Lower tube
3
Page 4

. After sliding lower tube (B) inside the upper tube (A), line
3
up he screw holes on each tube (Figure 3).
A
Power Base Assembly
1. Position the power base (G) beneath the handle support
H) as shown in Figure 5-2.
(
C
D
B
Figure 3
A. Upper tube C. Slotted screw
B. Lower tube D. Countersunk nut
4. Locate in the Parts Bag the slotted screw (C) and the
countersunk nut (D). Insert the screw through the aligned
holes in the upper and lower tubes and secure other end
with the nut.
Note: You may have to carefully move the wiring inside the
tube to one side if it blocks the path of the screw. (Use the
shipping wire provided; do not use a sharp tool.)
5. Loosen the adjustable handle and reposition until it reaches
the optimum length for the principal operator, then retighten
the bolt in Figure 4. (Readjust for each subsequent operator.)
E
Figure 5-1
H
F
G
Figure 5-2
I
F. Power base connector
G. Power base
H. Handle support
I.
2 Phillips-head screws
2. Pull the power base connector (F) out of the power base
(G). Push to snap together the connector on the handle
support to the power head’s connector; only one position
is possible, and they should fit without forcing (Figure 5-1).
3. Push the coupled connectors back into the motor compartment.
4. With the Snow Joe decal on the handle support (H) facing
you, line up the grooves in the handle support (H) with
the grooves in the power base, and slide together until
interlocked (Figure 5-3).
IMPORTANT: If you encounter any resistance, STOP!
Possibly the wiring and connectors are out of position;
in that case, reinsert them with care into the motor
compartment and repeat step 4.
5. Locate two Phillips-head screws (I) in the Parts Bag. Insert
the first screw into the hole in back of the handle support
and turn until tight. Insert the second screw into second
hole and tighten (Figure 5-3).
Figure 5-3
Figure 4
E. Carriage Bolt
4
Page 5

Operation
NOTE: It is best to remove snow before it becomes packed
down.
m
Electric shock may cause SEVERE INJURY or
DEATH. Heed these warnings:
• Do not allow any part of snow thrower to make contact
ith water while powered on. If the appliance becomes
w
wet while turned off, wipe dry before starting.
• Use only a UL-rated extension cord for outdoor, all-
weather use. Do not use an extention cord over
150 feet (46 meters).
• Don’t touch the appliance or its plug with wet hands.
Don’t stand in water; wearing rubber boots offers
some protection.
WARNING
EXTENSION CORD CHART
Cord length is: 100 ft. (30 m) 150 ft. (46m)
Wire gauge is: 16 14
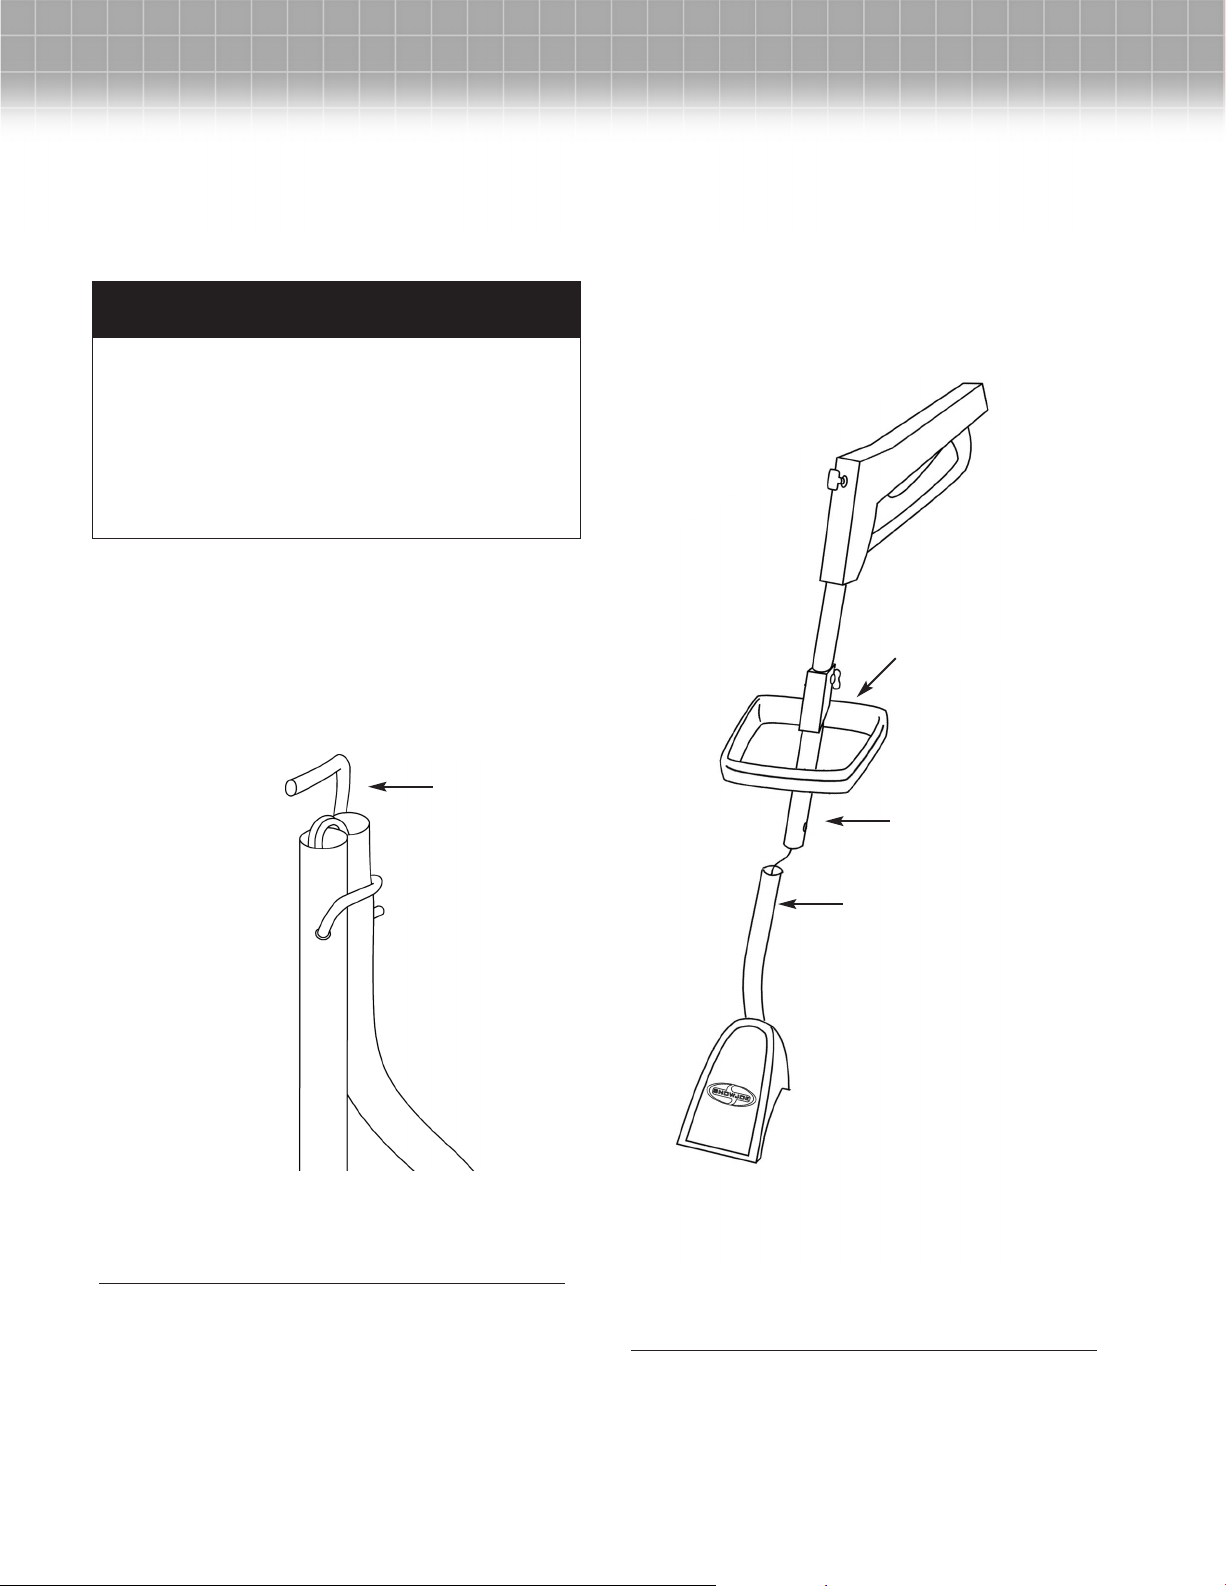
1. Extension cord: Note that the snow thrower has a polarized
plug (J), with one prong slightly longer and wider than the
other. The extension cord plug and the slotted end should be
likewise polarized, so that the original plug fits snugly into the
extension cord slots.
m
To prevent the snow thrower cord and extension cord from
disconnecting during use, tie the extension cord into a loose
knot around the lower bar (K) of the handle as shown in next
step (Figure 7, Item O).
2. Plug the extension cord into a wall outlet. Insert the key
(L) into the slot in front of the hand-grip (M) (Figure 7).
M
L
N
K
O
Figure 7
K. Lower bar
L. Key
M. Hand-grip (Top bar)
N. On/Off switch (under hand-grip)
O. Cord tied to handle
Powering On and Off
3. Insert the key (L). Squeeze the On/Off switch (N), as shown in
Figure 7. Release the switch by releasing grip pressure.
4. When finished with work, remove the key and disconnect
the extension cord.
Figure 6
J. Polarized plug
J
5
Page 6

Operating Procedures
A
B
1. Turn on the snow thrower switch: With key inserted,
squeeze on/off switch to power on. Position the appliance
so that the blade makes level contact with the ground, by
titling it slightly forward (away from you). When starting in
deep snow, see suggestion below.
2. Begin to push the snow thrower forward: Do not rush.
If the snow is being completely cleared from the ground, you
re moving at the correct rate of forward motion.
a
3. Snow depth: Your rate of speed will depend on the depth
of the snow.
• The snow thrower’s capacity for snow removal is
4 inches (10 cm) for each pass. A single pass
should clear all snow up to that depth, permitting
you to move at a steady rate on a straight path.
• For snow deeper than 4 inches, a side-to-side
motion is effective. Hold in each hand the top and
lower handles and make a sweeping pass from side
to side; you should aim to remove 4 inches with
each sweep. Keep up a steady back and forth
movement for each area of work. Rest at intervals
as needed.
4. Desired path width: You can only clear a path as wide as
the appliance width at one time. By angling the snow
thrower to the right or to the left of your current path, place the
cleared snow wherever you desire it to go. Of course, you
should place it where it does not need to be cleared later.
Maintenance
m
Risk of Serious Bodily Injury:
emove the key and disconnect the extension cord
R
before beginning any maintenance task. If the switch
were to engage accidentally serious injury could result.
Lifetime Lubrication
Lubrication is not necessary and may damage the appliance.
The snow thrower is lubricated for lifetime use at the factory
before shipment.
Replacing the Rotor
1. Remove lock nut (counterclockwise) and flat washer (Figure 8).
WARNING
m
5. Note wind direction: If possible, move in the same direction
as the wind.
6. Working on gravel or pebbles: To avoid throwing loose
surface material along with snow, push down on the handle
to raise the scraper above the gravel or pebbles.
7. Power cord and extension cord: Inspect both cords at the
end of each snow-clearing session to detect any damage;
if damaged, replace. Be careful to avoid the blade running
over the cord. Keep cords clear of heat sources, sharp objects,
or heavy weights standing on them when in storage. Don’t
yank on cords or otherwise abuse them.
Figure 8
A. Lock nut
B. Flat washer
6
Page 7

2. Using an open end wrench, loosen the nut between the
E
F
C
D
G
body and the rotor (counterclockwise). Hold the loosened
nut and turn the outer body bolt counterclockwise. Remove
ut, bolt, and washers (Figure 9).
n
Figure 9
C. Bolt
D. Flat washer
E. Flat washer
F. Nut
Storage
CAUTION: Store electrical appliances in a locked area away
from children and unauthorized users.
1. Before storing, inspect the entire appliance for any damaged
or worn parts. Check connections and screws and tighten
f necessary. Check blade condition. Examine the extension
i
cord and its plug for excess wear or damage, and replace
if warranted.
2. Store the snow thrower safely out of harm’s way and prevent
access by unauthorized users, preferably by placing in a
locked cabinet. Keep away from dust and humidity by
loosely covering with a tarp and using de-humidifying
products as conditions warrant.
3. Keep the extension cord with the appliance. If the entire
appliance is locked away, keep the key in a container or
plastic bag, tied or taped to the handle so it isn’t lost. If the
appliance isn’t locked up, it is advisable to store the key in a
separate secure place to prevent unauthorized use.
Service and Support
If your Snow Joe 322P electric snow thrower requires service
or maintenance, please call 1-866-SNOWJOE for assistance.
3. Pull out the rotor starting at the left side (Figure 10).
Figure 10
G. Rotor
Model and Serial Numbers
When contacting the company, reordering parts, or arranging
model and serial numbers, which are found on the decal on the
lower tube. Copy these numbers into the space provided
below.
Please record the following numbers from the housing or handle of your
new product:
Model #:
3 2 2 P R M
Serial #:
Note: You may need to pull out the rotor using both hands.
Please wear gloves to prevent injury.
4. Install the new rotor reversing the above steps.
7
Page 8

A One-Year Full Warranty
for residential use
in the United States and Canada
General Conditions:
Snow Joe, LLC warrants this product to the original purchaser for one years against defects in material or workmanship when used for
normal residential purposes. Snow Joe, LLC will repair any defect in material or workmanship, and repair or replace any defective
part, subject to the conditions, limitations, and exclusions set forth herein. Such repair or parts replacement will be free from charge to the
original purchaser except noted below.
The duration of the warranty applies only if the product is put to personal use around the household or residence. If the product is put
o any business use, commercial or industrial, then the duration of this warranty is 90 days from the date of original purchase. If any product
t
is rented or leased, the duration of the warranty is 90 days from the date of original purchase.
It is the owner’s responsibility to perform correctly all maintenance, and minor adjustments explained in the owner’s manual.
Electric Products:
To obtain a replacement electric powered unit or repair the existing electric powered unit, you must return the complete unit and
postage prepaid to: Snow Joe Return Center, 86 Executive Avenue, Edison, NJ 08817
Gasoline / Battery Products:
Limitations
l Batteries are warranted only for the period of 12 months after the date of purchase on a prorated basis. Rechargeable batteries
will be replaced free from charge during the first 90 days. After the initial 90 days, batteries will be replaced at prorated
cost to the customer
l Idlers, cables, and electrical components are warranted to the original purchaser for use at household or residence for a period
of two years
Exclusions
l Snow Joe brand engines are covered under this warranty. All other engines and engine accessories are covered only by
the engine manufacturer’s warranty and are not covered by this warranty
l Parts used that are not genuine Snow Joe parts are not covered by this warranty
l Damages resulting from misuse, alteration, improper assembly, improper adjustment, neglect, or accident which requires repair
is not covered under this warranty
l Belts, augers, and tines are not covered under warranty – belts, augers, and tines wear out and can be purchased at
www.snowjoe.com or by calling 1-866-766-9563
Snow Joe, LLC may from time to time change the design of its products. Nothing contained in this warranty shall be construed as
obligating Snow Joe, LLC to incorporate such design changes into previously manufactured products, nor shall such changes be
construed as an admission that previous designs were defective.
This warranty is intended to cover product defects only. Snow Joe, LLC is not liable for indirect, incidental, or consequential damages
in connection with the use of the Snow Joe Products covered by this warranty. This warranty does not cover any cost or expense
incurred by the purchaser in providing substitute equipment or service during reasonable periods of malfunction or non-use of this
product, while waiting for completion of repairs under this warranty. Some states do not allow exclusions of incidental or consequential
damages, so the above exclusions may not apply in all states. This warranty may give you specific legal rights in your state.
If you wish to contact Snow Joe, please direct inquiries to the:
Customer Service Department
Snow Joe Center
86 Executive Avenue
Edison, NJ 08817
Customers who have purchased Snow Joe products exported from the United States and Canada should contact their Snow Joe
Distributor (Dealer) to obtain information applicable for your country, province, or state. If for any reason, you are not satisfied with the
distributor’s service, or if you have difficulty obtaining warranty information, contact your Snow Joe seller. If in the event your efforts
are unsatisfactory, please write to the Snow Joe Center at the above address.
If you have any questions about your product warranty, please call 1-866-SNOW-JOE or visit us online at www.snowjoe.com.
8
 Loading...