

Page 1
DEALER SET-UP INSTRUCTIONS for SNAPPER
21" CAST ALUMINUM REAR DISCHARGE WALK BEHIND MOWERS
This SNAPPER Walk Behind Mower uses a handle engine control bail system to kill the engine for the SAFETY
of the operator. These mowers are designed for quick set-up. The checklist on Page 4 should be filled out by
the dealer as the items are checked off and/or performed and the Consumer/Operator Product Registration card
filled out and sent to the Customer Service department at SNAPPER when completed. CAUTION: Cutting blades
are extremely sharp. Wear heavy leather gloves when handling or working with blades. Be careful to avoid
cutting yourself on sharp edges of blade.
STEP 1: Remove unit from carton. Remove packing
material from unit and unfold handles. Do this carefully to
prevent cables from hanging up or becoming kinked.
STEP 2: The bolts attaching the lower handle to the
handle brackets are for shipping purposes only. Remove
those bolts, and insert two curved head bolts out through
each handle bracket and lower handle tube, securing
with internal lock washers and nylon lock nuts. Tighten
securely. See Figure 1.
STEP 3: Remove the two shipping bolts (one each side)
attaching the upper handle to the lower handle. Replace
each with a curved head bolt, inserting out through each
side, and securing with an internal lock washer and a
plastic T-knob nut. Tighten securely. See Figure 1.
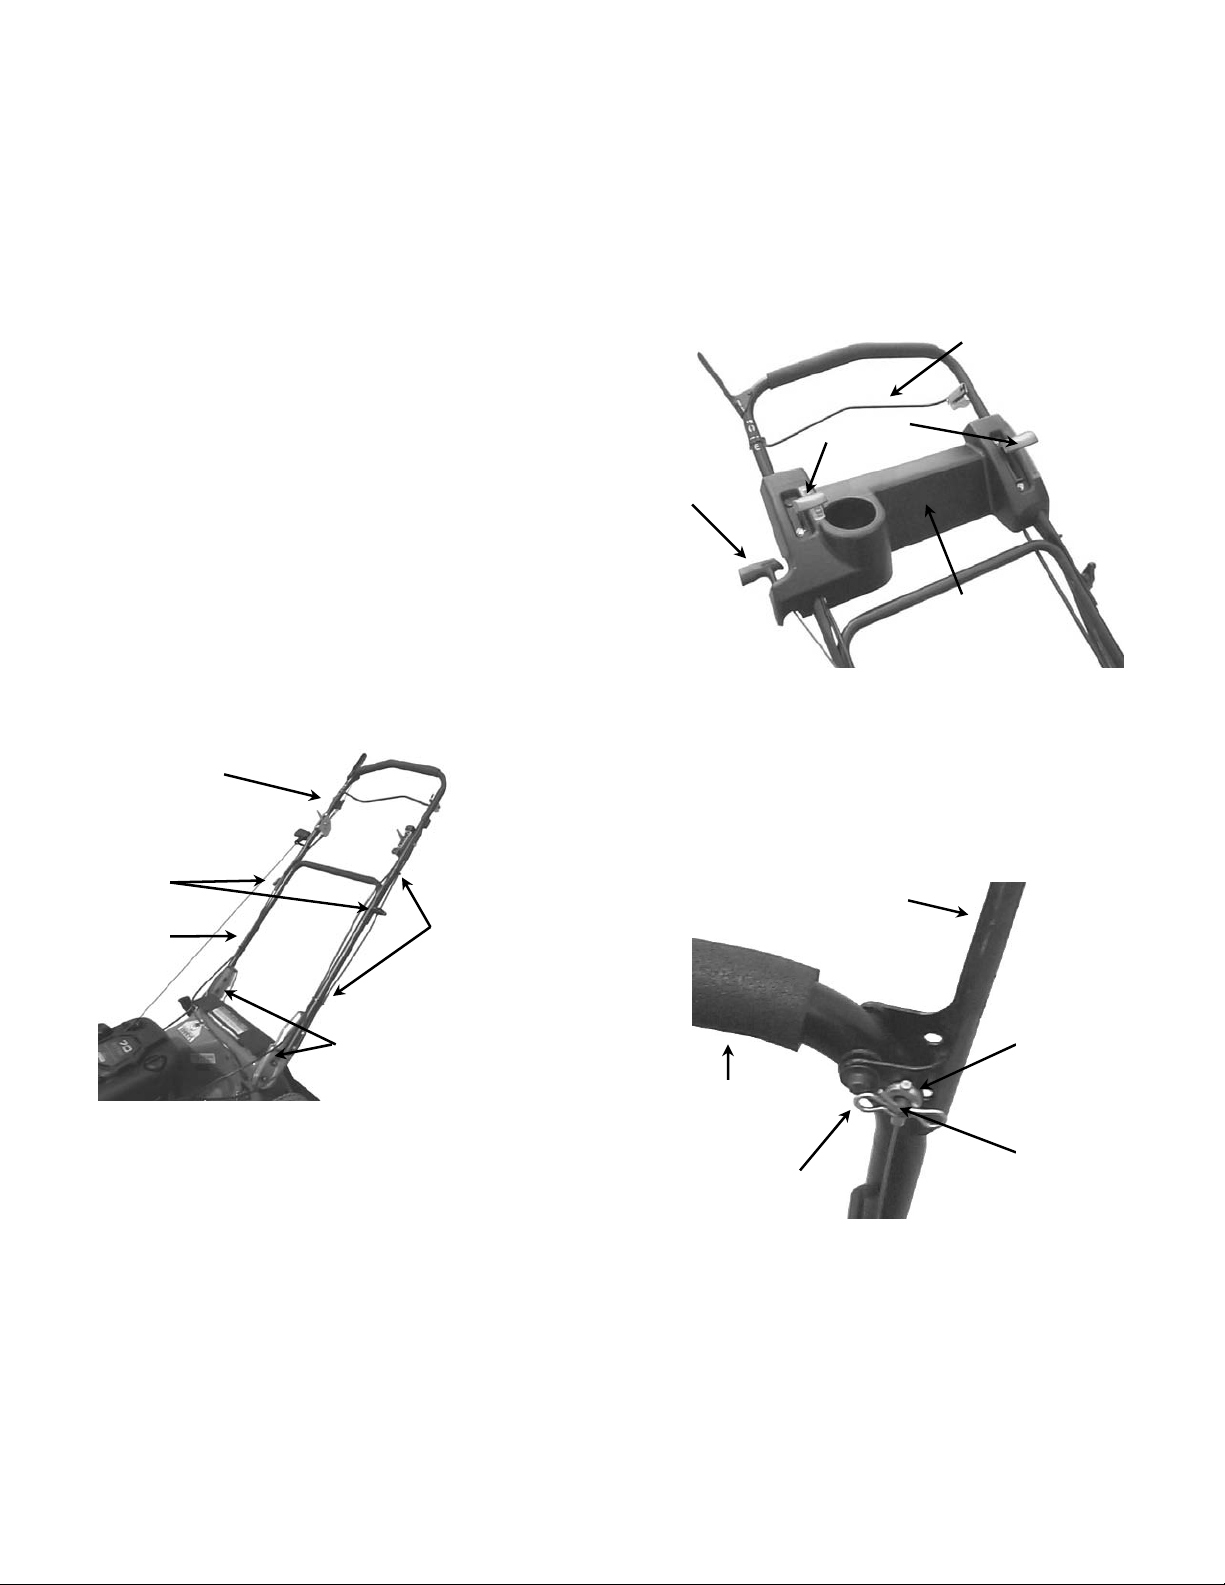
STEP 4: Secure control cables along each side of handle
assembly with four cable clips, positioning them as
shown in Figure 1. Make sure that cables are set into
relief loops in cable clips. Once clips are installed, make
sure that all controls operate without binding.
UPPER
HANDLE
T-KNOB
NUTS
LOWER
HANDLE
CABLE CLIPS
(2 EACH SIDE)
BLADE CONTROL
CONTROL
KNOBS
RECOIL ROPE
HANDLE
OPERATOR
CONSOLE
FIGURE 2
STEP 7: Remove hairpin from cable mounting stud on
back of wheel control lever. Slip ring end of cable onto
stud, and replace hair pin. See Figure 3.
WHEEL
DRIVE
CONTROL
HANDLE BRACKETS
FIGURE 1
STEP 5: Pull blade control bail against handle and at the
same time, pull engine rope handle and slip pull cord into
rope guide located on handle. See Figure 2.
STEP 6: Install Operator Console onto upper handle with
four 1/4-20 x 1/2” torx screws. Also, firmly press control
knobs onto engine speed and ground speed control levers.
(NOTE: Both knobs are identical.) See Figure 2.
CABLE
RING END
UPPER
HANDLE
STUD
HAIR PIN
FIGURE 3
STEP 8: Tip mower back against the upper handle to gain
access to cutting blade. Remove foam shipping block
from cutting blade. This must be removed before starting
the engine.
INSTRUCTION No. 7101612 (I.R. 8/21/2007)
TP 300-5284-IR-WB-N
Page 2
IMPORTANT: This mower is shipped with the recycling
plug installed. The plug must be removed if the mower
is operated with grass catcher. DO NOT start or operate
this mower without the plug or the entire grass catcher
in place.
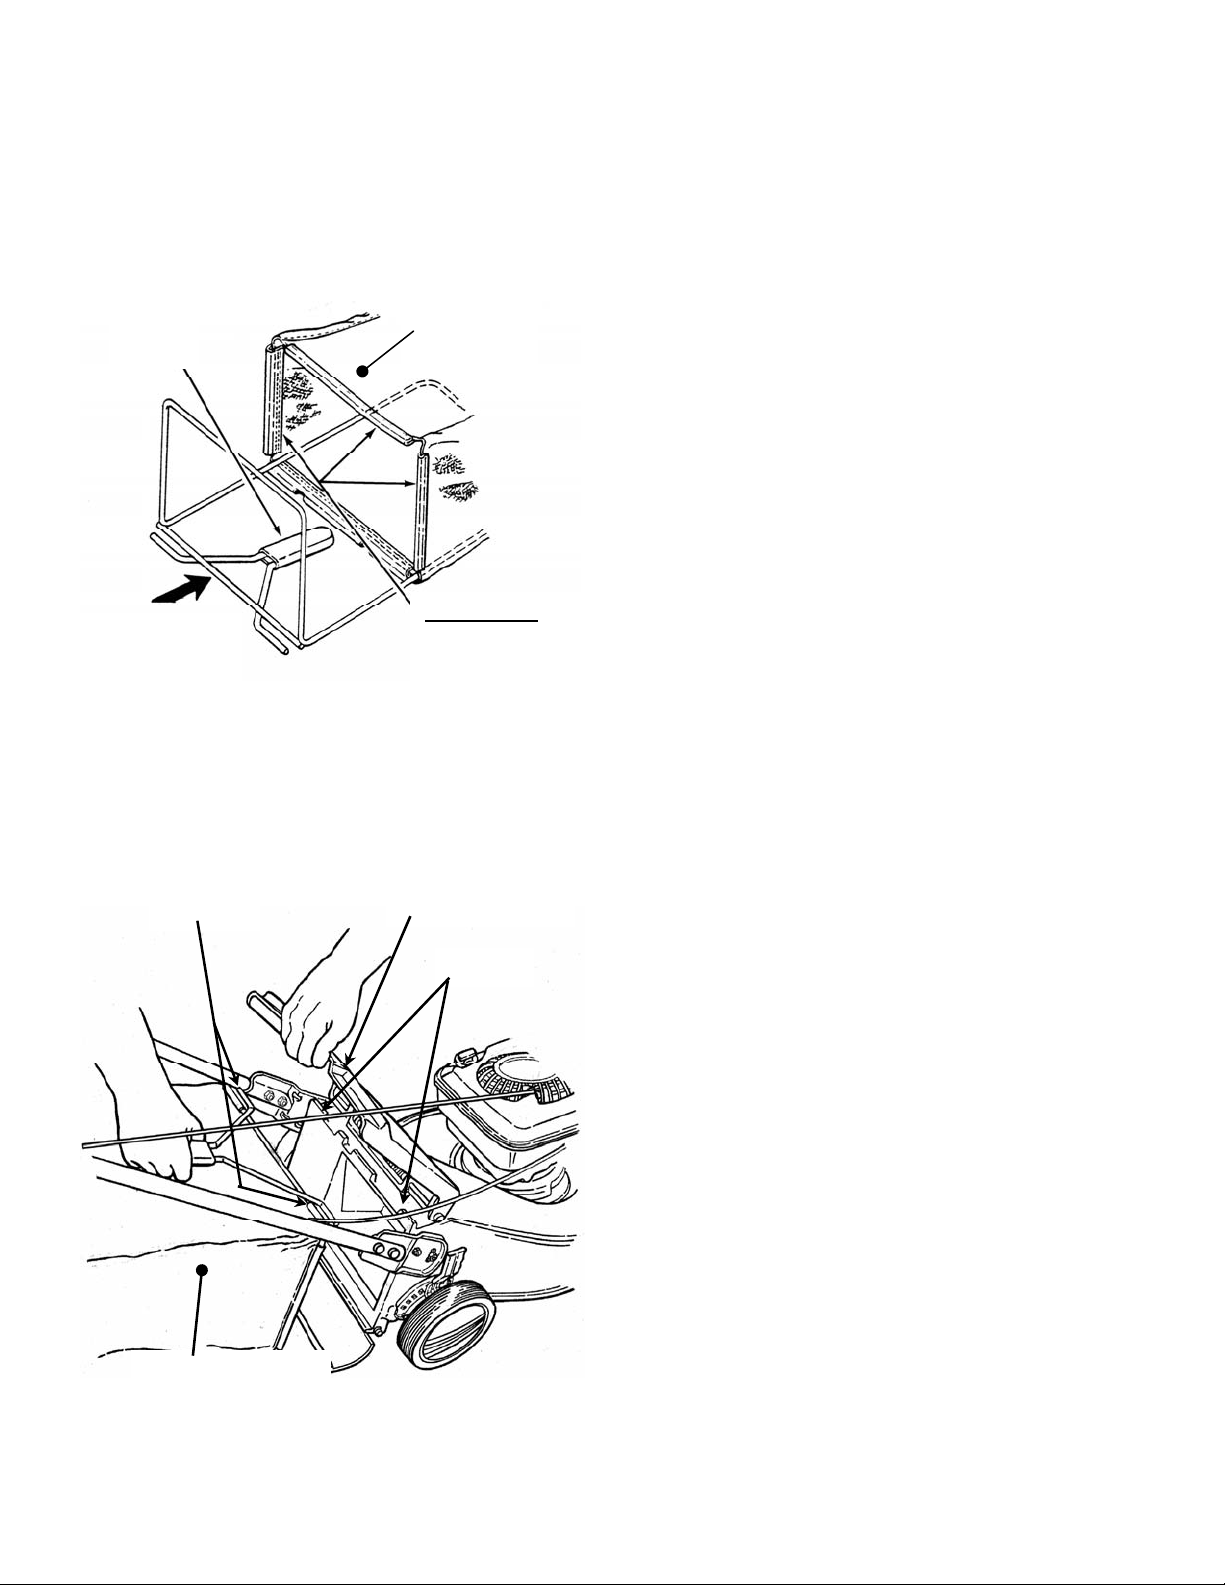
STEP 9: With grass catcher and catcher frame
assembly upside down (plastic bottom turned up), insert
bag frame assembly into catcher as shown in Figure 4.
Fasten "C" shaped plastic edge strip located on front of
bag around frame assembly on all four sides. Make sure
edge strip is fastened securely.
CATCHER
HANDLE
SLIDE FRAME ALL
THE WAY INTO
GRASS CATCHER
BOTTOM OF
GRASS
CATCHER
EDGE STRIPS:
ATTACH STRIPS TO
FRAME.
FIGURE 4
STEP 10: Install grass catcher to mower as follows: Lift
discharge door, then grasp handle and hold grass
catcher/frame up while placing rod ends over tabs at rear
of mower deck. Release discharge door. See Fig ure 5.
ROD
ENDS
GRASS CATCHER
DISCHARGE DOOR
TABS
FIGURE 5
2
Page 3

NOTES
___________________________________________________________________
___________________________________________________________________
___________________________________________________________________
___________________________________________________________________
___________________________________________________________________
___________________________________________________________________
___________________________________________________________________
___________________________________________________________________
___________________________________________________________________
___________________________________________________________________
___________________________________________________________________
___________________________________________________________________
___________________________________________________________________
___________________________________________________________________
___________________________________________________________________
___________________________________________________________________
___________________________________________________________________
___________________________________________________________________
___________________________________________________________________
___________________________________________________________________
___________________________________________________________________
___________________________________________________________________
___________________________________________________________________
___________________________________________________________________
___________________________________________________________________
___________________________________________________________________
___________________________________________________________________
___________________________________________________________________
___________________________________________________________________
___________________________________________________________________
___________________________________________________________________
___________________________________________________________________
___________________________________________________________________
___________________________________________________________________
___________________________________________________________________
___________________________________________________________________
___________________________________________________________________
___________________________________________________________________
___________________________________________________________________
___________________________________________________________________
___________________________________________________________________
___________________________________________________________________
3
Page 4

DEALER PRE-SALE CHECKLIST for SNAPPER
21" CAST ALUMINUM REAR DISCHARGE WALK BEHIND MOWERS
The following must be accomplished prior to sale. Refer to the previous pages in this instruction for detailed
set-up instructions. Review this checklist with purchaser. Check (
checklist.
SET-UP CHECKLIST
_____ FOAM SHIPPING BLOCK removed from cutting blade.
_____ UPPER HANDLE & LOWER HANDLE secured in place and hardware tightened securely.
_____ OPERATOR CONSOLE installed and CONTROL KNOBS pressed firmly in place.
_____ WHEEL DRIVE CABLE connected.
_____ SIDE CHUTE, RECYCLING PLUG or GRASS CATCHER installed on mower.
_____ BLADE retaining bolt(s) checked and tighten securely. (30 to 40 ft. lbs. recommended.)
LUBRICATION
_____ ENGINE OIL added to bring level up to full mark on 4-cycle engines (Refer to Engine Manual).
_____ OIL mixed with FUEL in specified ratio (2-cycle engines only).
OPERATIONAL TEST
_____ ENGINE started, engine control settings checked and adjusted as neede d.
_____ WHEEL DRIVE checked for proper operation and adjusted as needed.
_____ GROUND SPEED control checked.
CPSC (Consumer Product Safety Commission) COMPLIANCE TEST
_____ BLADE CONTROL stops engine when released.
DEALER’S RECORDS & FINAL CHECK
_____ PERSONALLY HANDED Operator’s Manual & Mower Safety Booklet to purchaser.
_____ INSTRUCTED purchaser to read and follow instructions in Operator’s Manual.
_____ DEMONSTRATED proper starting procedure and operation of mower to purchaser.
_____ INSTRUCTED purchaser how to service air cleaner, maintain oil level (4-cycle) or mix oil (2-cycle).
_____ ASSISTED purchaser in completing Product Registration Card.
CONSUMER/OPERATOR PRODUCT REGISTRATION CARD
Purchase Date ___________________ Model ________________________ Serial No. ________________________
Retailers Name ___________________________________ Signature _____________________________________
Address _____________________________________City _____________________ State ________Zip _______
MOWER WILL BE USED COMMERCIALLY? ______ YES ______NO
Purchaser’s Name _________________________________ Signature _____________________________________
Address ____________________________________ City _____________________ State ________Zip ________
IMPORTANT: This form is to be retained by the Dealer for future reference regarding Warranty, proof of
purchase, traceability for product recall or service, etc. Complete the Product Registration Card and Mail to
Customer Service Department at SNAPPER, P.O. BOX 1379, McDonough, Georgia, 30253.
4
√ ) items actually performed and signed on
INSTRUCTION No. 7101612 (I.R. 8/21/2007)
TP 300-5284-IR-WB-N
 Loading...