

Operator’s Manual
Not for
Reproduction
!
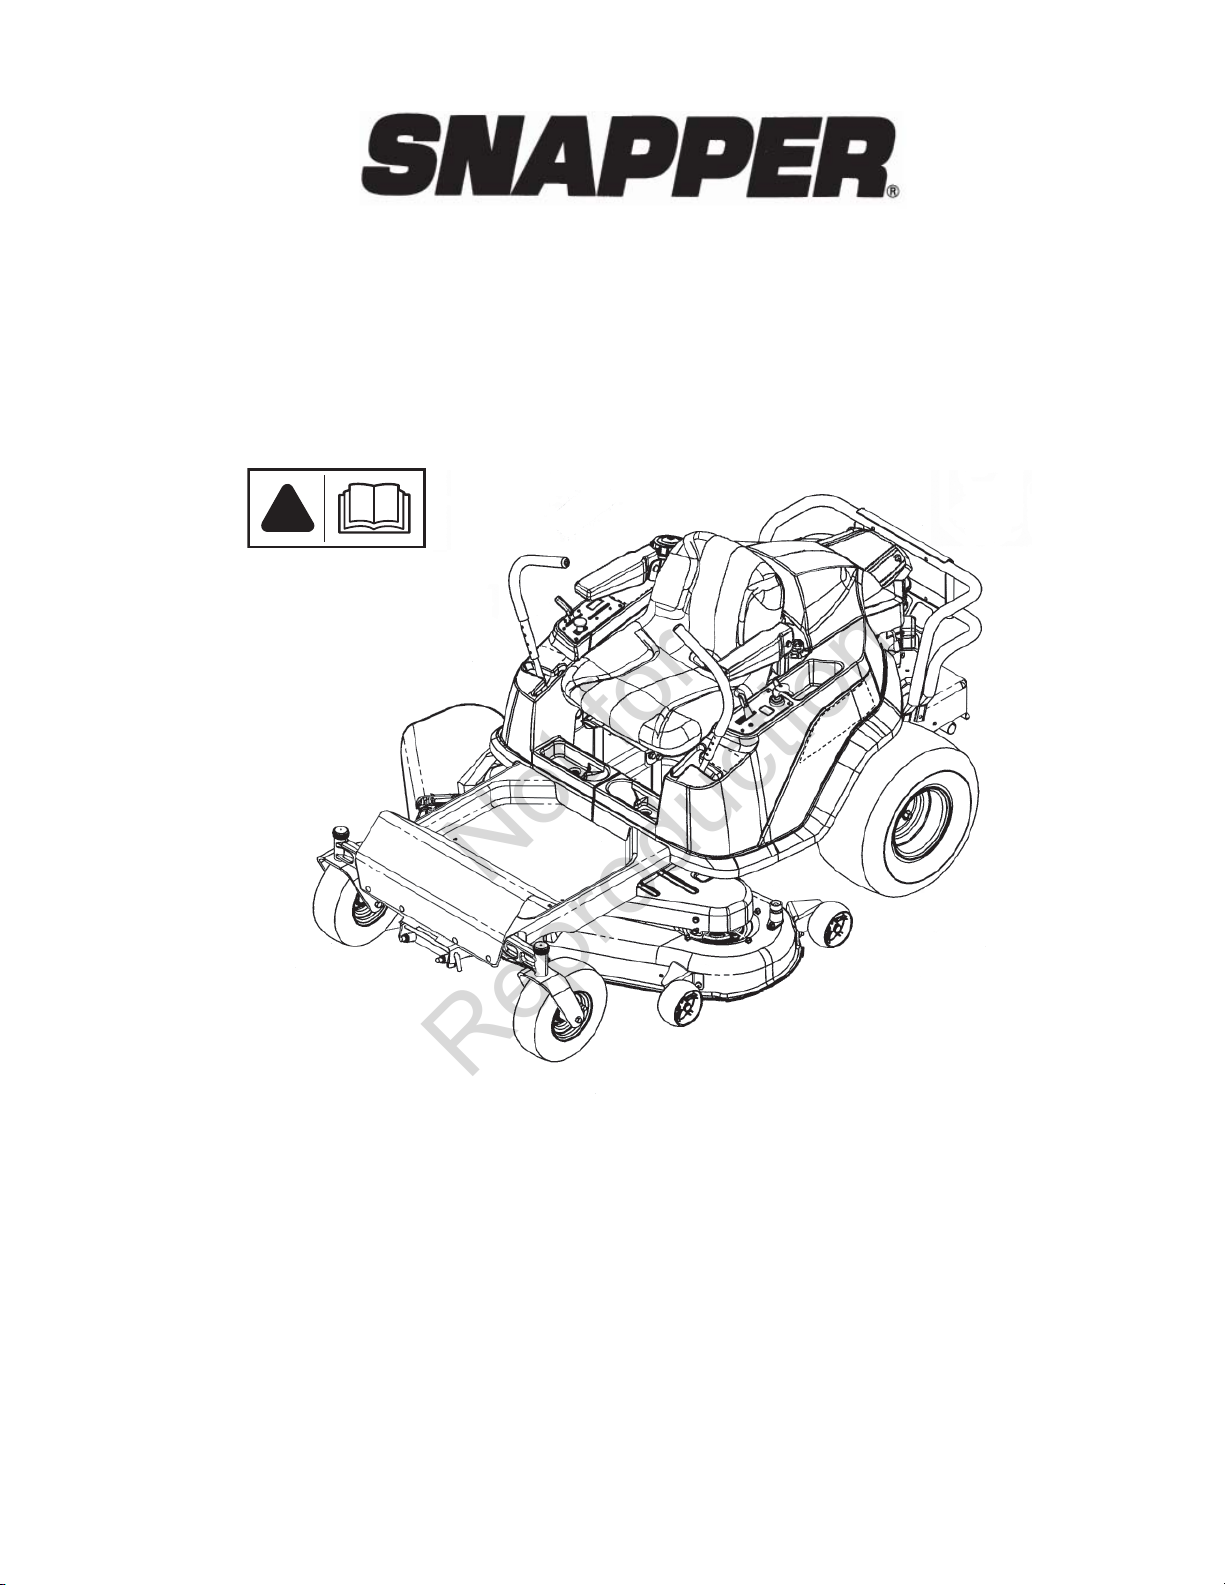
285Z Series Zero Turn Rider
Mfg. No. Description
7800632 RZT26520, 26HP Snapper Zero-Turn Rider with 52” Mower
7104441
Revision B
Thank You for purchasing this quality-built SNAPPER mower. We’re pleased that you placed your confidence in the
SAMPLE
Not for
Reproduction
SNAPPER brand. When operated and maintained according to the instructions in this manual, your SNAPPER mower
will provide many years of dependable service.
This manual contains safety information to make you aware of the hazards and risks associated with the machine
and how to avoid them. This machine is designed and intended only for finish cutting of established lawns and is
not intended for any other purpose. It is important that you read and understand these instructions thoroughly before
attempting to start or operate this equipment. Save these original instructions for future reference.
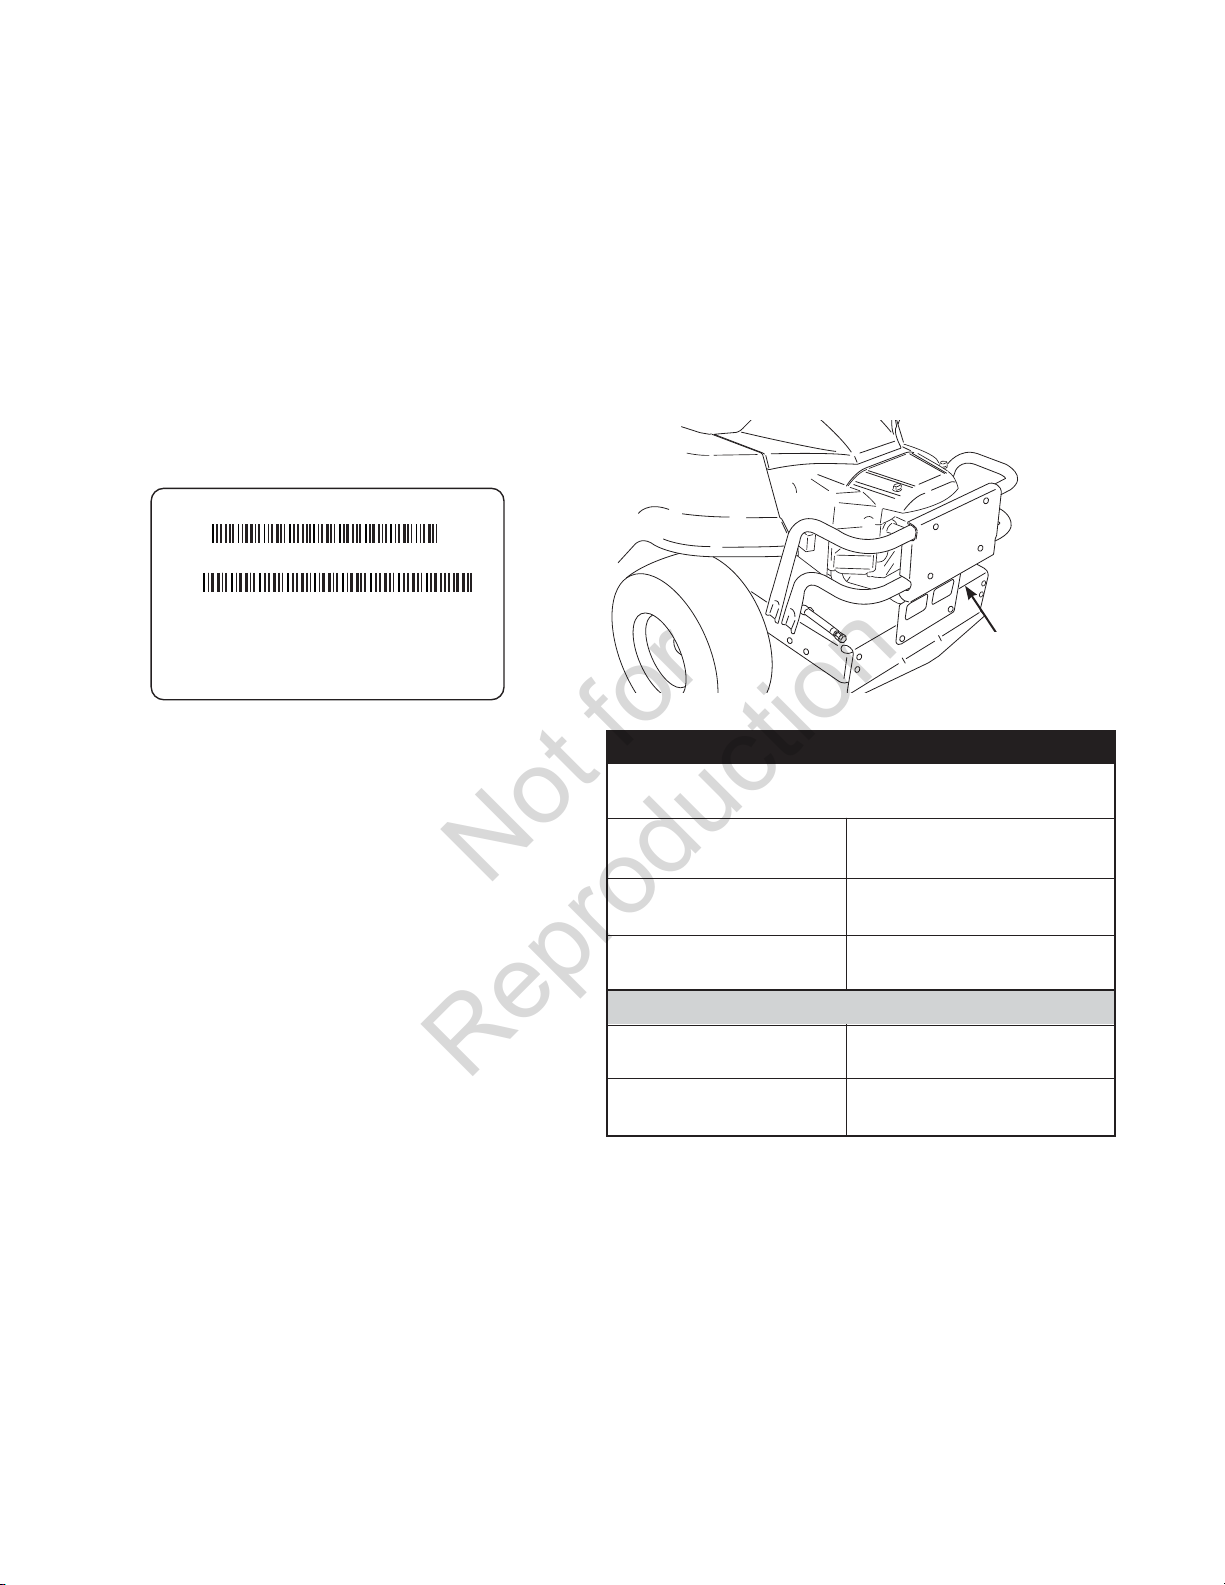
Identification Numbers
Product Identification Tag
Model / Modèle / Model XXXXXXX
Serial / Série / Serie XXXXXXXXX
USA 800-935-2967
WWW.SNAPPER.COM
Briggs & Stratton Power Products Group, LLC
Milwaukee, WI 53201 USA
Unit ID Tag
When contacting your authorized dealer for replacement parts, service, or information you MUST have
these numbers.
Record your model name/number, manufacturer’s identification numbers, and engine serial numbers in the space
provided for easy access. These numbers can be found
in the locations shown.
NOTE: For location of engine identification numbers,
refer to the engine owner’s manual.
PRODUCT REFERENCE DATA
Model Description Name/Number
Unit MFG
Mower Deck MFG Number
Dealer Name
Engine Make
Engine Type/Spec
Number
ENGINE REFERENCE DATA
Unit SERIAL Number
Mower Deck SERIAL
Date Purchased
Engine Model
Engine Code/Serial Number
Number
SNAPPER is a trademark of
Briggs & Stratton Power Products Group, LLC
Milwaukee, WI, USA.
Copyright © 2010, Briggs & Stratton Corporation
Milwaukee, WI, USA. All Rights Reserved.
2
www.Snapper.com

Table of Contents
Not for
Reproduction
Operator Safety .................................................. 4
Features and Controls ..................................... 13
Control Functions ..................................................13
Operation .......................................................... 15
General Operating Safety......................................15
Checks Before Starting .........................................15
Starting the Engine ................................................16
Stopping the Rider and Engine .............................16
Mowing ..................................................................16
Pushing the Rider by Hand ...................................16
Zero Turn Driving Practice ....................................17
Attaching a Trailer .................................................19
Maintenance ..................................................... 20
Maintenance Chart ................................................20
Checking Tire Pressures .......................................21
Checking/Adding Fuel ...........................................21
Fuel Filter ..............................................................21
Engine Maintenance .............................................21
Washing the Mower Deck .....................................22
Storage..................................................................22
Adjustments and Service ................................ 23
Seat Adjustments ..................................................23
Ground Speed Lever Adjustment ..........................23
Speed Balancing Adjustment ................................23
Cutting Height Adjustment ....................................24
Mower Removal and Installation ...........................24
PTO Clutch Adjustment .........................................26
Check Mower Blade Stoppping Time ....................26
Mower Deck Leveling ............................................27
Servicing the Mower Blades ..................................28
Lubrication ............................................................29
Cleaning the Battery and Cables...........................30
Battery Charging ...................................................30
Troubleshooting ............................................... 31
Troubleshooting the Rider .....................................31
Troubleshooting the Mower ...................................32
Specifications ................................................... 33
Warranties ......................................................... 34
3
Operator Safety
Not for
Reproduction
Congratulations on purchasing a superior-quality piece of lawn
and garden equipment. Our products are designed and manufactured to meet or exceed all industry standards for safety.
Do not operate this machine unless you have familiarized yourself
with it. Reading and understanding this operator’s manual is a
way to do just that.
Power equipment is only as safe as the operator. If it is misused,
or not properly maintained, it can be dangerous! Remember, you
are responsible for your safety and that of those around you.
Use common sense, and think through what you are doing. If you
are not sure that the task you are about to perform can be safely
done with the equipment you have chosen, ask a professional:
contact your local authorized dealer.
Read the Manual
The operator’s manual contains important safety information you need to be aware of BEFORE you operate
your unit as well as DURING operation.
Safe operating techniques, an explanation of the product’s features and controls, and maintenance information is included to help you get the most out of your
equipment investment.
Be sure to completely read the Safety Rules and
Information found on the following pages. Also completely read the Operation section.
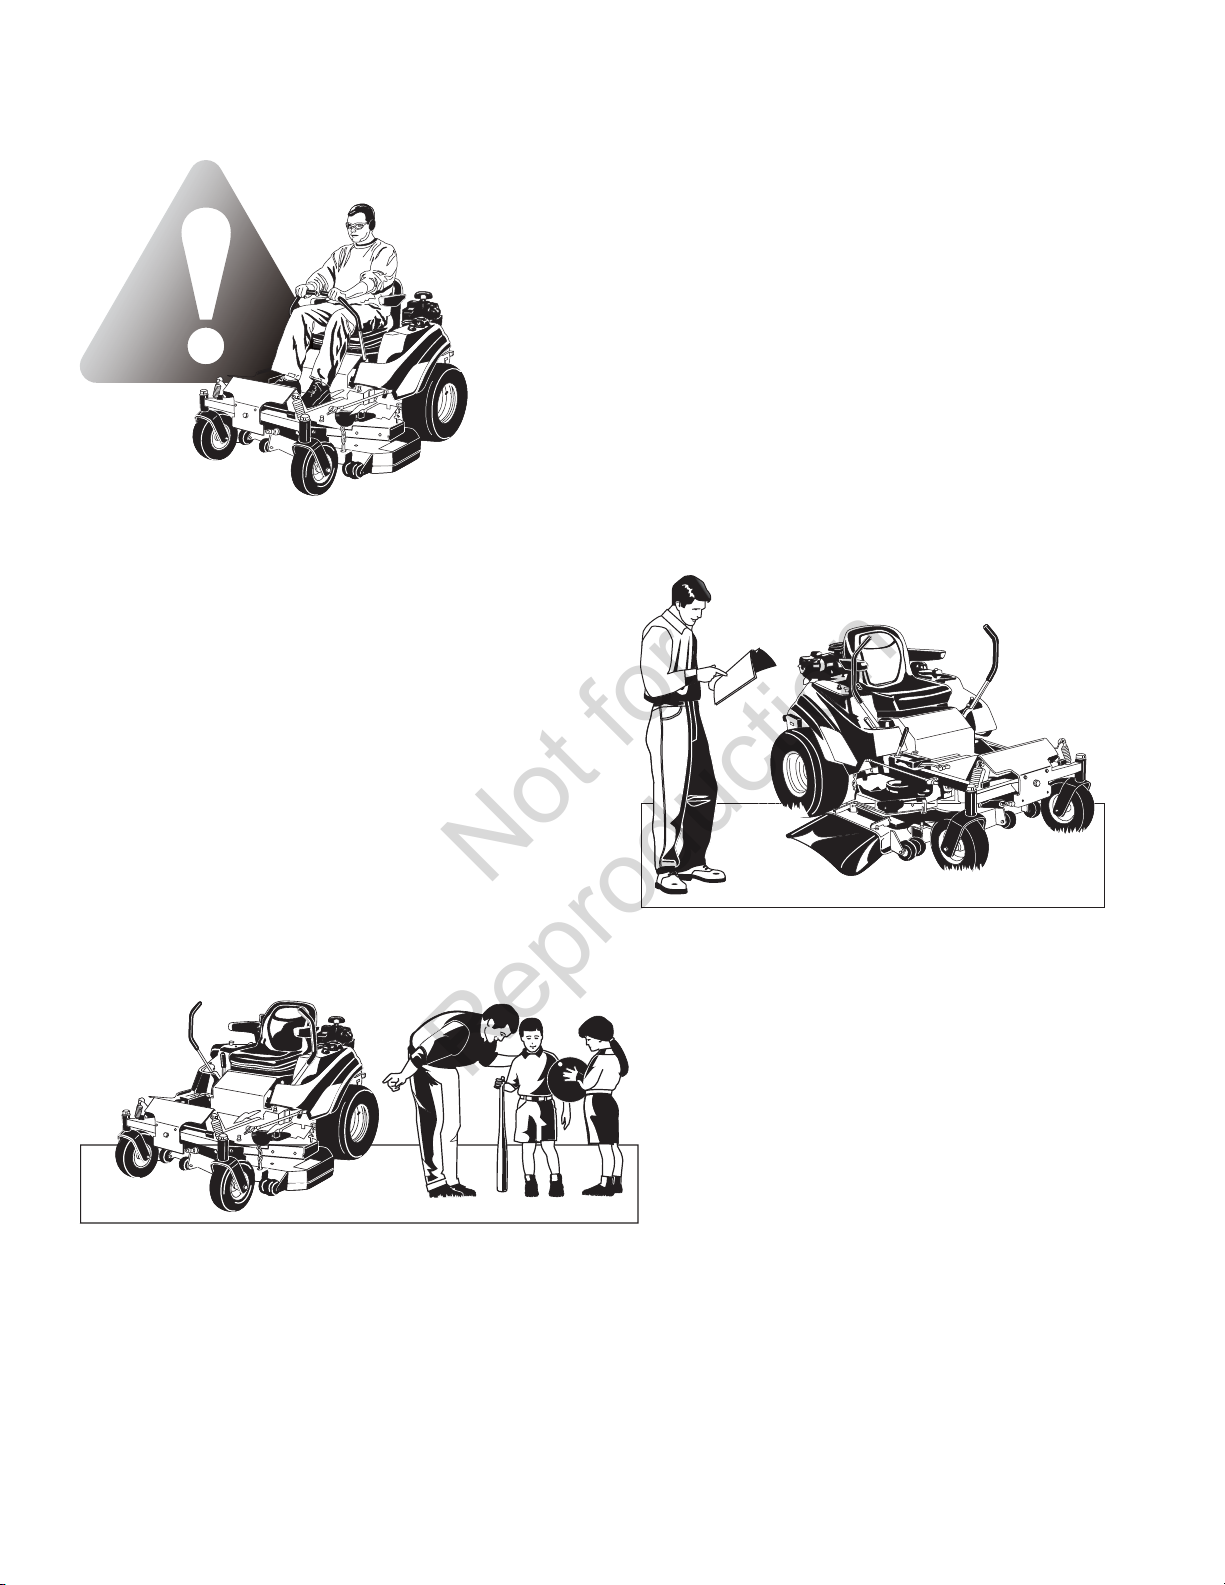
Operating Safety
Children
Tragic accidents can occur with children. Do
not allow them anywhere near the area of
operation. Children are often attracted to the
unit and mowing activity. Never assume that
children will remain where you last saw them.
If there is a risk that children may enter the
area where you are mowing, have another
responsible adult watch them.
4
www.Snapper.com
3.5
Not for
Reproduction
20
Operator Safety
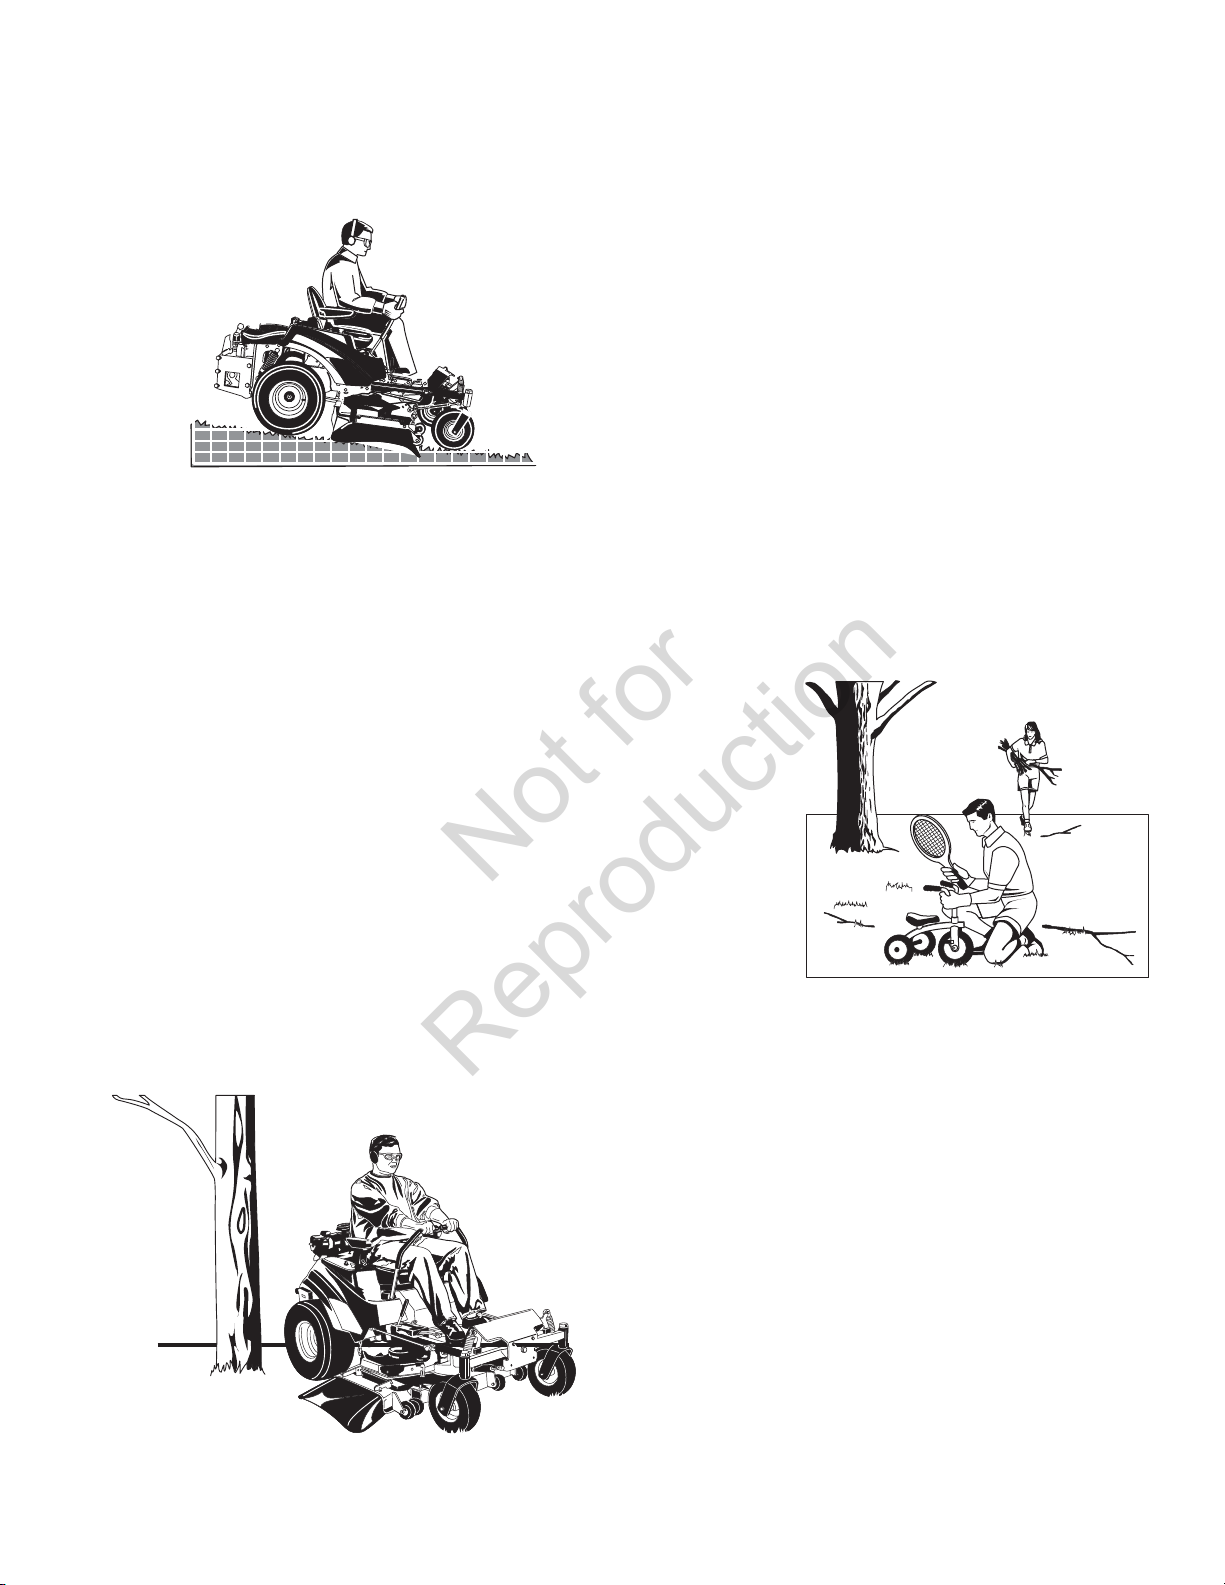
Slope Operation
Operation on slopes can be dangerous. Using the unit on
a slope that is too steep where you do not have adequate
wheel traction (and control) can cause sliding, loss of
steering, control, and possible rollover. You should not
operate on a slope greater than a 3.5 foot rise over a 20
foot length (10 degrees).
Always mow up and down slopes, not across, and avoid
sudden turns or rapid speed changes. Reduce speed and
use extreme caution on ALL slopes.
Also, note that the surface condition you are on can
greatly impact your ability to safely operate this machine.
Operating on wet or slippery slopes can cause sliding and
loss of steering and control. Do not operate on slopes that
are slippery, wet, or have soft soil conditions.
If you feel unsure about operating the unit on a slope, don’t
do it. It’s not worth the risk.
Thrown Objects
This unit has spinning mower blades. These blades can pick up and
throw debris that could seriously injure a bystander. Be sure to clean
up the area to be mowed and remove objects that could be thrown by
the blade BEFORE you start mowing. Do not operate this unit without
the entire grass catcher or discharge guard (deflector) in place.
Also, do not allow anyone in the area while the unit is running! If someone does enter the area, shut the unit off immediately until they leave.
This equipment has many moving parts that can injure
you or someone else. However, if you stay in the operator
zone (stay seated in the seat), and follow the safety rules
in this operator’s manual, the unit is safe to operate.
The mower deck has spinning mower blades that can
amputate hands and feet. Do not allow anyone near the
unit while it is running! Keep safety devices (guards,
shields, and switches) in place and working.
To help you, the operator, use this equipment safely, it is
equipped with an operator-present safety system. Do NOT
attempt to alter or bypass the system. See your dealer
immediately if the system does not pass all the safety
interlock system tests found in this manual
Moving Parts
5
Operator Safety
Not for
Reproduction
Retaining Walls, Drop-Offs, and Water
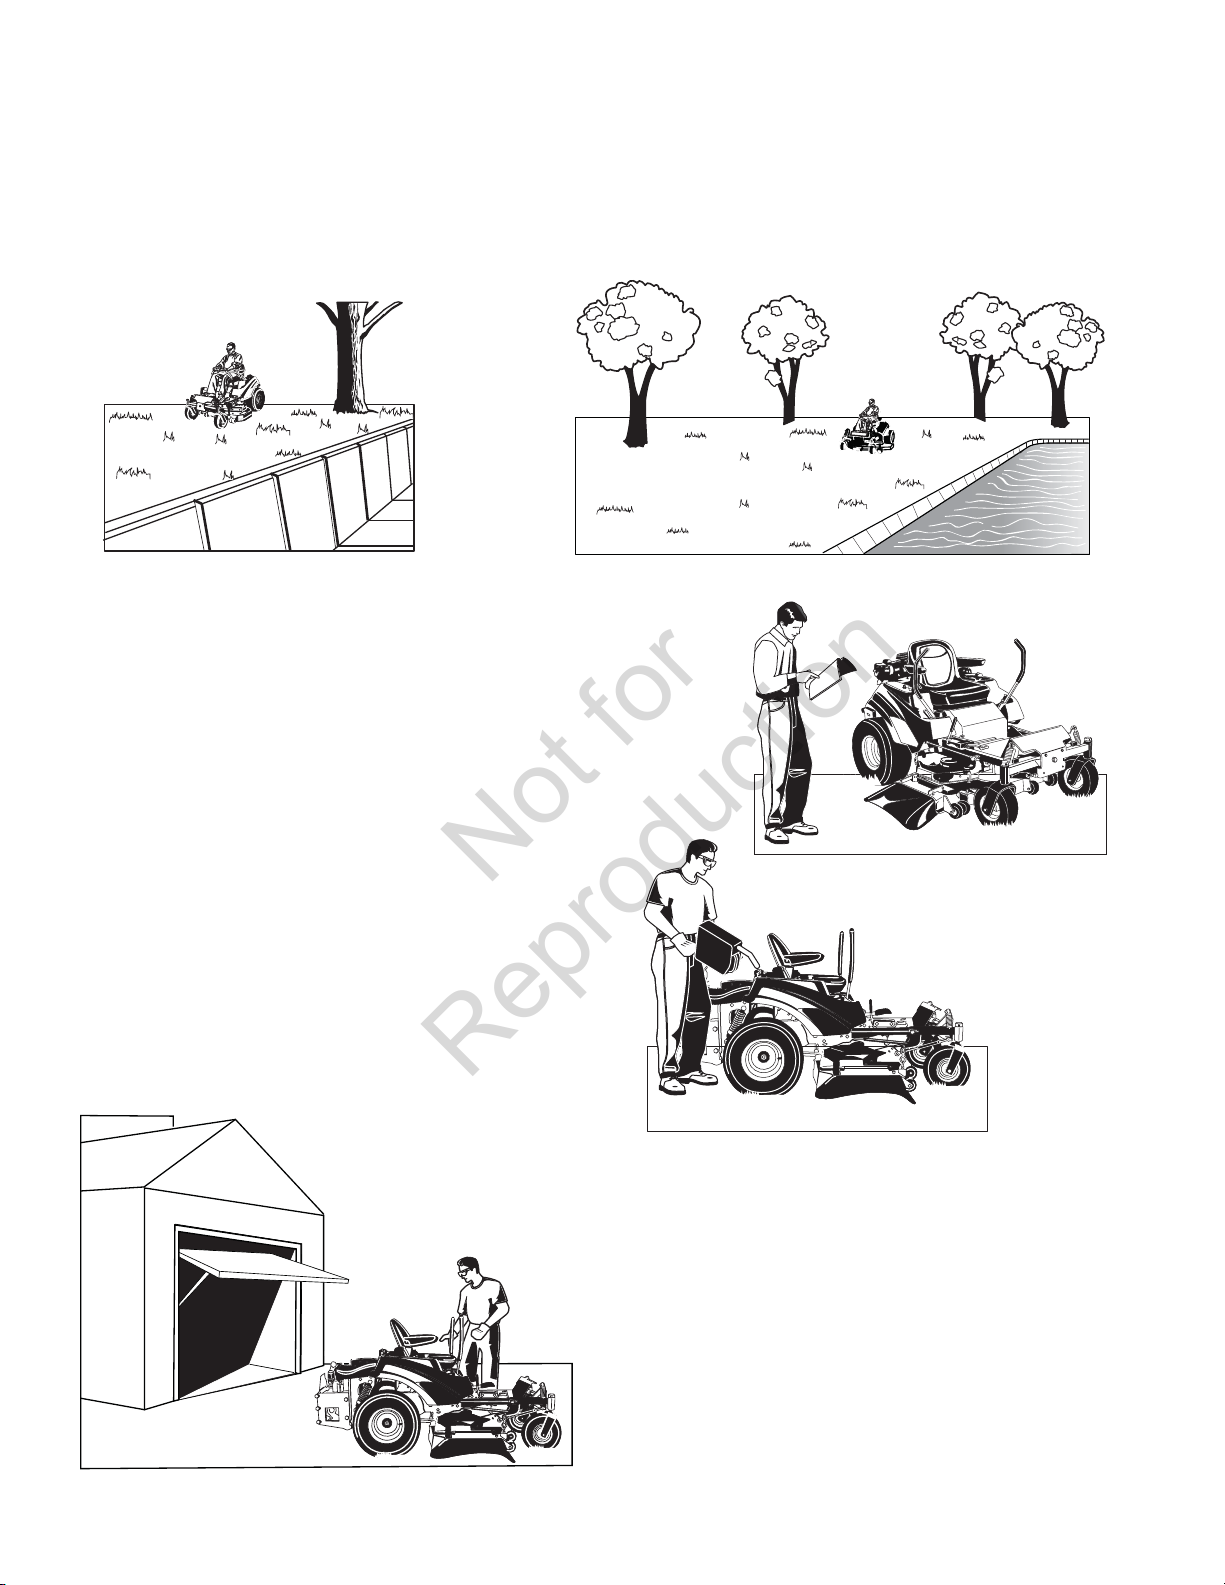
Retaining walls and drop-offs around steps and water are a common hazard. Give yourself a minimum of two mower
widths of clearance around these hazards and hand-trim with a walk behind mower or string trimmer. Wheels dropping over retaining walls, edges, ditches, embankments, or into water can cause rollovers, which may result in serious
injury, death, or drowning.
Fuel and Maintenance
Always disengage all drives, shutoff the engine, and
remove the key before doing any cleaning, refueling, or
servicing.
Gasoline and its vapors are extremely flammable. Do not
smoke while operating or refueling. Do not add fuel while
engine is hot or running. Allow engine to cool for at least 3
minutes prior to adding fuel.
Do not add fuel indoors, in an enclosed trailer, garage,
or any other enclosed area that is not well ventilated.
Gasoline spills should be cleaned up promptly and before
operation begins.
Gasoline should be stored only in sealed containers
approved for fuel.
Proper maintenance is critical to the safety and performance of your unit. Keep the unit free of grass, leaves,
and excess oil. Be sure to perform the maintenance procedures listed in this manual, especially periodically testing
the safety system.
Enclosed Areas
Only operate this unit outdoors and away from unventilated areas such as inside garages or enclosed trailers.
6
The engine emits poisonous carbon monoxide gas and
prolonged exposure in an enclosed area can result in
serious injury or death.
www.Snapper.com

Operator Safety
Not for
Reproduction
WARNING: This powerful cutting machine is capable of amputating hands and feet and can throw objects that can
cause injury and damage! Failure to comply with the following SAFETY instructions could result in serious injury or
death to the operator or other persons. The owner of the machine must understand these instructions and must allow
only persons who understand these instructions to operate machine. Each person operating the machine must be of
sound mind and body and must not be under the influence of any substance, which might impair vision, dexterity or
judgment. If you have any questions pertaining to your machine which your dealer cannot answer to your satisfaction,
contact the Customer Service Department.
Protection for Children
Tragic accidents can occur if the operator is not alert to
the presence of children. Children are often attracted to
the machine and the mowing activity. Children who have
been given rides in the past may suddenly appear in the
mowing area for another ride and be run over or backed
over by the machine. Never assume that children will
remain where you last saw them.
1. KEEP children out of the mowing area and under the
watchful care of a responsible adult other than the
operator.
2. DO NOT allow children in yard when machine is
operated (even with the blade OFF).
3. DO NOT allow children or others to ride on machine,
attachments or towed equipment (even with the
blades OFF). They may fall and be seriously injured.
4. DO NOT allow pre-teenage children to operate
machine.
5. ALLOW only responsible adults & teenagers with
mature judgment under close adult supervision to
operate machine.
6. DO NOT operate blades in reverse. STOP BLADES.
LOOK and SEE behind and down for children, pets
and hazards before and while backing.
7. USE EXTRA CARE when approaching blind corners,
shrubs, trees, or other objects that may obscure
vision.
Protection Against Tipovers
Slopes are a major factor related to loss-of-control and
tip-over accidents, which can result in severe injury or
death. All slopes require extra CAUTION. If you cannot
back up the slope or if you feel uneasy on the slope, DO
NOT mow it. Use extra care with grass catchers or other
attachments; these affect the handling and the stability of
the machine.
1. DO NOT operate machine on slopes exceeding 10
degrees (18% grade).
2. Exercise EXTREME CAUTION on all slopes. Turn
blades OFF when traveling uphill. Use a slow speed
and avoid sudden or sharp turns.
3. DO NOT operate machine back and forth across face
of slopes. Operate up and down. Practice on slopes
with blades off.
4. AVOID starting, stopping or turning on slopes. If
machine stops going uphill or tires lose traction, turn
blades OFF and back slowly straight down the slope.
5. STAY ALERT for holes and other hidden hazards.
Tall grass can hide obstacles. Keep away from
ditches, washouts, culverts, fences and protruding
objects.
Protection Against Tipovers
(Continued From Previous Column)
6. KEEP A SAFE DISTANCE (at least 3 feet) away from
edge of ditches and other drop offs. The machine
could turn over if an edge caves in.
7. Always begin forward motion slowly and with caution.
8. Use weights or a weighted load carrier in accordance
with instructions supplied with a grass catcher. DO
NOT operate machine on slopes exceeding 10
degrees (18% grade) when equipped with grass
catcher.
9. DO NOT put your foot on the ground to try to stabilize
the machine.
10. DO NOT operate machine on wet grass. Reduced
traction could cause sliding.
11. Chose a low enough speed setting so that you will not
have to stop or shift on a slope. Tires may lose trac-
tion on slopes even though the brakes are functioning
properly.
12. DO NOT operate machine under any condition where
traction, steering or stability is doubtful.
13. Always keep the machine in gear when going down
slopes. DO NOT shift to neutral (or actuate hydro roll
release) and coast downhill.
Preparation
1. Read, understand, and follow instructions and warn-
ings in this manual and on the machine, engine and
attachments. Know the controls and the proper use of
the machine before starting.
2. Only mature, responsible persons shall operate the
machine and only after proper instruction.
3. Data indicates that operators age 60 and above, are
involved in a large percentage of mower-related inju ries. These operators should evaluate their ability to
operate the mower safely enough to protect them-
selves and others from serious injury.
4. Handle fuel with extra care. Fuels are flammable and
vapors are explosive. Use only an approved fuel con tainer. DO NOT remove fuel cap or add fuel with
engine running. Add fuel outdoors only with engine
stopped and cool. Clean spilled fuel from machine.
DO NOT smoke.
5. Practice operation of machine with BLADES OFF to
learn controls and develop skills.
7

Operator Safety
Not for
Reproduction
Preparation
(Continued From Previous Page)
6. Check the area to be mowed and remove all objects
such as toys, wire, rocks, limbs and other objects that
could cause injury if thrown by blade or interfere with
mowing.
7. Keep people and pets out of mowing area. Immed-
iately STOP blades, STOP engine, and STOP
machine if anyone enters the area.
8. Check shields, deflectors, switches, blade controls
and other safety devices frequently for proper opera-
tion and location.
9. Make sure all safety decals are clearly legible.
Replace if damaged.
10. Protect yourself when mowing and wear safety glass es, long pants and substantial footwear.
11. Know how to STOP blades and engine quickly in
preparation for emergencies.
12. Use extra care when loading or unloading the
machine into a trailer or truck.
13. Check grass catcher components frequently for signs
of wear or deterioration and replace as needed to
prevent injury from thrown objects going through
weak or worn spots.
Safe Handling of Gasoline
To avoid personal injury or property damage, use
extreme care in handling gasoline. Gasoline is extremely
flammable and the vapors are explosive.
1. Extinguish all cigarettes, cigars, pipes and other
sources of ignition.
2. Use only an approved fuel container.
3. DO NOT remove fuel cap or add fuel with the engine
running. Allow the engine to cool before refueling.
4. DO NOT refuel the machine indoors.
5. DO NOT store the machine or fuel container inside
where there is an open flame, spark or pilot light such
as on a water heater or other appliances.
6. DO NOT fill fuel containers inside a vehicle or on a
truck or trailer bed with a plastic liner. Always place
the containers on the ground away from the vehicle
before filling.
7. Remove gas-powered equipment from the vehicle or
trailer and refuel it on the ground. If this is not pos sible, then refuel equipment using a portable con-
tainer, rather than a gasoline dispenser nozzle.
8. DO NOT start gas powered equipment in enclosed
vehicles or trailers.
9. Keep the nozzle in contact with the rim of the fuel
tank or container opening at all times until fueling is
complete. DO NOT use a nozzle lock-open device
10. If fuel is spilled on clothing, change clothing immedi-
ately.
11. Never overfill a fuel tank. Replace fuel cap and tigh-
ten securely.
OPERATION
1. Mount and dismount machine from left side. Keep
clear of discharge opening at all times.
2. Start engine from operator’s seat, if possible. Make
sure blades are OFF and parking brake is set.
3. DO NOT leave machine with engine running. STOP
engine, STOP blades, SET brake, and Remove key
before leaving operators position of any reason.
4. DO NOT operate machine unless properly seated
with feet on feet rests or pedal(s).
5. STOP BLADES and ENGINE and make sure blades
have stopped before removing grass catcher or
unclogging mower to prevent loss of fingers or hand.
6. Blades must be OFF except when cutting grass.
Set blades in highest position when mowing over
rough ground.
7. Keep hands and feet away from rotating blades
underneath deck. DO NOT place foot on ground
while BLADES are ON or machine is in motion.
8. DO NOT operate machine without entire grass
catcher or guards in place and working. DO NOT
point discharge at people, passing cars, windows or
doors.
9. Slow down before turning.
10. Watch out for traffic when near or crossing roadways.
11. STOP engine immediately after striking an obstruc-
tion. Inspect machine and repair damage before
resuming operation.
12. Operate machine only in daylight or with good artifi-
cial light.
13. Move joystick (if equipped) SLOWLY to maintain con trol during speed and directional changes.
14. Exercise CAUTION when pulling loads. Limit loads
to those you can safely control and attach loads to
hitch plate as specified with attachment instructions.
15. On slopes, the weight of the towed equipment may
cause loss of traction and loss of control. When tow-
ing, travel slowly and allow extra distance to stop.
16. DO NOT operate engine in enclosed areas. Engine
exhaust gases contain carbon monoxide, a deadly
poison.
17. DO NOT discharge material against a wall or obstruc tion. Material may ricochet back towards the operator.
18. Only use accessories approved by the manufacturer.
See manufacturer’s instructions for proper operation
and installation of accessories.
Emissions
1. Engine exhaust from this product contains chemi-
cals known, in certain quantities, to cause cancer,
birth defects, or other reproductive harm.
2. Look for the relevant Emissions Durability Period and
Air Index information on the engine emissions label.
Ignition System
1. This spark ignition system complies with Canadian
ICES-002.
8
www.Snapper.com
Operator Safety
Not for
Reproduction
Towing
1. Tow only with a machine that has a hitch designed for
towing. DO NOT attach towed equipment except at
the hitch point.
2. Follow the manufacturer’s recommendation for weight
limits for towed equipment and towing on slopes.
3. DO NOT allow children or others on towed equip-
ment.
4. On slopes, the weight of the towed equipment may
cause loss of traction and loss of control.
5. Travel slowly and allow extra distance to stop.
Maintenance
1. DO NOT store machine or fuel container inside where
fumes may reach an open flame, spark or pilot light
such as in a water heater, furnace, clothes dryer or
other gas appliance. Allow engine to cool before
storing machine in an enclosure. Store fuel container
out of the reach of children in a well ventilated, unoc-
cupied building.
2. Keep engine free of grass, leaves or excess grease
to reduce fire hazard and engine overheating.
3. When draining fuel tank, drain fuel into an approved
container outdoors and away from open flame.
4. Check brakes frequently; adjust, repair or replace as
needed.
5. Keep all bolts, nuts and screws properly tight. Check
that all cotter pins are in proper position.
Maintenance
(Continued From Previous Column)
6. Always provide adequate ventilation when running
engine. Exhaust gases contain carbon monoxide, an
odorless and deadly poison.
7. Disconnect negative (black) cable from battery before
performing maintenance or service. Cranking engine
could cause injury.
8. DO NOT work under machine without safety blocks.
9. Service engine and make adjustments only when
engine is stopped. Remove spark plug wire(s) from
spark plug(s) and secure wire(s) away from spark
plug(s).
10. DO NOT change engine governor speed settings or
overspeed engine.
11. Lubricate machine at intervals specified in manual to
prevent controls from binding.
12. Mower blades are sharp and can cut. Wrap the
blades or wear heavy leather gloves and use
CAUTION when handling them.
13. DO NOT test for spark by grounding spark plug next
to spark plug hole; spark plug could ignite gas exiting
engine.
14. Have machine serviced by an authorized dealer at
least once a year and have the dealer install any new
safety devices.
15. Maintain or replace safety and instruction labels as
necessary.
16. Use only genuine replacement parts to assure that
original standards are maintained.
WARNING
Grass Catcher bags used on this product are made of
woven fabric, and are subject to deterioration and wear
during normal usage. Check condition of bags before
each use. Immediately replace worn or damaged catcher bags with only bags recommended by the manufacturer. The Grass Catcher is optional equipment on some
models.
WARNING
Engine exhaust, some of its constituents, and certain
vehicle components contain or emit chemicals known to
the State of California to cause cancer or other reproductive harm.
WARNING
Battery posts, terminals and related accessories contain
lead and lead compounds, chemicals known to the
State of California to cause cancer and birth defects or
other reproductive harm. Wash hands after handling.
9

Operator Safety
Not for
Reproduction
E
N
TED LI
OT
D
G
10 DEGREE SLOPE
LON
A
D
L
O
F
THIS IS A
ONLY RIDE UP AND DOWN HILL,
NOT ACROSS HILL
10 DEGREES MAX.
WARNING: To avoid serious injury, operate your unit up and
down the face of slopes, never across the face. Do not operate
on slopes greater than 10 degrees. Make turns gradually to
prevent tipping or loss of control. Exercise extreme caution
when changing direction on slopes. Braking may be affected by
attachments. Reduce speed on slopes.
1. Fold this page along dotted line indicated above.
2. Hold page before you so that its left edge is vertically parallel to a tree
trunk or other upright structure.
3. Sight across the fold in the direction of hill slope you want to measure.
4. Compare the angle of the fold with the slope of the hill.
SUGGESTED GUIDE FOR SIGHTING SLOPES FOR SAFE OPERATION
10
www.Snapper.com
Operator Safety
Not for
Reproduction
Safety and Instructional Decals
All DANGER, WARNING, CAUTION and instructional
messages on your rider and mower should be carefully
read and obeyed. Personal bodily injury can result when
these instructions are not followed. The information is for
your safety and it is important! The safety decals below
are on your rider and mower.
If any of these decals are lost or damaged, replace them
at once. See your local dealer for replacements.
These decals are easily applied and will act as a constant visual reminder to you, and others who may use the
equipment, to follow the safety instructions necessary for
safe, effective operation.
Decal, Warning
Part No. 1734273
Decal, Caution
Part No. 7104393
Decal, Danger
Part No. 7104224
Decal, Danger
Part No. 1704276
Decal, Warning
Part No.
7104223
Decal, Danger
Part No. 1704277
Decal,
Instructional
Part No. 7104234
Decal, Warning
Part No.
7104225
11
Operator Safety
Not for
Reproduction
7104226
Decal, Ground
Speed Lever, L.H.
Part No. 7104226
7104232
Decal, Control Panel,
L.H.
Part No. 7104232
7104227
Decal, Ground
Speed Lever, R.H.
Part No. 7104227
7104233
Decal, Control Panel,
R.H.
Part No. 7104233
Safety Interlock System Tests
This unit is equipped with a Safety Interlock System.
Do not attempt to bypass or tamper with the switches/
devices.
TEST 1 — ENGINE SHOULD NOT CRANK IF:
• PTO switch is engaged, OR
• Parking brake is disengaged, OR
• Ground speed levers are not locked in their START/
PARK positions.
TEST 2 — ENGINE SHOULD CRANK IF:
• PTO switch is NOT engaged, AND
• Parking brake is engaged, AND
• Ground speed levers are locked into their
START/PARK positions.
TEST 3 — ENGINE SHOULD SHUT OFF IF:
• Operator rises off seat with PTO engaged, OR
• Operator rises off seat with parking brake disenaged, OR
• Operator rises off seat with ground speed levers not
locked in their START/PARK positions.
TEST 4 — CHECK MOWER BLADE STOPPING TIME
The mower blades and mower drive belt should come
to a complete stop within five seconds after the electric
PTO switch is turned off (or operator rises off seat). If
mower drive belt does not stop within five seconds, see
your dealer.
7104231
Decal, Transmission
Release
Part No. 7104231
Decal, Weight Limit
Part No. 7101940
NOTE: Once the engine has stopped, the PTO switch
must be turned off, the parking brake must be engaged,
and the ground speed levers must be locked in their
START/PARK positions in order to start the engine.
WARNING
If the unit does not pass a safety test, do not
operate it. See an authorized dealer.
12
www.Snapper.com
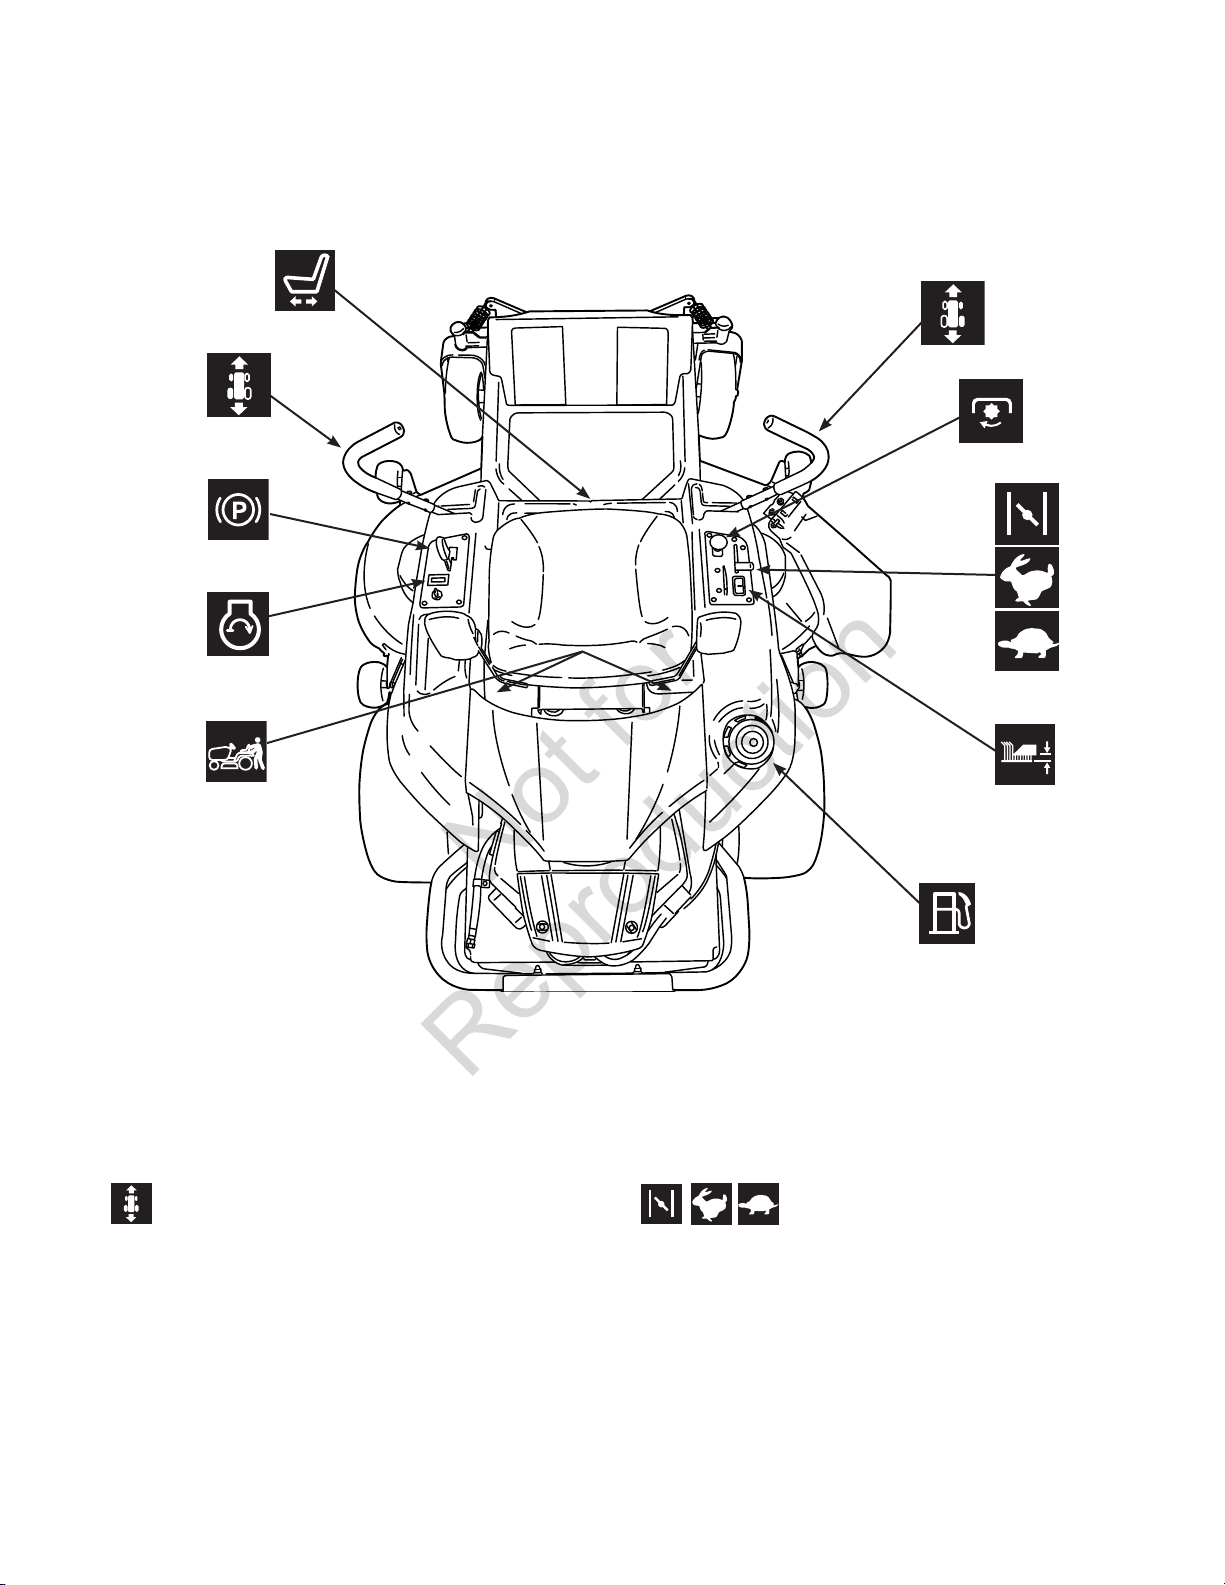
Features and Controls
Not for
Reproduction
Control Functions
The information below briefly describes the function of individual controls. Starting, stopping, driving, and mowing
require the combined use of several controls applied in specific sequences. To learn what combination and sequence
of controls to use for various tasks see the Operation section.
Ground Speed Levers
These levers control the ground speed and direction of the rider. The left lever controls the left rear drive
wheel and the right controls the right rear drive wheel.
Moving a lever forward increases the FORWARD speed
of the associated wheel, and pulling back on a lever
increases the REVERSE speed.
The further a lever is moved away from the neutral position the faster the drive wheel will turn.
See the Operation section for steering instructions.
The engine speed / choke control controls the engine
speed and choke. Move the engine speed control to
the FAST position to increase engine speed, and to the
SLOW position to decrease engine speed. Move the
engine speed / choke control past the FAST position
to the CHOKE position to start a cold engine. A warm
engine may not require choking.
NOTE: Always operate the rider with the engine speed
control in the FAST position.
Engine Speed / Choke Control
(Choke-O-Matic)
13

Operation
Not for
Reproduction
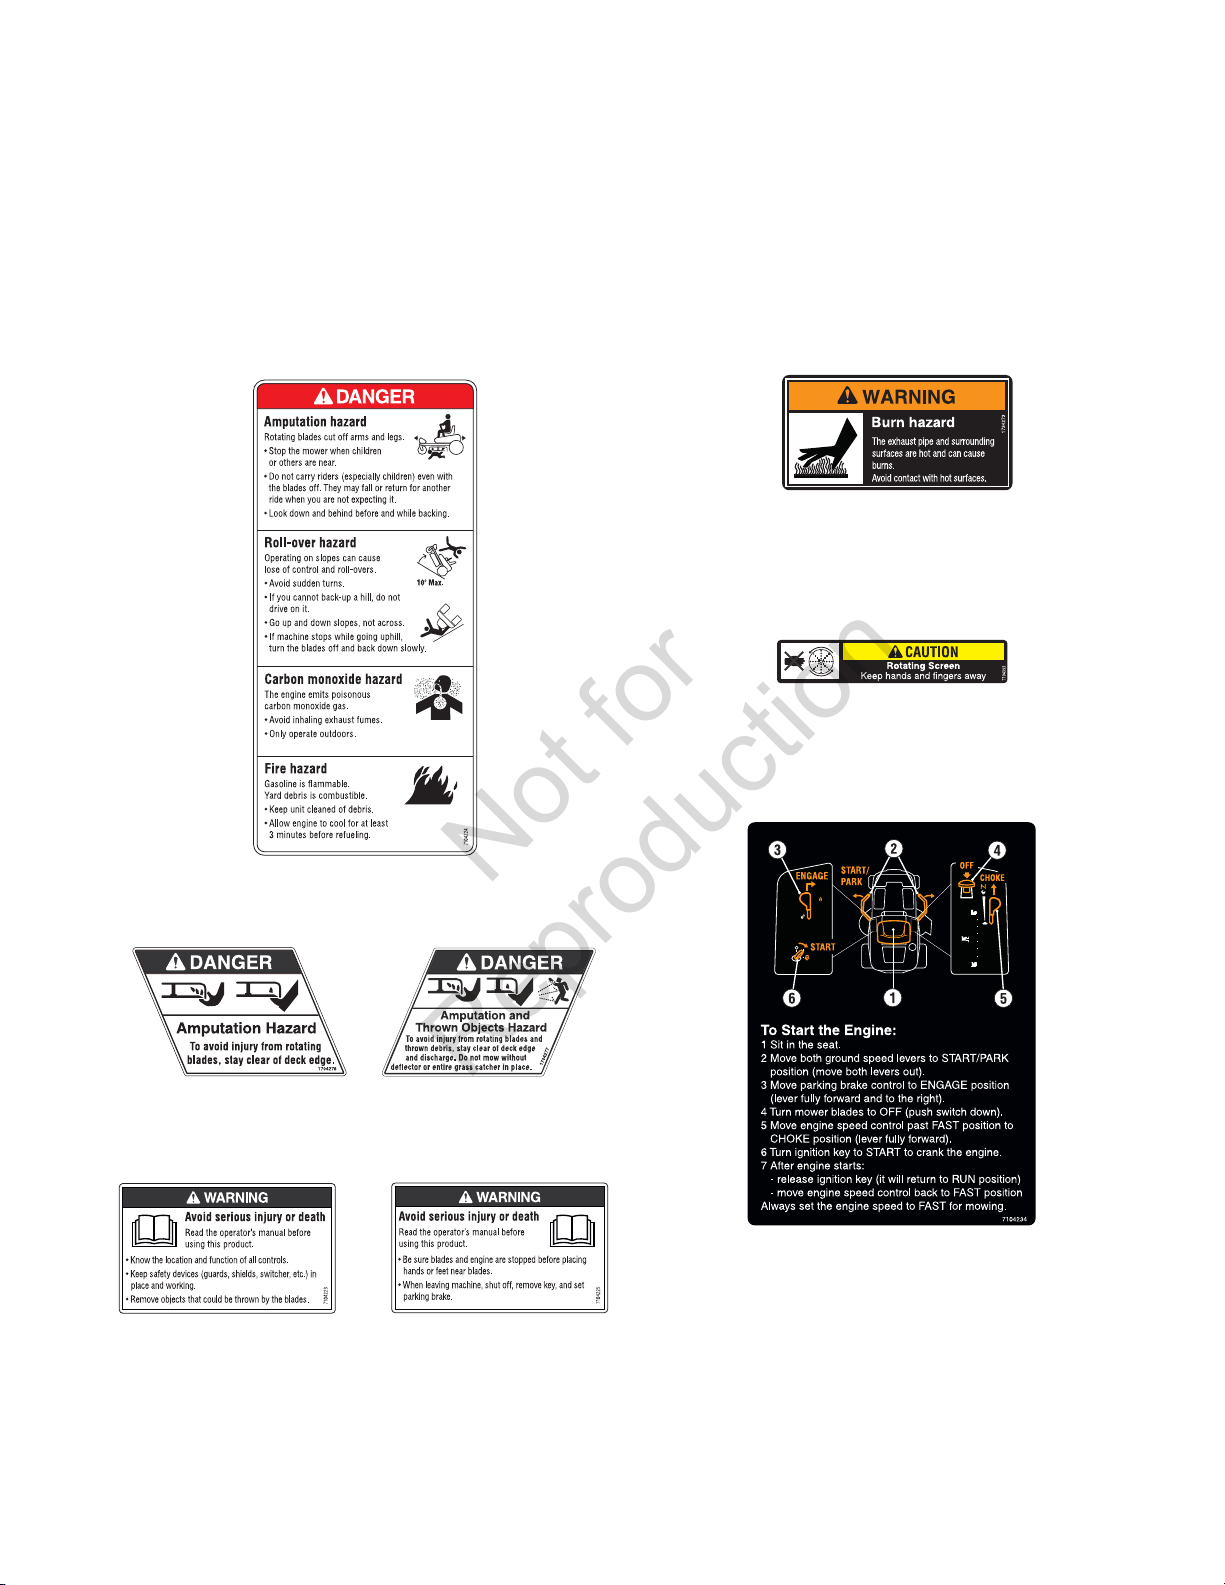
Ignition Switch
The ignition switch starts and stops the engine; it
has three positions:
OFF Stops the engine and shuts off the
electrical system.
RUN Allows the engine to run and powers the
electrical system.
START Cranks the engine for starting.
NOTE: Never leave the ignition switch in the RUN position with the engine stopped–this drains the battery.
PTO Switch
The PTO (Power Take-Off) switch engages and
disengages the mower blade clutch. To engage the PTO,
pull UP on the switch. Push DOWN to disengage. Note
that the operator must be seated firmly in the rider seat
for the PTO to function.
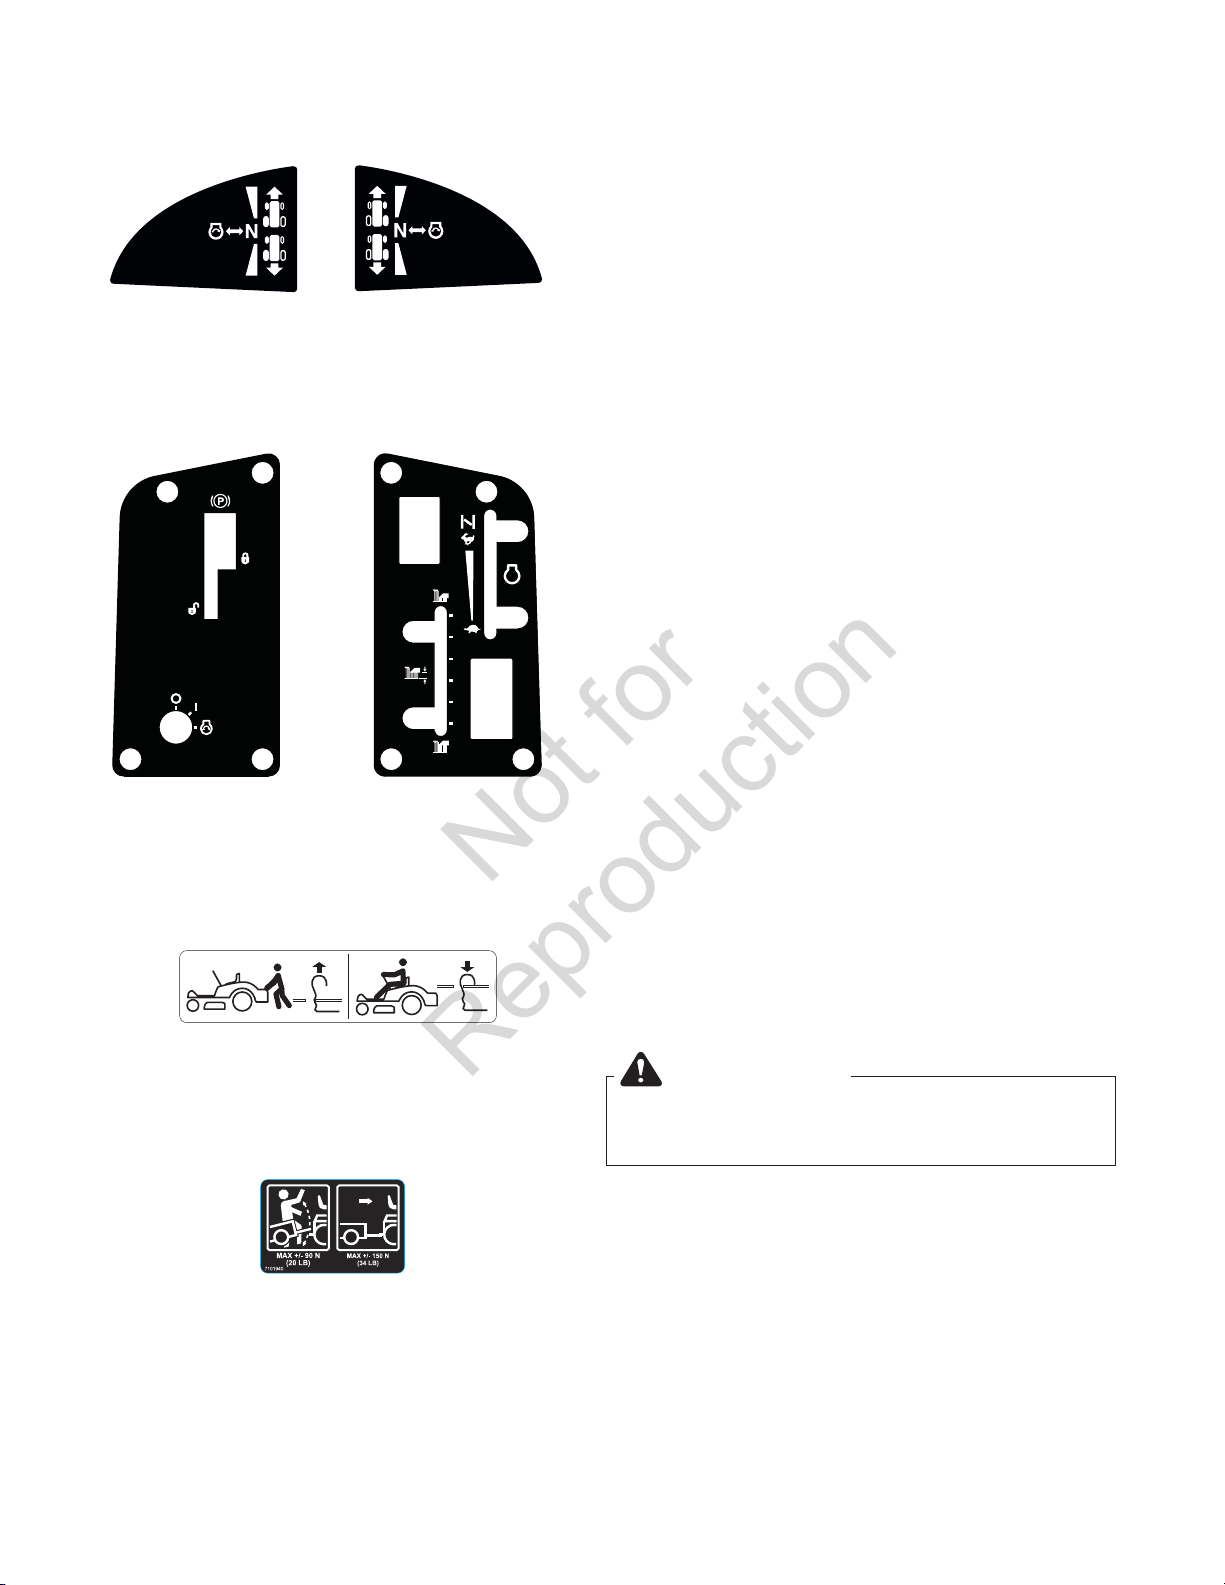
Transmission Release Levers
The transmission release levers deactivate the
transmissions so that the unit can be pushed by hand
(see Pushing the Unit by Hand).
Fuel Tank Cap
To remove the cap, turn counterclockwise.
Mower Cutting Height Adjustment
Switch
The mower cutting height is adjustable between 1-1/2”
(3,8 cm) and 3-3/4” (9,5 cm). See Cutting Height
Adjustment.
Parking Brake
Moving the parking brake lever forward and to the
right engages the parking brake. Moving the lever to the
left and back disengages the brake.
Seat Adjustment Lever
The seat can be adjusted forward and backward
(see Seat Adjustments).
14
www.Snapper.com
Operation
Not for
Reproduction
General Operating Safety
Before first time operation:
• Be sure to read all information in the Operator
Safety section before attempting to operate this rider
and mower.
• Become familiar with all of the controls and how to
stop the unit.
• Drive in an open area without mowing to become
accustomed to driving the unit.
WARNING
Never operate on slopes greater than 18 percent
(10°).
Select slow ground speed before driving onto
a slope. Use extra caution when operating on
slopes with a rear-mounted grass catcher.
Mow up and down slopes, not across the face,
use caution when changing directions and DO
NOT START OR STOP ON SLOPE.
Checks Before Starting
• Check that the crankcase is filled to full mark on dip-
stick (A, Figure 1 - located under engine cover). See
the engine owner’s manual for instructions and oil
recommendations.
• Make sure all nuts, bolts, screws and pins are in
place and secure.
• Adjust the seat position (B), and make certain you
can reach all controls from the operator’s position.
• Fill the fuel tank (C) with fresh fuel. Refer to the
engine owner’s manual for fuel recommendations.
B
C
A
WARNING
Never allow passengers to ride on the unit.
Before leaving the operator’s position for any
reason, lock the ground speed levers in the
START/PARK position, engage the parking brake,
disengage the PTO, stop the engine and remove
the key.
To reduce fire hazard, keep the engine, rider and
mower free of grass, leaves and excess grease.
Do not stop or park rider over dry leaves, grass
or combustible materials.
Gasoline is highly flammable and must be
handled with care. Never fill the tank when the
engine is still hot from recent operation. Do not
allow open flame, smoking or matches in the
area. Avoid over-filling and wipe up any spills.
WARNING
If you do not understand how a specific control
functions, or have not yet thoroughly read the
Features and Controls section, do so now. Do
NOT attempt to operate the rider without first
becoming familiar with the location and function
of ALL controls.
Figure 1. Pre-Start Checks
WARNING
Do not load this zero-turn rider on a trailer or
truck using two separate ramps. Only use a
single ramp that is at least one foot wider than
the width of the rear wheels of this rider. This
rider has a zero turning radius and the rear
wheels could fall off the ramps, or the rider could
tip over injuring the operator or bystanders.
15
Operation
Not for
Reproduction
Starting the Engine
1. While sitting in the operator’s seat, make sure the
PTO switch is disengaged, the parking brake is
engaged, and the ground speed levers are locked in
the START/PARK position.
2. Set the engine speed control to the CHOKE position.
NOTE: A warm engine may not require choking.
3. Insert the key into the ignition switch and turn it to
START.
4. After the engine starts, move the engine speed control back to the FAST position. Warm up the engine
by running it for at least a minute before engaging the
PTO switch or driving the rider.
5. After warming the engine, ALWAYS operate the
rider at FULL ENGINE SPEED when mowing.
In the event of an emergency the engine can be
stopped by simply turning the ignition switch to
STOP. Use this method only in emergency situations.
For normal engine shut down follow the procedure given
in Stopping the Rider and Engine.
Stopping the Rider and Engine
1. Return the ground speed levers to the middle (or
neutral ‘N’) position to stop rider movement. Pivot the
levers outward to lock them in the START/PARK position.
2. Disengage the PTO by pushing down on the PTO
switch.
3. Engage the parking brake by moving the parking
brake lever forward and to the right.
4. Move the engine speed control to the SLOW position
and turn the ignition key to OFF. Remove the key.
8. Begin mowing. See Operator Safety for tips on safe
mowing practices.
9. When finished, shut off the PTO.
10. Stop the engine (see Stopping the Rider and
Engine).
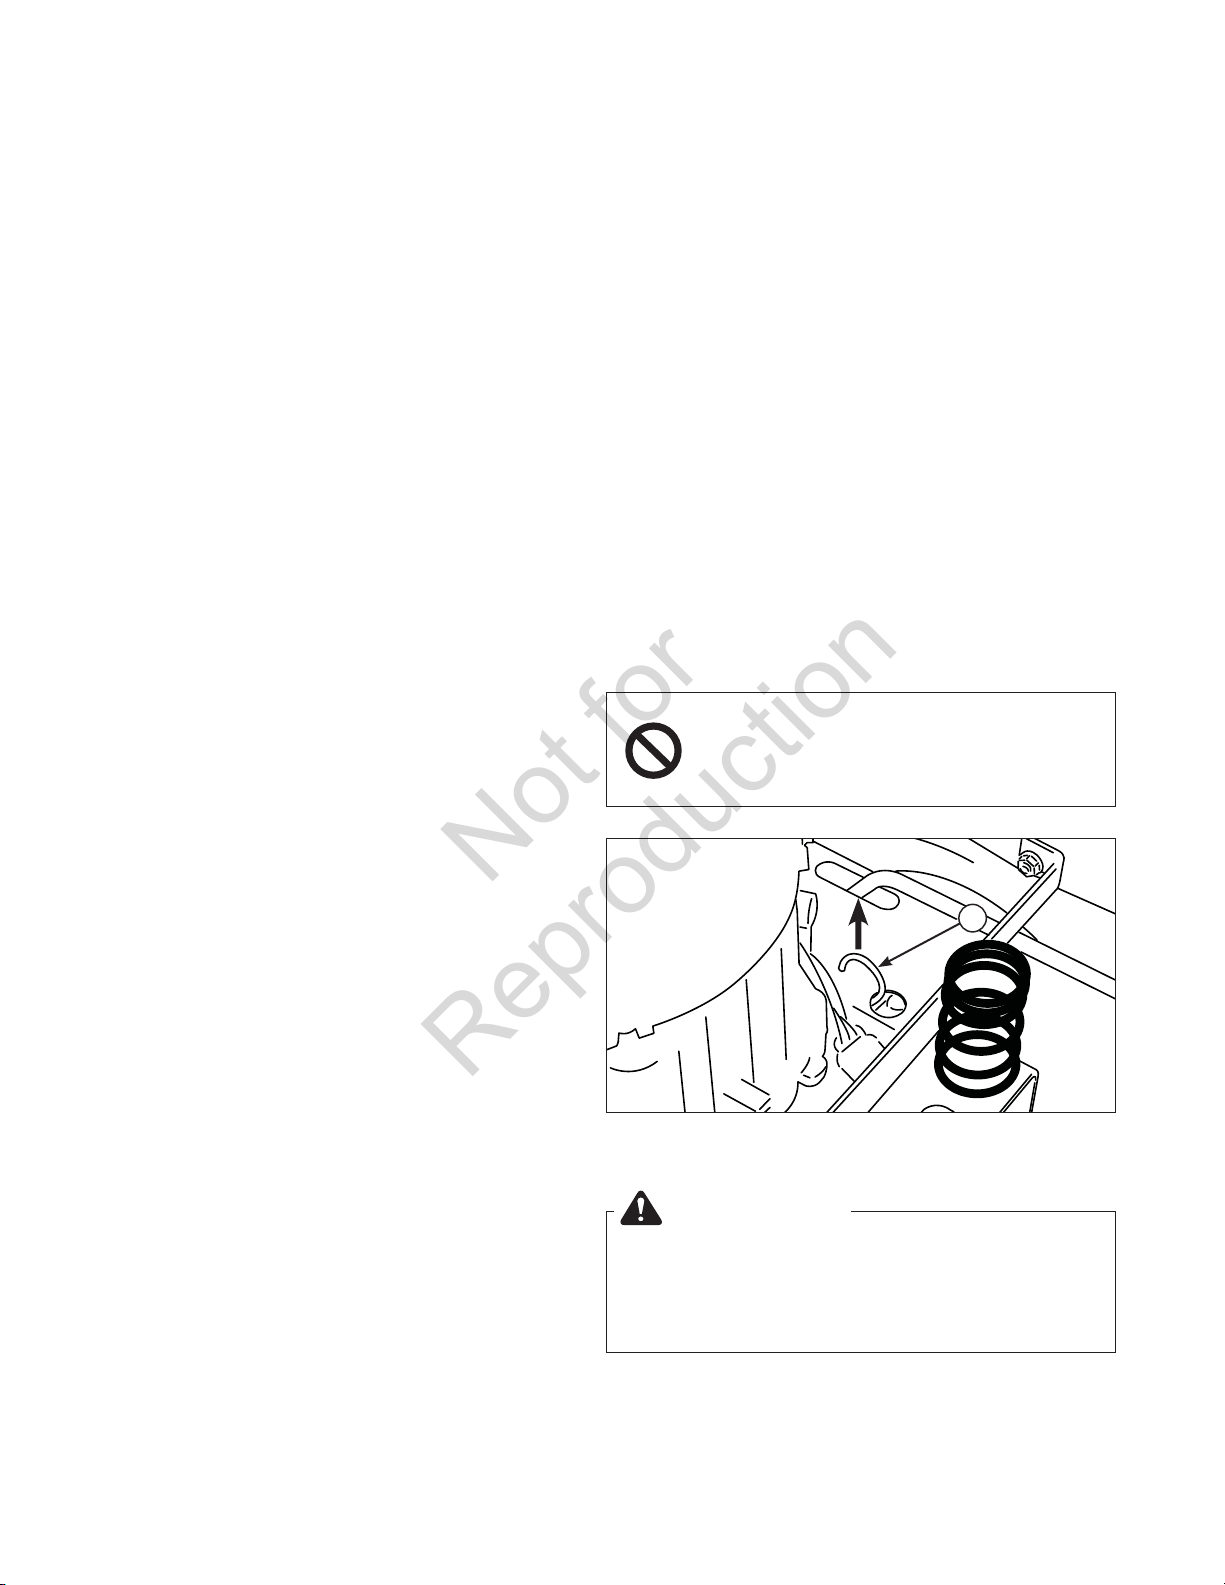
Pushing the Rider by Hand
1. Disengage the PTO, engage the parking brake, lock
the ground speed levers into their START/PARK positions, turn the ignition OFF, remove the key, and wait
for all moving parts to stop.
2. To disengage the transmissions, pull the roll release
rods (A, Figure 2), located on either side of the
engine, up into the PUSH position.
3. Disengage the parking brake.
The rider can now be pushed by hand.
4. After moving the rider, re-engage the transmissions
by pushing the roll release rods back down to the
DRIVE position.
DO NOT TOW RIDER
Towing the unit will cause transmission damage. Do not use another vehicle to push or
pull this unit.
A
Mowing
1. Make sure the PTO switch is disengaged, the parking
brake is engaged, the ground speed levers are locked
in their START/PARK positions, and the operator is in
the seat.
2. Start the engine (see Starting the Engine).
3. Set the mower cutting height (see Cutting Height
Adjustment).
4. Set the engine speed control to FAST.
5. Disengage the parking brake.
6. Engage the PTO by pulling up on the switch.
7. Pivot the ground speed levers in from the START/
PARK position to the neutral ‘N’ position.
16
Figure 2. Roll Release Components (On Each Side)
WARNING
DO NOT disengage the transmissions and
coast down slopes. DO NOT use Roll Release
to disengage the transmissions unless machine
motion can be controlled and engine is off.
www.Snapper.com
Operation
Not for
Reproduction
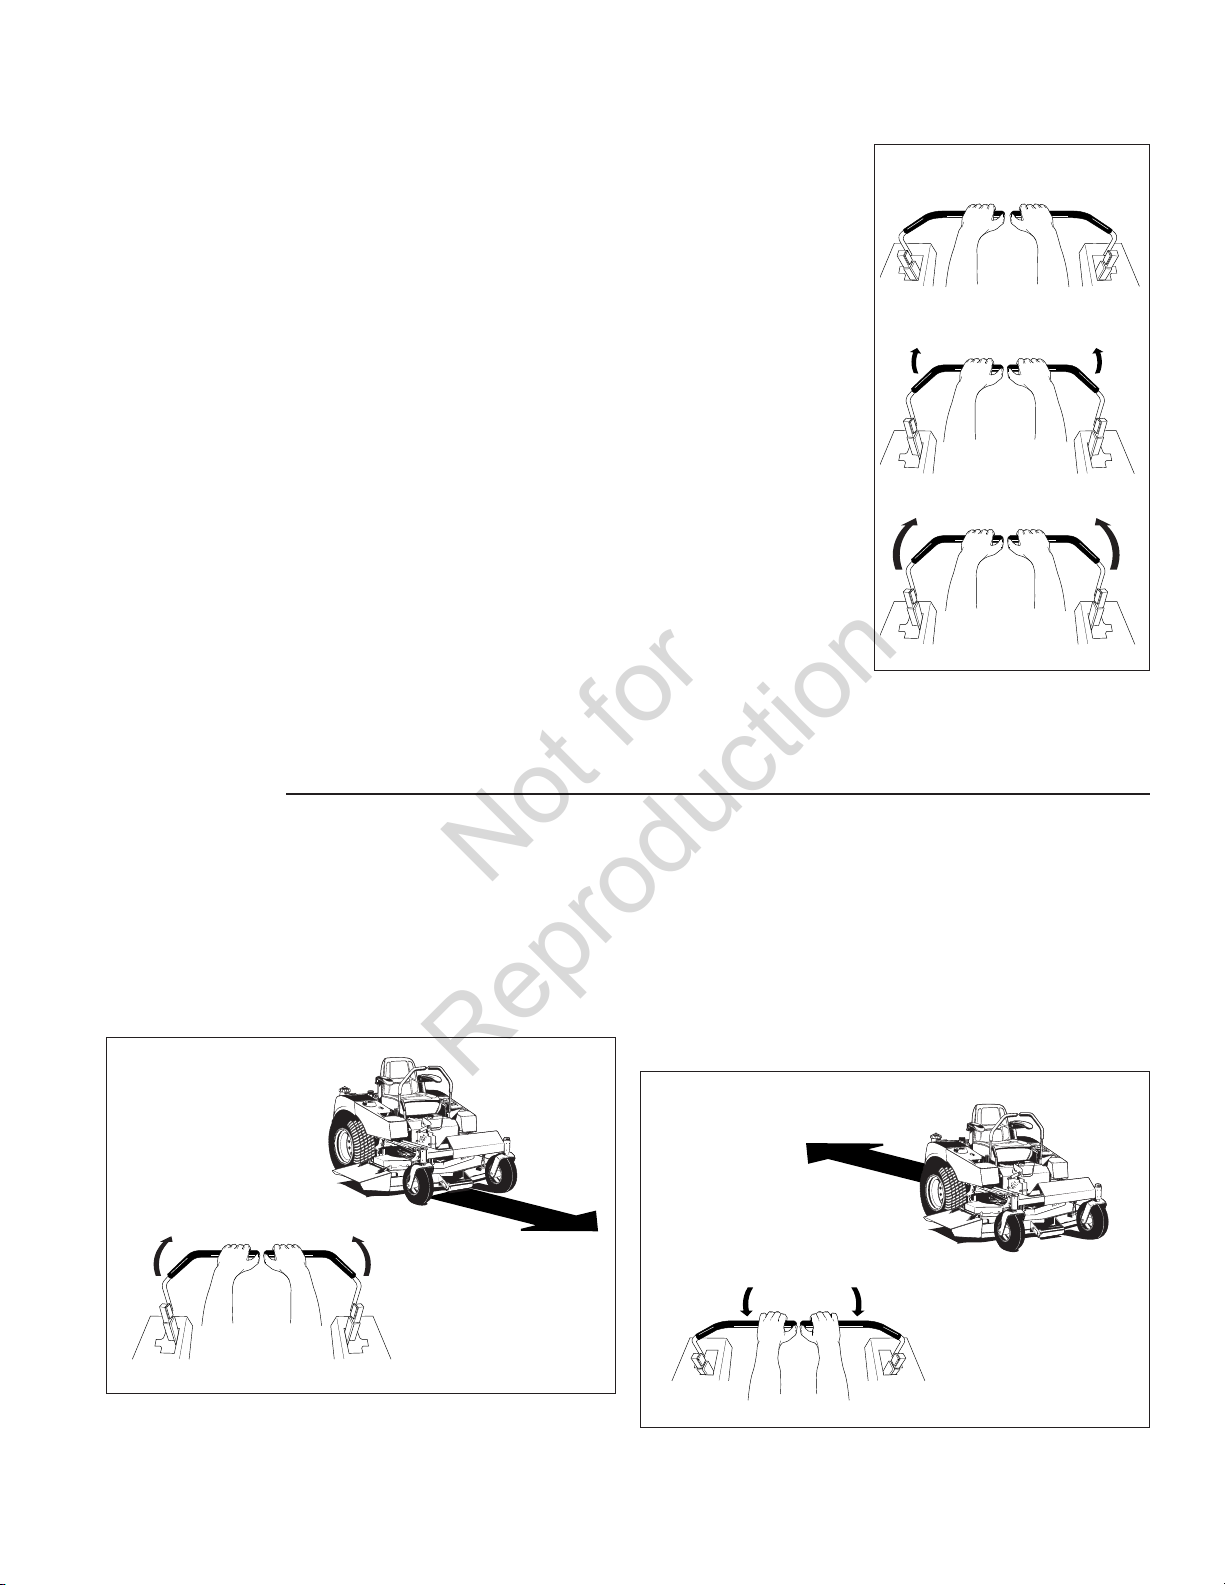
Zero Turn
Driving Practice
The ground speed levers of the zero turn rider are
responsive, and learning to gain a smooth and efficient
control of the rider’s forward, reverse, and turning movements will take some practice.
Spending some time going through the maneuvers shown
and becoming familiar with how the unit accelerates, travels, and steers — before you begin mowing — is absolutely essential to getting the most out of the zero turn
rider.
Locate a smooth, flat area of your lawn — one with
plenty of room to maneuver. (Clear the area of objects,
people and animals before you begin.) Operate the
unit at mid-engine speed during this practice session
(ALWAYS operate at full engine speed when mowing),
and turn slowly to prevent tire slippage and damage to
your lawn.
We suggest you begin with the Smooth Travel procedure to the right, and then advance through the forward,
reverse, and turning maneuvers.
Smooth Travel
The ground speed levers
of the zero turn rider are
responsive.
The BEST method of
handling the ground
speed levers is in three
steps — as shown in
Figure 3.
FIRST place your hands
onto the levers as
shown.
SECOND, to go forward
gradually push the levers
forward with your palms.
THIRD, to speed up,
move the levers farther
forward. To slow down
smoothly, slowly move
the levers toward neutral.
Figure 3. Move Ground
Speed Levers Gradually
Basic Driving
Forward Travel Practice
Gradually move both ground speed levers — evenly
FORWARD from neutral. Slow down and repeat.
Straight forward travel takes practice. If necessary, top
speed can be balance-adjusted — see Speed Balancing
Adjustment section.
Forward
Travel
Reverse Travel Practice
LOOK DOWN & BEHIND, then gradually move both
ground speed levers evenly BACK from neutral. Slow
down and repeat.
Practice backing up for several minutes before attempting to do so near objects. The rider turns as sharply in
reverse as when going forward, and backing up straight
takes practice.
Reverse
Travel
Figure 4. Forward Travel
Figure 5. Reverse Travel
17

Operation
Not for
Reproduction
Practice Turning Around a Corner
While traveling forward allow one lever to gradually return
back toward neutral. Repeat several times.
To prevent pivoting directly on thetire tread, it is best to
keep both wheels going at least slightly forward.
Executing
Turns
Figure 6. Turning Around a Corner
Practice Turning In Place
To turn in place, “zero turn,” gradually move one ground
speed lever forward from neutral and one lever back from
neutral simultaneously. Repeat several times.
Changing the amount each lever is pulled — forward or
back, changes the “pivot point” you turn on.
Turning
In-Place
Figure 7. Turning in Place
Advanced Driving
Executing an End-Of-Row Zero
Turn
Your zero turn rider’s unique ability to turn in
place allows you to turn around at the end of
a cutting row rather than having to stop and
Y-turn before starting a new row.
For example, to execute a right end-of row
zero turn:
1. Slow down at the end of the row.
2. Move the LEFT ground speed lever
forward slightly while moving the
RIGHT ground speed lever back to center
and then slightly back from center.
3. Begin mowing forward again.
This technique turns the rider RIGHT and
slightly overlaps the row just cut — eliminating
the need to back up and re-cut missed grass.
As you become more familiar and experienced with operating the zero turn rider, you
will learn more maneuvers that will make your
mowing time easier and more enjoyable.
Remember, the more you practice, the
better your control of the rider will be!
Figure 8. Executing an End-Of-Row Turn
18
www.Snapper.com
Attaching a Trailer
Not for
Reproduction
The maximum weight of a towed trailer should be less
than 200 lbs (91 kg). Secure the trailer with an appropriately sized clevis pin (A, Figure 9) and clip (B).
Excessive towed loads can cause loss of traction and
loss of control on slopes. Reduce towed weight when
operating on slopes. The surface being driven on greatly
impacts traction and stability. Wet or slippery surfaces
can greatly reduce traction and the ability to stop or turn.
Carefully evaluate the surface conditions before operating the unit and trailer, and never operate on slopes
greater than 10°. See Protection Against Tipovers and
Towing in the Operator Safety section of this manual.
Operation
A
B
3’6”
(1m)
20’ (6m)
Figure 9. Trailer Weight Recommendations
19

Maintenance
Not for
Reproduction
Maintenance Chart
RIDER AND MOWER
Every 8 Hours or Daily
Check safety interlock system
Clean debris off rider and mower deck
Clean debris from engine compartment
Every 25 Hours or Annually *
Check tire pressure
Check mower blade stopping time
Check rider and mower for loose hardware
Every 50 Hours or Annually *
Check rider brakes
See Dealer Annually to
Lubricate rider and mower
Clean battery and cables
Check mower blades **
* Whichever comes first
** Check blades more often in regions with sandy soils or
high dust conditions.
ENGINE
First 5 Hours
Change engine oil
Every 8 Hours or Daily
Check engine oil level
Every 25 Hours or Annually *
Clean engine air filter and pre-cleaner **
Every 50 Hours or Annually *
Change engine oil
Replace oil filter
Annually
Replace air filter
Replace pre-cleaner
See Dealer Annually to
Inspect muffler and spark arrester
Replace spark plug
Replace fuel filter
Clean engine air cooling system
* Whichever comes first
** Clean more often in dusty conditions or when airborne
debris is present.
20
www.Snapper.com

Check Tire Pressures
Not for
Reproduction
Tire pressure should be checked periodically, and maintained at the levels shown in the chart. Note that these
pressures may differ slightly from the “Max Inflation”
stamped on the side-wall of the tires. The pressures
shown provide proper traction, improve cut quality, and
extend tire life.
Maintenance
Checking / Adding Fuel
To add fuel:
1. Remove the fuel cap.
2. Fill the tank to the bottom of the filler neck. This will
allow for fuel expansion.
NOTE: Do not overfill. Refer to your engine manual for
specific fuel recommendations.
3. Install and hand tighten the fuel cap.
Fuel Filter
The fuel filter is located in the fuel line between fuel tank
and fuel pump. If the filter is dirty or clogged, replace as
follows:
1. Disconnect the negative battery cable.
2. Place a container below the filter to catch spilled fuel.
3. Using pliers, open and slide hose clamps from fuel
filter (A, Figure 11).
4. Remove hoses from filter.
5. Install new filter in proper flow direction in fuel line.
6. Secure with hose clamps.
7. Reconnect the negative battery cable when finished.
Front 25 psi (1,72 bar)
Rear 15 psi (1,03 bar)
Figure 10. Checking Tire Pressure
Tire Pressure
WARNING
Gasoline is highly flammable and must be
handled with care. Never fill the tank when the
engine is still hot from recent operation. Do not
allow open flame, smoking or matches in the
area. Avoid over-filling and wipe up any spills.
Do not remove fuel filter when engine is hot, as
spilled gasoline may ignite. DO NOT spread hose
clamps further than necessary. Ensure clamps
grip hoses firmly over filter after installation.
Do not use gasoline containing METHANOL,
gasohol containing more than 10% ethanol,
gasoline additives, premium gasoline, or white
gas because engine/fuel system damage
could result.
Engine Maintenance
Refer to engine manual for all engine maintenance procedures and recommendations.
Figure 11. Fuel Filter Replacement
(View looking back from battery compartment)
A
21

Maintenance
Not for
Reproduction
Washing the Mower Deck
The washout port allows you to connect a typical garden
hose to the trim side (L.H.) of the mower deck to remove
grass and debris from the underside of the deck. This
ensures proper and safe operation of the mower.
1. Park the rider on a smooth, level surface such as a
concrete floor. Disengage the PTO, lock the ground
speed levers into their START/PARK positions,
engage the parking brake, turn off the engine, and
remove the ignition key.
2. Attach the quick disconnect (A, Figure 12) to a garden hose (B), and connect to the washout port (C)
on the mower deck.
3. Turn on the water.
4. Start the engine, set the mower deck in the highest cutting position, and engage the PTO to remove
grass and debris from the underside of the mower
deck.
5. Disengage the PTO, turn off the engine, and remove
the ignition key.
6. Remove the garden hose and quick disconnect from
the mower deck when cleaning is completed.
A
B
C
WARNING
Before running the mower, make sure the hose
is properly connected and does not come into
cotact with the blades. When the mower is
running and the blades are engaged, the person
cleaning the mower must be in the operator
position, and there must be no bystanders.
Failure to follow these precautions may result in
serious injury or death.
Storage
Before you store your unit for the off-season, read the
Maintenance and Storage instructions in the Operator
Safety section, then perform the following steps:
• Disengage the PTO, move the ground speed levers
into the START/PARK positions, set the parking
brake, & remove the key.
• Perform engine maintenance and storage measures
listed in the engine owner’s manual. This includes
draining the fuel system, or adding stabilizer to the
fuel (do not store a fueled unit in an enclosed structure - see warning).
• Battery life will be increased if it is removed, put in a
cool, dry place and fully charged about once a month.
If the battery is left in the unit, disconnect the negative
cable.
Before starting the unit after it has been stored:
• Check all fluid levels. Check all maintenance items.
• Perform all recommended checks and procedures
found in the engine owner’s manual.
• Allow the engine to warm up for several minutes
before use.
Figure 12. Mower Deck Washout Port
22
WARNING
Never store the unit (with fuel) in an enclosed,
poorly ventilated structure. Fuel vapors can
travel to an ignition source (such as a furnace,
water heater, etc.) and cause an explosion.
Fuel vapor is also toxic to humans and animals.
www.Snapper.com

A
Not for
Reproduction
B
Figure 13. Seat Adjustment
Seat Adjustments
The seat and ground speed levers should be adjusted
so that operator’s elbows are supported by the arm rests
when his/her hands are on the controls, and the ground
speed levers can be moved through their full range of
motion without contacting the operator’s legs.
Adjustments and Service
Seat Position Adjustment
Lift the seat adjustment lever (A, Figure 13). Slide the
seat forward or backward to the desired position, then
lower the seat adjustment lever. Make sure the lever
locks into the locking slots (B) in the seat base.
Ground Speed Lever Adjustment
Remove the ground speed lever mounting hardware
(Figure 14) and reposition the lever either up or down
from its original position. Replace the hardware.
Figure 14. Ground Speed Lever Adjustments
Speed Balancing Adjustment
If the rider drifts to the right or left when the ground
speed levers are in the maximum forward position, the
top speed of each of these levers can be balanced. Only
adjust the speed of the wheel that is traveling faster.
To Reduce the Speed of the Faster Wheel
1. Loosen the bolt securing the forward adjust plate
(Figure 14).
2. Slide the plate up approximately 1/8”.
3. Retighten the bolt and recheck speed balance.
4. Repeat steps 1-3 until adjustment is complete.
WARNING
DO NOT adjust the rider for a faster overall speed
forward or reverse than it was designed.
23

Adjustments and Service
Not for
Reproduction
Cutting Height Adjustment
The cutting height adjustment switch controls the mower
cutting height. The cutting height is adjustable between
1-1/2” (3,8 cm) and 3-3/4” (9,5 cm).
To adjust cutting height:
Press the adjustment switch (A, Figure 15) forward to
lower the mower deck, backward to raise the mower
deck.
The slot in the cutting height indicator (B) indicates the
cutting height of the mower deck.
B
Mower Removal and Installation
NOTE: Perform mower installation and removal on a hard
flat surface such as a concrete floor.
Removal
1. Disengage the PTO, engage the parking brake, lock
the ground speed levers into their START/PARK positions, turn off the ignition, remove the key, and wait
for all moving parts to stop.
2. Place a 2 x 4 or similiar support under each end of
the mower deck, then lower the mower deck to its
lowest position. See Cutting Height Adjustment.
3. Pull back on the tensioning idler (F, Figure 16) in
the direction indicated by the arrow, and remove the
mower belt from the PTO pulley (C).
E
D
B
F
E
C
A
Figure 15. Cutting Height Adjustment
E
D
Figure 16. Mower Belt Routing
4. Remove the hairpin clips and washers (A, Figure 17)
securing the rear mower deck brackets (B) to the rear
lift arms (C), and pull the arms out from the holes in
the brackets. Retain all removed hardware.
5. Remove the hairpin clips and washers (A, Figure 18)
securing the front mower deck bracket (B) to the front
lift rods (C), and pull the rods out from the holes in the
bracket. Retain all removed hardware.
6. Pivot the front wheels out of the way and slide the
mower deck out from under the unit.
A
24
www.Snapper.com

Installation
Not for
Reproduction
1. Disengage the PTO, engage the parking brake, lock
the ground speed levers into their START/PARK positions, turn off the ignition, remove the key, and wait
for all moving parts to stop.
2. Lower the mower deck to its lowest position (see
Cutting Height Adjustment).
3. Pivot the front wheels out of the way and slide the
mower deck under the unit. Place a 2 x 4 or similar
support under each end of the mower deck.
4. Insert the front lift rods (C, Figure 18) into the bottom
holes in the front mower deck bracket (B), and secure
each with a washer and hairpin clip (A).
5. Insert the rear lift arms (C, Figure 17) into the front
holes in the rear mower deck brackets (B), and
secure each with a washer and hairpin clip (A).
6. Pull back on the tensioning idler (D, Figure 16) in the
direction indicated, and install the belt onto the PTO
pulley as shown in Figure 16.
Important: Be sure the belt is installed properly onto
all pulleys.
Adjustments and Service
A
C
B
Figure 17. Rear Deck Lift Components
(Right side shown, left side same)
C
Figure 18. Front Deck Lift Components
Right side shown, left side same)
A
B
25

Adjustments and Service
Not for
Reproduction
B
B
Figure 19. PTO Clutch Adjustment
A
B
PTO Clutch Adjustment
Check the PTO clutch adjustment after the initial 25 hour
break-in period and then after every 250 hours of operation. Also perform the following procedure if the clutch is
slipping or will not engage, or if a new clutch has been
installed.
1. Remove key from ignition switch and disconnect
spark plug wires to prevent the possibility of accidental starting while the PTO is being adjusted.
2. Note the position of the 3 adjustment windows (A,
Figure 19) in the side of the brake plate and the
nylock adjustment nuts (B).
3. Insert a .016”-.018” (0,40-0,45 mm) feeler gauge (C)
through each window, positioning the gauge between
the rotor face and the armature face as shown in
Figure 20.
4. Alternately tighten the adjustment nuts (B, Figure 19)
until the rotor face and armature face just contacts the
gauge.
5. Check the windows for an equal amount of tension
when the gauge is inserted and removed, and make
any necessary adjustments by tightening or loosening
the adjustment nuts.
NOTE: The actual air gap between the rotor and armature may vary even after performing the adjustment procedure. This is due to dimensional variations on component parts, and is an acceptable condition.
6. Check the mower blade stopping time. The mower
blades and mower drive belt should come to a complete stop within 5 seconds after the electric PTO
switch is turned off.
A
B
C
Figure 20. Adjust PTO Clutch
WARNING
To avoid serious injury, perform adjustments
only with engine stopped, key removed and rider
on level ground.
Check Mower Blade Stopping Time
Mower blades and mower drive belt should come to a
complete stop within 5 seconds after electric PTO switch
is turned off.
1. With parking brake engaged, PTO disengaged and
an operator in the seat, start the engine.
2. Have an assistant observe the mower drive belt
through the opening between the frame and top of
mower deck. Engage the PTO and wait several seconds. Disengage the PTO and check the amount of
time it takes for the mower drive belt to stop.
3. If the mower drive belt does not stop within 5 seconds, see an authorized dealer.
26
www.Snapper.com

Adjustments and Service
Not for
Reproduction
A
B
Figure 21. Orient Blades Side-to-Side
Mower Deck Leveling
Perform these adjustments on a flat level surface. Be
sure to check and adjust tire pressures before leveling
the mower deck.
Side-To-Side Leveling
1. With the mower installed, place the rider on a smooth,
level surface such as a concrete floor. Turn the front
wheels so they are straight.
2. Check for bent blades and replace if necessary.
3. Set the cutting height to mid position. Arrange the
outside mower blades so that they are pointing from
side-to-side (Figure 21).
4. Measure the distance between the outside tips of
each blade (A, Figure 22) and the ground (B). If there
is more than 1/8” (3 mm) difference between the
measurements on each side, proceed to step 5. If the
difference is 1/8” (3mm) or less, proceed to step 6.
5. Side-to-side leveling is accomplished using the
threaded rod (A, Figure 23) and trunnion (B) on the
right and left rear sides of the mower deck. Loosen
the jam nuts (C) and adjust the nuts up or down to
adjust the mower level. When complete, tighten the
jam nuts against the trunnion to lock the adjustment in
place.
Front-To-Back Leveling
6. Arrange the blades so they face front-to-back (Figure
24).
7. Measure the distance from the ground to the front tip
of the center blade and from the ground to the rear tip
of the rear blades (Figures 22 & 24). The front tip of
the front blade should be 1/8” - 1/4” (3 - 6 mm) lower
than the rear tips of the rear blades. If not, proceed
with steps 8 - 9.
8. The front hitch rods (A, Figure 25) are used to adjust
front-to-back leveling. To raise or lower the front of
the mower deck, loosen the rear jam nuts (B) on
both front hitch rods. Adjust the front jam nuts (C) on
both hitch rods to adjust the mower deck level. When
adjusted correctly, tighten the rear jam nuts to lock
the front hitch rods in place.
9. Re-check the blade measurement, then repeat steps
7 - 9 as necessary.
Figure 22. Measure Blade Tips to Ground
A
B
C
C
Figure 23. Mower Leveling - Side-to-Side
(Right side shown, left side hidden)
Figure 24. Orient Blades Front-to-Back
27

Adjustments and Service
Not for
Reproduction
C
B
C
B
A
Figure 25. Mower Leveling - Front-to-Back
Servicing the Mower Blades
1. Remove mower deck (see Mower Removal and
Installation).
2. To remove blade for sharpening, use a block of wood
(A, Figure 28) to prevent blade rotation while loosening the hardware.
3. Remove the bolt (C), blade washer (B), and blade.
4. Use a file to sharpen blade to a fine edge. If blade is
damaged, it must be replaced.
5. Balance the blade as shown in Figure 27. Center the
blade’s hole on a nail lubricated with a drop of oil. A
balanced blade will remain level.
6. Reinstall the blade (Figure 28) with the tabs pointing
up toward the mower deck as shown.
7. Reinstall the blade washer (B, Figure 28), concave
side up, and bolt (C). Use a wooden block (A) to
prevent blade rotation while tightening the hardware.
Torque hardware to 50-60 ft-lbs (68-81 Nm).
A
LOOSEN
Figure 26. Blade Removal
Workbench
Nail
Figure 27. Balancing the Blade
WARNING
For your personal safety, blade mounting
hardware must be installed with the blade
washer, then securely tightened to 50-60 ft-lbs
(68-81 Nm).
WARNING
For your personal safety, do not handle the
sharp mower blades with bare hands. Careless
or improper handling of blades may result in
serious injury.
28
Figure 28. Blade Installation
www.Snapper.com

Lubrication
Not for
Reproduction
Lubricate the unit at the points shown in Figure 29, as
well as the others listed in this section.
Grease:
• front caster wheel axles
• front caster spindle bosses
• front axle center pivot
• mower blade spindles *
• mower deck idler arm
• mower deck lift motor screw (located up under
right fender)
Use grease fittings when present. Disassemble parts to
apply grease to moving parts when grease fittings are not
installed.
Not all greases are compatible. Use automotive-type
lithium grease.
* Some blade spindles have grease fittings above the
mower deck, while others have grease fittings below the
deck.
Adjustments and Service
2x
2x
Oil:
• ground speed lever pivot points
• discharge chute hinge
• deck lift pivot points
Generally, all moving metal parts should be oiled where
contact is made with other parts. Keep oil and grease
off belts and pulleys. Remember to wipe fittings and surfaces clean both before and after lubrication.
Figure 29. Lubrication Points (Grease)
29
Adjustments and Service
Not for
Reproduction
Cleaning the Battery and Cables
1. Disconnect the cables from the battery, negative
cable first (C, Figure 30).
2. Clean the battery terminals and cable ends with a
wire brush until shiny.
3. Reinstall the battery and reattach the battery cables,
positive cable first (A).
4. Coat the cable ends and battery terminals with petroleum jelly or non-conducting grease.
5. Be sure to replace the terminal cover (B) over the
positive battery terminal.
B
A
Battery Charging
A dead battery or one too weak to start the engine may
be the result of a defect in the charging system or other
electrical component. If there is any doubt about the
cause of the problem, see your dealer. If you need to
replace the battery, see Cleaning the Battery and
Cables section.
To charge the battery, follow the instructions provided by
the battery charger manufacturer as well as all warnings
included in the safety section of this book. Remove the
battery from the rider and place on a level, non-concrete
surface. Charge the battery at 6-10 amps for 1 hour. Do
not charge at a rate higher than 10 amps.
C
Figure 30. Battery Compartment
WARNING
Be careful when handling the battery. Keep
flames and sparks away from the battery.
When removing or installing battery cables,
disconnect the negative cable FIRST and
reconnect it LAST. If not done in this order, the
positive terminal can be shorted to the frame by a
tool.
WARNING
Keep open flames and sparks away from the
battery; the gasses coming from it are highly
explosive. Ventilate the battery well during
charging.
30
www.Snapper.com

Troubleshooting the Rider
Not for
Reproduction
PROBLEM LOOK FOR REMEDY
Ground speed levers not in
START/PARK positions.
Troubleshooting
Lock ground speed levers in START/ PARK positions.
Engine will not turnover
or start.
Engine starts hard or runs
poorly.
Engine knocks.
Excessive oil
consumption.
Engine exhaust is black.
Engine runs, but rider will
not drive.
PTO (electric clutch) switch
in ON position.
Out of fuel. If engine is hot, allow it to cool, then refill the fuel tank.
Parking brake disengaged. Engage parking brake.
Fuel valve closed (if
equipped).
Engine flooded. Open the choke.
Gas is old or stale. Drain fuel and replace with fresh fuel.
Battery terminals require
cleaning.
Battery discharged or dead. Recharge or replace.
Wiring loose or broken. See authorized service dealer.
Solenoid or starter motor
faulty.
Safety interlock switch not
working.
Spark plug(s) faulty, fouled
or incorrectly gapped.
Water in fuel. Drain fuel and refill with fresh fuel.
Circuit breaker blown. See authorized service dealer.
Fuel mixture too rich. Clean air filter. Check the choke.
Spark plug faulty, fouled, or
incorrectly gapped.
Fuel filter dirty. Replace fuel filter.
Low oil level. Check/add oil as required.
Using wrong grade oil. See engine manual.
Engine running too hot. See engine fins, blower screen, and air cleaner.
Using wrong grade oil. See engine manual.
Too much oil in crankcase. Drain excess oil.
Dirty air filter. Replace air filter. (See engine manual.)
Engine choke control is in
closed position.
Transmission(s) disengaged. Unlock roll release rod(s).
Belt is broken. See authorized service dealer.
Drive belt slips. See authorized service dealer.
Brake is not fully released. See authorized service dealer.
Internal transmission
problem.
Place in OFF position.
Open fuel valve.
Clean the battery terminals.
See authorized service dealer.
See authorized service dealer.
Clean and gap or replace. (See engine manual.)
Clean and gap or replace. (See engine manual.)
Open choke control.
See authorized service dealer.
31

Troubleshooting
Not for
Reproduction
PROBLEM LOOK FOR REMEDY
Pulleys or belt greasy or oily. Clean as required.
Rider drive belt slips.
Brake will not hold.
Rider steers or handles
poorly.
Troubleshooting the Mower
PROBLEM LOOK FOR REMEDY
Mower will not raise.
Mower cut is uneven.
Belt stretched or worn. See authorized service dealer.
Brake components worn or
damaged.
Internal transmission
problem.
Steering linkage is loose. Check and tighten any loose connections.
Improper tire inflation. See Maintenance section.
Mower deck not properly
installed.
Deck lift components
damaged.
Mower not leveled properly. See Mower Adjustment.
Rider tires not inflated
equally or properly.
Engine speed too slow. See engine speed control to FAST.
See authorized service dealer.
See authorized service dealer.
Unlock roll release rod(s).
See authorized service dealer.
See Maintenance section.
Mower cut is rough
looking.
Engine stalls easily with
mower engaged.
Excessive mower
vibration.
Excessive belt wear or
breakage.
Mower drive belt slips or
fails to drive.
Ground speed too fast. Decrease ground speed.
Blades are dull. Sharpen or replace blades. See Servicing the Mower Blades.
Mower drive belt slipping
because it is oily or worn.
Blades not properly fastened
to spindles.
Engine speed too slow. Set engine speed control to FAST.
Ground speed too fast. Decrease ground speed.
Cutting height set too low. Cut tall grass at maximum cutting.height during first pass.
Discharge chute jamming
with cut grass.
Blade mounting hardware is
loose.
Mower blades, spindles, or
pulleys are bent.
Mower blades are out of
balance.
Blade installed incorrectly. See authorized service dealer.
Bent or rough pulleys. See authorized service dealer.
Using incorrect belt. See authorized service dealer.
Idler pulley spring broken or
not properly attached.
Mower drive belt broken. See authorized service dealer.
See authorized service dealer.
See Servicing the Mower Blades.
Cut grass with discharge pointing toward previously cut area.
Tighten to 50-60 ft-lbs (68-81 Nm).
See authorized service dealer.
Remove, sharpen, and balance blades. See Servicing the Mower
Blades.
See authorized service dealer.
32
www.Snapper.com

Specifications
Not for
Reproduction
Engine:
26 HP Briggs & Stratton
Make Briggs & Stratton
Model 26 hp PRO Twin
Horsepower 26 @ 3500 rpm
Displacement 44.0 cu in. (724 cc)
Electrical System Battery 12 Volt, 230 CCA
Alternator 16 amp
Oil Capacity 64 oz (1,9 L) w/Filter
Chassis:
Fuel Tank Capacity: 3.0 Gallons (11,4 L)
Rear Wheels Tire Size: 18 x 9.50-8
Inflation Pressure: 15 psi (1,03 bar)
Front Wheels Tire Size: 11 x 4.00-5
Inflation Pressure: 25 psi (1,72 bar)
Parts and Accessories
See an authorized dealer.
Engine Power Rating Information
The gross power rating for individual gas engine models is labeled in accordance with SAE (Society of Automotive
Engineers) code J1940 (Small Engine Power & Torque Rating Procedure), and rating performance has been obtained
and corrected in accordance with SAE J1995 (Revision 2002-05). Torque values are derived at 3060 RPM; horsepower values are derived at 3600 RPM. Actual gross engine power will be lower and is affected by, among other things,
ambient operating conditions and engine-to-engine variability. Given both the wide array of products on which engines
are placed and the variety of environmental issues applicable to operating the equipment, the gas engine will not
develop the rated gross power when used in a given piece of power equipment (actual “on-site” or net horsepower).
This difference is due to a variety of factors including, but not limited to, accessories (air cleaner, exhaust, charging,
cooling, carburetor, fuel pump, etc.), application limitations, ambient operating conditions (temperature, humidity, altitude), and engine-to-engine variability. Due to manufacturing and capacity limitations, Briggs & Stratton may substitute
an engine of higher rated power for this Series engine.
Transmissions:
Make Hydro Gear
Model ZC-AHBB-2A7B-1DPX (LH)
ZC-DHBB-2A7C-1DPX (RH)
Type EZT
Hydraulic Fluid Sealed Unit
Speeds Forward: 0-6 MPH (0-9.66 km/h)
@ Specified rpm Reverse: 0-3 MPH (0-4.83 km/h)
Dimensions:
Overall Length 75” (191 cm)
Overall Width 61” (155 cm)
Height 39” (99 cm)
Weight (approx.) 554 lbs (252 kg)
33

Warranties
Not for
Reproduction
34
www.Snapper.com

Not for
Reproduction
35

Snapper, Inc.
Not for
Reproduction
P.O. Box 702
Milwaukee, WI U.S.A.
www.Snapper.com
1-800-935-2967

Manual del Operador
Not for
Reproduction
!
Unidad Cero Giro Serie 285Z
Mfg. No. Descripción
7800632 Unidad Cero Giro Snapper 26HP con Cortacésped de 52 pulg. RZT26520

Gracias por haber adquirido este cortacésped SNAPPER de alta calidad. Nos complace que confíe en la marca
MUESTRA
Not for
Reproduction
SNAPPER. Si se maneja y se realiza el mantenimiento adecuado, tal y como se indica en este manual; su
cortacésped SNAPPER le proporcionará años de funcionamiento fiable.
Este manual contiene información de seguridad para advertirle sobre los peligros y riesgos asociados con la
máquina y cómo evitarlos. Esta máquina fue diseñada para el corte de acabado de céspedes establecidos y para
ninguna otra finalidad. Es importante que usted lea y comprenda bien estas instrucciones antes de intentar encender
u operar este equipo. Conserve estas instrucciones originales para consulta futura.
Números de identificación
Product Identification Tag
Model / Modèle / Model XXXXXXX
Serial / Série / Serie XXXXXXXXX
USA 800-935-2967
WWW.SNAPPER.COM
Briggs & Stratton Power Products Group, LLC
Milwaukee, WI 53201 USA
Etiqueta de Ident.
de la Unidad
Al comunicarse con su distribuidor autorizado para
pedir repuestos, servicio o información, usted DEBE
tener estos números.
Registre su nombre/número de modelo, números de
identificación del fabricante y números de serie del motor
en el espacio provisto para fácil acceso. Estos números
se encuentran en las ubicaciones mostradas.
NOTA: Para ubicar los números de identificación del
motor, consulte el manual del propietario del motor.
SNAPPER es una marca registrada de
Briggs & Stratton Power Products Group, LLC
Milwaukee, WI, USA.
DATOS DE REFERENCIA DEL PRODUCTO
Descripción Nombre/Número del modelo
Número de
Número de MFG de la cubierta del
cortacésped
Nombre del distribuidor
Fabricante del motor
Tipo/Espec. del motor
MFG de la unidad
DATOS DE REFERENCIA DEL MOTOR
Número de SERIE de la unidad
Númerode SERIE de la cubierta del
cortacésped
Fecha de adquisición
Modelo del motor
Código/Número de serie del motor
Copyright © 2010, Briggs & Stratton Corporation
Milwaukee, WI, USA. Todos los derechos
reservados.
2
www.Snapper.com

Tabla de contenido
Not for
Reproduction
Seguridad del Operador .................................... 4
Características y controles ............................. 13
Funciones de control .............................................13
Funcionamiento ................................................ 15
Seguridad de funcionamiento general ..................15
Verificaciones antes del arranque .........................15
Cómo arrancar el motor ........................................16
Cómo detener la unidad y el motor .......................16
Corte de césped....................................................16
Cómo empujar la unidad manualmente ................16
Práctica de conducción con Giro Cero ..................17
Cómo anexarle un remolque .................................19
Mantenimiento .................................................. 20
Cuadro de mantenimiento .....................................20
Verificación de las presiones de las llantas ...........21
Verificación/agregado de combustible ..................21
Filtro de combustible .............................................21
Mantenimiento del motor .......................................21
Limpieza de la plataforma del cortacésped ...........22
Almacenaje ...........................................................22
Servicio y ajustes ............................................. 23
Ajustes del asiento ................................................23
Ajuste de la palanca de velocidad de
desplazamiento .....................................................23
Ajuste de equilibrio de velocidad...........................23
Ajuste de altura de corte .......................................24
Extracción e instalación del cortacésped ..............24
Ajuste de embrague de PTO .................................26
Verificar el tiempo de detención de la cuchilla
del cortacésped ....................................................26
Nivelación de la cubierta del cortacésped ............27
Cómo dar servicio a las cuchillas
del cortacésped ....................................................28
Lubricación ............................................................29
Cómo limpiar la batería y los cables .....................30
Carga de batería ...................................................30
Resolución de problemas ............................... 31
Resolución de problemas de la unidad
montable ...............................................................31
Resolución de problemas del cortacésped ...........32
Especificaciones .............................................. 33
Garantía ............................................................. 34
3

Seguridad del Operador
Not for
Reproduction
Felicitaciones por su compra de un equipo de jardín y césped de
calidad superior. Nuestros productos fueron diseñados y fabricados
de modo a satisfacer o superar todas las normas de seguridad de la
industria.
No opere esta máquina a no ser que se haya familiarizado con la
misma. Leer y comprender este manual del operador es una forma de
hacer exactamente eso.
Este equipo motorizado es solo tan seguro como el operador. Si se
hace uso indebido del mismo o no se lo mantiene correctamente,
puede ser peligroso. Recuerde que usted es responsable por su
seguridad y por la seguridad de quienes lo rodean.
Use el sentido común y piense bien en lo que está haciendo. Si no
está seguro de que la tarea que está por realizar pueda ser efectuada
sin peligro con el equipo que ha elegido, pregúntele a un profesional.
Comuníquese con su distribuidor autorizado local.
Lea el manual
El manual del operador contiene información de seguridad
importante que usted debe conocer ANTES de utilizar su
unidad así como DURANTE su funcionamiento.
Se incluyen técnicas de operación segura, una explicación
de las características y los controles del producto e
información de mantenimiento para ayudarle a aprovechar
al máximo la inversión que ha realizado en su equipo.
Asegúrese de leer por completo las Reglas de Seguridad e
Información que contienen las siguientes páginas. También
lea por completo la sección de Funcionamiento.
Seguridad del operador
Niños
Pueden ocurrir accidentes trágicos con los niños.
No permita su presencia en ningún lugar cerca
del área de funcionamiento. Los niños suelen
sentirse atraídos por la unidad y por la actividad
del cortacésped. Nunca presuponga que los
niños permanecerán donde los vio por última vez.
Si existe el riesgo de que puedan ingresar niños
al área en el que está cortando el césped, pídale
a otro adulto responsable que los vigile.
4
www.Snapper.com

3.5
Not for
Reproduction
20
Seguridad del Operador
Operación en pendientes
Puede ser peligroso operar en pendientes. El uso de la unidad en
una pendiente demasiado inclinada donde no tenga tracción de
ruedas (y control) adecuados puede causar deslizamientos, falta
de maniobrabilidad, control y posible vuelco. No opere sobre una
pendiente con una elevación superior a 3.5 pies sobre un largo de
20 pies (10 grados).
Siempre corte el césped hacia arriba y hacia abajo de las
pendientes y nunca hacia los costados, y evite los giros repentinos
y los cambios de velocidad rápidos. Reduzca la velocidad y tenga
extremo cuidado en TODAS las pendientes.
Asimismo, tenga en cuenta que la condición de la superficie en la
que se encuentra puede tener gran impacto sobre su capacidad de
operar esta máquina de manera segura. El operar la máquina sobre
pendientes mojadas o resbaladizas puede causar deslizamientos
y falta de maniobrabilidad y control. No opere en pendientes
resbaladizas, mojadas o con suelo blando.
Si se siente inseguro con respecto a operar la unidad en una
pendiente, no lo haga. El riesgo no vale la pena.
Objetos lanzados
La unidad tiene cuchillas de cortacésped giratorias. Estas cuchillas pueden
recoger y arrojar detritos que podrían lesionar gravemente a un transeúnte.
Asegúrese de limpiar el área a ser cortada y retirar objetos que podrían ser
arrojados por la cuchilla ANTES de comenzar a cortar el césped. No opere
este unidad sin el recolector de hierba entero o la protección de descarga
(deflector) colocados.
Asimismo, no permita a nadie en el área mientras la unidad esté en
funcionamiento. Si alguien ingresa al área, apague la unidad de inmediato
hasta que la persona se haya retirado.
Este equipo contiene muchas piezas móviles que pueden
causarle lesiones a usted o a otras personas. Sin embargo, si se
mantiene en la zona del operador (sentado en el asiento), y sigue
las reglas de seguridad de este manual del operador, puede
operar la unidad con seguridad.
La cubierta de la plataforma tiene cuchillas giratorias que pueden
amputar las manos y los pies. No permita que nadie se acerque
a la unidad cuando esté en funcionamiento. Mantenga los
dispositivos de seguridad (protecciones, seguros e interruptores)
en su lugar y en buen funcionamiento.
Para ayudarlo a usted, el operador, a utilizar este equipo sin
peligro, el mismo está equipado con un sistema de seguridad
de operador presente. NO intente alterar o anular el sistema.
Vea a su distribuidor de inmediato si el sistema no pasa todas
las pruebas de sistema de interbloqueo de seguridad que se
encuentran en este manual.
Piezas móviles
5

Seguridad del Operador
Not for
Reproduction
Paredes de retención, puntos de descenso y agua
Las paredes de retención y puntos de descenso alrededor de escalones y agua son un peligro común. Permítase un mínimo
de dos anchos de cortacésped alrededor de estos puntos de peligro y corte manualmente con un cortacésped manual o una
bordeadora. Si las ruedas caen por arriba de paredes de retención, bordes, cunetas, terraplenes o dentro del agua, esto
puede causar vuelcos, los que pueden resultar en lesiones graves, muerte o ahogamiento.
Combustible y mantenimiento
Siempre desengrane todas las marchas, apague el motor y quite
la llave antes de realizar cualquier tipo de limpieza, carga de
combustible o servicio.
La gasolina y sus vapores son extremamente inflamables.
No fume al operar o cargar combustible en esta máquina. No
agregue combustible con el motor caliente o en marcha. Permita
que el motor se enfríe al menos 3 minutos antes de agregar
combustible.
No agregue combustible en interiores, en un remolque cerrado,
un garaje u otras áreas que no estén bien ventiladas. Se debe
limpiar de inmediato cualquier derrame de gasolina antes de
poner en funcionamiento el equipo.
Se debe almacenar gasolina únicamente en recipientes sellados
aprobados para combustible.
El mantenimiento adecuado es crítico para la seguridad y
el desempeño de su unidad. Mantenga la unidad libre de
césped, hojas y exceso de aceite. Asegúrese de realizar los
procedimientos de mantenimiento indicados en este manual,
especialmente pruebas periódicas de la seguridad del sistema.
Áreas cerradas
Solo opere esta unidad en exteriores y lejos de
áreas si ventilar, tales como dentro de garajes o
6
remolques cerrados. El motor emite monóxido de
carbono venenoso y la exposición prolongada en
un área cerrada puede resultar en lesiones graves
o muerte.
www.Snapper.com

Seguridad del Operador
Not for
Reproduction
ADVERTENCIA: Esta potente máquina cortacésped puede llegar a amputar manos y pies y puede lanzar objetos que pueden
causar lesiones y daños. El no cumplimiento de las siguientes instrucciones de SEGURIDAD puede resultar en lesiones graves
o muerte del operador u otras personas. El propietario de la máquina deberá comprender estas instrucciones y permitir utilizar
la máquina únicamente a personas que comprendan estas instrucciones. Todas las personas que hagan funcionar la máquina
deberán ser dueñas de sí mental y físicamente y no deberán hallarse bajo la influencia de ningún tipo de sustancias que puedan
deteriorar sus capacidades visuales, su destreza o capacidad de juicio. Si tiene alguna pregunta relativa a su máquina que su
distribuidor no pueda responder a su satisfacción, llame al Departamento de Atención al Cliente.
Protección para niños
Pueden ocurrir accidentes trágicos si el operador no está atento
a la presencia de niños. Los niños suelen sentirse atraídos por
la unidad y por la actividad del cortacésped. Los niños que han
montado en un cortacésped en el pasado pueden aparecer
repentinamente en la zona en la que está cortando el césped
para que los lleve y pueden caerse o ser atropellados por la
máquina. Nunca presuponga que los niños permanecerán
donde los vio por última vez.
1. MANTENGA a los niños fuera de la zona de segado y bajo
la atenta vigilancia de un adulto que se responsabilice de
ellos, aparte del operador de la máquina.
2. NO PERMITA que los niños estén en el jardín mientras
utiliza la máquina (incluso cuando la cuchilla esté
DESCONECTADA).
3. NO PERMITA que niños u otros se monten sobre la
máquina, en sus accesorios o en el equipo de remolque (ni
con las cuchillas DESCONECTADAS). Podrían caerse y
resultar gravemente heridos.
4. NO PERMITA que menores preadolescentes utilicen la
máquina.
5. PERMITA ÚNICAMENTE que adultos responsables y
adolescentes con madura capacidad de juicio y bajo la
cercana supervisión de un adulto utilicen la máquina.
6. NO maneje las cuchillas marcha atrás. DETENGA LAS
CUCHILLAS MIRE detrás y debajo de usted antes de
retroceder y antes de retroceder y mientras lo haga por si
hay niños, animales domésticos u otros peligros.
7. PONGA UN CUIDADO ESPECIAL al acercarse a esquinas
ciegas, arbustos, árboles u otros objetos que puedan
obstaculizar la visión.
Cómo evitar vuelcos
Las pendientes son un factor de gran importancia en la pérdida
de control y en los accidentes en los que vuelca el cortacésped,
y podrían causar lesiones graves o incluso la muerte. Todas
las pendientes requieren mayor PRECAUCIÓN. Si no puede
ir hacia atrás sobre una pendiente con el cortacésped, o no
se siente seguro sobre la pendiente, NO corte el césped en la
misma. Ponga el mayor cuidado con los recogedores de hierba
y otros elementos anexos: afectan al manejo y a la estabilidad
de la máquina.
1. NO MANEJE la máquina en pendientes de excedan los
10 grados (18% nivel).
2. Tenga EXTREMO CUIDADO en todas las pendientes.
DESCONECTE las cuchillas cuando suba una pendiente.
Utilice una velocidad lenta evitando giros bruscos.
3. NO MANEJE la máquina hacia adelante y hacia atrás en
medio de las pendientes. Manéjela hacia arriba y hacia
abajo. Practique sobre las pendientes con las cuchillas
desconectadas.
4. EVITE arrancar, detenerse, o girar sobre las pendientes.
Si la máquina se detiene mientras sube o los neumáticos
pierden tracción, DESCONECTE las cuchillas y retroceda
lentamente en línea recta hacia abajo.
Cómo evitar vuelcos
(Continuación de la columna previa)
5. ESTÉ alerta ante la presencia de hoyos y otros peligros
ocultos. La hierba alta puede ocultar obstáculos.
Manténgase lejos de cunetas, deslaves, alcantarillas,
cercas y objetos que puedan salir proyectados.
6. MANTENGA UNA DISTANCIA DE SEGURIDAD (mínima
de 91,5 cm) de separación con cunetas y otros desniveles.
La máquina podría volcar si se mete una parte en un
desnivel.
7 Comience siempre a moverse hacia adelante lentamente y
con precaución.
8. Utilice pesos o un transportador de carga con peso de
acuerdo con las instrucciones proporcionadas junto con el
recolector de hierba. NO DEBE manejar la máquina sobre
pendientes que superen los 10 grados (18% nivel) cuando
se remolca un recolector de hierba.
9. NO coloque su pie en el suelo para intentar estabilizar la
máquina.
10. NO utilice el cortacésped sobre hierba húmeda. La
reducción de tracción puede causar deslizamiento.
11. Escoja una velocidad lo suficientemente baja de tal manera
que no tenga que parar o cambiar en una pendiente. Los
neumáticos pueden perder tracción en las pendientes
incluso cuando los frenos funcionen debidamente.
12. NO maneje la máquina bajo ninguna circunstancia donde la
tracción, la dirección o la estabilidad sean dudosas.
13. Mantenga la máquina en marcha al bajar las pendientes.
NO utilice el punto muerto (ni libere el hidro-rodamiento)
para bajar una pendiente.
Preparación
1. Lea, comprenda, y siga las instrucciones y advertencias en
este manual y las indicadas sobre la máquina, el motor y
sus accesorios. Conozca los controles y el uso apropiado
de la máquina antes de comenzar.
2. Únicamente deberá hacer funcionar la máquina personas
maduras y responsables, y únicamente tras la adecuada
instrucción.
3. Los datos indican que operadores de 60 o más años
están implicados en un amplio porcentaje de lesiones
relacionadas con el uso de cortacéspedes. Estos
operadores deberán evaluar su capacidad de utilizar la
unidad de manera lo suficientemente segura como para
protegerse a sí mismos y a los demás frente a graves
lesiones.
4. Manipule el combustible con especial precaución. Los
combustibles son inflamables y sus vapores, explosivos.
Utilice un recipiente de combustible homologado. NO retire
la tapa del combustible ni añada combustible con el motor
en marcha. Añada combustible únicamente en exteriores y
con el motor parado y frío. Limpie el carburante derramado
sobre la máquina. NO fume.
5. Cuando haga prácticas para manejar la máquina,
hágalo con LAS CUCHILLAS DESCONECTADAS para
familiarizarse con los controles y mejorar su habilidad.
7

Seguridad del Operador
Not for
Reproduction
Preparación
(Continuación de la página anterior)
6. Compruebe la zona cuyo césped haya de ser cortado y
retire objetos como son juguetes, cables, piedras, ramas
y otros elementos que puedan causar lesiones si son
lanzados por la cuchilla o interfieren con el funcionamiento
del cortacésped.
7. Mantenga a las personas y los animales domésticos lejos
de la zona en la que va a cortar el césped. DETENGA
inmediatamente las cuchillas, DETENGA el motor y
DETENGA el cortacésped en caso de que alguna persona
entre en la zona.
8. Compruebe con frecuencia el adecuado funcionamiento
y ubicación de broqueles, deflectores, conmutadores,
controles de la cuchilla y otros dispositivos de seguridad.
9. Asegúrese de que todas las calcomanías de seguridad se
lean con claridad. Reemplácelas si están dañadas.
10. Protéjase cuando corte el césped y use gafas protectoras,
pantalones largos y calzados sólidos.
11. Debe saber cómo DETENER la cuchilla y el motor con
rapidez ante cualquier emergencia.
12. Extreme la precaución cuando cargue o descargue la
máquina de camiones o furgonetas.
13. Compruebe con frecuencia los componentes del recogedor
de hierba en busca de signos de desgaste o deterioro y
repóngalos según sea necesario para evitar las lesiones
producidas por el lanzamiento de objetos a través de
puntos débiles o desgarrados.
Manipulación segura de la gasolina
Para evitar lesiones personales o daños en los bienes, extreme
la precaución cuando manipule gasolina. La gasolina es
extremadamente inflamable y sus vapores son explosivos.
1. Apague cigarrillos, puros, pipas y cualquier otra fuente de
fuego.
2. Utilice un recipiente de combustible homologado.
3. NO retire la tapa del combustible ni añada combustible con
el motor en marcha. Dé tiempo al motor para que se enfríe
antes de reponer el combustible.
4. NO ponga combustible en la máquina en espacios
interiores.
5. NO almacene la máquina ni el contenedor de combustible
en interiores en que haya llamas expuestas, chispas o
luces pilotos como las de los calentadores de agua u otros
dispositivos.
6. Nunca llene recipientes de combustible en el interior de
vehículos o sobre el lecho de un camión o remolque con
revestimientos de plástico. Sitúe los recipientes sobre el
suelo, lejos del vehículo, antes de llenarlos.
7. Retire del vehículo o camión el equipamiento que se
alimente de gasolina y reponga el combustible sobre su
suelo. Si ello no es posible, reponga el combustible del
equipo utilizando un contenedor portátil y no con boquillas
dosificadoras de gasolina.
8. NO arranque equipos alimentados por gasolina en
vehículos o camiones cerrados.
9. Mantenga la boquilla en contacto con el borde de la boca
del tanque o recipiente de combustible en todo momento y
hasta haber completado el llenado. NO use un dispositivo
para trabar y abrir boquillas.
10. Si se derrama combustible sobre su ropa, cámbiese de
inmediato.
11. Nunca llene en exceso el depósito. Vuelva a situar la tapa
del combustible y ajústela firmemente.
FUNCIONAMIENTO
1. Monte y desmonte la máquina desde el lado izquierdo.
Manténgase alejado del agujero de descarga en todo
momento.
2. Si es posible, encienda el motor desde el asiento
del usuario. Asegúrese de que las cuchillas estén
DESACTIVADAS y de que esté activado el freno de mano.
3. NO abandone la máquina con el motor en funcionamiento.
DETENGA el motor, DETENGA las cuchillas, ACTIVE el
freno y quite la llave antes de abandonar el puesto del
conductor.
4. NO maneje la máquina a no ser que esté correctamente
sentado con los pies sobre los apoyos para los pies o los
pedales.
5. DETENGA LAS CUCHILLAS y EL MOTOR y asegúrese
que las cuchillas hayan parado antes de quitar el recolector
de césped o antes de desatascar el cortacésped para
evitar cortarse los dedos o la mano.
6. Las cuchillas deberán estar DESCONECTADAS (OFF)
siempre que no se esté cortando el césped. Coloque las
cuchillas en la posición mas alta cuando esté cortando
sobre una superficie desigual.
7. Mantenga las manos y los pies lejos de las cuchillas
en rotación que están debajo de la plataforma. NO
ponga el pie en el suelo mientras las CUCHILLAS estén
ACTIVADAS (ON) o la mientras la máquina esté en
movimiento.
8. NO maneje la máquina sin que el recolector de césped
o los protectores estén correctamente colocados y en
funcionamiento. NO apunte la descarga hacia personas,
coches en tránsito, ventanas o puertas.
9. Reduzca la velocidad antes de realizar giros.
10. Tenga precaución con el tráfico cuando se halle cerca de
vías de comunicación o cruce por ellas.
11. DETENGA la máquina inmediatamente al encontrarse
con un obstáculo. Inspeccione el cortacésped y repare los
daños antes de volver a manejarlo.
12. Maneje la máquina sólo durante el día o con luz artificial
potente.
13. Mueva el joystick (si lo tiene) LENTAMENTE para
mantener el control durante los cambios de velocidad y
dirección.
14. Tenga CUIDADO cuando arrastre cargas. No lleve más
carga de la que pueda controlar con seguridad y sujete las
cargas al amarre tal y como se indica en las instrucciones
de los accesorios.
15. Sobre las pendientes, el peso del equipo remolcado puede
causar pérdida de tracción y pérdida de control. Cuando
esté remolcando, vaya despacio y deje distancia extra para
detenerse.
16. NO haga funcionar el motor en zonas cerradas. Los gases
del tubo de escape del motor contiene monóxido de
carbono, un veneno letal.
17. NO descargue materiales contra paredes u obstáculos. Los
materiales puede rebotar hacia el operador.
18. Utilice únicamente accesorios aprobados por el fabricante.
Consulte las instrucciones del fabricante para obtener
información sobre el funcionamiento y la instalación de
accesorios.
Emisiones
1. El escape del motor de este producto contiene sustancias
químicas que, en ciertas cantidades, se sabe que
causan cáncer, defectos de nacimiento u otros daños
reproductivos.
2. Busque información relevante de Periodo de Durabilidad
de Emisiones e Índice de Aire en la etiqueta de emisiones
del motor.
Sistema de ignición
1. Este sistema de encendido por chispa cumple con la
ICES-002 canadiense.
8
www.Snapper.com

Seguridad del Operador
Not for
Reproduction
Remolcar
1. Remolque solamente con una máquina que tenga un
enganche diseñado para remolque. NO sujete el equipo
remolcado a un lugar que no sea el punto de enganche.
2. Siga las recomendaciones del fabricante en cuanto a
los límites de peso para equipos remolcados y remolque
en pendientes.
3. NO deje que se suban al remolque niños u otras
personas.
4. Sobre las pendientes, el peso del equipo remolcado
puede causar pérdida de tracción y pérdida de control.
5. Vaya despacio y deje una distancia extra para poder
parar.
Mantenimiento
1. NO guarde el cortacésped ni el recipiente para el
carburante en lugares donde los humos puedan
alcanzar una llama, chispa o luz piloto tal como la de
los calentadores, hornos, secadoras u otros dispositivos
que utilicen gas. Permita que el motor se enfríe antes de
almacenar la máquina en un lugar cerrado. Guarde el
recipiente de combustible fuera del alcance de los niños
en un edificio bien ventilado y desocupado.
2. Mantenga la máquina libre de césped, hojas o
exceso de grasa para reducir el riesgo de incendio y
sobrecalentamiento del motor
3. Cuando drene el tanque de combustible, drene el
combustible hasta un contenedor homologado y hágalo
en espacios exteriores y lejos de llamas expuestas.
4. Compruebe frecuentemente los frenos; ajústelos,
arréglelos o cámbielos si es necesario.
5. Mantenga todos los pernos, tuercas y tornillos
debidamente apretados. Compruebe que todos los
contrapinos se hallan en la posición adecuada.
6. Procure que haya siempre una ventilación adecuada
antes de poner el motor en funcionamiento. Los gases
del tubo de escape del motor contienen monóxido de
carbono, un veneno inodoro letal.
7. Desconecte el cable negativo (negro) de la batería
antes de efectuar el mantenimiento o realizar cualquier
reparación en la máquina. El motor de arranque puede
causar lesiones.
8. NO trabaje debajo de la máquina sin bloques de
seguridad.
9. Únicamente realice reparaciones y ajustes en el motor
cuando éste se halle parado. Retire el (los) cable(s) de
bujía del enchufe de la bujía y fije el (los) cable(s) lejos
del (los) enchufe(s) de la bujía.
10. NO cambie los ajustes de velocidad del regulador del
motor o el motor de sobrevelocidad.
11. Lubrique la máquina en los intervalos de tiempo
especificados en el manual para prevenir que se
peguen los controles.
12. Las cuchillas del cortacésped son afiladas y pueden
producir cortes. Envuelva las cuchillas o utilice gruesos
guantes de cuero y extreme la PRECAUCIÓN cuando
las manipule.
13. NO compruebe la existencia de chispas basando la
bujía junto al orificio de la bujía; la chispa podrá prender
la gasolina que salga del motor.
14. Realice el mantenimiento de la máquina a través de un
distribuidor autorizado al menos una vez al año y haga
que el distribuidor le instale todos los dispositivos de
seguridad nuevos.
15. Mantenga o cambie las etiquetas de instrucciones y de
seguridad cuando sea necesario.
16. Utilice únicamente piezas de repuesto auténticas para
garantizar que se mantengan los estándares originales.
ADVERTENCIA
Las bolsas de recolección de hierba utilizadas en este
producto son hechas de tela tejida, y están sujetas a
deterioro y desgaste durante el uso normal. Verifique el
estado de las bolsas antes de cada uso. Sustituya de
inmediato bolsas recolectoras desgastadas o dañadas
solo con bolsas recomendadas por el fabricante. El
Recogedor de Hierba es un equipo opcional en algunos
modelos.
ADVERTENCIA
El escape del motor, algunos de sus componentes
y ciertos componentes del vehículo contienen o
emiten sustancias químicas conocidas al Estado de
California como causadoras de cáncer y otros daños
reproductivos.
ADVERTENCIA
Los bornes y terminales de batería y accesorios
relacionados contienen plomo y compuestos de plomo,
sustancias químicas conocidas al Estado de California
como causadoras de cáncer y defectos de nacimiento
u otros daños reproductivos. Lávese las manos
después del uso.
9

Seguridad del Operador
Not for
Reproduction
DOBLAR A LO LARGO DE LA LÍNEA INFERIOR
ESTA ES UNA PENDIENTE DE 10 GRADOS
GUÍA SUGERIDA PARA EL AVISTAMIENTO DE PENDIENTES PARA
UNA OPERACIÓN SEGURA DEL MONTABLE CON ACCESORIO
CONDUZCA SÓLO HACIA ARRIBA Y
HACIA ABAJO POR LA PENDIENTE
NUNCA DE UN LADO A OTRO
10 GRADOS MÁXIMO
cambiar de dirección en una pendiente. Los accessorios tendrán un
en pendientes con una inclinación mayor a 10 grados. Gire gradualmente
arriba y hacia abjo por la pendiente, nunca de un lado a otro. No opere
ADVERTENCIA: Para evitar lesiones graves, opere la unidad hacia
efecto al momento de frenar. Reduzca la velocidad en las pendientes.
para evitar volcarse o perder el control. Tenga mucho cuidado al
verticalmente paralelo al tronco de un árbol u otra estructura ventical.
3. Mire por encima del doblez en dirección de la pendiente que desea medir.
2. Sostenga la página frente a usted de modo que el borde izquierdo esté
1. Doble la página a lo largo de la linea punteada como se indica arriba.
4. Compare el ángulo del doblez con la pendiente de la colina.
10
www.Snapper.com

Seguridad del Operador
Not for
Reproduction
Calcomanías de seguridad e instrucciones
Todos los mensajes de PELIGRO, ADVERTENCIA,
PRECAUCIÓN e instrucciones en su unidad montable
y su cortacésped deben ser leídos y obedecidos
cuidadosamente. Se pueden provocar lesiones
corporales cuando no se siguen estas instrucciones. ¡La
información es para su seguridad y es importante! Las
calcomanías de seguridad que aparecen a continuación
están en su unidad montable y su cortacésped.
Si cualquiera de estas calcomanías se pierde o se daña,
sustitúyala de inmediato. Vea al distribuidor autorizada
para su reemplazo.
Estas calcomanías se aplican con facilidad y actúan
como un recordatorio visual constante para usted, y otras
personas que puedan usar el equipo, de que se deben
seguir las instrucciones de seguridad necesarias para
una operación segura y eficaz.
Calcomanía, Advertencia
Pieza No. 1734273
Calcomanía, Peligro
Pieza No. 7104224
Calcomanía, Peligro
Pieza No. 1704276
Calcomanía, Cuidado
Pieza No. 7104393
Calcomanía, Peligro
Pieza No. 1704277
Calcomanía, instrucciones
Pieza No. 7104234
Calcomanía, Advertencia
Pieza No. 7104223
Calcomanía, Advertencia
Pieza No. 7104225
11

Seguridad del Operador
Not for
Reproduction
7104226
Calcomanía, palanca
de velocidad de
desplazamiento, izquierda
Pieza No. 7104226
7104232
Calcomanía: panel de
control, izquierda
Pieza No. 7104232
Calcomanía, liberación
de la transmisión
Pieza No. 7104231
7104227
Calcomanía, palanca
de velocidad de
desplazamiento, derecha
Pieza No. 7104227
Calcomanía: panel de
control, derecha
Pieza No. 7104233
7104231
7104233
Pruebas de Sistema de Interbloqueo de
Seguridad
Esta unidad está equipada con un Sistema de
Interbloqueo de Seguridad. No intente evitar o manipular
los interruptores/dispositivos de seguridad
PRUEBA 1 — EL MOTOR NO DEBE ARRANCAR SI:
• El interruptor de PTO está activado, O
• El freno de estacionamiento está desactivado, O
• Las palancas de control de velocidad de
desplazamiento no están trabadas en sus posiciones
de ARRANCAR/ESTACIONAR.
PRUEBA 2 — EL MOTOR DEBE ARRANCAR SI:
• El interruptor de PTO NO está activado, Y
• El freno de estacionamiento está activado, Y
• Las palancas de control de velocidad de
desplazamiento están trabadas en sus posiciones de
ARRANCAR/ESTACIONAR.
PRUEBA 3 — EL MOTOR DEBE APAGARSE SI:
• El operador se levanta del asiento con el PTO
activado, O
• El operador se levanta del asiento con el PTO
desactivado, O
• El operador se levanta del asiento con las palancas
de velocidad de desplazamiento sin trabar en sus
posiciones de ARRANCAR/ESTACIONAR.
PRUEBA 4 — VERIFIQUE EL TIEMPO DE DETENCIÓN DE
LA CUCHILLA DEL CORTACÉSPED
Las cuchillas y la correa de la transmisión del
cortacésped deben detenerse por completo cinco
segundos después de que el interruptor PTO eléctrico
es apagado (o el operador se levanta del asiento). Si la
correa de la transmisión del cortacésped no se detiene
después de cinco segundos, comuníquese con su
distribuidor autorizado local.
NOTA: Una vez que se haya detenido el motor, se debe
apagar el interruptor del PTO, se debe activar el freno
de estacionamiento y se debe trabar las palancas de
velocidad en las posiciones ARRANCAR/ESTACIONAR
a fin de arrancar el motor.
12
ADVERTENCIA
Calcomanía, límite de peso
Pieza No. 7101940
Si la unidad no aprueba una prueba de seguridad,
no la utilice. Vea a su concesionario autorizado.
www.Snapper.com

Características y controles
Not for
Reproduction
Funciones de control
La información que aparece a continuación describe brevemente la función de controles individuales. Arrancar,
detener, conducir y cortar requieren el uso combinado de diversos controles aplicados en secuencias específicas.
Para aprender qué combinación y secuencia de controles se deben usar para distintas tareas, lea la sección
FUNCIONAMIENTO.
Palancas de velocidad de
desplazamiento
Estas palancas controlan la velocidad de desplazamiento
y la dirección de la unidad montable. La palanca
izquierda controla la rueda de tracción trasera izquierda y
la palanca derecha controla la rueda de tracción trasera
derecha.
El mover la palanca hacia adelante aumenta la velocidad
de desplazamiento hacia ADELANTE de la rueda
asociada, y si se tira de la palanca, se aumenta la
velocidad de MARCHA ATRÁS.
Cuanto más lejos se mueva la palanca de la posición
neutral, más rápido girará la rueda de transmisión.
Ve la sección de Funcionamiento para instrucciones de
realización de maniobras.
El control de velocidad/estrangulador del motor controla
la velocidad y la estrangulación del motor. Mueva el
control de velocidad/estrangulador del motor hasta la
posición de RÁPIDO para aumentar la velocidad del
motor y hasta la posición de LENTO para disminuirla.
Velocidad del motor/Control del
estrangulador (Choke-O-Matic)
13

Características y controles
Not for
Reproduction
Interruptor de ignición
El interruptor de ignición arranca y detiene el motor;
tiene tres posiciones:
OFF (APAGADO) Detiene el motor y apaga el
sistema eléctrico.
MARCHA Permite que el motor funcione y
suministra energía al sistema
eléctrico.
ARRANQUE Hace girar el motor para que
arranque.
NOTA: Nunca deje el interruptor de ignición en la
posición de MARCHA con el motor apagado, ya que esto
agota la batería.
Interruptor de PTO
El interruptor de PTO (Power Take-Off) activa y
desactiva el embrague de la cuchilla del cortacésped.
Para activar el PTO, LEVANTE el interruptor. Empújelo
hacia ABAJO para desactivarlo. Observe que el operador
debe estar sentado firmemente en el asiento de la unidad
para que el PTO funcione.
Tapa del tanque de combustible
Para quitar la tapa, gírela en el sentido antihorario.
Interruptor de ajuste de altura de corte
del cortacésped
La altura de corte del cortacésped puede ajustarse entre
1-1/2 pulg. (3,8 cm) y 3-3/4 pulg. (9,5 cm). Ver Ajuste de
altura de corte.
Freno de estacionamiento
Cuando se mueve la palanca del freno de
estacionamiento hacia adelante y hacia la derecha, se
activa el freno de estacionamiento. Cuando se mueve la
palanca hacia la izquierda y hacia atrás, se desactiva el
freno.
Palancas de liberación de la
transmisión
Las palancas de liberación de la transmisión desactivan
las transmisiones de modo que se pueda empujar la
unidad manualmente (ver Empujar la unidad manualmente).
Palanca de ajuste de asiento
El asiento puede ajustarse hacia adelante y hacia
atrás (ver Ajustes de asiento).
14
www.Snapper.com

Funcionamiento
Not for
Reproduction
Seguridad de funcionamiento general
Antes de operar por primera vez:
• Asegúrese de leer toda la información en la sección
de Seguridad del Operador antes de intentar operar
esta unidad montable y cortacésped.
• Familiarícese con todos los controles y con la manera
de detener la unidad.
• Conduzca en un área abierta sin cortar para
acostumbrarse a conducir la unidad.
ADVERTENCIA
Nunca opere en pendientes superiores al 18%
(10°).
Seleccione la velocidad de desplazamiento
lenta antes de conducir en una pendiente. Tenga
especial precaución al operar en pendientes con
un recogedor de hierba de montaje trasero.
Corte el césped hacia arriba y hacia abajo de
las pendientes y no a lo ancho; tenga cuidado
al cambiar de dirección y NO ARRANQUE NI SE
DETENGA EN UNA PENDIENTE.
ADVERTENCIA
Nunca lleve pasajeros en la unidad.
Antes de dejar el puesto de operador por
cualquier motivo, trabe las palancas de velocidad
de desplazamiento en la posición ARRANCAR/
ESTACIONAR, active el freno de estacionamiento,
desengrane el PTO, detenga el motor y quite la
llave.
Para reducir el peligro de incendio, mantenga
el motor, la unidad y el cortacésped libres de
césped, hojas y exceso de grasa. No se detenga
o estacione la unidad sobre hojas secas, hierba o
materiales combustibles.
La gasolina es altamente inflamable y debe
manipularse con cuidado. Nunca llene el tanque
cuando el motor todavía esté caliente por haber
sido recientemente. No permita la presencia
de llamas o fósforos en el área ni que se fume
en el lugar. Evite el exceso de llenado y limpie
cualquier derrame.
Verificaciones antes del arranque
• Constate que el cigüeñal esté lleno hasta la marca
de lleno en la varilla medidora de aceite de motor
(A, Figura 1 - ubicada debajo de la tapa del motor).
Consulte el Manual del Operador del motor para
instrucciones y recomendaciones sobre el aceite.
• Asegure que todas las tuercas, pernos, tornillos y
grampas estén en su lugar y bien apretados.
• Ajuste la posición del asiento (B), y asegúrese de
poder alcanzar todos los controles desde la posición
del operador.
• Llene el tanque de combustible (C) con combustible
nuevo. Consulte el manual del propietario del motor
para recomendaciones sobre el aceite.
B
C
A
Figura 1. Verificaciones prearranque
ADVERTENCIA
No cargue esta unidad cero giro en un remolque
o camión con dos rampas separadas. Use
únicamente una sola rampa que tenga al menos
un pie más de ancho que las ruedas traseras de
la unidad montable. Esta unidad tiene un radio
cero giro y las ruedas traseras se podrían caer
de las rampas, o la unidad montable podría
volcarse y lesionar al operador o a transeúntes.
ADVERTENCIA
Si no comprende cómo funciona un control
determinado o todavía no ha leído en su totalidad
la sección de Características y Controles,
hágalo ahora. NO intente operar la unidad sin
familiarizarse primero con la ubicación y la
función de TODOS los controles.
15

Funcionamiento
Not for
Reproduction
Cómo arrancar el motor
1. Sentado en el asiento del operador, asegúrese que
el interruptor del PTO esté desactivado, el freno de
estacionamiento esté activado, y las palancas de
velocidad de desplazamiento estén en la posición de
ARRANCAR/ESTACIONAR.
2. Posicione el control de velocidad del motor en la
posición de ESTRANGULADOR.
NOTA: Es posible que si el motor está caliente, no sea
necesario el uso del estrangulador.
3. Inserte la llave en el interruptor de ignición y gírela a
START (ARRANCAR).
4. Una vez que el motor arranque, mueva el control de
velocidad del motor nuevamente a la posición RÁPIDO.
Caliente el motor dejándolo en marcha durante al menos
un minuto antes de activar el interruptor de PTO o
conducir la unidad.
5. Después de calentar el motor, SIEMPRE opere la
unidad a VELOCIDAD MÁXIMA DEL MOTOR al cortar
el césped.
En el caso de una emergencia, se puede detener el
motor simplemente girando el interruptor de la ignición
a STOP (PARAR). Use este método sólo en situaciones
de emergencia. Para apagar el motor normalmente siga el
procedimiento proporcionado en Cómo detener la unidad y el
motor.
8. Comience a cortar el césped. Ver Seguridad del Operador
para consejos sobre prácticas seguras para cortar el
césped.
9. Cuando termine, apague el PTO.
10. Apague el motor (ver Cómo detener la unidad y el motor).
Cómo empujar la unidad manualmente
1. Desactive el PTO, active el freno de estacionamiento,
trabe las palancas de velocidad de desplazamiento
en sus posiciones de ARRANCAR/ESTACIONAR,
apague la ignición, quite la llave y espere que todas
las piezas móviles se detengan.
2. Para desactivar las transmisiones, tire de las varillas
de liberación de rodamiento (A, Figura 2), ubicadas
en cualquiera de los dos lados del motor, hacia arriba
hasta la posición PUSH (EMPUJAR).
3. Desactive el freno de estacionamiento.
Ahora se puede empujar la unidad manualmente.
4. Después de mover la unidad, vuelva a activar las
transmisiones empujando las varillas de liberación
de rodamiento nuevamente hacia abajo a la posición
DRIVE (CONDUCIR).
Cómo detener la unidad y el motor
1. Vuelva a colocar las palancas de velocidad de
desplazamiento a la posición central (o neutral ‘N’) para
detener el movimiento de la unidad. Gire las palancas
hacia afuera para trabarlas en la posición ARRANCAR/
ESTACIONAR.
2. Desactive el PTO presionando el interruptor de PTO.
3. Accione el freno de estacionamiento moviendo la
palanca de freno de estacionamiento hacia adelante y
hacia la derecha.
4. Coloque el control de velocidad del motor en la posición
LENTO y coloque la llave de ignición en APAGADO.
Quite la llave.
Corte de césped
1. Sentado en el asiento del operador, asegúrese que
el interruptor del PTO esté desactivado, el freno de
estacionamiento esté activado, y las palancas de
velocidad de desplazamiento estén en la posición de
ARRANCAR/ESTACIONAR.
2. Arranque el motor (vea Cómo arrancar el motor).
3. Ajuste la altura de corte del cortacésped (ver Ajuste de
altura de corte).
4. Posicione el control de velocidad del motor en RÁPIDO.
5. Desactive el freno de estacionamiento.
6. Active el PTO tirando del interruptor.
7. Gire las palancas de velocidad de desplazamiento hacia
adentro de la posición ARRANCAR/ESTACIONAR a la
posición neutral ‘N’.
NO REMOLQUE LA UNIDAD
Remolcar la unidad causará daños a la
transmisión. No use otro vehículo para
empujar o remolcar esta unidad.
A
Figura 2. Componentes de liberación de rodamiento
(en cada lado)
ADVERTENCIA
NO desactive las transmisiones para bajar
pendientes. NO use la Liberación de Rodamiento
para desactivar las transmisiones, a no ser que
se pueda controlar el movimiento de la máquina y
el motor esté apagado.
16
www.Snapper.com

Funcionamiento
Not for
Reproduction
Giro cero
Práctica de conducción
Los controles de velocidad de desplazamiento de la
unidad cero giro son sensibles y hará falta bastante
práctica para aprender a lograr un control suave y eficaz
de los movimientos hacia adelante, hacia atrás y de giro
de la unidad.
Tómese el tiempo de realizar las maniobras indicadas
y familiarizarse con cómo acelera, se desplaza y gira la
unidad — antes de comenzar a cortar el césped — es un
paso absolutamente esencial para aprovechar al máximo
la unidad cero giro.
Busque un área lisa y plana en su césped — un
área con bastante espacio para maniobrar. (Retire
todos los objetivos, personas y animales del lugar entes
de comenzar). Opere la unidad en aceleración media
del motor durante esta sesión de práctica (SIEMPRE
opere en aceleración máxima del motor al cortar) y gire
lentamente para evitar que los neumáticos resbalen y
dañen su césped.
Le sugerimos comenzar con el procedimiento de
Desplazamiento suave hacia la derecha y después
avanzar con las maniobras hacia adelante, marcha atrás
y de giro.
Conducción básica
Desplazamiento
suave
Las palancas
de velocidad de
desplazamiento de la
unidad giro cero son
receptivas.
El MEJOR método de
manipular las palancas
de control de velocidad
de desplazamiento tiene
tres pasos: como se
muestra en la Figura 3.
PRIMERO, coloque las
manos en las palancas
como se muestra.
SEGUNDO, para avanzar
gradualmente, presione
las palancas hacia
adelante con las palmas.
TERCERO, para
acelerar, mueva
las palancas más
hacia adelante. Para
desacelerar suavemente,
mueva con lentitud las
palancas hacia atrás
desde la posición neutral.
Figura 3. Mueva
las palancas de
control de velocidad
de desplazamiento
gradualmente
Práctica de desplazamiento hacia adelante
Mueva gradualmente las dos palancas de velocidad de
desplazamiento — de manera pareja HACIA ADELANTE
desde la posición neutral. Desacelere y repita.
Se necesita práctica para desplazarse en línea recta
hacia adelante. Si fuera necesario, se puede ajustar el
equilibrio de la velocidad máxima — ver la sección Ajuste
de equilibrio de velocidad.
Desplazamiento
hacia adelante
Práctica de desplazamiento marcha atrás
MIRE HACIA ABAJO Y HACIA ATRÁS, luego mueva
gradualmente ambas palancas de velocidad de
desplazamiento de manera pareja HACIA ATRÁS desde
la posición neutral. Desacelere y repita.
Practique retroceder durante unos cuantos minutos antes
de intentar hacerlo cerca de objetos. La unidad gira tan
bruscamente en reversa como yendo hacia adelante, por
lo que retroceder en línea recta requiere práctica.
Desplazamiento
marcha atrás
Figura 4. Desplazamiento hacia adelante
Figura 5. Desplazamiento marcha atrás
17

Funcionamiento
Not for
Reproduction
Cómo practicar girar en una esquina
Al desplazarse hacia adelante, deje que una de las
palancas regrese gradualmente hacia la posición neutral.
Repita varias veces.
Para evitar pivotar directamente sobre la huella del
neumático, es mejor hacer que ambas ruedas sigan
avanzando al menos ligeramente.
Realización de
giros
Figura 6. Cómo girar en una esquina
Conducción avanzada
Practique girar en el lugar
Para girar en el lugar, “giro cero”, mueva gradualmente
hacia adelante una palanca de control de velocidad de
desplazamiento desde la posición neutral y mueva hacia
atrás la otra palanca desde la posición neutral de manera
simultánea. Repita varias veces.
Cuando se cambia la cantidad que se tira de cada
palanca — hacia adelante o hacia atrás, se cambia el
“punto de pivote” sobre el que se gira.
Giro en el
lugar
Figura 7. Giro en el lugar
Cómo realizar un giro cero de fin de
hilera
La capacidad única de su unidad giro cero de
girar en su lugar le permite girar al final de una
hilera de corte en vez de tener que detenerse
y hacer un giro en Y antes de comenzar una
nueva hilera.
Por ejemplo, para realizar un giro cero de fin de
hilera a la derecha:
1. Baje la velocidad al final de la hilera.
2. Mueva la palanca IZQUIERDA de control
de velocidad de desplazamiento levemente
hacia adelante mientras regresa la palanca
DERECHA de velocidad de desplazamiento
hacia el centro y luego la mueve levemente
hacia abajo desde el centro.
3. Comience a cortar el césped hacia adelante
nuevamente.
Esta técnica hace que la unidad gire hacia
la DERECHA y se superponga levemente
a la hilera recién cortada: lo que elimina la
necesidad de retroceder y volver a cortar
césped no alcanzado.
A medida que se familiarice con la operación de
la unidad giro cero y sea más experimentado,
aprenderá más maniobras que facilitarán
su tiempo de cortado y harán que sea más
disfrutable.
Recuerde, cuando más practique, ¡tendrá
mayor control de la unidad!
Figura 8. Cómo realizar un giro cero de fin de hilera
18
www.Snapper.com

Cómo anexarle un remolque
Not for
Reproduction
El peso máximo de un remolque debe ser inferior a
200 lbs (91 kg). Sujete el remolque con una clavija de
tamaño adecuado (A, Figura 9) y gancho (B).
Las cargas remolcadas excesivas pueden causar
pérdida de tracción y pérdida de control en pendientes.
Disminuya el peso remolcado cuando opere en
pendientes. La superficie sobre la que se conduce
tiene gran impacto sobre la tracción y la estabilidad.
Las superficies mojadas o resbaladizas pueden reducir
significativamente la tracción y la capacidad de detenerse
o girar. Evalúe detenidamente las condiciones de la
superficie antes de operar la unidad y el remolque,
y nunca opere sobre pendientes de más de 10º. Ver
Protección contra vuelcos y remolques en la sección de
Seguridad del Operador de este manual.
Funcionamiento
A
B
200 Lbs.
(91 kg)
3 pies 6
pulg.
(1m)
20 pies (6 m)
Figura 9. Recomendaciones de peso de remolque
19

Mantenimiento
Not for
Reproduction
Cuadro de mantenimiento
UNIDAD MONTABLE Y CORTACÉSPED
Cada 8 horas o diariamente
Verifique el sistema de interbloqueo de seguridad
Limpie desechos de la unidad y de la cubierta del
cortacésped
Limpie desechos del compartimiento del motor
Cada 25 horas o anualmente *
Verifique la presión de los neumáticos
Verifique el tiempo de detención de la cuchilla del
cortacésped
Controle la unidad y el cortacésped en busca de
herrajes sueltos
Cada 50 horas o anualmente *
Verifique los frenos de la unidad
Vea al Distribuidor anualmente para
Lubrique la unidad montable y el cortacésped
Limpie la batería y los cables
Controlar las cuchillas del cortacésped **
* Lo que ocurra primero
** Controle las cuchillas con mayor frecuencia en
regiones con suelos arenosos o condiciones muy
polvorientas.
MOTOR
Primeras 5 horas
Cambie el aceite del motor
Cada 8 horas o diariamente
Verifique el nivel del aceite del motor
Cada 25 horas o anualmente *
Limpie el filtro de aire y el prelimpiador del motor **
Cada 50 horas o anualmente *
Cambie el aceite del motor
Recambie el filtro de aceite
Anualmente
Sustituya el filtro de aire
Recambie el prelimpiador
Vea al Distribuidor anualmente para
Inspeccionar el silenciador y el supresor de chispas
Sustituir la bujía
Sustituir el filtro de combustible
Limpiar el sistema de refrigeración de aire del motor
* Lo que ocurra primero
** Limpie con mayor frecuencia en condiciones
polvorientas o cuando haya desechos transportados
por aire.
20
www.Snapper.com

Verificación de la presión de los
Not for
Reproduction
neumáticos
Se debe verificar la presión de los neumáticos
periódicamente, y se la debe mantener en los niveles
indicados en el cuadro. Note que estas presiones
pueden ser ligeramente distintas al “Inflado Máximo”
estampado en las paredes laterales de los neumáticos.
Las presiones mostradas brindan una tracción correcta,
mejoran la calidad de corte y extienden la vida de los
neumáticos.
Verificación/agregado de combustible
Para agregar combustible:
1. Quite la tapa de llenado de combustible.
2. Llene el tanque hasta la base de la boquilla de
llenado. Esto permitirá la expansión del combustible.
NOTA: No lo llene en exceso. Consulte el manual del
motor para recomendaciones específicas sobre el
combustible.
3. Coloque y ajuste la tapa de combustible con la mano.
Filtro de combustible
El filtro de combustible está ubicado en la línea de
combustible entre el tanque de combustible y la bomba
de combustible. Si el filtro está sucio o tapado, sustitúyalo
como se indica a continuación:
1. Desconecte el cable negativo de la batería.
2. Coloque un recipiente debajo del filtro para atajar el
combustible derramado.
3. Con tenazas, abra y deslice las grampas del filtro de
combustible (A, Figura 11).
4. Retire las mangueras del filtro.
5. Instale un filtro nuevo en la dirección correcta del flujo
en la línea de combustible.
6. Sujételo con las grampas de manguera.
7. Al terminar, vuelva a conectar la batería negativa del
cable.
Mantenimiento
Neumático Presión
Delanteros 25 psi (1,72 bar)
Traseros 15 psi (1,03 bar)
Figura 10. Verificación de la presión de los neumáticos
ADVERTENCIA
La gasolina es altamente inflamable y debe
manipularse con cuidado. Nunca llene el tanque
cuando el motor todavía esté caliente por haber
sido recientemente. No permita la presencia
de llamas o fósforos en el área ni que se fume
en el lugar. Evite el exceso de llenado y limpie
cualquier derrame.
No remueva el filtro de combustible cuando el
motor esté caliente, ya que la gasolina derramada
puede prenderse fuego. NO extienda las grampas
de la manguera más de lo necesario. Asegúrese
de que las grampas sujeten firmemente las
mangueras sobre el filtro después de la
instalación.
No use gasolina que contenga METANOL,
gasohol que contenga más de 10% de etanol,
gasolina premium o gasolina blanca porque se
podrían provocar daños al motor/sistema de
combustible.
A
Mantenimiento del motor
Consulte el manual del motor para todos los
procedimientos y recomendaciones de mantenimiento.
Figura 11. Sustitución del filtro de combustible
(Vista desde atrás del compartimento de la batería)
21

Mantenimiento
Not for
Reproduction
Limpieza de la plataforma del cortacésped
El orificio de lavado le permite conectar una manguera
común de jardín del lado de recorte (izq.) de la cubierta
del cortacésped para eliminar pasto y detritos de la parte
inferior de la cubierta. Este asegura el funcionamiento
correcto y seguro del cortacésped.
1. Estacione la unidad montable sobre una superficie
plana y nivelada, tal como un piso de concreto.
Desactive el PTO, trabe las palancas de velocidad
de desplazamiento en sus posiciones ARRANCAR/
ESTACIONAR, active el freno de estacionamiento,
apague el motor y quite la llave de ignición.
2. Sujete el desconector rápido (A, Figura 12) a una
manguera de jardín (B), y conéctelo al orificio de
lavado (C) en la cubierta del cortacésped.
3. Abra el suministro de agua.
4. Ponga el motor en marcha, coloque la plataforma del
cortacésped en la posición de corte más alta, y active
el PTO para quitar el pasto y los detritos de debajo de
la cubierta del cortacésped.
5. Desengrane el PTO, apague el motor y retire la llave
de ignición.
6. Quite la manguera de jardín y el desconector rápido
de la cubierta del cortacésped cuando termine de
limpiar.
A
B
C
ADVERTENCIA
Antes de utilizar el cortacésped, asegúrese que
la manguera esté conectada correctamente y que
no toque las cuchillas. Cuando el cortacésped
está funcionando y las cuchillas están activadas,
la persona que limpie el cortacésped debe estar
en la posición del operador y no debe haber
transeúntes presentes. Si no se siguen estas
precauciones, esto puede resultar en lesiones
graves o muerte.
Almacenaje
Antes de almacenar su unidad fuera de temporada,
lea las instrucciones de Mantenimiento y Almacenaje en
la sección de Seguridad del Operador, luego realice los
siguientes pasos:
• Desactive el PTO, mueva las palancas de velocidad
de desplazamiento a las posiciones ARRANCAR/
ESTACIONAR, coloque el freno de estacionamiento y
quite la llave.
• Realice los pasos de mantenimiento del motor y
almacenaje indicados en el manual del propietario del
motor. Esto incluye drenar el sistema de combustible,
o agregar estabilizador al combustible (no almacene
una unidad con combustible en una estructura
cerrada - ver advertencia)
• La vida útil de la batería se incrementará si se la quita,
se la coloca en un lugar fresco y seco y se la carga
completamente una vez por mes. Si se deja la batería
en la unidad, desconecte el cable negativo.
Antes de poner en marcha la unidad después de su
almacenaje:
• Verifique todos los niveles de líquido. Verifique todos
los ítems de mantenimiento.
• Realice todas las verificaciones y los procedimientos
recomendados en el manual del propietario del motor.
• Permita que el motor se caliente durante varios
minutos antes de utilizarlo.
Figura 12. Orificio de lavado de la cubierta del
cortacésped
22
ADVERTENCIA
Nunca almacene la unidad (con combustible) en
una estructura cerrada y con poca ventilación.
Los vapores del combustible pueden trasladarse
a una fuente de ignición (tal como una caldera,
un calentador de agua, etc.) y causar una
explosión.
El vapor del combustible también es tóxico para
seres humanos y animales.
www.Snapper.com

A
Not for
Reproduction
B
Figura 13. Ajuste del asiento
Ajustes del asiento
Se debe ajustar las palancas del asiento y de velocidad
de desplazamiento de modo que los codos del operador
queden apoyados en los apoyabrazos cuando sus manos
están sobre los controles, y las palancas de velocidad de
desplazamiento puedan moverse por todo su espectro de
movimiento sin tocar las piernas del operador.
Ajuste de la posición del asiento
Levante la palanca de ajuste del asiento (A, Figura 13).
Deslice el asiento hacia adelante o hacia atrás a la
posición deseada, luego baje la palanca de ajuste del
asiento. Asegúrese que la palanca se trabe en las ranuras
(B) en la base del asiento.
Ajuste de la palanca de velocidad de
desplazamiento
Retire los herrajes de ensamblaje de la palanca de
velocidad de desplazamiento (Figura 14) y vuelva a
colocar la palanca ya sea hacia arriba o hacia abajo de
su posición original. Vuelva a colocar los herrajes.
Servicio y ajustes
Figura 14. Ajustes de la palanca de velocidad de
desplazamiento
Ajuste de equilibrio de velocidad
Si la unidad se va hacia la derecha o hacia la izquierda
cuando las palancas de velocidad de desplazamiento
estén en la posición máxima hacia adelante, se puede
equilibrar la velocidad máxima de cada una de estas
palancas. Sólo ajuste la velocidad de la rueda que gire
más rápido.
Para reducir la velocidad de la rueda que gire más
rápido
1. Afloje el perno que sujeta la placa de ajuste de
avanzo (Figura 14).
2. Deslice la placa hacia arriba aproximadamente 1/8
pulg. (3 mm).
3. Vuelva a ajustar el perno y verifique nuevamente el
equilibrio de la velocidad.
4. Repita los pasos 1-3 hasta que se complete el ajuste.
ADVERTENCIA
NO realice ajustes en la unidad montable para
lograr una velocidad general de avanzo o de
marcha atrás superior a la velocidad para la cual
fue diseñado.
23

Servicio y ajustes
Not for
Reproduction
Ajuste de altura de corte
El interruptor de ajuste de altura de corte controla la
altura de corte del cortacésped. La altura de corte del
cortacésped puede ajustarse entre 1-1/2 pulg. (3,8 cm) y
3-3/4 pulg. (9,5 cm).
Para ajustar la altura de corte:
Presione el interruptor de ajuste (A, Figura 15) hacia
adelante para bajar la cubierta del cortacésped, hacia
atrás para elevar la cubierta del cortacésped.
La ranura en el indicador de altura de corte (B) indica la
altura de corte de la cubierta del cortacésped.
B
Extracción e instalación del cortacésped
NOTA: Realizar la extracción e instalación del
cortacésped sobre una superficie dura y nivelada como
un piso de concreto.
Extracción
1. Desactive el PTO, active el freno de estacionamiento,
trabe las palancas de velocidad de desplazamiento
en sus posiciones de ARRANCAR/ESTACIONAR,
apague la ignición, quite la llave y espere que todas
las piezas móviles se detengan.
2. Coloque un soporte de 2 x 4 o similar debajo de cada
extremo de la cubierta del cortacésped; luego baje la
cubierta del cortacésped a su posición más baja. Ver
Ajuste de la altura de corte.
3. Tire de la polea tensora hacia atrás (F, Figura 16) en
la dirección indicada por la flecha, y retire la correa
del cortacésped de la polea del PTO (C).
E
D
B
F
C
A
Figura 15. Ajuste de la altura de corte
E
E
D
Figura 16. Encaminamiento de la correa del
cortacésped
4. Quite las horquillas y arandelas (A, Figura 17) que
sujetan los soportes traseros de la cubierta del
cortacésped (B) a los brazos de elevación traseros
(C), y, tirando, retire los brazos de los orificios en los
soportes. Guarde todos los herrajes extraídos.
5. Quite las horquillas y arandelas (A, Figura 18)
que sujetan el soporte delantero de la cubierta del
cortacésped (B) a las varillas de elevación delanteras
(C), y, tirando, retire las varillas de los orificios en los
soportes. Guarde todos los herrajes extraídos.
6. Pivote las ruedas delanteras retirándolas del camino
y deslice la cubierta del cortacésped de debajo de la
unidad.
A
24
www.Snapper.com

Instalación
Not for
Reproduction
1. Desactive el PTO, active el freno de estacionamiento,
trabe las palancas de velocidad de desplazamiento
en sus posiciones de ARRANCAR/ESTACIONAR,
apague la ignición, quite la llave y espere que todas
las piezas móviles se detengan.
2. Baje la cubierta del cortacésped a su posición más
baja (ver Ajuste de altura de corte).
3. Pivote las ruedas delanteras retirándolas del camino
y deslice la cubierta del cortacésped debajo de la
unidad. Coloque un soporte 2 x 4 o similar debajo de
cada extremo de la cubierta del cortacésped.
4. Inserte las varillas de elevación delanteras (C, Figura
18) dentro de los orificios inferiores en el soporte
delantero de la cubierta del cortacésped (B), y sujete
cada una con una arandela y una horquilla (A).
5. Inserte los brazos de elevación traseros (C, Figura
17) dentro de los orificios delanteros en los soportes
traseros de la cubierta del cortacésped (B), y sujete
cada uno con una arandela y una horquilla (A).
6. Tire de la polea tensora hacia atrás (D, Figura 16) en
la dirección indicada, e instale la correo en la polea
del PTO como indica la Figura 16.
Importante: Asegúrese que la correa esté
correctamente instalada en todas las poleas.
Servicio y ajustes
A
C
B
Figura 17. Componentes del elevador trasero de la
cubierta
(Se muestra el lado derecho; el izquierdo es igual)
C
A
B
Figura 18. Componentes del elevador delantero de
la cubierta
(Se muestra el lado derecho; el izquierdo es igual)
25

Servicio y ajustes
Not for
Reproduction
B
B
Figura 19. Ajuste del embrague de PTO
A
B
Ajuste de embrague de PTO
Verifique el ajuste del embrague del PTO después del
periodo inicial de ablande de 25 horas y luego cada 250
horas de funcionamiento. También realice el siguiente
procedimiento si el embrague se resbala, no se engrana
o se ha instalado un nuevo embrague.
1. Quite la llave del interruptor de ignición y desconecte
los cables de la bujía para anular la posibilidad de un
arranque accidental mientras se ajusta el PTO.
2. Observe la posición de las 3 ventanas de ajuste
(A, Figura 19) al costado de la placa de freno y las
tuercas de ajuste nylock (B).
3. Inserte una lámina calibradora (C) de 0,016 pulg. 0,018 pulg. (0,40-0,45 mm) a través de cada ventana,
posicionando la lámina entre la cara del rotor y la cara
del inducido como se muestra en la Figura 20.
4. Ajuste alternativamente las tuercas de ajuste (B,
Figura 19) hasta que la cara del rotor y la cara del
inducido apenas entren en contacto con la lámina
calibradora.
5. Verifique que las ventanas tengan una misma
cantidad de tensión cuando se inserte y se quite la
lámina calibradora, y realice los ajustes necesarios
ajustando o aflojando las tuercas de ajuste.
NOTA: El intervalo de aire real entre el rotor y el inducido
puede variar aun después de realizar el proceso de
ajuste. Esto se debe a variaciones dimensionales en las
piezas componentes y es una condición aceptable.
6. Verifique el tiempo de detención de la cuchilla
del cortacésped. Las cuchillas y la correa de la
transmisión del cortacésped deben detenerse
por completo cinco segundos después de que el
interruptor PTO eléctrico es apagado.
A
B
C
Figura 20. Ajuste el embrague de PTO
ADVERTENCIA
Para evitar lesiones graves, realice ajustes solo
con el motor detenido, la llave extraída y la
unidad montable sobre un piso nivelado.
Verificar el tiempo de detención de la
cuchilla del cortacésped
Las cuchillas y la correa de la transmisión del
cortacésped deben detenerse por completo cinco
segundos después de que el interruptor PTO eléctrico es
apagado.
1. Con el freno de estacionamiento activado, el PTO
desactivado y un operador en el asiento, ponga en
marcha el motor.
2. Pídale a un ayudante que observe la correa de
transmisión del cortacésped a través de la abertura
entre el armazón y la parte superior de la cubierta
del cortacésped. Accione el PTO y espere varios
segundos. Desactive el PTO y verifique la cantidad
de tiempo que lleva para que se detenga la correa de
transmisión del cortacésped.
3. Si la correa de la transmisión del cortacésped no se
detiene después de cinco segundos, comuníquese
con un distribuidor autorizado.
26
www.Snapper.com

Figura 21. Orientar las cuchillas lado a lado
Not for
Reproduction
Nivelación de la cubierta del cortacésped
Realice estos ajustes sobre una superficie plana y
nivelada. Asegúrese de verificar y ajustar la presiones de
las llantas antes de nivelar la cubierta del cortacésped.
Nivelación lado a lado
1. Con el cortacésped instalado, coloque la unidad
montable en una superficie plana y nivelada como un
piso de concreto. Gire las ruedas delanteras de modo
que queden derechas.
2. Verifique que no haya cuchillas dobladas y
sustitúyalas de ser necesario.
3. Coloque la altura de corte en la posición media.
Disponga las cuchillas del cortacésped exteriores de
manera que apunten lado a lado (Figura 21).
4. Mida la distancia entre las puntas exteriores de cada
cuchilla (A, Figura 22) y el suelo (B). Si hay más de
una diferencia de 1/8 pulg. (3 mm) entre las medidas
de cada lado, siga con el paso 5. Si la diferencia es
de 1/8 pulg. (3 mm) o menos, siga con el paso 6.
5. La nivelación lado a lado se logra usando las varillas
con rosca (A, Figura 23) y el muñón (B) en los
lados traseros derecho e izquierdo de la cubierta
del cortacésped. Afloje las tuercas de bloqueo (C)
y ajuste las tuercas hacia arriba o hacia abajo para
ajustar el nivel del cortacésped. Cuando termine,
ajuste las tuercas de bloqueo contra el muñón para
fijar el ajuste.
Servicio y ajustes
atrás. Para elevar o bajar el frente de la cubierta del
cortacésped, afloje las tuercas de bloqueo traseras
(B) a ambos lados de las varillas de enganche.
Ajuste las tuercas de bloqueo delanteras (C) en
ambas varillas de enganche para ajustar el nivel de
la cubierta del cortacésped. Cuando está ajustado
correctamente, ajuste las tuercas de bloqueo traseras
para trabar las varillas de enganche en su lugar.
9. Vuelva a verificar la medida de las cuchillas y repita
los pasos 7 - 9, si fuera necesario.
A
B
Figura 22. Medir la distancia entre las puntas de la
cuchilla y el piso
A
B
C
C
Figura 23. Nivelación del cortacésped - Lado a lado
(Se muestra el lado derecho; el izquierdo está
oculto)
Nivelación de adelante hacia atrás
6. Disponga las cuchillas de modo que miren de
adelante hacia atrás (Figura 24).
7. Mida la distancia entre el suelo y la punta delantera
de la cuchilla central y del suelo a la punta trasera
de las cuchillas traseras (Figuras 22 y 24). La punta
delantera de la cuchilla delantera debe estar 1/8 pulg.
- 1/4 pulg. (3 - 6 mm) más alta que las puntas traseras
de las cuchillas traseras. De no ser así, siga con los
pasos 8 - 9.
8. Las varillas frontales de enganche (A, Figura 25),
se usa para ajustar la nivelación de adelante hacia
Figura 24. Orientar las cuchillas de adelante hacia
atrás
27

Servicio y ajustes
Not for
Reproduction
C
B
C
B
A
Figura 25. Nivelación del cortacésped - de adelante
hacia atrás
A
Cómo dar servicio a las cuchillas del
cortacésped
1. Extraiga la cubierta del cortacésped (ver Extracción de
la cubierta del cortacésped).
2. Para extraer la cuchilla para afilarla, use un bloque
de madera (A, Figura 28) para evitar la rotación de la
cuchilla al aflojar los herrajes.
3. Extraiga el perno (C), la arandela de la cuchillar (B), y
la cuchilla.
4. Use una lija para afilar la cuchilla hasta que tenga
un borde fino. Si la cuchilla está dañada, debe ser
sustituida.
5. Equilibre las cuchillas como se muestra en la Figura
27. Centre el agujero de la cuchilla en un clavo
lubricado con una gota de aceite. Una cuchilla
equilibrada permanece nivelada.
6. Reinstale la cuchilla con las alas de sustentación
(Figura 28) apuntando hacia arriba en dirección a la
cubierta del cortacésped como se muestra.
7. Reinstale la arandela de la cuchilla (B, Figura 28),
con el lado cóncavo hacia arriba, y el perno (C). Use
un bloque de madera (A) para evitar que roten las
cuchillas al ajustar los herrajes. Apriete los herrajes a
50-60 lbs-pies (68-81 Nm).
LOOSEN
AFLOJAR
Figura 26. Extracción de las cuchillas
Banco de trabajo
Figura 27. Cómo equilibrar la cuchilla
Clavo
ADVERTENCIA
Para su seguridad personal, se deben instalar
los herrajes de montaje de las cuchillas con la
arandela de cuchilla, y luego apretar bien a 50-60
lbs-pies (68-81 Nm).
ADVERTENCIA
Para su seguridad personal, no manipule las
cuchillas filosas del cortacésped sin guantes.
La manipulación descuidada o incorrecta de las
cuchillas puede provocar lesiones graves.
28
Figura 28. Instalación de las cuchillas
www.Snapper.com

Lubricación
Not for
Reproduction
Lubrique la unidad en los puntos indicados en la Figura
29, así como los demás indicados en esta sección.
Engrase:
• ejes de las ruedas delanteras
• salientes del huso de las ruedas delanteras
• pivote central del eje delantero
• husos de las cuchillas del cortacésped *
• brazo libre de la cubierta del cortacésped
• tornillo del motor de elevación de la cubierta del
cortacésped (ubicado debajo del guardabarros
derecho)
Use las graseras cuando existan. Desarme las piezas
para aplicar grasa a las piezas móviles cuando no se
hayan instalado graseras.
No todas las grasas son compatibles. Use grasa de litio
para automóviles.
* Algunos husos de cuchilla tienen graseras arriba de
la cubierta del cortacésped, mientras que otros tienen
graseras debajo de la cubierta.
Servicio y ajustes
2x
2x
Aceite:
• puntos de pivote de la palanca de velocidad de
desplazamiento
• bisagra de la tolva de descarga
• puntos de pivote de elevación de la cubierta
Por lo general, todas las piezas móviles de metal deben
ser aceitadas cuando entran en contacto con otras
piezas. Mantenga las correas y las poleas libres de aceite
y grasa. Recuerde limpiar con un paño los accesorios y
las superficies antes y después de la lubricación.
Figura 29. Puntos de lubricación (grasa)
29

Servicio y ajustes
Not for
Reproduction
Cómo limpiar la batería y los cables
1. Desconecte los cables de la batería; el cable negativo
primero (C, Figura 30).
2. Limpie los terminales de la batería y los extremos del
cable con un cepillo de alambre hasta que brille.
3. Reinstale la batería y vuelva a conectar los cables de
la batería, primero el cable positivo (A).
4. Recubra los extremos de cable y los terminales de la
batería con vaselina o grasa no conductora.
5. Asegúrese de volver a colocar la tapa de terminal (B)
sobre el terminal de batería positivo.
Carga de batería
Una batería muerta o demasiado débil para arrancar el
motor puede ser el resultado de un defecto en el sistema
de carga u otro componente eléctrico. Si existen dudas
sobre la causa del problema, comuníquese con su
distribuidor. Si necesita sustituir la batería, vea la sección
Limpieza de la batería y cables.
Para cargar la batería, siga las instrucciones dadas
por el fabricante del cargador de baterías, así como
también todas las advertencias incluidas en la sección
de seguridad de este libro. Quite la batería de la unidad
montable y colóquela sobre una superficie nivelada
que no sea de concreto. Cargue la batería a 6-10
amperes por 1 hora. No la cargue a una tasa superior a
10 amperes.
B
A
C
Figura 30. Compartimiento de la batería
ADVERTENCIA
Tenga cuidado al manipular la batería. Aleje las
llamas y las chispas de la batería.
Al quitar o instalar cables de la batería, desconecte
PRIMERO el cable negativo y vuélvalo a conectar
por ÚLTIMO. Si no se sigue este orden, el terminal
positivo puede entrar en corto con el armazón a
través de una herramienta.
ADVERTENCIA
Mantenga la batería alejada de llamas abiertas
y chispas; los gases que provienen de la misma
son altamente explosivos. Ventile bien la batería
durante la carga.
30
www.Snapper.com

Resolución de problemas de la unidad montable
Not for
Reproduction
PROBLEMA BUSQUE SOLUCIÓN
Las palancas de velocidad de
desplazamiento no están en las posiciones
ARRANCAR/ESTACIONAR.
El interruptor del PTO (embrague eléctrico)
está en la posición ENCENDIDA.
No hay combustible. Si el motor está caliente, permita que se enfríe, luego vuelva
Freno de estacionamiento desactivado. Freno de estacionamiento de motor.
Válvula de combustible cerrada (si la
tuviera).
Motor ahogado. Abrir el estrangulador.
La gasolina está vieja o se ha echado a
El motor no gira ni arranca.
perder.
Los terminales de la batería necesitan ser
limpiados.
La batería está descargada o muerta. Recárguela o reemplácela.
Cableado flojo o quebrado. Vea al distribuidor de servicio autorizado.
Motor solenoide o de arranque defectuoso. Vea al distribuidor de servicio autorizado.
El interruptor de interbloqueo de seguridad
no funciona.
La(s) bujía(s) es/son defectuosa(s), está(n)
dañada(s) o mal espaciada(s).
Resolución de problemas
Trabe las palancas de velocidad de desplazamiento en las
posiciones ARRANCAR/ESTACIONAR.
Colóquelo en la posición de APAGADO.
a llenar el tanque de combustible.
Abrir la válvula de combustible.
Drene el combustible y reemplácelo con combustible nuevo.
Limpie los terminales de la batería.
Vea al distribuidor de servicio autorizado.
Limpie y cambie el espaciamiento o reemplace.
Vea el Manual del Motor.
El motor no arranca bien o
no funciona bien.
El motor golpea.
Consumo excesivo de
aceite.
El escape del motor está
negro.
El motor funciona, pero la
unidad no se acciona.
Agua en el combustible. Drene el combustible y vuelva a llenarlo con combustible
nuevo.
Se quemó el disyuntor. Vea al distribuidor de servicio autorizado.
La mezcla de combustible es demasiado
rica.
La bujía es defectuosa, está dañada o mal
espaciada.
Filtro de combustible sucio. Sustituir el filtro de combustible.
Bajo nivel de aceite. Controle/agregue aceite según sea necesario.
Usa un aceite del tipo incorrecto. Vea el Manual del Motor.
El motor se está calentando demasiado. Limpie las aletas del motor, la pantalla del ventilador y el
Usa un aceite del peso incorrecto. Vea el Manual del Motor.
Demasiado aceite en la caja del cigüeñal. Drene el exceso de aceite.
Filtro de aire sucio. Sustituya el filtro de aire. Vea el Manual del Motor.
El control del estrangulador del motor está
en posición cerrada.
Transmision(es) desactivadas. Destrabar varilla(s) de liberación de rodamiento.
La correa está rota. Vea al distribuidor de servicio autorizado.
La correa de la transmisión se resbala. Vea al distribuidor de servicio autorizado.
El freno no está completamente liberado. Vea al distribuidor de servicio autorizado.
Problema de transmisión interno. Vea al distribuidor de servicio autorizado.
Limpie el filtro de aire. Verifique el estrangulador.
Limpie y cambie el espaciamiento o reemplace.
(Ver el manual del motor.)
limpiador de aire del motor.
Abra el control del estrangulador.
31

Resolución de problemas
Not for
Reproduction
PROBLEMA BUSQUE SOLUCIÓN
La correa de la transmisión
de la unidad montable se
resbala.
El freno no se queda fijo.
La unidad tiene problemas
de giro o manejo.
Resolución de problemas del cortacésped
PROBLEMA BUSQUE SOLUCIÓN
El cortacésped no se eleva.
El corte del cortacésped es
desparejo.
El corte luce brusco.
El motor se detiene
con facilidad cuando
el cortacésped está
engranado.
Vibración excesiva del
cortacésped.
Las poleas o la correa están grasosas o
aceitosas.
Correa estirada o desgastada. Vea al distribuidor de servicio autorizado.
Los componentes del freno están
desgastados o dañados.
Problema de transmisión interno. Vea al distribuidor de servicio autorizado.
La conexión de dirección está floja. Controle y ajuste cualquier conexión floja.
Inflado incorrecto de los neumáticos. Vea la sección de Mantenimiento.
La cubierta del cortacésped no ha sido
instalada correctamente.
El/los componente(s) del elevador de la
cubierta está(n) dañado(s).
El cortacésped no está nivelado
correctamente.
Los neumáticos de la unidad montable
no están inflados de manera pareja o
correcta.
La velocidad del motor es demasiado
lenta.
La velocidad de desplazamiento es
demasiado rápida.
Las cuchillas están desafiladas. Afile o sustituya las cuchillas. Ver Cómo dar servicio a las
La correa de la transmisión del
cortacésped se resbala porque está muy
aceitada o desgastada.
Las cuchillas no están sujetadas
correctamente a los husos.
La velocidad del motor es demasiado
lenta.
La velocidad de desplazamiento es
demasiado rápida.
La altura de corte está demasiado baja. Corte el césped alto a la altura máxima de corte en la
La tolva de descarga se bloquea con
césped cortado.
Los herrajes de montaje de las cuchillas
están flojos.
Las cuchillas, husos o poleas del
cortacésped están doblados.
Las cuchillas del cortacésped están
desbalanceadas.
La correa está instalada incorrectamente. Vea al distribuidor de servicio autorizado.
Limpie según sea necesario.
Vea al distribuidor de servicio autorizado.
Ver Extracción e instalación del cortacésped
Vea al distribuidor de servicio autorizado.
Ver Ajuste del cortacésped.
Ver sección de Mantenimiento.
Posicione el control de velocidad del motor en RÁPIDO.
Disminuya la velocidad de desplazamiento.
cuchillas del cortacésped.
Vea al distribuidor de servicio autorizado.
Cómo dar servicio a las cuchillas del cortacésped.
Posicione el control de velocidad del motor en RÁPIDO.
Disminuya la velocidad de desplazamiento.
primera pasada.
Corte el césped con la descarga apuntando el área cortada
anteriormente.
Apriete a 50-60 lbs-pies (68-81 Nm).
Vea al distribuidor de servicio autorizado.
Quite, afile o equilibre las cuchillas. Ver Cómo dar servicio a
las cuchillas del cortacésped.
Desgaste o rotura excesiva
de la correa.
La correa de la transmisión
del cortacésped se resbala
o no acciona.
32
Poleas dobladas o ásperas. Vea al distribuidor de servicio autorizado.
Uso de correa incorrecta. Vea al distribuidor de servicio autorizado.
El resorte de la polea tensora está roto o
no está unido correctamente.
Correa de transmisión rota. Vea al distribuidor de servicio autorizado.
Vea al distribuidor de servicio autorizado.
www.Snapper.com

Especificaciones
Not for
Reproduction
Motor:
26 HP Briggs & Stratton
Fabricante Briggs & Stratton
Modelo 26 hp PRO Twin
Caballos de fuerza 26 a 3500 rpm
Desplazamiento 44,0 pulg. cúbicas (724 cc)
Sistema eléctrico Batería de 12 Voltios, 230 CCA
Alternador 16 amperes
Capacidad de aceite 64 onzas (1.9 L) c/filtro
Transmisiones:
Fabricante Hydro Gear
Modelo ZC-AHBB-2A7B-1DPX (LH)
ZC-DHBB-2A7C-1DPX (RH)
Tipo EZT
Líquido hidráulico Unidad sellada
Velocidades Avanzo: 0-6 MPH (0-9,66 km/h)
@ rpm especificados Marca atrás: 0-3 MPH (0-4,83 km/h)
Dimensiones:
Chasis:
Tanque de combustible Capacidad: 3.0 Galones (11,4 L)
Ruedas traseras Tamaño de neumáticos: 18 x 9,50-8
Presión de inflado: 15 psi (1,03 bar)
Ruedas delanteras Tamaño de neumáticos: 11 x 4,00-5
Presión de inflado: 25 psi (1,72 bar)
Largo total 75 pulg. (191 cm)
Ancho total 61 pulg. (155 cm)
Altura 39 pulg. (99 cm)
Peso (aprox.) 554 lbs. (252 kg)
Piezas y accesorios
Vea al distribuidor autorizado.
Información de clasificación de potencia del motor
La clasificación de potencia bruta para modelo de motor de gasolina individual está etiquetada de acuerdo con el
código J1940 (Small Engine Power & Torque Rating Procedure) de la SAE (Society of Automotive Engineers), y
la clasificación de rendimiento ha sido obtenida y corregida en conformidad con SAE J1995 (Revisión 2002-05).
Los valores de torque han sido derivados a 3060 rpm; los valores de caballos de fuerza han sido derivados a 3600
rpm. La potencia bruta efectiva del motor resultará disminuida y se verá afectada por, entre otros elementos, las
condiciones ambientales de funcionamiento y variabilidad entre motores. Dado el amplio conjunto de productos en
que son colocados los motores y la variedad de cuestiones ambientales relevantes para el funcionamiento del equipo,
el motor de gasolina no desarrollará la potencia bruta clasificada cuando sea utilizado en un componente dado de
un equipo motorizado (caballos de fuerza efectivos in situ o netos). Estas diferencias se deben a diversos factores,
incluidos, entre otros, accesorios (limpiadores de aire, tubos de escape, carga, refrigeración, carburador, bomba de
combustible), limitaciones de aplicación, condiciones ambientales de funcionamiento (temperatura, humedad, altitud),
y la variabilidad entre motores. A causa de las limitaciones de fabricación y de capacidad, Briggs & Stratton podrá
sustituir este motor de esta Serie por un motor con mayor clasificación de potencia.
33

Garantía
Not for
Reproduction
34
www.Snapper.com

Not for
Reproduction
35

Snapper, Inc.
Not for
Reproduction
P.O. Box 702
Milwaukee, WI EE.UU.
www.Snapper.com
1-800-935-2967
 Loading...