

Page 1
1
Installation
Instructions
54” Mower Mulch Kit
Mfg. No. 1694508
INSTALLATION
1. Remove the mower deck. See Operator’s Manual.
2. Remove mower blades and splined washers.
3. Remove and discard the existing baffle from the left
side of the mower.
4. Install the left (23-1/2” long) baffle and right (26-1/2”
long) front baffle (B & C, Figure 2) using six 5/16-18 x
3/4 carriage bolts (A), lockwashers, and nuts (D).
Insert the carriage bolts from the bottom as shown.
Be sure the bolts are inserted fully into the slots in the
mower deck.
For 54” Mower Decks
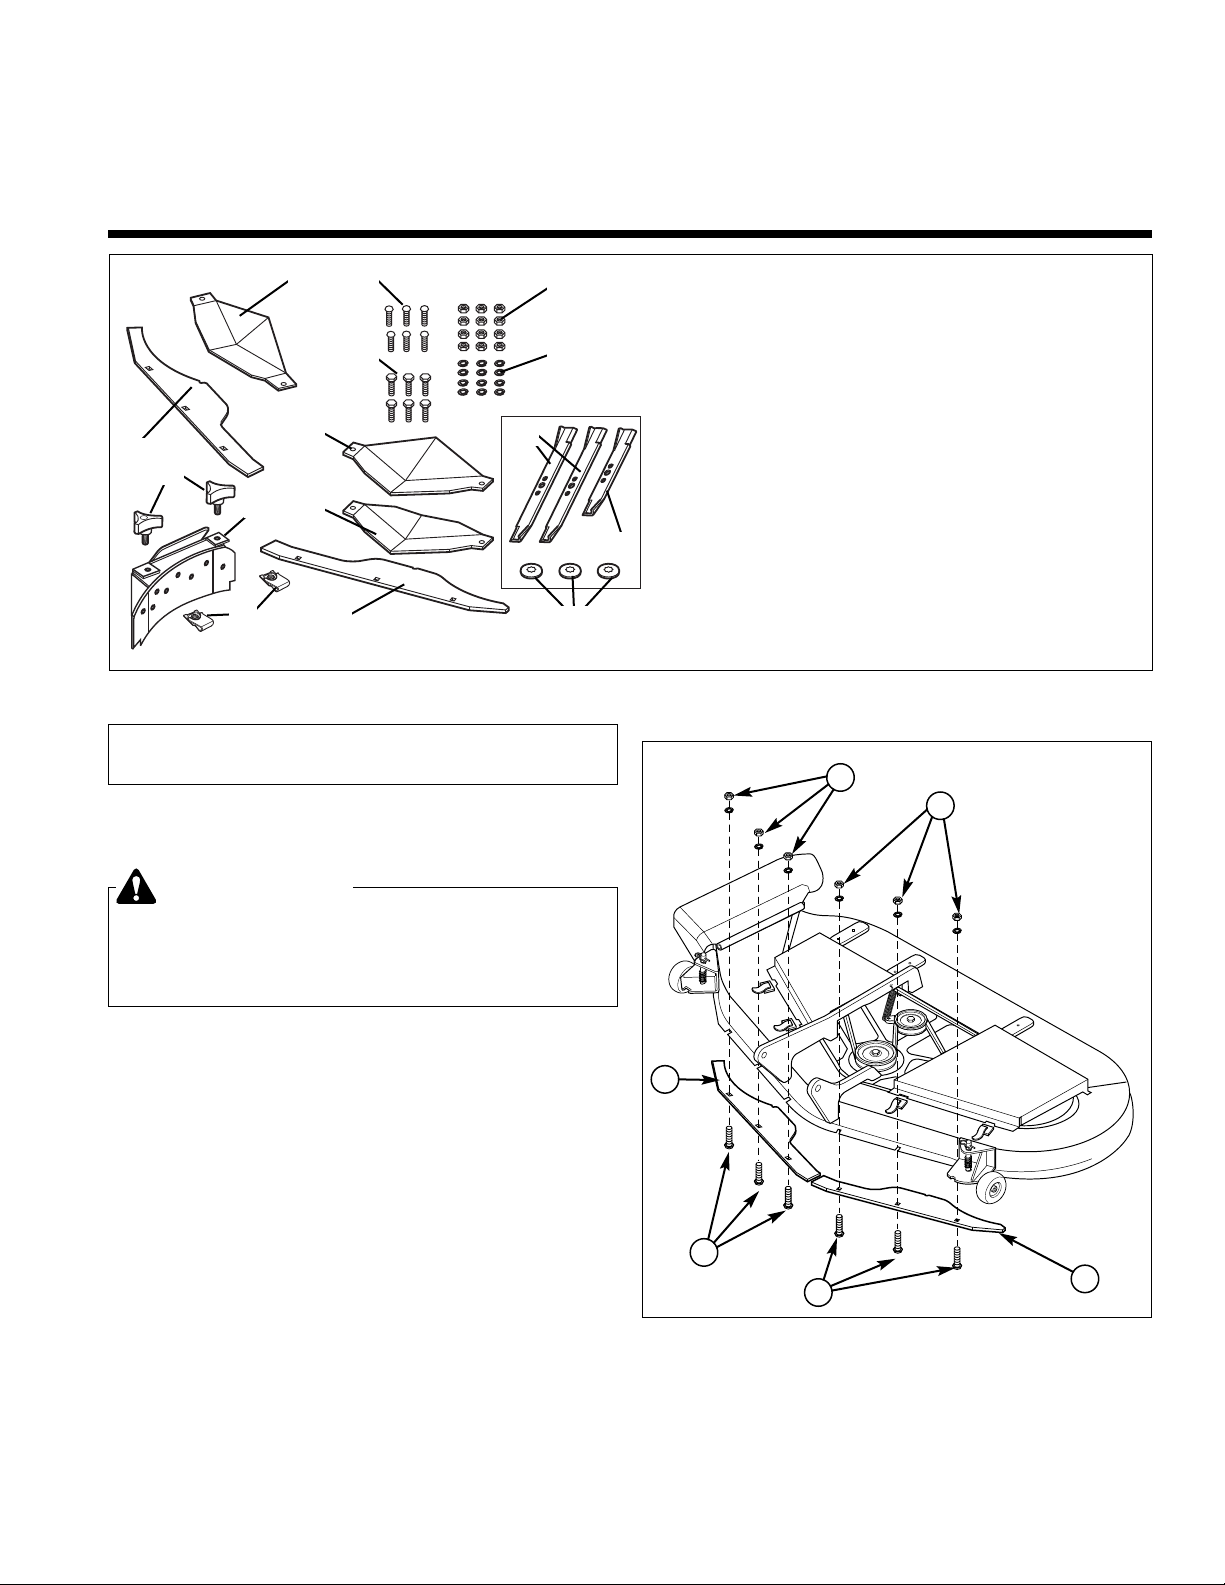
Figure 1. Contents
Figure 2. Install Front Baffles
A. 5/16-18 x 3/4 Carriage Bolts
B. Left Front Baffle (23-1/2” Long)
C. Right Front Baffle (26-1/2” Long)
D. 5/16-18 Nut and Lockwasher
Kit Contents:
Ref Part No. Qty. Description
1 1720613 1 BAFFLE, Front, LH
2 1721023 1 BAFFLE, Front, RH
3 1725801 1 COVER ASSY., Discharge
4 1721075 1 RAMP, RH
5 1725909 1 RAMP, LH
7 1921332 6 CAPSCREW, 5/16-18 x 3/4
8 1931333 6 CARRIAGE BOLT, 5/6-18 x 3/4
9 1917372 12 NUT, 5/16-18
10 1917356 12 LOCKWASHER, 5/16
11 1726048 2 BLADE, Mower, Long
12 1726049 1 BLADE, Mower, Short
13 5022319 2 KNOB
14 1935255 2 2 RETAINET CLIP
This kit adds mulching baffles and ramps to 54”
mower decks.
C
B
D
D
3
8
7
4
5
6
10
9
1
2
WARNING
Before beginning any service work turn off the
PTO, set the parking brake, turn off the ignition,
and disconnect the spark plug wire(s).
A
A
11
12
13
14
15
Page 2
2
Installation Instructions 54” Mower Mulch Kit
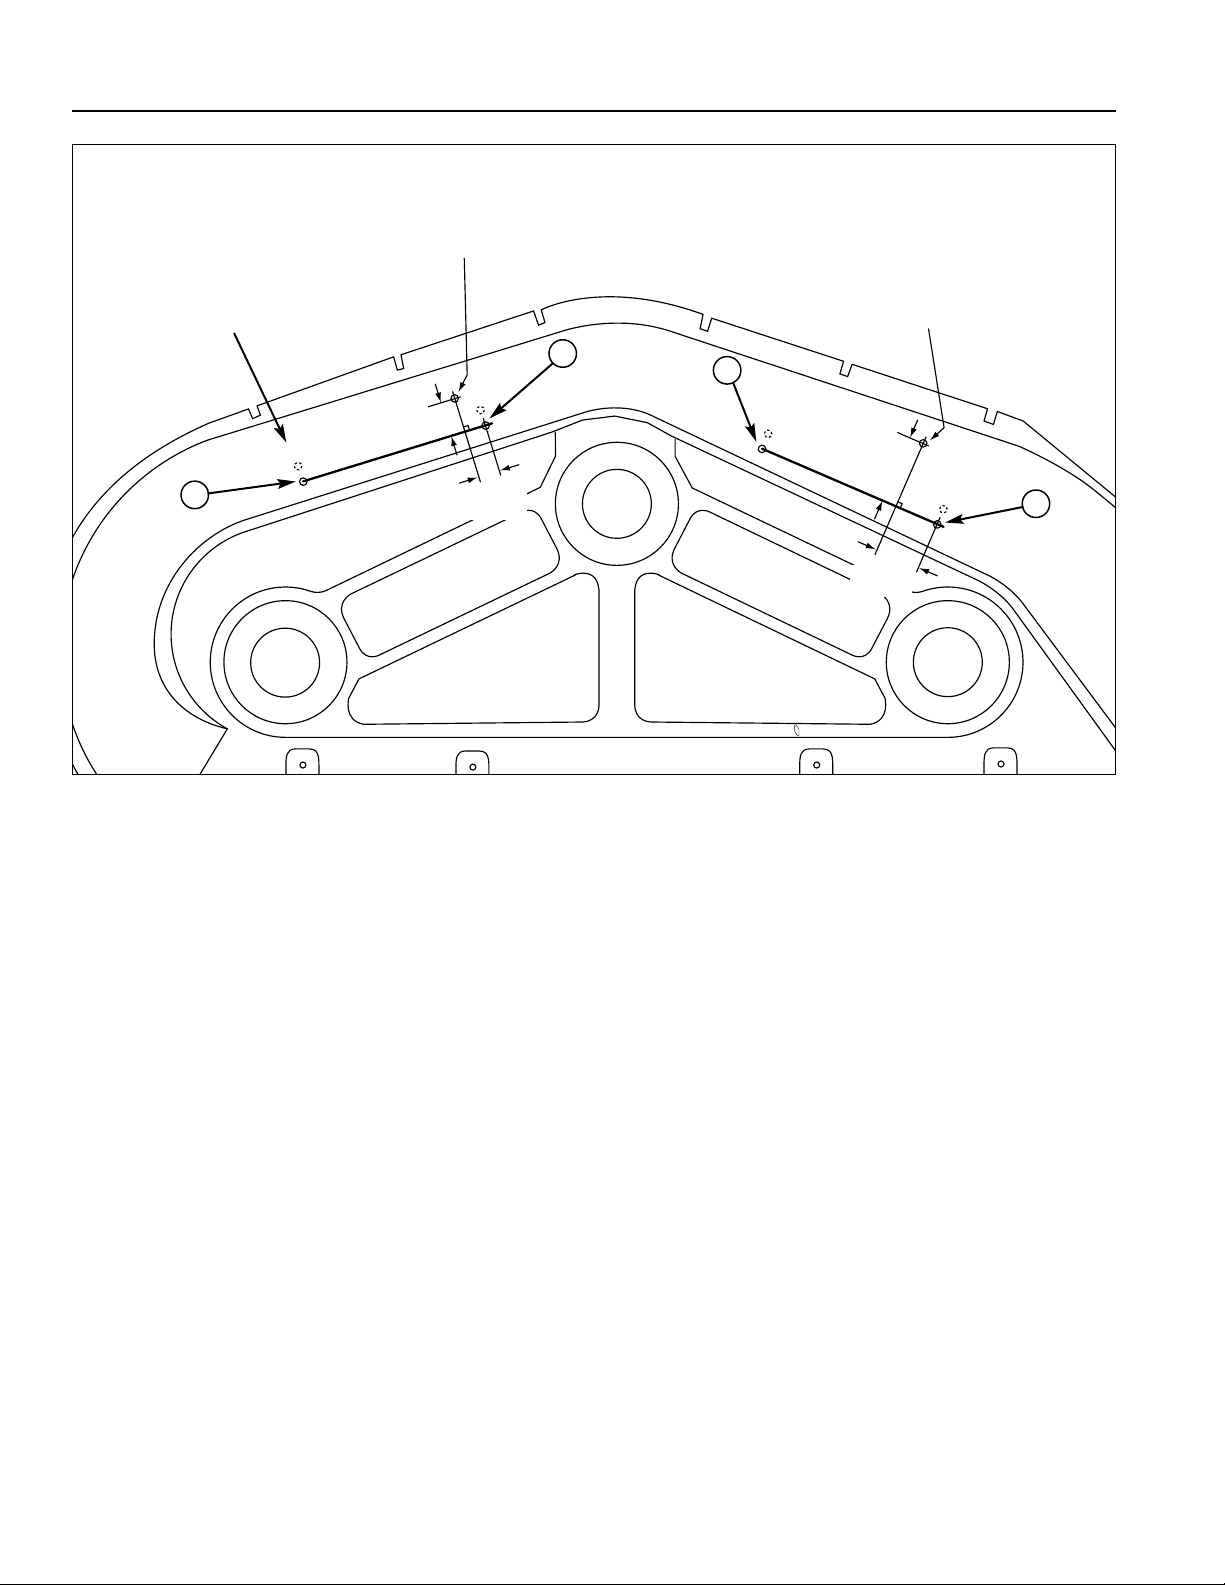
Drill 11/32" Hole Here
Drill 11/32" Hole Here
1-1/4"
25/32"
2-1/2"
3-11/32"
Deck Viewed from Above
Note: Dashed
holes in early
models only.
A
A
A
A
Figure 3. Drill Ramp Mounting Holes
A. Cover Bolt Holes
5. Remove capscrews securing the belt covers and
remove the belt covers.
6. Using a grease pencil and straight edge, draw a line
between the belt cover bolt holes (A, Figure 3).
7. Use a ruler and right-angle square to locate the ramp
mounting holes as shown in Figure 3. Center punch
and drill two 11/32” holes in the locations shown.
The ramps themselves will be used to locate the
remaining holes.
Page 3

3
54” Mower Mulch Kit Installation Instructions
8. Flip the mower deck upside down and select the
appropriate ramps (see Figure 5).
9. Place the 17” right-hand ramp (A, Figure 4) against
the bottom and front of the deck. Secure the left side
of the ramp using a 5/16-18 x 3/4 capscrew, lockwasher, and nut. Insert the capscrew from the bottom of the deck.
10.With the center crease below the locating notch, and
the ramp positioned against the front of the deck,
center punch and drill the right ramp mounting hole
(use 11/32” drill).
11.Secure the right side of the ramp using a 5/16-18 x
3/4 capscrew, lockwasher, and nut. Insert the capscrew from the bottom of the deck.
12.Repeat steps 8 through 10 for the 13-1/2” left-hand
ramp.
13.Secure the ramps (A & B) to the deck using four
5/16-18 x 3/4 capscrews, lockwashers, and nuts (C).
Insert the capscrews from inside the deck as shown.
14.Install new mower blades (Ref. 11 & 12 Figure 1) and
new splined washers (Ref. 13). Install mower blade
(Ref. 12) on the center arbor. Torque the blade
mounting capscrews to 45-55 ft. lbs. (61-75 N.m.).
Figure 4. Mower Deck from Bottom
A. 17” Right-hand Ramp
B. 13-1/2” Left-hand Ramp
C. 5/16-18 x 3/4 Capscrew, Lockwasher, & Nut
Figure 5. Ramp Selection
C
A
B
14.Check and tighten all hardware. Rotate the blades
by hand to check clearances.
15.Reinstall the belt covers.
16.Reinstall the mower deck.
Locating Notch
Center Crease
Drill 11/32” Holes
Center Crease
Locating Notch
C
C
Mower Deck Viewed From Below
17" Right-Hand Ramp
(All Models)
13-1/2" Left-Hand Ramp
(2004-Later Models)
13-1/2" Left-Hand Ramp
(2003-Earlier Models)
Page 4

Installation Instructions 54” Mower Mulch Kit
Form No. 1726006-02
Rev. 03/2008
© 2008 Simplicity Manufacturing, Inc. All Rights Reserved
TP 200-3908-02-AT-SMAN
MANUFACTURING, INC.
500 N Spring Street / PO Box 997
Port Washington, WI 53074-0997 USA
17.Install the discharge baffle (A, Figure 6). Using the
top two holes as a guide, center punch and drill two
11/32” holes. Secure with two knobs (B) and retainer
clips (C). Insert the retainer clips from the bottom of
the deck. Note that the discharge baffle overlaps the
right front baffle.
SIDE DISCHARGING
If the grass has become to long to mulch, convert the
deck to a side discharge mower, cut the grass to normal
height, and resume mulching with the next cutting.
To convert the deck back to a side discharge mower,
simply remove the hardware securing the discharge baffle and remove the discharge baffle (A, Figure 6).
Reinstall the discharge baffle to convert back to a
mulcher.
Figure 6. Install Discharge Baffle
A. Discharge Baffle
B. Knobs
C. Retainer Clips
A
B
Drill 11/32”
Holes
B
 Loading...