

SMK 4SYDN User Manual

REMOTE USER GUIDE
Safety Instructions
You must keep safety in mind while using this device. Keep
these and any other instructions for future reference.
Observe Warnings: Carefully follow all warnings on the device
and in the operating instructions.
Heat: Do NOT place the device near heat sources such as
radiators, stoves, heat registers, or other appliances that
produce heat.
Care and Use
Cleaning: Do NOT use liquid, abrasive, solvent, or aerosol
cleaners. Use a damp cloth for cleaning.
When Not in Use: Remove the batteries if this device is to be
left unattended or unused for a long period of time.
Refer servicing to qualied personnel when a
solid object or liquid has fallen onto or into the
device.
Do NOT attempt to service this device. Refer all
servicing to qualied personnel. Opening covers
other than the battery cover will void the warranty.
Publishing Information
Copyright © 2015. EchoStar Technologies L.L.C., Englewood,
Colorado 80112. All rights reserved.
The information in this User Guide may change without notice.
Revisions may be issued to tell you about such changes.
Send comments or questions about this User Guide to
techpubs@echostar.com or
Technical Publications, EchoStar Technologies L.L.C,
90 Inverness Drive Circle East, Englewood, Colorado 80112.
Document Number: 206231
Printed in
DISH is a registered trademark of DISH Network L.L.C.
All product names, trade names, or corporate names
mentioned in this User Guide are acknowledged to be the
proprietary property of the registered owners.
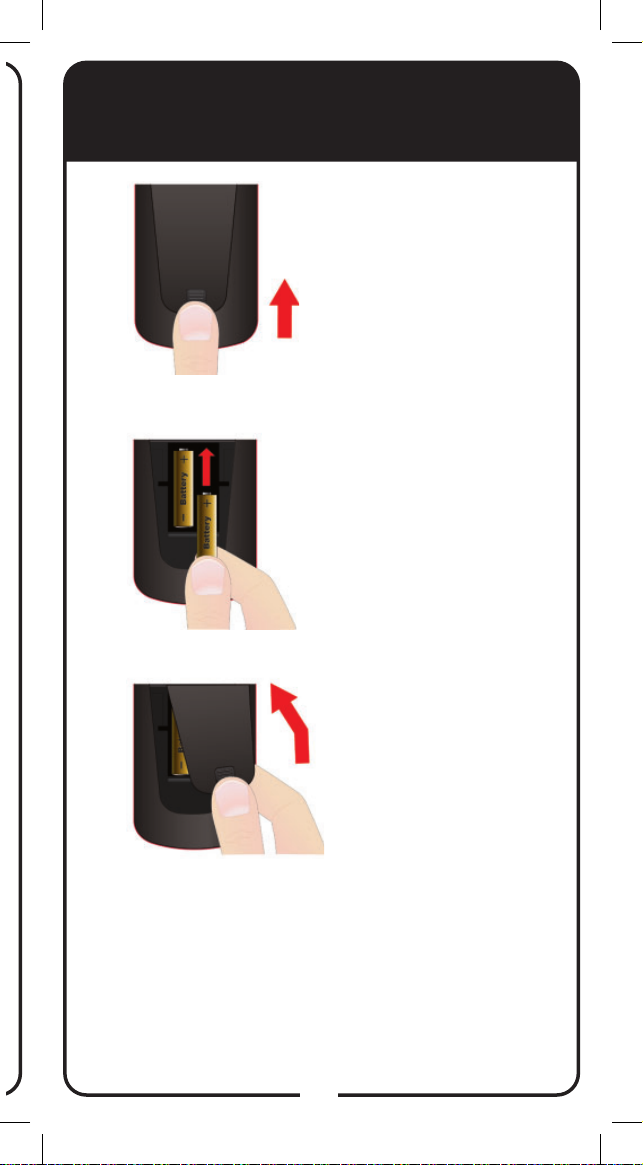
Insert the Batteries
Push the tab toward
1
the top of the remote to
release the battery door
latch and then lift the
battery door from the
remote.
2
3
Insert 2 AA batteries,
making sure to match
the plus (+) ends with
the plus markings on the
battery case.
Replace the remote
battery cover.
1
R
E
M
OT
E
A
N
T
E
N
NA
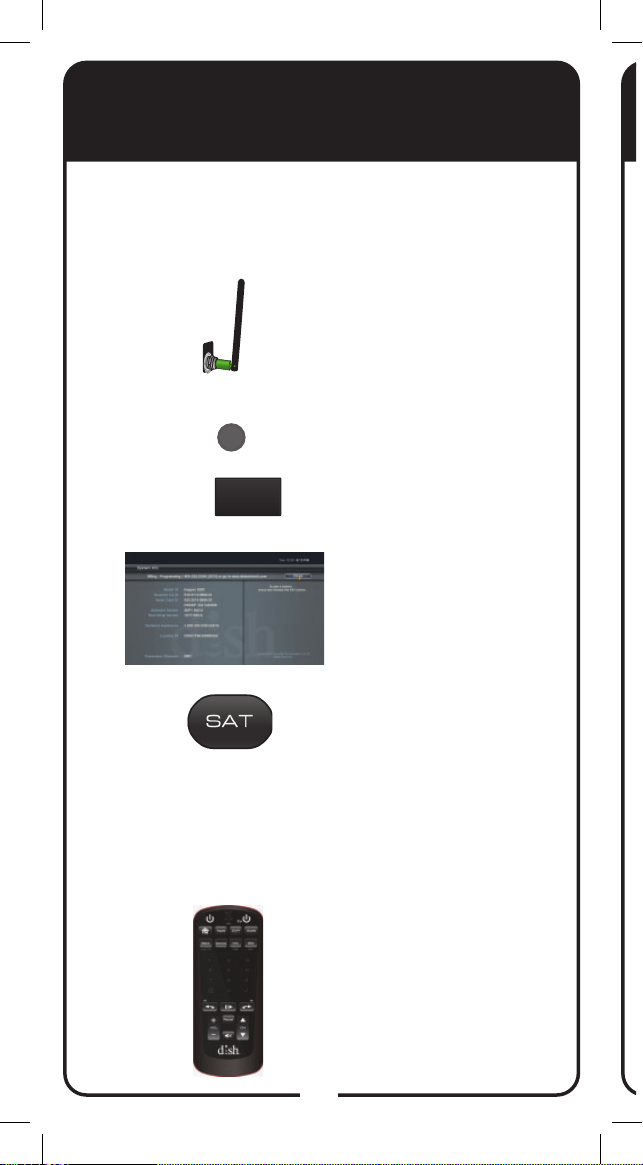
Pairing Remote to the
Hopper® or Joey® Receiver
For the remote to work with either a Hopper® or
Joey® receiver, it must be paired. Use the following
procedure to pair the remote.
Verify the antenna
1
is installed on the back
of your Hopper receiver.
Joey receivers have an
internal antenna.
2
3
4
5
Hopper:
OR
Joey:
SYSTEM
INFO
SYS INFO
Turn your receiver
and TV on, and press
SYSTEM INFO on the
front panel.
Conrm that you
see the System
Info screen.
Press and release the
SAT button on your
remote (on the side of
the remote). Wait until
you hear a tone and see
the remote listed on the
screen. After pairing,
you should hear a series
of ascending tones.
Conrm that your
remote operates your
receiver by pressing
remote buttons. If this is
not working, go back to
step 4.
2
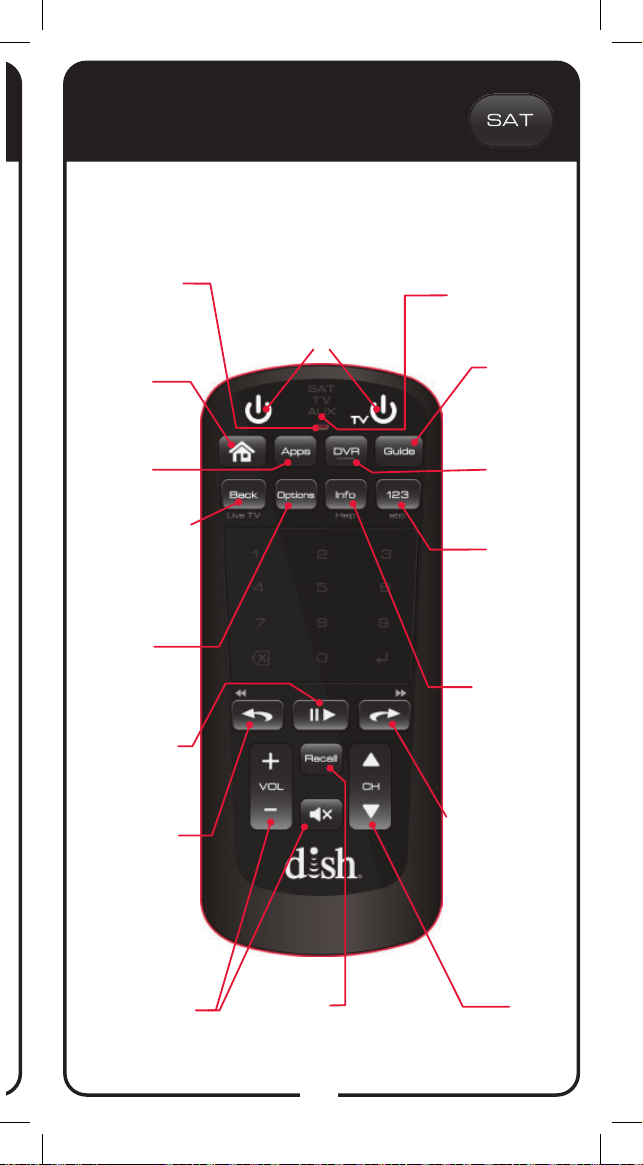
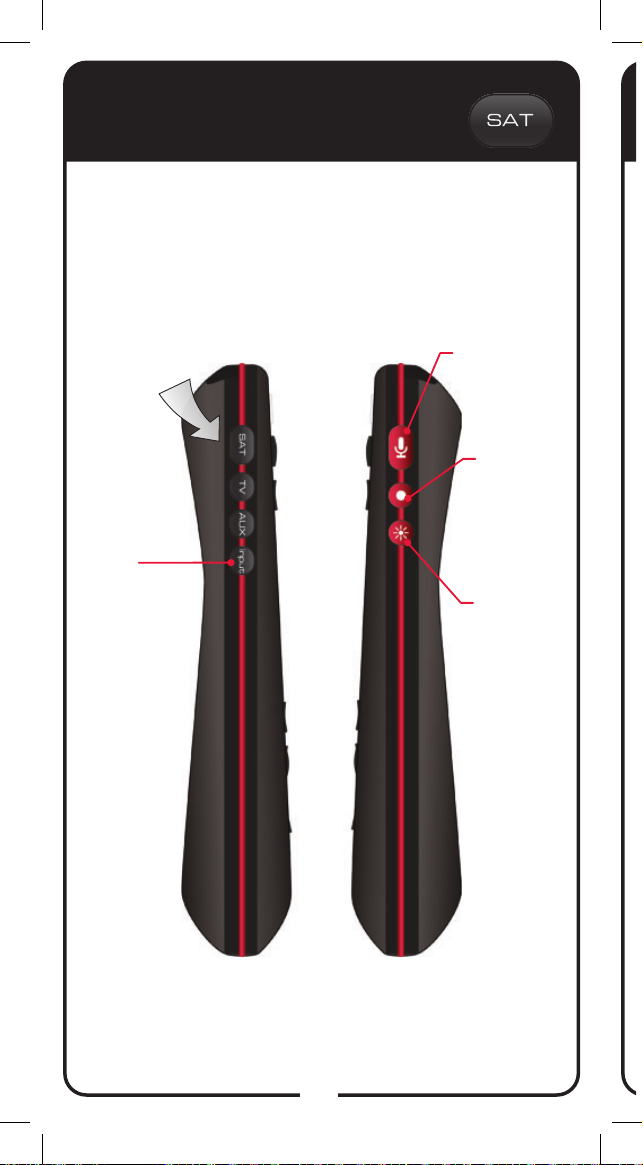
SAT Mode
To use the features described in this section, make sure
you are in SAT mode by pressing the SAT Mode button.
Note: Some features may not be available depending on
your receiver model.
Microphone
Captures voice
when remote
is in voice
command mode
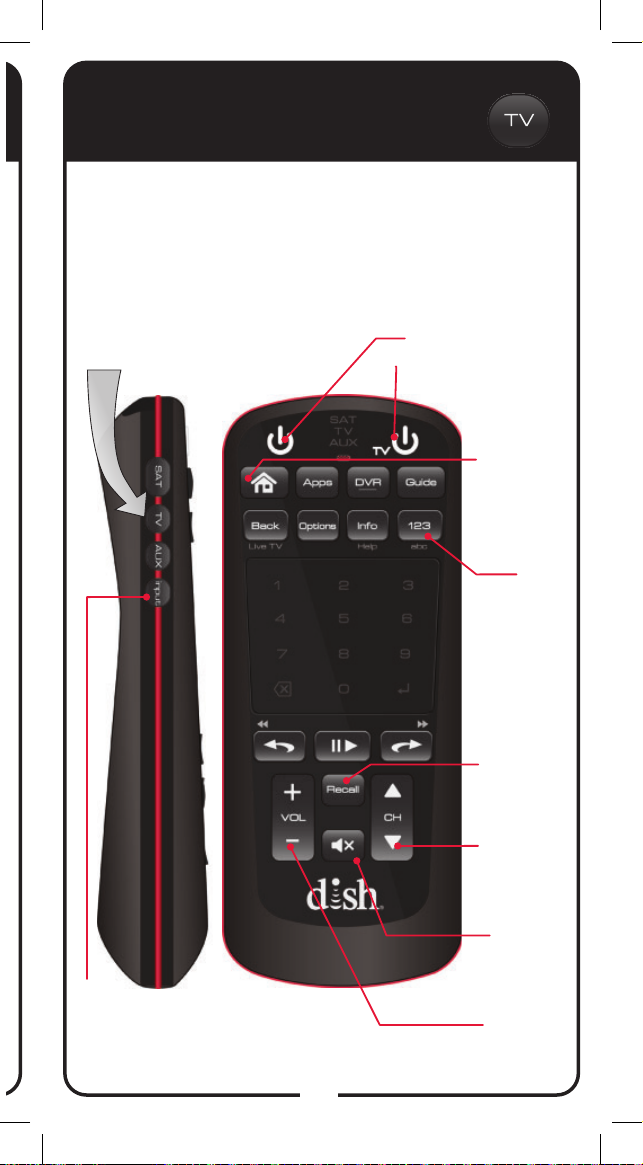
Home
Access
receiver
features and
settings
Apps
Displays the
Apps menu
Back/Live TV
Return to
previous
menu. Press
and hold
to return to
viewing live TV
Options
Opens
contextual
options menu
for each
screen
Pause/Play
Pauses or
plays a live
or recorded
program
Skip Back/
Back
Press and
release to
skip back 10
seconds in
a program.
Press and
hold to reverse
the program.
Vol and Mute
Buttons
Control TV volume
Programming
required
Power & TV Power
Left button turns the
receiver on/off
Right button turns the
TV on/off
Recall
Return to
previously
viewed TV
channel(s)
3
SAT/TV/AUX
Mode indicator lights
up when sending
signals in that mode
Guide
Display
current and
future satellite
program
listings
DVR
Displays list
of recorded
programs
123/abc
Displays the
number pad in
the touchpad.
Press and hold
to navigate
the on-screen
alpha keypad
Info/Help
Retrieve info
on programs
and set a timer.
Press and hold
for contextual
Skip Forward/
in a program.
hold to forward
Channel up/down,
navigate through
menus, and select
a desired option
help
Forward
Press and
release to
skip forward
10 seconds
Press and
through the
program.
CH
SAT Mode, continued
To use the features described in this section, make sure
you are in SAT mode by pressing the SAT Mode button.
Note: Some features may not be available depending on
your receiver model.
Press this
button for
SAT Mode
SAT LED
lights up
Input
Swaps the
tuner
Microphone
Activates
voice control
screen
Hot Key/
Shortcut
Button
Use this
button to set
up a shortcut
Backlight
Backlights
the remote
buttons
4
TV Mode
To use the features described in this section, make sure you
are in TV mode by pressing the TV Mode button. Remote
programming is required. Note: The remote has Limited
Mode enabled, which means only the Volume, Mute, and TV
Power buttons work in TV Mode (see Enabling or Disabling
Limited Mode on page 19). Note: Some features may not be
available depending on your TV model.
Press this
button for
TV Mode
Power & TV Power
Left button turns the
receiver on/off
Right button turns the
TV on/off
TV Menu
Access
menu
features
available on
some TVs
123
Enter a
channel
number
from the
touchpad
Input
Switch between
TV inputs
(available only for
certain makes and
models of TVs)
Recall
Return to
last TV
channel
viewed
Channel
Up/Down
Channel up/
down on the
TV
Mute
Turn TV
volume on
or off
Volume
Control TV
volume
5
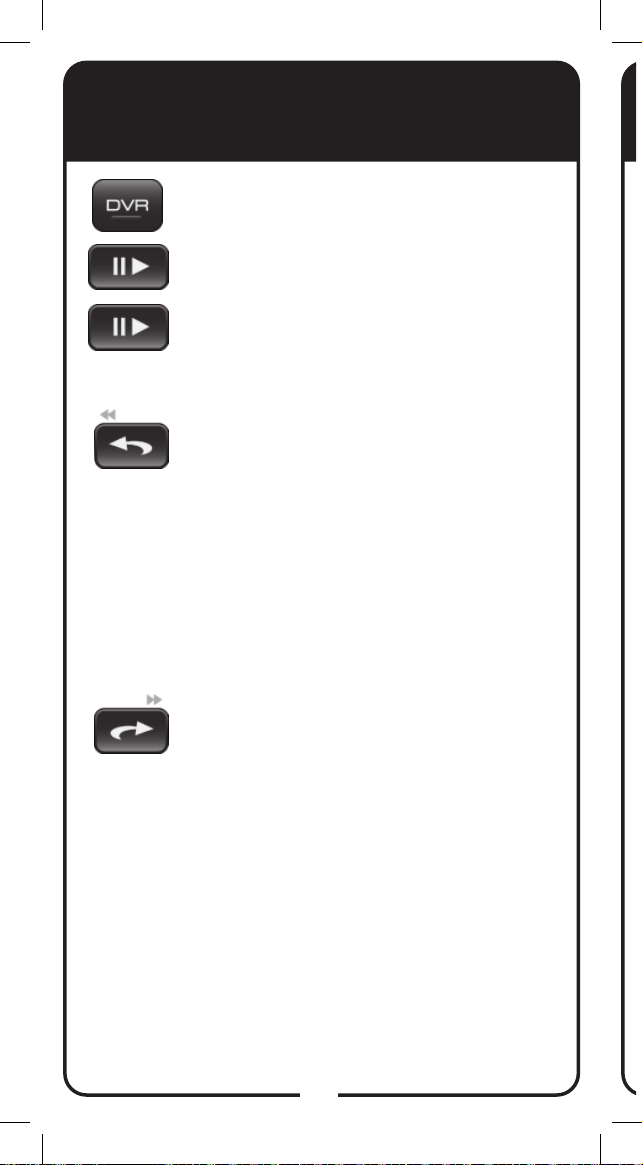
DVR Functions
• Displays a list of recorded programs.
• Plays a live or recorded program.
• Pauses a live or recorded program.
• Press SKIP BACK to skip back about
10 seconds in a program. Press and
hold SKIP BACK to reverse the program
four times as fast as normal play. Press
BACK twice to reverse at 15 times normal
speed, three times to reverse at 60 times
normal speed, and four times to reverse
at 300 times normal speed. The onscreen bar shows how far you’ve gone.
For a live program, you can only reverse
back to the last channel change or back
one hour, whichever occurs rst.
• Press SKIP FWD to skip ahead about
30 seconds in the program. Press and
hold SKIP FWD (Forward) to fast-forward
through the program four times normal
speed. Press FWD twice to forward at
15 times normal speed, three times to
forward at 60 times normal speed, and
four times to forward at 300 times normal
speed. The on-screen bar shows how
far you’ve gone. Of course, you cannot
forward a live program that has not been
broadcast yet.
6
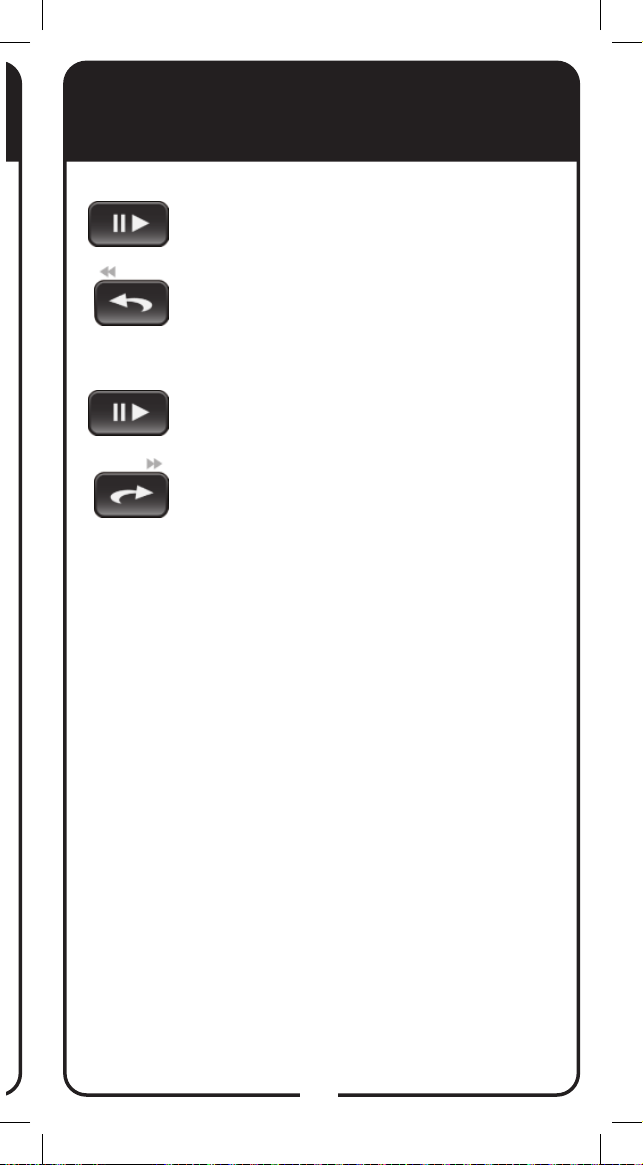
DVR Functions, continued
• PAUSE and then press and hold SKIP
BACK to reverse the program in slow
motion at 1/4 the speed of normal play.
Press BACK again to reverse at normal
speed.
• Press PAUSE and then press and hold
SKIP FWD to forward the program
in slow motion at 1/15 the speed
of normal play. Press FWD twice
to forward at 1/4 as fast as normal
play. Press FWD three times to play
the program. Of course, you cannot
forward a live program that has not
been broadcast yet.
7
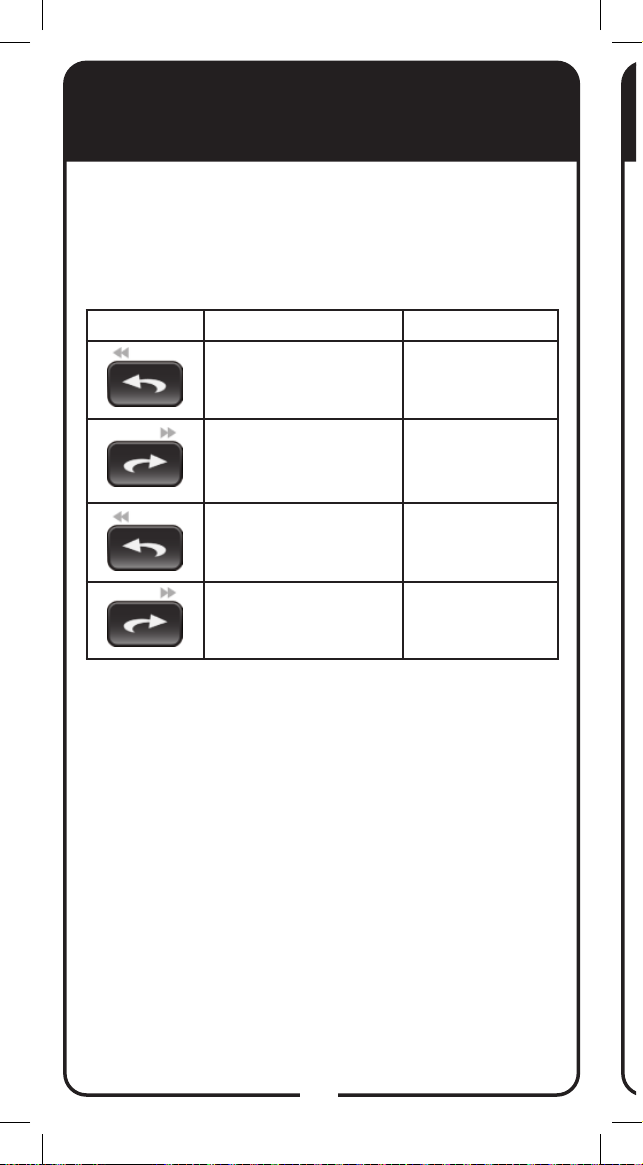
Using Remote Button
Shortcuts
In addition to their normal functions, some buttons
on your remote control have special shortcut
functions. These shortcuts are enabled while
navigating the on-screen Electronic Program Guide
(EPG) or viewing the scrollable list of events.
Buttons In Guide Display Scroll in Lists
Move 3 hours back
Move 3 hours ahead
24 hours back To beginning of list
24 hours ahead To end of list
By 1 screen
upward
By 1 screen
downward
8
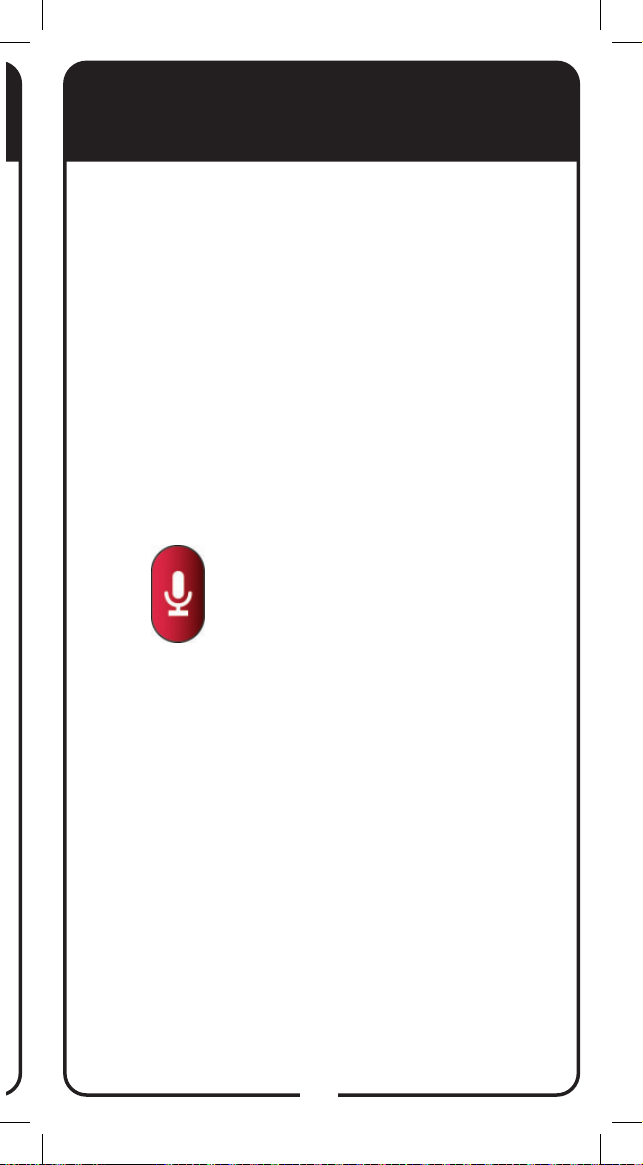
Using Voice Commands
This remote features the ability to say commands
rather than using the remote to work through the
menu options. You can use the microphone for the
following features:
• Search for a show or a movie
• Minor control of the receiver
• Find a program in the Guide
• Access your DVR programming
• Display Picture-In-Picture
• Swap a tuner
• Record a program
• Watch ESPN
Press the Microphone button
1
on the side of the remote.
The Voice Control Screen
appears.
9
 Loading...