

Page 1
Installation Instructions
Note:
Neoprene Seat Covers
WWW.SMITTYBILT.COM
and steps may vary depending on the year of the vehicle. These instructions are intended
to help with the installation process on all models.
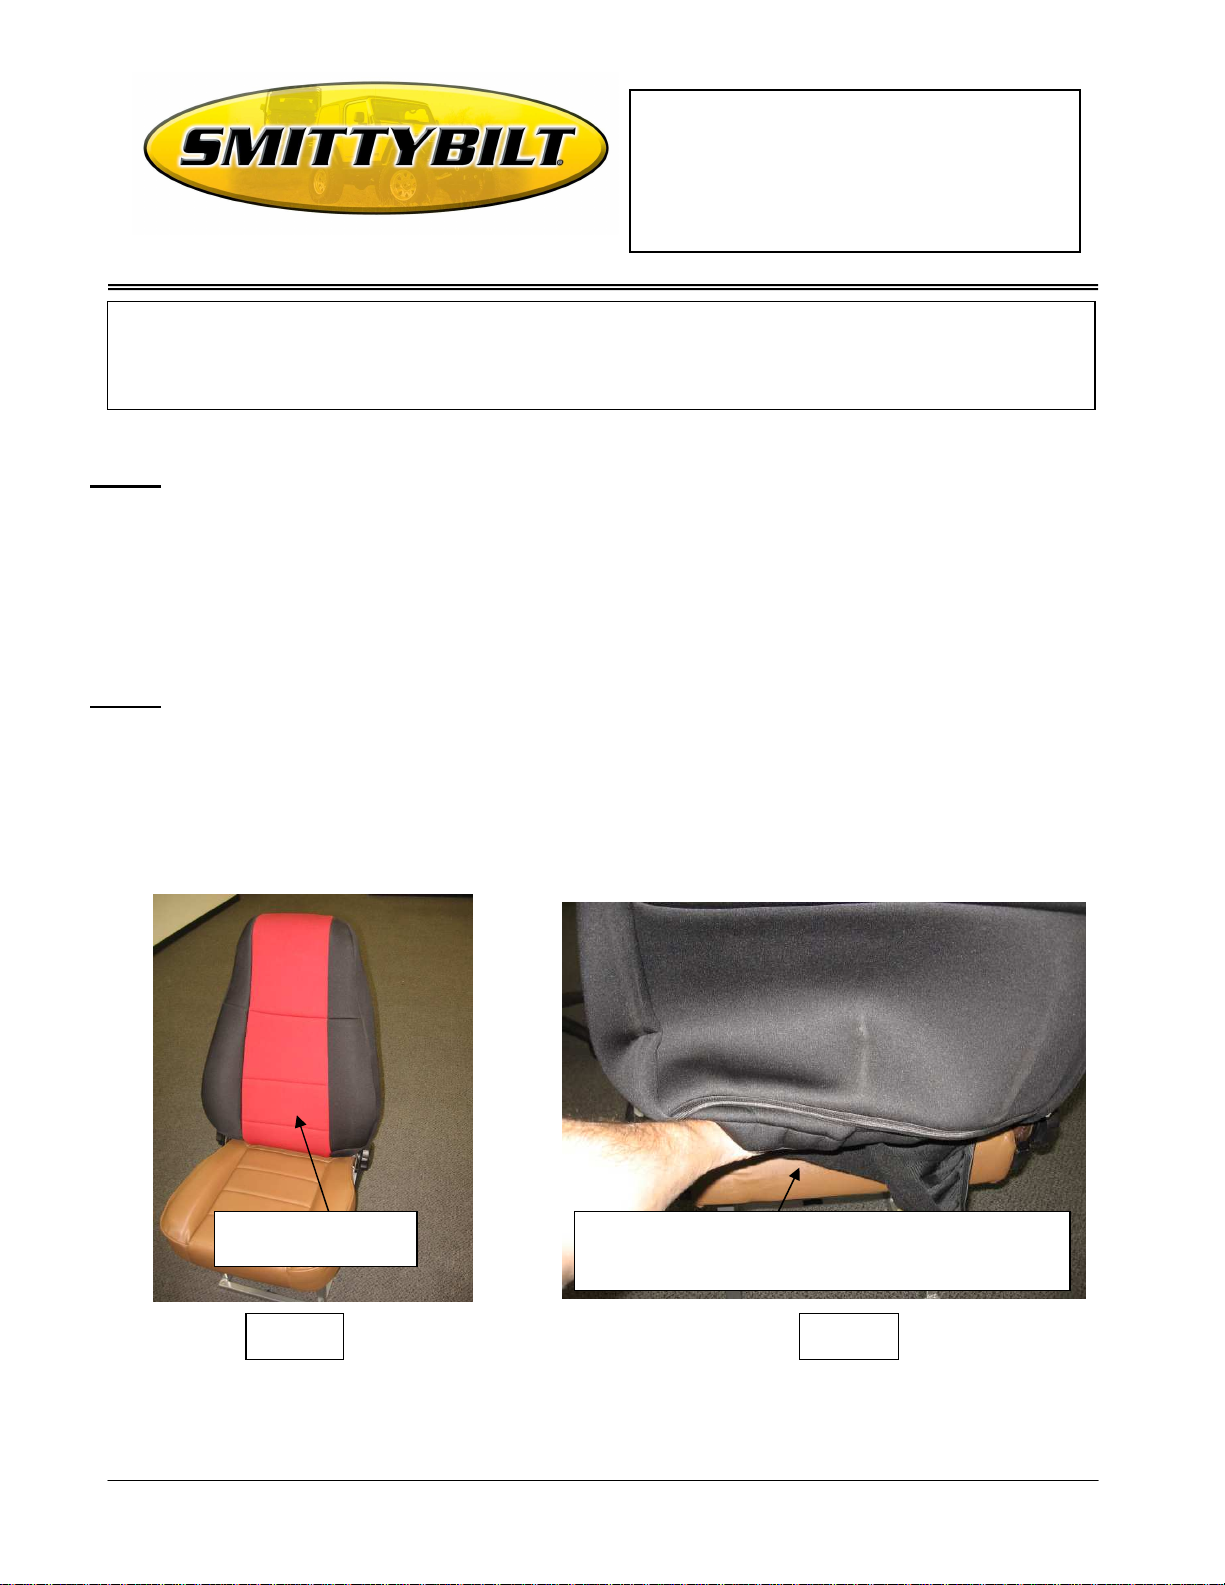
Step 1: Remove covers from box and place top (back section) loosely over the seat. (Fig A)
Note: Depending on your particular make or model there may be some slots/holes/flaps for
various features the seat uses.
Example: (TJ) Has a slot on the outer edge for the seat pull strap and/or a hole in the bottom left
corner for the seat tilt lever.
(JK) Has slots on the side for airbags, if your vehicle does not have airbags, simply
tuck the flap into the seat cover.
Step 2: Pull cover down over seat and insert front flap pushing through the middle of the seat.(Space
between the top and bottom portions of the seat.) Pull flap through the space and tuck under the
the back section of the seat cover. Fasten the Velcro together to hold in place. (Fig B)
Note: On some JK’s you will need to tuck up the flap on the bottom of the OEM cover into
the new neoprene cover. There will also be two holes on the top of the cover that you carefully
pull over the plastic headrest sleeves on the top of the seat.
Please read instructions thoroughly before installing this product. Some pictures
Slide top back section
of seat cover over seat.
For Technical Support/Warranty Information please call 310-762-9944
Push the front flap through the center of the seat and
fasten to the Velcro on the inside of the back bottom
portion of the cover.
Fig A Fig B
Smittybilt, 400 West Artesia Blvd, Compton, CA 90220
Page 2
Installation Instructions
that you pushed through the seat.
Neoprene Seat Covers
WWW.SMITTYBILT.COM
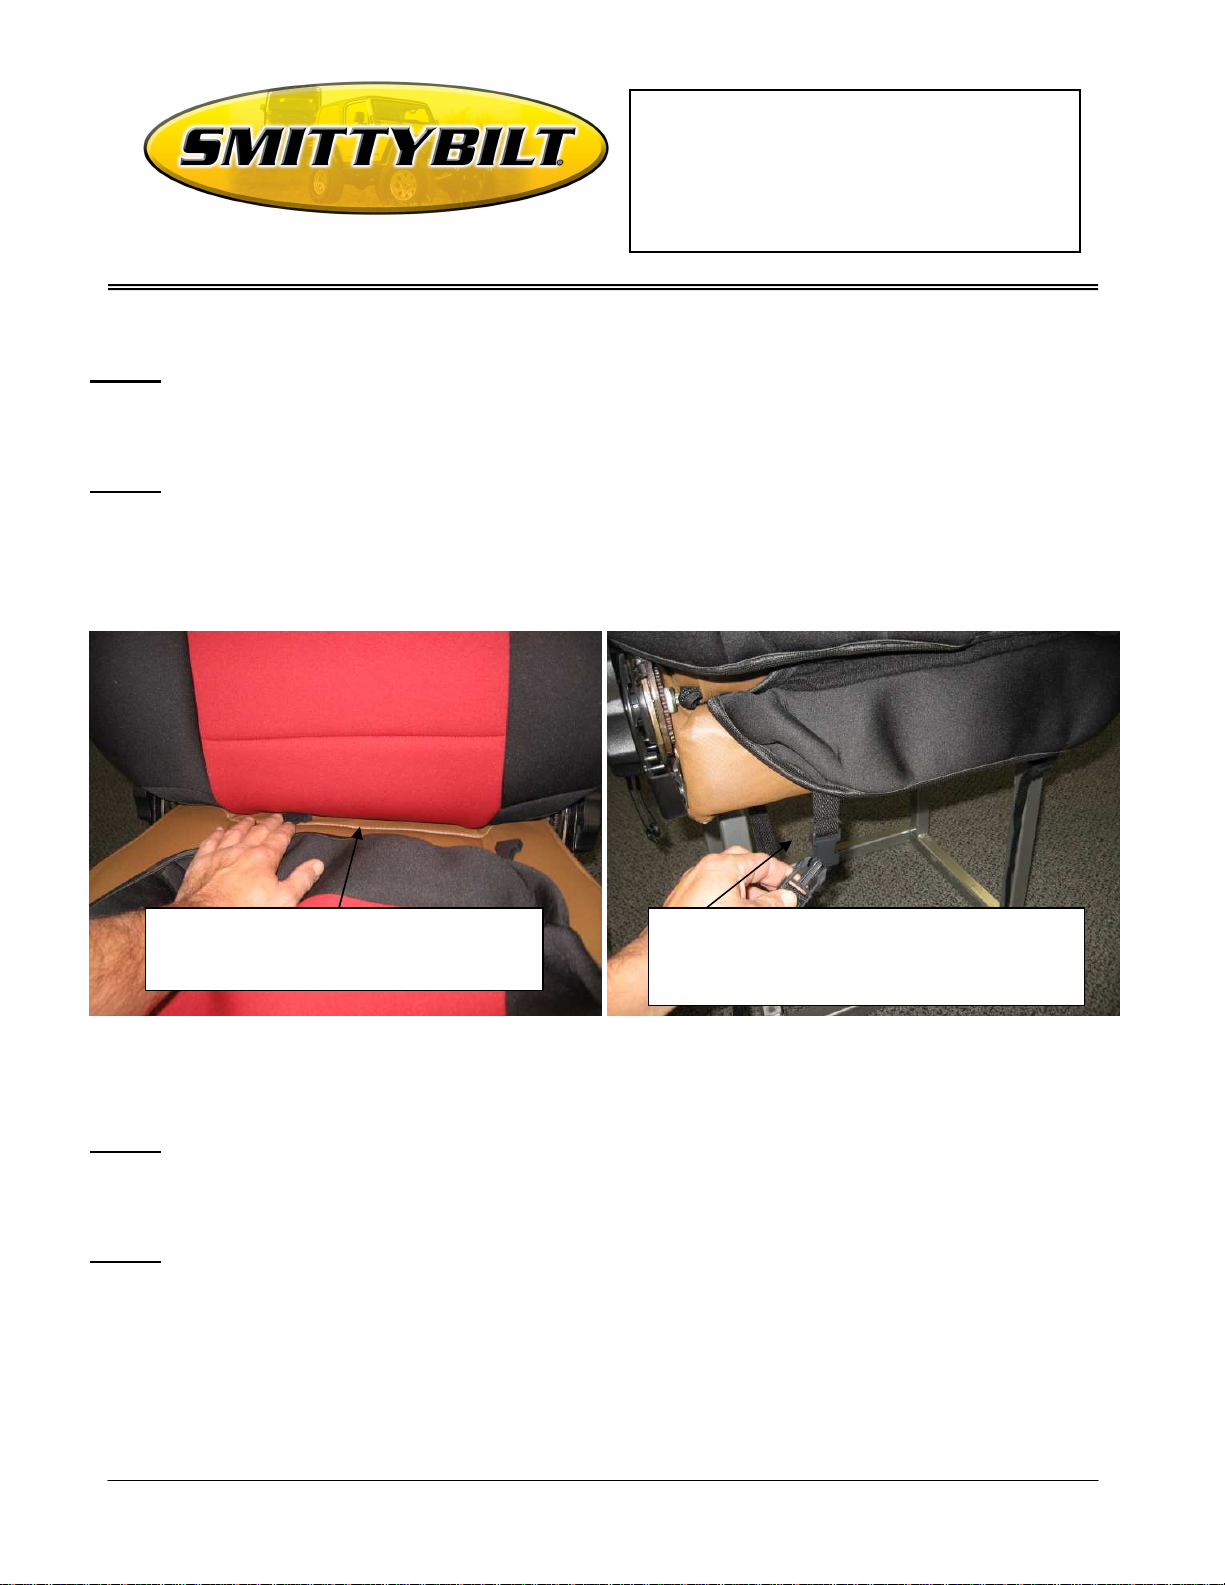
Step 3: Place bottom portion of cover on bottom section of the seat. Push the back end through the center
section of the seat. (Fig C) Fold the side of the cover down around the edges and front of seat.
Step 4: If your particular model has straps on the front run them under the seat towards the back and connect
them to the buckles that you pushed through the seat. (Fig D) Make sure that the straps do not
interfere with any seat operations.
Push the back end through the center
section of the seat towards the back.
(Fig C) (Fig D)
Step 5: If your model has straps with hooks on them simply pull them snug under your seat and attach
to an appropriate place that does not interfere with seat operation. (Fig E)
Step 6: Make any adjustments needed to make the cover straight. Pull straps/buckles snug. Install headrest
covers if applicable. Installation is now complete. (Fig F) Use the same process for opposite side.
For Technical Support/Warranty Information please call 310-762-9944
Smittybilt, 400 West Artesia Blvd, Compton, CA 90220
Run the straps under the seat towards the
back and connect them to the buckles
Page 3

Installation Instructions
Limited
One (1) Year Limited Warranty on Soft/Cut & Sew
Products
-
Product cleaning and maintenance instructions
Neoprene Seat Covers
WWW.SMITTYBILT.COM
If your model has straps
with hooks on the
simply pull them snug
under your seat and
attach to an appropriate
place that does not
interfere with seat
operation.
Fig E Fig F
. Soft/Cut & Sew Products - Mild soap and a soft bristle should be used to clean all soft goods
products. Do not machine wash covers.
Smittybilt soft/cut & sew products carry the foregoing limited repair or replacement warranty for
a period of (1) one-year against workmanship and defects in the material from the date of
purchase.
Limited Warranties
Smittybilt’s products are covered under the following limited warranties only. Note that the duration of the
limited warranty differs according to the material and finish of the product purchased. Subject to the duration
and conditions of the limited warranty stated below, Smittybilt warrants to the original retail purchaser that its
products are free from defects in material and workmanship. All other warranties and representations
express or implied, are hereby disclaimed, including fitness for merchantability and buyer’s intended use or
purpose. All parts are sold “AS IS” except for the limited warranties granted herein. Buyer assumes all risks
as to the selection, suitability and performance of all goods and products selected. This limited warranty
does not cover damage or impairment in any part due to misuse, improper installation, accident or contact
with on-road or off-road hazards, product modification, improper or inadequate cleaning and/or maintenance.
Smittybilt is not responsible for items damaged during shipping. This warranty is not transferable from the
original buyer. For the original Buyer to be eligible for the limited warranty coverage, the Buyer must provide
proof of purchase. Smittybilt strongly recommends returning the warranty registration card.
Customer’s remedy hereunder shall be limited only to repair or replacement (at Smittybilt’s option) of any
defective part(s) returned to Smittybilt at customer’s expense. The determination of whether or not a
returned part is defective or subject to coverage under the limited warranties stated herein shall be made at
Smittybilt’s sole discretion.
For Technical Support/Warranty Information please call 310-762-9944
Smittybilt, 400 West Artesia Blvd, Compton, CA 90220
 Loading...