

Page 1
Installation Instructions
Parts Included Qty
Parts Included Qty
Replacement Top
86-94 Suzuki Samurai
WWW.SMITTYBILT.COM
NOTE: Read instructions entirely before installing this product. This top is designed to be a
snug/tight fit to reduce flapping and noise. It is recommended to install this product when
temperatures are above 75 degrees. If temperatures are below this; the material can contract over
an inch. Wrinkles from packaging will go away once the material relaxes. You must have the factory
bow to install this part.
Top 1
Lock Nuts 2
Machine Screws 2
Tension Straps 2
Snaps with Screws 5
Step 1: Remove old top (if equipped)
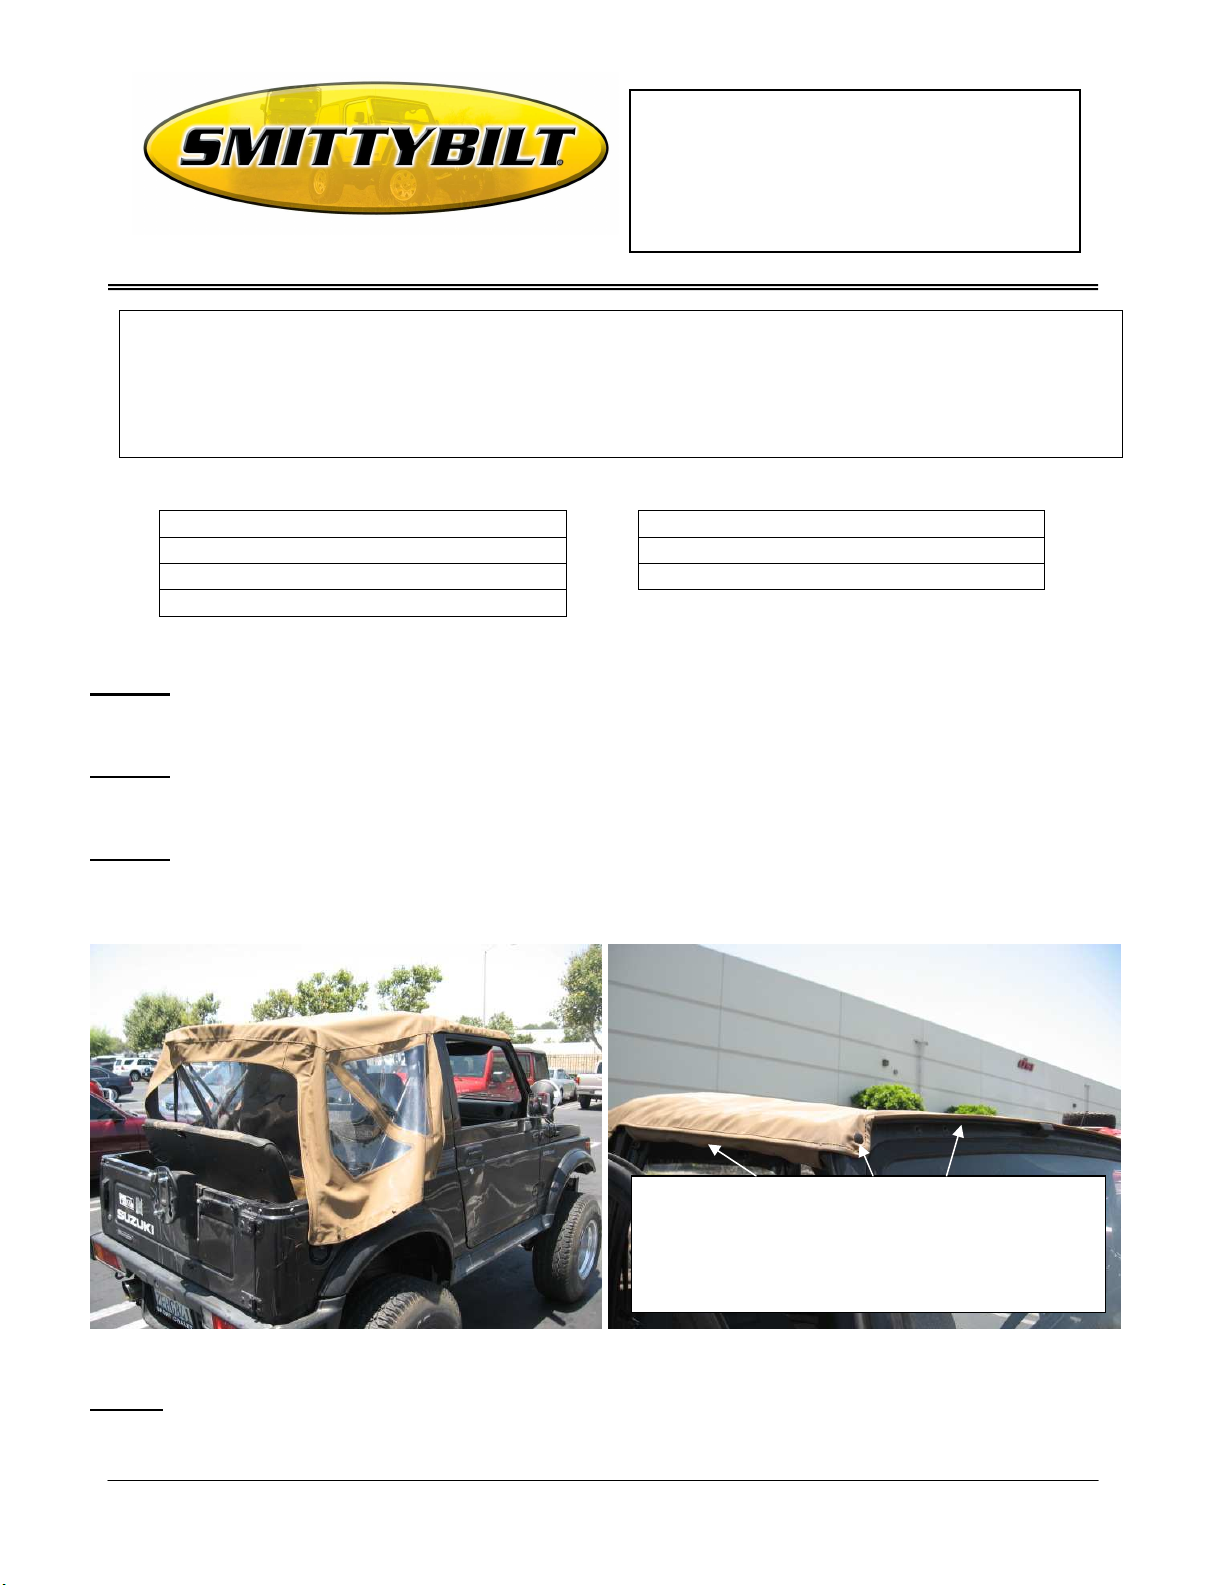
Step 2: Using care place and spread new top over vehicle. (Fig A)
Step 3: Slide plastic channel sewn into the front of the top into the windshield channel on top
of your windshield frame. Fasten the front snaps on each corner. (Fig B)
(Fig A) (Fig B)
Step 4: Unfasten the Velcro flaps on the sections over the doors and wrap around frame.(Fig B)
For Technical Support/Warranty Information please call 310-762-9944
Smittybilt, 400 West Artesia Blvd, Compton, CA 90220
Slide plastic channel sewn into the front of the top
into the windshield channel on top of your
windshield frame. Fasten the front snaps on each
corner. Unfasten the Velcro flaps on the sections
over the doors and wrap around frame.
Page 2
Installation Instructions
Replacement Top
86-94 Suzuki Samurai
WWW.SMITTYBILT.COM
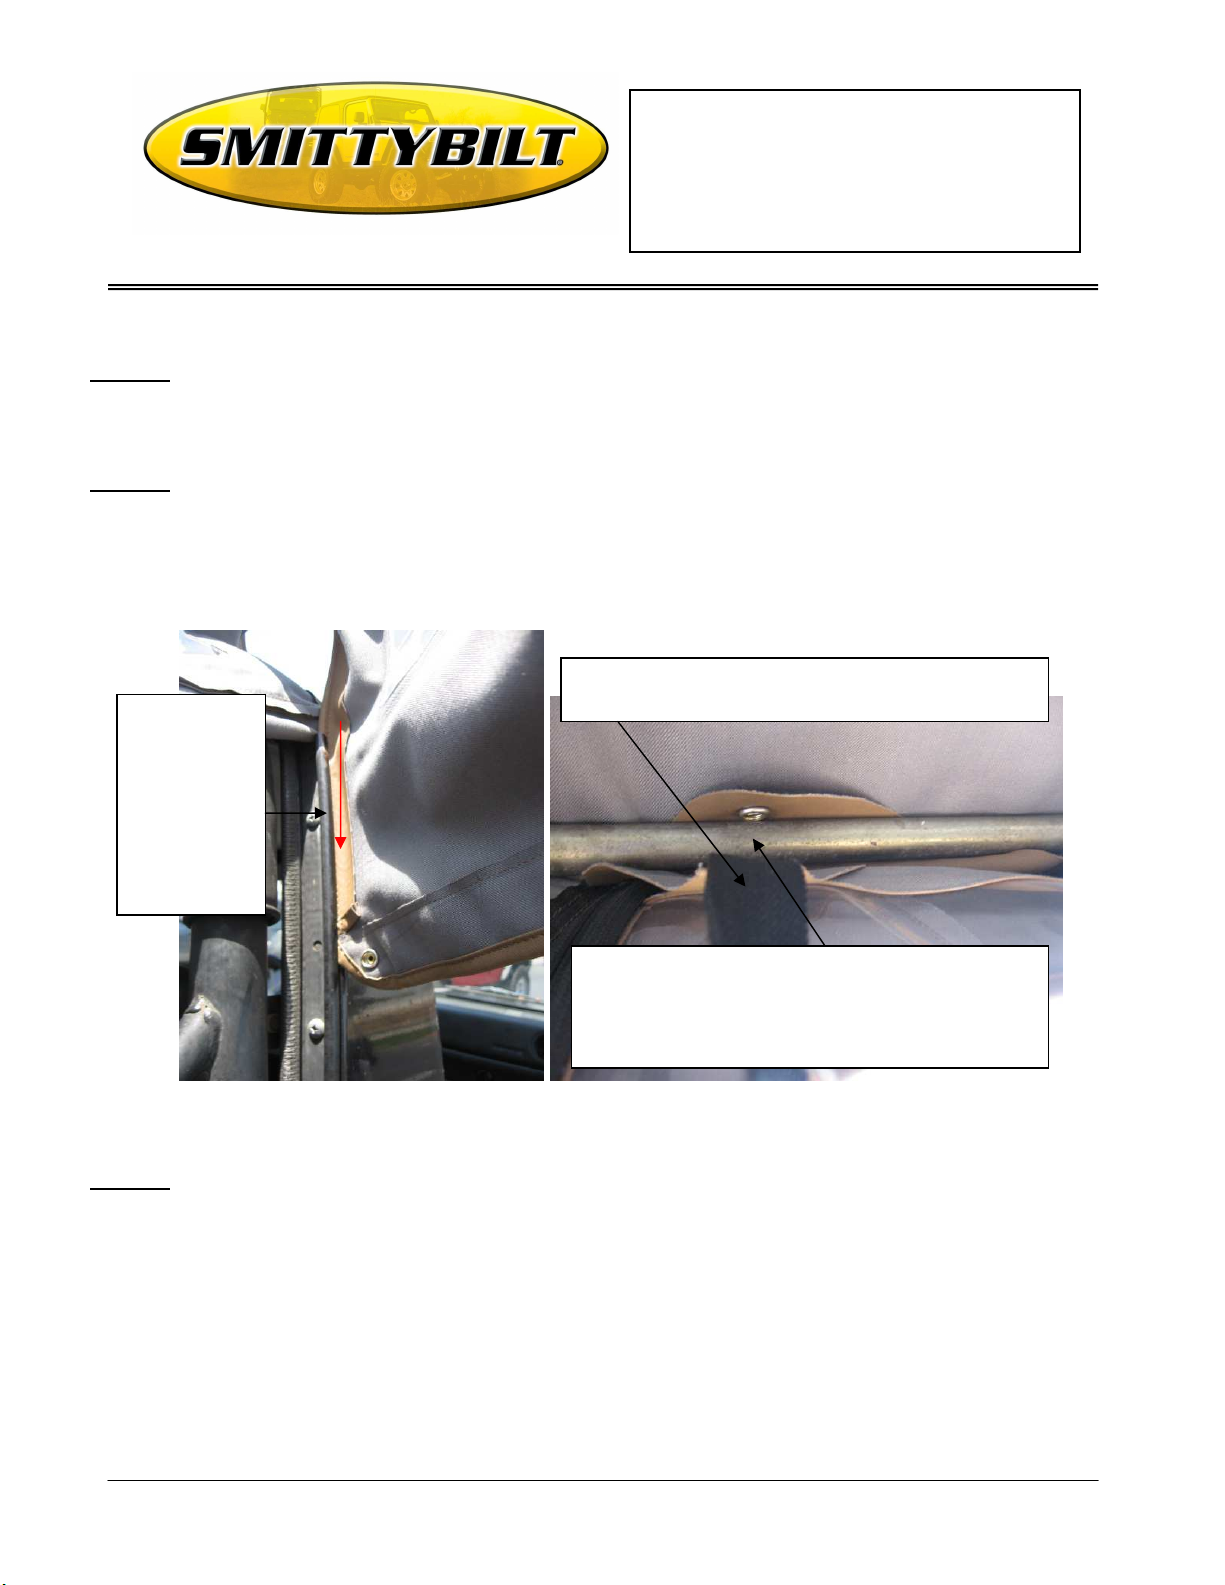
Step 5: Slide the front edges of the side windows down along the side channels on the
vehicle. (Fig C)
Step 6: With the top draped over the rear bow assembly, center it on the bow assembly. If your
bow does not have snaps already attached you will need to install the included snaps. Use
the snap flap as a guide to where the snaps should attach.(Fig D) Mark the location and
drill a hole into the bow using a 3/32 drill bit.(use caution when drilling) now install snap.
The tension straps sewn in each corner of the top
Slide the
front edges
of the side
windows
down along
the side
channels on
the vehicle
go under the bow assembly
Fold the snap flaps ( 3 total) over the bow to
indicate location for the included snaps. Mark the
location and drill a hole into the bow using a 3/32
drill bit.(use caution when drilling) now install snap
(Fig C) (Fig D)
Step 7: If the tension straps and brackets are not on your vehicle, install the two included
with top. They mount on the inside lip of body tub just to the outside of the tailgate.
(Fig E) Install by using the bracket as a template to mark the hole, then drill hole using
a 7/32” drill bit. Secure bracket with included screw and nut. Unfasten the Velcro at
the end of the newly installed tension strap and pull it up and slide it through the buckle
end of the tension straps on the top.(Fig D)Then pull tightly down and fasten Velcro back
together. (Do not pull excessively)
For Technical Support/Warranty Information please call 310-762-9944
Smittybilt, 400 West Artesia Blvd, Compton, CA 90220
Page 3

Installation Instructions
your vehicle
.
Replacement Top
86-94 Suzuki Samurai
WWW.SMITTYBILT.COM
The tension straps mount on the inside lip of body
tub just to the outside of the tailgate. Install by
using the bracket as a template to mark hole, then
drill hole using a 7/32” drill bit. Secure bracket
with included screw and nut.
(Fig E) (Fig F)
Step 8: Now fasten snaps along each side of the vehicle. (Fig F) You may need to pull, this top is
designed for a tight/snug fit.
Step 9: Fasten the rear snap-holes on the rear curtain over the studs on the rear of your vehicle.
(Fig G)
Fasten snaps along each side of the
vehicle. You may need to pull, this top
is designed for a tight/snug fit.
(Fig G) (Fig H)
Fasten the rear snap-holes on the rear
curtain over the studs on the rear of
For Technical Support/Warranty Information please call 310-762-9944
Smittybilt, 400 West Artesia Blvd, Compton, CA 90220
Page 4

Installation Instructions
Replacement Top
86-94 Suzuki Samurai
WWW.SMITTYBILT.COM
Step 10: Make sure front over head door flaps are secured. (Fig B) Installation is now complete.
(Fig I)
Note: If temperatures are not at the recommended degree you can try lying top on vehicle hood (not
running) to warm top. Or using Extreme caution; a low heat type of heat gun.
Care and Maintenance
-TOP, The top should only be washed with soap and warm water. Do not use an abrasive cleaner or rag. Especially
on the windows.
- SNAPS, Keep the snaps (if applicable) clean and a silicone lubrication will help prevent them from sticking
together.
-SEAMS, If seeps happen to occur in seams they can be treated with a Scotchguard type of spray. Patches can also
be applied
on the inside of the top in the case of a rip or tear.
-Zippers, Keep zippers clean and apply a silicone lubricant to them to help prevent damaged to them and keep
them operating
smoothly. Zipper heads can also be repaired if they happen to spread apart by using pliers to gently squeeze the head
back
together
LIMITED WARRANTY
Smittybilt (The Company) warrants to the original purchaser of this product that should the product or any part thereof, under
normal use and conditions, be proven defective in material or workmanship within the warranty period of 1 year from the date of
purchase, such defect(s) will be repaired or replaced (At the Company’s option) without charge for parts or labor. To obtain repair or
replacement within the terms of the warranty, the product is to be delivered with proof of warranty coverage ( e.g. dated bill of sale,
receipt), specification of defect, freight pre-paid with Returns Good Authorization Number from Smittybilt to place of purchase. Items
returned to Smittybilt Automotive without an Returns Authorization Number will be refused and returned to sender at the senders
expense.
This warranty does not apply to any product or part thereof which, in the opinion of the Company, has suffered or been damaged
through altercation, improper installation, mishandling, misuse, neglect accident or acts of nature. THE EXTENT OF THE
COMPANY’S LIABILITY UNDER THIS WARRANTY IS LIMITED TO THE REPAIR OR REPLACEMENT PROVIDED ABOVE AND,
IN NO EVENT, SHALL THE COMPANY’S LIABILITY EXCEED THE PURCHASE PRICE PAID BY THE PURCHASER FOR THIS
PRODUCT.
This warranty is in lieu of all expressed warranties and liabilities. ANY IMPLIED WARRANTIES, INCLUDING ANY IMPLIED
WARRANTY OF MERCHANTABILITY SHALL BE LIMITED TO THE DURATION OF THIS WRITTEN WARRANTY. ANY ACTION
FOR BREACH OF ANY WARRANTY HEREUNDER INCLUDING ANY IMPLIED WARRANTY OF MERCHANTABILITY MUST BE
BROUGHTH WITHIN A PERIOD OF 90 DAYS FROM DATE OF ORIGINAL PURCHASE.IN NO CASE SHALL THE COMPANY BE
LIABLE FOR ANY CONSEQUENTIAL OR INCIDENTAL DAMAGES FOR BREACH OF THIS OR ANY OTHER WARRANTY,
EXPRESSED OR IMPLIED,WHATSOEVER. No person or representative is authorized to assume for the company any liability other
than expressed herein in connection with the sale of this product. Some states do not allow limitations on how long an implied
warranty lasts or the exclusion or limitation of incidental or consequential damage, therefore above limitations may not apply to you.
This warranty gives the purchaser specific legal rights. The purchaser may have additional rights, which vary from state to state.
Some states do not allow limitations on how long an implied warranty lasts or the exclusion or limitation of incidental or
consequential damage, therefore above limitations may not apply to you. This warranty gives the purchaser specific legal rights. The
purchaser may have additional rights, which vary from state to state.
For Technical Support/Warranty Information please call 310-762-9944
Smittybilt, 400 West Artesia Blvd, Compton, CA 90220
 Loading...