

Page 1
Installation Instructions
1
NOTE: Carefully read the entire instructions thoroughly before attempting to install this prod
uct.
G.E.A.R. Overhead Console
07-10 Wrangler/Unlimited
WWW.SMITTYBILT.COM
(Part # 56660xx)
Parts Included Qty Parts Included Qty
Overhead Main Frame
Front Adapter Bracket 1
Windshield Frame Nut-Plate 1
Sport Bar Clamp Rings 2
GEAR cover with pouches 2
Footman Loop 1
NOTE: It will be necessary to have the soft top folded down or hardtop removed when installing this
product.
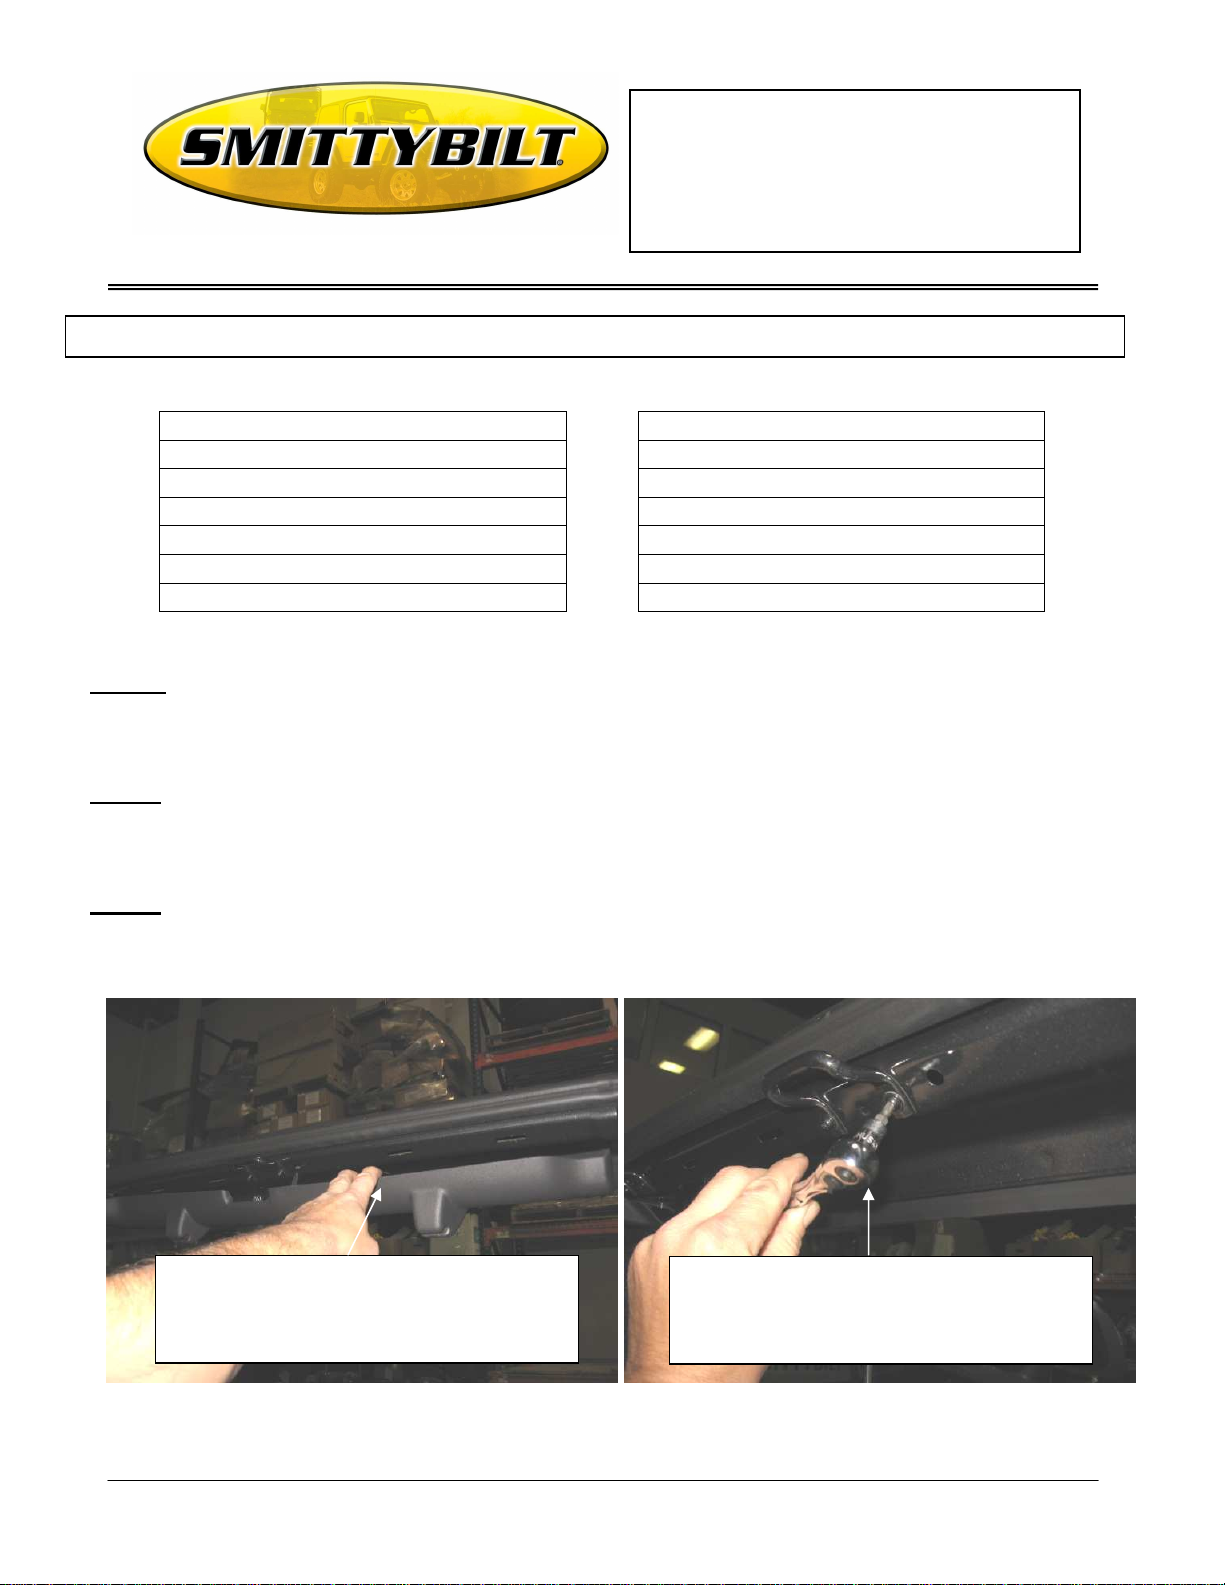
Step 1: Carefully remove top center windshield interior trim piece. (Fig A) Note: pull carefully or use some
type of panel puller. (Fig A)
Step 2: Remove center footman loop. On some models it can be un-bolted using a #25 torx on others
you will need to drill out the rivets using a drill and 1/8” drill bit. (Fig B) Note: Use caution when
drilling. Drill the hole out using a ¼” drill bit.
10x25mm Hex Bolt 1
10mm Flat Washer 2
10mm Hex Nut 1
Allen Head Machine Screw 2
#10 x ½” Machine Screw 2
Cap Nut 2
Carefully remove top center windshield interior
trim. Note: pull carefully or use some type of
panel puller.
(Fig A) (Fig B)
Smittybilt, 400 West Artesia Blvd, Compton, CA 90220
Remove center footman loop. On some models
it can be un-bolted using a #25 torx on others
you will need to drill out the rivets using a drill
and 1/8” drill bit. Use caution when drilling.
Page 2
Installation Instructions
not tighten compl
etely at this time.
slot into
the windshield
frame.
G.E.A.R. Overhead Console
07-10 Wrangler/Unlimited
WWW.SMITTYBILT.COM
(Part # 56660xx)
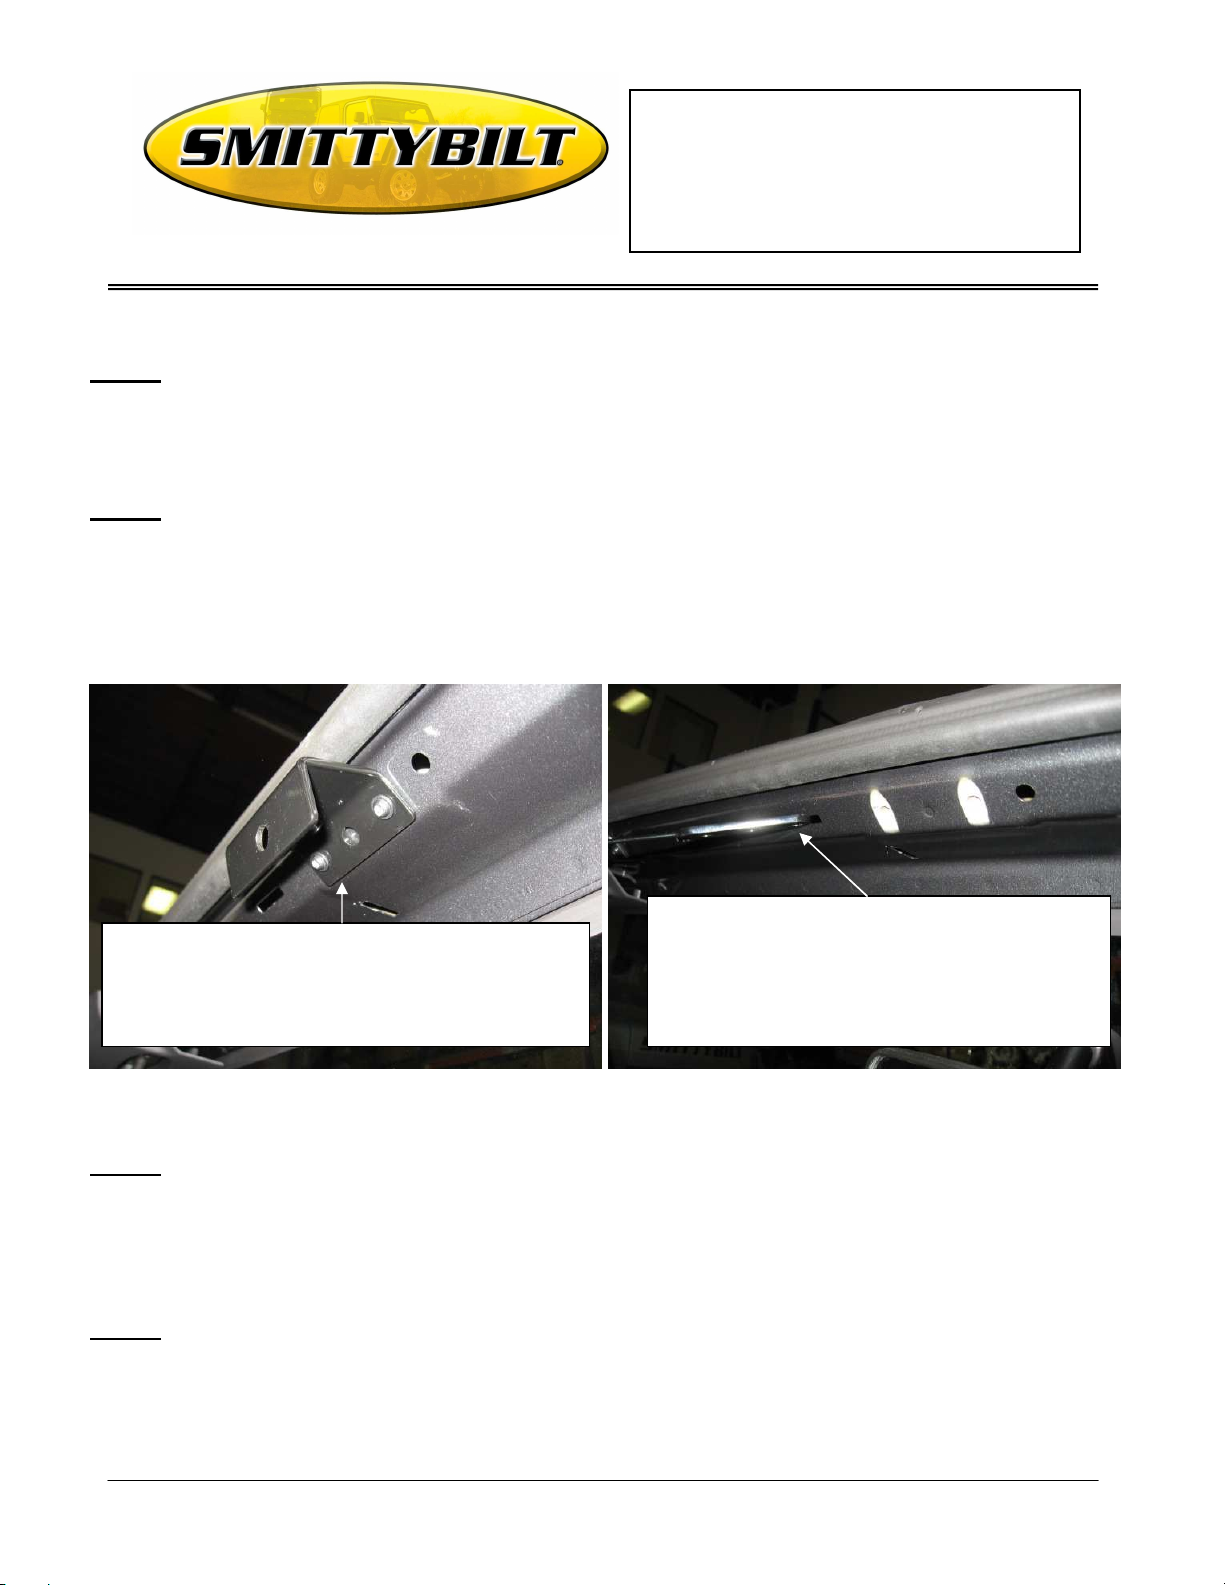
Step 3: If your footman loop was bolted on, attach the front adapter bracket to the same holes using the
factory bolts you previously removed. Do not tighten completely at this time. (Fig C) Proceed
to Step 7 now.
Step 4: If your footman loop was riveted on you will need to use the windshield frame nut plate. To the
left of where the footman loop was mounted there is a slot in the windshield frame. Simply hold
the rod connected to the nut plate and slide the nut plate through the slot into the windshield
frame. (Fig D)
To the left of where the footman loop was
If your footman loop was bolted on, attach the
front adapter bracket to the same holes using
the factory bolts you previously removed. Do
(Fig C) (Fig D)
Step 5: Once you have inserted the nut plate into the windshield frame slide it down until the two
threaded holes in the nut plate line up with the two holes in the windshield frame that the footman
loop was bolted too. (Fig E) It may be necessary to bend the rod on the nut plate in order to get the
correct and easiest angle to line the holes up.
Step 6: When the holes are lined up, you may now attach the front windshield adapter bracket to the
windshield frame using the included allen head machine screws as shown in Fig C.
Smittybilt, 400 West Artesia Blvd, Compton, CA 90220
mounted there is a slot in the windshield
frame. Simply hold the rod connected to the
nut plate and slide the nut plate through the
Page 3

Installation Instructions
the plate
. Do not fully tighten at
this time.
G.E.A.R. Overhead Console
07-10 Wrangler/Unlimited
WWW.SMITTYBILT.COM
(Part # 56660xx)
Once you have insert the nut plate into the windshield
frame slide it down until the two threaded holes in the
nut plate line up with the two holes in the windshield
frame that the footman loop was bolted too. It may be
necessary to bend the rod on the nut plate in order to
get the correct and easiest angle to line the holes up.
(Fig E) (Fig F)
Step 7: Install the main plate now by first setting the back portion on top of your center sport bar. (Fig F)
Then attach the front portion to the previously installed windshield adapter bracket with included
10 mm hardware. (Fig G) Do not tighten completely at this time.
Install the main plate now by first setting the back
portion on top of your center sport bar.
Attach the front portion to the
previously installed windshield adapter
bracket with included 10 mm hardware.
Do not tighten completely at this time.
(Fig G) (Fig H)
Step 8: Install the 2 sport bar clamp rings on the rear section. Do so, by sliding them around the sport bar.
(Between the sound bar and sport bar) Line them up with the notch in the plate. Do not fully tighten
at this time. (Fig H)
Install the 2 hose clamps on the rear section. (1 per side)
Do so, by sliding them around the sport bar (between the
sound bar and sport bar) Line them up with the notch in
Smittybilt, 400 West Artesia Blvd, Compton, CA 90220
Page 4

Installation Instructions
G.E.A.R. Overhead Console
07-10 Wrangler/Unlimited
WWW.SMITTYBILT.COM
(Part # 56660xx)
Step 9: Tighten the front windshield adapter bracket to the windshield completely at this time. (Fig C)
Step 10: Now re-install the front windshield trim piece you removed in Step 1. (Fig I)
Now re-install the front windshield trim piece you
previously removed. Use care when re-installing, it is a
snug fit.
(Fig I) (Fig J)
Step 11: Make sure main plate is centered and or parallel with the vehicle and then proceed to tighten the
front bolt and rear sport bar clamp rings completely.
Step 12: Now place the cover over your frame and secure by fastening the top Velcro straps (Fig J, K)
(Fig K) (Fig L)
Smittybilt, 400 West Artesia Blvd, Compton, CA 90220
Page 5

Installation Instructions
G.E.A.R. Overhead Console
07-10 Wrangler/Unlimited
WWW.SMITTYBILT.COM
(Part # 56660xx)
Step 13: The pouches can be installed in a variety of places, by sliding the pouch straps through
the webbing on the overhead (Fig L) then fold the strap back up and place it through the
webbing on the back of the pouch.(Fig M) Then slide the pouch strap through the next row
of webbing on the overhead (Fig N) and then secure by fastening the snaps. (Fig O)
(Fig M) (Fig N)
(Fig O) (Fig P)
Step 14: Installation is now complete. (Fig P)
Make sure all pouches are secure and do not obstruct view before operating vehicle.
Smittybilt, 400 West Artesia Blvd, Compton, CA 90220
Page 6

Installation Instructions
G.E.A.R. Overhead Console
07-10 Wrangler/Unlimited
WWW.SMITTYBILT.COM
(Part # 56660xx)
Step 15: (If Applicable) If you’re using a standard top/bikini and want to utilize the center strap, attach the
included footman loop to the overhead. First determine the best location; depending on the style it
may in the front or the rear. Once you have determined the best location, hold the footman loop up
and mark the two holes. Then drill the two holes using a ¼ drill bit and attach with included screw
and cap-nut. You can either install it over the G.E.A.R. cover or drill through both the cover and
frame, or drill through the frame and carefully make a small cut in the cover to expose the footman
loop. (Fig Q, R)
(Fig Q) (Fig R)
Smittybilt (The Company) warrants to the original purchaser of this product that should the product or any part thereof, under normal use and
conditions, be proven defective in material or workmanship within the warranty period of 90 days from the date of purchase, such defect(s) will be
repaired or replaced (At the Company’s option) without charge for parts or labor. To obtain repair or replacement within the terms of the warranty,
the product is to be delivered with proof of warranty coverage ( e.g. dated bill of sale, receipt), specification of defect, freight pre-paid with
Returns Good Authorization Number from Smittybilt to place of purchase. Items returned to Smittybilt without a Returns Authorization Number
will be refused and returned to sender at the senders’ expense.
This warranty does not apply to any product or part thereof which, in the opinion of the Company, has suffered or been damaged through
altercation, improper installation, mishandling, misuse, neglect accident or acts of nature. THE EXTENT OF THE COMPANY’S LIABILITY
UNDER THIS WARRANTY IS LIMITED TO THE REPAIR OR REPLACEMENT PROVIDED ABOVE AND, IN NO EVENT,
SHALL THE COMPANY’S LIABILITY EXCEED THE PURCHASE PRICE PAID BY THE PURCHASER FOR THIS PRODUCT.
This warranty is in lieu of all expressed warranties and liabilities. ANY IMPLIED WARRANTIES, INCLUDING ANY IMPLIED
WARRANTY OF MERCHANTABILITY SHALL BE LIMITED TO THE DURATION OF THIS WRITTEN WARRANTY. ANY ACTION
FOR BREACH OF ANY WARRANTY HEREUNDER INCLUDING ANY IMPLIED WARRANTY OF MERCHANTABILITY MUST BE
BROUGHTH WITHIN A PERIOD OF 90 DAYS FROM DATE OF ORIGINAL PURCHASE.IN NO CASE SHALL THE COMPANY BE
LIABLE FOR ANY CONSEQUENTIAL OR INCIDENTAL DAMAGES FOR BREACH OF THIS OR ANY OTHER WARRANTY,
EXPRESSED OR IMPLIED,WHATSOEVER. No person or representative is authorized to assume for the company any liability other than
expressed herein in connection with the sale of this product. Some states do not allow limitations on how long an implied warranty lasts or the
exclusion or limitation of incidental or consequential damage, therefore above limitations may not apply to you. This warranty gives the purchaser
specific legal rights. The purchaser may have additional rights, which vary from state to state. Some states do not allow limitations on how long an
implied warranty lasts or the exclusion or limitation of incidental or consequential damage, herefore above limitations may not apply to you. This
warranty gives the purchaser specific legal rights. The purchaser may have additional rights, which vary from state to state.
Smittybilt, 400 West Artesia Blvd, Compton, CA 90220
LIMITED WARRANTY
 Loading...