

Page 1
Installation Instructions
NOTE:
Please read instructions entirely before installing this part.
G.E.A.R. Tailgate Cover
TJ (Part # 56622xx)
WWW.SMITTYBILT.COM
07-11 JK (Part # 56623xx)
Parts Included Qty Parts Included Qty
G.E.A.R. Tailgate Cover 1 Self-tapping Screw 10
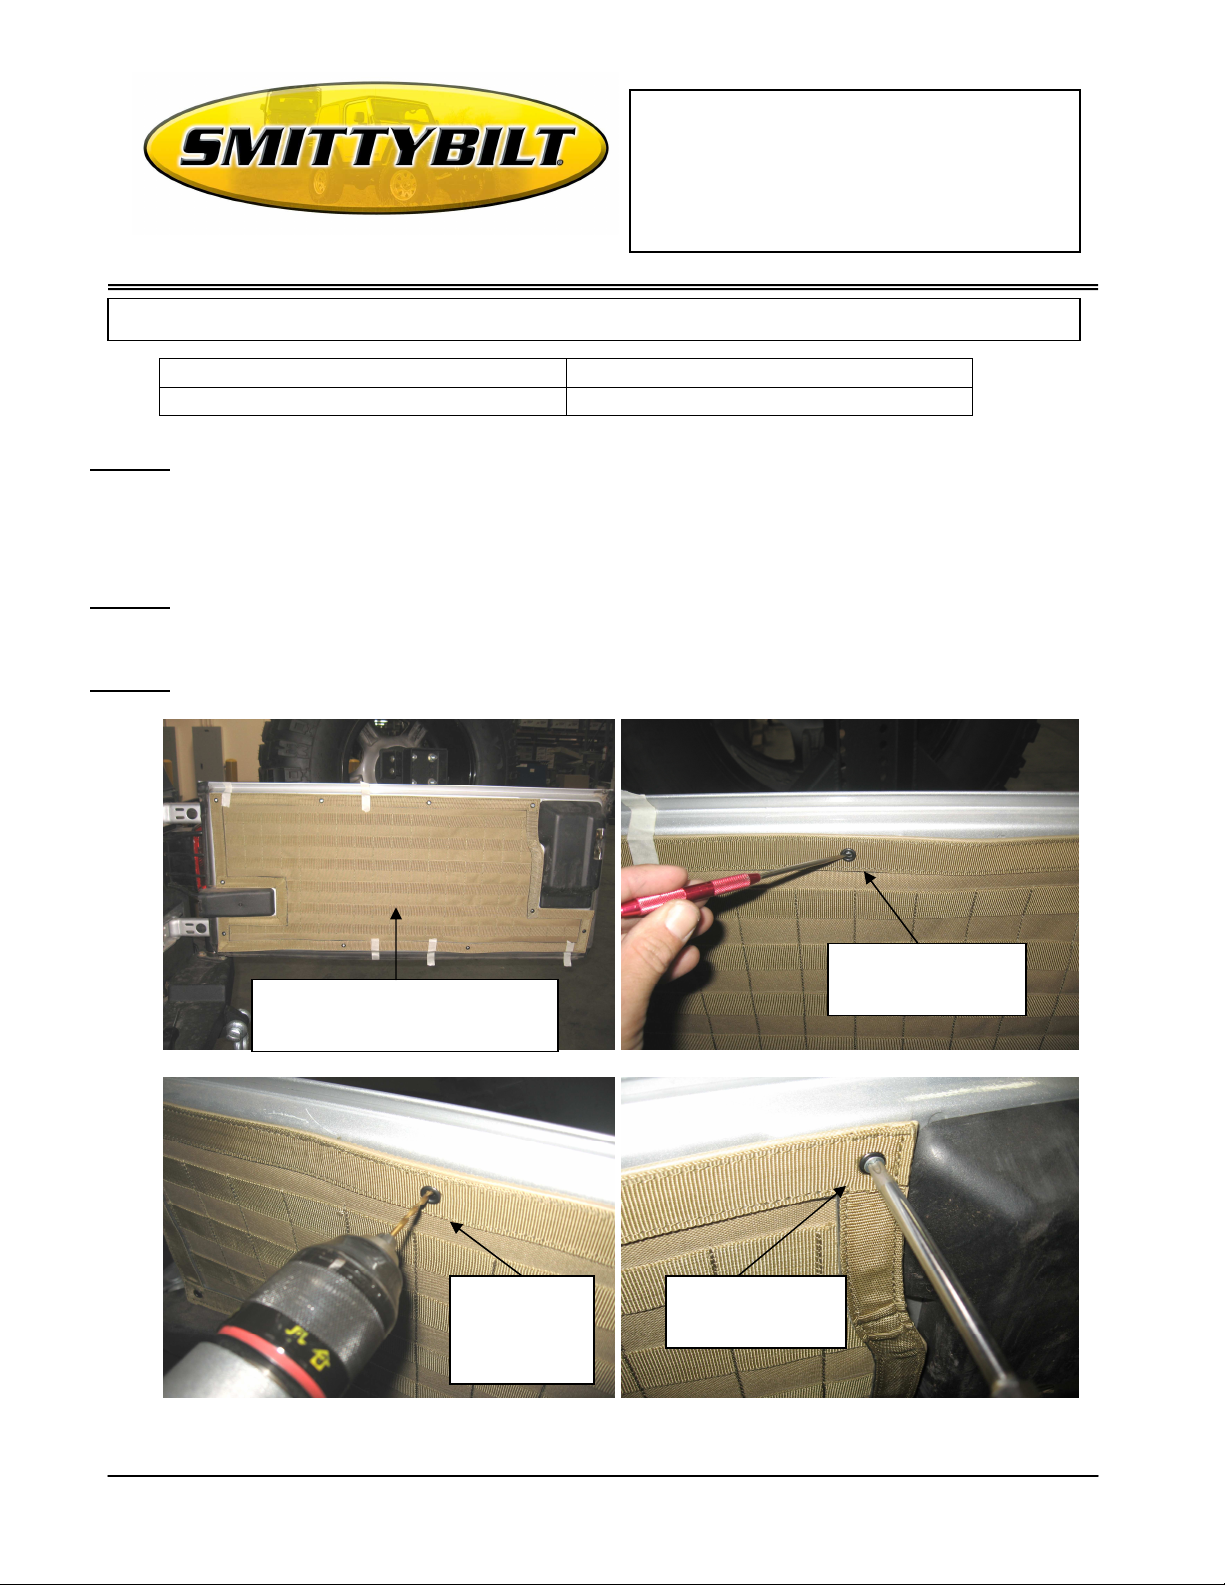
Step 1: Position tailgate cover on tailgate in the optimal location. Pull tight and either tape on,
or with assistance have someone hold it, then use a scribe to mark holes. (Fig A, B)
Note: On 2011 vehicles you will first need to remove the tailgate support bracket from
the tailgate using a #30 torx bit. (Fig E)
Step 2: Once all holes are marked set cover to the side and drill the marked holes using a 7/64”
dill bit. (Before drilling make sure there are no obstructions) Fig C
Step 3: Now install the included screws. (Make sure not to over-tighten) (Fig D)
Use a scribe to
Position tailgate cover on
tailgate in the optimal location
(Fig A) (Fig B
Drill the
marked
holes using
a 7/64” bit
(Fig C) (Fig D)
For Technical Support/Warranty Information please call 310-762-9944
Smittybilt, 400 West Artesia Blvd, Compton, CA 90220
Install the
included screws
mark holes.
Page 2
Installation Instructions
G.E.A.R. Tailgate Cover
TJ (Part # 56622xx)
WWW.SMITTYBILT.COM
07-11 JK (Part # 56623xx)
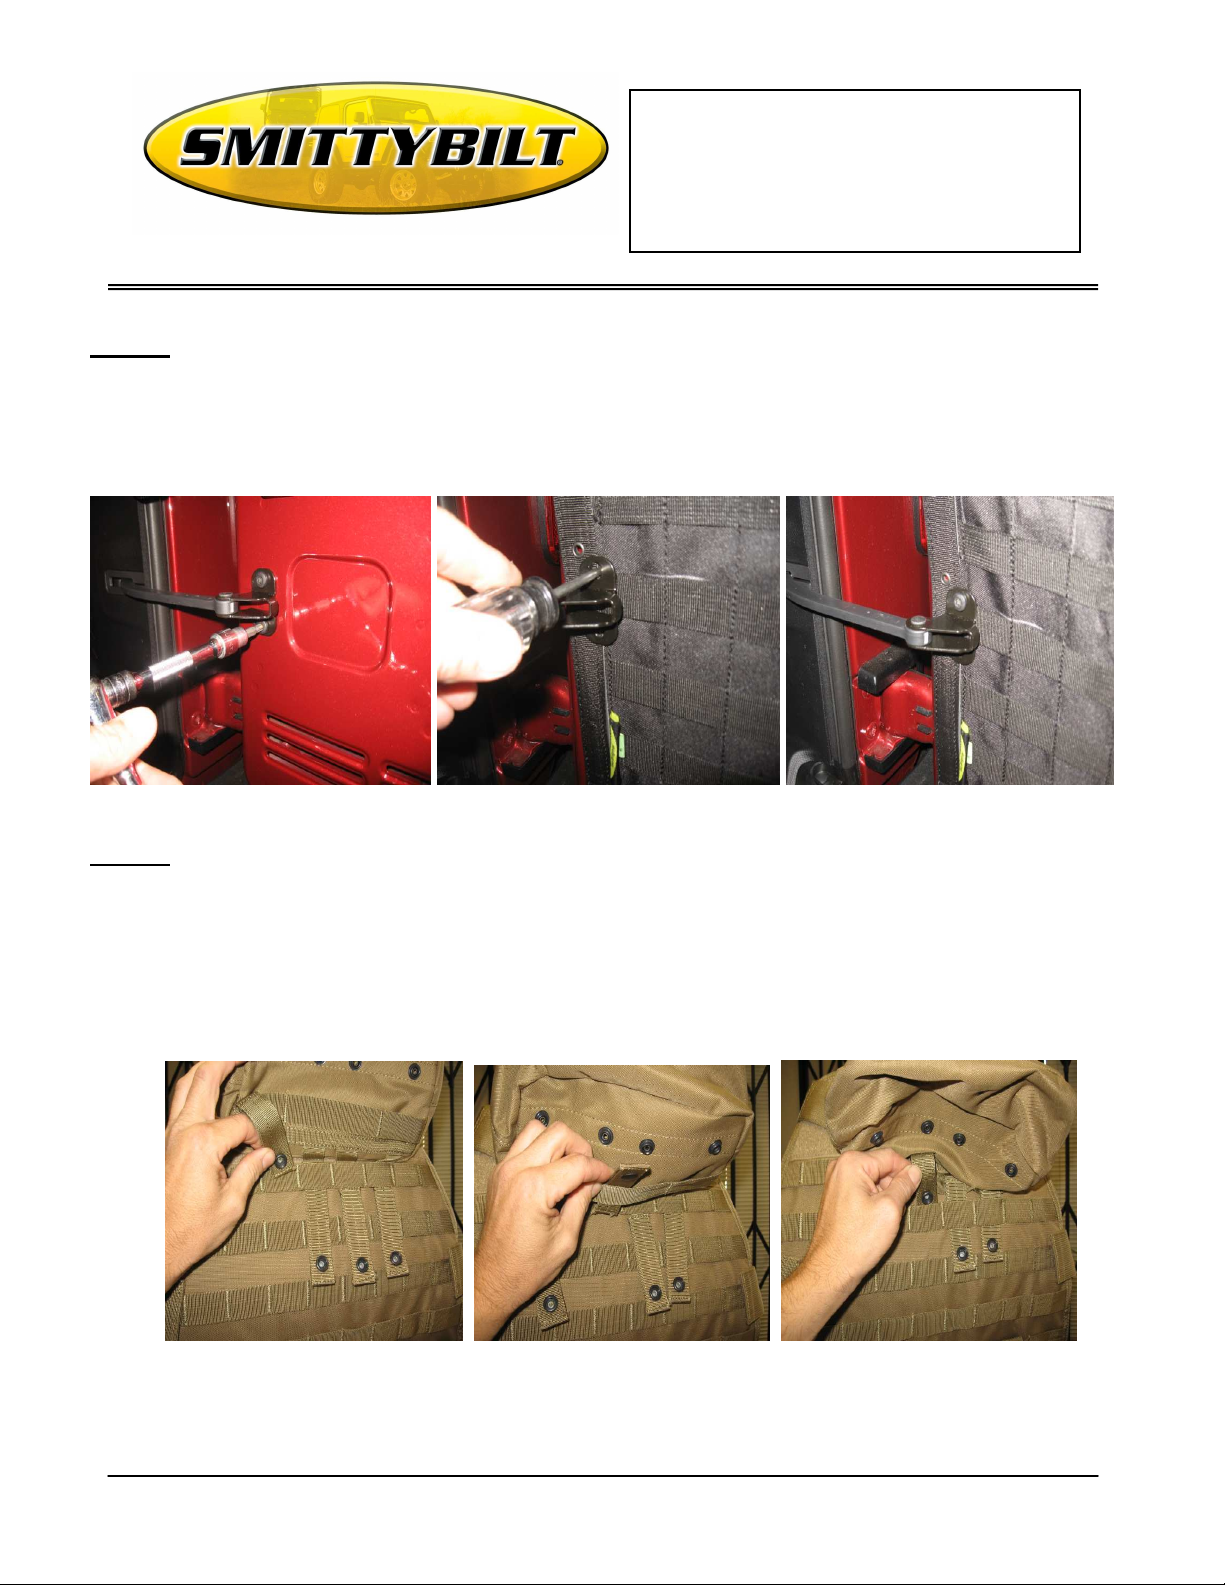
Step 4: (2011 JK Only) Fold the tailgate support bar bracket back over the GEAR cover and using
an Awl tool punch holes through the cover into the OEM holes for the bracket. (Fig F)
If you don’t have an Awl, you can carefully use a sharp blade to make a slit in the cover.
Now proceed to align the bracket over the cover and re-install the previously removed
bolts. (Fig G)
(Fig E) (Fig F) (Fig G)
Step 5: After all screws are installed now attach pouches to cover. After determining the best
location for the pouch, slide the pouch straps through the webbing in the cover. (Fig H)
Now fold the strap back up and place it through the webbing on the back of the pouch.
(Fig I) Then slide the pouch strap through the next row of webbing on the cover. (Fig J)
Depending on the size of the pouch and length of strap you may go through 2, 3 or more
rows of webbing on the cover. Finally secure by fastening snaps together. Installation
is now complete.
(Fig H) (Fig I) (Fig J)
For Technical Support/Warranty Information please call 310-762-9944
Smittybilt, 400 West Artesia Blvd, Compton, CA 90220
Page 3

Installation Instructions
G.E.A.R. Tailgate Cover
TJ (Part # 56622xx)
WWW.SMITTYBILT.COM
07-11 JK (Part # 56623xx)
TJ Version JK Version
Compliment your new GEAR tailgate unit with other Smittybilt GEAR products.
Overhead Console Door Gear Panels Gear Seat Covers
Limited Warranties
Smittybilt’s products are covered under the following limited warranties only. Note that the duration of the limited warranty differs according to the material and
finish of the product purchased. Subject to the duration and conditions of the limited warranty stated below, Smittybilt warrants to the original retail purchaser that
its products are free from defects in material and workmanship. All other warranties and representations express or implied, are hereby disclaimed, including fitness
for merchantability and buyer’s intended use or purpose. All parts are sold “AS IS” except for the limited warranties granted herein. Buyer assumes all risks as to
the selection, suitability and performance of all goods and products selected. This limited warranty does not cover damage or impairment in any part due to misuse,
improper installation, accident or contact with on-road or off-road hazards, product modification, improper or inadequate cleaning and/or maintenance. Smittybilt is
not responsible for items damaged during shipping. This warranty is not transferable from the original buyer. For the original Buyer to be eligible for the limited
warranty coverage, the Buyer must provide proof of purchase. Smittybilt strongly recommends returning the warranty registration card.
Customer’s remedy hereunder shall be limited only to repair or replacement (at Smittybilt’s option) of any defective part(s) returned to Smittybilt at customer’s
expense. The determination of whether or not a returned part is defective or subject to coverage under the limited warranties stated herein shall be made
Limited One (1) Year Limited Warranty on Soft/Cut & Sew Products -
Smittybilt soft/cut & sew products carry the foregoing limited repair or replacement warranty for a period of (1) one-year against workmanship and defects in the
material from the date of purchase.
To assure product quality, Smittybilt reserves the right to change product design, material, specification and finishes without prior notice to customers. This limited
warranty gives you specific legal rights and you may also have other rights, which may vary from state to state. Some states do not allow limitations on how long an
implied warranty lasts, so the above limitations may not apply as to you. Also, some states do not allow the exclusion or limitation of incidental or consequential
damages, so the above limitations or exclusions may not apply to you. Smittybilt reserves the right to discontinue product lines and substitute products, or provide
other remedies than those listed in this limited warranty for those discontinued products.
For Technical Support/Warranty Information please call 310-762-9944
Smittybilt, 400 West Artesia Blvd, Compton, CA 90220
 Loading...