

Page 1
Installation Instructions
Dual Battery Tray (Part # 2800)
97-06 Jeep Wranglers
STEP 1:
STEP 2:
NOTE: Carefully read entire instructions thoroughly before attempting to install this part.
This Dual Battery Tray only accommodates OPTIMA brand batteries. It is recommended to
have the wiring portion of this product be done by a certified mechanic/installer. Use caution
and care while working with batteries and electrical components.
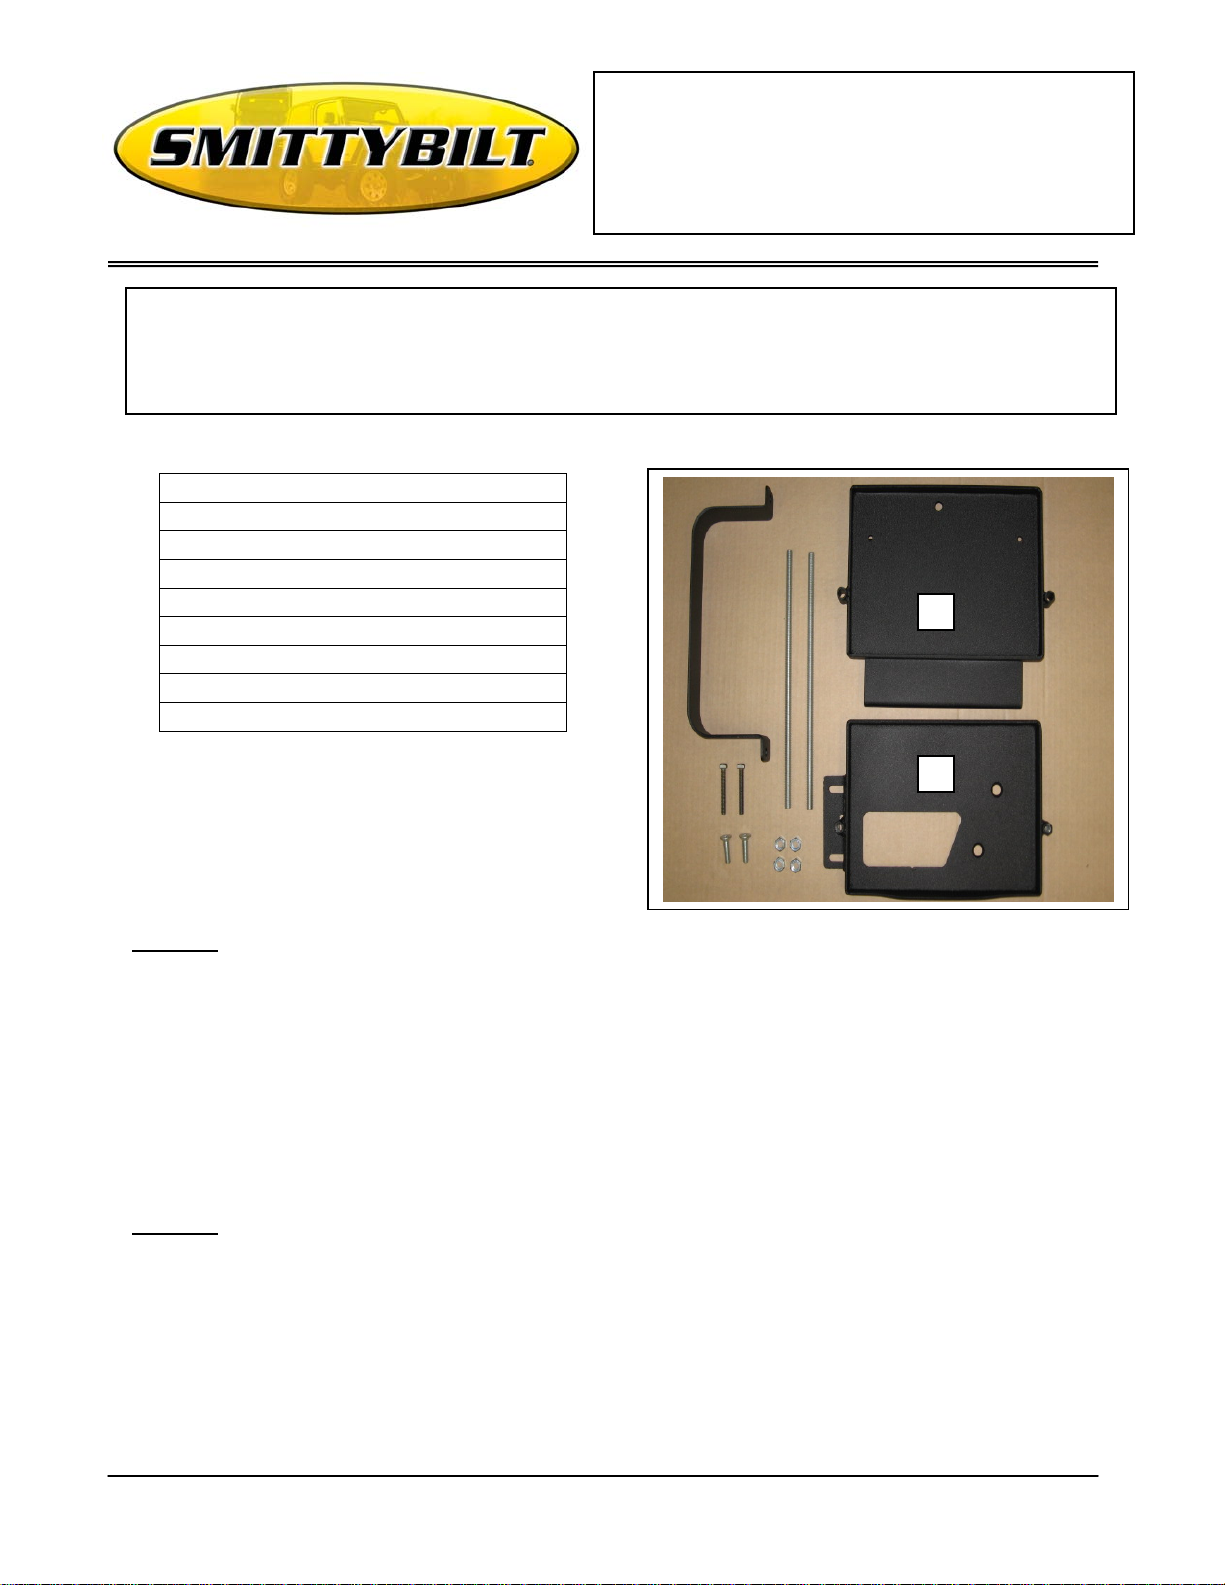
Parts Included Qty
Middle Tray (A) 1
Lower Tray (B) 1
Upper “U” Clamp 1
3/8”- 16 Nuts 4
3/8” x 11 “Threaded Rods 2
M8 x 25mm counter sunk bolt 2
1/4” x 1 ¾” bolt 2
• Remove the factory/existing battery by first removing the terminals from the battery.
CAUTION: Do not let terminals/cables come into contact with any metallic parts.
• Remove the factory plastic hold down clamp on the front bottom portion of the battery.
• Remove the battery from the vehicle.
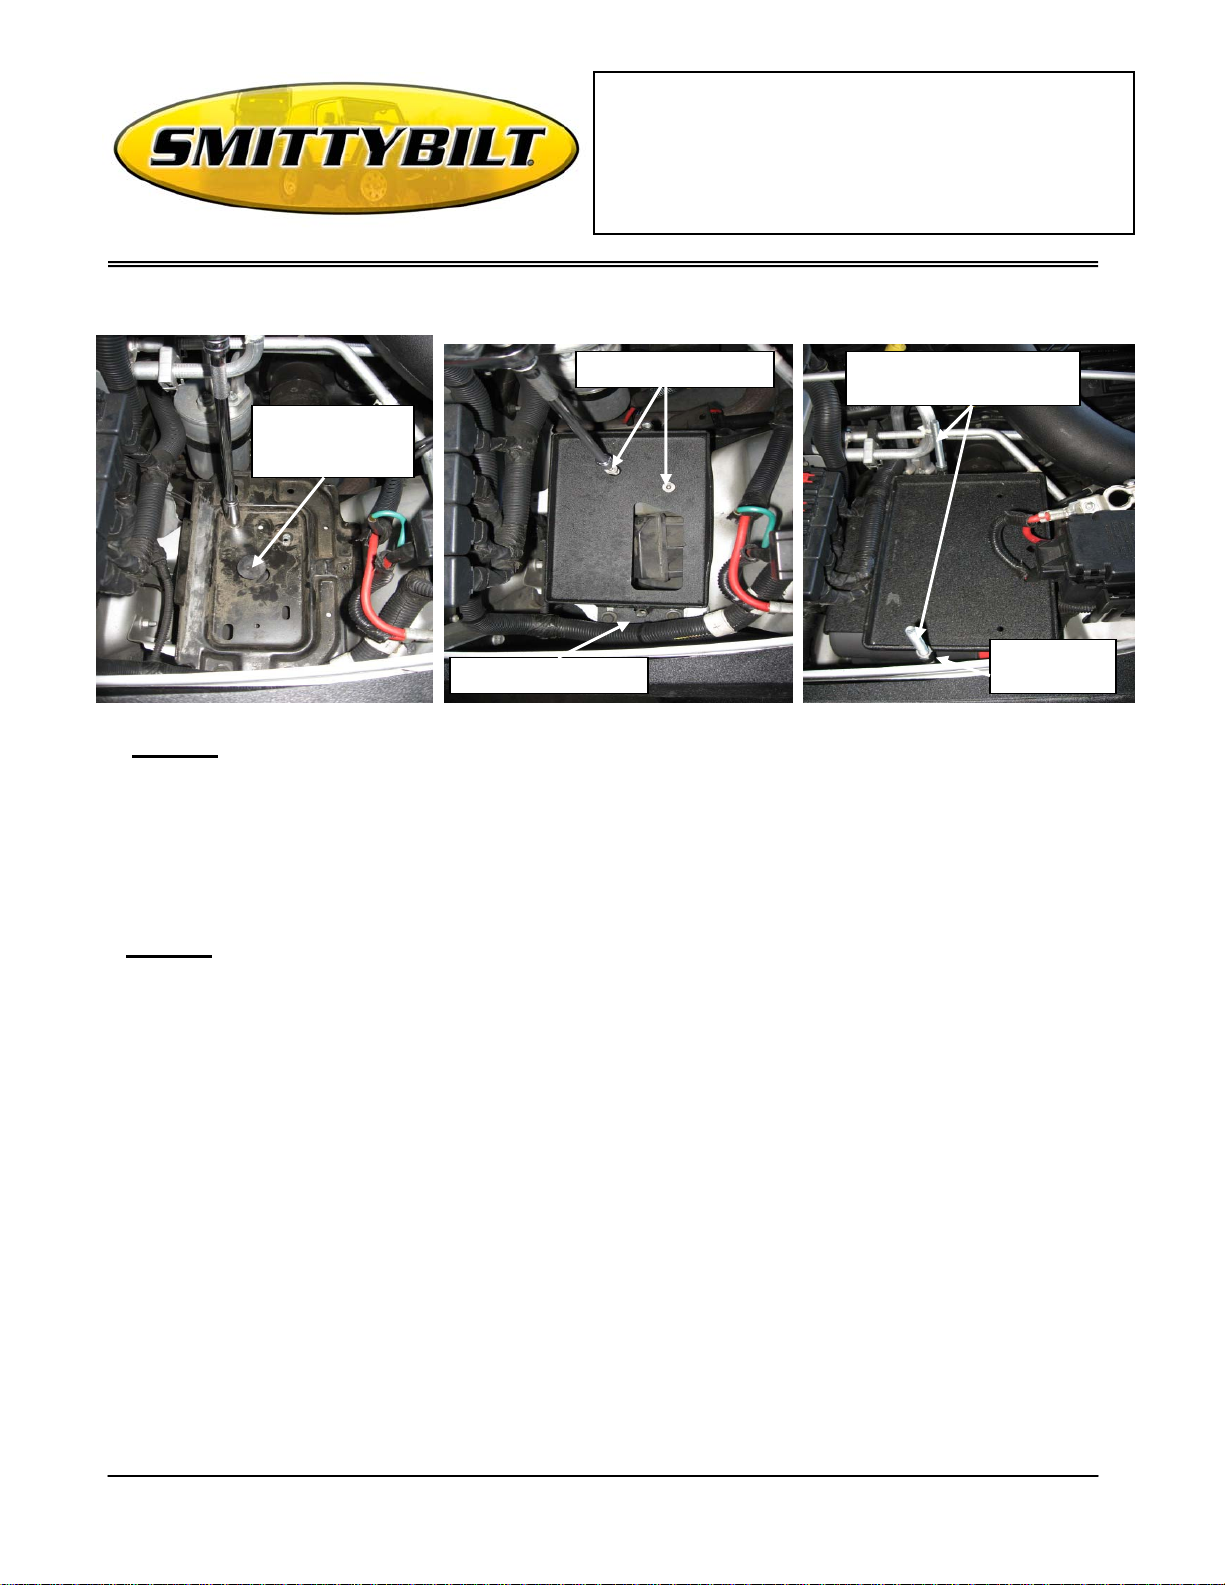
• You may now remove the factory battery tray and unclip the battery temperature sending
unit. (Provisions will need to be made for the sensor in order to avoid the check engine light
from coming on.) Fig A.
• Install the lower battery tray using two of the original tray fasteners on the left (outside) of
the bracket.
• Use the two provided counter-sunk bolts to secure the right (inside) of the bracket. Fig B.
• NOTE: the factory nut-clips can be moved slightly to help align the holes in the bracket if
needed.
A
B
For Technical Support/Warranty Information please call 310-762-9944
Smittybilt, 400 West Artesia Blvd, Compton, CA 90220
Page 2
Installation Instructions
Dual Battery Tray (Part # 2800)
97-06 Jeep Wranglers
Use supplied bolts here
Disconnect battery
temperature sending
unit.
Re-use factory bolts here.
Slide rods through top hole and
thread into bottom holes.
Secure tray
with hex-nuts
(Fig A) (Fig B) (Fig C)
STEP 3:
• Install the first battery with the terminals down and pointing towards the front of the vehicle.
• Place the middle tray on top of the battery, making sure it fits snug.
• Slide the threaded rods through the holes in the middle plate and thread into the bottom
plate.
• Install and thread hex nuts down the threaded rods to secure the middle tray down. Do not
over-tighten them; this may cause damage to the battery. Fig C
STEP 4:
• Now place the second battery on top of the middle tray.
• Place the upper clamp over the battery and lineup the holes in it with the previously installed
threaded rods.
• Secure clamp with hex nuts, again taking caution not to tighten too much in order to prevent
damage to the battery. Fig D, E, F.
For Technical Support/Warranty Information please call 310-762-9944
Smittybilt, 400 West Artesia Blvd, Compton, CA 90220
Page 3

Installation Instructions
Dual Battery Tray (Part # 2800)
97-06 Jeep Wranglers
Fig D Fig E Fig F
Install top
bracket over
battery onto
threaded rods
Secure top
bracket with
hex-nuts
STEP 5:
• On later model TJ’s it may be necessary to move the PCM box forward slightly by removing
the existing rivets, then moving the box and reinstalling new rivets. Fig G.
• Check to make sure NO wiring or air conditioning lines are in contact with the tray. Fig H
• Installation of the battery tray is now complete.
• To complete the wiring portion of this set-up it is recommended to have it done by an
automotive electrical specialist.
The PCM box may need to be
moved forward on some models
Make sure no
wires or lines are
making contact
with the tray.
(Fig G) (Fig H)
WARRANTY
Smittybilt (The Company) warrants to the original purchaser of this product that should the product or any part thereof, under normal use and conditions, be proven
defective in material or workmanship within the warranty period of 90 DAYS from the date of purchase, such defect(s) will be repaired or replaced (At the
Company’s option) without charge for parts or labor. To obtain repair or replacement within the term s of the warr anty, the product is to be delivered with proof of
For Technical Support/Warranty Information please call 310-762-9944
Smittybilt, 400 West Artesia Blvd, Compton, CA 90220
Page 4

Installation Instructions
Dual Battery Tray (Part # 2800)
97-06 Jeep Wranglers
warranty coverage ( e.g. dated bill of sale, receipt), specification of defect, freight pre-paid with Returns Good Authorization Number from Smittybilt to place of
purchase. Items returned to Smittybilt Automotive without an Returns Authorization Number will be refused and returned to sender at the senders expense.
This warranty does not apply to any product or part thereof which, in the opinion of the Company, has suffered or been dama ged through altercation, improper
installation, mishandling, misuse, neglect accident or acts of nature. THE EXTENT OF THE COMPANY’S LIABILITY UNDER THIS WARRANTY IS
LIMITED TO THE REPAIR OR REPLACEMENT PROVIDED ABOVE AND, IN NO EVENT, SHALL THE COMPANY’S LIABILITY EXCEED THE
PURCHASE PRICE PAID BY THE PURCHASER FOR THIS PRODUCT.
This warranty is in lieu of all expressed warranties and liabilities. ANY IMPLIED WARRANTIES, INCLUDING ANY IMPLIED WARRANTY OF
MERCHANTABILITY SHALL BE LIMITED TO THE DURATION OF THIS WRITTEN WARRANTY. ANY ACTION FOR BREACH OF ANY WARRANTY
HEREUNDER INCLUDING ANY IMPLIED WARRANTY OF MERCHANTABILITY MUST BE BROUGHTH WITHIN A PERIOD OF 90 DAYS FROM
DATE OF ORIGINAL PURCHASE.IN NO CASE SHALL THE COMPANY BE LIABLE FOR ANY CONSEQUENTIAL OR INCIDENTAL DAMAGES FOR
BREACH OF THIS OR ANY OTHER WARRANTY, EXPRESSED OR IMPLIED,WHATSOEVER. No person or representative is authorized to assume for the
company any liability other than expressed herein in connection with the sale of this product. Some states do not allow limitations on how long an implied warranty
lasts or the exclusion or limitation of incidental or consequential damage, therefore above limitations may not apply to you. This warranty gives the purchaser
specific legal rights. The purchaser may have additional rights, which vary from state to state.
Some states do not allow limitations on how long an implied warranty lasts or the exclusion or limitation of incidental or consequential damage, therefore above
limitations may not apply to you. This warranty gives the purchaser specific legal rights. The purchaser may have additional rights, which vary from state to state.
For Technical Support/Warranty Information please call 310-762-9944
Smittybilt, 400 West Artesia Blvd, Compton, CA 90220
 Loading...