

Page 1
Installation Instructions
p
6” Fender Flares (#17191)
1987-1995 Jee
Included in this Kit: (2) Front Flares (2) Rear Flares (2) Mud Guard
Hardware Bag: (28) Snap bases, (28) Snap Covers, (40) Rubbe r Spacers,(4) #8 x 1-1/2” Screw
(28) #12 x 1-1/4” Screw (20’) Rubber Fender Trim
Prior to installation: Pre-fit all flares before you attempt to install. If you plan on painting your
Fender Flares it must be done prior to installation. All surfaces must be cleaned using a scouring pad
such as Scotch Brite and prepped using an adhesion promoter. Follow all specifications required by the
paint manufacturer. As you remove factory parts set them aside safely for later use.
Installation Instructions
Step One: Remove the Factory Flares from vehicle
1. Start with the rear fender flare.
2. Locate and remove the bolts holding the factory flares on the vehicle.
3. Repeat on the other side of vehicle.
4. Proceed to the front and remove the marker lights on the factory flare. Set aside for later
use. Locate and remove the bolts holding the factory flare on the vehicle.
5. Repeat on the other side of vehicle.
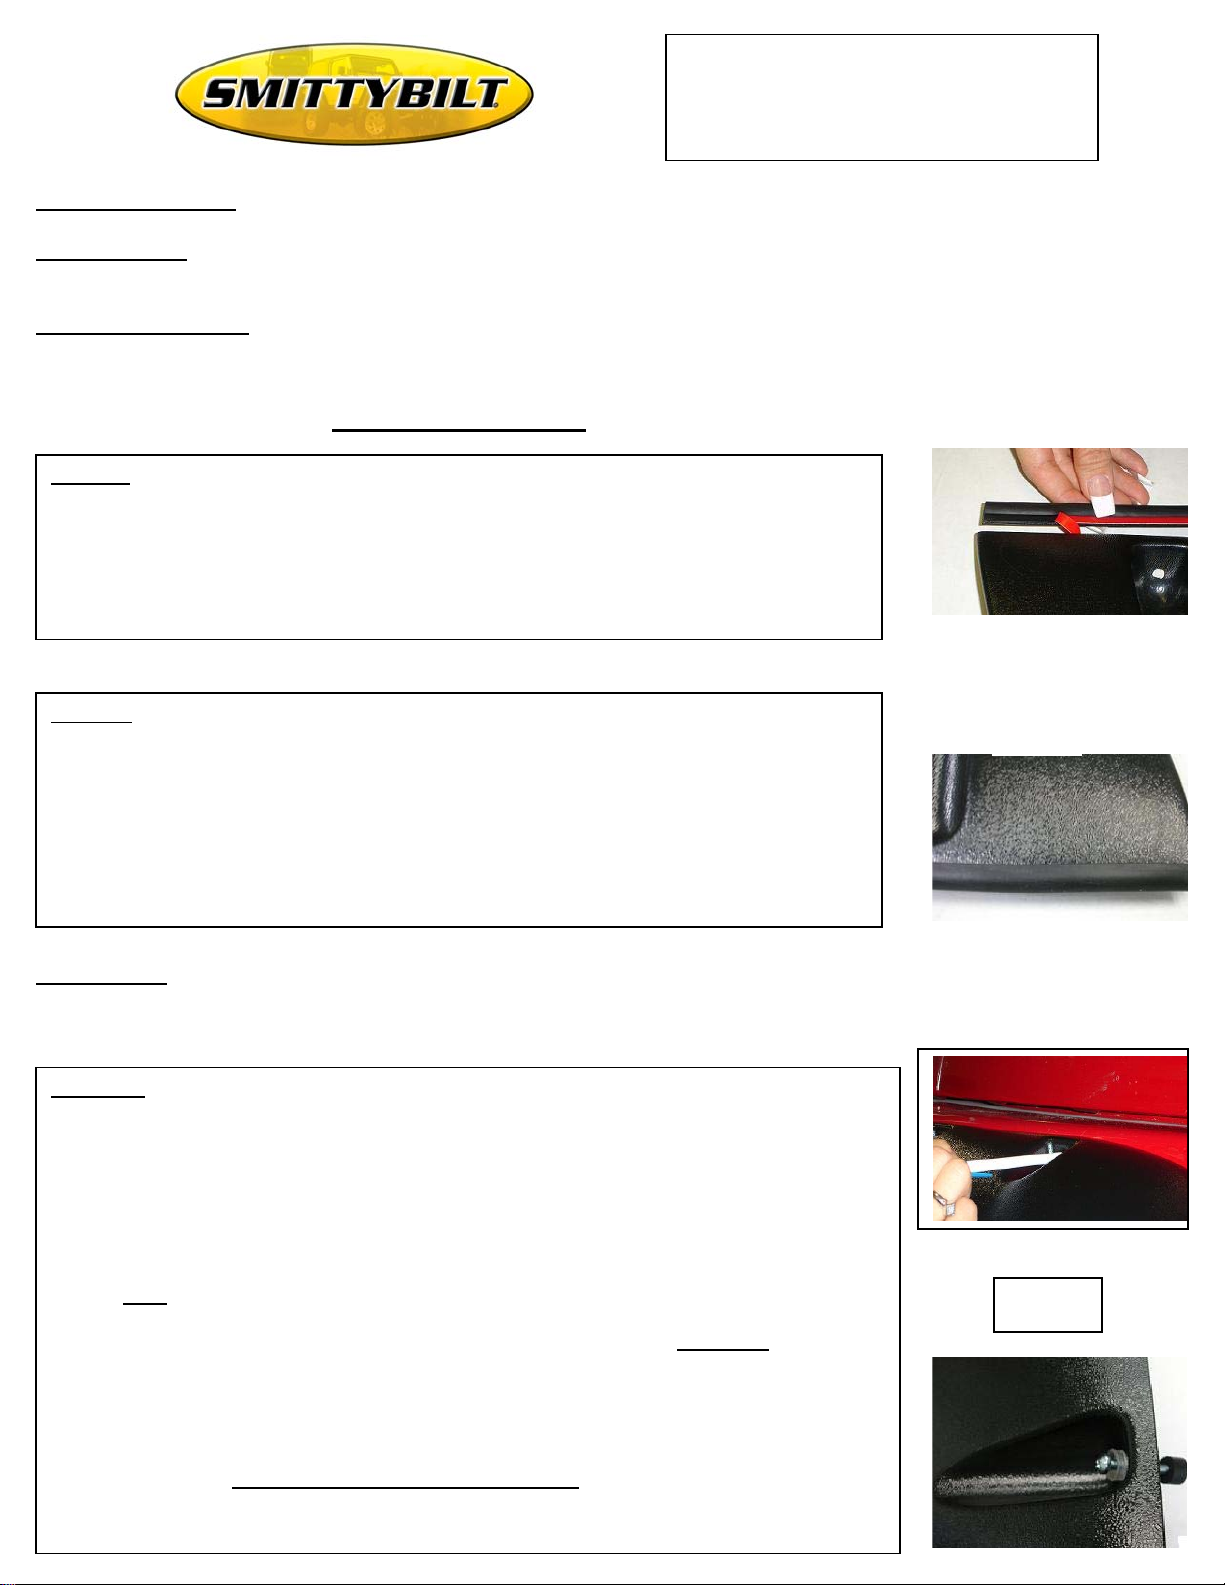
Step Two: Install Rubber Trim
1. Locate the supplied rubber trim. Peel back approximately 1” of the backing away from the
edge of the rubber trim. Starting at one end of the flare, push the trim onto the outer edge of
the flare (See: Fig A)
2. Continue pressing the rubber trim onto the flare. Push on approximately 4” then hold in
place. (See: Fig B) Pull away the backing from backside. (See: Fig C) Continue on in this
manner until you have gone completely around the flare. This will take some time but once
you master the technique it will proceed quickly. Cut rubber trim to length as installed.
3. Repeat this process for the remaining flares.
Wranglers
Fig A
Fig B
IMPORTANT:
Trimming Jeep® Fenders before proceeding with the installation.
Step Three: Install Flares and Mud Guards
1. Attach the new Mud Guards to the vehicle using the factor screws removed in step 1. (TJ
2. Align the front fender flares on the vehicle. The cut a hole in the turn signal area must align
3. Center punch all marked areas and proceed to drill using a 5/32 drill bit.
4. Attach the flares using the supplied screws. Place screws over the snap cap base, through
5. Align the rear flare with the rear vertical seam of the factory fender. YJ ONLY
6. Center punch all marked areas and proceed to drill using a 5/32 drill bit.
7. Attach the flares using the supplied screws. Place screws over the snap cap base, through
8. Place the snap cap cover over the mounting screws and cap base and press firmly into place.
If you are planning to install 33” Tires or larger on you Jeep
ONLY: Discard Mud Guards for CJ7 and Scrambler Jeeps)
with the hole in the new Flare. Mark mounting holes using fender flares as a guide (See: Fig
C)
flares and then place (2) rubber spacers over the screw and attach the flares to the vehicle. Do
NOT
over tighten the screws. Reinstall the factory marker light into flare, using the supplied
(4) #8 x 1- 1/2” screws.
other end of the flare with the bottom edge of the bodywork. ALL MODELS Mark the
mounting holes using the flare as a guide. (See: Fig C)
flares and then place (1) rubber spacer over the screw and attach the flares to the vehicle.
(See: Fig D) CAUTION DO NOT over tighten screws
Repeat process for the remaining caps.
®,
Please proceed to
Fig C
Fig D
Align the
Page 2
p
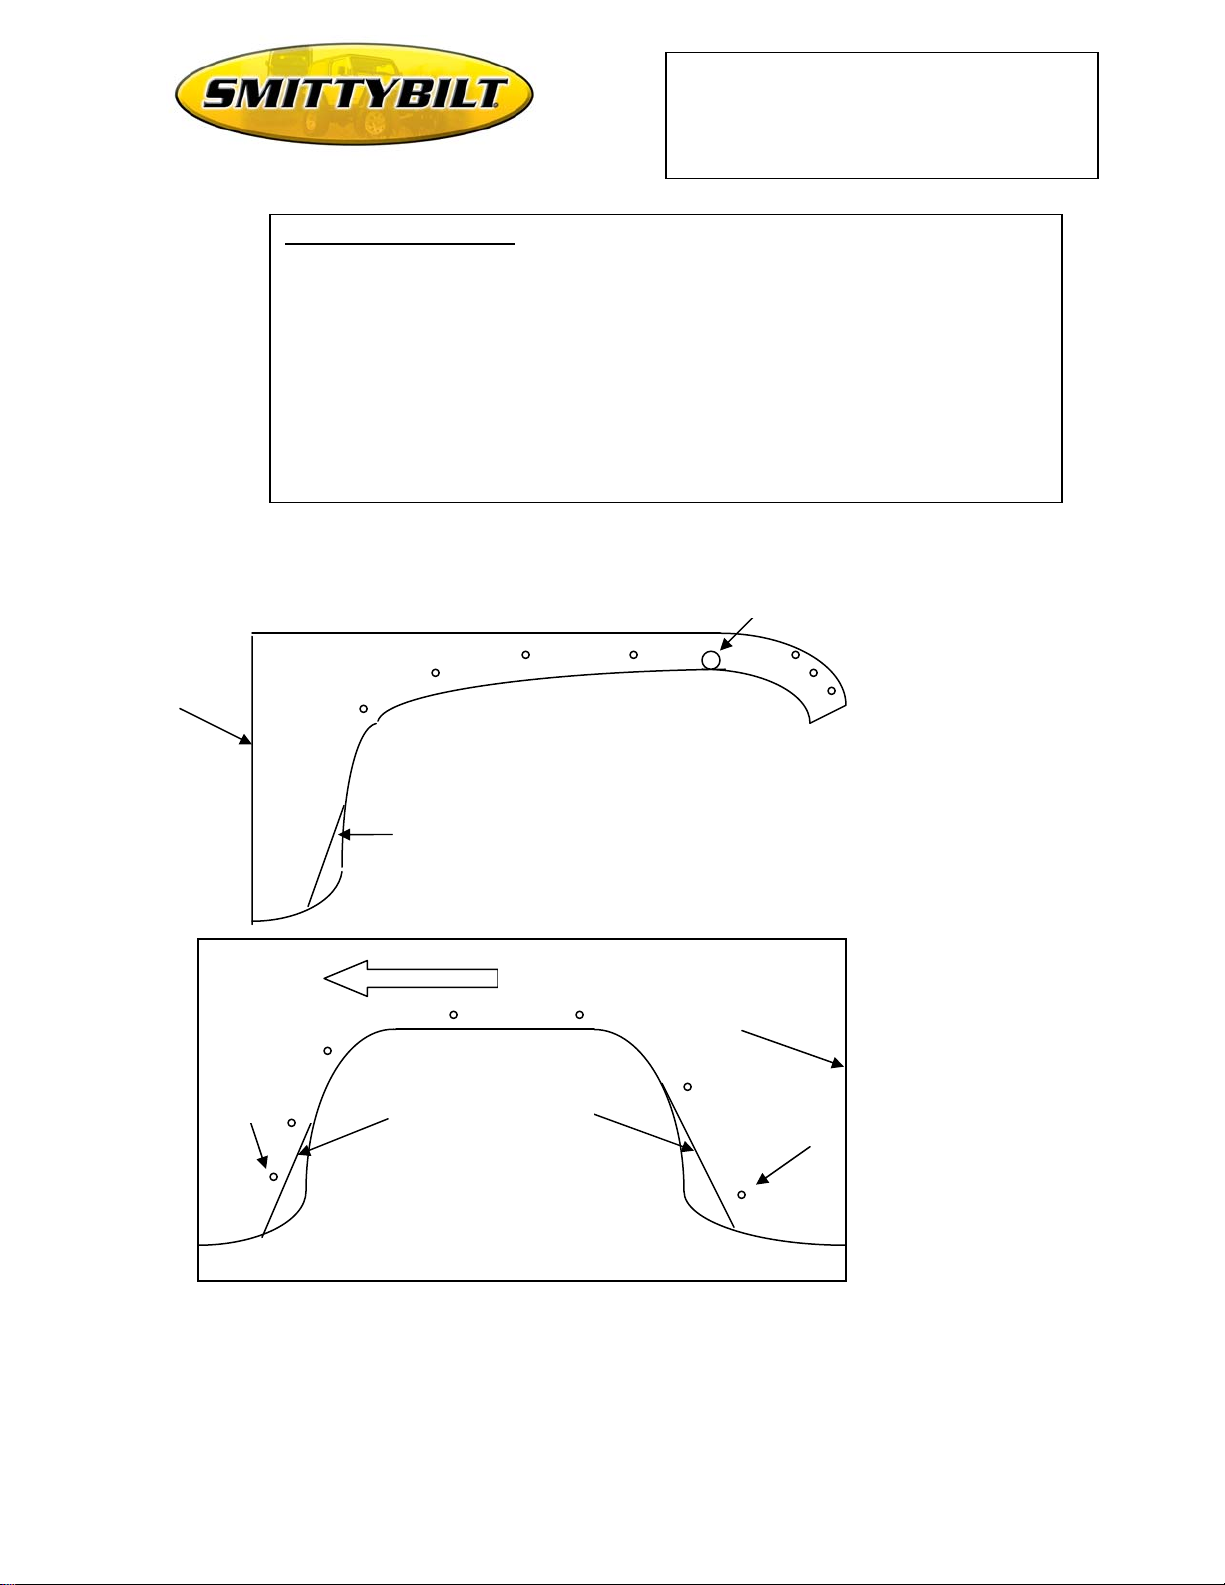
Fig E
Trimming Vehicle Fenders – For YJ ONLY with 33” or Larger Tires
1. Measure 4-3/4” from the back vertical seam of the front fender towards front of
vehicle and mark this location at the bottom edge of the fender. (See: Fig E)
2. From this measurement draw a straight line up tangent to the radius of the
vehicle fender opening. Cut away metal using an air nibbler or other suitable
tool. Coat this area with a rust inhibitor to prevent rusting. (See: Fig E) Proceed
to rear fender. (See: Fig F).
3. Draw a line tangent to the radius of the rear wheel arch, through the factory
screw mounting hole and repeat this procedure for the front of the wheel arch.
Cut away the metal using an air nibbler or other suitable tool. Coat this area with
a rust inhibitor to prevent rusting. Repeat for all remaining fender wells.
Installation Instructions
6” Fender Flares (#17191)
1987-1995 Jee
Align flares with
Wranglers
Vertical Seam
Fig F
Factory hole
Cut line tangent to
Wheel Arch Opening
Forward
Cut lines tangent to
Wheel Arch opening
Align flare with
vertical seam
Factory Hole
Page 3

Installation Instructions
p
6” Fender Flares (#17191)
Smittybilt’s products are covered under the following limited warranties only. Note that the duration of the
limited warranty differs according to the material and finish of the product purchased. Subject to the duration and
conditions of the limited warranty stated below, Smittybilt warrants to the original retail purchaser that its
products are free from defects in material and workmanship. All other warranties and representations express or
implied, are hereby disclaimed, including fitness for merchantability and buyer’s intended use or purpose. All
parts are sold “AS IS” except for the limited warranties granted herein. Buyer assumes all risks as to the selection,
suitability and performance of all goods and products selected. This limited warranty does not cover damage or
impairment in any part due to misuse, improper installation, accident or contact with on-road or off-road hazards,
product modification, improper or inadequate cleaning and/or maintenance. Smittybilt is not responsible for items
damaged during shipping. This warranty is not transferable from the original buyer. For the original Buyer to be
eligible for the limited warranty coverage, the Buyer must provide proof of purchase. Smittybilt strongly
recommends returning the warranty registration card.
Customer’s remedy hereunder shall be limited only to repair or replacement (at Smittybilt’s option) of any
defective part(s) returned to Smittybilt at customer’s expense. The determination of whether or not a returned part
is defective or subject to coverage under the limited warranties stated herein shall be made at Smittybilt’s sole
discretion.
To assure product quality, Smittybilt reserves the right to change product design, material, specification and
finishes without prior notice to customers. This limited warranty gives you specific legal rights and you may also
Limited 90 Day Warranty
1987-1995 Jee
have other rights, which may vary from state to state. Some states do not allow limitations on how long an
implied warranty lasts, so the above limitations may not apply as to you. Also, some states do not allow the
exclusion or limitation of incidental or consequential damages, so the above limitations or exclusions may not
apply to you. Smittybilt reserves the right to discontinue product lines and substitute products, or provide other
remedies than those listed in this limited warranty for those discontinued products
Requesting Warranty Coverage
To make a claim under this limited warranty, customer must:
(1) Call Smittybilt, at (888) 717-5797 for a return authorization code (RAC) and/or Smittybilt may require
photographic proof of defect before issuing an (RAC); (2) return the defective part, properly packaged to prevent
further damage to the product, postage prepaid, together with dated proof of purchase receipt and identifying
return authorization code (RAC) on the outside of the packaging to Smittybilt at 1600 Walnut Parkway, Compton,
CA 90220. Warranty claims can not be determined until the returned merchandise is inspected. A minimum
charge of fifteen percent (15%) may be added for all products which are determined to be returned for reasons
other than warranty. Additional charges may be applied if merchandise is damaged or unsellable upon receipt.
Wranglers
For Technical Support/Warranty Information please call 310-762-9944
Smittybilt, 400 West Artesia Blvd, Compton, CA 90220
 Loading...