

Page 1
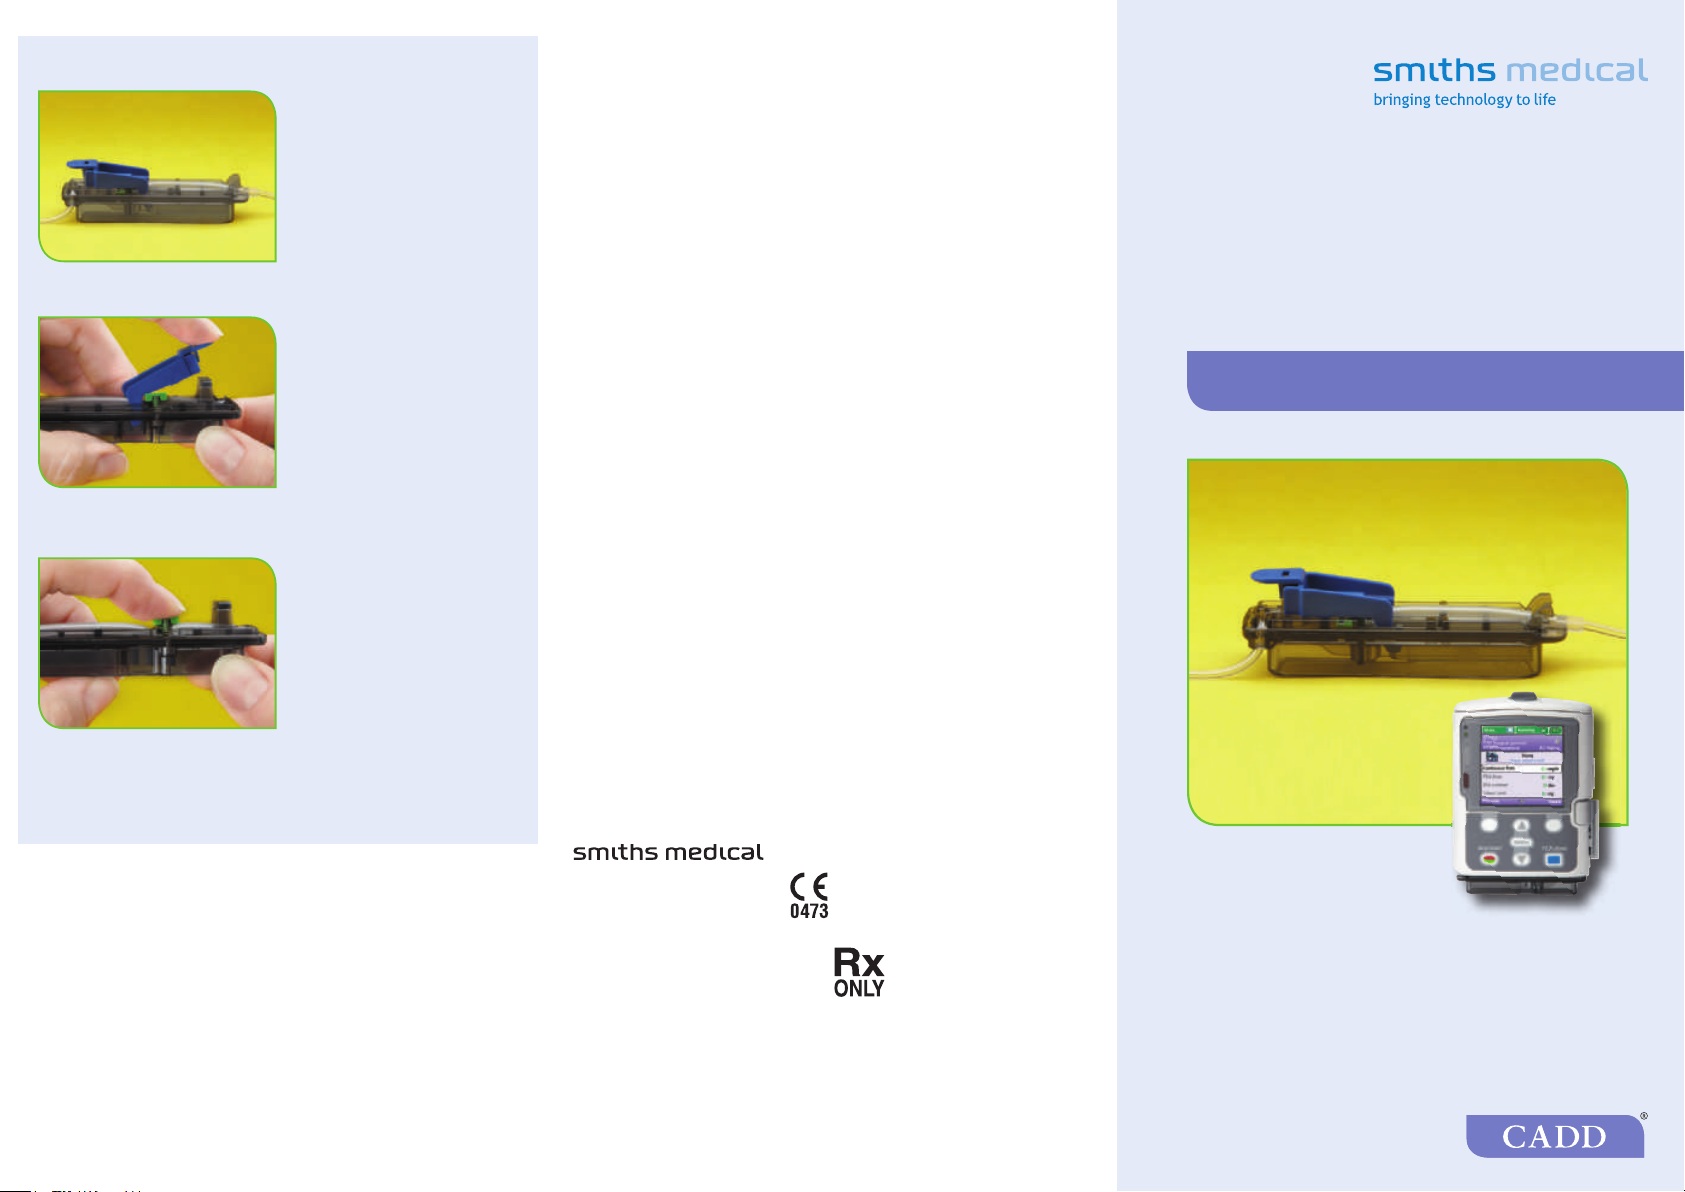
Priming
The sets are designed to be
easily primed with the blue
flow stop clip in place.
Closing the fl uid path
Remove the blue clip to
close the fluid path.
Opening the fl uid path
Press the green button to
open the fluid path.
1. Close all tubing clamps.
2. Disconnect the tubing
from the patient’s
access site.
3. Open all tubing clamps.
4. Press and hold the
green button to allow
gravity flow.
CADD® Administration Sets
with Flow Stop
Quick Reference Card
CADD®-Solis Pumps
Smiths Medical ASD, Inc.
St. Paul, MN 55112, USA
Phone: 1-214-618-0218
Toll-Free USA: 1-800-258-5361
Australian Representative
Smiths Medical Australasia Pty. Ltd.
Brisbane, QLD 4113, Australia
Phone: +61 (0) 7 3340 1300
www.smiths-medical.com
Find your local contact information at www.smiths-medical.com/customer-support
Smiths Medical is part of the global technology business Smiths Group plc. MPAUCA-1002
Product(s) described may not be licensed or available for sale in all countries. Please
see the Instructions for Use/Operator’s Manual for a complete listing of the indications,
contraindications, warnings and precautions. CADD and the Smiths Medical and CADD
design marks are trademarks of Smiths Medical. The symbol ® indicates the trademark is
registered in the U.S. Patent and Trademark Offi ce and certain other countries.
©2013 Smiths Medical. All rights reserved. IN193106EN-032013
EC Authorized Representative
Smiths Medical International Ltd.
TN25 4BF, UK
Phone: +44 (0) 1233 722100
Flow stop free-flow protection is an integral
set-based free-flow protection device that
®
has been added to CADD
administration sets.
Page 2
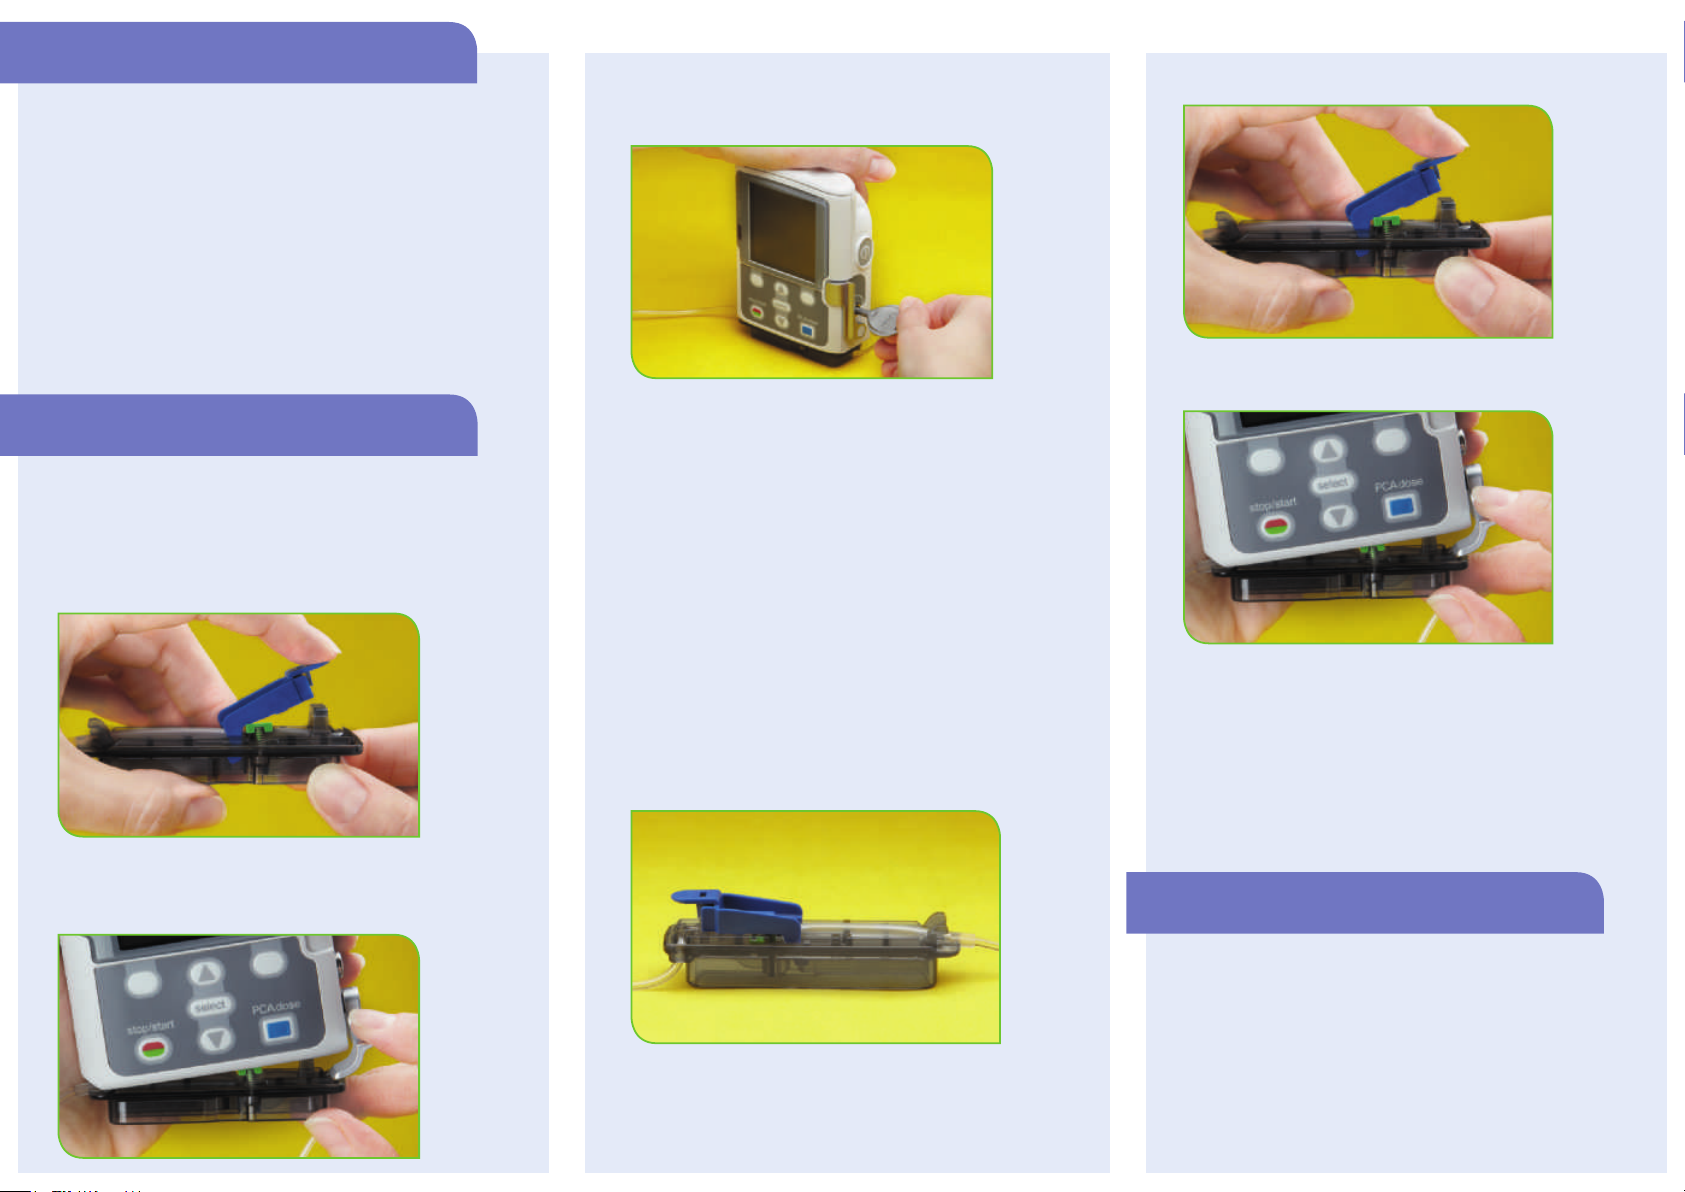
Step 1- Connect the Tubing
If using a syringe:
1. Remove all air from the syringe.
2. Close all tubing clamps.
3. Remove the protector cap from the luer.
4. Using aseptic technique, connect the luer on the short
piece of tubing to the syringe.
If using an IV bag:
1. Remove all air from the IV bag.
2. Close all tubing clamps.
3. Remove protective cap from the bag spike.
4. Using aseptic technique, insert the spike into the IV bag port.
Step 2- Prime the Tubing
WARNING: Leave the blue clip on the cassette in place until
ready to attach the cassette to the pump. Storing the cassette
with the blue clip removed may affect delivery accuracy.
For pump priming:
1. Remove the blue clip from the cassette.
3. Place the pump upright on a firm, flat surface, and press
down on the latch side of the pump so the cassette fits
tightly against the pump.
4. Lift the cassette latch into the closed position. If you
experience resistance when lifting the cassette latch
handle, do not force the latch. If the pump doesn’t latch
easily, unlatch the cassette and repeat the process.
5. To lock the cassette, insert the pump key into the lock and
turn it clockwise into the locked position
6. Open all clamps.
7. Prime the tubing using the pump’s priming feature.
Ensure that the entire fluid path is free of all air. Maintain
asepsis of the distal tubing end.
8. Close all tubing clamps.
4. Remove the blue clip from the cassette.
5. Insert the cassette hooks into the hinge pins, on the
bottom of the pump.
2. Make sure the cassette latch is unlocked, open the cassette
latch, and insert the cassette hooks into the hinge pins, on
the bottom of the pump.
For gravity priming:
1. Open all tubing clamps. Leave the blue clip in place.
2. If using a syringe, press the syringe plunger to remove air.
If using an IV bag, allow gravity to fill the fluid path with
fluid. Remove all air from the fluid path. Maintain asepsis
of the distal tubing end.
3. Close all tubing clamps.
WARNING: Do not attempt to prime the set by attaching a
syringe to the distal end of the set and withdrawing the air,
as this will damage the filter.
6. Place the pump upright on a firm, flat surface, and press
down on the latch side of the pump so the cassette fits
tightly against the pump.
7. Lift the cassette latch into the closed position. If you
experience resistance when lifting the cassette latch
handle, do not force the latch. If the pump doesn’t latch
easily, unlatch the cassette and repeat the process.
8. To lock the cassette, insert the pump key into the lock and
turn it clockwise into the locked position
Step 3- Start the Infusion
1. Using aseptic technique, connect the tubing to the
patient’s access site.
2. Open all tubing clamps and begin the infusion.
WARNING: Ensure fluid path below filter is free of air
before connection to patient. Please refer to the detailed
Instructions for Use supplied with the administration sets
for additional information, cautions, and warnings. For
pump priming, refer to the Operator’s Manual supplied
with the pump.
 Loading...