

Smith & Noble Metro Chic Hardware, Metro Track Flat Aluminum Hardware, Metro Track Flat Wood Hardware Installation Instructions Manual
STEP BY STEP INSTALLATION INSTRUCTIONS
Metro Chic
Hardware
Corner Ceiling Mount
Single Rod Set

Everything
Table of Contents
Step 1 -
Getting Started ..................................3
You Need
A Smooth Set-Up
We want you to love your new hardware and that includes having
a smooth installation experience. We suggest saving this guide. If
you encounter any difculties or questions, please reach out to us
for help. It’s why we’re here. Call us at 800.248.8888 for more info
on installation.
We recommend you hold on to all packaging until your hardware is
fully installed. Should something go wrong (we strongly doubt it), we
want any potential returns to be a painless as possible.
Overview - Corner Ceiling Mount Single Rod Set ...............4
Step 2 - Marking Brackets and Placement ..................5
Step 3 - Attaching the Rod Connector ......................6
Step 4 - Adding or Removing Carriers & End Stops ..........7
Step 5 - Attaching Bracket to Rod .........................8
Step 6 - Attaching the Finials .............................9
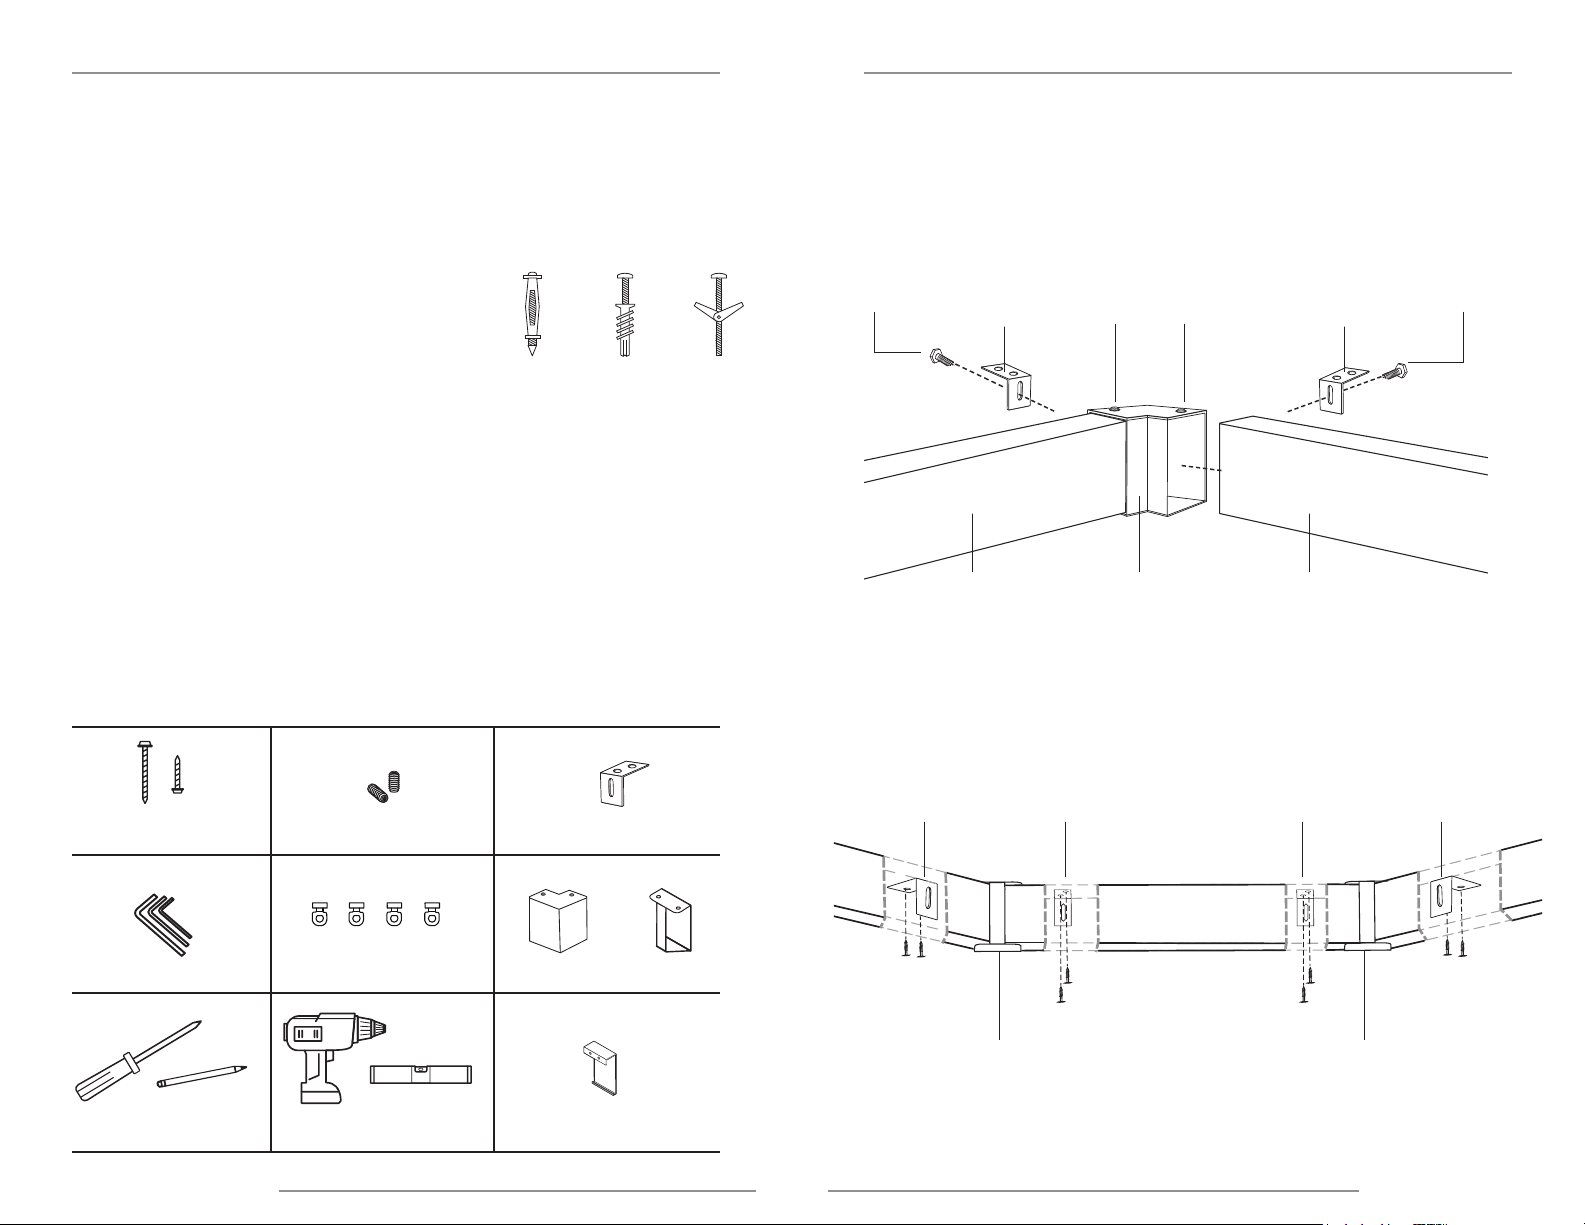
Step 7 - Attaching Elbow/Corner Brackets .................10
Step 8 - Attaching Brackets to Ceiling .....................10
Step 9 - Attaching Drapery to Rod ........................11
Accessories - Baton/Wand ...................................12
Care & Cleaning ...................................Back Cover
Warranty ..........................................Back Cover
Customer Service Hours
Monday — Friday: 6am — 6pm PT
Saturday — Sunday: 7am — 4pm PT
smithandnoble.com
smithandnoble.com
1
800.248.8888
2
STEP 1 - GETTING STARTED OVERVIEW
TOGG LE
Tools & Parts
Before you begin, check the accompanying diagram to make sure you have all the parts you
need.
You’ll need to make sure the sur face you intend to install your hardware is sturdy
enough to accommodate the brackets. If you’re screwing directly into a surface this means
locating wood studs that are strong enough to securely bond with the included screws.
Other wise, you’ll need to use a secure fastener (as illustrated) but please note this piece is
not included.
WALLBOARD OR PLASTER:
Hollow wall applications: Use a secure fastener designed
specically for this purpose.
METAL:
Prepare by pre-drilling holes and then using the included screws.
CONCRETE, STONE, BRICK OR TILE:
Use a masonr y drill and sur face-specic plugs, anchors, or screws. When selecting a
fastener be sure it’s designed to support the weight of the product being installed (if you’re
not sure, either give us a call or ask a professional at your local hardware store). Once
obtained, follow the fastener manufacturer’s instructions regarding proper installation.
TOOLS YOU WILL NEED TO INSTALL YOUR HARDWARE:
Pencil, screwdriver, ¼" nut driver, level, and a drill with a 7⁄64" drill bit.
Note: It’s important to monitor the amount of pressure you apply when using a drill. If the
screws are too tight this may cause the screw itself to break off in the wall or window frame.
MO LLY
BOLT
SELF DRILLING
ANCHOR
BOLT
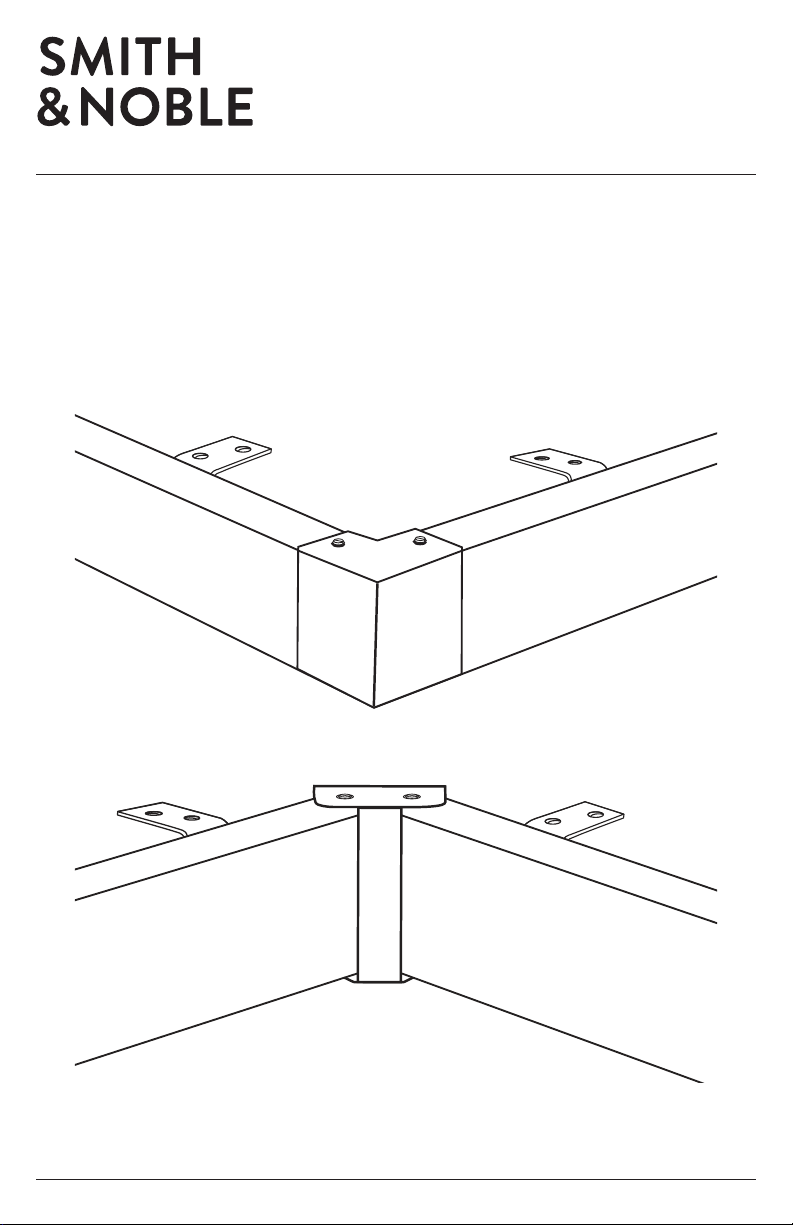
Metro Chic Ceiling Corner Rod Set
90° Corner Bracket
HEX SCREW HEX SCREW
MOUNTING
BRACKET
ROD
SET SCREWS
BRACKET
MOUNTING
BRACKET
ROD90°CORNER
Elbow Bracket
MOUNTING
SCREWS
ALLEN WRENCHES
SCREWDRIVER & PENCIL
(NOT INCLUDED)
smithandnoble.com 800.248.8888
3
SET SCREWS
CARRIERS
POWER DRILL & LEVEL
(NOT INCLUDED) SPLICE COVER
CEILING MOUNT BRACKET
CORNER /ELBOW BRACKETS
BRACKET
EL BO W
BRACKET
MOUNTING
BRACKET
MOUNTING
BRACKET
EL BO W
BRACKET
MOUNTING
BRACKET
4
 Loading...