

Smith & Noble Honeycomb Shades Skylight Step By Step Installation Instructions

STEP BY STEP INSTALLATION INSTRUCTIONS
123
4 5
Motivia
™
Motorization
Honeycomb Shades
Skylight

1
2
smithandnoble.com
800.248.8888
Table of Contents
Step 1 - Getting Started ..................................3
Overview - Motorization Honeycomb Skylight .................4
Step 2 - Brackets & Battery Pack Placement .................5
Step 3 - Installing the Brackets ............................6
Step 4 - Installing the Battery Pack .........................7
Step 5 - Installing the Top Rail .............................8
Step 6 - Installing the Bottom Rail .........................9
Step 7 - Installing the Tracks .............................10
Step 8 - Operating the Shade ............................11
Step 9 - Adjusting the Limits .........................12 - 14
Step 10 - Leveling the Shade ..............................15
Troubleshooting ...........................................16
Removing the Shade ........................................17
Managing the Wires ........................................18
Advanced Programming .................................19 - 20
Care & Cleaning ...........................................21
Safety .....................................................22
Warranty ..........................................Back Cover
A Smooth Set-Up
We want you to love your new window coverings and that
includes having a smooth installation experience. If you
encounter any difculties or questions, please reach out to us
for help. It’s why we’re here. Call us at 800.248.8888 or visit
www.smithandnoble.com/knowhow for more info on installation.
We recommend you hold on to all packaging until your
window coverings are fully installed. Should something go
wrong (we strongly doubt it), we want any potential returns to
be a painless as possible.
Customer Service Hours
Monday — Friday: 6am — 7pm PT
Saturday — Sunday: 7am — 4pm PT
smithandnoble.com
Everything
You Need
3
4
smithandnoble.com
800.248.8888
First, make sure you have all the parts and tools required to install your shades.
ALL THE HARDWARE YOU’LL NEED:
Pencil, screw-driver, ¼” nut driver, level, and a drill with a 1⁄16” drill bit.
Then nd wooden studs where you’ll want to attach the brackets; if you need to mount your
shades to wallboard or plaster, use a secure fastener designed for hollow wall applications. For
metal surfaces, pre-drill holes and use the included screws. For concrete, stone, brick, or tile
surfaces, use a masonry drill and appropriate plugs, anchors, or screws. Additional fasteners
other than those sent with your shade may be required.
It’s important when selecting a fastener to make sure it’s designed to support the weight of the
shade. Follow the fastener manufacturer’s instruction from there on out.
Getting Started
Motorized Honeycomb Skylight
PENCIL
(NOT INCLUDED)
LEVEL
(NOT INCLUDED)
SCREWS
PENCIL & SCREWDRIVER
(NOT INCLUDED)
POWER DRILL & LEVEL
(NOT INCLUDED)
MOUNTING BRACKETS
OverviewStep 1 — Parts & Tools
BATTERY WAND
CLIPS
WALL MOUNT
BATTERY PACK CLIPS

5
6
smithandnoble.com
800.248.8888
Shades are shipped with the required
number of brackets for proper installation.
End brackets should be located approx-
imately 3" from either end.
Depending on the width of the shade,
additional brackets may be necessary,
evenly spaced between the two end
brackets.
Determine Placement of
Brackets and Battery Pack
Make sure that the battery wire will be
able to reach the motor.
There is a minimum of 23⁄4" needed from
the back of the bracket to the front of
the window opening.
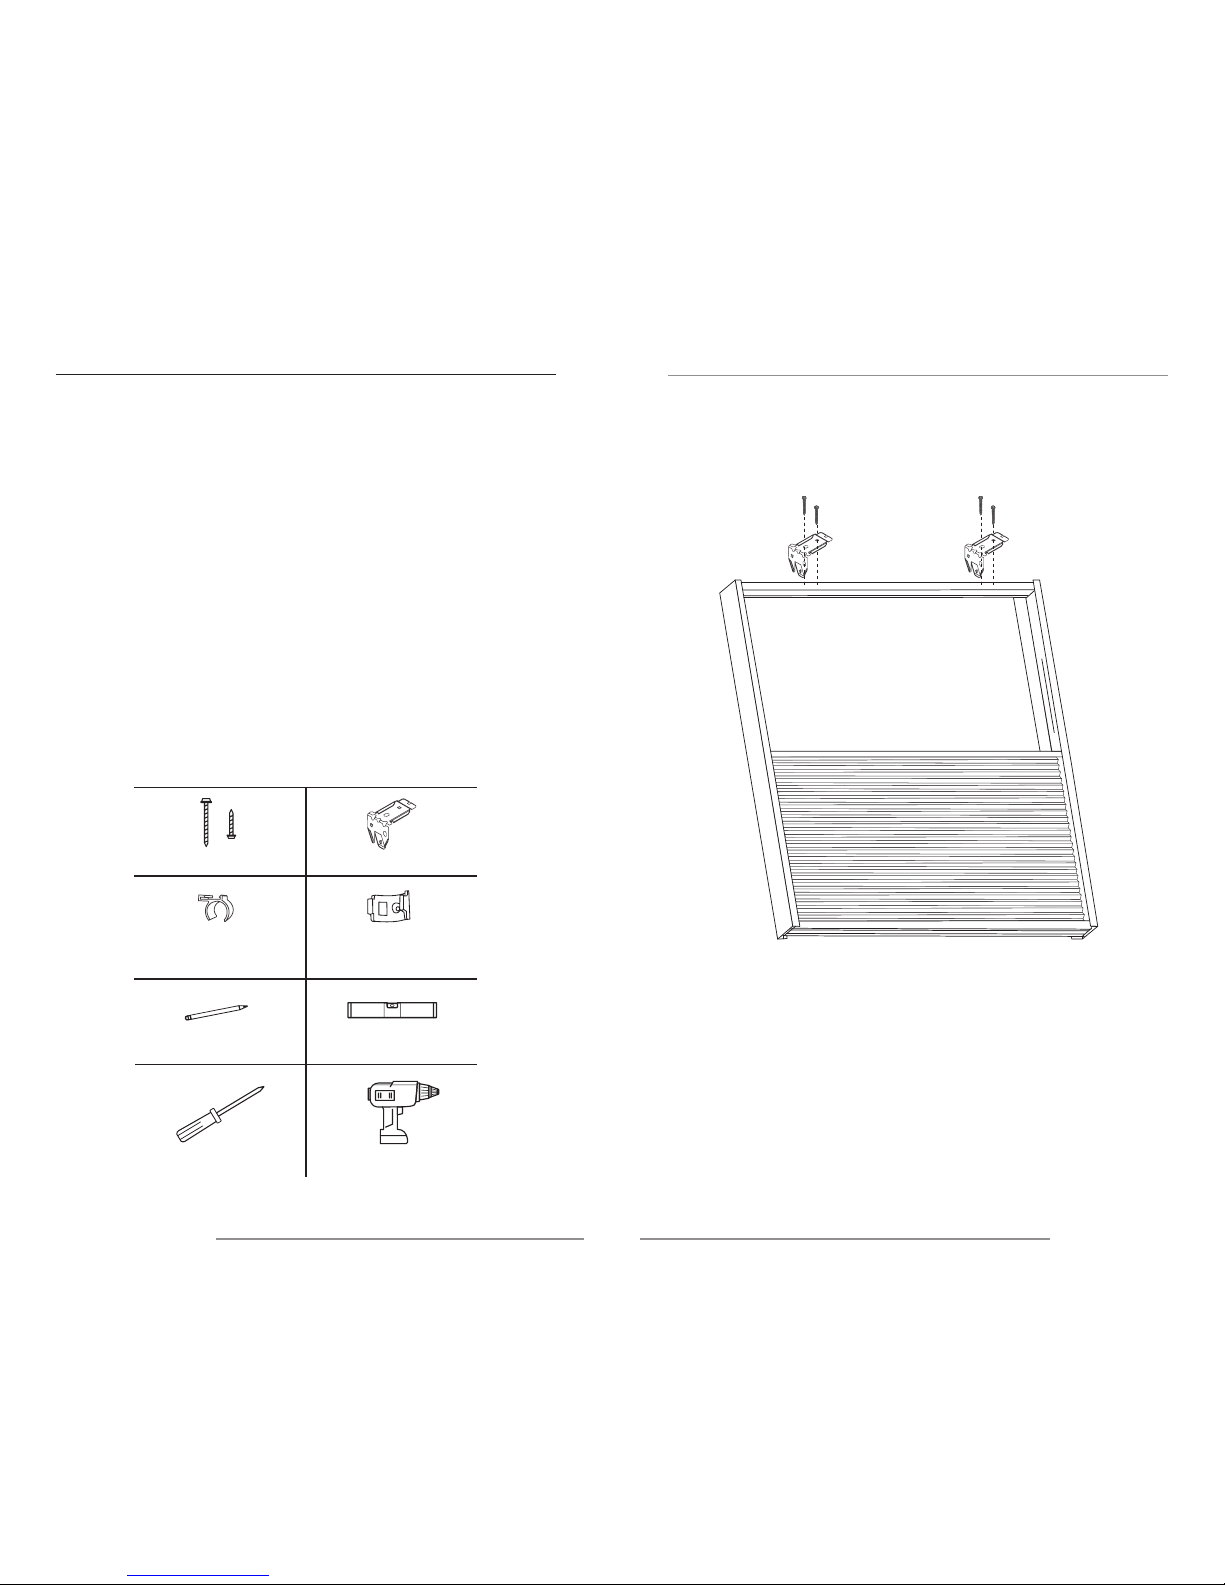
Step 3 — Installing the Brackets
Step 2 — Brackets & Battery Pack Placement
Using the mounting bracket as a template,
measure to the edge of the bracket and
mark the hole locations with a pencil for
drilling. When mounting brackets, make
sure they are in line with each other.
BATTERY
PACK
MIN. OF 2
3
⁄4 FROM
BACK OF BRACKET
TO FRONT OF
WINDOW OPENING
MOUNTING
BRACKETS
3"
MOUNTING
BRACKETS
 Loading...