

Page 1
Hardware Basics
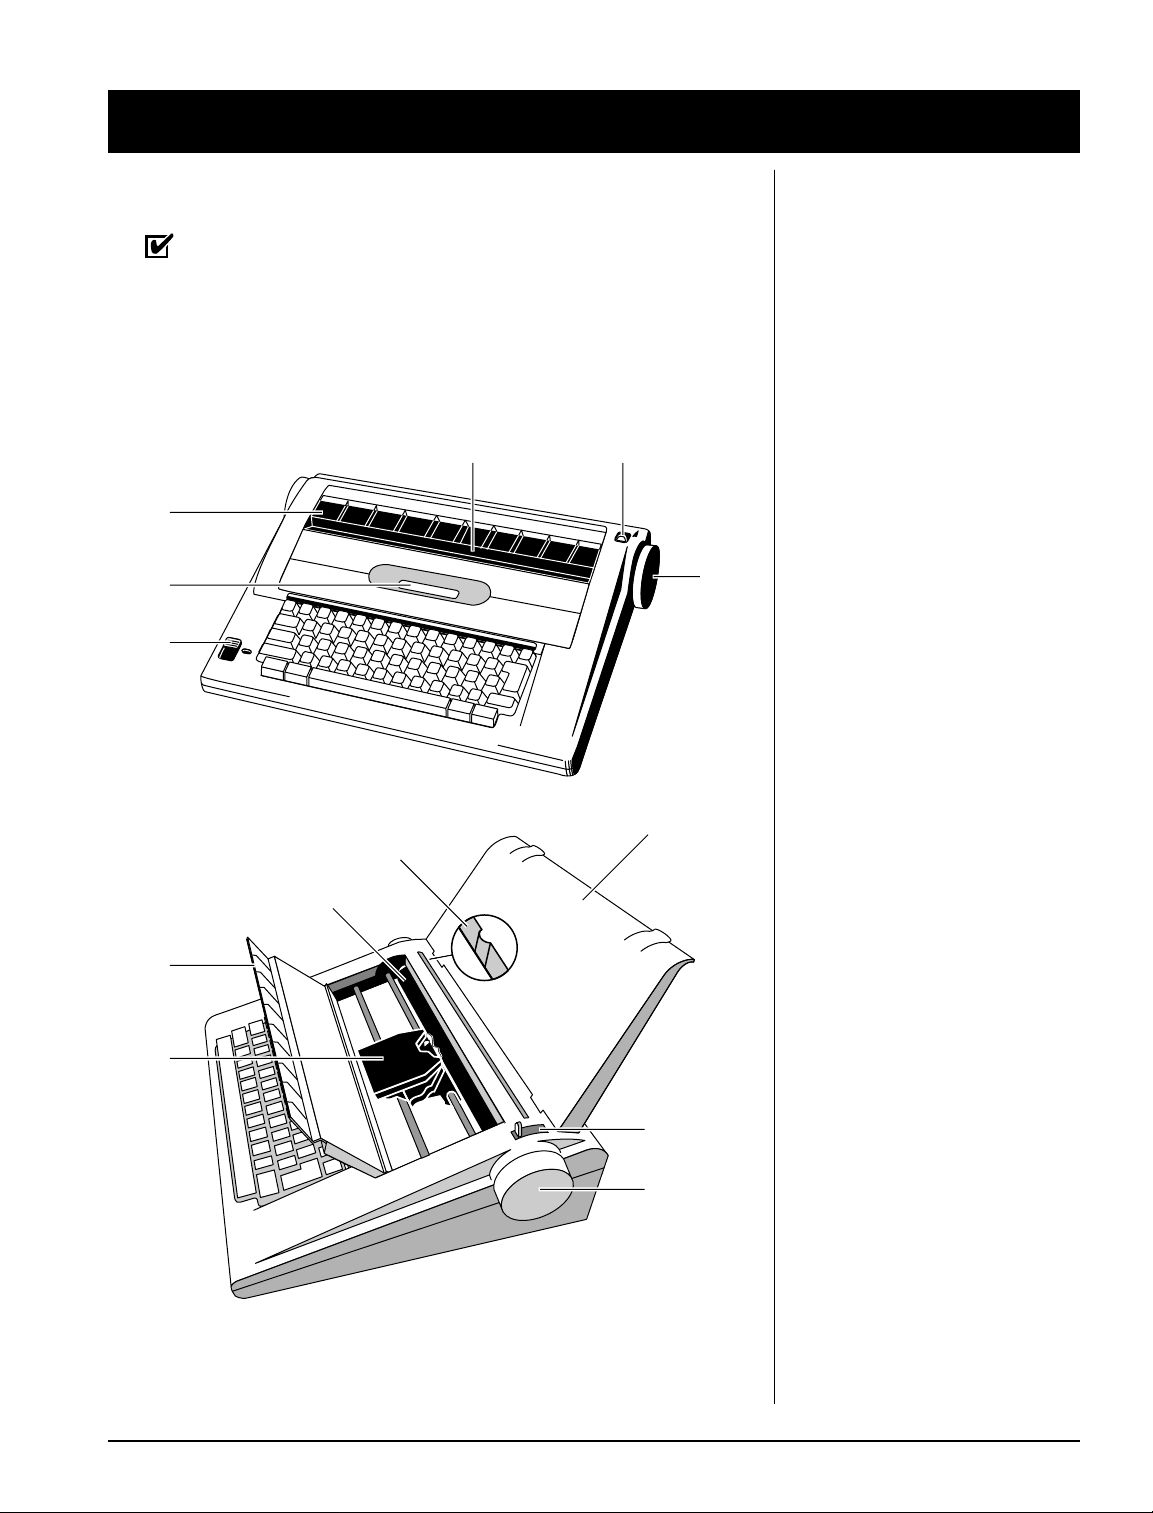
Typewriter Diagram
IMPORTANT: Be sure to save all packing materials. If you move or
ship the typewriter, it should be re-packed in the
original carton. To secure the unit for transport, see
“Care and Maintenance.”
This diagram depicts only basic hardware features. For information on
the features, see specific chapters or the Quick Reference Guide on the
back cover.
4
1
2
3
8
9
1
5
6
7
1. Sound Shield
2. Display
3. Mode Selector/Power Switch
4. Typing Scale
5. Paper Release Lever
6. Platen Knob
7. Paper Support/Snap on Cover
8. Paper Alignment Mark
9. Platen
10. Carrier Mechanism
10
5
6
Smith Corona Corporation Hardware Basics — 1-1
Page 2
Setting Up
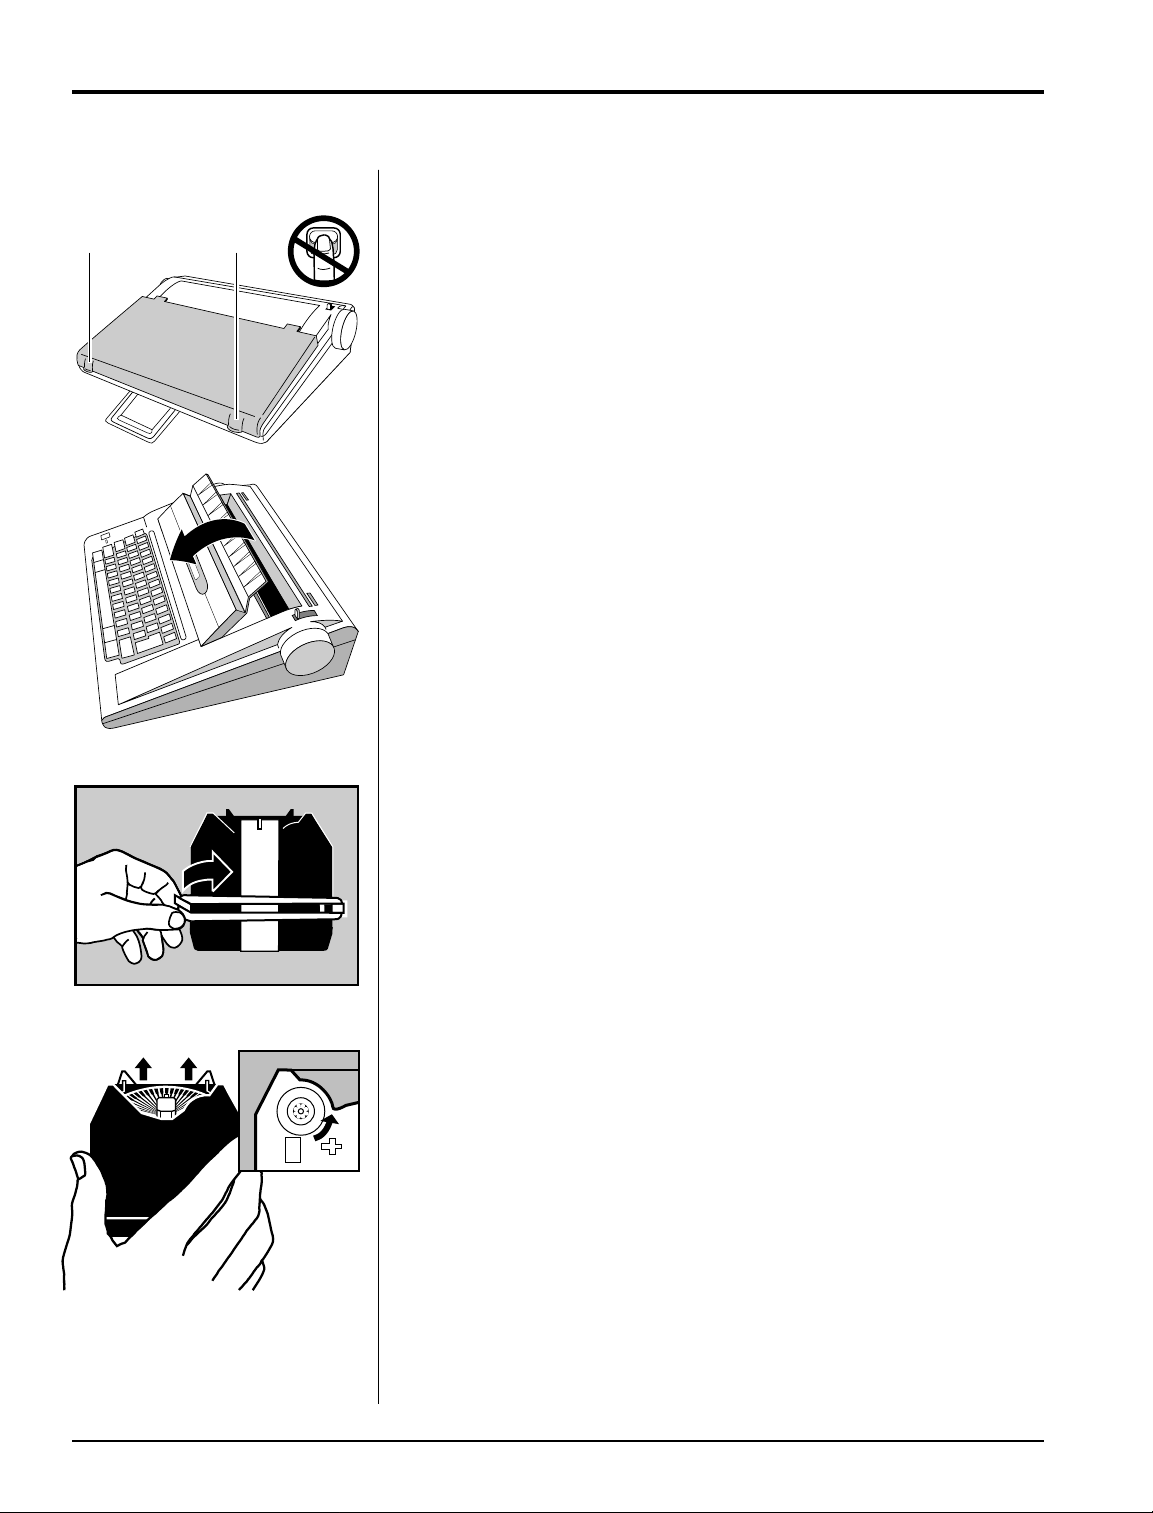
Lift here... and here.
Before you can use your typewriter, you must remove the packing
materials from the carrier mechanism. This is essential to the proper
functioning of your typewriter. Do not turn the unit on until you have
released the carrier mechanism (10). The numbers in diagram
correspond to those in the instructions.
1. Remove the snap-on cover (7) from the typewriter. This cover also
functions as a paper support. (See “Paper Support.”)
2. Tilt the sound shield (1) toward you.
3. Remove the rubber band (left side first) from the tabs.
4. Remove the carrier restraint card.
5. Remove the ribbon cassette. If the typewriter ribbon is slack, advance
it by turning the gear wheel on the bottom of the cassette in the
direction indicated.
6. Place the cassette back on the carrier, and return the sound shield to
its original position. You will hear it snap into place. The unit will
not operate if the sound shield is not secure. An error message will
appear on the display.
1-2 — Hardware Basics Smith Corona Corporation
Page 3
Paper Support
;;
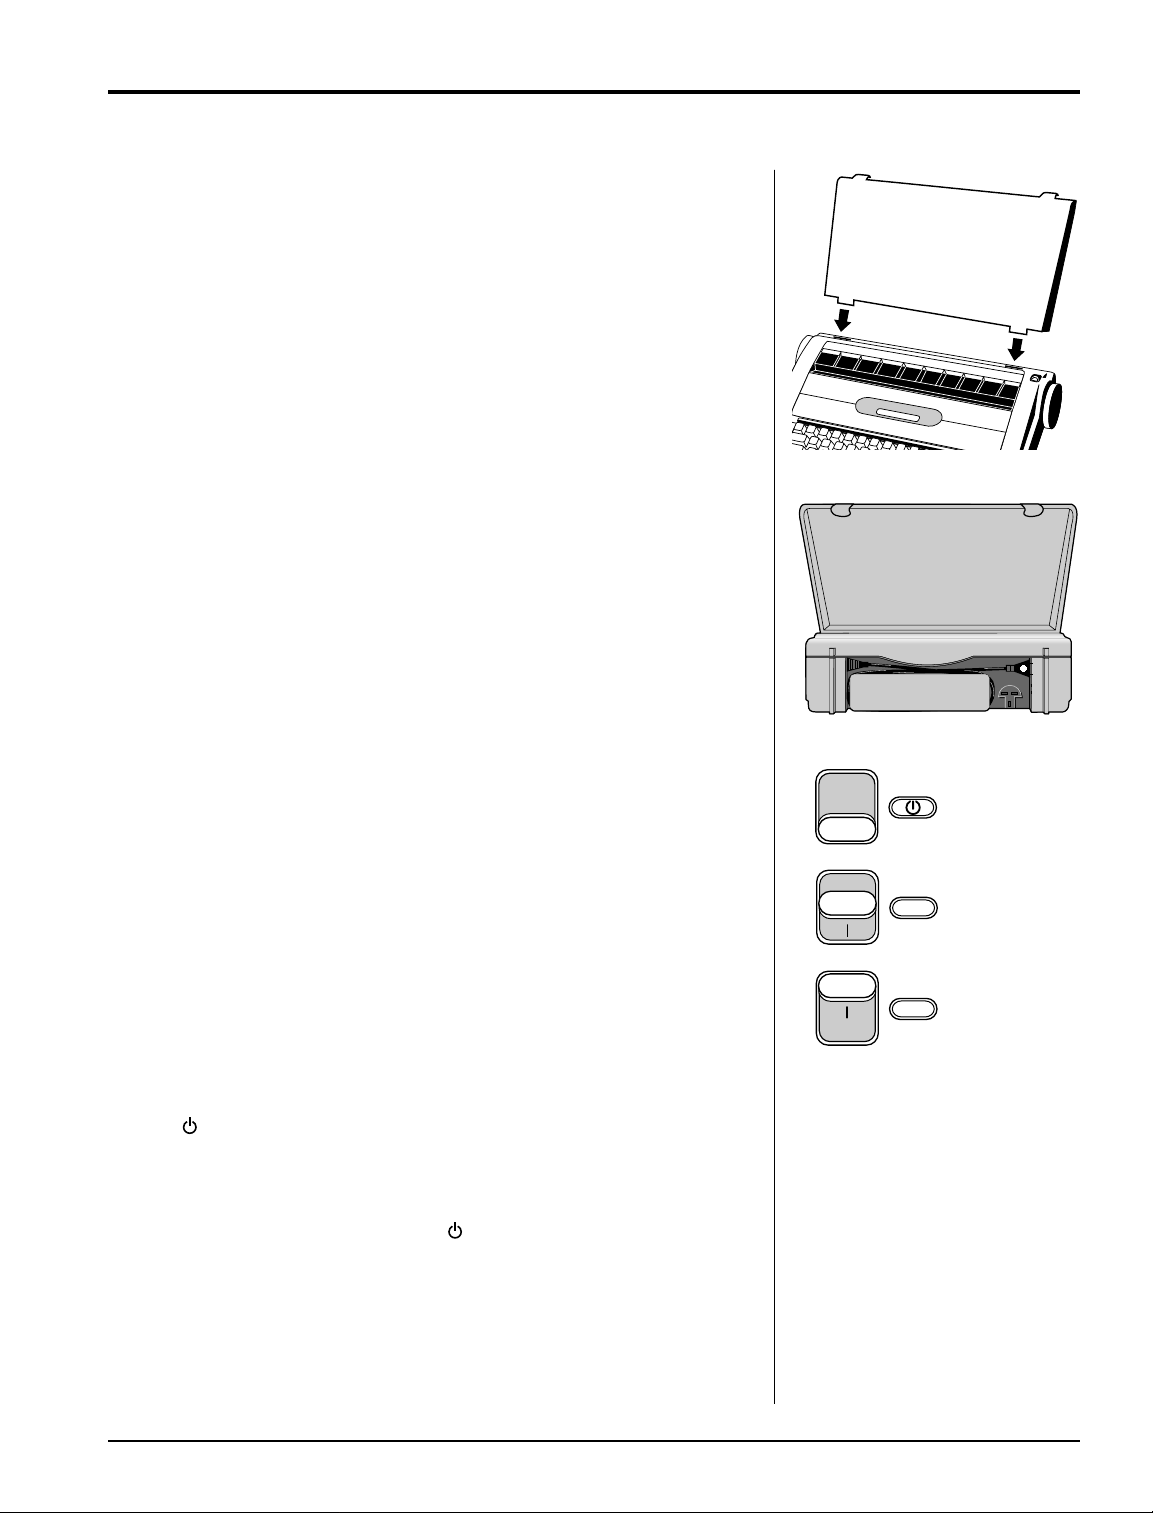
Your keyboard cover functions as a paper support. Follow the
instructions below to insert the support.
1. Remove the cover from the keyboard if you have not already
done so.
2. Turn the cover upside down and align the tabs with the slots behind
the paper alignment mark (8).
3. Slide the tabs into the slots to provide an angled paper support for
your typing page.
Electrical Plug
Your typewriter has a convenient new feature to protect the cord
during transport. (See “Care and Maintenance” at the back of this
manual.)
1. Remove the plug from the protection slot and unwind the cord
for use.
2. Plug the typewriter into a proper electrical outlet. (Use the correct
electrical current.)
Selecting a Mode
You can type in two different modes. Select the mode you prefer to use
by moving the Mode Selector (3) located to the left of the keyboard.
Type Mode – Typed characters immediately appear on paper. The
display shows a typing scale indicating current print position, margins,
and tabs.
Mem Mode – Characters appear on the display as you type and are
simultaneously saved in the built-in memory so that text can be
reviewed, recalled or edited before printing.
You will learn about these modes in later chapters.
Standby Mode/Power On
1. The symbol indicates the unit is in Standby mode. The keyboard
is inactive until you select Type or Mem. When you select Type or
Mem, the “on” symbol (|) is displayed. The carrier moves to the
preset left margin.
2. Slide the switch back to Standby ( ) when finished.
Type
Mem
Standby Mode
Type Mode
Memory Mode
Smith Corona Corporation Hardware Basics — 1-3
Page 4
The Display
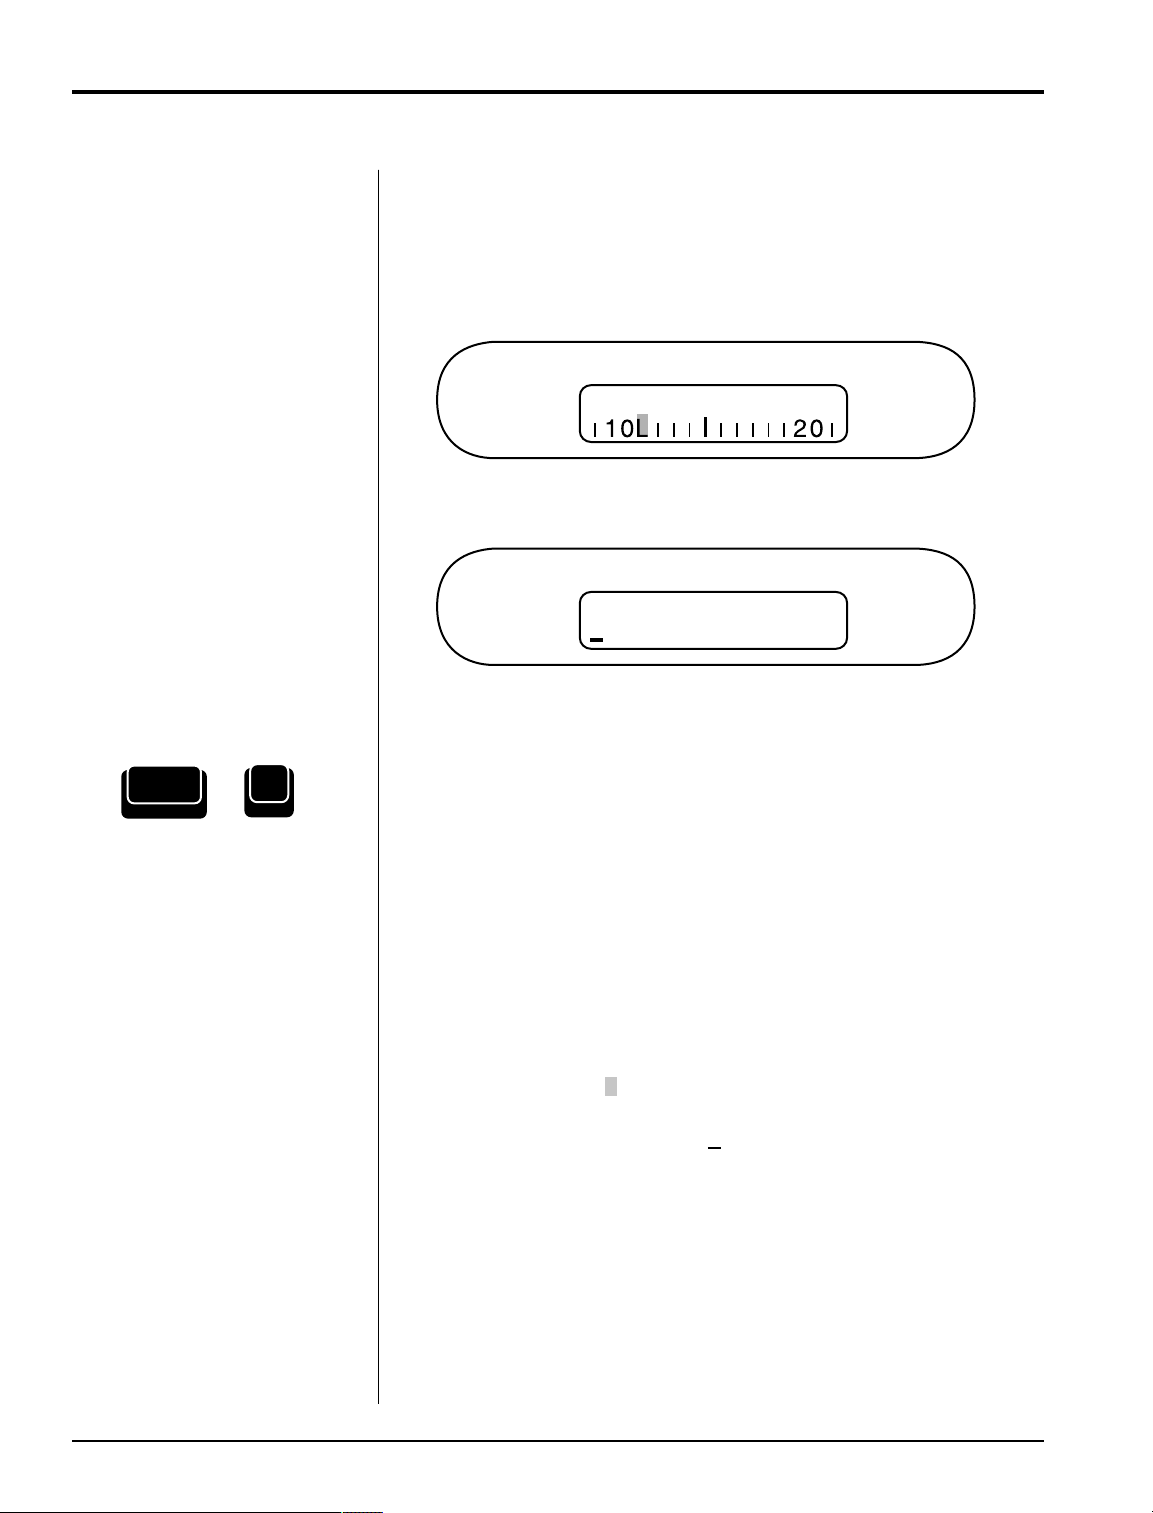
The display is active in both Type and Mem Modes. When in Type
Mode, the display shows the typing scale. A blinking cursor indicates the
typing position. The left and right margin settings are marked by “L”
and “R” respectively.
Code
+
End Of Page Pitch
11 14 OFF
10 12 15
1 1
Line
1
⁄2 2
Impression
L M H
In Mem Mode, the display shows typed text.
End Of Page Pitch
11 14 OFF
10 12 15
1 1
Line
1
⁄2 2
Impression
L M H
The Quick Brown
Display Contrast
A
Adj
You can adjust the intensity of your display by pressing Code + Adj (A).
The display prompts:
Contrast Adjust
and will darken as you repeatedly press the A (Adj) key while holding
down the Code key until the darkest level is reached; then it reverts to
the lightest setting and starts over. Release both keys when the desired
contrast level is reached.
Cursor
In Type Mode, the cursor on the display indicates where the next
character will be typed or where a correction will be made. This cursor
appears as a rectangle ( ).
In Mem Mode, the cursor indicates the position in the text. This cursor
appears as an underline character ( ).
1-4 — Hardware Basics Smith Corona Corporation
Page 5
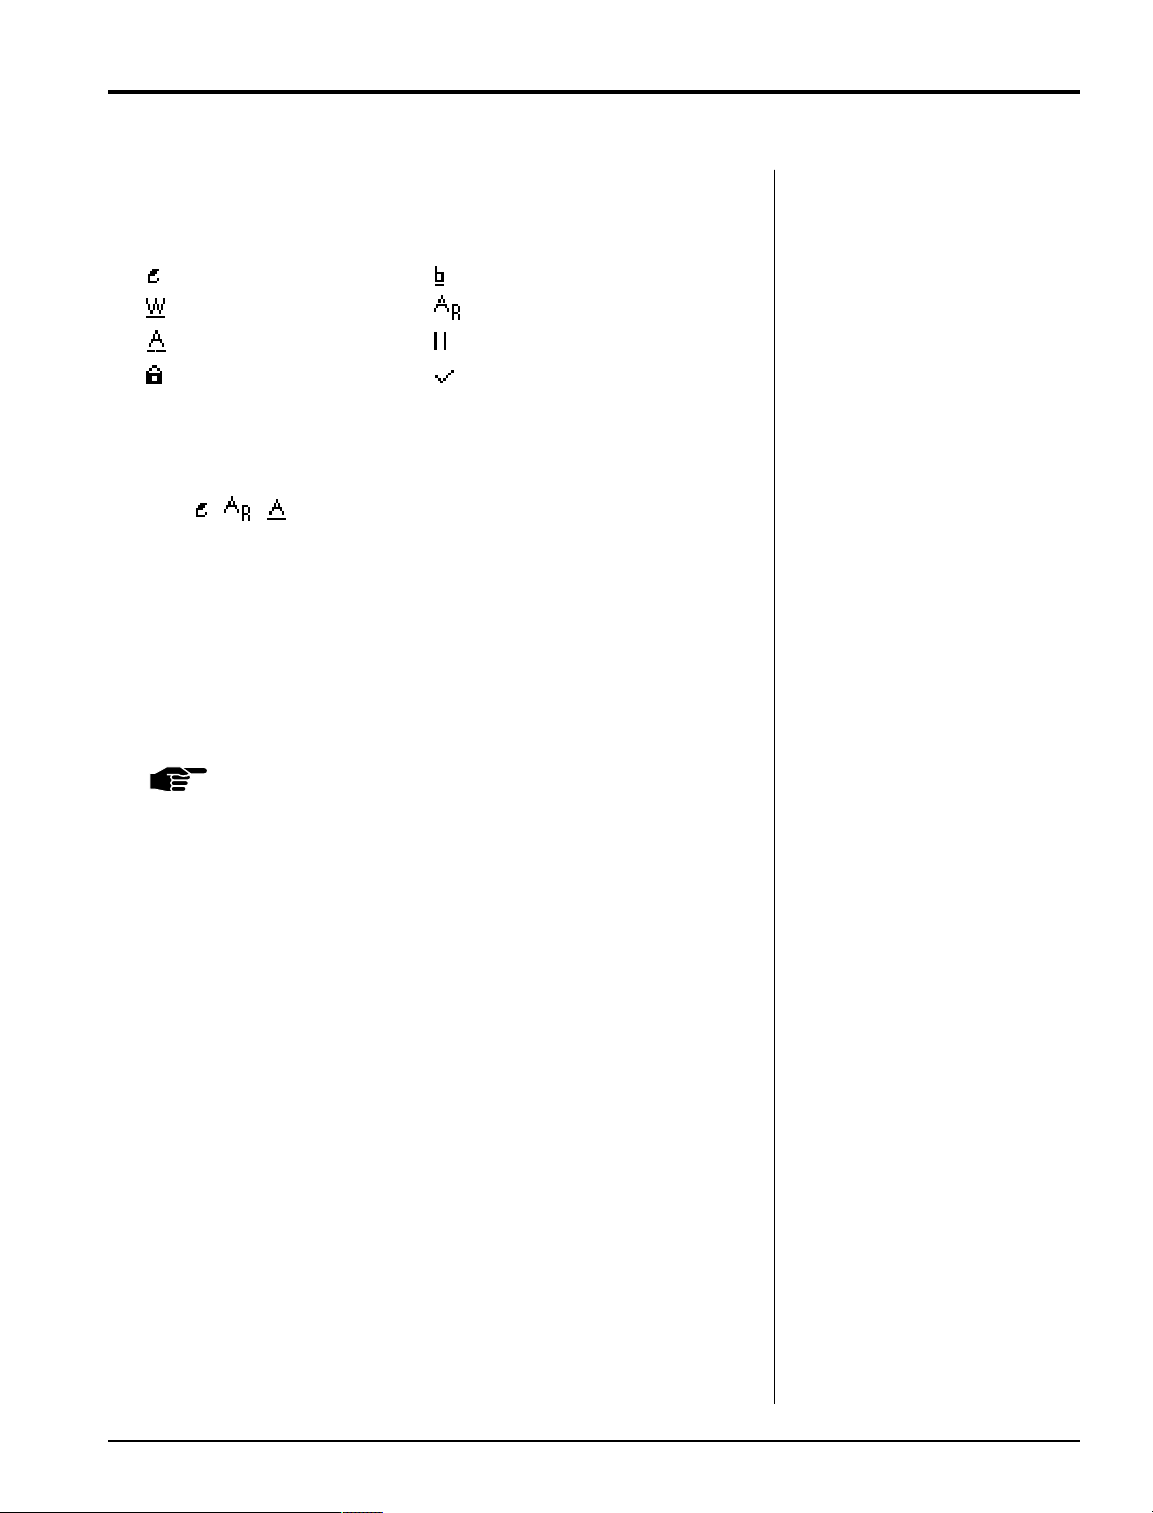
Status Indicator
In both modes, you can immediately find out which of the following
features are active by using the Status Indicator.
– Spell-Right Dictionary – Bold
– Auto Underscore Word – Auto Return (Type Mode only)
– Auto Underscore All – Keyboard II
– Caps Lock – Punctuation Check
For example:
If the Spell-Right Dictionary, Auto Return, and Auto Underscore All are
active, the display would look like this when the Status Indicator is used:
Status
In Mem Mode, the Status Indicator also shows the number of the file
currently in use.
Activating the Status Indicator
1. Hold down Code for a few seconds. The current status appears on
the display.
2. Release Code to deactivate the Status Indicator.
NOTE: This feature cannot be activated when using the Auto
Center feature.
Smith Corona Corporation Hardware Basics — 1-5
Page 6
Code
+
Volume Control
You can adjust the volume of the beeps heard from your unit by pressing
and holding Code, then pressing V. Display prompts:
Volume # –
(# lists a volume level from 0 through 10)
V
Volume has been set on medium at the factory. When you set the volume
level to 0, no beeps will be heard. When you change the volume level,
the new setting you select is stored unless you select 0. If the unit is
turned off while at the 0 selection, the volume level will be reset to
medium when it is turned on again.
Automatic Paper Insert
NOTE: Your typewriter easily handles 12” wide paper and a 9”
typing line. Standard bond paper stock is recommended
for best quality. Copier paper, erasable bonds and very
heavy textured bond papers do not print well with
Correctable Film Ribbon. For those paper types, we
recommend High Density Correctable Film or
Multi-Strike Ribbons. If typing stencils, use those
specifically designed for daisywheel printers.
Code
+
Shift
Paper In
1. Insert paper securely in the slot behind the platen (9) against the
paper alignment mark (8). (For 12” wide paper, center on the
platen area.)
2. Press Code + Left Shift/Paper In. Paper automatically advances to
approximately one inch from the top of the page.
3. Advance paper more, if necessary, using the Index Up/Down
feature (see “Other Features”) or Return key.
4. Push the paper release lever (5) back, and straighten the paper, if
necessary. Return lever to its original position.
1-6 — Hardware Basics Smith Corona Corporation
Page 7
Automatic Paper Eject
When you reach the end of a page you can automatically eject your
paper by pressing Code + Right Shift/Paper Out key. The paper begins
ejecting immediately.
NOTE: The platen may rotate a few seconds after
ejecting paper.
Platen Knob/Variable Line Spacer
If you are not using the End of Page Warning option, you can rotate the
platen (6) to position the paper up or down at variable line positions.
Code
+
Shift
Paper Out
Smith Corona Corporation Hardware Basics — 1-7
Page 8
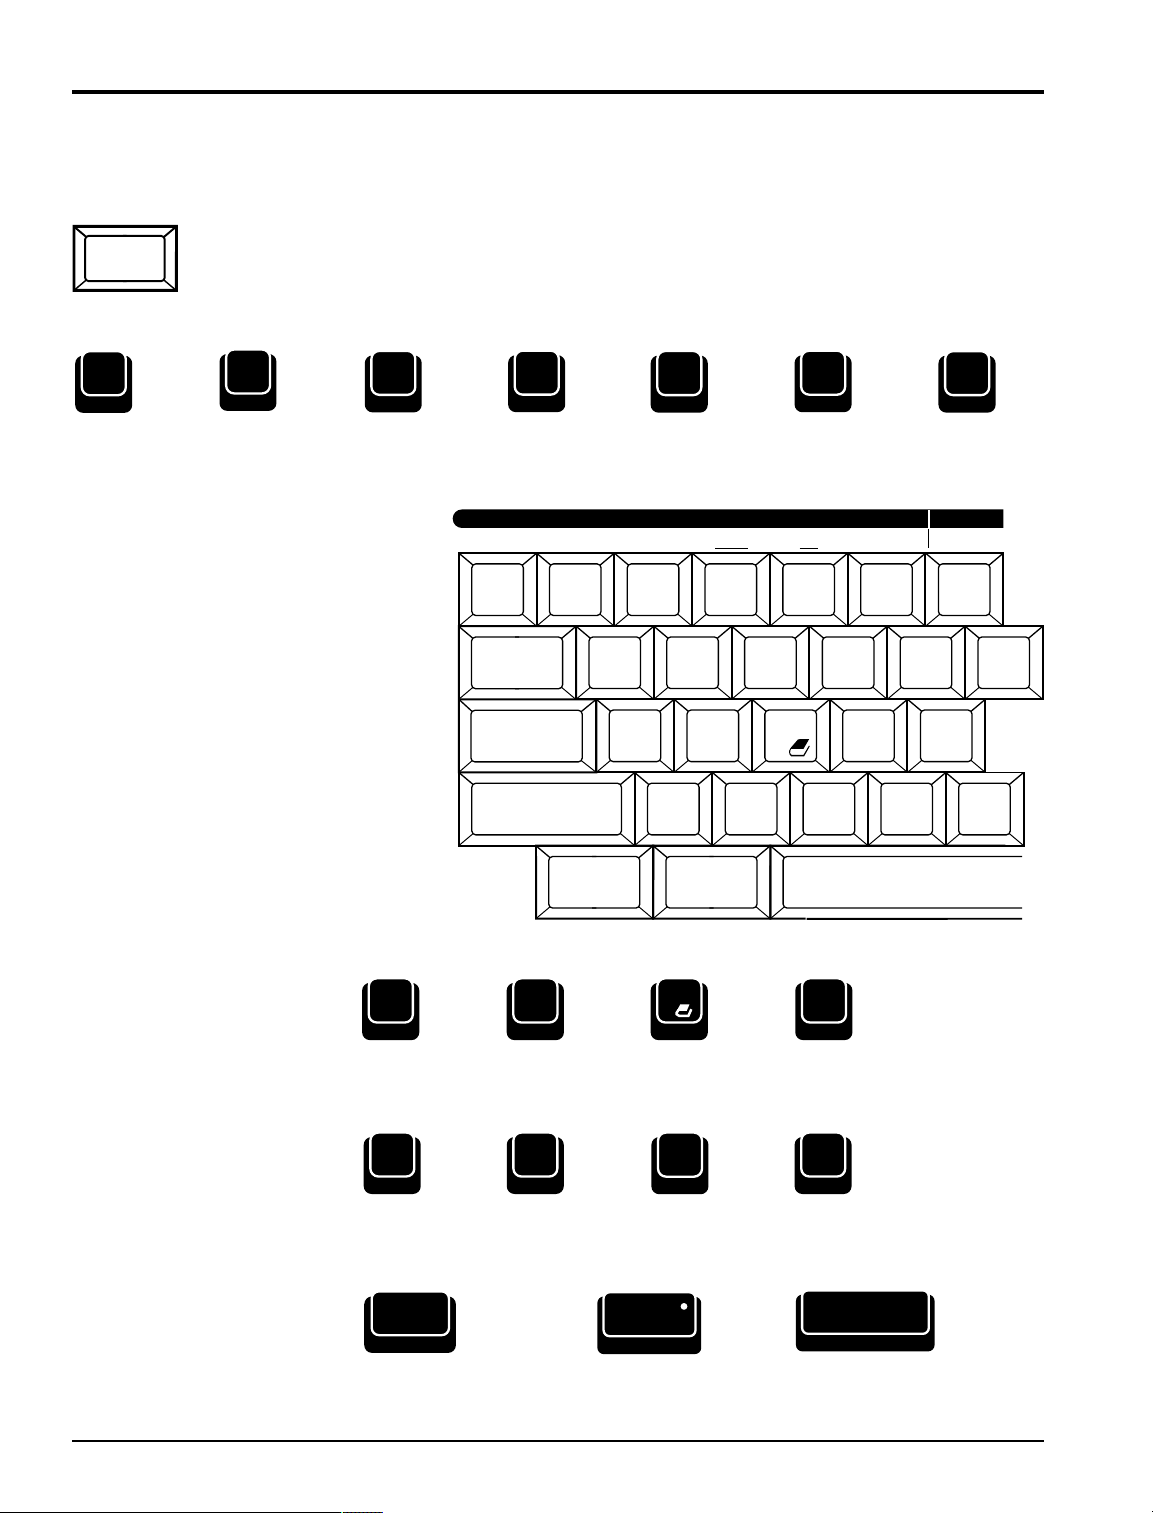
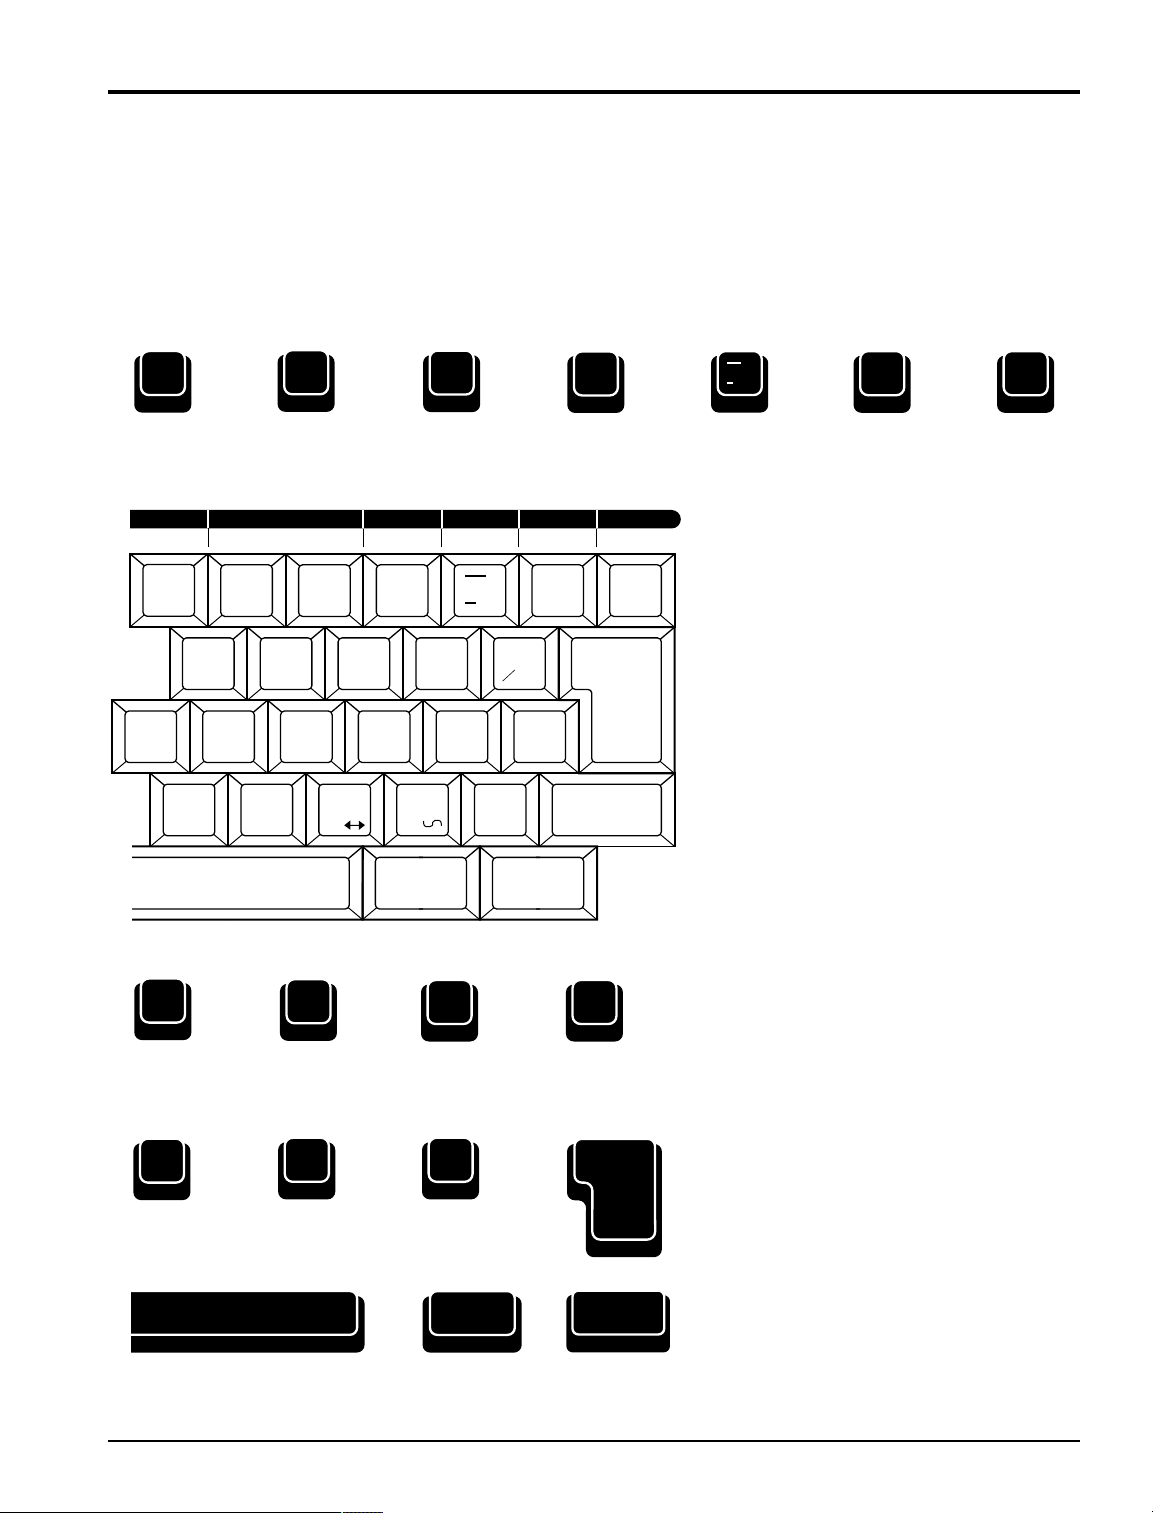
Keyboard Diagram
C
Close
Caps Lock
Lock
Code
When used in combination with other keys, the Code Key can activate indicated functions in
either the Keyboard or Cursor Bank. Those that function only in Mem Mode are marked with
an asterisk (*).
Code Key Functions on Upper Keyboard
!
Tab S
AutoSpell Activates
^
1
Activates
Auto Return
ç
@
2
Centers
Text
#
é
3
$
`
4
Underscore
Word
Spell Return Center Word
^
TabS
!
All
AUTO IND
ç
@#
é
¿
%
5
Half Space
All Half Space
$
`
345612
Tab
Tab C
Lock
Caps Lock
Shift
QWERTY
A
S
D
ZXCVB
Paper In
Abbr
F
~
¢
6
Index UpUnderscore
Up
¿
%
~
¢
G
FindAdj Stop
BoldCloseDemo
Code Key Functions on Lower Keyboard
A
Adj
Adjusts the
intensity of the
display
Z
Demo
Activates Self
Demonstration
Tab
Tab C
Clears
Current Tab
S
Stop
* Activates
Stop Codes
X
Abbr
Activates
Abbreviations
Code
D
Activates
Dictionary
* Close a File
Activates
Caps Lock
Margin
L
R
F
Find
Activates
Find
B
Bold
Activates
Bold Printing
Shift
Paper In
Automatically
Inserts Paper
1-8 — Hardware Basics Smith Corona Corporation
Page 9
§
&
[
7
]
*
8
(
9
)
¶
0
+
=
Back
Space
Index Down Activates
Subscript
SCRIPTEX
Down Sub Super Search Insert Format
(
[]
&
*
§¶
Activates
Superscript
)
7890
1
UI
H
N
Next Mark
I
Ind
Ind
O
SpTab
P
JKL
Punc KBII List
M
Half Space
O
SpTab
,
,
.
.
WordEraser
LineEraser
:
;
J
Punc
4
1
2
?
/
Correct
"
'
* Activates
Search
+
=
Return
Shift
Paper Out
K
KB ll
Back
Space
Reloc
* Inserts
Text
* Sets
Format
* Moves
Cursor to
Beginning
of Previous
Paragraph
Activates
Temporary
Left Margin
L
List
Activates
List
Activates
Half Space
Activates
Special Tabs
N
Next
* Activates
Next
Half Space
* Activates
Punctuation
Check
M
Mark
* Marks a
Block of Text
WordEraser
LineEraser
Erases
Lines
Activates
Keyboard II
Return
Reloc
Shift
Paper Out
Automatically
Ejects Paper
Relocates Print
Hammer/Cursor
Smith Corona Corporation Hardware Basics — 1-9
Page 10
Code Key
Code
Code
Code
+
+
Down
&
7
Up
~
¢
6
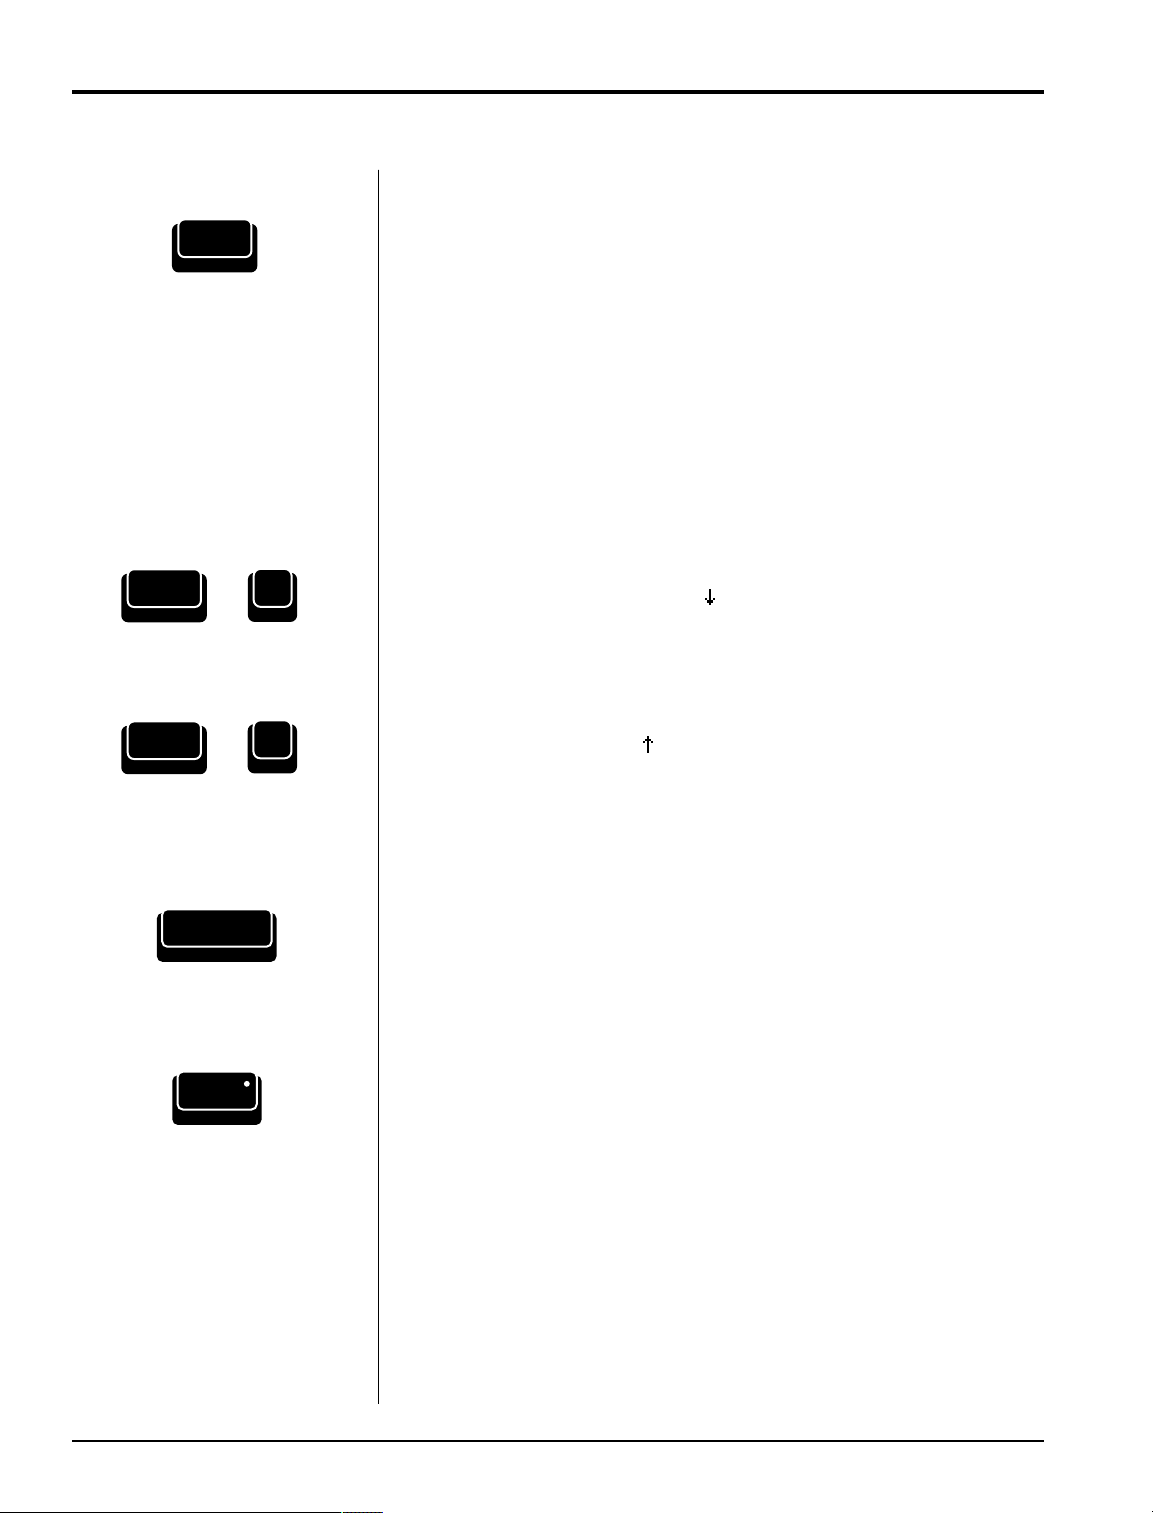
The Code key is used in combination with other keys to activate features.
Code key combinations are activated by pressing and holding the Code
key down while pressing a second key. For a complete list of Code
functions, see the back cover of this manual.
Index Down/Index Up
When you are using the End of Page Warning, you will need to adjust
your paper using the Index keys. With these keys, you can move the
paper up or down in increments according to the line spacing
selected – single, 11⁄2, or double line spacing.
Using Index Down
[
Press Code + Index Down (7). In Type Mode, the typing position moves
down. In Mem Mode, the symbol ( ) appears on the display. When
printing, the printing position moves down to that point.
Using Index Up
Press Code + Index Up (6). In Type Mode, the typing position moves up.
In Mem Mode, the symbol ( ) appears on the display. When printing,
the printing position moves up to that point.
These are repeating keys. If you hold them down, the paper will
continue to move up or down.
Shift
Shift
Paper In
Press Shift while typing an alpha key to type upper case letters or to type
the characters located on the top of certain keys, such as $ or %.
Lock
Lock
Caps Lock
1-10 — Hardware Basics Smith Corona Corporation
Press Lock to continuously type in upper case characters while also
typing the characters on the top row (left) of the number keys. The Lock
light will come on when Lock is pressed. To deactivate Lock, press Lock
or Shift. The light goes out.
Page 11
Shift Lock Indicator Light
The Shift Lock light will flash to indicate that you have typed an error or
word not in the dictionary. Press the Spacebar to deactivate it.
Caps Lock
The Caps Lock feature enables you to type numbers and capital letters
without accessing the Shift keys.
1. Press Code + Lock (Caps Lock) to activate. A beep is heard and the
Shift Lock light goes on. Display prompts:
Caps Lock ON
and the
2. Type an upper case letter or a numeral without using the Shift key.
3. Press Code + Lock (Caps Lock) to deactivate the feature. No beep is
heard. The display prompts:
Caps Lock OFF
symbol appears when you activate the Status Indicator.
NOTE: If a Shift key is pressed, lower case characters and other
punctuation/symbols on the top of the keys can be
accessed; e.g., 1⁄4, ”, @.
Code
+
Lock
Caps Lock
Smith Corona Corporation Hardware Basics — 1-11
Page 12
Code
+
K
KB ll
Keyboard II
The Keyboard II feature allows you to access the international characters
and other symbols that appear on the top right of the number keys.
1. Press Code + KBII (K). The display prompts:
Keyboard II ON
2. Press Shift + Desired Keyboard II key.
3. Press Code + KBII (K) to deactivate Keyboard II. The display
prompts:
Keyboard II OFF
For those characters (^ ~ `) printed above letters, type the KB II
character first, then the desired letter. The print hammer or cursor
remains in place so you can type the letter below the symbol. The
Status Indicator will display II when Keyboard II is activated.
RRRRRR
R
`
Repeat Action
All keys will automatically repeat when held down except the following
Keyboard II characters: ^ ` ~.
1-12 — Hardware Basics Smith Corona Corporation
 Loading...