

smirthwaite STRATO 10041, STRATO 10043, STRATO 10042, STRATO 10044, STRATO 10045 Instructions For Use Manual
6/17
STRATO
INSTRUCTIONS FOR USE
Sizes 1 & 2
Codes 10041 & 10042
Sizes 3, 4 & 5
Codes 10043, 10044 & 10045

!
Strato
1
SECTION PAGE START
1.0 STRATO SIZES 1&2 2
2.0 STRATO SIZES 3,4 & 5 19
!
Strato
2
STRATO
INSTRUCTIONS FOR USE
Sizes 1 & 2
Codes 10041 & 10042

!
Strato
3
CONTENTS PAGE
1.0 INTRODUCTION 3
2.0 ILLUSTRATION OF YOUR CHAIR 4
3.0 FOR YOUR SAFETY 5
4.0 TECHNICAL DATA 7
5.0 UNPACKING YOUR CHAIR 8
6.0 SETTING UP AND ADJUSTING YOUR CHAIR 8
7.0 CARE AND MAINTENANCE 14
8.0 WARRANTY & SERVICE 15
9.0 CONTINUOUS IMPROVEMENT 16
10.0 SERVICE INSPECTION 17
1.0 INTRODUCTION
Thank you for choosing the Smirthwaite Strato Nursery Chair.
Strato is an innovative Nursery chair designed for children who are able to get in and
out of their chair independently but require minimal to moderate postural support
when seated. The uniquely contoured seat tilts forward to encourage an extremely
comfortable anterior tilt of the pelvis for improved stability as well as trunk and lower
limb alignment. The Strato aims to enhance the user’s function and cognitive
development.
IMPORTANT!
These instructions should be read by all therapists and carers using
the equipment and should be retained for future reference. The
product should always be used under adult supervision.
Any incorrect use of the product and failure to follow the instructions
may put the user at risk or impede the function. If you have any
queries using this product or wish for further copies, please do not
hesitate to contact Customer Service department on
T: +44 (0) 1626 835552.
This product has been designed and manufactured specifically and
solely for use by clients with special needs.

!
Strato
4
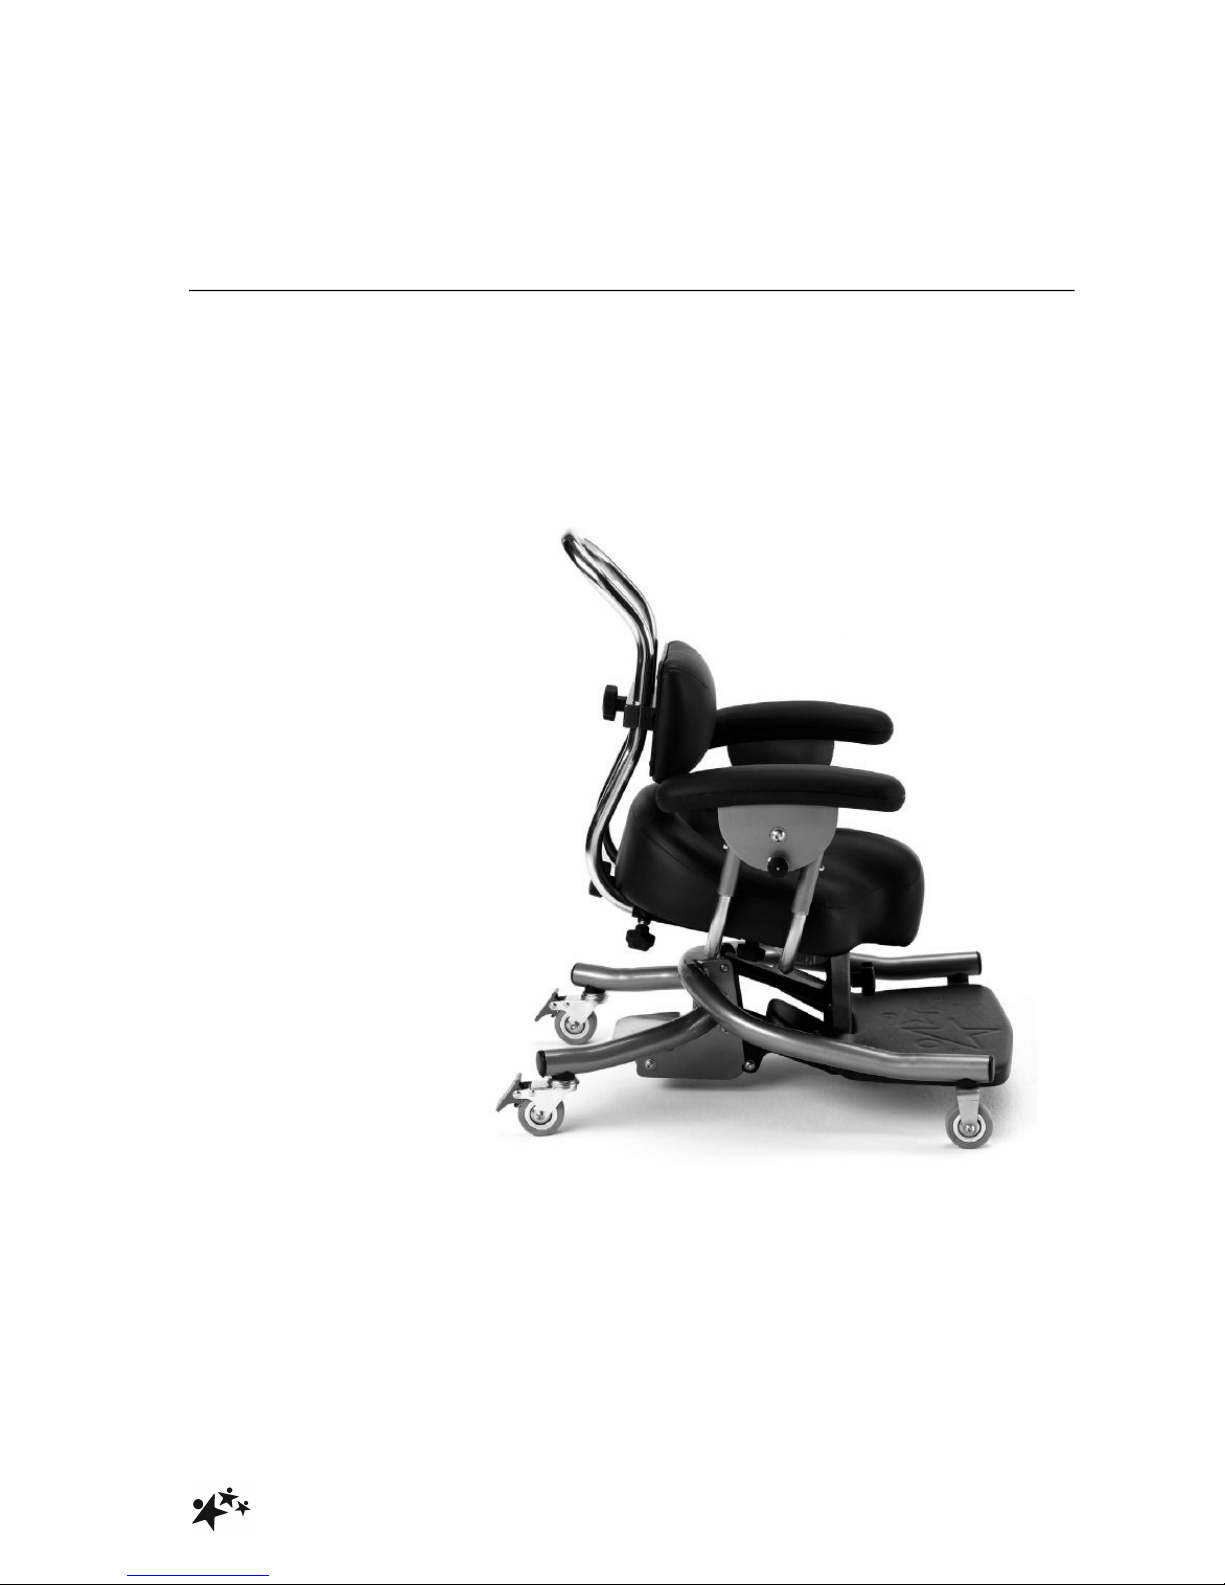
2.0 ILLUSTRATION OF YOUR CHAIR
A. Handle Extension
B. Handle
C. Handy Hook
D. Lumbar Prompt!
E. Pelvic Strap
F. Armrest
G. Personal Pocket
H. Seat
I. Footrest
J. Castor

!
Strato
5
3.0 FOR YOUR SAFETY
STOP!
Please read these instructions CAREFULLY and THOROUGHLY.
• The user should NOT be left unattended whilst in the chair. Always ensure a
responsible therapist or carer is in attendance.
• The carer should be familiar with the methods of adjustment and have completed
all adjustments appropriately to meet the needs of the child before transferring
the child onto the chair
• Regular maintenance checks and cleaning are essential for the safe use of this
equipment (see care and maintenance section).
• Always fasten the pelvic strap and any other straps provided with the chair.
• Always lock at least two of the wheels when the chair is static!
• The castors of the Strato are designed for indoor use only, and may be damaged
if used outdoors. The Strato should not be used as a transit chair!
• Regularly check that straps and/or harnesses are not showing signs of tearing or
fraying, and that they fasten correctly.
• If any part is loose, damaged or functioning incorrectly, DO NOT use until
rectified.
• Always keep this product away from naked flames, cigarettes and sources of
heat including open fireplaces, radiators, heaters.
• DO NOT fit parts or accessories of other manufacturers to this product unless
authorised to do so in writing by Smirthwaite Ltd. Failure to follow these
instructions will not only invalidate the guarantee but could make the chair
dangerous to use. Smirthwaite Ltd will not accept liability for any injury or damage
incurred through such malpractices. Any repairs required must be carried out by
Smirthwaite Ltd authorised personnel.
• If you believe the chair or any fitted accessory to be faulty at any time, DO NOT
USE – contact Smirthwaite by telephone on +44 (0)1626 835552
• The Strato is CE marked. This certifies that it meets all relevant European safety
requirements.

!
Strato
6
STOP!
LAP STRAPS & HARNESSES SAFETY NOTICE
Lap straps and harnesses must be appropriate and safe for the user and
the users clothing.
Lap straps and harnesses must be checked every time the chair is used to
ensure they are fitted as prescribed by the clinician, take account of the
users clothing and are tightened so that the user cannot sustain injury.
Checking the fit of lap straps and harnesses must be done with the user in
the chair and should be undertaken as soon as the users sits in the chair.
!
Strato
7
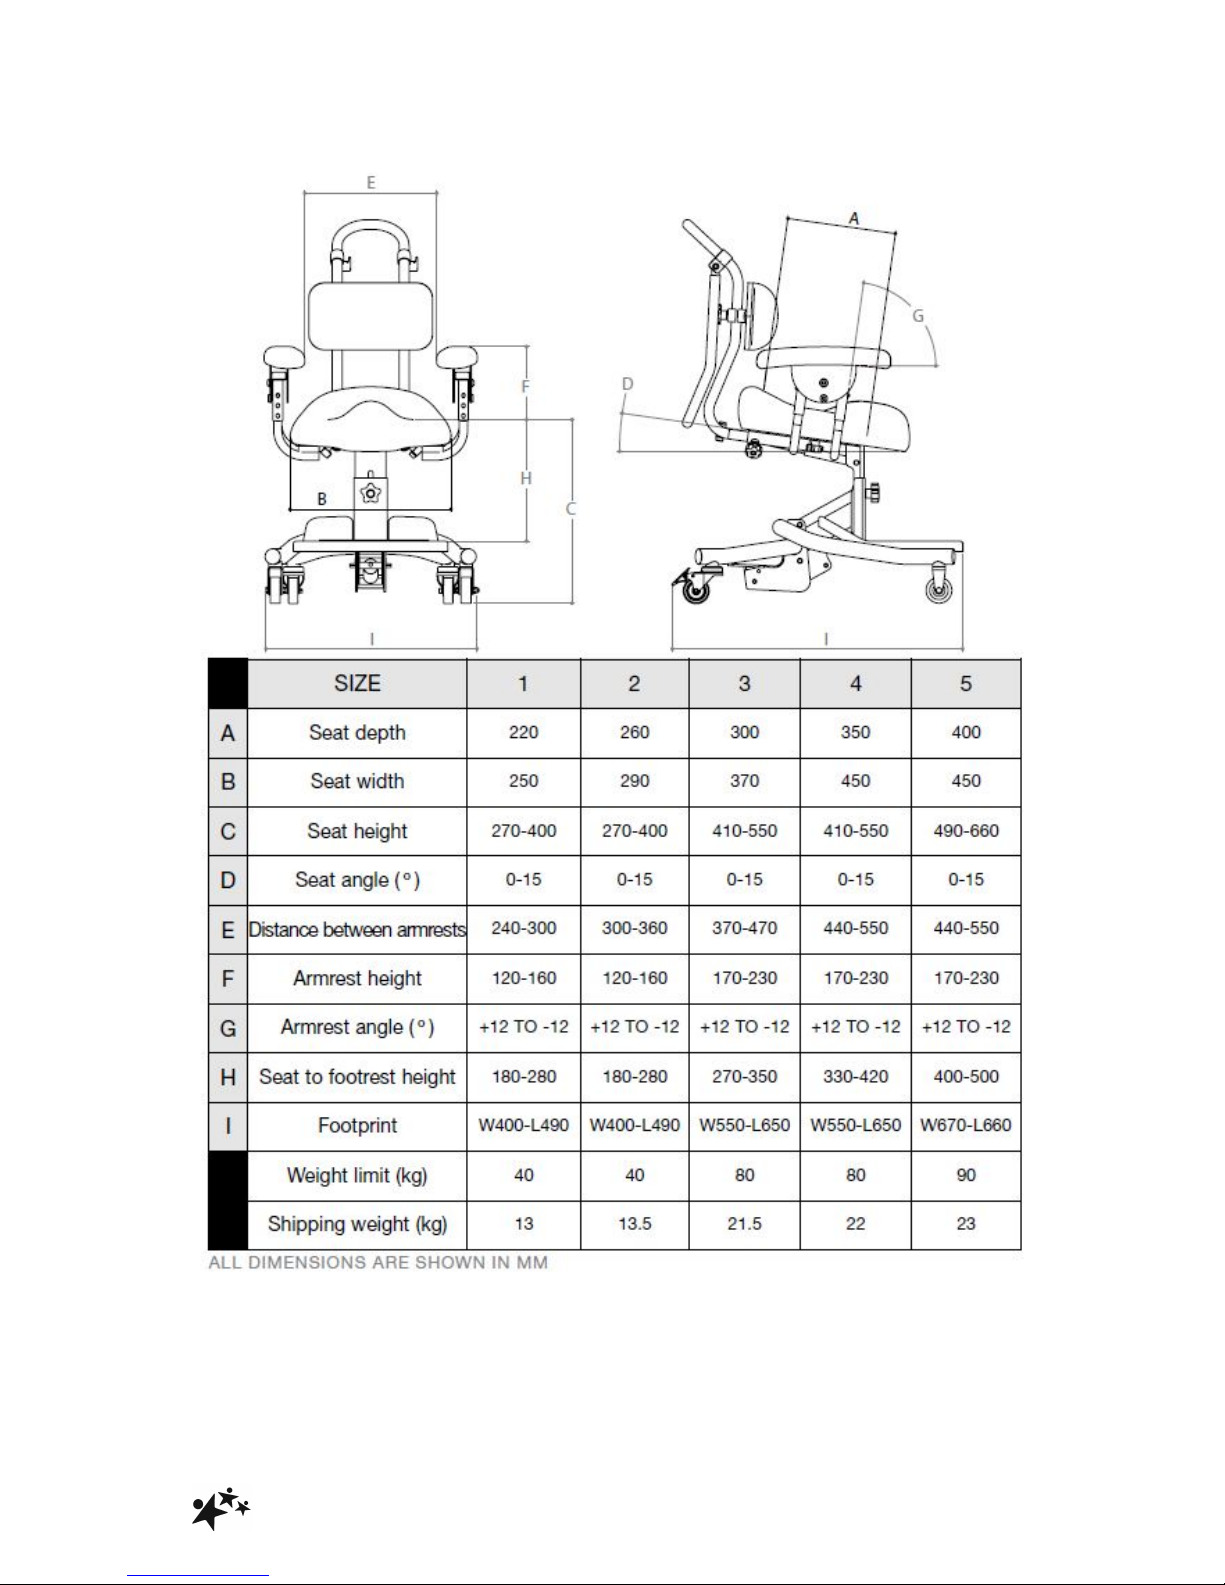
4.0 TECHNICAL DATA
!
Strato
8
5.0 UNPACKING YOUR CHAIR
• When delivered, the Strato will be ready assembled as per your order.
• Please take note of any instructions on the packaging box when unpacking your
Strato.
• Once the chair has been carefully unpacked, please check all parts.
• Ensure that all handwheels are securely tightened and that none are missing.
• If any part is loose, damaged or functioning incorrectly, do not use until rectified.
6.0 SETTING UP AND ADJUSTING YOUR CHAIR
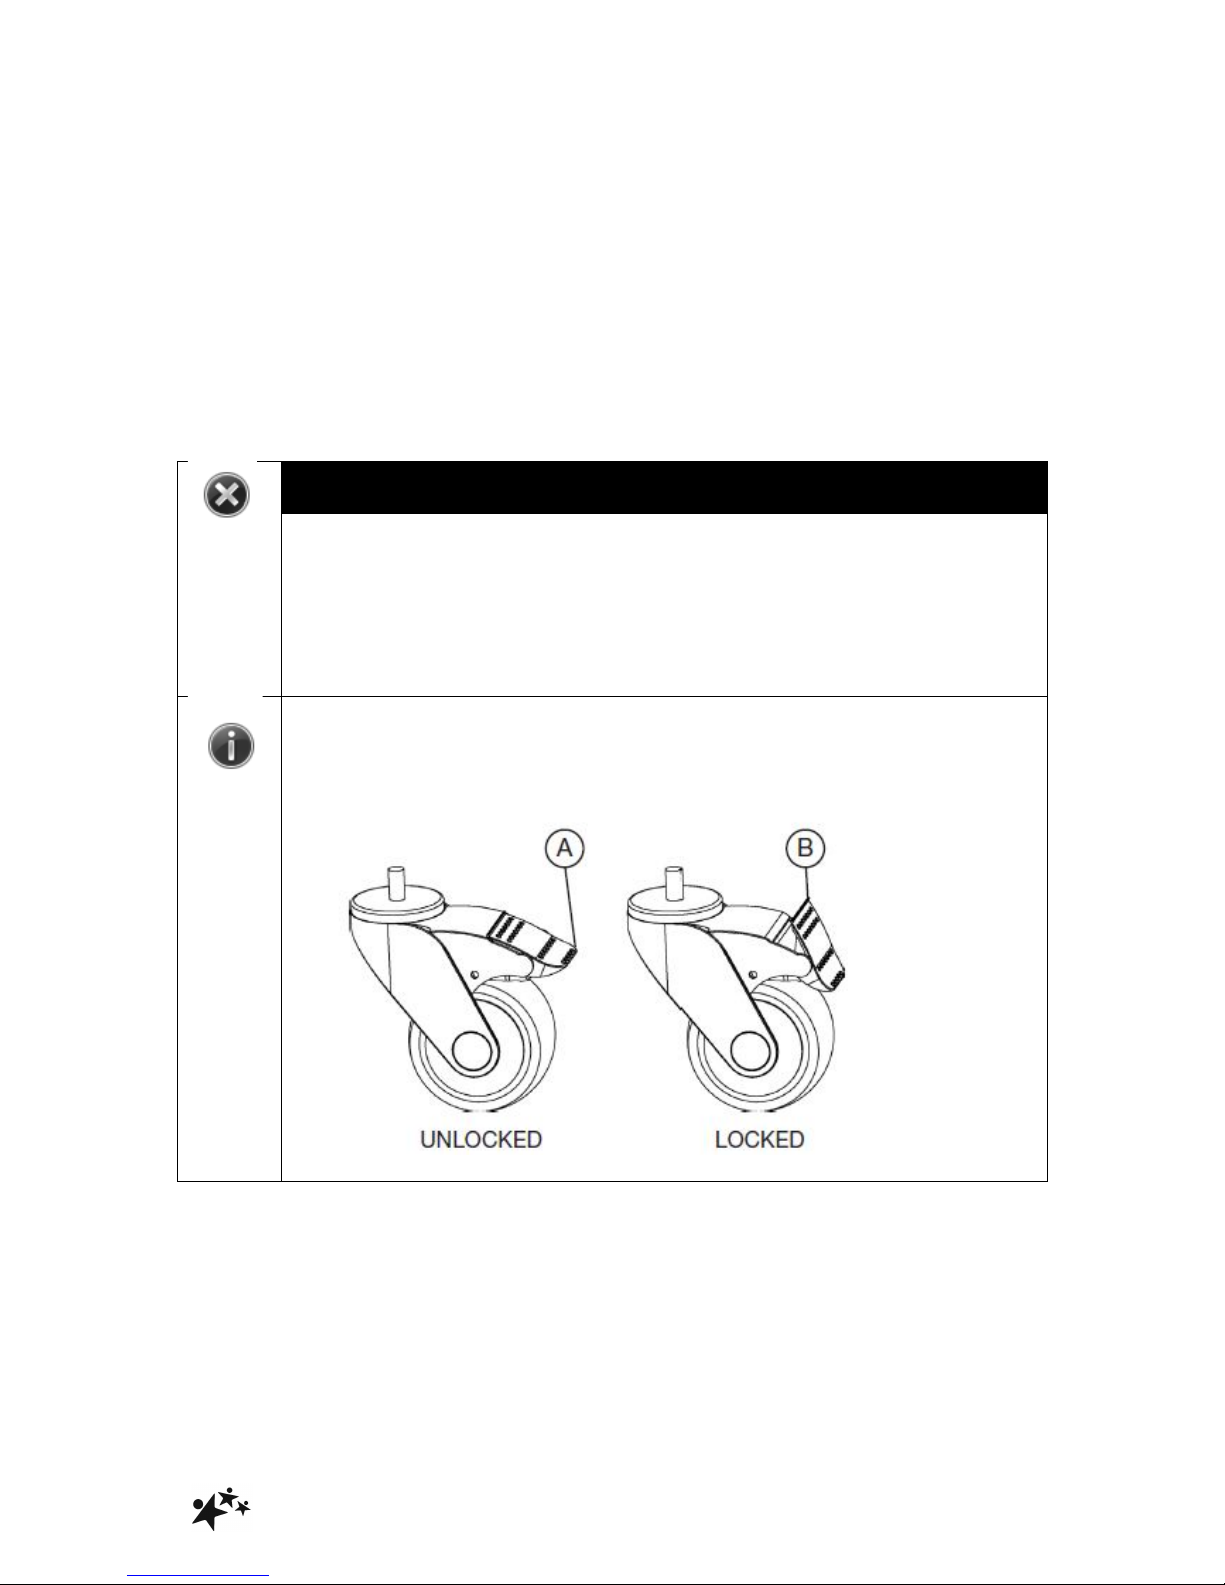
STOP!
If in any doubt, ALWAYS seek ADVICE.
Always turn hand wheels, levers and screws clockwise to tighten or
anti-clockwise to loosen. The chair must be fully adjusted by a
therapist or trained representative before use.
Always lock the castors when attaching items or making
adjustments. To lock, apply foot to point (A), to unlock apply foot to
point (B).

!
Strato
9
6.1 SEAT
6.1.1 SEAT ADJUSTMENTS
• Two adjustments can be made to the seat; height and angle
• Adjustments can be made with or without the user seated in the chair!
6.1.2 HEIGHT
• Hold handle (A)
• Depress pedal (B) with foot
• Adjust seat height to required
position
• Take foot of pedal (B)!
6.1.3 ANGLE (FORWARD TILT)
• Turn handwheel (D) clockwise to
tilt the seat backward
• Turn handwheel (D) anitclockwise
to tilt the seat forward
• Use adjustment indicator (E) to
record angle of the seat
!
Strato
10
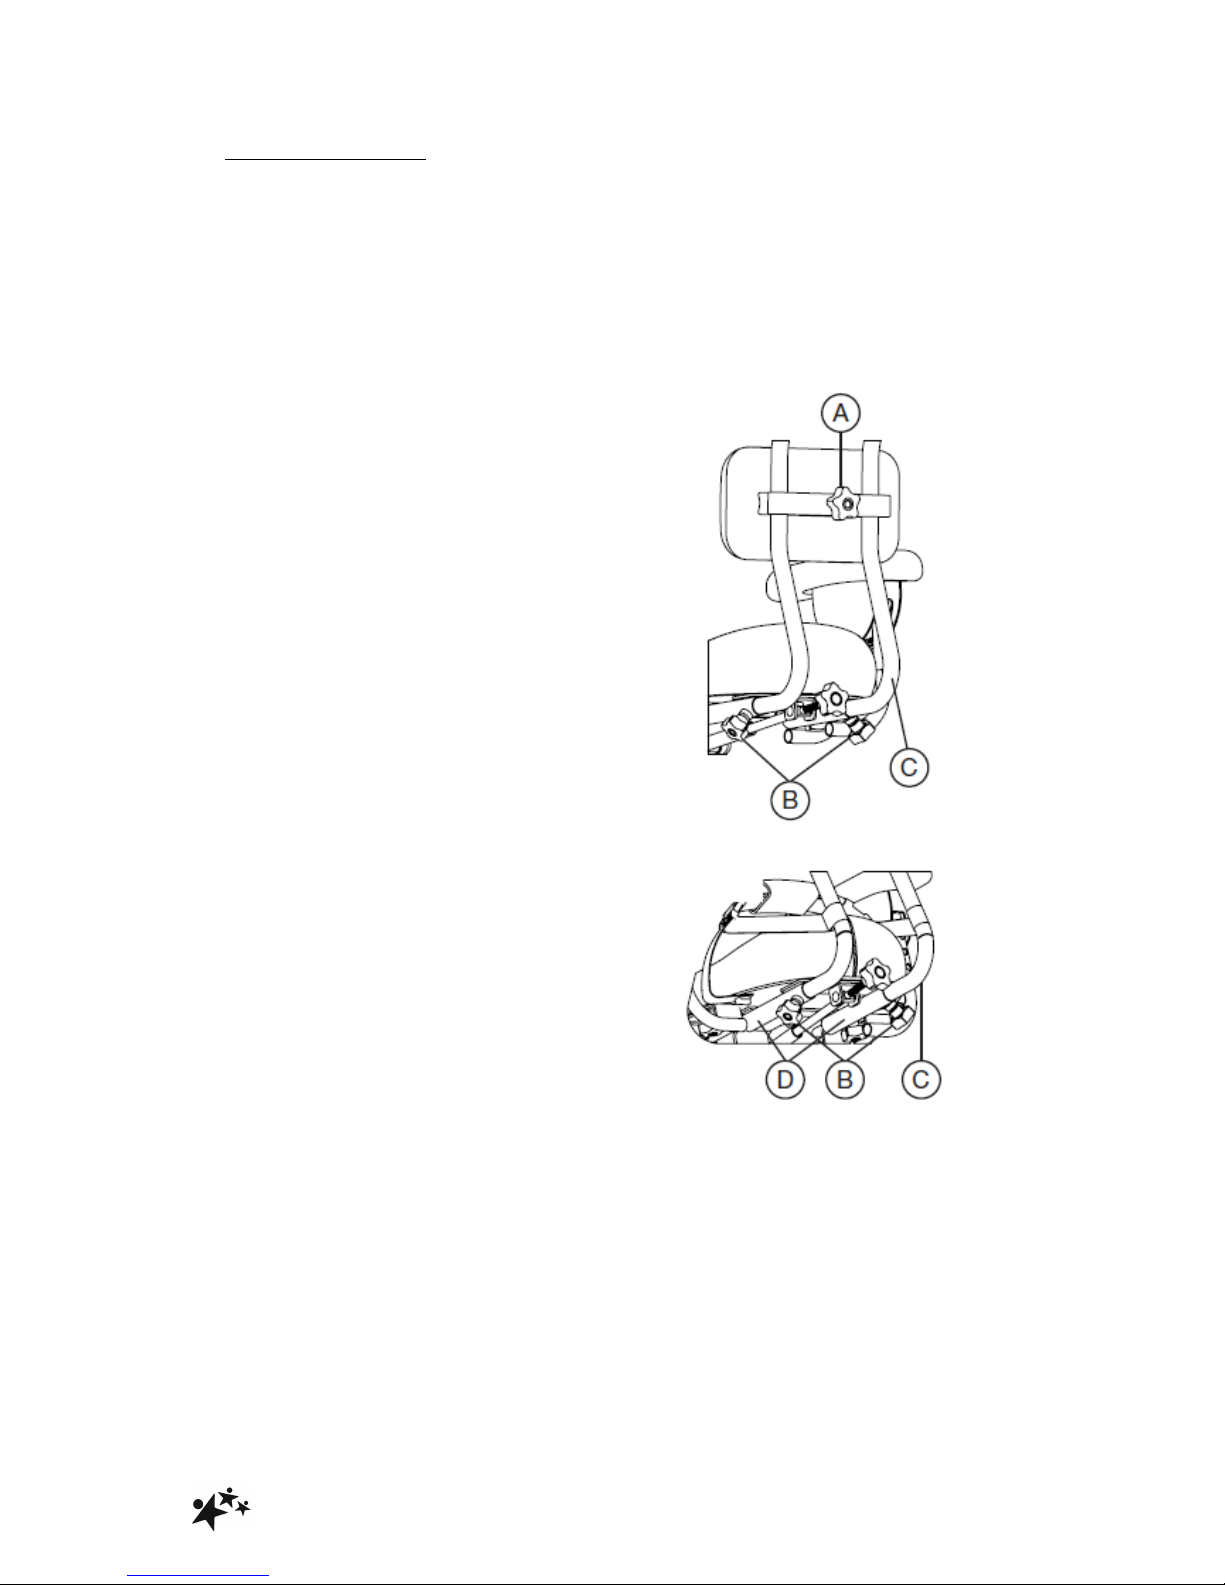
6.2 LUMBAR PROMPT
6.2.1 LUMBAR PROMPT ADJUSTMENT
• It is recommended that the lumbar prompt be correctly positioned at the user’s
lumbar region!
• Two adjustments can be made to the Lumbar Prompt; height and depth.!
6.2.2 HEIGHT
• Loosen handwheel (A)!
• Move lumbar prompt up or down
to achieve the desired position!
• Re-tighten handwheel (A)!
6.2.3 DEPTH
• Loosen handwheels (B)
• Slide lumbar prompt tubes (C) in
or out to the desired position
• Re-tighten handwheels (B)
6.2.4 LUMBAR PROMPT
ATTACHMENT
• Insert ends of lumbar prompt tube
(C) into receivers (D)
• Tighten handwheels (B)
• To detach, simply reverse the
process
!
Strato
11
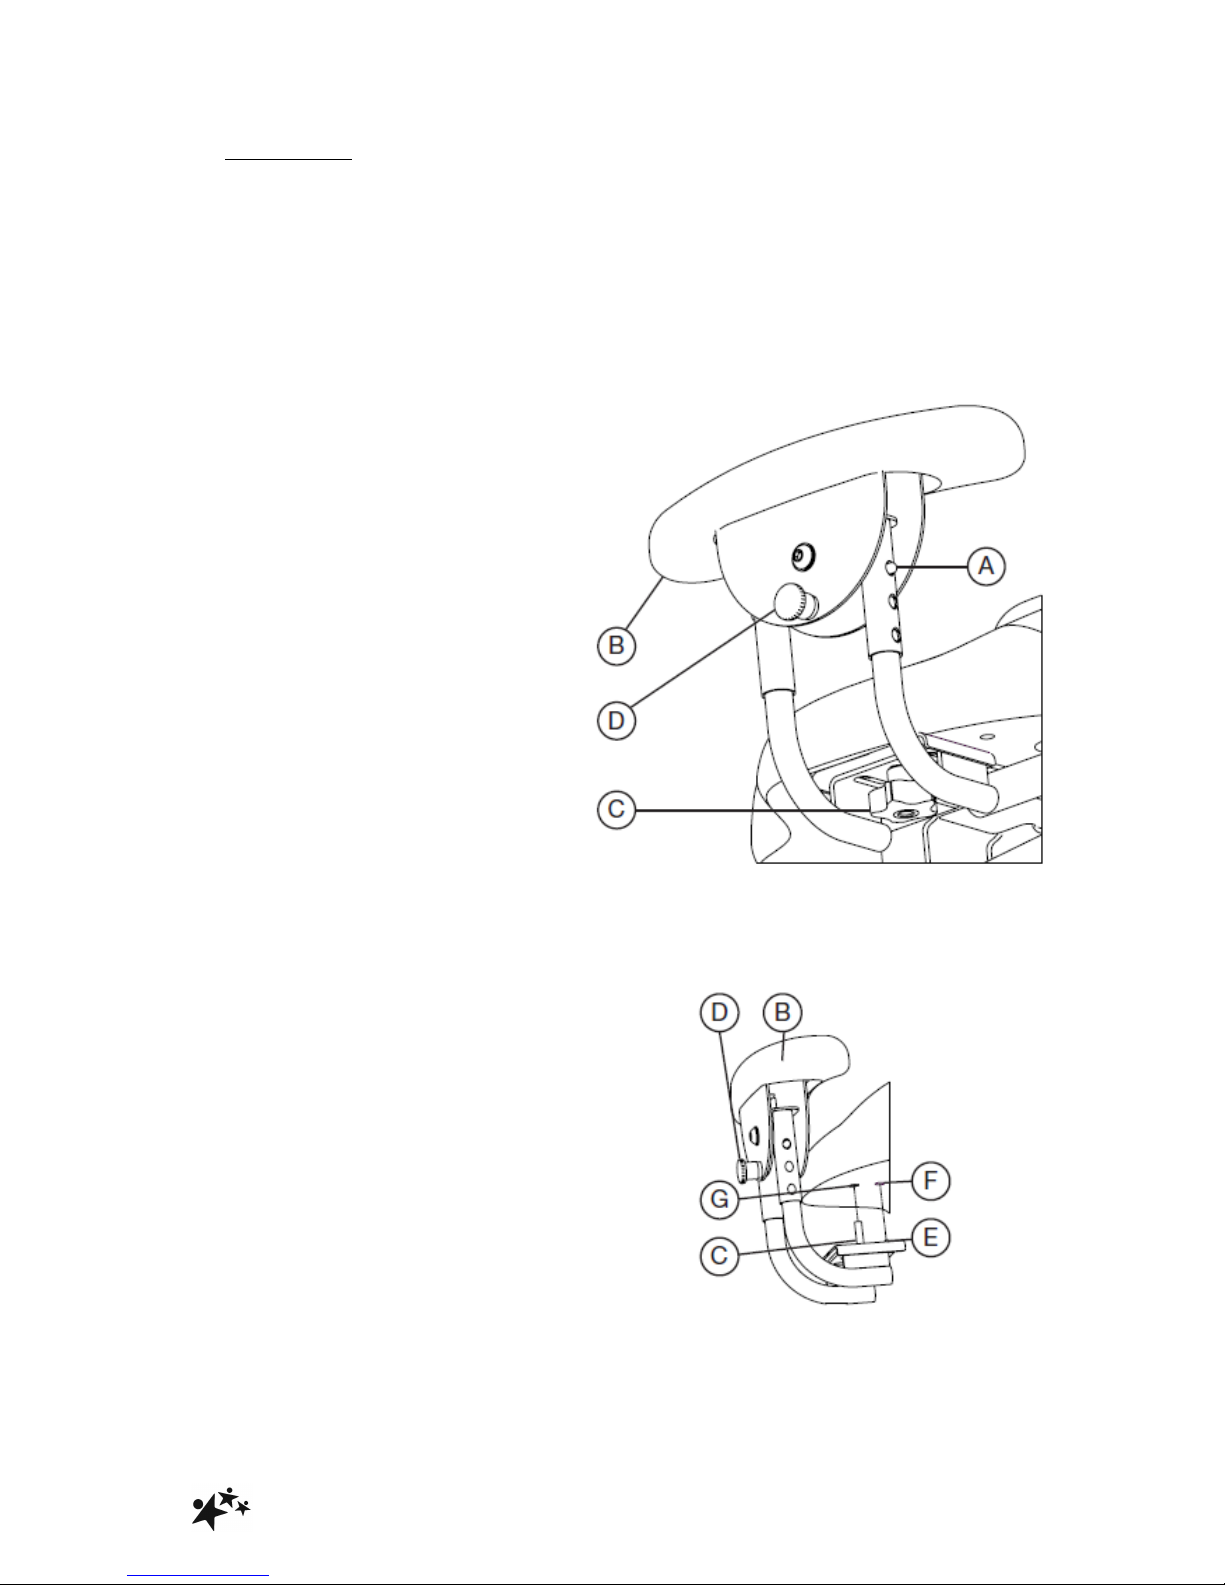
6.3 ARMRESTS
6.3.1 ARMREST ADJUSTMENT
• Three adjustments can be made to the armrests; height, width and angle.!
6.3.2 HEIGHT
• Depress spring pins (A)!
• Slide the armrest (B) up or down
to the desired position!
• Ensure both spring pins are re-
engaged!
• Repeat for the other armrest!
6.3.3 WIDTH
• Loosen handwheel (C)
• Slide armrest (B) in or out to
desired position
• Re-tighten handwheel (C)
• Repeat for the other armest
6.3.4 ANGLE
• Pull spring plunger (D)
• Tilt armrest (B) to desired position
• Release spring plunger (D)
• Ensure spring plunger (D) is re-
engaged
• Repeat process for the second
armrest
6.3.5 ARMREST ATTACHMENT
• For ease of attaching armrest, lay
chair on its side
• Hold armest (B) under seat
• Locate tab (E) in hole (F)
• Screw handwheel (C) into hole
(G)
• Tighten handwheel (C) to secure
• Repeat for second armrest
• To detach, simply reverse the
process!
 Loading...