

smirthwaite Juni Instructions For Use Manual
06/15
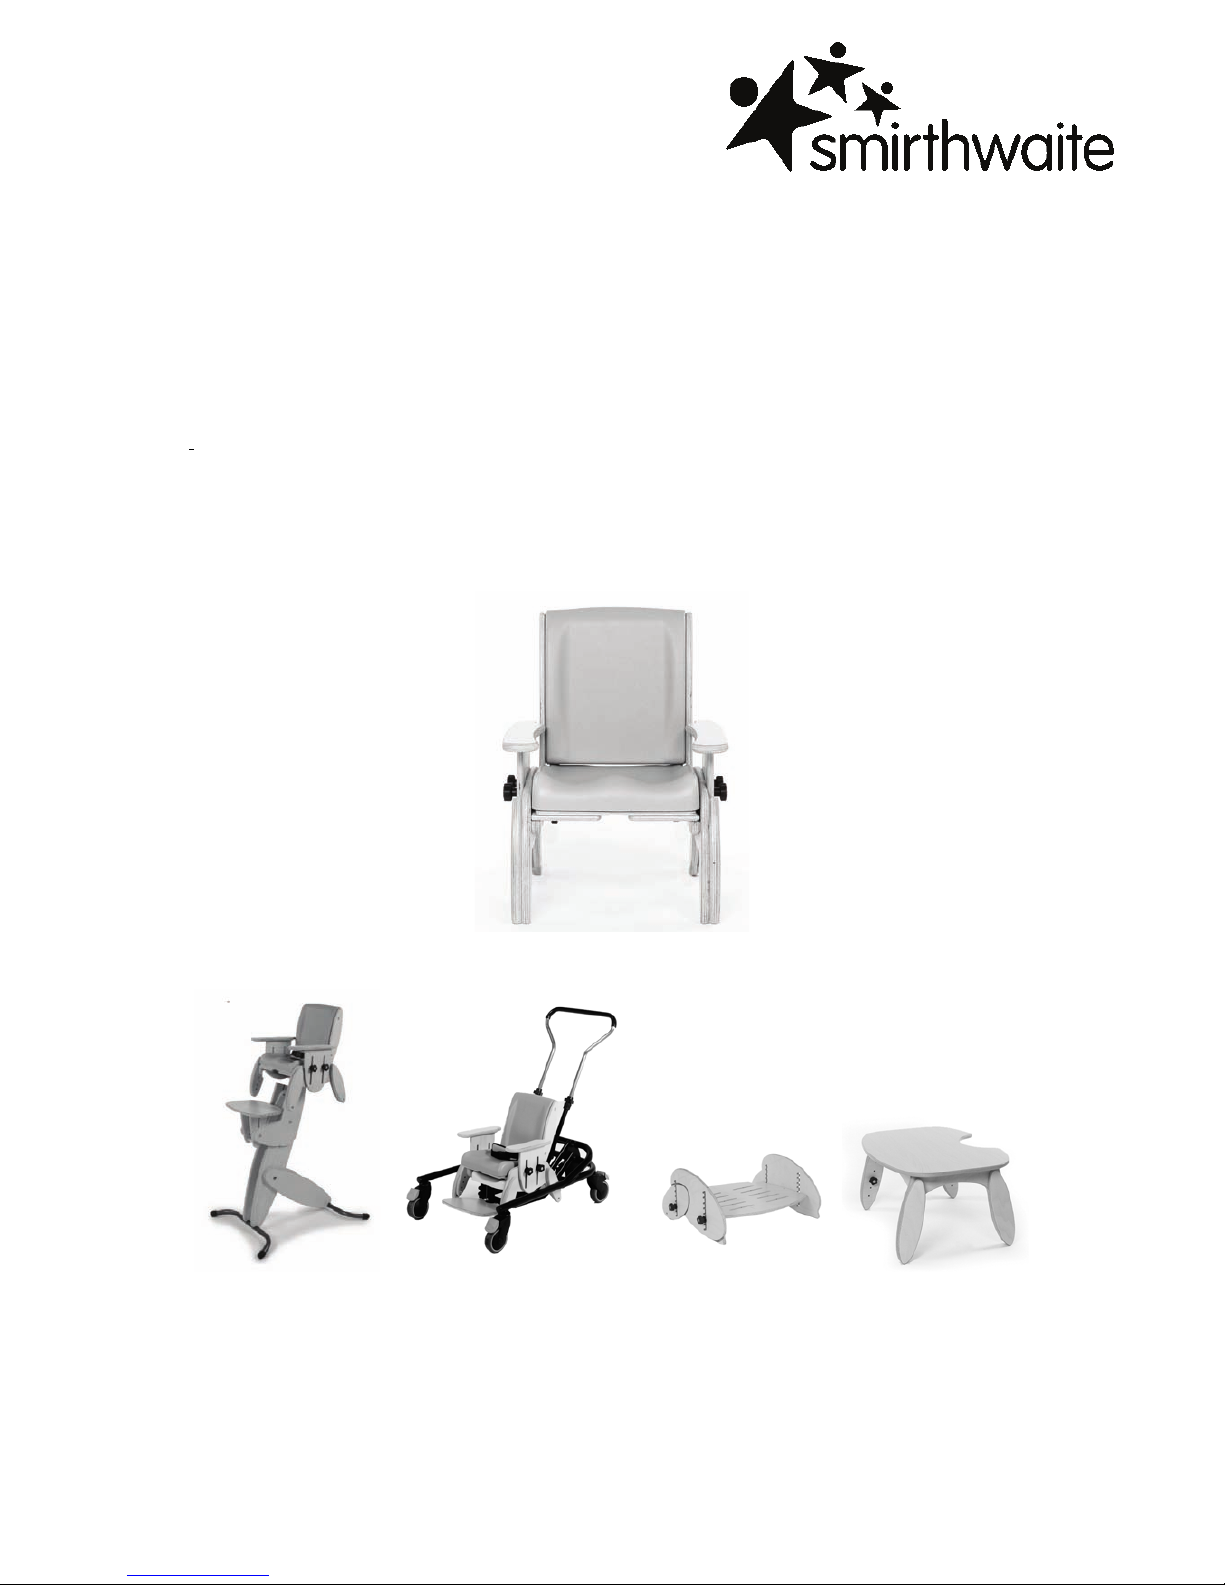
Juni
INSTRUCTIONS FOR USE
Covers Juni Chair, Booster, Hi Lo Base, Footrest & Table

!
Juni
1
SECTIONS PAGE START
1.0 JUNI CHAIR 2
2.0 BOOSTER 19
3.0 HI-LO BASE 35
4.0 FOOTREST 48
5.0 TABLE 57
Juni
2
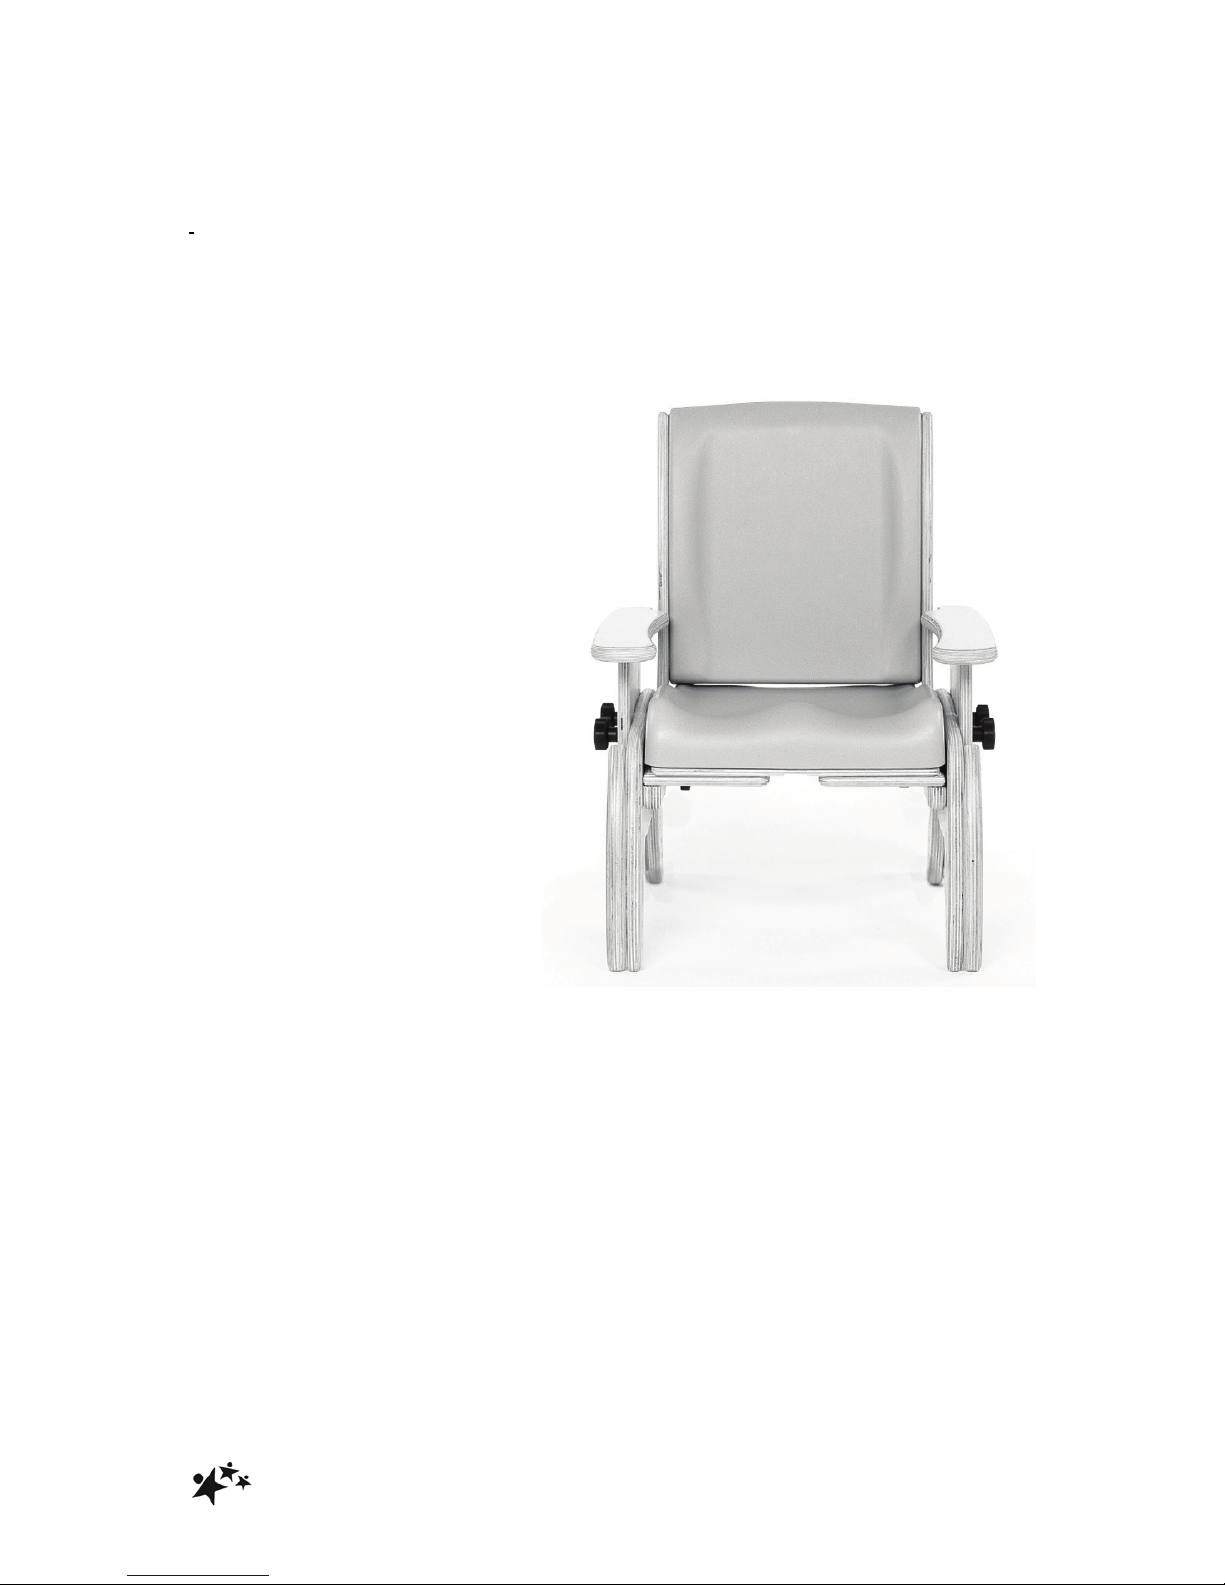
1.Juni Chair
INSTRUCTIONS FOR USE
Codes 16011 - 16034
!
Juni
3
CONTENTS PAGE
1.0 INTRODUCTION 3
2.0 ILLUSTRATION & TECHNICAL DATA 4
3.0 FOR YOUR SAFETY 4
4.0 UNPACKING AND ASSEMBLING YOUR CHAIR 5
5.0 SETTING UP AND ADJUSTING YOUR CHAIR 6
6.0 CARE & MAINTENANCE 14
7.0 WARRANTY & SERVICE 17
8.0 CONTINUOUS IMPROVEMENT 17
9.0 SERVICE INSPECTION 18
1.0 INTRODUCTION
Thank you for choosing your new Smirthwaite Juni Chair.
The Juni has been designed for children who require minimal levels of postural
support when seated. It’s simple, unobtrusive design style fits well into nursery,
school and home environments.
IMPORTANT!
These instructions should be read by all therapists and carers using
the equipment and should be retained for future reference. The
product should always be used under adult supervision.
Any incorrect use of the product and failure to follow the instructions
may put the user at risk or impede the function.
This product has been designed and manufactured specifically and
solely for use by clients with special needs.

Juni
4
2.0 ILLUSTRATION OF YOUR JUNI CHAIR
A. Contoured seat
B. Adjustable
backrest
C. Adjustable
armrest
D. Outrigger legs
2.1 TECHNICAL DATA
3.0 FOR YOUR SAFETY
STOP!
Please read these instructions CAREFULLY and THOROUGHLY
! The user should NOT be left unattended whilst using the chair. Always ensure
a responsible adult or carer is in attendance
! The carer should be familiar with the methods of adjustment and have
completed all adjustments appropriately to meet the needs of the child before
use
! Regular maintenance checks and cleaning are essential for the safe use of
this equipment (see care and maintenance section)
A
C
D
B
!
Juni
5
! If any part is loose, damaged or functioning incorrectly, do not use until
rectified
! Always fasten the pelvic strap and any other straps provided
! The mobile base accessory is for indoor use ONLY
! Regularly check that straps or harnesses are not showing any signs of tearing
or fraying and that they fasten correctly
! Ensure that all screws and handwheels are securely tightened and that none
are missing.
! Always keep this product away from naked flames, cigarettes and sources of
heat including open fireplaces, radiators, heaters
! The chair is ONLY to be used on a flat level surface
!
! DO NOT fit parts or accessories of other manufacturers to this product unless
authorised to do so in writing by G&S Smirthwaite Ltd. Failure to follow these
instructions will not only invalidate the guarantee but could make the chair
dangerous to use. G&S Smirthwaite Ltd will not accept liability for any injury or
damage incurred through such malpractices. Any repairs required must be
carried out by G&S Smirthwaite Ltd authorized personnel
! The Juni is CE marked. This certifies that it meets all relevant European
safety requirements
STOP!
LAP STRAPS & HARNESSES SAFETY NOTICE
Lap straps and harnesses must be appropriate and safe for the user and
the users clothing.
Lap straps and harnesses must be checked every time the chair is used to
ensure they are fitted as prescribed by the clinician, take account of the
users clothing and are tightened so that the user cannot sustain injury.
Checking the fit of lap straps and harnesses must be done with the user in
the chair and should be undertaken as soon as the users sits in the chair.
If you believe this product to be faulty -DO NOT USE

Juni
6
4.0 UNPACKING AND ASSEMBLING YOUR CHAIR
• The Juni chair is supplied either fully assembled or in part assembled form, for
the customer to undertake final assembly – see guide below. For a detailed
guide refer to Section 5.
• A part assembled Juni is supplied with the seat cushion (A) removed and the
back cushion fully rotated forward (B). The back cushion is held secure for
transport by setting each armrest (C) in a low position once the back cushion has
been rotated forward. Leg outriggers (D) are set to minimum height as standard.
• No tools are required to finalize assembly, simply use the handwheels and
washers provided.
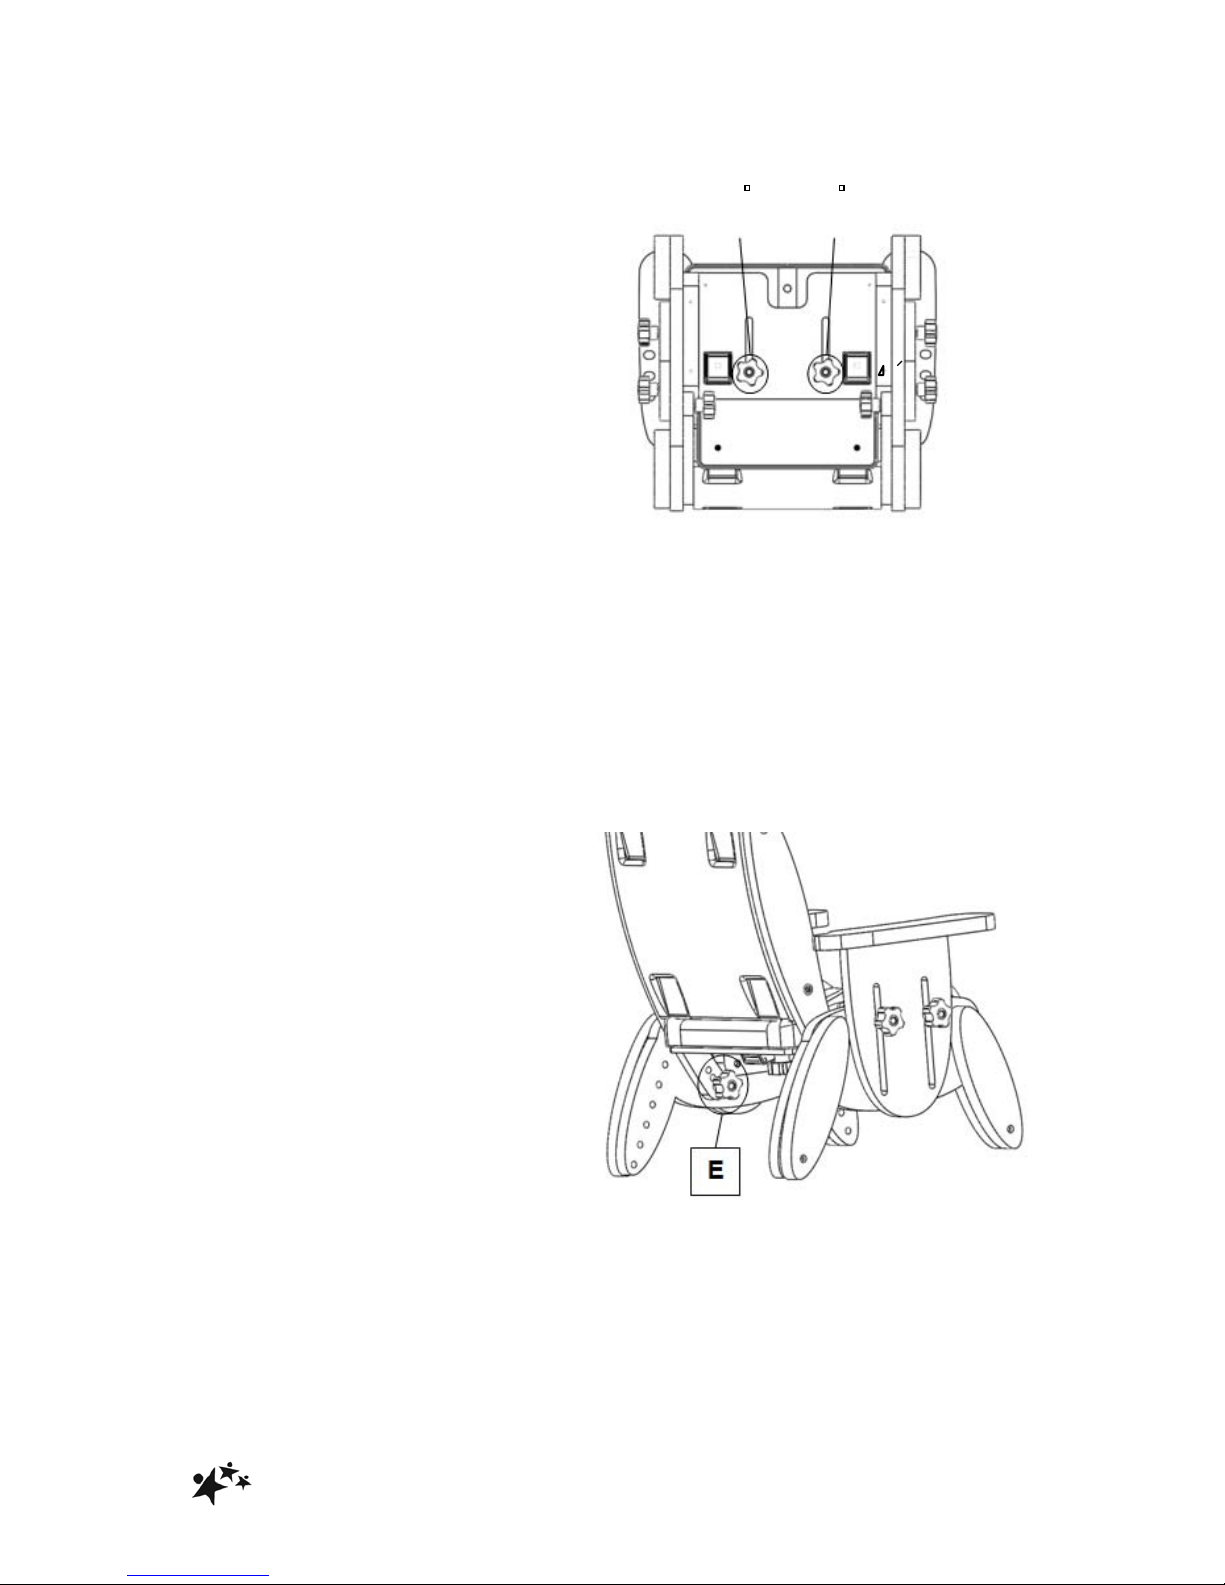
• Firstly, loosen the handwheels securing each armrest, and raise them to permit
the back cushion to be rotated to vertical or slight rearward recline. Insert a
handwheel and washer (E) in each chair side.
• Offer up the seat cushion (A) to the Juni chair and secure using two handwheels
and washers (F) on the underside of the chair
A B C
D F E

!
Juni
7
5.0 SETTING UP AND ADJUSTING YOUR JUNI CHAIR
STOP!
If in any doubt, ALWAYS seek ADVICE
Always turn handwheels and screws clockwise to tighten or anti-
clockwise to loosen. The chair must be fully adjusted by a therapist
or trained representative before use.
A hexagon key is provided for adjustments.
IMPORTANT!
The chair should be fully adjusted to fit the child before use.
5.1 SEAT
5.1.1 SEAT ADJUSTMENTS
Five adjustments can be made to the seat; height, depth, width, back recline
and back lumbar support adjustment.
5.1.2 HEIGHT
To adjust seat height
• Your Juni chair is fitted with four
outrigger legs (A), permitting
seat height adjustment
• To adjust, firstly lay the chair on
its back
• For each outrigger, identify and
remove the securing screw (M6
x 30) (B) to permit outrigger
removal
• Position each outrigger leg to
the desired height
• Insert and tighten each securing
screw to affix leg outrigger in
place
• Ensure all 4 legs are set to the
same height
Juni
8
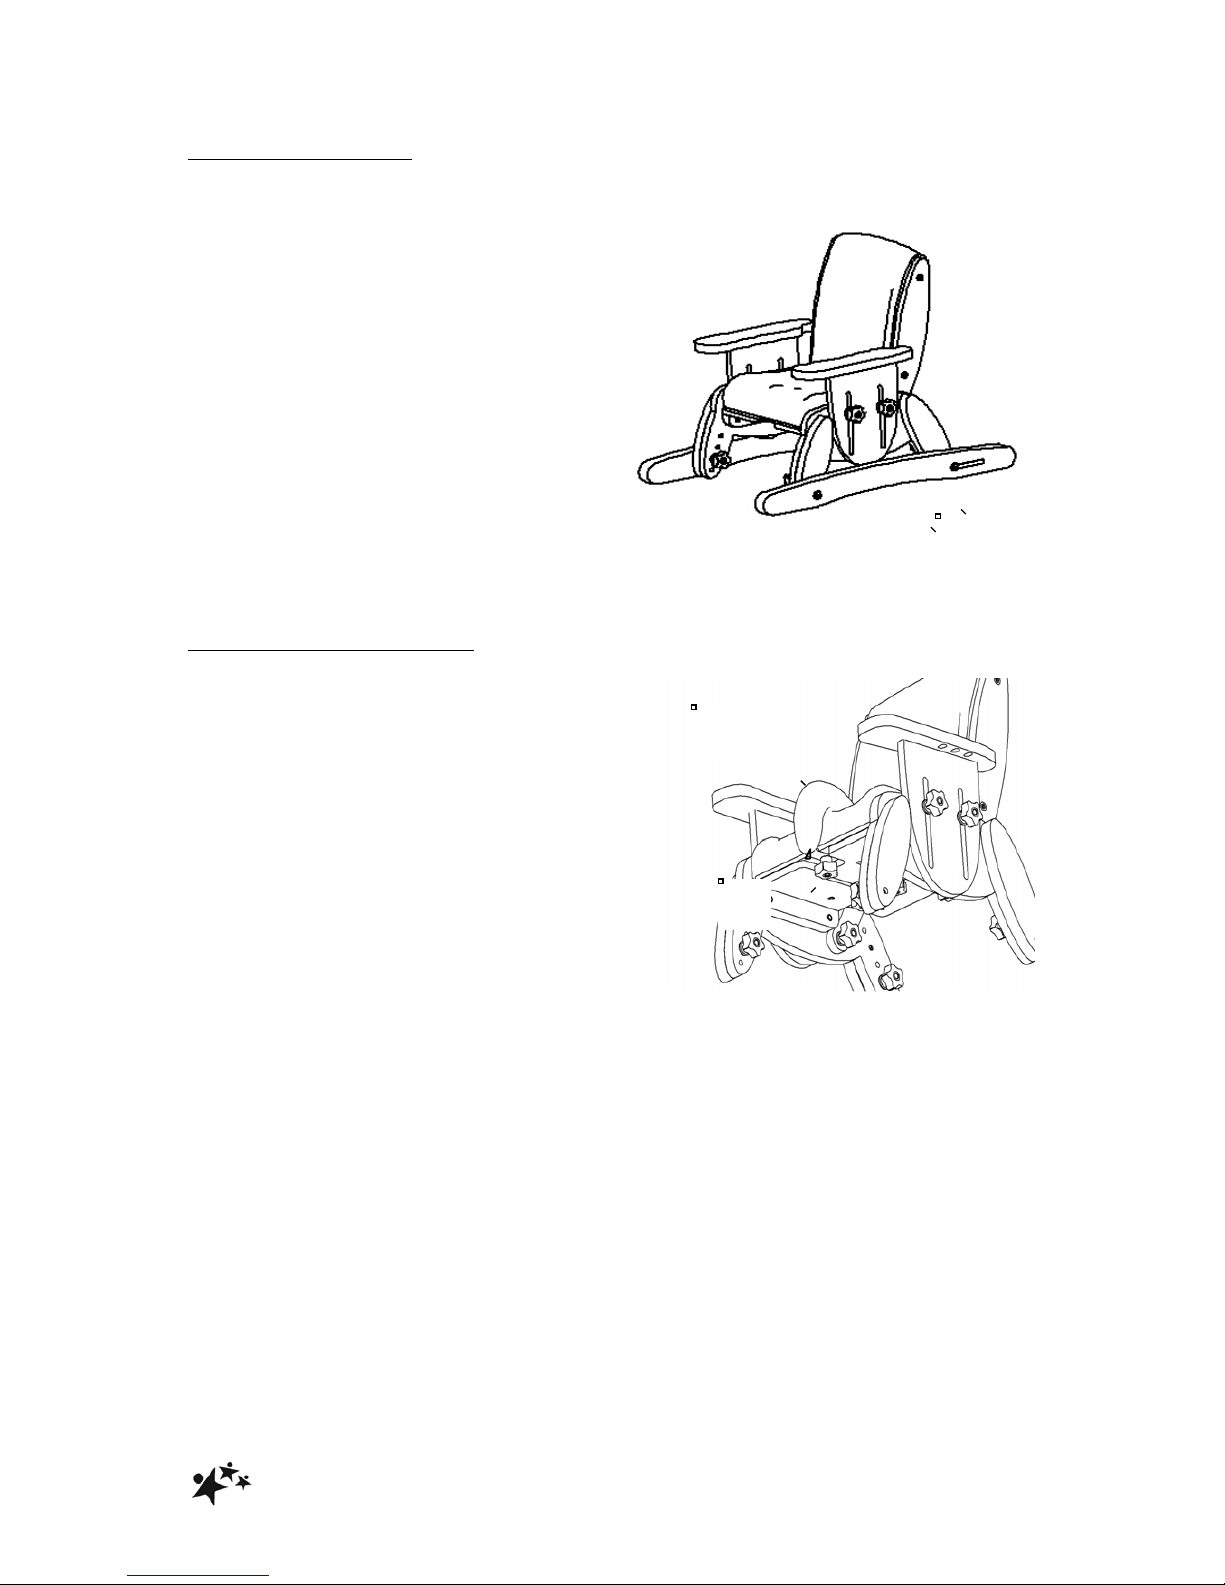
5.1.3 DEPTH
To adjust seat depth
•
Loosen handwheels (C) and
(D)
•
Slide seat forwards or
backward to desired position
•
Tighten handwheels (C) and
(D)
5.1.4 WIDTH
To reduce seat width or to provide additional support
• 25mm and 50mm width trunk support cushions can be supplied.
• Cushions are secured to the inside face of the arm rest wood, using the
Velcro strips provided.
5.1.5 BACK RECLINE
To adjust seat back recline angle
•
Locate and remove the two
handwheels securing the seat
back recline angle (E)
•
The Juni seat back can be
reclined in steps of 5o from 95o
through to 105o.
• When the desired back recline
angle has been achieved,
simply insert and tighten the
two handwheels (E).
C
D
!
Juni
9
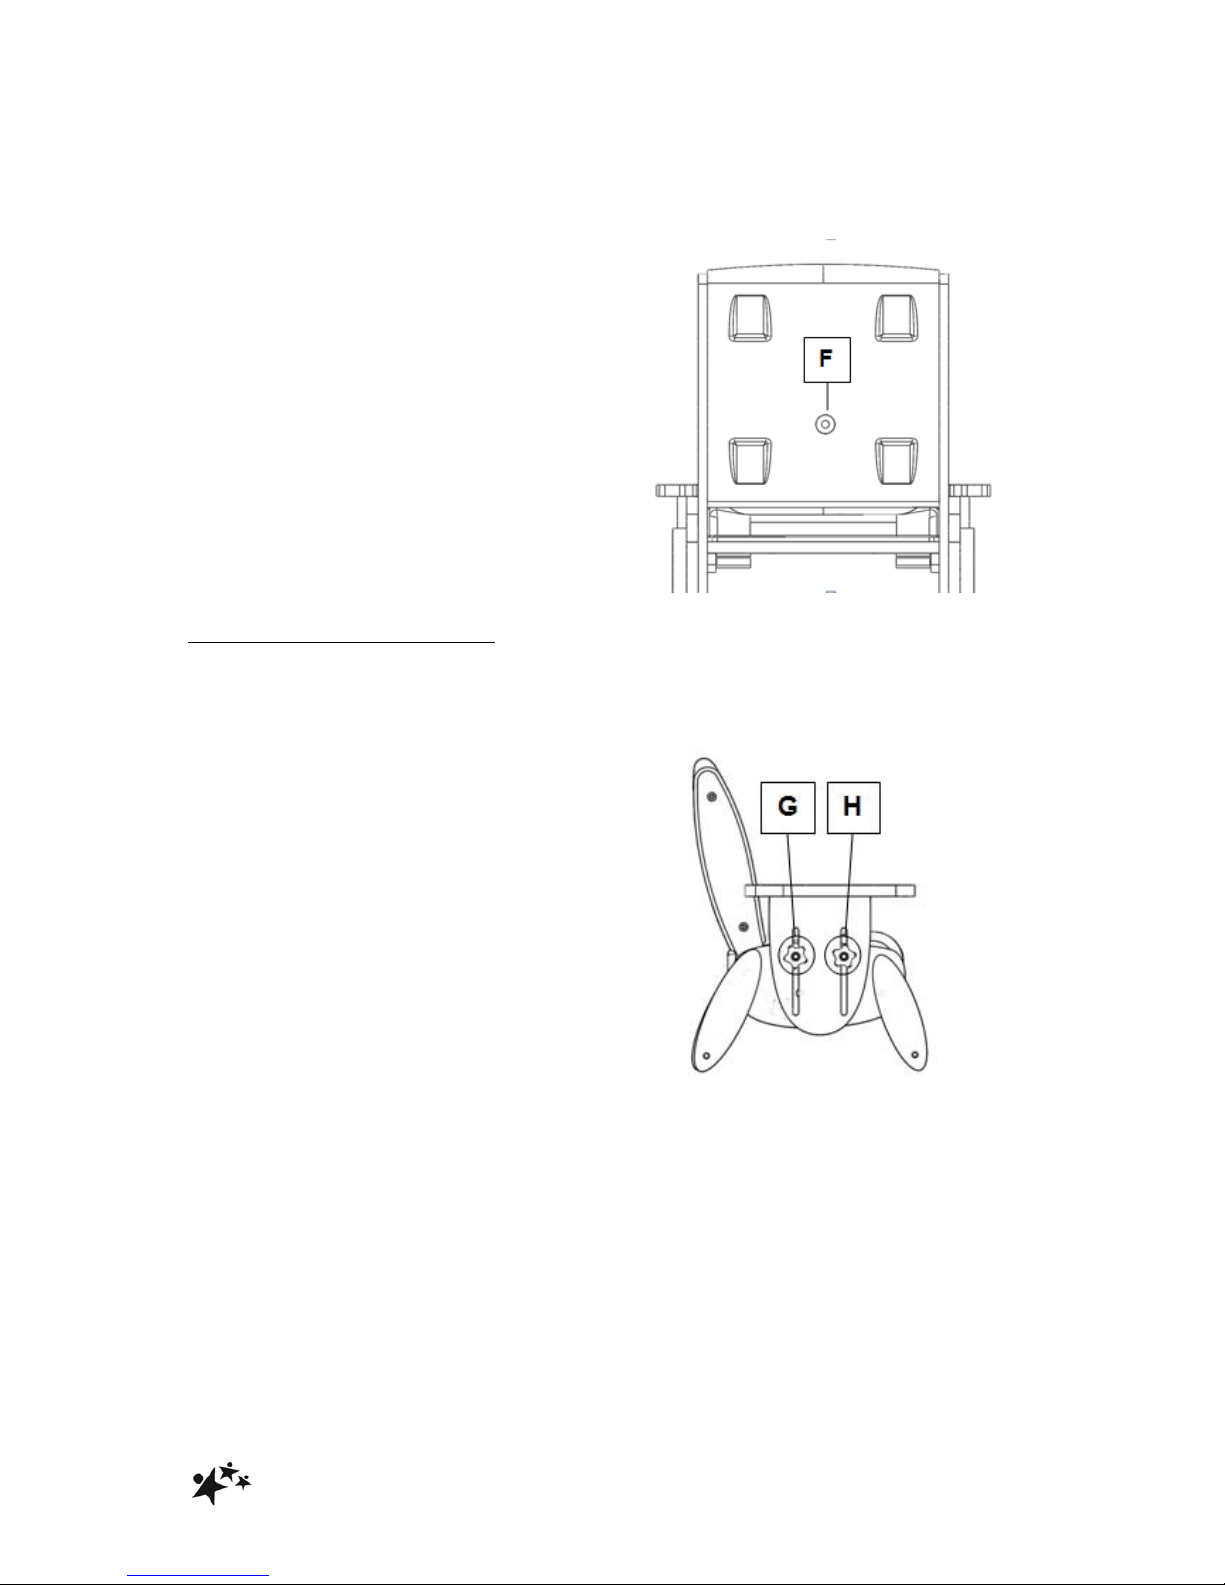
5.1.6 BACK LUMBAR PROMPT
To adjust seat back lumbar prompt
• To adjust the lumbar prompt, insert
the hex head tool (as supplied) into
rear of the Juni seat back (F), and
rotate to achieve the desired
amount of prompt.
!
5.2 ADJUSTABLE ARMREST
5.2. 1 HEIGHT
To adjust armrest height
• Loosen hand wheels and washers
(G, H)
• Slide arm rest up or down to the
desired position
• Tighten hand wheels (G, H)
• Repeat on opposite side of chair
• Ensure arm rests are at the same
height and horizontal – this is
particularly important if the chair is
to be used with the tray accessory.!
Juni
10
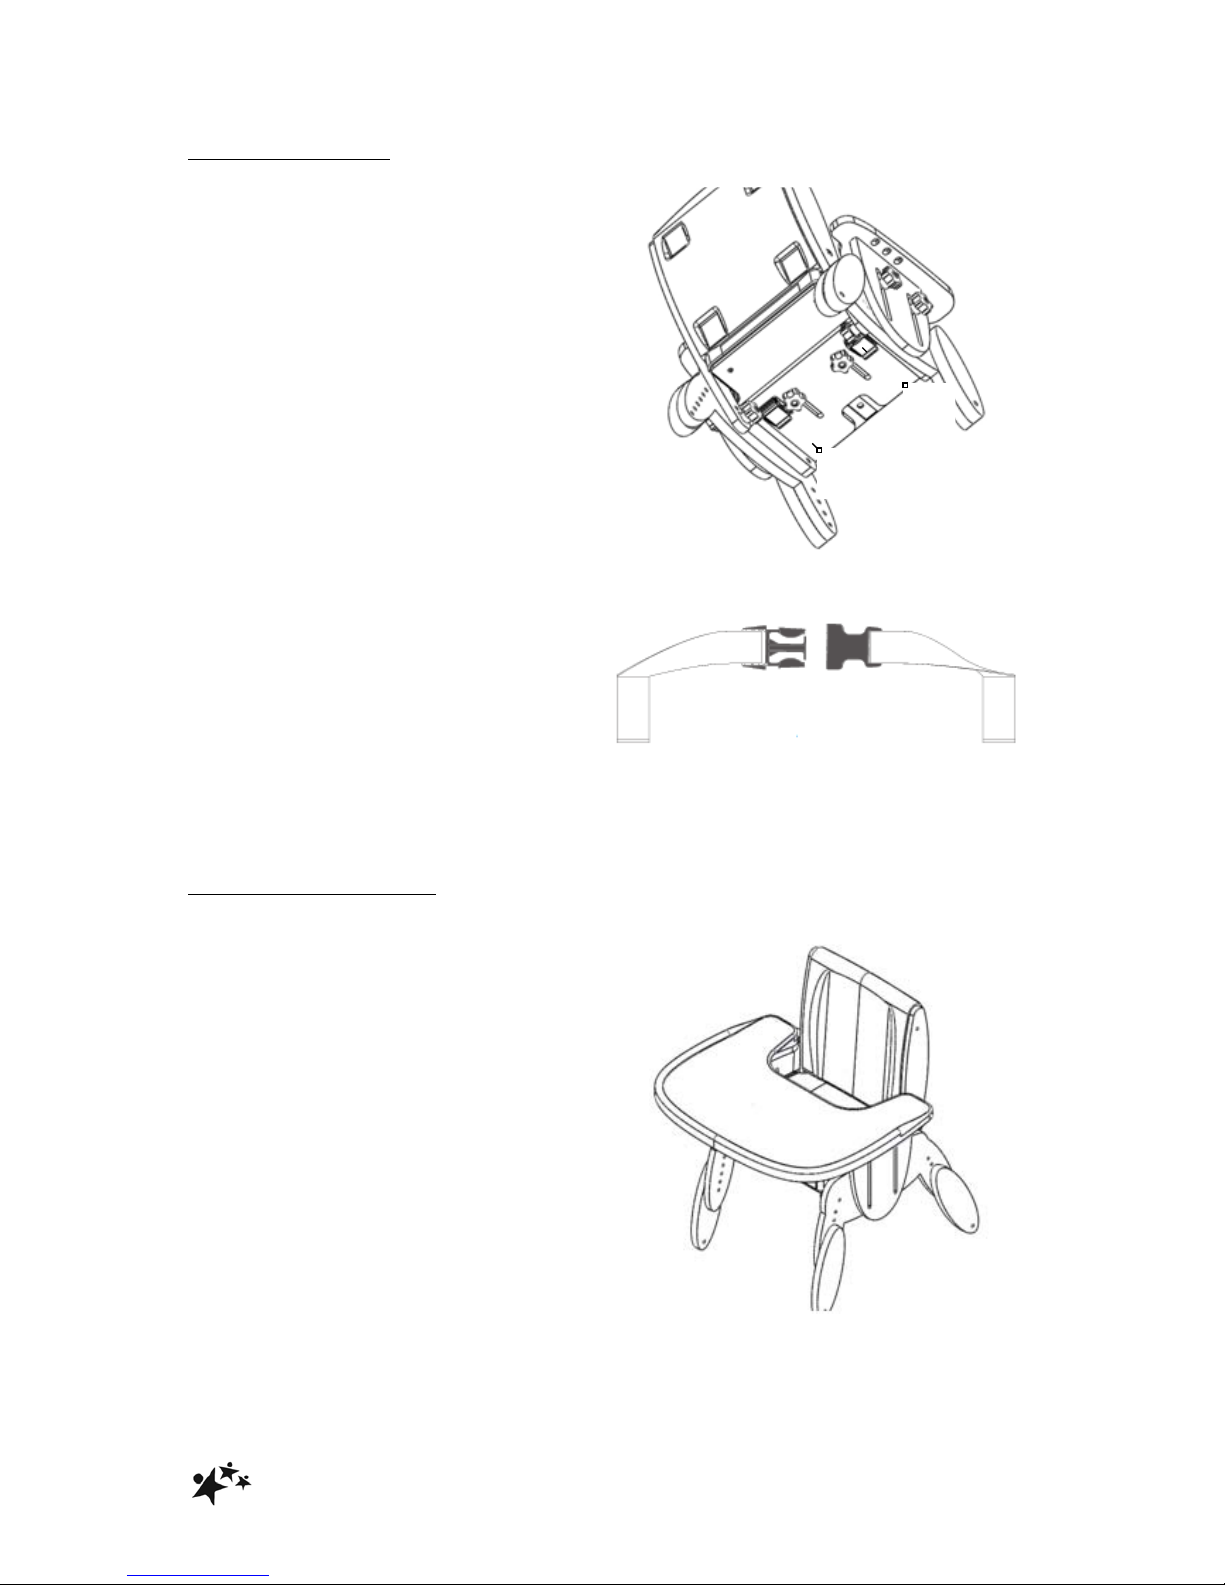
5.3 PELVIC STRAP
• The pelvic strap is secured to the
seat by two cam-lock
mechanisms, located under the
seat base (I, J)
•
To adjust the strap for growth,
simply lift each cam-
lock to
release, adjust the strap
appropriately and then close each
cam-lock
.
Buckle Strap (Standard)
• The buckle is secured by pushing
the male plug into the female
receiver
• To release the buckle, press both
sides of the male plug
• The strap length can be altered by
adjusting the tri-
glide (as shown
opposite)
5.4 TRAY ACCESSORY
•
Check armrests are set to the
same height, and are securely
tightened
• Slide the tray onto the armrests, to
the desired position – the tray will
automatically lock into position
• To
remove tray, pull the quick
release lever on the underside of
the tray, and pull the tray forward
•
Ensure the protective film on the
tray is removed before use
J
I
Juni
11
5.5 SKI ACCESSORY
• The static ski accessory is fixed to
the Juni chair by 4 x M6 screws (K),
which locate through each Juni
chair outrigger.
•
A slot is designed into the rear of
each static ski, this
facilitates ski
fitment if height of chair is adjusted.
•
Ensure the screws are tight at all
times
•
A variant of the Ski Accessory
inco
rporating a footboard is
available (Codes SK111 to SK114).
Fitment is identical to the static ski.
5.6 POMMEL ACCESSORY
•
The Pommel accessory (L) slides
over the front of the seat cushion
and is fixed to the Juni using the
supplied hand wheel (M)
•
The Pommel can remain in place
when the seat depth is adjusted.
L K M
Juni
12
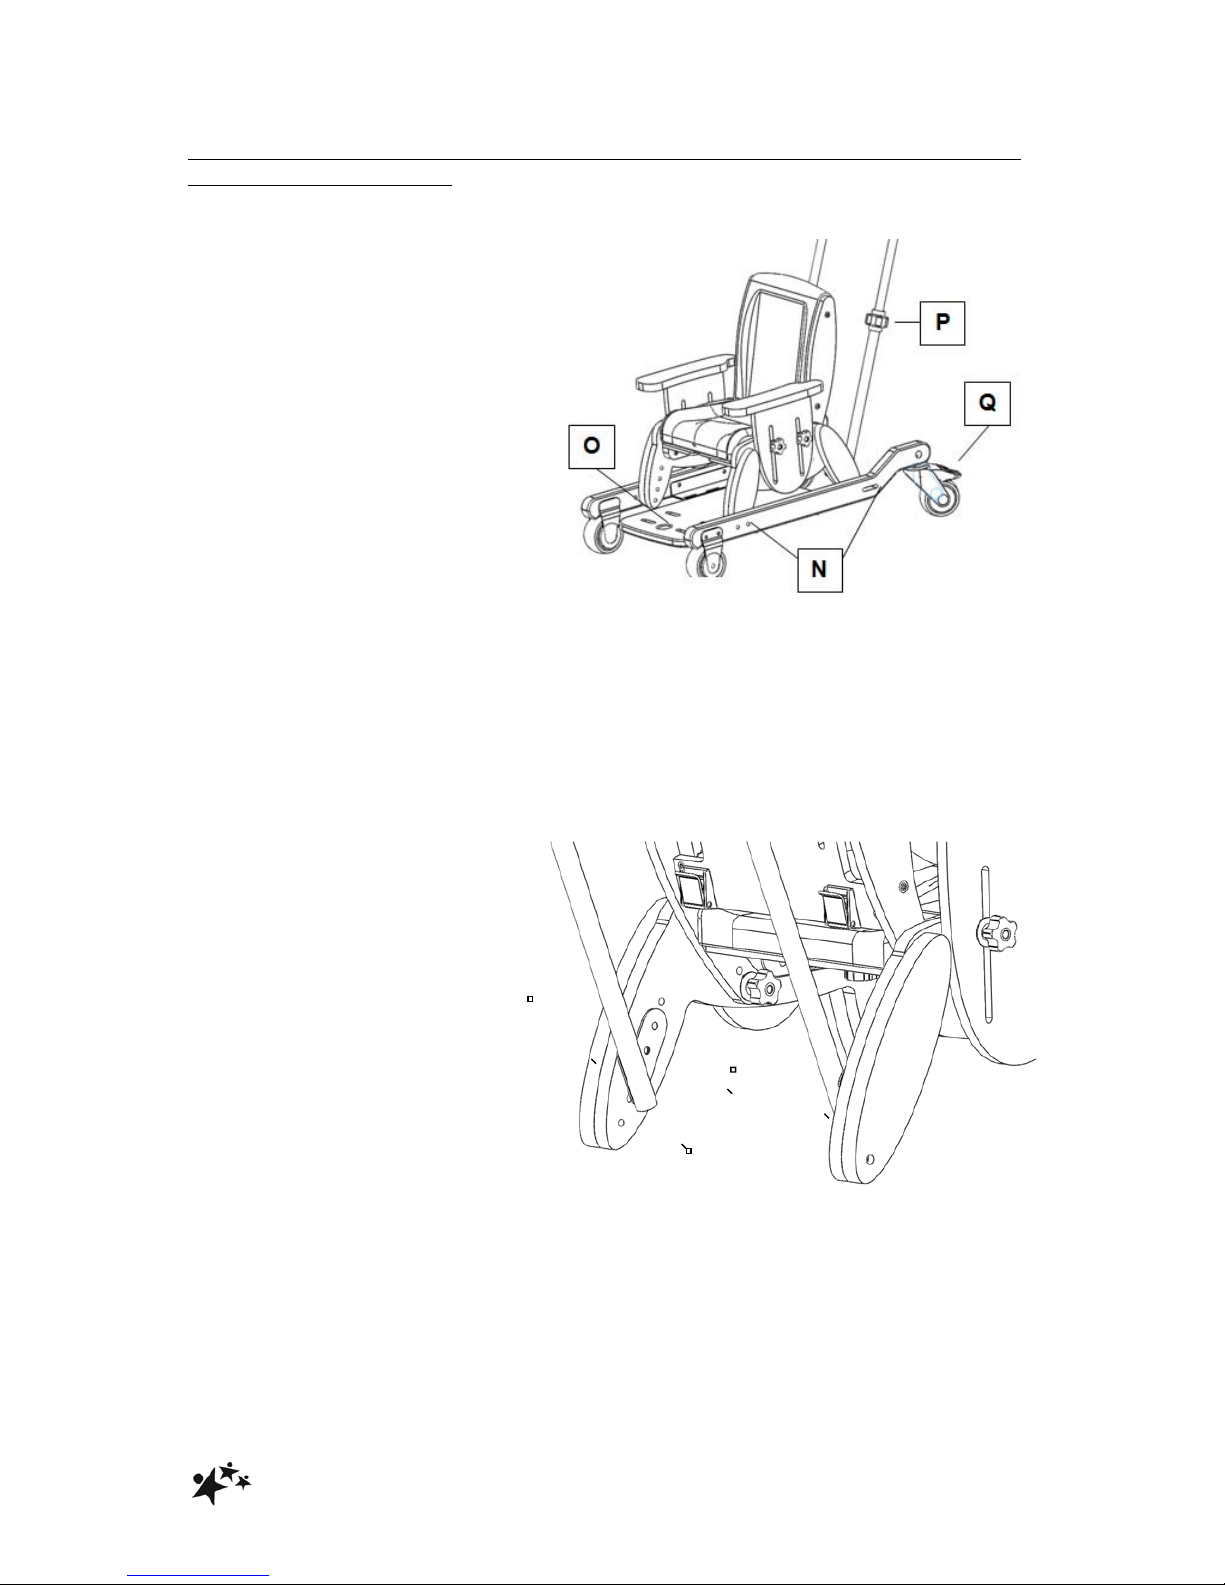
5.7 MOBILE BASE, RETRACTABLE FOOTBOARD AND HEIGHT ADJUSTABLE
HANDLE ACCESSORIES
•
The mobile base accessory is
fixed to the Juni chair by 4 x
M6 screws (N), which locate
th
rough each Juni chair
outrigger
•
The rear castors can be
locked by applying pressure
to the foot lever (Q) An
adjustable height handle
accessory is available, with
soft grip. The height can be
adjusted by unlocking clamps
(P), adjust to the desired
height, and then retightening
the clamps (P)
•
The Retractable footboard accessory permits easy transfer into the chair. To
retract the footboard, simply press the Red button (O) and push the board
rearwards
• The adjustable handle is
secured to the inside
face of the rear Juni
legs.
•
Remove the M6 screw
(R)
that fixes the out
rigger (S)
to the main
leg assembly (T)
•
Offer up the handle
bracket, and re-insert
the M6 screw (R),
securing both the
bracket and out rigger
back into place
• Repeat for the second rear leg
R
S
T
!
Juni
13
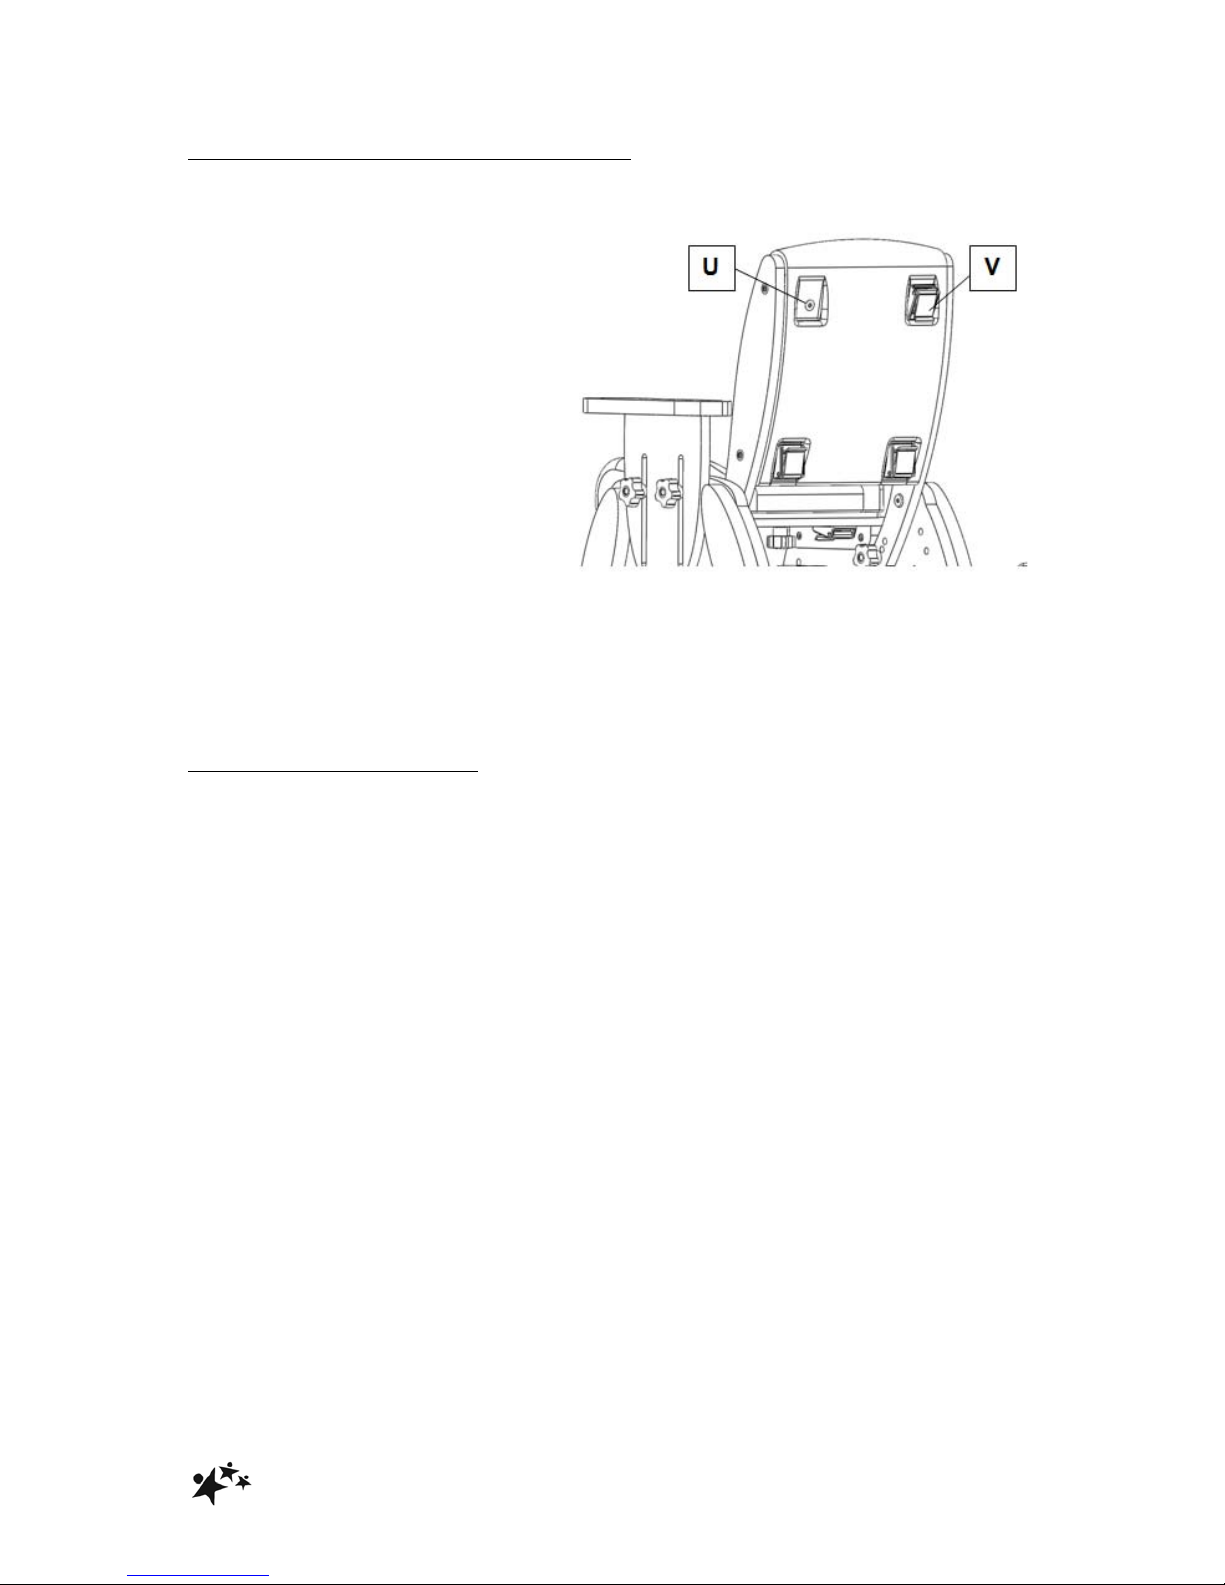
5.8 FOUR POINT HARNESS ACCESSORY
• A four point harness is available
as an accessory
• The rear of the Juni seat back
has 4 recesses that are
designed to locate fixing camlocks for the four point harness
• Take a sharp implement and
pierce each recess where the
‘dimple’ is visible on the surface
(U)
• Offer up a cam-lock and using
an M6 screw, fasten the camlock to the seat
• Repeat for the 3 remaining camlocks (V)
• The 4 point harness can now be
secured using the cam-locks.
5.9 FOOTBOARD RAISERS
• Footboard raisers are available for both the retractable footboard (codes DL111
to DL114) and the ski with footboard accessory (SK111 to SK114)
• Raisers are available in 12mm (RA049 to RA052) and 24mm thickness (RA045
to RA048)
• The raisers simply screw to the footboards with the screws provided.
• Raisers can be stacked together to increase the total raiser height.
!
Juni
14
6.0 CARE AND MAINTENANCE
All our wooden chairs are easy to clean. Each chair has anti-bacterial properties,
ensuring that surfaces are kept hygienic to reduce any risk of cross infection.
IMPORTANT!
Cleaning is recommended on a regular basis
• Clean upholstery and wooden parts with a damp cloth and mild detergent
• Stubborn marks on the woodwork should be cleaned by using a soft brush
• Do not soak or immerse the chair in water
• The pelvic strap can be cleaned with a damp cloth. In cases of extreme soiling
it can be machined washed at low temperature with mild detergent but must
be drip dried
• Store the chair in a cool dry place out of direct sunlight
• DO NOT use bleach, solvents, abrasives, synthetic detergents, wax polishes,
antibacterial sprays or wipes
For further information please refer to MHRA or your NHS cleaning guidelines
6.1 DAILY CHECKS
• Check the tray (if supplied) to ensure no parts are loose or damaged
• Check all upholstery for signs of wear and tear
• Check that the hand wheels tighten correctly, and are not cross-threaded or
damaged
• Check all straps for fraying, and that buckles are not missing/damaged!
STOP!
The user should not be seated while the checks are carried out.
6.2 SERVICE INTERVAL
The Juni chair should be serviced every 3 years. Servicing must only be undertaken
by a Smirthwaite service engineer, or by a Smirthwaite trained representative.

!
Juni
15
6.3 NOMINAL SERVICE LIFE
Your product has a nominal service life of 12 years, during which full post-sales
support will be available with regard to spares and servicing.
Product service life has been determined based upon the design complexity of
product, and the anticipated exposure to normal use.
Good practice dictates all Smirthwaite products have been designed and
manufactured to high levels of safety and quality, and will meet requirements of
normal use when maintained in line with our servicing recommendations.
STOP!
If the product has been out of use for an extended period of time (6
months or more) it should always be serviced prior to being
reissued.
If the product has been subjected to ‘heavy’ or ‘constant’ use, the
service should be reduced to half the recommended period.
Constant and/or heavy use is considered to be:
• Daily use above 7 hours duration
• Weekly use above 5 days duration
• Monthly use above 10 months per year
• Use by a client who is at 90% to 100% of the maximum weight limit of
the product. The maximum weight limit must NEVER be exceeded
• Use by a client who is extremely active, either voluntarily or
involuntarily

!
Juni
16
6.4 EXTENDING NOMINAL SERVICE LIFE
At Smirthwaite we are proud to produce products that have a reputation for quality
and durability.
We believe our products have the potential to provide benefits to our clients beyond
the nominal service life documented above.
We will continue to provide full support beyond the nominal service life provided the
following conditions are met:
1. A full service schedule has been maintained. (Please refer to Page 18)
2. A full service and inspection is undertaken at the end of the nominal service
life period
3. The product is subsequently serviced annually (or biannually if under
‘heavy/constant’ use conditions)
4. Smirthwaite reserve the right to limit support where parts/components are no
longer available
6.5 DOCUMENTATION/RECORDS
• It is the responsibility of the current equipment owner to ensure the ‘Instructions
for Use’ manual and any further manuals for accessories fitted to the equipment
are handed over to the new owner at the time of exchange/sale
• It is the responsibility of the current equipment owner to ensure the service and
inspection record form is kept up to date
6.6 PRODUCT CONFIGURATION
• Smirthwaite will document and maintain a record of the original product
configuration at the time of first sale
• Smirthwaite will not be held responsible for any subsequent changes to this
configuration unless authorized to do so in writing by G&S Smirthwaite Ltd
• It is the equipment owner’s responsibility to maintain their own records of
changes to the equipment configuration and to be able to provide such records to
subsequent owners to maintain traceability
• We recommend an inspection/service by a Smirthwaite Service Engineer (or
Smirthwaite trained engineer) whenever a significant change is made to product
configuration to ensure the product is safe to use. If in any doubt, ALWAYS
seek ADVICE

!
Juni
17
IMPORTANT REMINDER!
DO NOT fit parts or accessories of other manufacturers to this product
unless authorized to do so in writing by G&S Smirthwaite Ltd.
Any servicing or repairs required must be carried out by G&S Smirthwaite
Ltd (or a Smirthwaite trained engineer).
If you believe this product to be faulty – DO NOT USE
If in any doubt, ALWAYS seek ADVICE.
7.0 WARRANTY & SERVICE
Smirthwaite warrants the products detailed on your order to be free from defects in
materials and workmanship for a period of 2 years from date of delivery.
Possible action may
be for us to arrange to send out one of our Service Engineers,
or have the goods
returned to us.
Should a repair not be possible within the guarantee period we will
replace the product for new or nearest equivalent product. In the unlikely event that
we cannot repair or exchange we will refund in full. This guarantee is for the UK only.
The warranty excludes faults due to accident, neglect, misuse, not following the
Instructions and normal wear and tear. This guarantee is in addition to your legal
rights. Goods will only be collected from the original delivery address.
A charge may be made where the goods cannot be repaired under the terms of the
warranty. You will be advised before this is made.
8.0 CONTINUOUS IMPROVEMENT
G & S Smirthwaite Ltd are committed to continuous improvement to their product
range.
G&S Smirthwaite Ltd reserve the right to change the specification or material without
prior notice.

!
Juni
18
9.0 SERVICE INSPECTION
9.1 Product Information
Model:
Size:
Date of Manufacture:
Serial Number:
Final Inspection:
9.2 Service & inspection record form:
Date
Procedure
Service
Personnel


Juni
19
2.JUNI BOOSTER
INSTRUCTIONS FOR USE
Hi Booster Codes: JB112, JB122, JB212, JB222, JB312, JB322, JB412, JB422
Lo Booster Codes: JB111, JB121, JB211, JB221, JB311, JB321 JB411, JB421

!
Juni
20
CONTENTS PAGE
1.0 INTRODUCTION 20
2.0 ILLUSTRATION & TECHNICAL DATA 21
3.0 FOR YOUR SAFETY 22
4.0 UNPACKING AND ASSEMBLING YOUR JUNI BOOSTER 23
5.0 SETTING UP AND ADJUSTING YOUR JUNI BOOSTER 24
6.0 CARE & MAINTENANCE 30
7.0 WARRANTY & SERVICE 33
8.0 CONTINUOUS IMPROVEMENT 33
9.0 SERVICE INSPECTION 34
1.0 INTRODUCTION
Thank you for choosing the Smirthwaite Juni Booster product.
The Juni Booster has been designed to provide a quick and simple way to achieve
extra height for your child.
The Hi Booster is perfect for a breakfast bar or feeding your child whilst standing.
The Lo Booster has been designed to enable a child to be included at the dinner
table during mealtimes.
IMPORTANT!
These instructions should be read by all therapists and carers using
the equipment and should be retained for future reference. The
product should always be used under adult supervision.
Any incorrect use of the product and failure to follow the instructions
may put the user at risk or impede the function.
This product has been designed and manufactured specifically and
solely for use by clients with special needs.
 Loading...