


Table of contents
1 Warnings 4
1.1 General safety warnings 4
1.2 Manufacturer's liability 5
1.3 Purpose of the appliance 5
1.4 Disposal 5
1.5 Identification plate 6
1.6 This User Manual 6
1.7 How to read the User Manual 6
2 Description 7
2.1 General description 7
2.2 Control panel 7
2.3 Other parts 8
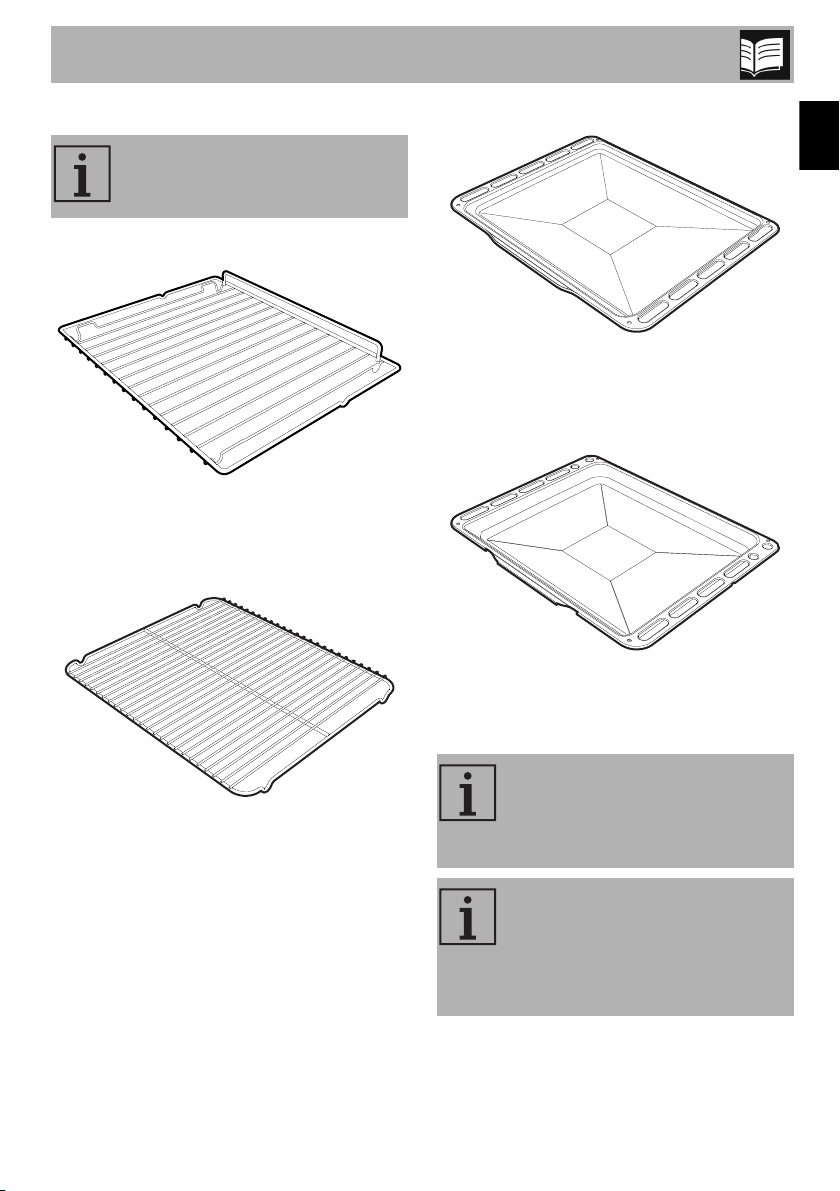
2.4 Available accessories 9
3 Use 10
3.1 Warnings 10
3.2 First use 10
3.3 Use of accessories 11
3.4 Using the oven 11
3.5 Cooking tips 13
4 Cleaning and maintenance 16
4.1 Warnings 16
4.2 Cleaning the appliance 16
4.3 Removing the door 16
4.4 Cleaning the door glazing 17
4.5 Extraordinary maintenance 19
5 Installation 21
5.1 Gas connection 21
5.2 Adaptation to various types of gas 22
5.3 Electrical connection 24
5.4 Cable replacement 24
5.5 Positioning 25
EN
We recommend that you read this manual carefully. It includes all the instructions on
maintaining the aesthetic qualities and functionality of the appliance you have purchased.
For more information about the product: www.smeg.com
3

Warnings
1 Warnings
1.1 General safety warnings
Injury to persons
• This appliance and its accessible
parts get very hot during use.
• Do not touch the heating elements
during use.
• Accessible parts get very hot
during use, so keep children away
unless they are constantly
supervised.
• Children should not play with the
appliance.
• While in use, do not place metal
objects on the appliance, such as
knives, forks, spoons and lids.
• Turn off the appliance after use.
• Never attempt to extinguish
flames/fire with water. Turn off the
appliance and cover the flame
with a lid or a fire-proof blanket.
• Cleaning and maintenance
should not be performed by
children without supervision.
• Qualified personnel should carry
out the installation and servicing in
compliance with existing
regulations.
• Do not modify the appliance.
• Do not insert sharp metal objects
(knives and utensils) into the slots.
• Do not attempt to repair the
appliance yourself or without the
intervention of a qualified
technician.
• If the power cord is damaged,
immediately contact the technical
support service to replace the
cord.
Damage to the appliance
• Do not use abrasive or corrosive
detergents on the glass parts (e.g.
powder products, stain removers
and metal scouring pads).
• The appliance must not be
installed behind decorative doors
to prevent overheating.
• If possible, use wooden or plastic
utensils.
• Do not sit on the appliance.
4
Warnings
• Do not use steam jets to clean the
appliance.
• Do not block openings, ventilation
slots and heat dissipation vents.
• Do not leave the appliance
unattended during cooking/
baking operations that could
release fats or oils.
• Do not leave anything on the
baking surfaces.
• Do not use the appliance to heat
a room under any circumstances.
For this appliance
• Before replacing the light bulb, make
sure the appliance is turned off.
• Do not lean or sit on the door when
it is open.
• Make sure that no objects are stuck
in the doors.
1.2 Manufacturer's liability
The manufacturer accepts no liability for
damage to persons or property caused by:
• use of the appliance in any way other
than stipulated herein;
• failure to comply with the instructions in
the User Manual;
• tampering with any part of the
appliance;
• use of after-market replacement parts.
1.3 Purpose of the appliance
• This appliance is designed for cooking
or baking food in the home. Any other
use is inappropriate.
• The use of this appliance by children
who are 8 years of age or older and by
persons with reduced physical, sensory
or mental abilities or who lack
experience and knowledge is permitted
when supervised or given instructions by
adults responsible for their safety.
• This appliance is not designed to work
with external timers or remote control
systems.
1.4 Disposal
This appliance must be disposed of
separately from other waste
(Directives 2002/95/EC, 2002/
96/EC, 2003/108/EC). This appliance
does not contain substances in quantities
considered to be hazardous to health and
the environment, in accordance with current
European directives.
To dispose of the appliance:
• Cut the power supply cable and remove
the cable together with the plug.
Electric voltage
Danger of shock
• Turn off the main electrical power
supply.
• Unplug the power cord from the power
outlet.
EN
5
Warnings
• Take the appliance to a suitable
recycling center for electric and
electronic waste, or return it to the dealer
when purchasing an equivalent product,
as a one-on-one exchange.
Please note that non-polluting, recyclable
materials are used for the packaging of the
appliance.
• Take packaging materials to
appropriate recycling centers.
Plastic packaging
Suffocation hazard
• Do not leave the packaging or any parts
of it unattended.
• Do not allow children to play with the
plastic packaging bags.
1.5 Identification plate
The identification plate contains technical
data, the serial number and brand name of
the appliance. The identification plate
should never be removed.
1.7 How to read the User Manual
This User Manual uses the following
definitions of terms:
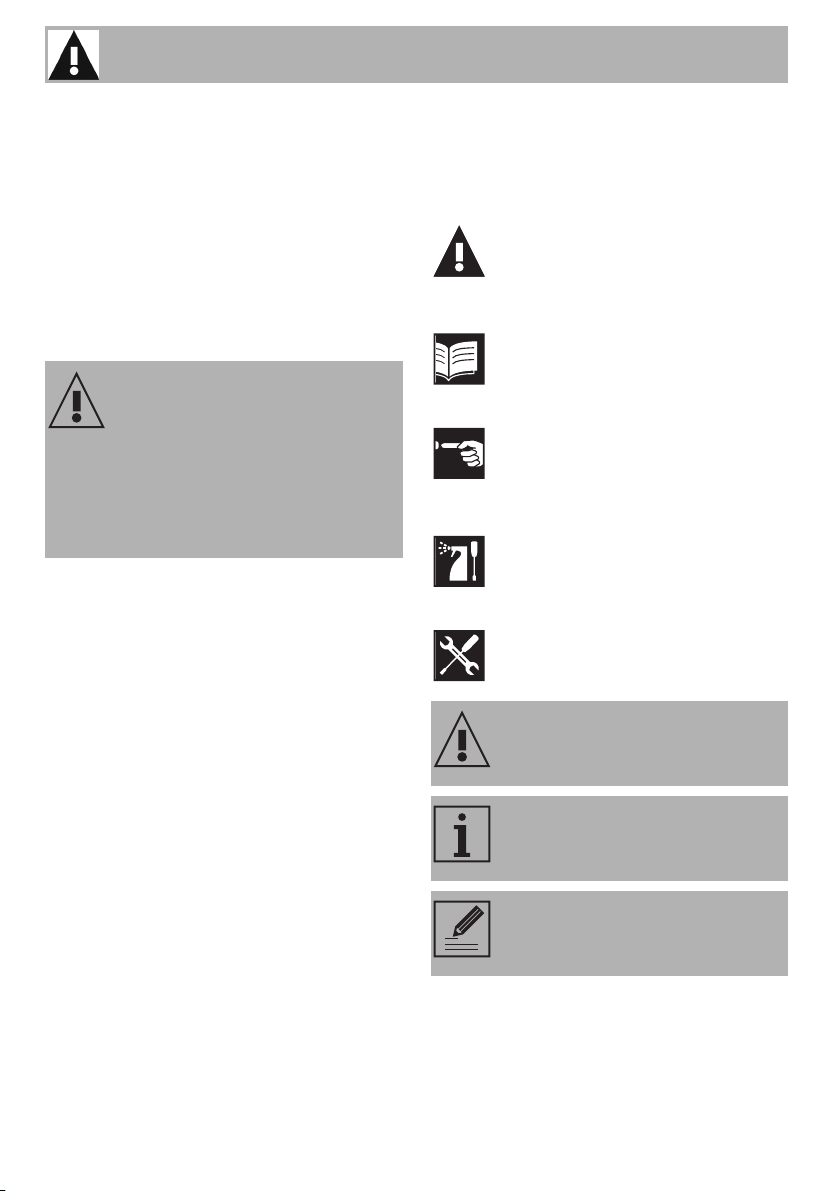
Warnings
General information about the User
Manual, about safety and for final
disposal.
Description
Description of the appliance and
accessories.
Use
Information about the use of the
appliance and accessories, baking
advice.
Cleaning and maintenance
Information about proper cleaning
and maintenance of the appliance.
Installation
Information for qualified technicians:
installation, startup and testing.
1.6 This User Manual
This User Manual is an integral part of the
appliance and must be kept intact and
available for users throughout the life cycle
of the appliance.
Before using the appliance, please read
this User Manual.
6
Safety warnings
Information
Suggestion
1. Sequential order of instructions.
• Standalone instruction for use.
2 Description
2.1 General description
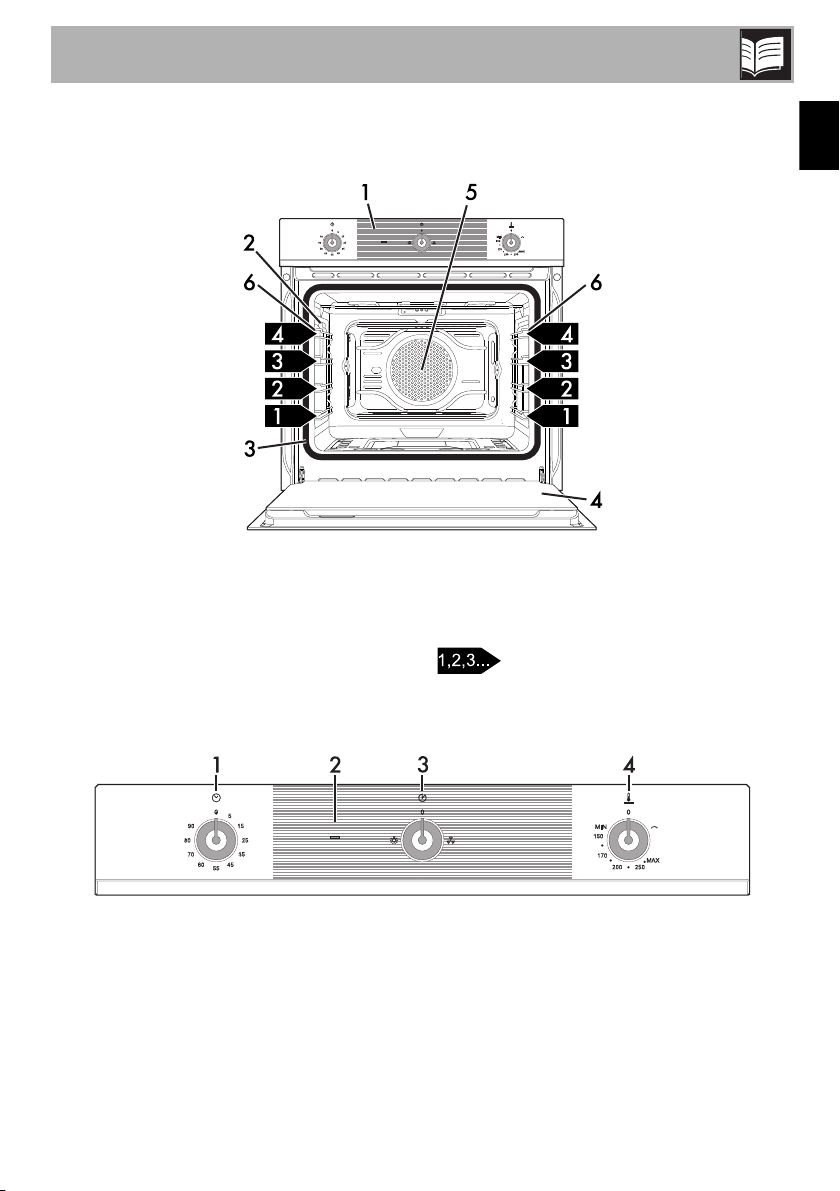
Description
EN
1 Control panel
2 Light
3 Gasket
4 Door
2.2 Control panel
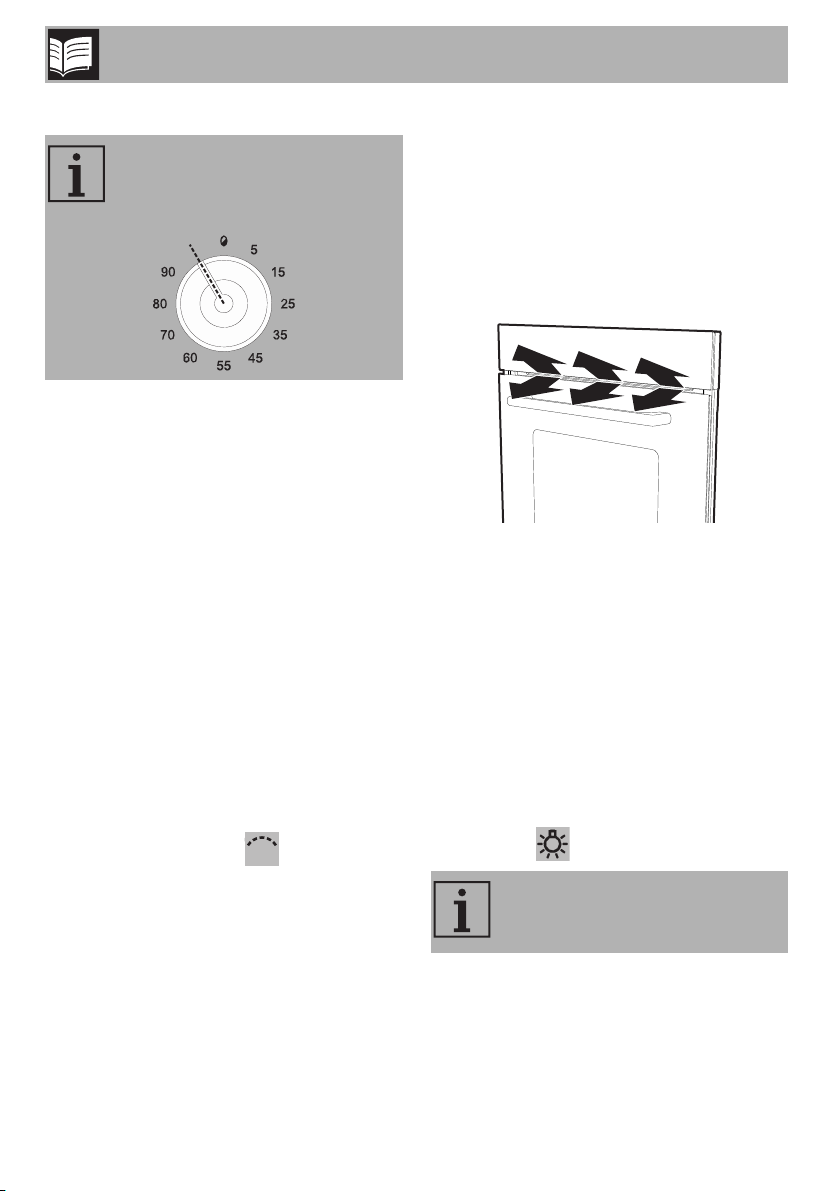
1 Timer knob
To use the timer, you must set the buzzer by
turning the knob clockwise. The numbers
correspond to minutes (maximum 90 minutes).
5 Fan
6 Frame support for racks/trays
7 Gas grill
Frame rack
Adjustment is progressive and you can set
the timer at any intermediate position
between the numbers. When the buzzer
sounds to signal the end of cooking time,
this does not interrupt the operation of the
oven.
7
Description
2.3 Other parts
When the timer knob is in a
position between 90 and 0, no
function is active.
2 Indicator light
This turns on to indicate that the electric grill
is on.
3 Function knob
Turn the function knob clockwise 90° to turn
on the light inside the oven cavity.
Turn the function knob counterclockwise 90°
to turn on the light inside the oven cavity.
4 Temperature knob
This is used to turn on the lower burner or
the electric grill.
You can select the cooking temperature by
turning the knob counterclockwise to the
desired setting between MIN and MAX.
To turn on the electric grill, turn the knob
clockwise to the symbol .
Positioning shelves
The appliance has shelves for positioning
trays and racks at various heights. The
position heights go from the bottom
upwards (see 2.1 General description).
Cooling fan
The fan cools the oven and turns on during
cooking or baking.
The fan provides a steady outflow of air
from above the door, which may continue
for a short time after the appliance has
been turned off.
Internal lighting
The internal lighting for the appliance turns
on:
• when the door is opened;
• when the function is selected.
When the door is open, you
cannot turn off the internal lighting.
8
Description
2.4 Available accessories
Not all accessories are provided
on all models.
Rack
Used to hold containers containing food to
be cooked.
Tray rack
Oven tray
EN
Used for collecting grease from foods on
the rack above.
Deep tray
Used for collecting grease from foods on
the rack above and for baking cakes, pizza
and baked desserts.
This is placed above the oven tray, and is
used for cooking or baking foods that might
drip.
Oven accessories that may come
into contact with food are made of
materials that comply with the
provisions of current laws.
Original accessories supplied or
optional can be purchased at
authorized service centers. Only
use original manufacturer’s
accessories.
9
Use
3 Use
3.1 Warnings
High temperature inside the oven
while in use
Burn hazard
• Keep the door closed while cooking or
baking.
• Use potholders or wear thermal gloves
to protect your hands when handling
pans that have been inside the oven.
• Do not touch the heating elements inside
the oven.
• Do not pour water directly on very hot
trays.
• Do not allow children to be near the
oven during operation.
Improper use
Risk of damage to surfaces
• Do not cover the bottom of the oven with
sheets of aluminum or tin foil.
• Do not place pots or pans directly on
the bottom of the oven.
• Do not pour water directly on very hot
racks.
High temperature inside the oven
while in use
Danger of fire or explosion
• Do not use spray products near the
oven.
• Do not use or store flammable materials
near the oven.
• Do not use plastic dishes or containers
for cooking or baking food.
• Do not put sealed tin cans or containers
in the oven.
• Do not leave the oven unattended when
baking things that could release fats or
oils.
• Remove all trays and racks that will not
be used during cooking or baking.
3.2 First use
1. Remove all protective film from the
outside and inside of the appliance and
accessories.
2. Remove all labels (except the nameplate
with technical data) from the inside of the
oven and accessories.
3. Remove and wash all accessories of the
appliance (see 4 Cleaning and
maintenance).
4. Leave the oven empty and heat it to the
maximum temperature for long enough
to remove any manufacturing residues.
10

Use
3.3 Use of accessories
Racks and trays
Racks and trays must be inserted into the
side guides until they stop.
• The mechanical safety locks that prevent
accidental removal of the racks must
face downward and towards the rear of
the oven.
Tray rack
The tray rack must be inserted into the tray.
This way, the grease can be collected
separately from the food being cooked or
baked.
3.4 Using the oven
Using the electric grill
High temperature inside the oven
while in use
Danger of fire or explosion
EN
Insert the racks and trays gently
into the oven and push back until
they stop.
Clean the trays before using them
for the first time to remove any
manufacturing residues.
• Never exceed 60 minutes when
cooking in grilling mode.
Press and turn the temperature knob
clockwise to the symbol .
It is not possible to use the gas
oven and the electric grill at the
same time.
11

Use
Using the gas oven
If the electrical power is off, the
cooling fan will not work. Do not
light the oven manually.
Electronic spark igniter:
1. Open the oven door fully.
2. Press and turn the temperature knob
counterclockwise to a spot between
MIN and MAX. This automatically
activates the electric spark igniter.
3. Once it ignites, keep the temperature
knob pressed for a few seconds to allow
the thermocouple to heat up.
If the burner has not lit after 15
seconds, stop trying to ignite it,
leave the oven door open and
wait 60 seconds before trying to
ignite it again.
In case the oven is accidentally
switched off, turn the knob to the
off position and wait 60 seconds
before igniting it again.
List of features
Gas burner
The heat radiating only from the
bottom allows you to complete the
cooking/baking of foods that
require a higher base temperature,
without affecting their browning.
Perfect for cakes, pies, tarts and
pizzas.
Gas burner + fan
Together with the gas burner, the
fan distributes the heat evenly. This
+
feature is ideal for slow cooking
with a constant temperature.
Grill
The heat coming from the grill
element gives perfect grilling results,
especially for thin and medium
thickness meat, and in combination
with the rotisserie (when present), it
gives the food an even browning at
the end of the cooking. Perfect for
sausages, ribs and bacon. This
function allows you to grill large
quantities of food, particularly meat,
evenly.
12
Fan-assisted grill
The air that the fan produces softens
the set heat wave generated by the
+
grill, allowing for perfect grilling,
even of very thick foods. Perfect for
large cuts of meat (e.g. shank of
pork).

Use
3.5 Cooking tips
General tips
• Use a fan function to achieve uniform
cooking at several levels.
• Increasing the temperature does not
shorten cooking or baking times (the
food could be well cooked on the
outside and undercooked on the inside).
Tips for cooking meats
• Cooking times vary depending on the
thickness and quality of the meat, and on
consumer tastes.
• Use a meat thermometer when cooking
roasts, or simply press on the roast with a
spoon. If it feels hard, it is ready;
otherwise, it needs to roast a bit longer.
Tips for cooking with the grill and fanassisted grill
• The meat can be grilled starting with a
cold oven or with the oven preheated if
you want to change the effect of the
cooking.
• With the fan-assisted grilling feature, it is
recommended that the oven be
preheated before grilling.
Tips for baking cakes and cookies
• It is preferable to use dark metal pans,
which help to absorb the heat better.
• The temperature and baking duration
depend on the quality and consistency
of the dough.
• To check whether the cake is baked
through, stick a toothpick into its highest
point at the end of the baking time. If the
dough does not stick to the toothpick, the
dessert is cooked.
• If the dessert goes flat when it comes out
of the oven, on the next occasion reduce
the set temperature by about 10°C,
selecting a longer cooking time if
necessary.
Tips for defrosting and leavening
• With the wrapping removed, place
frozen foods into a lidless container and
place it on the first rack in the oven.
• Do not overlap foods.
• To defrost meat, use a rack placed on
the second level and a tray placed on
the first level. This way, the meat does not
remain in contact with the liquid from
thawing.
• The most delicate parts can be covered
with aluminum foil.
• For good leavening, place a container
of water at the bottom of the oven.
To save energy
• Turn off the oven a few minutes before
the time required. Cooking will continue
for the remaining minutes with the heat
already accumulated inside the oven.
• Do not open the oven door very often to
avoid heat loss.
• Always keep the inside of the appliance
clean.
EN
13

Table of cooking times
Use
Dishes
Lasagna
Cannelloni
Baked pasta
Roast chicken
Turkey breast
Pork loin
Roast rabbit
Lamb
Pork chops
Hamburgers
Sausages
Ribs
Meat shish kebabs
Chicken
Weight
(Kg)
5 3 230 - 240 50 - 60 230 - 240 45 - 50
2.5 2 220 - 230 25 - 30 220 - 230 25 - 30
2.5 2 220 - 230 25 - 30 220 - 230 25 - 30
1.2 2 200 - 210 80 - 90 200 - 210 70 - 80
3 2 200 - 210 90 - 100 200 - 210 90 - 100
1.2 2 210 - 220 70 - 75 200 - 210 70 - 75
1.5 2 200 - 210 75 - 80 200 - 210 75 - 80
1.5 2 200 - 210 90 - 95 200 - 210 90 - 95
1 4 Grill 15 8 Grill 15 8
1 4 Grill 11 7 Grill 11 7
1.5 4 Grill 15 5 Grill 15 5
1.5 4 Grill 15 5 Grill 15 5
1.5 4 Grill 11 10 Grill 11 5
1.2 Rotisserie Grill 80 Grill 70
Rack
position
from the
bottom
Temperature
Static oven Convection oven
(°C)
Time
(minutes)
Side 1 Side 2 Side 1 Side 2
Temperature
(°C)
Time
(minutes)
Mackerel
Salmon trout
Turbot
Fish shish kebabs
Pizza
Cookies
Paradise cake
Tart
Donuts
8 2 180 - 190 25 - 30 180 - 190 25 - 30
1.3 2 180 - 190 35 - 40 180 - 190 35 - 40
1 2 180 - 190 25 - 30 180 - 190 25 - 30
1 4 Grill 7 3 Grill 7 5
1 3 240 12 - 15 240 12 - 15
1 3 190 18 180 18
1 2 190 50 - 55 180 55 - 60
1 3 190 35 - 40 180 35 - 40
1.2 3 190 45 - 50 180 50 - 55
The times indicated in the table are approximate and do not include preheating times.
14

Use
Table of conversions
Weight Measurement Volume
Metric Imperial Metric Imperial Metric Imperial
15 g 1/2 oz 5 mm 1/4 in 25 ml 1 fl oz
25 g 1 oz 1 cm 1/2 in 50 ml 2 fl oz
40 g 1 1/2 oz 2.5 cm 1 in 85 ml 3 fl oz
50 g 2 oz 5 cm 2 in 100 ml 3 1/2 fl oz
75 g 3 oz 7.5 cm 3 in 150 ml 5 fl oz (1/4 pint)
100 g 4 oz 10 cm 4 in 200 ml 7 fl oz
150 g 5 oz 12.5 cm 5 in 300 ml 10 fl oz (1/2 pint)
175 g 6 oz 15 cm 6 in 450 ml 15 fl oz (3/4 pint)
200 g 7 oz 18 cm 7 in 600 ml 1 pint
225 g 8 oz 20 cm 8 in 700 ml 1 1/4 pint
250 g 9 oz 23 cm 9 in 900 ml 1 1/2 pint
275 g 10 oz 25 cm 10 in 1 l 1 3/4 pint
350 g 12 oz 30 cm 12 in 1.2 l 2 pints
375 g 13 oz 1.25 l 2 1/4 pints
400 g 14 oz 1.5 l 2 1/2 pints
425 g 15 oz 1.6 l 2 3/4 pints
450 g 1 lb 1.75 l 3 pints
550 g 1 1/4 lb 1.8 l 3 1/4 pints
675 g 1 1/2 lb 2 l 3 1/2 pints
750 g 1 3/4 lb 2.1 l 3 3/4 pints
900 g 2 lb 2.25 l 4 pints
1.5 kg 3 lb 2.75 l 5 pints
1.75 kg 4 lb 3.4 l 6 pints
2.25 kg 5 lb 3.9 l 7 pints
5 l 8 pints (1 gallon)
EN
Temperature
140°C Fan 120°C 275°F Gas 1
150°C Fan 130°C 300°F Gas 2
160°C Fan 140°C 325°F Gas 3
180°C Fan 160°C 350°F Gas 4
190°C Fan 170°C 375°F Gas 5
200°C Fan 180°C 400°F Gas 6
220°C Fan 200°C 425°F Gas 7
230°C Fan 210°C 450°F Gas 8
240°C Fan 220°C 475°F Gas 9
15

Cleaning and maintenance
4 Cleaning and maintenance
4.1 Warnings
Improper use
Risk of damage to surfaces
• Do not use steam jets to clean the
appliance.
• Do not use cleaning products that are
abrasive, corrosive or that contain
chlorine, ammonia or bleach (e.g.
powder cleaners, stain removers, etc.).
• Do not use rough or abrasive materials
or sharp metal scrapers.
4.2 Cleaning the appliance
We recommend using cleaning
products distributed by the
manufacturer.
Tips for cleaning the interior of the oven
Proper maintenance of the oven's interior
requires that it be cleaned regularly, after
allowing it to cool.
Avoid leaving dried up food inside the oven
because it could damage the enamel
surface.
Before cleaning, take out all removable parts.
To make cleaning easier, we recommend
the removal of:
• the door;
• the frame supports for racks/trays;
• the oven seal (except pyrolytic models).
If you are using specific cleaning
products, we recommend
operating the appliance at the
maximum temperature for about
15-20 minutes to remove any
residues.
4.3 Removing the door
To facilitate cleaning, we recommend that
you remove the door and place it on a
towel.
To remove the door, proceed as follows:
1. Open the door completely and insert two
pins into the holes in the hinges, as
shown in the image.
16

Cleaning and maintenance
2. Grasp the door on both sides with both
hands. Lift it, forming an angle of about
30°, and remove it.
3. To remount the door, insert the hinges
into the slots on the appliance, making
sure that the grooves A fit tightly in the
slots. Lower the oven door and once it is
is position, remove the pins from the
holes in the hinges.
4.4 Cleaning the door glazing
We recommend always keeping the glass
doors thoroughly clean. Use paper towels.
If there are tough to clean spots, use a
damp sponge and regular detergent.
Removing the inner glass
To facilitate cleaning, the inner glass panels
of the door can be removed.
1. Remove the inner glass panel by pulling it
gently upward at the rear, moving it as
indicated by the arrows (1).
2. Then pull the front part of the glass panel
upwards (2). This way, the four pins
attached to the glass panel are
disengaged from their grooves in the
door.
EN
17

Cleaning and maintenance
3. Some models have an intermediate glass
panel. Remove the intermediate panel by
lifting it upwards.
4. Clean the external glass panel and the
one you just removed. Use paper towels.
If there are tough to clean spots, use a
damp sponge and mild detergent.
5. Reinsert the glass panels in the reverse
order of removal.
6. Reposition the inner glass panel. Make
sure you center and insert the four pins
into their grooves in the door, using a
little pressure.
18

Cleaning and maintenance
Removal of the frame supports for racks/
trays
Removing the guide frames makes it easier
to clean the sides of the oven. This must be
done each time you use the automatic
cleaning cycle (only on some models).
To remove the guide frames: Pull the frame
towards the inside of the oven to unhook it
from its housing A, and then slide it out of
the grooves at the back B.
When you have finished cleaning the oven,
repeat the procedures indicated above to
reposition the guide frames.
4.5 Extraordinary maintenance
Removing and installing the oven gasket
To remove the oven gasket:
• Unhook the hooks located at the four
corners and pull out the oven gasket.
To install the oven gasket:
• Hook the hooks located at the four
corners of the oven gasket.
Tips for maintenance of the oven gasket
The oven gasket must be soft and elastic.
To maintain the oven gasket clean, use a
soft sponge and rinse with warm water.
EN
19

Cleaning and maintenance
Replacing the oven light
Live parts
Danger of shock
• Turn off the electrical power supply to
the oven.
1. Remove all accessories inside the oven.
2. Remove the frame supports for racks/trays.
3. Remove the light cover using a tool (e.g.
a screwdriver).
Be careful not to scratch the enamel
of the oven walls.
4. Loosen and remove the light bulb.
Do not touch the halogen bulb with
your fingers; cover them with an
insulating cloth.
5. Replace the bulb with a similar one
(40W).
6. Reattach the cover. Leave the inside of
the glass molding (A) facing the door.
20
7. Press the cover firmly so that it adheres
tightly to the light bulb holder.

Installation
5 Installation
5.1 Gas connection
Gas leakage
Danger of explosion
• After each intervention, ensure that the
tightening torque of the gas connections
is between 15 and 20 Nm.
• Where required, use a pressure
regulator that complies with current
regulations.
• After installation is complete, check for
any leaks with a soapy solution, never
with a flame.
• Installation with a flexible hose must be
done so that the length of the hose does
not exceed two meters when fully
extended.
• Hoses should not come into contact with
moving parts and should not be crushed.
General information
The connection to the gas mains may be
done with a rigid copper pipe or with a
continuous flexible steel hose connected to
the wall, in compliance with the provisions
set out in current regulations. For use with
other types of gas, see chapter “5.2
Adaptation to various types of gas”. The
gas inlet connection is threaded ½”
external gas (ISO 228-1).
Connection with a flexible steel hose
Make the connection to the gas mains
using a continuous flexible steel hose
attached to the wall that is in compliance
with the specifications indicated in current
regulations.
Carefully tighten the connector 3 to the gas
connector 1 of the appliance, inserting the
seal 2 supplied.
Connection with a rigid copper pipe
The connection to the gas mains must be
done so as not to cause stress of any kind to
the appliance.
Carefully tighten the adapter unit 3 with the
double cone to the gas connector 1 of the
appliance, inserting the seal 2 supplied.
EN
21

Installation
Connection to liquid gas
Use a pressure regulator and make the
connection to the tank according to the
provisions of current regulations. The supply
pressure must comply with the values
indicated in the table “ Table of burner and
nozzle features”.
Ventilation on the premises
The appliance must be installed in a
continuously ventilated room as specified in
current regulations. In the room where the
appliance is installed, there must be enough
air flow as required for the regular
combustion of gas and the requirements for
ventilation in the room. The air intakes,
which are protected by grills, must be
properly sized in compliance with current
regulations and positioned so that they are
not obstructed, not even partially. The room
must be kept properly ventilated to disperse
the heat and humidity produced by cooking
or baking. In particular, after prolonged
use, it is recommended to open a window
or to increase the speed of fans.
Discharge of combustion products
5.2 Adaptation to various types of gas
In case other types of gas are used to
operate the oven, the nozzle on the burner
must be replaced and the gas valve must
be adjusted.
Replacing the nozzle
1. Open the door.
2. Remove all accessories inside the oven.
3. Lift the surface of the oven and pull it out.
4. Loosen the screws A and B.
5. Remove the lock that connects the
thermocouple and glow plug attached
to the burner with the screw A.
The discharge of combustion products may
be done by means of hoods connected to
an efficient natural draft chimney or by
means of forced extraction. An efficient
extraction system requires precise planning
by a specialist who can install it in
compliance with the positions and distances
indicated in the regulations. After
installation, the installer must issue a
certificate of compliance.
22
6. Remove the burner by sliding it outwards
until the nozzle is accessible.
7. Replace the nozzle using a 7mm socket
wrench.

Installation
Adjusting the minimum
The oven thermostat is equipped with a
screw to adjust the minimum. When
changing the type of gas supply, the
minimum must be adjusted as follows:
4. Remove the knob and use a screwdriver
to adjust the hole.
5. In case liquid gas will be used, the
adjustment screw must be screwed
clockwise as far as it will go.
1. Switch off the electrical supply to the
appliance.
2. Pull the oven slightly out of its housing,
remove the knobs and remove the front
by unscrewing the four screws (two
upper and two lower) that attach it to the
rest of the unit.
3. Push in the oven thermostat knob and
light the oven burner. Keep it at the
maximum for 10-15 minutes with the
door closed. After this, turn the knob to
the minimum temperature.
Table of burner and nozzle features
1 G20 - 20 mbar methane gas OVEN
Rated heat capacity (kW)
Nozzle diameter (1/100 mm)
Reduced capacity (W)
4 G30/31 - 30/37 mbar liquid gas OVEN
Rated heat capacity (kW)
Nozzle diameter (1/100 mm)
Reduced capacity (W)
G30 capacity (g/h)
G31 capacity (g/h)
2.6
120
900
2.6
76
900
189
186
EN
23

Installation
5.3 Electrical connection
Electric voltage
Danger of shock
• A qualified technician must complete the
electrical connection.
• The ground connection must be
completed in the manner indicated in the
regulations on electric installations.
• Turn off the main electrical power
supply.
General information
Check that the features of the electricity grid
comply with the information shown on the
identification plate.
The identification plate, containing technical
data, the serial number and brand name of
the appliance, is visibly located on the
appliance.
The identification plate should never be
removed.
The appliance operates at 127 V~.
Use a tripolar cable type SJT18AWG
(referring to the internal conductor section).
Complete the ground connection with a
cable that is longer than the others by at
least 20 mm.
Fixed connection
On the power line pole, install an
omnipolar circuit breaker in compliance
with the regulations on installation.
The circuit breaker must be located in an
easily accessible place near the appliance.
Connection with plug and socket
Check that the plug and socket are of the
same type.
Avoid the use of transformers, adapters or
shunts as these could cause overheating or
burns.
5.4 Cable replacement
Electric voltage
Danger of shock
• Turn off the main electrical power
supply.
1. Unscrew the screws on the back of the
casing and remove the casing to access
the terminal strip.
24
2. Replace the cable.
3. Make sure that the cables (oven or any
cooktop) are placed in the best position
to avoid contact with the appliance.

Installation
5.5 Positioning
Heavy appliance
Risk of crush injuries
• Move the appliance into the desired
position with the help of a second
person.
Pressure on the open door
Risk of damage to the appliance
• Do not use the open door as a lever to
move the appliance into place.
• Do not apply excessive pressure to the
door when it is open.
Increasing heat when the
appliance is in operation
Risk of fire
• Check that surrounding cabinetry
material is heat resistant.
• Check that the cabinetry has the
required openings.
• Do not install the appliance in a closed
recess with a door or in a cabinet.
Location of the power cord
EN
(rear view)
Front gasket
Make sure the gasket on the back of the
front panel is sealed to prevent the entry of
water or other liquids.
25

Installation
Fitting bushes
1. Remove the bushing caps inserted into
the front of the appliance.
2. Insert the appliance into the opening.
3. Secure the appliance to the cabinetry
with the screws.
Overall dimensions of the appliance (mm)
4. Cover the bushings with the caps that
were removed.
26

Installation
Positioning under the countertop (mm)
EN
Make sure that the rear/bottom of
the appliance has an opening of
approximately 60 mm.
27

Recessed position (mm)
Make sure that the top/rear of the
appliance has an opening of
approximately 35-40 mm depth.
Installation
28
 Loading...