

Page 1
Table of Contents
1 Description 9
1.1 General Description 9
1.2 Cooking zones 9
1.3 Symbols 11
2 Use 12
2.1 Warnings 12
2.2 Preliminary operations 13
2.3 Using the cooktop 13
3 Cleaning and maintenance 20
3.1 Warnings 20
3.2 Surface cleaning 20
3.3 Weekly routine cleaning 20
3.4 Food stains or residues 20
3.5 What to do if... 21
IMPORTANT INSTRUCTIONS
WARNING: If the instructions contained in this manual are not followed
precisely, fire or explosion may result causing property damage, personal
injury or loss of life.
EN
READ AND SAVE THESE INSTRUCTIONS - Your safety and the safety of
others are very important.
We have provided many important safety messages throughout this manual and
on the appliance.
Read all the instructions before using the appliance and always obey all safety
messages.
RECOGNIZE SAFETY INFORMATION
This is a safety alert symbol. This symbol alerts you to potential hazards that can
result in severe personal injury or loss of life.
UNDERSTAND SIGNAL WORDS
A signal word - DANGER, WARNING or CAUTION - is used with the safety alert
symbol. DANGER denotes the most serious hazards. It means you could lose your
life or be seriously injured if you do not immediately follow the instructions.
WARNING means you could lose your life or be seriously injured if the instructions
are not followed. CAUTION indicates a potentially hazardous situation which, if
not avoided, could result in minor to moderate injury.
3
Page 2
Important Safety Instructions
• This appliance is intended for use in the home only.
• Use this appliance only for its intended purpose. The
manufacturer cannot be held liable for damage caused by
WARNING
The safety messages will inform you of potential hazards, on how to avoid the risk of injury
and what can occur if the instructions are not followed.
IMPORTANT: Observe all codes and ordinances in force.
WARNING: For your safety, the instructions contained in this manual must be
followed to minimize the risk of fire or explosion and to prevent property damage,
personal injury or loss of life.
improper use of this appliance.
• This appliance complies with current safety regulations.
Improper use of this appliance can result in personal injury
and material damage.
• Read all the instructions before installing or using the
appliance for the first time.
• Keep these operating instructions in a safe place and pass
them on to any future user.
NOTE: This appliance is NOT designed for installation in manufactured (mobile)
homes or in recreational vehicles (RVs).
DO NOT install this appliance outdoors.
WARNING
To reduce the risk of fire, electrical shock, personal injury, or
damage when using the appliance, follow basic safety
precautions, including the following:
• Read all instructions.
• Proper installation is your responsibility.
Have a qualified technician install and
ground this appliance in accordance
with these installation instructions.
• It is the responsibility of the installer to
comply with installation information
specified on the model/serial ID plate.
The ID plates are visibly located under
4
the appliance. These ID plates must
never be removed.
• Proper installation is your responsibility.
Make sure your appliance is properly
installed and grounded by a qualified
installer.
• WARNING: NEVER use this appliance
as a space heater for heating or
warming a room. Doing so may result in
Page 3

Important Safety Instructions
the appliance overheating.
• DO NOT LEAVE CHILDREN
UNATTENDED: Children should not be
left alone or unattended in the area
where the appliance is being used.
Never allow children to sit or stand on
any part of the appliance.
• CAUTION: Do not store items of interest
to children in cabinets above a range or
on the backguard of a range - children
climbing on the range to reach items
could be seriously injured.
• WEAR PROPER APPAREL: Loose-fitting or
hanging garments should never be worn
while using the appliance.
• Do not store or use gasoline or other
flammable vapors, liquids or materials
near this or any other appliance.
• For safety reasons and to avoid damage
to your appliance, never sit, stand or
lean on the appliance.
• Do not leave the packing materials
around the home. Sort the various items
of waste and take them to the nearest
specialized waste collection facility.
• ELECTRICAL GROUNDING IS
REQUIRED. It is the customer’s
responsibility to:
1. Contact a qualified electrician.
2. Ensure that the electrical system is
adequate and in compliance with the
National Electrical Code ANSI / NFPA
70 Electrical Code – latest edition – or
the CANADIAN ELECTRICAL CODE,
C22.11 – 1982 and C22.2 No.
01982 – or latest edition – and all local
codes and ordinances.
• Always check that the controls are in the
“zero” (off) position when the appliance
is not in use.
EN
5
Page 4

Important Safety Instructions
• Do not attempt to repair or replace any
part of this appliance unless specifically
recommended in this manual. All other
servicing should be done by a qualified
technician.
• Never use any part of the appliance for
storage. Flammable materials can ignite
and plastic items may melt or burst into
flame.
• Never Leave Surface Units Unattended
at High Heat Settings – Boilover causes
smoking and greasy spillovers that may
ignite.
• Make Sure Reflector Pans or Drip Bowls
Are in Place – Absence of these pans or
bowls during cooking may subject wiring
or components underneath to damage.
• Protective Liners – Do not use aluminum
foil to line surface unit drip bowls or oven
bottoms, except as suggested in the
manual. Improper installation of these
liners may result in a risk of electric shock,
or fire.
• Glazed Cooking Utensils – Only certain
types of glass, glass/ceramic, ceramic,
earthenware, or other glazed utensils
are suitable for range-top service without
breaking due to the sudden change in
temperature.
• Use Proper Pan Size – This appliance is
equipped with one or more surface units
of different size. Select utensils having flat
bottoms large enough to cover the
surface unit heating element. The use of
undersized utensils will expose a portion
of the heating element to direct contact
and may result in ignition of clothing.
Proper relationship of utensil to burner
will also improve efficiency.
• Utensil Handles Should Be Turned
Inward and Not Extend Over Adjacent
Surface Units – To reduce the risk of
burns, ignition of flammable materials,
and spillage due to unintentional contact
with the utensil, the handle of a utensil
should be positioned so that it is turned
inward, and does not extend over
adjacent surface units.
• Do Not Cook on Broken Cook-Top – If
cook-top should break, cleaning
solutions and spillovers may penetrate
the broken cook-top and create a risk of
electric shock. Contact a qualified
technician immediately.
• DO NOT TOUCH SURFACE UNITS
OR AREAS NEAR UNITS – Surface units
may be hot even though they are dark in
color. Areas near surface units may
become hot enough to cause burns.
During and after use, do not touch, or let
clothing or other flammable materials
contact surface units or areas near units
until they have had sufficient time to cool.
Among these areas are the cook-top
and surfaces facing the cook-top.
Surface units may be hot even though
they are dark in color.
• DO NOT HEAT UNOPENED FOOD
CONTAINERS: A buildup of pressure
can cause the containers to burst.
6
Page 5
Important Safety Instructions
• DO NOT USE FLAMMABLE
PRODUCTS TO CLEAN THE
APPLIANCE.
• ONLY QUALIFIED SERVICE
PERSONNEL SHOULD PERFORM
REPAIRS. Service personnel must
disconnect the power supply before
servicing this unit.
• Do not use water on grease fires Smother the fire or flame or use dry
chemical or foam-type extinguisher.
• Use only dry potholders - Moist or damp
potholders on hot surfaces may result in
burns from steam. Do not let potholders
touch hot heating elements. Do not use a
towel or other bulky cloth.
• Do not stand or sit on the appliance.
State of California Proposition 65 Warning
WARNING
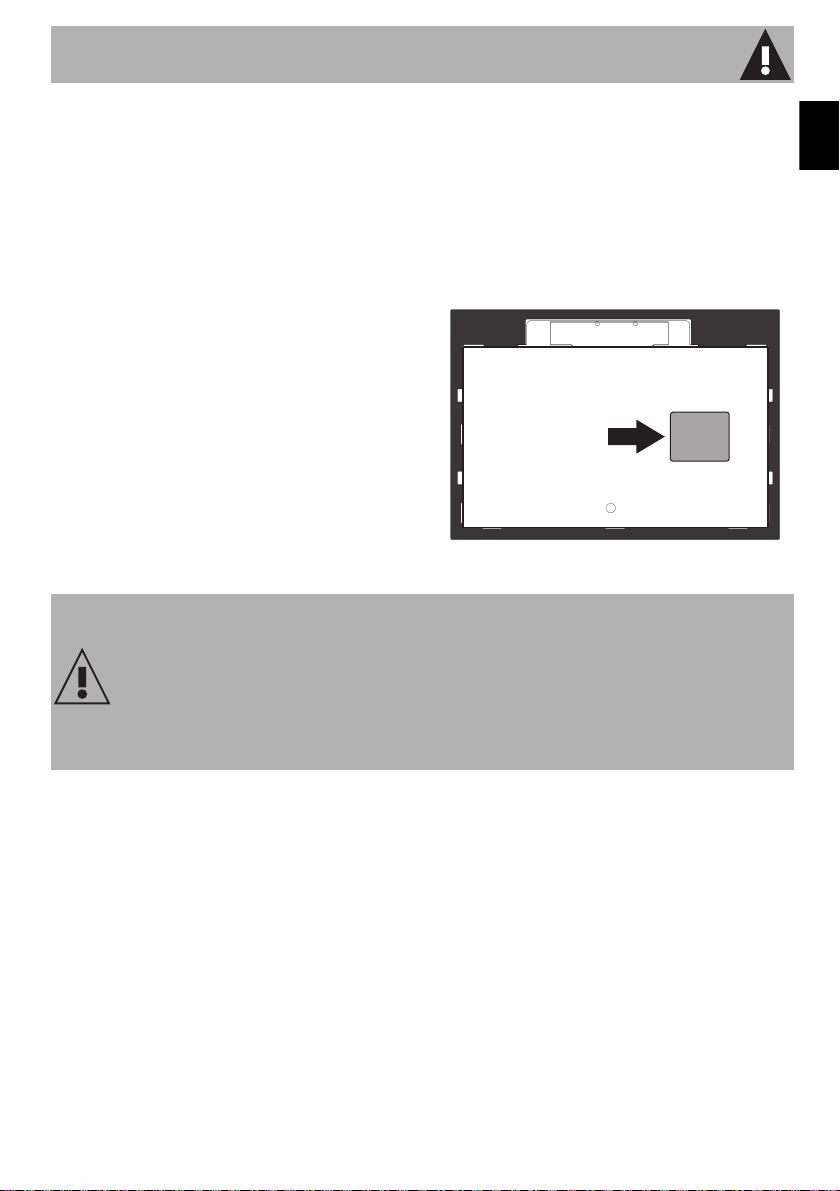
• Remove all packing materials and
temporary labels from the appliance.
• Record the model and serial number on
Page 2 of this booklet. The model and
serial numbers are on the appliance ID
plate. The ID plates are visibly located
under the appliance. THE ID PLATE
MUST NOT BE REMOVED.
EN
This product can expose you to chemicals including vinyl chloride, which is
known to the State of California to cause cancer and birth defects or other
reproductive harm. For more information go to www.P65Warnings.ca.gov.
7
Page 6
Important Safety Instructions
How to read the user manual
This user manual uses the following reading
conventions:
Instructions
General information on this user
manual, on safety and final
disposal.
Description
Description of the appliance and its
accessories.
Use
Information on the use of the
appliance and its accessories,
cooking advice.
Cleaning and maintenance
Information for proper cleaning and
maintenance of the appliance.
Safety instructions
Information
Advice
1. Order of use instructions.
• Stand-alone instructions.
SAVE THESE INSTRUCTIONS
8
Page 7

Description
1 Description
1.1 General Description
The appliance has cooking zones of
different diameters and powers depending
on the model. The location and the heat of
the cooking zones are delimited within the
diameters of the circles etched on the glass.
1.2 Cooking zones
The cooking zones are the HIGH-LIGHT
type meaning they turn on after a few
seconds and the heat is adjustable using the
controls on the front panel.
The cooking zones with two or three
concentric circles are double- or tripleheating: you can cook both within the
smallest circle or on both circles.
EN
12 in - 305 mm
24 in - 610 mm
30 in - 762 mm
9
Page 8

Description
36 in - 914 mm
External
Zone
diameter
(in - mm)
1
5 15/16 - 152
2
7 1/4 - 184
3
5 15/16 - 152
4
7 3/8 - 188
5
7 3/8 - 188
6
8 7/16 - 214
oval burner
7
8
11 5/16 - 288
* The powers are indicative and may vary depending on the selected settings and the voltage of the mains.
Max power
consumed
(W)*
1000
1400
1200
1800
1050
1000
1600
1050
Internal
diameter
(in - mm)
-
-
-
-
4 7/8 - 124
5 13/16 - 148
6 11/16 - 170
5 7/8 - 150
Max power
consumed
(W)*
-
-
-
-
750
1000
800
750
Intermediate
diameter
(in - mm)
-
-
-
-
-
-
-
8 9/16 - 216
Max power
consumed
(W)*
-
-
-
-
-
-
-
900
10
Page 9

Description
1.3 Symbols
key
Turns the cooktop on or off.
key
Pressing this key for 3 seconds enables or
disables the control lock.
Plus key
Increases the power level or the cooking
time.
Minus key
Decreases the power level or the cooking
time.
Cooking zones
Front left
Rear left
Central
Rear right
Front right
Right center
Front (version 12” - 305 mm only)
Rear (version 12” - 305 mm only)
EN
11
Page 10

Use
2 Use
2.1 Warnings
High temperature
Burn hazard
• Protect your hands with thermal gloves
during use.
• Do not touch or clean the cooktop
surface during operation or when the
residual heat warning lights are on.
• Surface units may be hot even though
they are dark in color.
• Do not place empty pots and pans on
the cooking zones when they are
switched on.
• Do not allow children of less than 8
years of age approach the appliance
during operation.
• Enables the control lock in the presence
of children or pets able to reach the
cooktop.
• After use, turn off the cooking zones.
They will remain hot for a certain period
of time after switching them off. Do not
touch the surfaces of the cooktop.
High temperature
Danger of fire or explosion
• Do not use or store flammable materials
near the appliance or directly under the
cooktop.
• Do not use cans, unopened containers,
dishes or plastic containers for cooking.
• Do not leave the appliance unattended
during cooking operations that could
release fats or oils.
• In the case of cracks or fractures or if
you cannot switch off the appliance,
disconnect the power supply
immediately and call Customer Service.
Improper use
Risk of damage to surfaces
• Do not use the cooktop if an oven
installed underneath is undergoing the
self-cleaning process.
• Use only pans with perfectly flat and
smooth bases on the cooktop.
• Avoid letting heavy objects fall on the
cooktop surface.
• In the case of cracks or fractures, switch
off the appliance, immediately
disconnect the power supply and call
Customer Service.
• Do not use the cooktop as a work
surface.
12
Page 11

Use
2.2 Preliminary operations
In order to remove any moisture that has
accumulated during manufacturing, for a
correct operation of the electronic circuits
and the control keypad:
1. Remove the protective film from the
appliance's external surfaces and the
accessories.
2. Remove any labels (except the
nameplate with the technical data).
During the first connection to the
mains supply, an automatic check
is run that turns on all the lights for a
few seconds. It may happen that
the display shows the message
to indicate that during factory
testing the cooktop was turned off
with the residual heat active. After
6 minutes this alert is automatically
disabled.
2.3 Using the cooktop
All the appliance's commands and controls
are grouped together on the front panel.
The cooktop is controlled using TouchControl sensor keys.
The power of the cooking zones may be set
at various levels.
Lightly touch a symbol on the glass ceramic
surface. Each correct touch is confirmed
with a beep.
Hot pots and pans should not
cover the sensor keys because
they might accidentally turn off the
appliance.
Switching on the cooktop
To switch on the cooktop, hold the
key for 3 seconds.
If you do not turn on a burner in the 30
seconds after switching on the cooktop, the
cooktop switches off automatically.
EN
13
Page 12

Use
Turning on a single cooking zone
1. After switching on the cooktop, press the
Minus keys to turn on the desired
cooking zone. The display shows the
symbol.
2. Press the Plus key. The display
shows the symbol to indicate that
the cooking zone is active at maximum
power.
3. Press the Plus and Minus keys
to increase or decrease the power as
desired.
If the Plus key is pressed when
the cooking zone is at maximum
power or , the cooking
zone is disabled ( ).
When the cooking zone is off ( ),
you cannot turn it on by pressing
the Minus key.
Turning on a double cooking zone
1. After you set the maximum power or
, press the Plus keys. On the
display, a bright dot lights up next to the
power indicating that the double
cooking zone or is turned on.
2. Press the Plus and Minus keys
to increase or decrease the power as
desired.
If the Plus key is pressed when
the cooking zone is at maximum
power or , the cooking
zone is disabled ( ).
14
Page 13

Use
Turning on a triple cooking zone
1. After you set the maximum power or
, press the Plus keys. On the
display, a bright dot lights up next to the
power indicating that the inside cooking
zone or is turned on.
2. Press the Plus key to turn on the full
cooking zone. On the display, a bright
dot lights up next to the power indicating
that the full cooking zone or is
turned on.
3. Press the Plus and Minus keys
to increase or decrease the power as
desired.
If the Plus key is pressed when
the cooking zone is at maximum
power or , the cooking
zone is disabled ( ).
Melting function
EN
This function can be used to melt
food such as butter, chocolate etc.
To activate the Melting function, first turn on
the cooktop, then:
1. After having set the power to (or
for multiple cooking zones), press
the Plus key. The display shows .
2. Press the Plus key again. The display
shows .
Residual heat
After switching off the cooking zone, if the
burner is still warm, the display shows the
message .
High temperature
Burn hazard
• Children cannot see the indication of
residual heat. In fact, even after having
been turned off, the cooking zone
remains hot for a certain period of time.
Make sure that children never touch the
cooktop.
15
Page 14

Use
Accelerator
With this function you can reach the desired
heating level in less time.
The cooking zones will start at maximum
power, then reduce power when they
reach the selected power level.
1. With the Plus and Minus keys,
select a power level between 1 and 9
(also in double or triple mode).
2. Simultaneously press the Plus and
Minus keys of the cooking zone on
which you want to enable the
accelerator function. The display
alternates between the alert and the
power just selected.
Power
level
12
23
34
45
56
Heating times with
function activated (min)
Control lock
The control lock is a device that protects the
appliance from accidental or inappropriate
use. Useful for preventing accidental
changes to set cooking values, the lock can
be enabled when the cooktop is on or off.
1. After switching on the cooktop, press the
key for at least 2 seconds. A
bright dot appears on the key to indicate
that the controls are now locked and
each time you press any of the keys the
display shows the alert or
(depending on the model).
2. Press the key for at least 2
seconds. The bright dot above the
symbol will turn off to indicate that the
controls are now unlocked and you can
press any key.
For security reasons, the
key remains
active when at least one cooking
zone is on. You can turn off the
entire cooktop at any time even if
the control lock is active.
67
78
810
912
16
Page 15

Use
Timer (on some models only)
This feature allows you to program a timer
which emits an acoustic signal at the end of
the set time (1 to 99 minutes).
1. With the keypad turned off, press the
key. The display shows
the message to indicate you
can change the timer.
2. Press the Plus or Minus keys to
set the time of the desired timer (hold
down the keys to speed up).
3. At the end of the set time, the cooktop will
alert you with a series of beeps. To stop
the beeping, press the
key.
4. To disable the timer during the
countdown you must reset its value using
the Minus key. When the display
shows , the timer is disabled.
Overheating protection
If you use the cooktop at full power for a
long period, the electronics may have
trouble cooling down, especially when the
room temperature is high.
In this case, a device cuts the power to the
front cooking zones and the display flashes
and .
If the temperature of the electronic board
does not decrease, the device cuts power
to all the cooking zones and the display
shows (only on some
models).
When the temperature returns below the
safety levels, cooking can resume.
Other functions
If three or more controls are used
simultaneously or for a long time (for
example: when a pan is mistakenly put on
them or from a water spill), an automatic
device turns off all cooking zones (if turned on)
and the display shows the error .
Remove the cause of the error from the
keys.
EN
17
Page 16

Use
Secondary menu
The cooktop is equipped with a secondary
menu that allows you to enable or disable
certain settings:
1 = Automatic control lock: in this mode,
one minute after the last action by the user
the control lock is automatically enabled.
2 = Showroom: in this mode, the appliance
turns off the heating elements and keeps the
control panel active (useful for in-store
demonstrations). Every minute, the display
shows for one second. To use
the cooktop normally, you must set this
mode to .
3 = ECO-logic (on some models only): in
this mode, the cooktop’s electronics
automatically adjust the power level in a
way which respects the maximum power
consumption limit set: 2.8 or 4 kW. To use
the cooktop at maximum power, you must
be set this mode to .
At first installation, within two minutes after
powering the cooktop, press and hold the
Plus and Minus keys of the first
cooking zone (next to the key).
The cooking zone display shows the
number of the setting currently being edited
(1 = Automatic control lock, 2 =
Showroom, 3 = ECO-logic) with its value
on the side ( : enabled, : disabled).
For example indicates that the
Automatic control lock is disabled.
Press the Plus or Minus keys to
change the setting of the or
values.
If the ECO-logic setting is changed, you
can select the following values (2.8
kW) (4 kW) (maximum
consumption). To advance to and change
the subsequent settings, press the
key.
18
if the cooktop is already installed
and in use, turn off the cooktop's
power. Turn the cooktop back on
within two minutes and proceed as
described above.
Page 17

Energy saving tips
Use
• The diameter of the base of a pan must
correspond to the diameter of the
cooking zone.
• When purchasing a pan, check if the
diameter indicated refers to the base or
to the top of the pan, because the top is
almost always greater than the base.
• The base of the pan must be very thick
and perfectly flat. The base of the pan
and the cooktop must be clean and dry.
• When preparing dishes with long
cooking times, you can save time and
energy by using a pressure cooker,
which preserves the vitamins in food.
• Make sure that the pressure cooker
contains enough liquid, as the result of
overheating caused by the lack of water
could damage the pan and the cooking
zone.
• If possible, always cover pans with a
suitable lid.
• Choose the right pan for the quantity of
food to be cooked. A large, but halfempty pan wastes energy.
• Do not use cast iron pans or those with a
rough bottom.
EN
19
Page 18

Table of cooking times
Use
Power
level
0
U
1
2
3 - 4
5
6
Types of cooking Suitable for...
OFF position Off
Warming dishes Heating up food
Simmering small quantities of food
(minimum power)
Simmering small quantities of food
Simmering
Cooking large quantities of food
Cooking large quantities of food, roasting
Melting butter, chocolate or similar
Keeping small amounts of water boiling,
whisking egg yolk or butter sauces
Heating solid or liquid foods, keeping
water boiling, thawing frozen foods,
making 2- or 3-egg omelettes, fruit and
vegetable dishes, various preparations
Keeping water boiling, 4- to 6-egg
omelettes, fruit and vegetable dishes,
various preparations
Cooking meats, fish and stewed
vegetables, dishes with more or less water,
preparing jams, etc.
7 - 8
9 - P *
* only on selected models
20
Roasting larger pieces, frying with flour
Roasting, frying, cooking (maximum
power)
Roasting meat or fish, steaks, liver,
browning meat and fish, eggs, etc.
Deep-frying potatoes, etc., bringing water
to boil quickly
Page 19

Cleaning and Maintenance
3 Cleaning and maintenance
3.1 Warnings
Improper use
Risk of damage to surfaces
• Do not use steam jets to clean the
appliance.
• Do not spill sugar or sweet mixtures onto
the cooktop during cooking.
• Do not place materials or substances
which may melt (plastic or aluminum foil)
on the surface during cooking.
• Always keep the cooktop clean and do
not place any objects on the sensor
keys.
• Do not use cleaning products containing
chlorine, ammonia or bleach on the
steel parts or those with metallic surface
finishes (e.g. anodizing, nickel or
chrome plating).
• Do not use abrasive or corrosive
detergents on the glass parts (e.g.
powder products, stain removers or
metal scouring pads). If possible, use
wooden or plastic utensils.
3.3 Weekly routine cleaning
Clean and maintain the cooktop once a
week using a standard product for cleaning
glass. Always follow the manufacturer's
directions. The silicone in these products
creates a water- and dirt-repellent
protective film. All the dirt remaining on the
film and can be removed easily. Just wipe
the surface with a clean cloth. Make sure
no detergent remains on the cooktop
surface because it will react aggressively
when the cooktop is heated up and can
change its structure.
3.4 Food stains or residues
Any marks left by the use of pans with
aluminum bases can be wiped off with a
damp cloth soaked in vinegar.
If, after cooking, burnt residues remain,
remove them, with water and dry
thoroughly with a clean cloth.
Grains of sand which may end up on the
cooktop while cleaning lettuce or potatoes
can scratch the cooktop when you move
pans around.
Therefore, make sure that no grains of sand
are left on the cooktop.
EN
3.2 Surface cleaning
To maintain the surfaces, you must clean
them regularly after each use once they
have cooled down.
21
Page 20

Cleaning and Maintenance
Changes in color do not affect the function
and stability of the glass. It is, in fact, not a
question of changes to the cooktop
material, but simply of residues which were
not removed and therefore charred.
Shiny spots can form due to the bases of
pans rubbing on the surface, especially if
they are aluminum, and the use of
unsuitable cleaning agents. They are
difficult to remove using common cleaning
products. You may need to repeat the
cleaning process several times. Using
aggressive detergents or sliding the base of
pans on the surface can, over time, wear
away the decorations of the cooktop and
could cause spots to form.
3.5 What to do if...
The cooktop does not work:
• Check that the cooktop is plugged in
and the main switch is turned on.
• Check that there are no power outages.
• Check that the fuse has not been tripped.
If it has, replace the fuse.
• Check that the thermal-magnetic circuit
breaker of the appliance has not been
tripped. If it has, reset the switch.
• Check that the sensor keys are not
locked by the control lock.
• Check that the keys are not partially
covered by a damp cloth, fluid or a
metallic object.
The results of cooking are unsatisfactory:
• Check if the cooking temperature is too
high or too low.
The cooktop smokes:
• Allow the cooktop to cool and clean it
after cooking.
• Check that the food has not spilled and
use a larger container if necessary.
The display shows the message “E2”:
• Check that no food has accidentally
fallen on the sensor keys.
• Remove any cookware or other items
that are partially on the sensor keys.
The display shows the message “E - E4”:
• There is a technical defect. Contact
Customer Service.
The fuses or the thermal-magnetic circuit
breaker of the appliance are triggered
repeatedly:
• Contact Customer Service or an
electrician.
There are fissures and cracks on the
cooktop:
• Switch off the appliance, immediately
disconnect the power supply and call
Customer Service.
22
 Loading...