

Page 1
Libretto d’istruzioni
Instruction manual
Mode d’emploi
Gebrauchsanweisung
Manual de instrucciones
Instruções de instala ção
Gebruiksaanwijzingen
Bruksanvisning
KTS75/KTS75C
Page 2
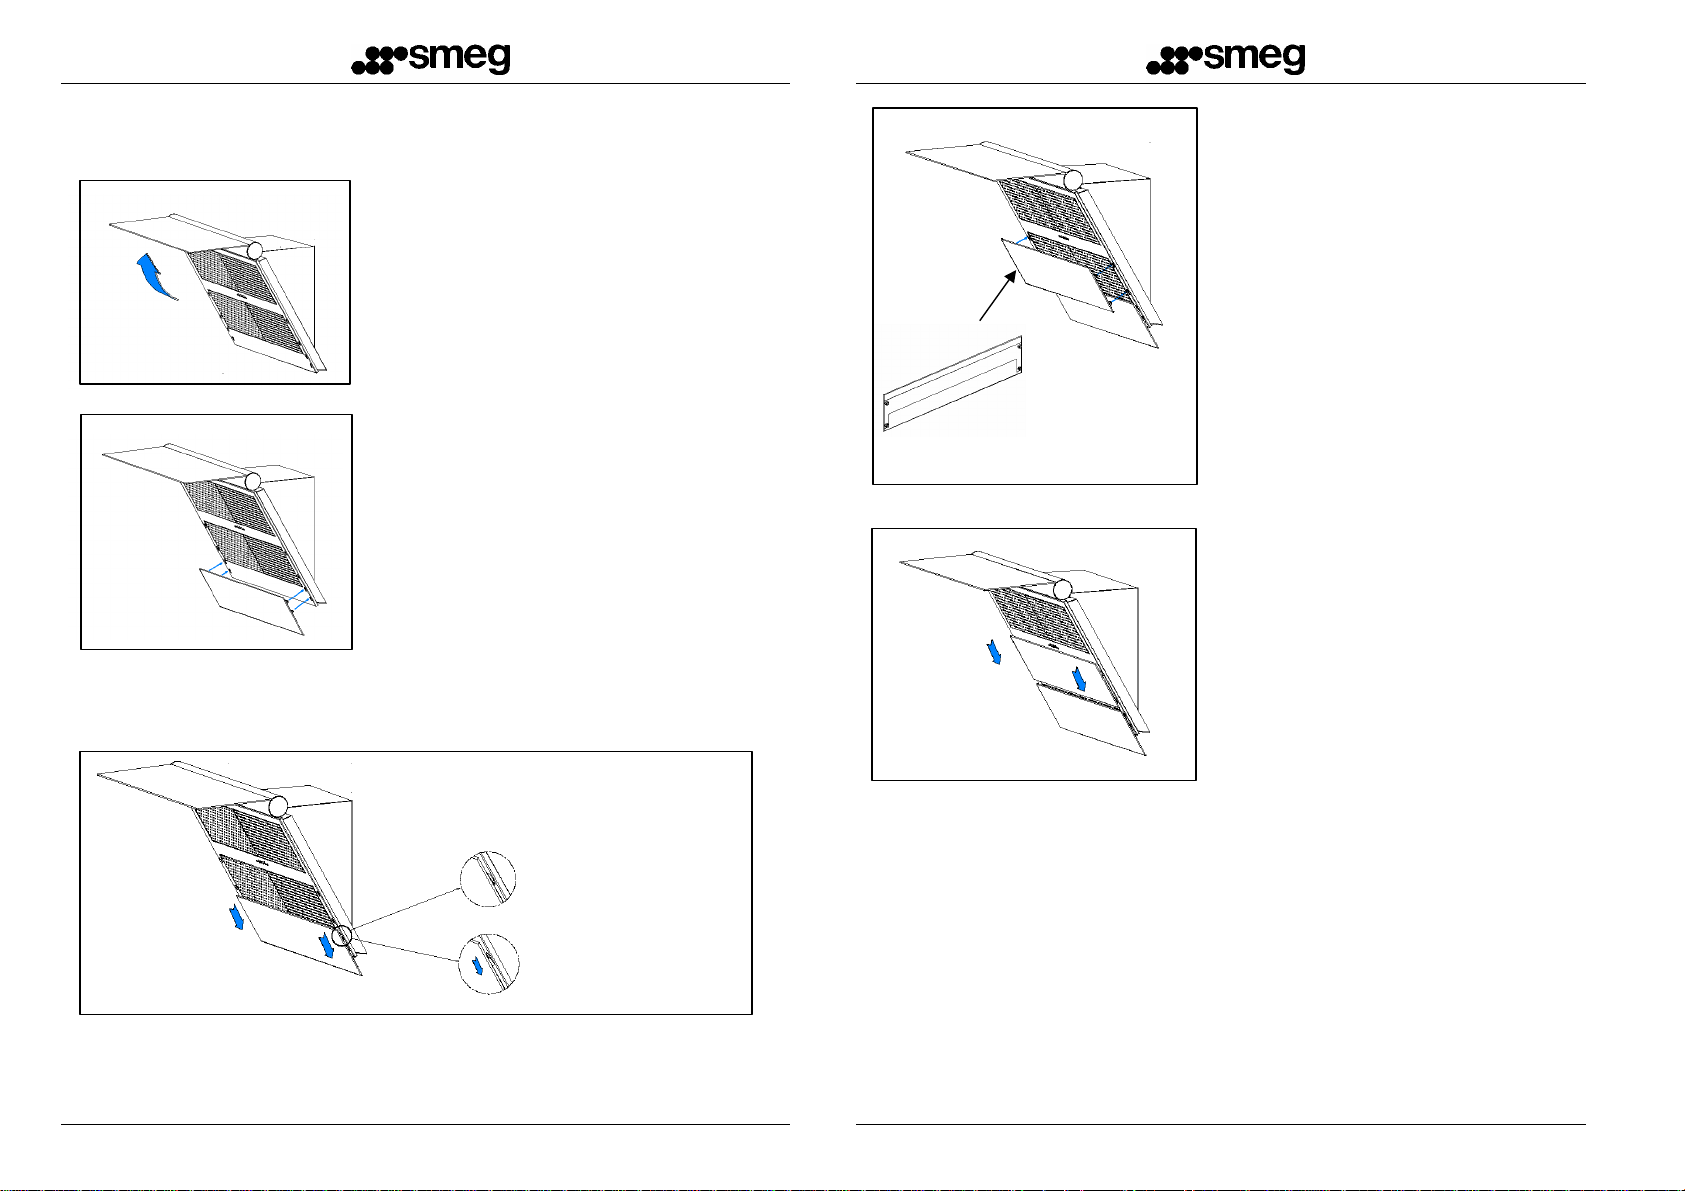
Fig.1
Installation of glass panels
Take the two 200x750 hood glass panels out
of the box.
Remove them from the box with care.
Open the hood upper glass panel (Fig.1).
Take the glass panel with the SMEG
logo close to the hood and centre the
four hinges in their seats (Fig.2).
Fig.4
Get the glass panel with no logo and
place it near the hood 2, centre the
four pins in the remaining four hood
seats (Fig.4).
(2) For proper positioning, check the position of
the metal frame on the back (Fig.4.1).
Fig.4.1 – Rear
view.
EN
Fig.2
Fig.3
Let the glass panel slide downwards
along the pin guides (Fig.3.2).
Fig.3.1 - Initial position
(Pins high)
Fig.3.2 - Final
position
01
Let the glass panel slide along the
pin guides (Fig.5 and Fig.3.2)
Fig.5
Glass removal
To remove the glass panels, follow the procedure in the reverse order.
EN
02
Page 3
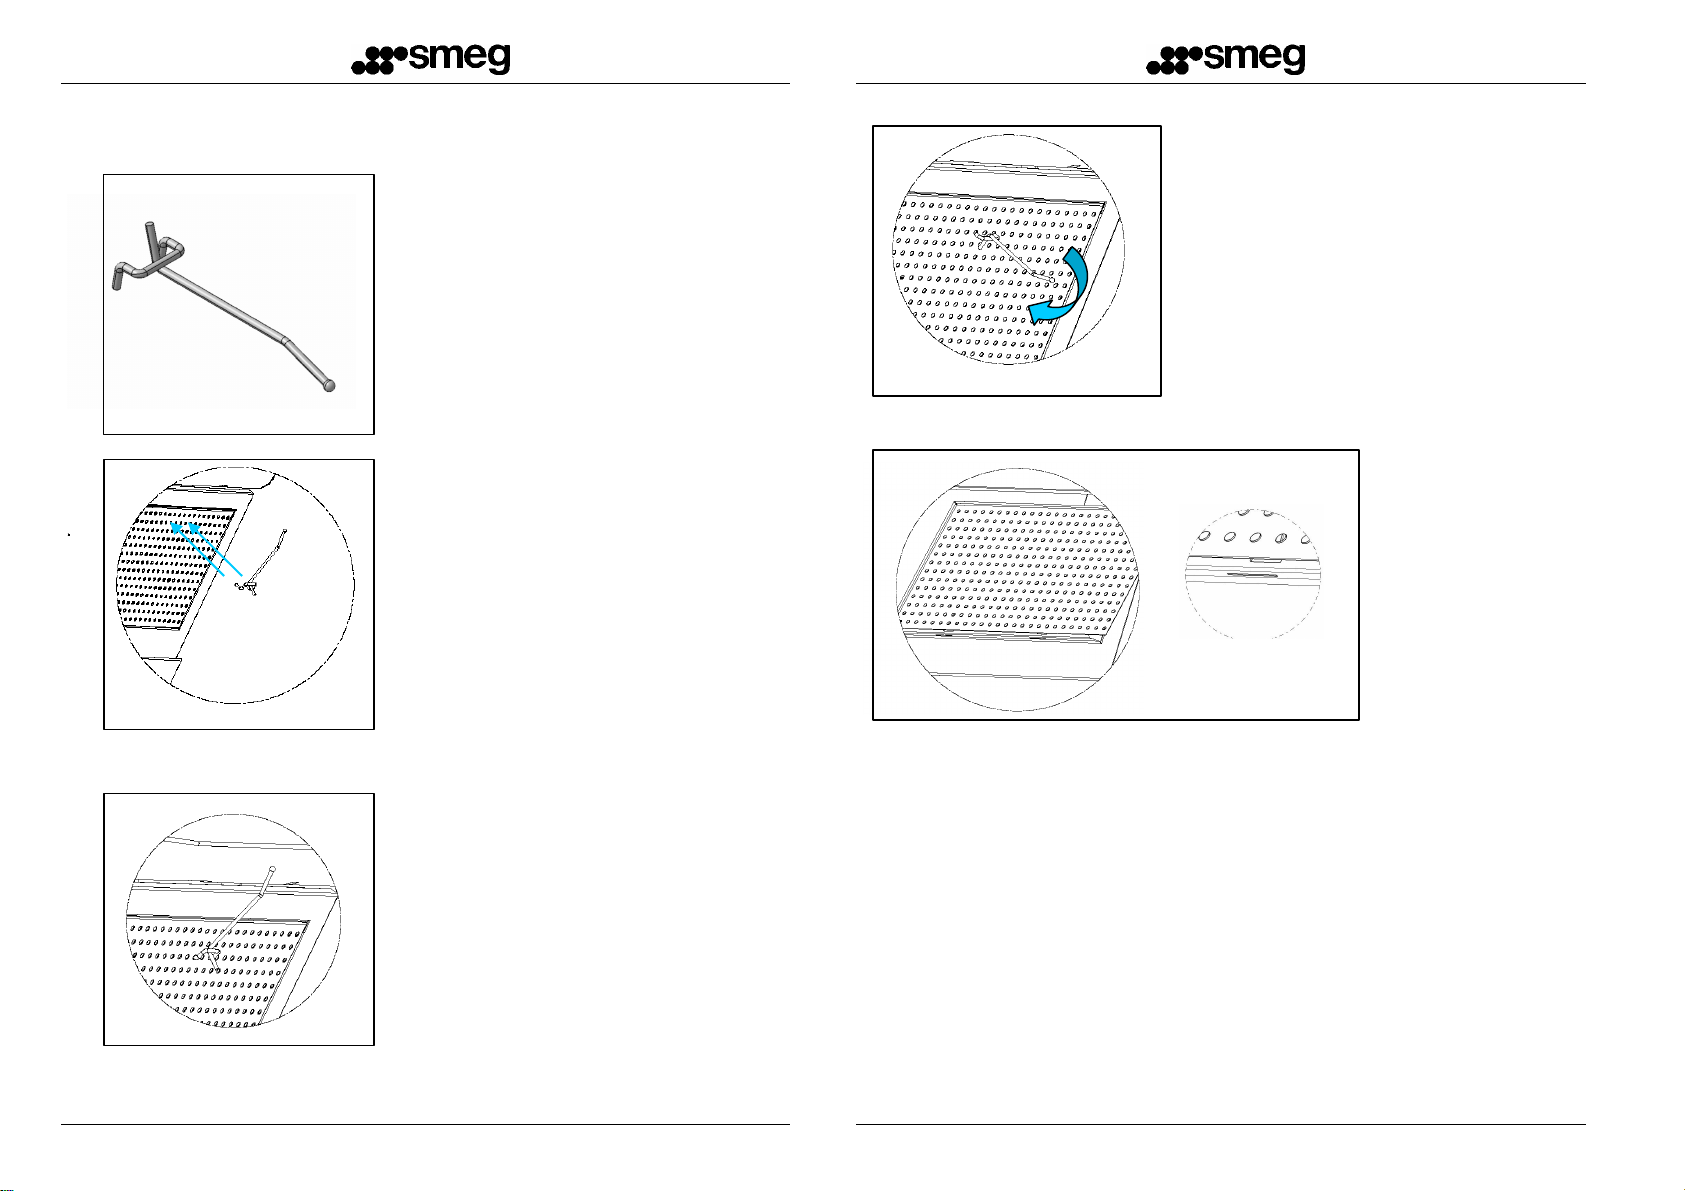
Removal of filter panels
To remove the filters, use the
key included in the supply
(Fig.5).
Turn the key downwards
and pull (Fig.8).
Fig.8
Fig.5
Fig.6
Place the key as shown in Fig.6.
Insert the key prongs in the holes on
the upper central part of the panel
(Fig.7) .
Fig.9
NB.: To remove the upper panel pair, remove the glass panels as described on page 2 .
Pull the panels up
to remove them
(Fig.9).
Fig.7
EN
03
EN
04
Page 4

Fig.10
Fig.11
Installation of the filter panels
Take the panels close to the hood.
Insert the filter pins in the seats as
shown in Fig.10
Rotate the panels and take them
close to the hood (Fig.11 and
Fig,12).
Adjustment of glass-closed position
Fig.13
Adjust the glass closed position after installing the hood.
Adjust the closing position of the glass by loosening/tightening the
adjustment screws.
Adjust the LH and RH sides.
Use a size-3 Allen key for the adjustment (Fig.13).
Fig.12
EN
05
EN
06
Page 5

Installation instructions
Height of the
holes for the
bracket
Level of the
EN
Fig.14 Fig.15
a) Fix the hood in the center over the hob;
b) Maintain the distances shown at fig. 14 and fig. 15.
Reference
height for the
center of the
exhaust hole
07
Page 6

OPERATING INSTRUCTIONS:
A
B
CONTROL PANEL:
In order to achieve the best performance, it is recommended to start the hood a few
minutes before starting cooking and keep it on for at least 15 minutes after finishing
cooking or after all fumes and odours have disappeared.
To start the hood, identify your type of control panel and follow the instructions:
SLIDER:
- Key (A) to turn on/off the hood’s light.
- Four-position Cursor (B):
0: Off
1/2/3: On/Speed adjustment
(A) (B)
ELECTROMECHANICAL PUSHBUTTONS:
Light ON/OFF Button
Motor OFF button
On/speed adjustment button
:
(A) to turn on/off
(B):
(A) (B)
WITH KNOBS
- Two-position Knob
the light (0-1)
- Four-position Knob
0 Motor OFF
1-2-3 Speed adjustment
EN 04
Page 7

ELECTRONIC PUSHBUTTONS:
It
Lights ON/OFF
Filters reset button
OPTIONAL FUNCTIONS:
- AUTO POWER-OFF TIMER: Pushing one of the speed adjustment buttons (2-3-4)
twice, you will activate the “Auto power-off timer” function that turns the motor and light off
10 mins. The activation of such function is signalled by the blinking LED
after
OFF/1 speed
Speed adjustment
above the pressed button.
- FILTERS CLEANING WARNING: When all the 4 LEDs blink at the same time
programmed to happen every 100h of operation)
clean/replace the filters
.
, the user is required to
(which is
Pressing the Reset button the 100h count will start again
Note: Pressing the reset button accidentally before the end of the 100h
cycle does not reset the filters cleaning memory
It is recommended that grease filters are cleaned every 100h and active
carbon filters are replaced every 200h.
CLEANING AND MAINTENANCE:
Before performing any cleaning and/or maintenance operation always disconnect
the hood from the mains supply.
Regular cleaning will ensure a good performance and extend the working life of the hood.
Special attention should be given to the grease filters and carbon filters (for recycling
hoods only).
Note: An excess of grease in the filter, as well as affecting the performance of the
hood, can also be a fire risk.
EXTERNAL CLEANING:
External and internal cleaning of the hood should be performed with a damp cloth and a
non-bleach liquid detergent, absolutely avoiding solvents or abrasive substances.
is advisable to use specific products, following their instructions. When cleaning the steel
of the hood, we suggest rubbing in the same direction as the grain.
EN 05
 Loading...