

Page 1
ISTRUZIONI di MONTAGGIO SENSORI di LIVELLO
DETERGENTE e BRILLANTANTE SU LAVASTOVIGLIE
PROFESSIONALE SOTTO BANCO 400-500
con ESTETICA
INSTALLATION MANUAL for DETERGENTS and
RINSE AID LIQUIDS LEVEL SENSOR KIT
for EXTERNAL TANKS for COMMERCIAL DISHWASHER
400 and 500 UNDER COUNTER
INSTALLATIONSANLEITUNG FÜR EXTERN
REINIGER-und KLARSPÜLMITTEL-SONDEN KIT
für GEWERBE-GESCHIRRSPÜLER
400 und 500 UNTERTISCH
P
Set up
19 510 1062 02
Page 2
Togliere il top A, il retro B ed il fianco sinistro C.
Remove the top A, the back B and the left side C.
Die Verkleidung oben A, hinten B und links C abnehmen.
400 500
A
C C
A
B B
Page 3
Togliere il tappo A.
Remove the cap A.
Die Kappe A abnehmen.
400
A
A
500
Page 4
Passare i due cavetti dal tappo del PG11.
Insert the cables through the cap of PG11.
Die zwei Kabel durch die Kappe des Pg11 stecken.
Passare i due cavetti attraverso l’anello in gomma, poi dal corpo
400-500
del PG11, senza stringere.
Insert the cables into the rubber washer and further into the
body of PG11, whithout tighten it.
Die zwei Kabeln durch die Gummischeibe stecken und danach
in den PG11 Körper, ohne es festzumachen.
Cablaggio a corredo da utilizzare solamente sui modelli (400-500-capote)
con scheda elettronica piccola.
Wiring accessory to be used only for models 400-500-hood with small
power board.
Das beigelieferte Kabel ist nur für
Modelle (400-500-Haube) mit
kleiner/quadratischer
Hauptplatine zu benutzen.
Page 5
Passare i cavi sonde dal foro A (da cui inizialmente è stato tolto il tappo),
poi attraverso la ghiera metallica.
Insert all the cables into the hole A (where the cap A has benn removed)
and further into the metal threated ring.
Die Kabel durch Loch A (wo die Kappe A abgenommen worden ist) und
dann in den flach Ring/Muttern mit Gewinde stecken.
400-500
Infilare PG11 nel foro A ed avvitarlo alla ghiera metallica.
Insert Pg11 into the hole A and tighten it with the metal threated ring.
PG11 in das Loch A einstecken und dann mit dem ring fest machen.
Page 6

Fare passare il cavo sonde aderente al cablaggio macchina
fino alla scheda principale.
Place the cables along the other cables until the PCB.
Die Kabel neben die existierenden bis zu der Hauptplatine legen.
400
Page 7

Modelli con scheda grande: eseguire il collegamento alla scheda
elettronica principale secondo lo schema elettrico a corredo della macchina.
cable connection with the PCB has to beModels with large power board:
done accordingly to the electrical scheme of the machine.
Modelle mit grosser/rechteckiger Hauptplatine:
Die Kabel verbinden wie in der elektrischen Zeichnung der Maschine
beschrieben wird.
400
Page 8

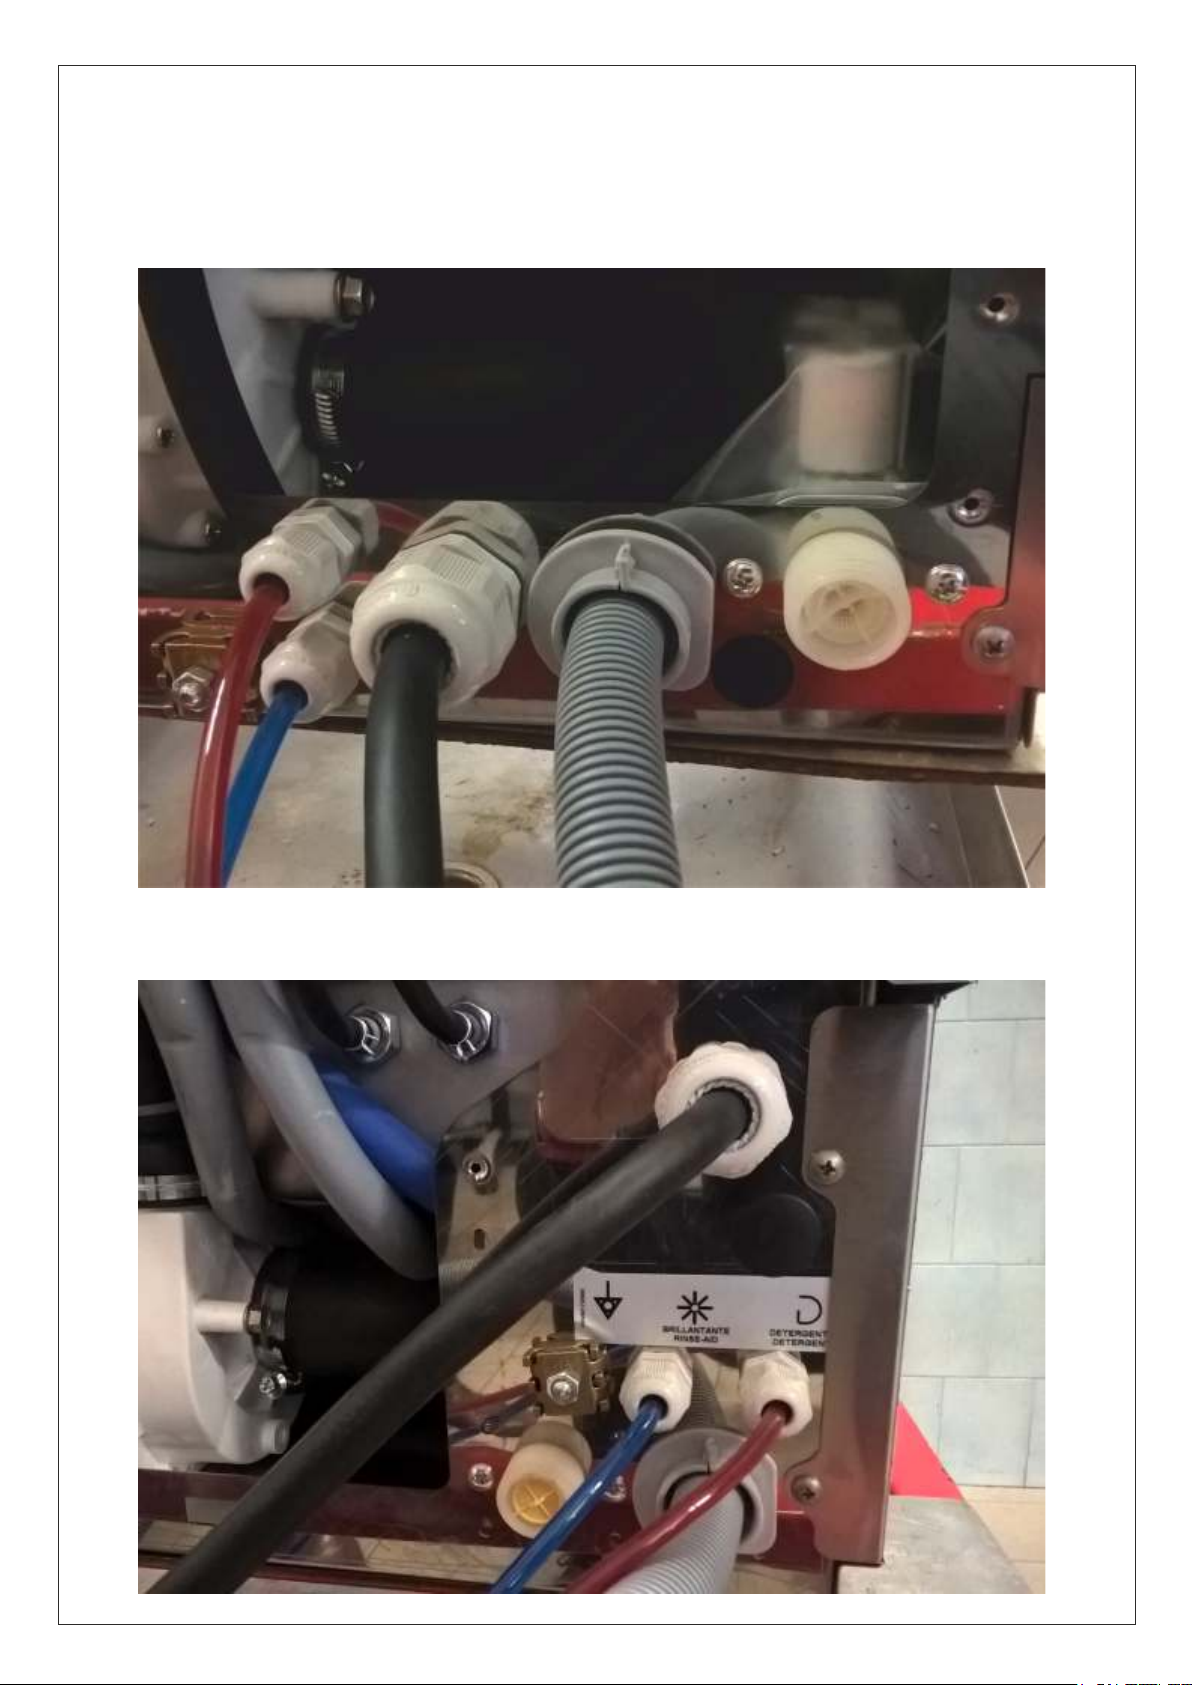
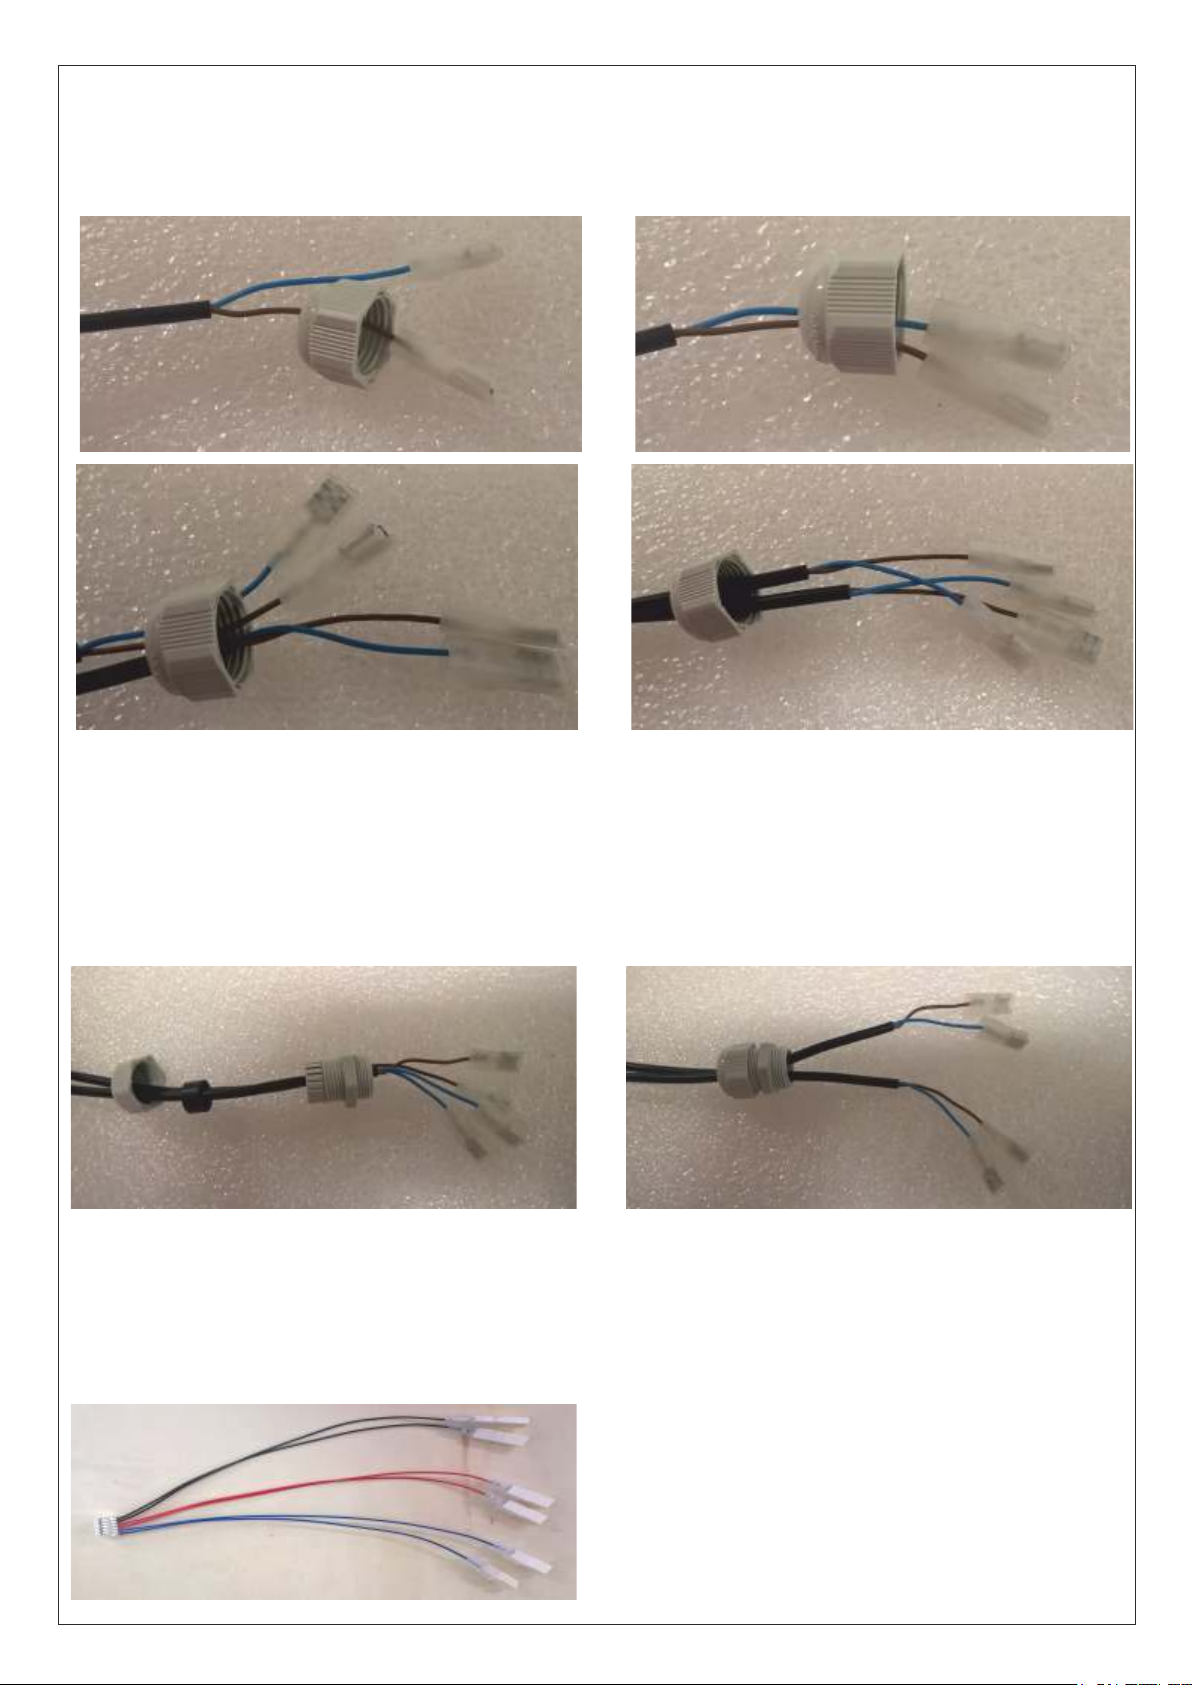
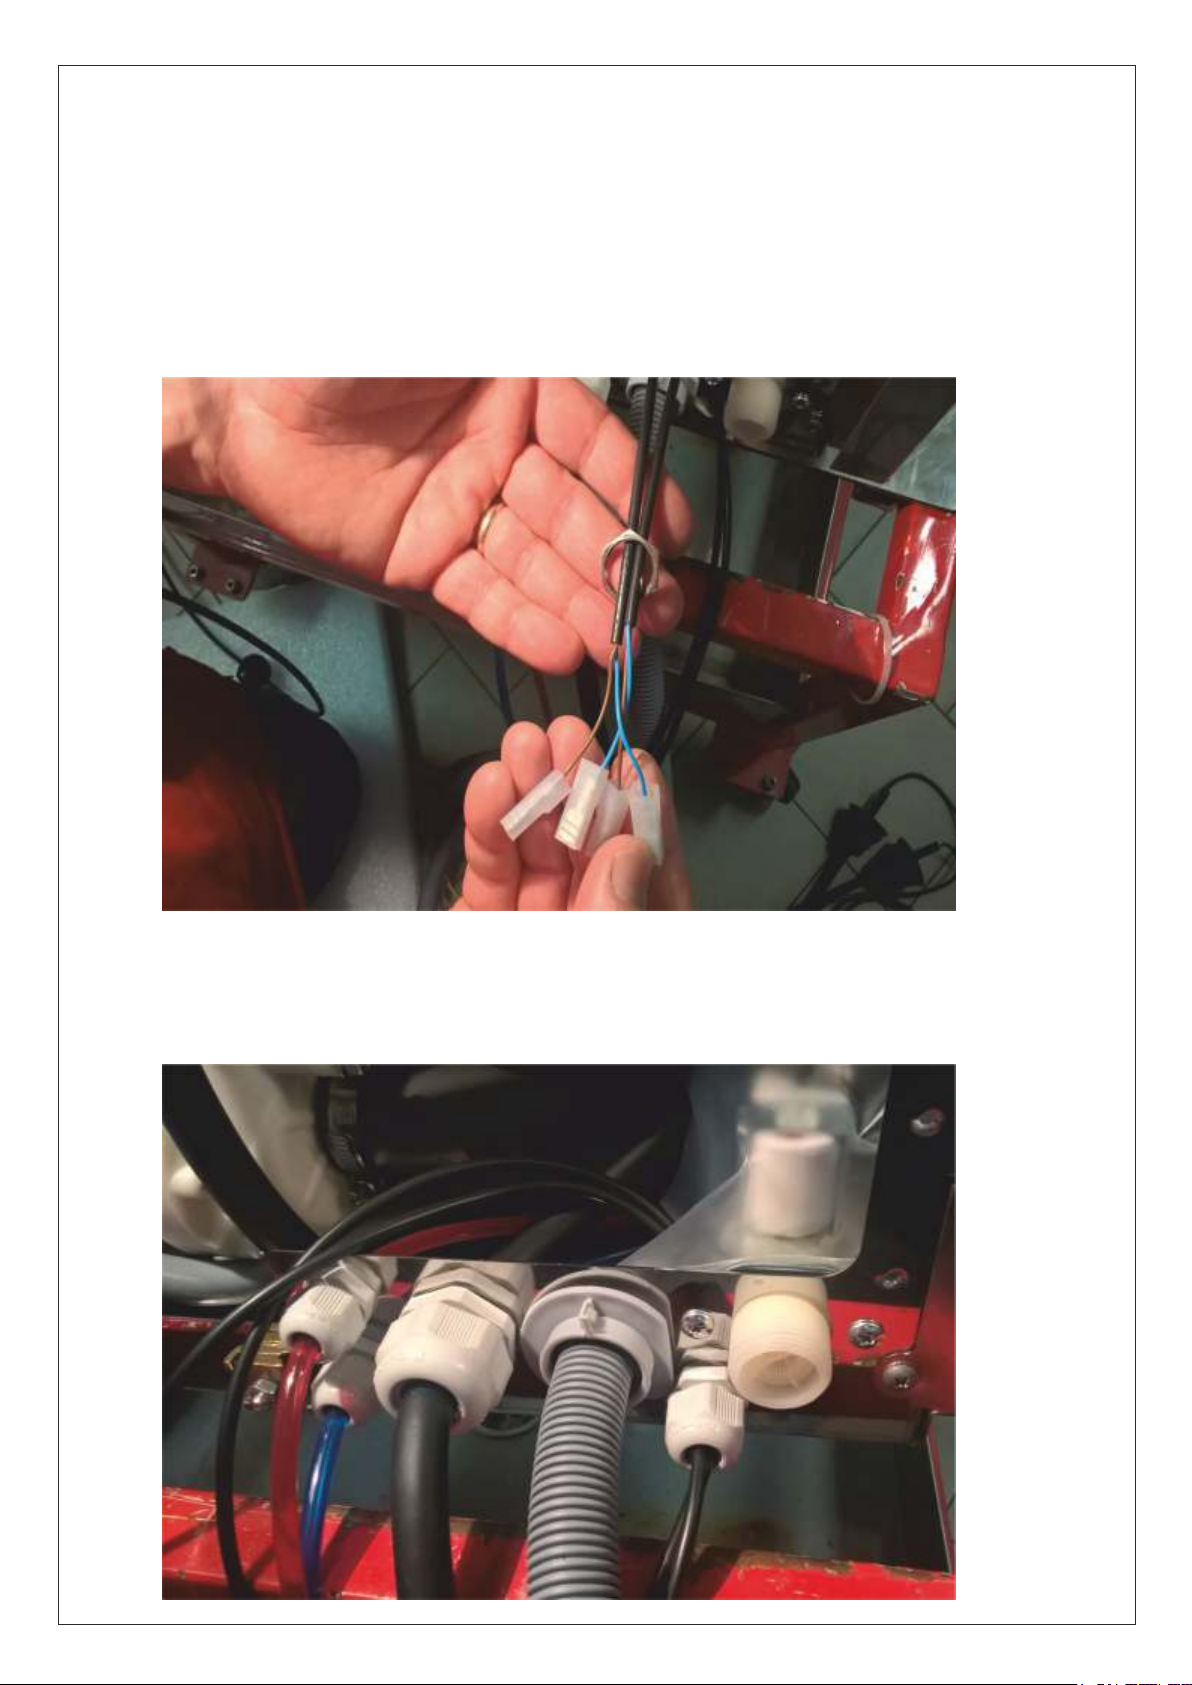
Modelli con scheda piccola: collegare il morsetto del cablaggio a corredo
e posizionare i cavi come indicato, quindi eseguire i seguenti collegamenti:
cavi blu alla lancia brillantante, cavi rossi alla lancia detergente, cavi neri al
reed del filtro vasca (se presente).
Models with small power board: connect the wire connector to the board
as shown and position the wires as shown in the picture. Then proceed with
the connection of each wire: blue wires to the rinse aid level sensor,
red wires to the detergent level sensor, black wires to the tank filter reed
sensor (if available).
Modelle mit kleiner/quadratischer Hauptplatine: Kabeladapter an der
Platine verbinden und die Kabel schuhverbinden wie folgt: blaue Kabel für
die Klarspülerlanze, rote Kabel für die Reinigerlanze, schwarze Kabel für
Reedkontakt Filtererkennung (wenn vorhanden).
!
!
Page 9

Chiudere il coperchio.
Close the lid.
Schließen Sie den Deckel
400
Page 10

Modelli con scheda grande: fare passare il cavo sonde aderente al
cablaggio macchina fino alla scheda principale ed eseguire il collegamento
secondo lo schema elettrico a corredo della macchina.
Models with large power board: put the level sensor wiring next to the
main wiring up to the main board and make connection as per wiring
diagram inside the appliance.
Modelle mit grosser/rechteckiger Platine: Kabel der Sauglanzen
durchführen bis zur Hauptplatine und an den Anschlüssen, wie im
Schaltplan beschrieben, verbinden.
500
!
!
!
Page 11

Modelli con scheda piccola: fare passare il cavo sonde aderente al cablaggio
macchina fino alla scheda principale. Collegare il morsetto del cablaggio a corredo e
posizionare i cavi come indicato, quindi eseguire i seguenti collegamenti:
cavi blu alla lancia brillantante, cavi rossi alla lancia detergente,
cavi neri al read del filtro vasca (se presente).
Models with small power board: put the level sensor wiring next to main wiring up to
the main board. Connect the wire connector to the power board and place the cables
next to the board as shown in the picture. Then proceed with the connection of each
wire: blue wires to the rinse aid level sensor, red wires to the detergent level sensor,
black wires to the tank filter reed sensor (if available).
Modelle mit kleiner/quadratischer Hauptplatine: Kabel der Sauglanzen durchführen
bis zur Hauptplatine. Kabeladapter an der Platine verbinden und die Kabel
schuhverbinden wie folgt: blaue Kabel für die Klarspülerlanze, rote Kabel für die
Reinigerlanze, schwarze Kabel für Reedkontakt Filtererkennung (wenn vorhanden).
!
!
Page 12

Chiudere il coperchio.
Close the lid.
Schließen Sie den Deckel
500
Page 13

Inserire i tubetti detergente e brillantante nelle rispettive sonde.
Insert Detergent and Rinse aid pipes into the level sensor.
Die Reiniger- und Klarspüler Schläuche in die Niveau-Sonde
einstecken.
400-500
Page 14

Inserire i filtri alle estremità.
Insert the filter at the end of the pipes.
Die Filter an die Schläuche anbringen.
400-500
Rimontare fianco sinistro, retro e top.
Install gain, back, top and side.
Oben, hinten und Seiten Verkleidung wieder montieren.
 Loading...