

Smeg KEX705, LSE490, LSE490KV, LSE501, LV5010B Instructions For Installation And Use Manual
...Lavastoviglie Lave-vaisselle Dishwasher
Geschirrspüler Afwasautomaat Lavavajillas
Istruzioni per l'installazione e l'uso Instructions pour l'installation et l'emploi Instructions for installation and use Informationen für Installation und Gebrauch Instructies voor installatie en gebruik Instrucciones para la instalación y el uso
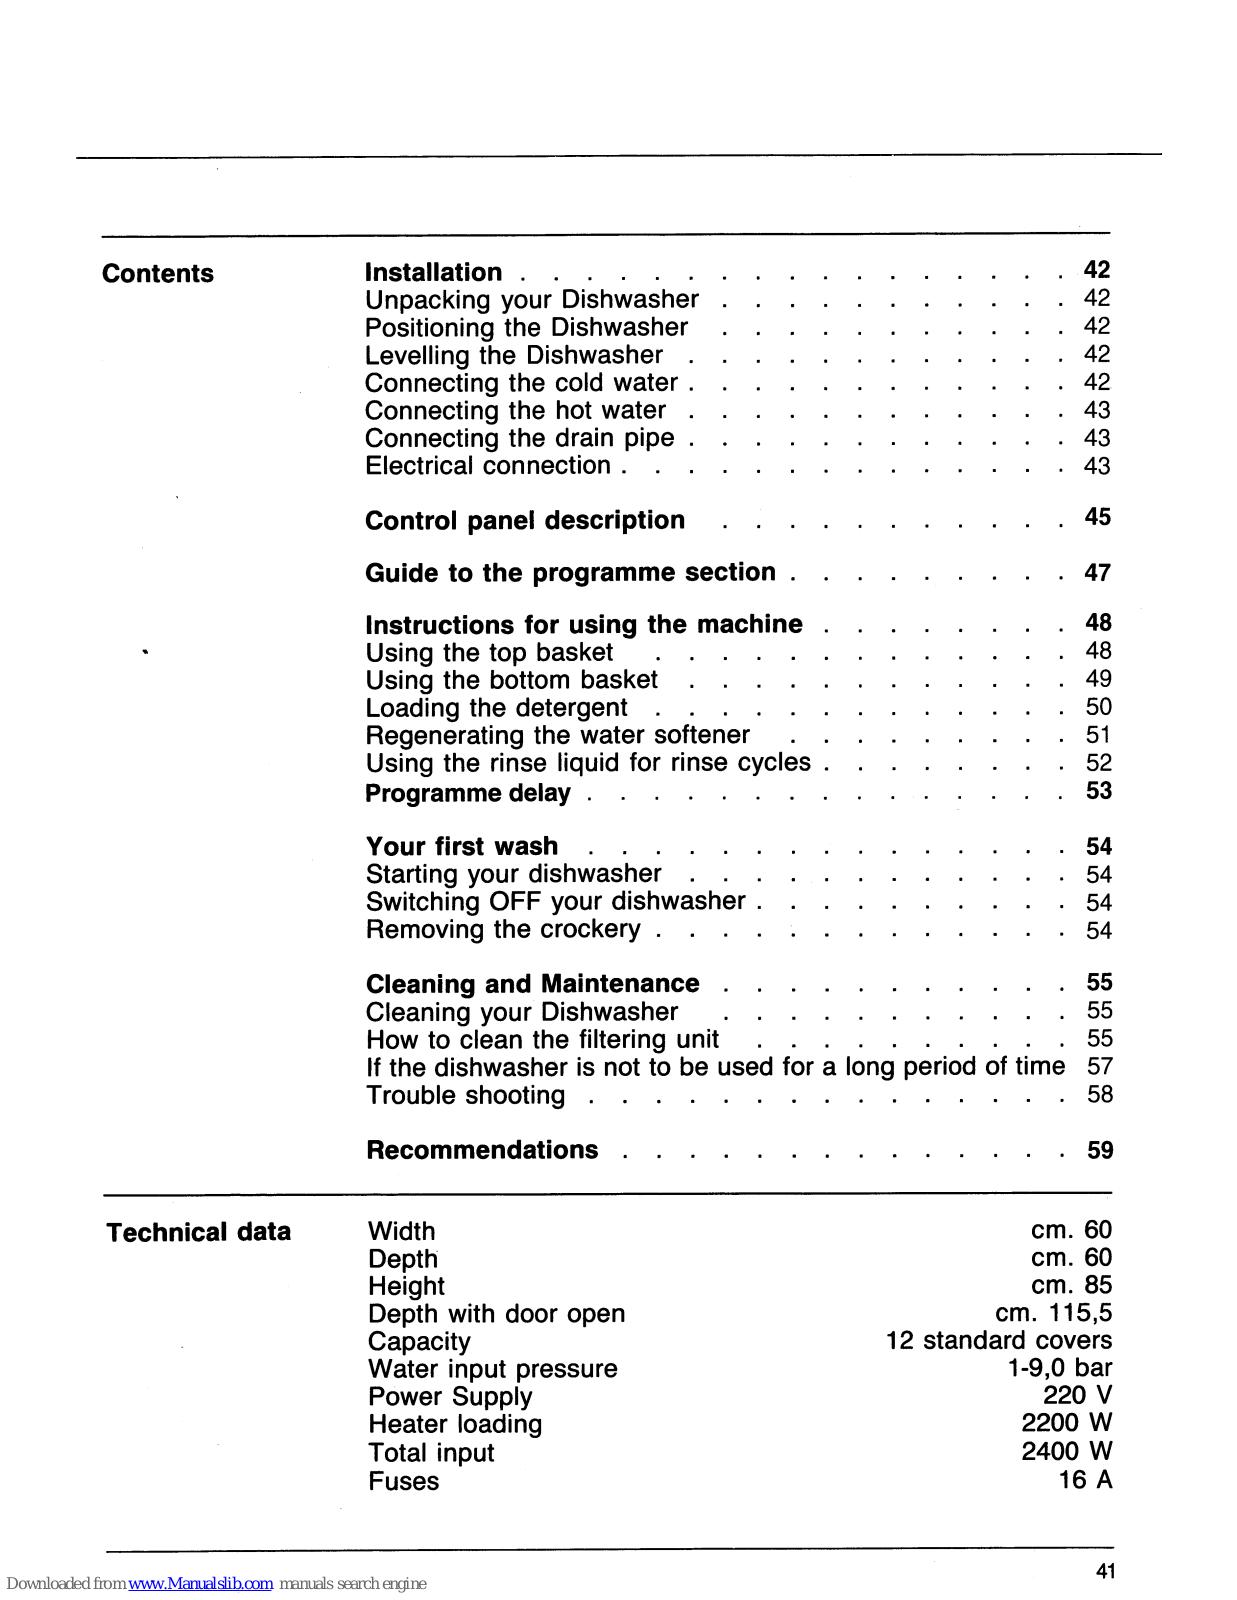
| Contents | Installation42Unpacking your Dishwasher42Positioning the Dishwasher42Levelling the Dishwasher42Connecting the cold water42Connecting the hot water42Connecting the drain pipe43Electrical connection43 |
|---|---|
| , | Control panel description |
| Guide to the programme section | |
| • | Instructions for using the machine |
| Your first wash 54 Starting your dishwasher 54 Switching OFF your dishwasher 54 Removing the crockery 54 | |
| Cleaning and Maintenance 55 Cleaning your Dishwasher 55 How to clean the filtering unit 55 If the dishwasher is not to be used for a long period of time 57 Trouble shooting 58 Recommendations 59 | |
| Technical data | Widthcm. 60Depthcm. 60Heightcm. 85Depth with door opencm. 115,5Capacity12 standard coversWater input pressure1-9,0 barPower Supply220 VHeater loading2200 WTotal input2400 WFuses16 A |
|
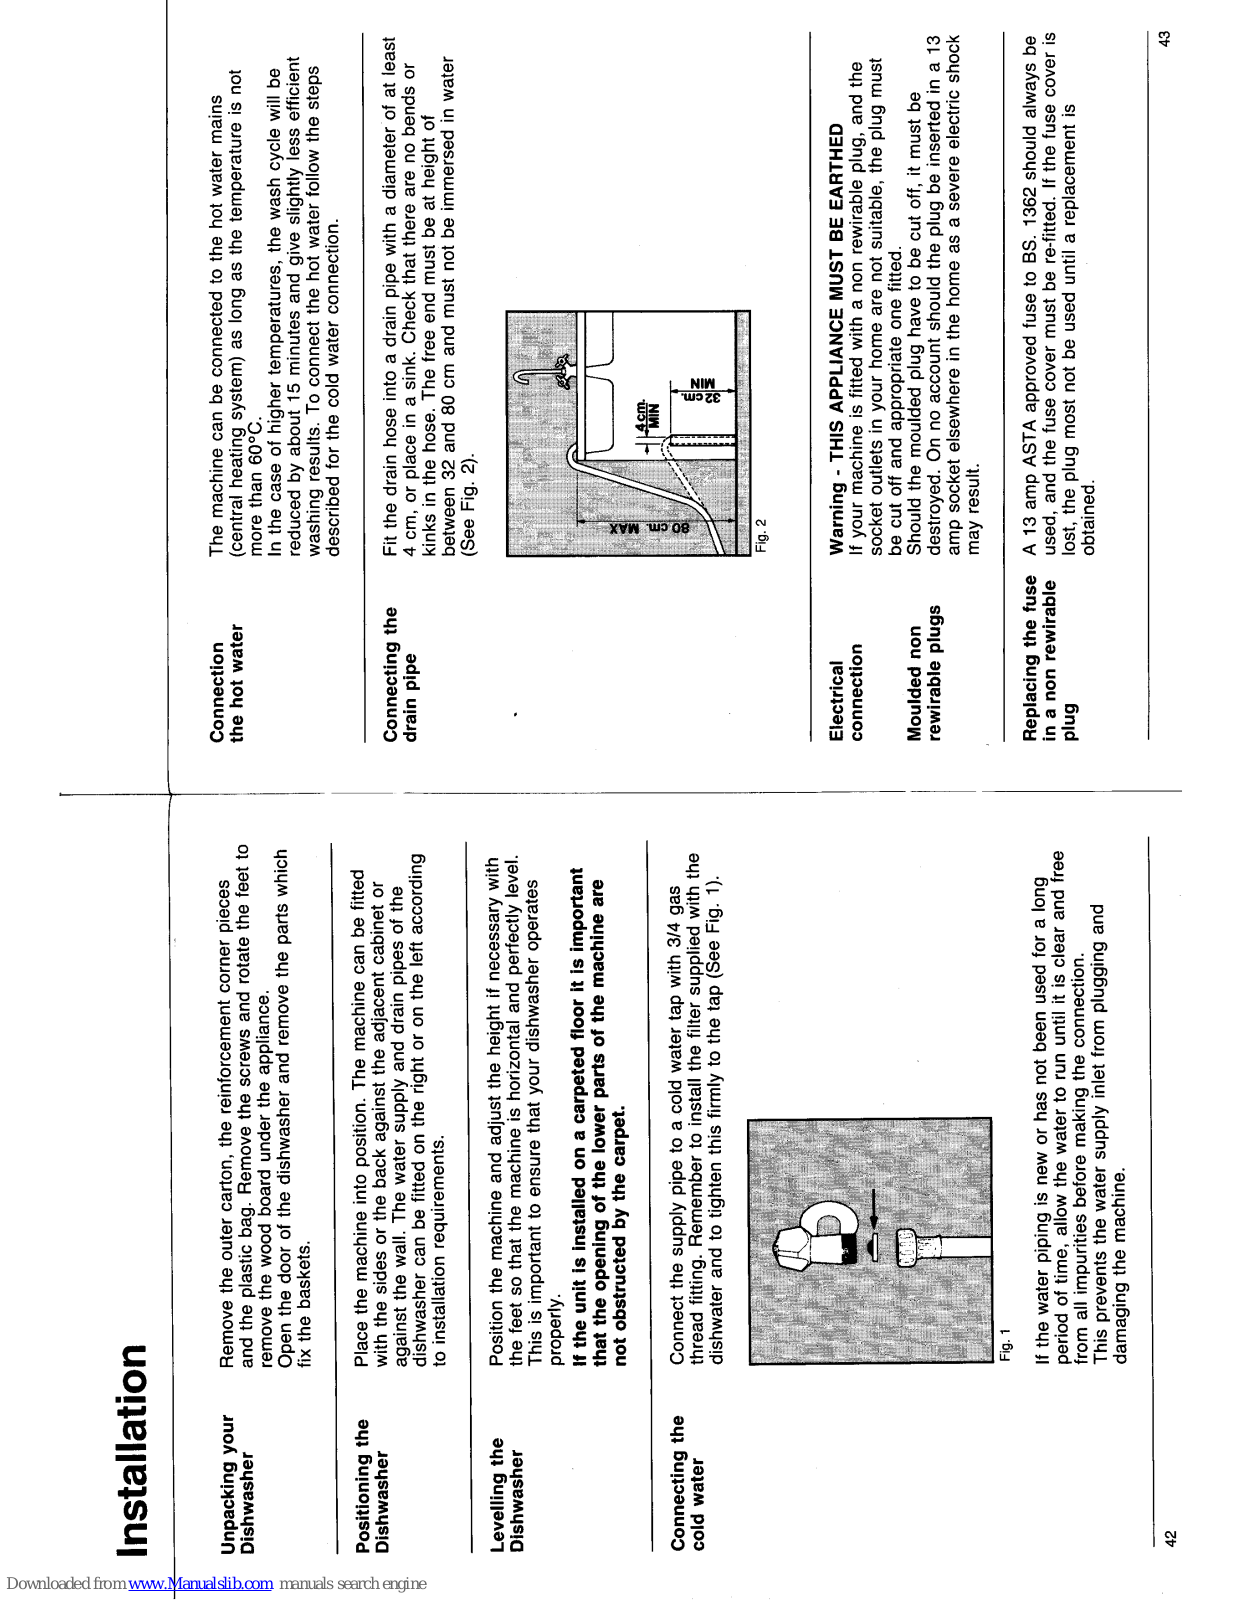
The machine can be connected to the hot water mains
hot water (central heating system) as long as the temperature is i more than 60°C. In the case of higher temperatures, the wash cycle will reduced by about 15 minutes and give slightly less effic washing results. To connect the hot water follow the st |
|
Hg. 2 |
ctricalWarning - THIS APPLIANCE MUST BE EARTHEDinectionIf your machine is fitted with a non rewirable plug, and
socket outlets in your home are not suitable, the plug r be cut off and appropriate one fitted.ulded nonShould the moulded plug have to be cut off, it must be destroyed. On no account should the plug be inserted amp socket elsewhere in the home as a severe electric may result. |
alacing the fuse A 13 amp ASTA approved fuse to BS. 1362 should alw
non rewirable used, and the fuse cover must be re-fitted. If the fuse c lost, the plug most not be used until a replacement is obtained. |
||
|---|---|---|---|---|---|---|
|
Remove the outer carton, the reinforcement corner pieces
Co
and the plastic bag. Remove the screws and rotate the feet to emove the wood board under the appliance. Open the door of the dishwasher and remove the parts which ix the baskets. |
Place the machine into position. The machine can be fitted
with the sides or the back against the adjacent cabinet or against the wall. The water supply and drain pipes of the dishwasher can be fitted on the right or on the left according o installation requirements. |
Position the machine and adjust the height if necessary with
the feet so that the machine is horizontal and perfectly level. This is important to ensure that your dishwasher operates properly. If the unit is installed on a carpeted floor it is important that the opening of the lower parts of the machine are not obstructed by the carpet. |
Connect the supply pipe to a cold water tap with 3/4 gas
thread fitting. Remember to install the filter supplied with the dishwater and to tighten this firmly to the tap (See Fig. 1). |
Fig. 1
If the water piping is new or has not been used for a long period of time, allow the water to run until it is clear and free from all impurities before making the connection. This prevents the water supply inlet from plugging and damaging the machine. |
||
| Installatio |
Unpacking your
Dishwasher |
Positioning the
Dishwasher |
Levelling the
Dishwasher |
Connecting the cold water |
| Control panel description |
|
|
|---|---|---|
| ation |
t If a replacement fuse cover is fitted, it must be of the correct
colour as indicated by the coloured marking or the colour that is embossed in woords on the base of the plug. Replacements can be obtained direct from your nearest Service Depot. |
for Important: the wires in the mains lead are coloured in accordance with the following code:
Title Green & yellow Eart Bue Neutral Brow Live Neutral Brow Neutral Brow Neutral Brow Neutral Brow Neutral Brow Neutral Brow with the coloured markings identifying the interminals in your plug, proceed as follows: Connect Green & yellow wire to terminal marked «E» or coloured Breen or Green & yellow wire to terminal marked at a or coloured Breek. Connect Brown wire to terminal marked at a or coloured Breek. T a 13 amp plug (BS. 1363) is used it must be fitted with a 13 amp plus (BS. 1363) is used it must be for tertical supply to your machine, consult a qualified electricial supply to your machine, consult a qualified electricial supply to your figure to ground the appliance. |
| d from www. |
tree cover
tinse cover Manualslib.com manuals |
Instructions for
connecting ca plug search engine |
| to the progra | Name Operations | Soak Cold prewash |
Cold prewash cycl
Energetic Wash cycle at 65°C cold water rinse cycles wash rinse cycle at 67°C drying cycle with hot a |
Wash cycle at 55°C Normal cold rinse cycle rins cycle at 67°C wash drying cycle drying cycle |
Cold rinse cycle
Rinses drying cycle with bot air |
|||
|---|---|---|---|---|---|---|---|---|
| Guide | Programme | - | N |
,
CO |
4 | |||
| Control panel description |
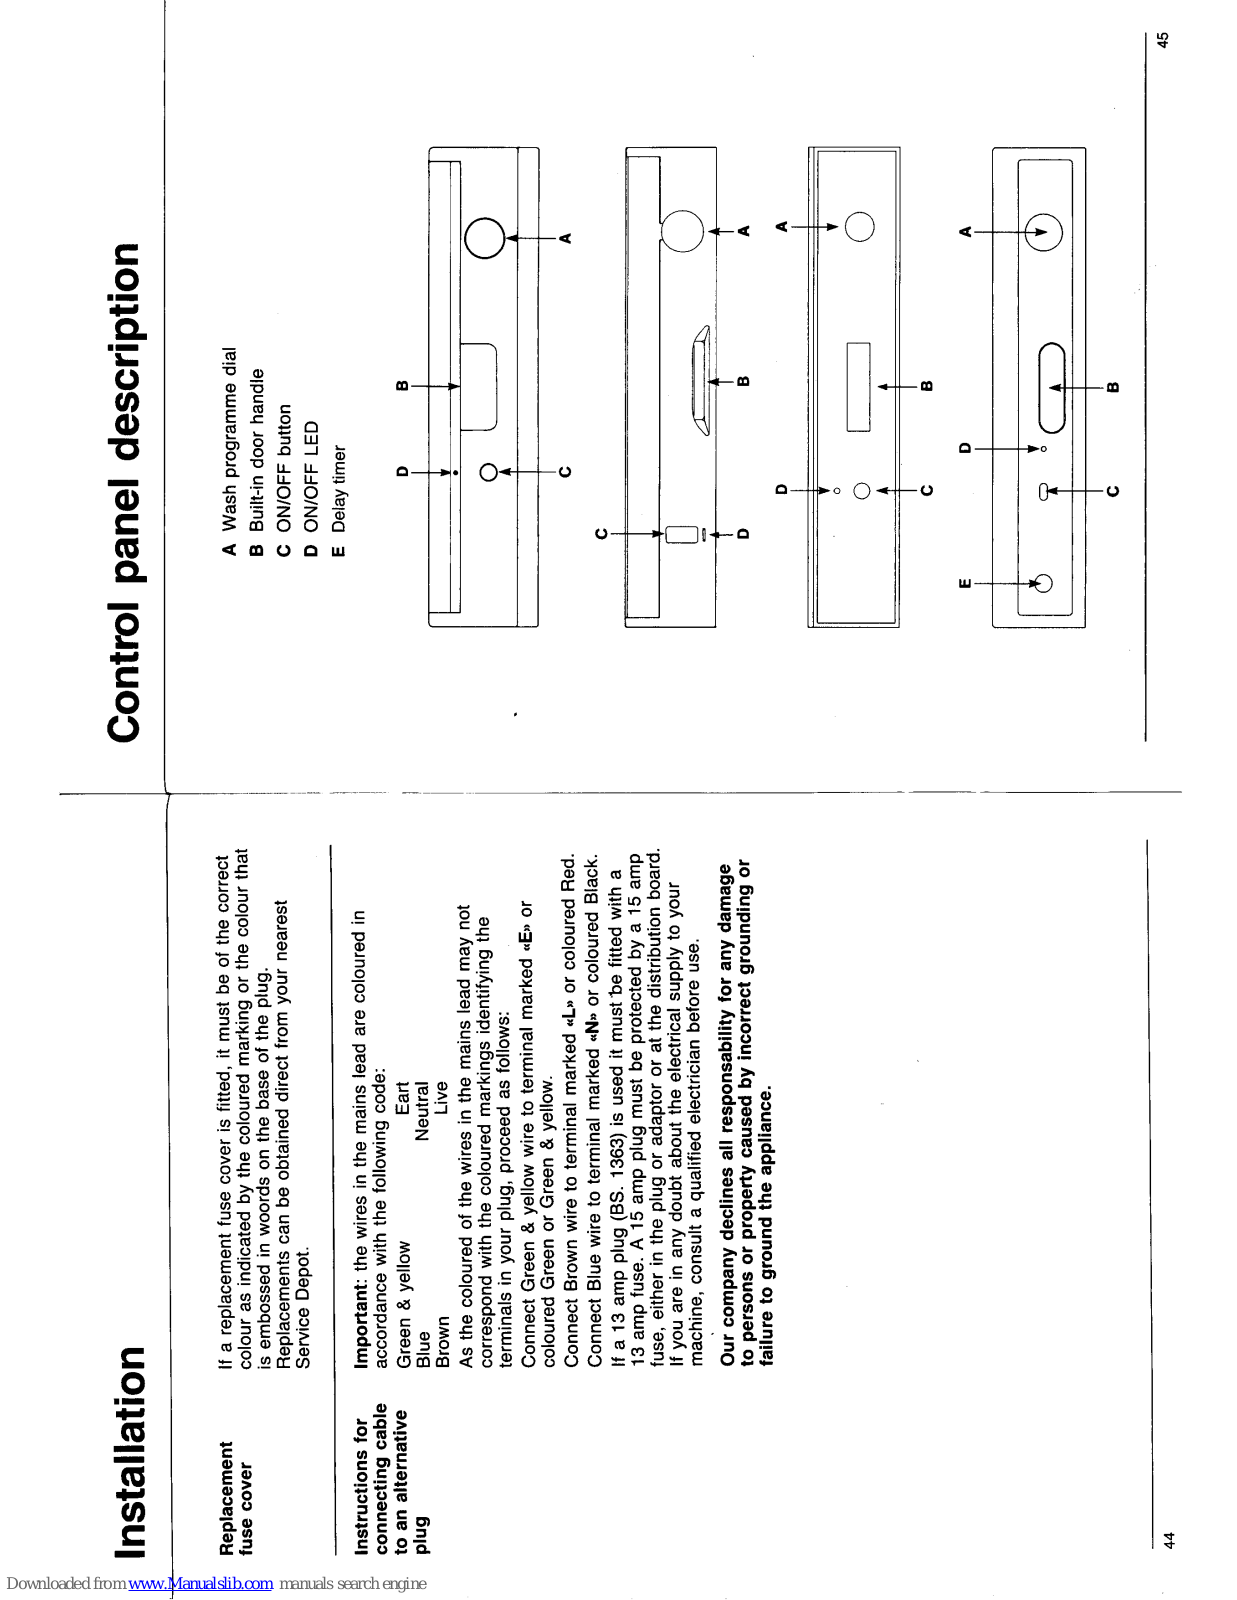
A
Turn the dial in clockwise direction to select the wash |
B
Put your hand into the recessed handle and pull the door |
ON-OFF C
ON/OFF button. For supplying electrical power to the dishwasher. |
D
Power LED. The LED in ON when button «C » is pressed and OFF when button «C » is not pressed. |
E Delay timer. |
Ι
Heavily soiled crockery, pots, not for delicate crockery 12 table covers
25 g
Pots and crockery before a wash programme
Type of cutlery and degree of dirtiness
Detergent
ramme section
Normally soiled crockery pots 12 table covers
25 g
Instructions for using the machine
|
ening the
washer |
To open the dishwasher door, pull the relative handle that will be assembled once the appliance has been installed. | |
|---|---|---|
| kery |
Your dishwasher holds up to 12 tables covers, including the
serving dishes. Before loading your crokery, remove large pieces of left over food to prevent these from plugging the filter. Very soiled pots and pans should be allowed to soak in water before placing in the dishwasher so that any food sticking to the bottom and sides comes away more easily. Load pots and pans in the bottom basket. |
|
|
g the
basket |
The top basket has two positions for loading different sizes of crockery. To adjust the height, pull the top basket out completely, remove the clip, slide off the steel runner by pushing them to the back, fit the other pair of wheels into the runners and pull forwards, finally replace the clips. Check that the wheels of the basket slide freely on the runners. | Using |
|
Use the top basket only for small of medium sized crockery
such as glasses, saucers, coffee and tea cups, shallow dishes and other light heat-resistant plastic items. Slightly soiled plates may also be washed when the top basket is in bottom position. |
||
| Plates should beand side, slide off the steel runner by pushing it to the back, fit the other pair of wheels into the |
Cups and glasses can be loaded on the left of the basket on two levels. To do so, lift the top grid. Plates and saucers can be arranged at the centre and to the far right, by fitting vertically into the clip.
runner and pull forwardse dishwasher several times, your personal experience will help you find the best way to load
our crokery in order to obtain the best washing results.
Several loading arrangements for the top basket are illustrated in the diagrams (See Fig. 3, Fig. 4).

Using the bottom basket
The 12 standard cover version basers cover the particularly strong. The 12 standard cover version has removable dividers for plates and a special basket for all types of cutlery. Plates, soup plates, dessert plates, pots and pans, lids and serving dishes should be placed in the bottom basket. Soup and dessert plates should be placed on the appropriate dividers, remembering to leave some space between one plate and another. Plates should always be placed in an upright position to allow water to circulate freely. Pots and pans should always be turned upside down. Dishes can be arranged in any way as long as the dirty surfaces of the dishes and the pots and pans are exposed to the jets of water from the bottom sprayers and water is allowed to circulate freely.
For best washing results, place cuttery with handles towards the bottom of the container (Fig. 5-6).

| Downloaded | from | www. | Manual | lslib.com | manuals | search | engin |
Instructions for using the machine
Loading the detergent
The detergent dispenser and the rinse liquid container are inside the door. The detergent dispenser is on the left and the rinse liquid container is on the right.
-ill the dispenser with detergent before each wash. The rinse iquid must be used only as necessary (see chapter on «Using inse liquid for rinsing»).
Press the button to open the detergent dispenser. The lid is a snap fit. Add the detergent using the special spoon and close the dispenser (See Fig. 7A).

Do not use too much detergent to prevent the form
of suds, bad washing results and pollution. The dispenser opens automatically during the wash cycle and
the detergent is added to the water. If the energetic programme is selected, othen than the dosage previously put in, a further quantity is needed so that chamber "G", which is above the dispenser door, is filled
chamber «G», which is above the dispenser door, is filled (Fig. 7B), or the small tub «H», which is situated inside of the dispenser (Fig. 7C).

50
Regenerating the water softener
| Setting |
No sait
required. The LED remains ON |
Medium
setting |
Maximum
setting |
achine is
o maximum |
|---|---|---|---|---|
|
Water
hardness in French degrees |
0 - 15°dF | 15 - 40°dF | 40 - 60°dF | N.B.: the mi |
Some dishwashers are fitted with an automatic softener that removes the hardness from the water.
Hard water leaves whitish stains on dry dishes; moreover, as time goes on the dishes become opaque.
MPORTANT INFORMATION
Please pay great attention so that after filling the salt container it is closed properly.
It is important that the wash lye does not penetrate into the salt container because if any detergent or lye does get in it could jeopardise the operation of the regenerating system. In this case, warranty no longer holds.
The appliance is designed to adjust the right amount in relation to the hardness of the mains water (fig. 8A, 8B, 8C).
Use only regenerative salt for household dishwashers. If salt in pastilles is used, do not fill the container fully.
Only in extreme cases use edible or industrial salt as they contain insoluble substances that with the passing of time could leopardise the water softening system.
On the bottom of the dishwasher there is a container where salt is to be poured for regeneration.
After removing the lower basket, unscrew the container cap by turning it anticlockwise and pour in salt using the funnel supplied with the dishwasher (fig. 8).
Before screwing the cap back on, remove the deposits of salt on the container opening.
The water softener contains about 2 Kg. of salt.
Note: The first time the machine is used, besides adding salt, a litre of water must also be added.
The salt container should always be filled before a wash, in this way the overflowing saline solution is immediately removed by the water. If this solution were to remain inside the tank for any length of tim, it could lead to corrosion.

| The rinse liquid is added automatically to the water during the last rinse cycle; it facilitates drying and prevents the formation of marks and limestone deposits on your crockery. To adjust the dosage, rotate the plug in the container to the position required: the dosages correspond to the numbers indicated (Fig. 9, Fig. 7C). The dosage should be increased when your crockery is dull or has round stains. If the crockery is sticky or has whitish lines, reduce the amount of rinse liquid used. The machine is factory set at minimum dosage. | Programme Delay (only on some models) (only on some models) (only on some models) (only on some models) (only on some models) (only on some models) (only on some models) (only on some models) (only on some models) (only on some models) (only on some models) (only on some models) (only on some models) (only on some models) (only on some models) (only on some models) (only on some models) (only on some models) (only on some models) (only on some models) (only on some models) (only on some models) (only on some models) (only on some models) (only on some models) (only on some models) (only on some models) (only on solution of the delay in hours (only on some models) (only on the machine models) (only on solution to switch on the machine models) (only on solution to switch on the machine models) (only on solution on switch poly on the machine models) (only on solution on the models) | ||
|---|---|---|---|
| Instructions for using the machine |
|
Using the rinse liquid container for the rinse cycles is inside the form max to the detengent dispenser. The rinse liquid container cap, or the liquid container dependent dispenser and the rinse liquid container cap, or the liquid container (see Fig. 9). The rinse liquid container cap or the rinse liquid container (see Fig. 9). Image the rinse liquid container (see Fig. 9). Image the rinse liquid container (see Fig. 9). Image the rinse liquid container (see Fig. 9). Image the rinse liquid container (see Fig. 9). Image the rinse liquid container (see Fig. 9). Image the rinse liquid container (see Fig. 9). Image the rinse liquid container (see Fig. 9). Image the rinse liquid container (see Fig. 9). Image the rinse liquid container (see Fig. 9). Image the rinse liquid container (see Fig. 9). Image the rinse liquid container (see Fig. 9). Image the rinse liquid container (see Fig. 9). Image the rinse liquid container (see Fig. 9). Image the rinse liquid container (see Fig. 9). Image the rinse liquid container (see Fig. 9). Image the rinse liquid container (see Fig. 9). Image the rinse liquid container (see Fig. 9). Image the reap, or the lid, when you have poured the rinse liquid into the container. |
52
| Your first | wash | Cleaning | and Maintenance |
|---|---|---|---|
|
Starting your
diswasher |
Before starting your dishwasher load the crockery, fill the detergent dispenser and close door. Remember to check that the water tap is open and that you have added the salt. Follow the table illustrated in this booklet, especially at first when you are not atmilite the dish washer. in order to |
Cleaning your
Dishwasher |
Clean the cabinet and inner door of your dishwasher regularly
using a soft cloth. Never use abrasive detergents or acids. Clean the door gasket with a damp sponge. Always unplug the dishwasher from the mains. |
|
select the best wash cycle programs. The many programs
illustrated in this table depend on the type of dishes to be washed, their mechanical and thermic resistance and on how dirty they are. To set the dishwasher, pull the programme dial out. Set the programme selected, the selected cycle must appear on the display. Press the «ON/OFF» button to start the wash programme. If you have set the wrong programme, press the «ON/OFF» button to stop the dishwasher. Select the right programme. Start the dishwasher by pressing the «ON/OFF» button. The programme dial may either remain out or pressed in during the wash cycle. |
How to clean
the filtering unit |
Check the filtering unit after each wash and if necessary
remove any deposits. Dishwashers with plastic filter Remove the circular filter «A » (Fig.10). Press the two tabs «B » (Fig. 11) in order to slide off the middle filter «C ». Remove the discarge conduit «D » (Fig. 12) by pressing the two tabs «E ». Dishwasher with stainless steel filter Remove the circular filter «A » (Fig. 13). Press the two tabs «B » (Fig. 14) in order to slide off the middle filter «C » (Fig. |
|
|
Switching OFF
your diswasher |
Simply press the «ON/OFF» button. Do not interrupt a wash cycle when this is running. |
15).
Clean the filters under running water with a hard brush. Remember that it is essential to clean the filters as illustrated above since the dishwasher will not operate if the filter is cloqged. |
|
|
Removing
the crockery |
Wait about 15 minutes after the end of the programme before
unloading the dishwasher to ensure that your crockery is perfectly dry and not too hot to handle. First empty the bottom basket: any drops of water that may still be on the top basket would otherwise fall into the crockery in the bottom basket. |
|
|
Clean the water input filter «A» (Fig. 1) placed at the mouth of
the tap, periodically. Close the tap and unscrew the end of the water discharge pipe, remove the filter and clean it very carefully under running water; replace the filter and rescrew the pipe. |
The sprayers can easily be removed to allow the nozzles to
be periodically cleaned and possible blockage prevented. The upper sprayer is removed by unscrewing the knurled nut while the lower one is removed by simply pulling it upwards. Wash them thoroughly under a jet of water and place them back in their seats. |
Some dishwashers are provided with an inferior spray arm
called «ORBITAL» which, thanks to the type of rotation it makes, allows the jets of water to reach the most difficult corners of the dishwasher and in this way it guarantees a better washing. To pull up the «ORBITAL» off, take the shorter spray arm «A » and «B» (fig. 16). Wash them with care below a jet of water and replace them in their spaces. |
Remember to take the following precautions:
• carry out two consecutive pre-rinse cycles • unplug the machine from the mains leave the door ajar to prevent the formation of bad odours • fill the rinse liquid container for the rinse cycle • close the water tap Before using the dishwasher again remember to: |
|
|---|---|---|---|---|
|
How to clean
the water input filter |
How to clean
the sprayers |
«ORBITAL»
spray arms |
If the dishwasher
is not to be used for a long period of time |
|
| nce | Fig. 15 | |||
| g and Maintena | a Ala | T-16- | Fig.14 | |
| eaning |
plug the machine to the mains open the water tap and allow the water to run for several minutes to ensure that the mains piping is clear connect the supply hose and open the water tap.
57
56
Fig. 16
| nmendations |
Any type of crockery normally used in the home may be washed in
this appliance. In some cases however check their characteristics. Before washing new crockery check that this can be washed in a dishwasher. |
and do not dry properly since the water collects in the bowl, where it can
wl not evaporate quickly enough. |
the colours under or in the enamelling are resistant to mechanical ckery washing. |
are today produced to offer good resistance to mechanical washing
for a normal duration. Delicate colours however inevitably fade when washed frequently. To test the colour resistance of a dinner service we suggest washing one or two pieces at a time in the dishwasher for about 4 weeks (perhaps using a piece which is slightly damaged). |
may loose their colour.
ns |
may stain when in direct contact with food containing sulphur (eggs, vegetables). These stains can be removed with silverware cleaning products. | ms can rarely be washed in your dishwasher. The relatively high temperature of the water and the detergent may damage these items | ts like cutting boards etc. can not be washed mechanically since they deform and crack. | with the blade glued to the handle must not be washed in the dishwasher since the glues used are not heat resistant. | which is not heat resistant may deform. Heat resistant plastic crockery must be washed only in the top basket. |
tal may in general be washed in your dishwasher. Some types of glass
must not however be washed mechanically since it tends to gradually become opaque. We therefore recommend washing delicate glasses with the «delicate programme» which reduces the |
|---|---|---|---|---|---|---|---|---|---|---|---|
| Recor |
Here are some
recommendati regarding your crockery. |
Cups, dishes a
plates with bo |
In the case of decorated croo |
Colours on the
enamelling |
Anodized
aluminium iten |
Silver cutlery | Hand made ite | Wooden objec | Old knives | Plastic crocke | Glass and crys |
| and Maintenance |
|
|
|
|
|
||||||
| Cleaning |
shooting
shooting Trouble |
inuals sea | rch engine |
Trouble shooting alslib.c
8


 Loading...