

Page 1

Cable/DSL Broadband Router
Built-in 4-Port 10/100Mbps Switch
USER GUIDE
SMC7004VBR
Page 2

7004VBR – Manual
COMPLIANCES
FCC - Class B
• This equipment has been tested and found to comply with the limits for a Class B digital
device, pursuant to Part 15 of the FCC Rules. These limits are designed to provide
reasonable protection against harmful interference in a residential installation.
EC Conformance Declaration - Class B
SMC contact for these products in Europe is:
SMC Networks Europe,
Edificio Conata II,
Calle Fructuós Gelabert 6-8, 2o, 4a,
08970 - Sant Joan Despí,
Barcelona, Spain.
This information technology equipment complies with the requirements of the Council Directive
89/336/EEC on the Approximation of the laws of the Member States relating to Electromagnetic
Compatibility and 73/23/EEC for electrical equipment used within certain voltage limits and the
Amendment Directive 93/68/EEC. For the evaluation of the compliance with these Directives, the
following standards were applied:
RFI Emission:
• Limit class B according to EN 55022:1998
• Limit class A for harmonic current emission according to EN 61000-3-2/1995
• Limitation of voltage fluctuation and flicker in low-voltage supply system according to EN
61000-3-3/1995
Immunity:
• Product family standard according to EN 55024:1998
• Electrostatic Discharge according to EN 61000-4-2:1995 (Contact Discharge: ±4 kV, Air
Discharge: ±8 kV)
• Radio-frequency electromagnetic field according to EN 61000-4-3: 1996 (80 - 1000MHz with
1kHz AM 80% Modulation: 3V/m)
2
Page 3

7004VBR – Manual
Safety Compliance
Underwriters Laboratories Compliance Statement
Important! Before making connections, make sure you have the correct cord set. Check it
(read the label on the cable) against the following:
The unit automatically matches the connected input voltage. Therefore, no additional adjustments
are necessary when connecting it to any input voltage within the range marked on the rear panel.
Wichtige Sicherheitshinweise (Germany)
1. Bitte lesen Sie diese Hinweise sorgfältig durch.
2. Heben Sie diese Anleitung für den späteren Gebrauch auf.
3. Vor jedem Reinigen ist das Gerät vom Stromnetz zu trennen. Verwenden Sie keine
Flüssigoder
4. Aerosolreiniger. Am besten eignet sich ein angefeuchtetes Tuch zur Reinigung.
5. Die Netzanschlu ßsteckdose soll nahe dem Gerät angebracht und leicht zugänglich sein.
6. Das Gerät ist vor Feuchtigkeit zu schützen.
7. Bei der Aufstellung des Gerätes ist auf sicheren Stand zu achten. Ein Kippen oder Fallen
könnte Beschädigungen hervorrufen.
8. Die Belüftungsöffnungen dienen der Luftzirkulation, die das Gerät vor Überhitzung schützt.
Sorgen Sie dafür, daß diese Öffnungen nicht abgedeckt werden.
9. Beachten Sie beim Anschluß an das Stromnetz die Anschlußwerte.
10. Verlegen Sie die Netzanschlußleitung so, daß niemand darüber fallen kann. Es sollte auch
nichts auf der Leitung abgestellt werden.
11. Alle Hinweise und Warnungen, die sich am Gerät befinden, sind zu beachten.
12. Wird das Gerät über einen längeren Zeitraum nicht benutzt, sollten Sie es vom Stromnetz
trennen. Somit wird im Falle einer Überspannung eine Beschädigung vermieden.
13. Durch die Lüftungsöffnungen dürfen niemals Gegenstände oder Flüssigkeiten in das
Operating Voltage Cord Set Specifications
• 120 Volts UL Listed/CSA Certified Cord Set
• Minimum 18 AWG
• Type SVT or SJT three conductor cord
• Maximum length of 15 feet
• Parallel blade, grounding type attachment plug rated 15A, 125V
• 240 Volts (Europe only) Cord Set with H05VV-F cord having three conductors with minimum
diameter of 0.75 mm2
• IEC-320 receptacle
• Male plug rated 10A, 250V
3
Page 4

7004VBR – Manual
COMPLIANCES
Gerät gelangen. Dies könnte einen Brand bzw. elektrischen Schlag auslösen.
1. Öffnen sie niemals das Gerät. Das Gerät darf aus Gründen der elektrischen Sicherheit nur
von authorisiertem Servicepersonal geöffnet werden.
2. Wenn folgende Situationen auftreten ist das Gerät vom Stromnetz zu trennen und von einer
qualifizierten Servicestelle zu überprüfen:
a. Netzkabel oder Netzstecker sind beschädigt.
b. Flüssigkeit ist in das Gerät eingedrungen.
c. Das Gerät war Feuchtigkeit ausgesetzt.
d. Wenn das Gerät nicht der Bedienungsanleitung entsprechend funktioniert oder Sie
mit Hilfe dieser Anleitung keine Verbesserung erzielen.
e. Das Gerät ist gefallen und/oder das Gehäuse ist beschädigt.
f. Wenn das Gerät deutliche Anzeichen eines Defektes aufweist.
3. Stellen Sie sicher, da? die Stromversorgung dieses Ger‰tes nach der EN 60950 gepr¸ft ist.
Ausgangswerte der Stromversorgung sollten die Werte von AC 7,5-8V, 50-60Hz nicht ¸ber
oder unterschreiten sowie den minimalen Strom von 1A nicht unterschreiten.. Der
arbeitsplatzbezogene Schalldruckpegel nach DIN 45 635 Teil 1000 beträgt 70dB(A) oder
weniger.
4
Page 5

TABLE OF CONTENTS
COMPLIANCES
CHAPTER 1 | Introduction
Features and Benefits
Package Contents
Minimum Requirements
CHAPTER 2 | Getting to know the Barricade
LED Indicators
Resetting the Barricade
CHAPTER 3 | Getting Connected
Basic Installation Procedure
3-click Installation Wizard
CHAPTER 4 | Configuring your Computer
Configuring Windows 95/98/Me
Configuring Windows 2000
Configuring Windows XP
Configuring a Macintosh Computer
CHAPTER 5 | Configuring the Barricade
Browser Configuration
Disable Proxy Connection
Accessing the Barricade Management
Navigating the Web-based Administration
Making Configuration Changes
Setup Wizard
Advanced Setup
Chapter 7 | Setting up the Print Server
Install the SMC Printer Port Monitor
Configure the Print Server using the SMC Printer Port Monitor
Configure LPR port on Windows 2000/XP
Confirm printer Connection
APPENDIX A | Troubleshooting
APPENDIX B | Technical Specifications
7004VBR – Manual
5
Page 6

7004VBR – Manual
CHAPTER 1 | Introduction
Congratulations on your purchase of a Barricade™ Cable/DSL Broadband Router (SMC7004VBR).
SMC is proud to provide you with a powerful yet simple communication device for connecting your
local area network (LAN) to the Internet.
1.0 | Features and Benefits
• EZ 3-Click Installation Wizard - A new and improved way to install your Barricade. In 3
simple clicks, you will be connected to the Internet.
• Internet connection to DSL or cable modem via a 10/100 Mbps WAN port
• Local network connection via 10/100 Mbps Ethernet switch ports
• DHCP for dynamic IP configuration, and DNS for domain name mapping
• Firewall with Stateful Packet Inspection, client privileges, hacker prevention, DoS, and NAT
• NAT also enables multi-user access with a single-user account, and virtual server
functionality (providing protected access to Internet services such as web, mail, FTP, and
Telnet)
• Virtual Private Network support using PPTP, L2TP, or IPSec pass-through
• User-definable application sensing tunnel supports applications requiring multiple connections
• Parental controls allows the user to block access to certain web sites
• Email alerts when the users network is being compromised
• Easy setup through a web browser on any operating system that supports TCP/IP
• Compatible with all popular Internet applications
1.1 | Package Contents
Before installing the Barricade™ Cable/DSL Broadband Router, verify that you have the items listed
under “Package Contents.” Also be sure that you have the necessary cabling. If any of the items are
missing or damaged, contact your local SMC distributor.
• Barricade Broadband Router
• Power adapter
• One CAT-5 Ethernet cable
• Four rubber feet
• CD with User Guide and EZ 3-Click Installation Wizard
• Quick Installation Guide
If possible, retain the carton and original packing materials in case there is a need to return the
product.
1.2 | Minimum Requirements
• Cable or DSL Modem with Ethernet connection and Internet access from your local telephone
company or Internet Service Provider (ISP) using a DSL modem or cable modem.
• A computer equipped with a 10 Mbps, 100 Mbps, or 10/100 Mbps Fast Ethernet card, or
USB-to-Ethernet converter.
• Network adapter with Ethernet (UTP CAT 5) cabling and TCP/IP protocol installed per PC
• Internet Explorer 4.0 (or Higher) or Netscape Navigator 4.7 (or Higher) for Web-based
configuration of the Barricade
6
Page 7
7004VBR – Manual
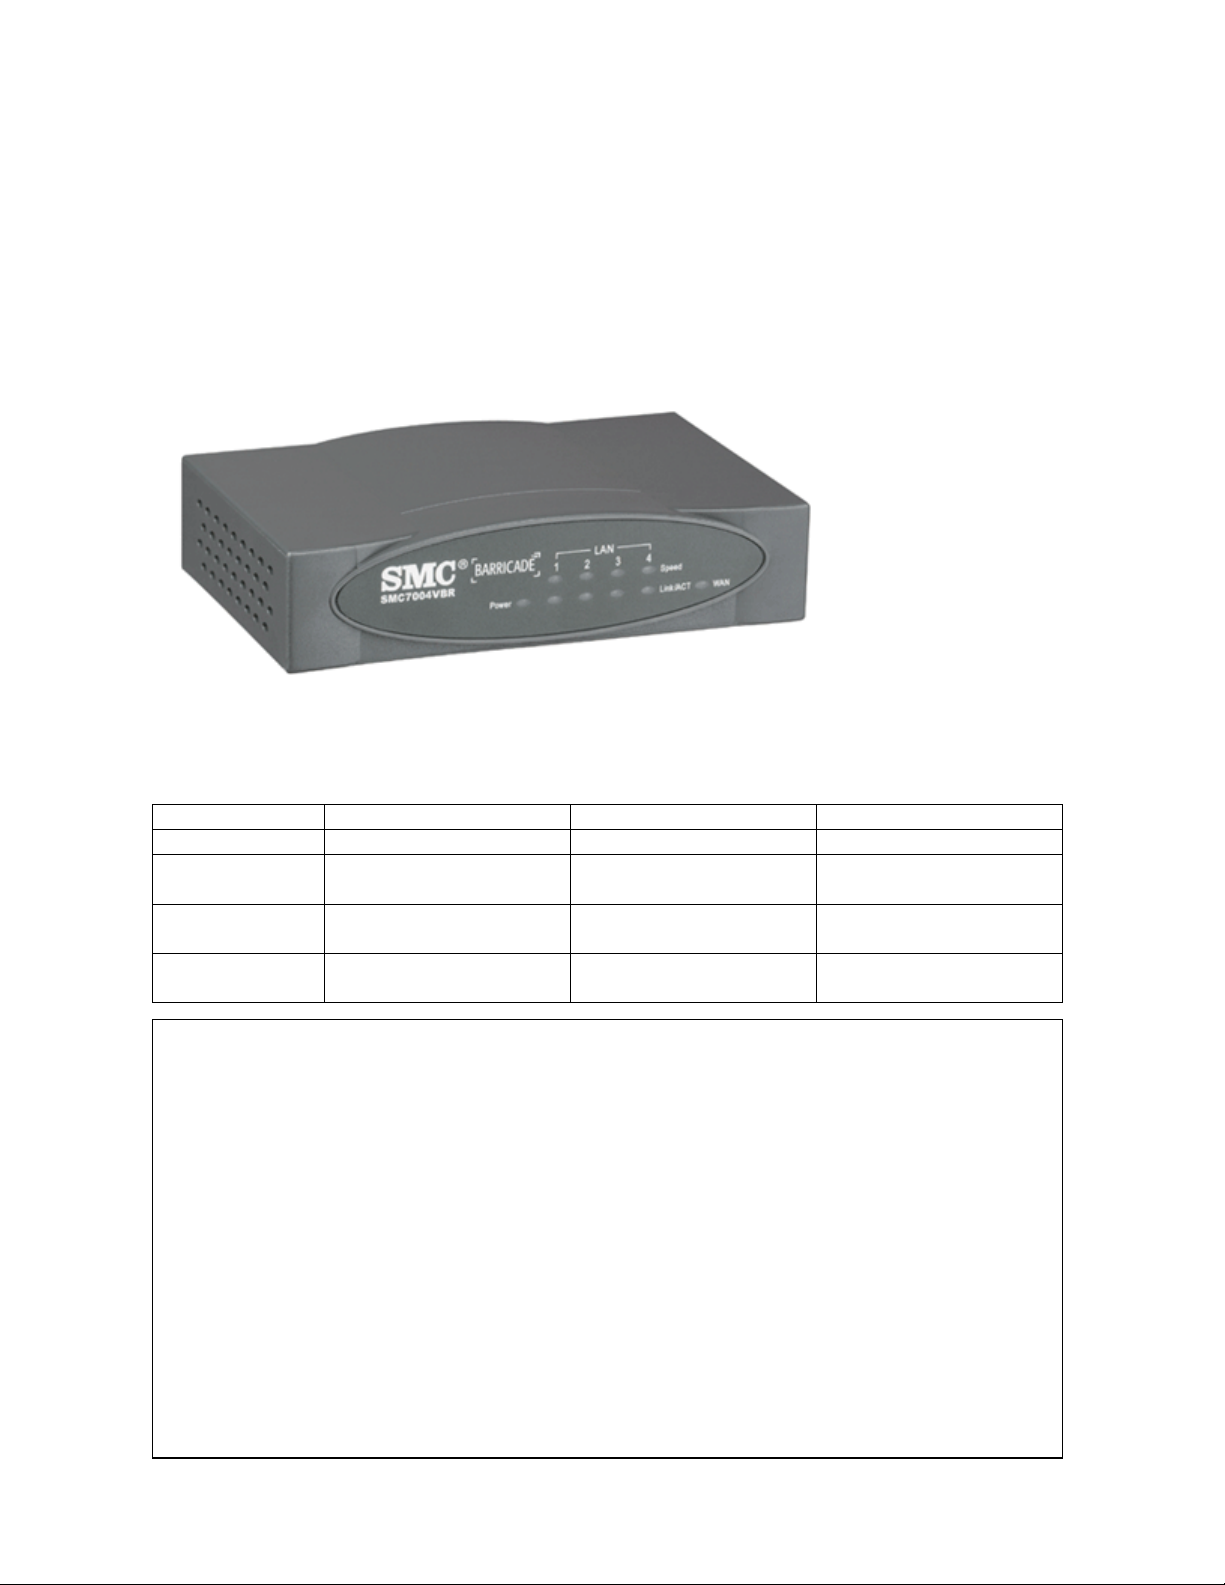
CHAPTER 2 | Getting to Know the Barricade
The SMC7004VBR Barricade Cable/DSL Broadband Router is the perfect solution for the home/office
environment. This full-featured router offers:
• 4 - 10/100 Mbps Auto-Sensing LAN ports with Auto-MDI MDIX feature
• 1 - 10/100 Mbps WAN port with Auto-MDI MDIX feature
• Comprehensive LEDs for network status and troubleshooting
• Reset Button
2.1 | LED Indicators
The Barricade includes LED indicators on the front panel that simplify installation and network
troubleshooting.
LED ON OFF FLASHING
POWER Receiving power Not receiving power N/A
WAN Good WAN connection
detected
LINK/ACT Good LAN connection
detected
10/100 Mbps LAN port operating at
100 Mbps
Resetting the Barricade
The Reset button is located on the rear panel of the Barricade Broadband Router. This Reset button
works 2 different ways depending on how long you hold the button down. Use a paper clip or a
pencil tip to push the Reset button.
Reset
If the Router is having problems connecting to the Internet, press and hold the Reset button for 1
second to reset the router. Resetting the router keeps all of the Router’s settings.
Restore Factory Defaults
If resetting the router does not resolve your issue, then you can follow these steps:
1. Power off the Barricade
2. Press the reset button and hold.
3. Power on the Barricade
4. Keep the button pressed about 5 seconds
5. Release the button
6. Watch the Power LED, it will flash 8 times.
No WAN connection
detected
No LAN connection
detected
LAN port operating at 10
Mbps
Transmitting or receiving
traffic
Transmitting or receiving
traffic
N/A
7
Page 8
7004VBR – Manual
CHAPTER 3 | Getting Connected
The SMC7004VBR Barricade Cable/DSL Broadband router is connected between the Cable/DSL
Broadband Modem and your computers. If you have more then one computer to connect, simply
plug the other computers into the LAN ports on the back of the router.
3.1 | Basic Installation Procedure
1. Connect the LAN
Run an Ethernet cable from one of the LAN ports on the back of the Barricade to your
computer’s network adapter.
2. Connect the WAN
Connect an Ethernet cable from your cable or DSL modem to the Barricade’s WAN port on
the back on the router.
3. Power on
Connect the power cable to the Barricade.
Once you have completed connecting all of the hardware, simply insert the Barricade CD-ROM and
the EZ 3-Click Installation Wizard will automatically connect you to the Internet.
Should we going into detail how 3-click wizard works? With Screen shots??
For manual configuration of the PCs, see Chapter 4.
For advanced configuration of the Barricade Broadband Router, see Chapter 5.
8
Page 9
7004VBR – Manual
CHAPTER 4 | Configuring your Computer
The information outlined in this chapter will guide you through the configuration for the following
Operating Systems:
• Windows 95/98
• Windows Me
• Windows 2000
• Windows XP
• Apple Macintosh
4.1 | Configuring Windows 95/98/Me
1. Access your Network settings by clicking [Start], choose [Settings], and then select [Control
Panel].
2. In the Control Panel, locate and double-click the [Network] icon.
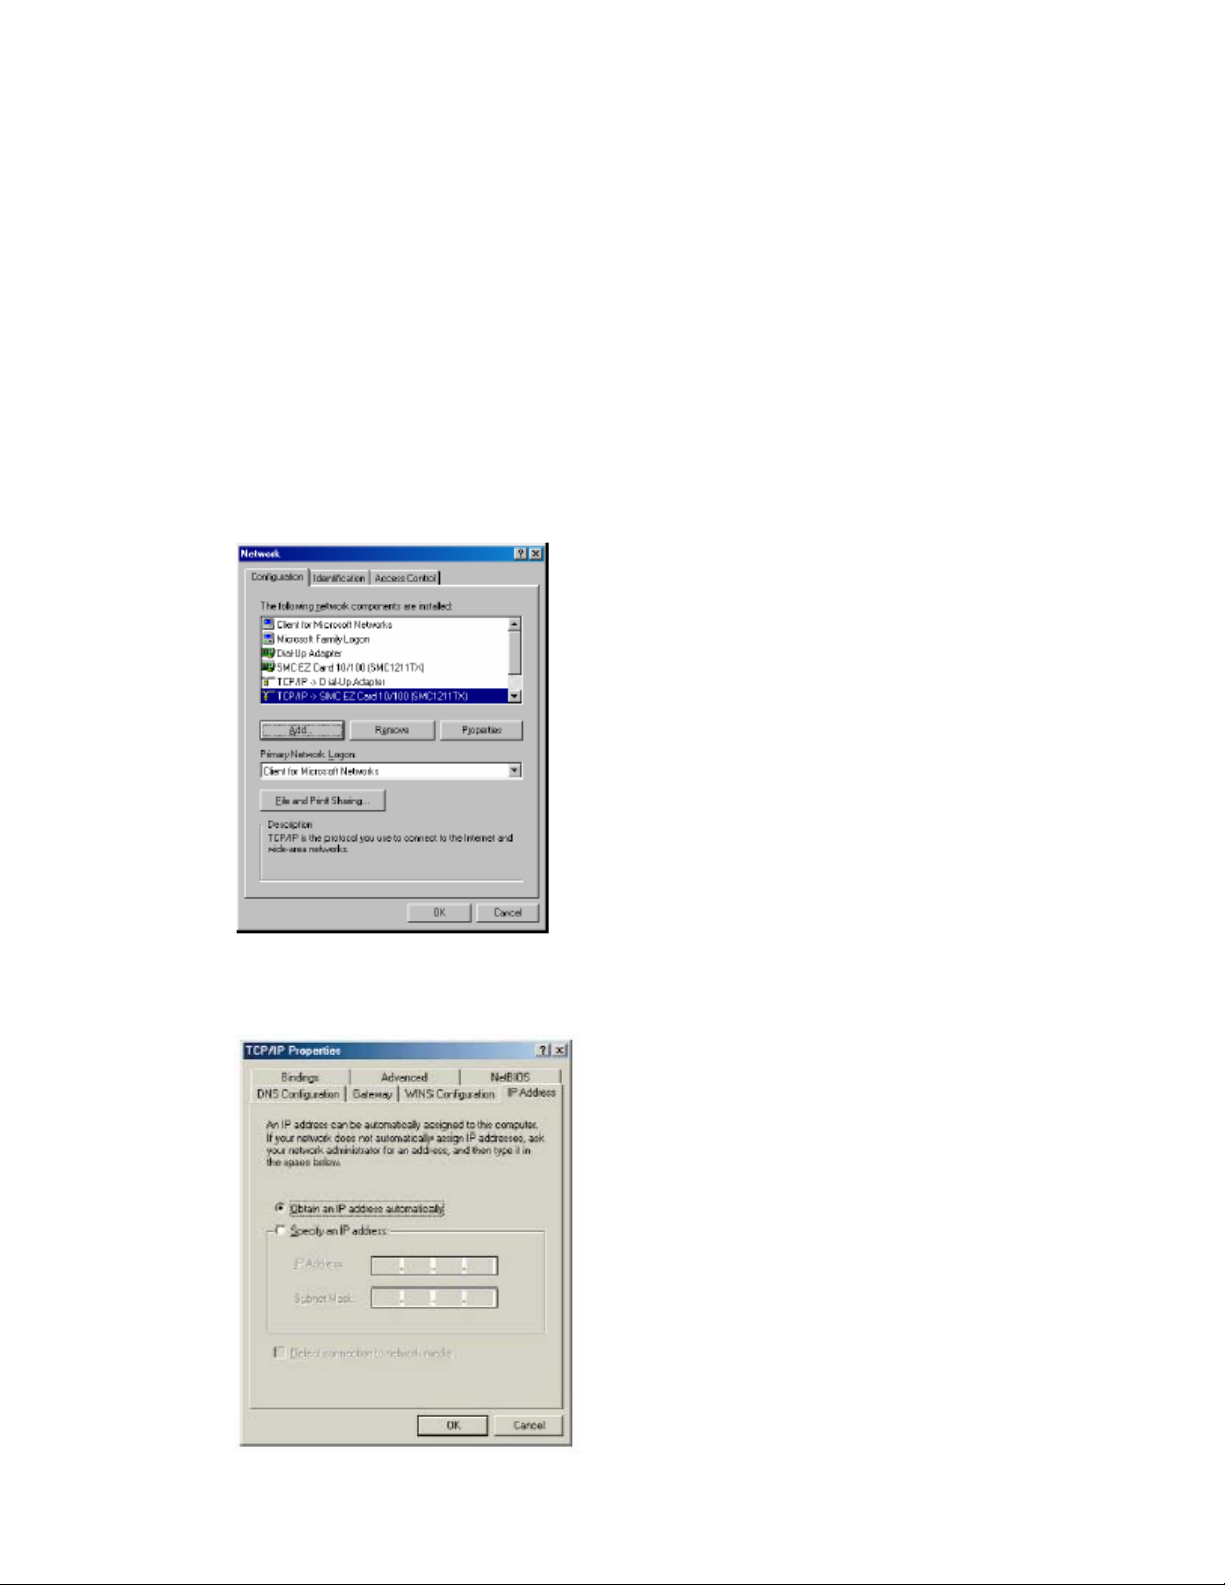
3. Highlight the TCP/IP line that has been assigned to your network card on the [Configuration]
tab of the [Network] properties window.
4. Next, click the [Properties] button to view that adapter’s TCP/IP settings.
9
Page 10

7004VBR – Manual
5. From the TCP/IP Properties dialog box, click the [Obtain an IP address automatically] option.
6. Next click on the [Gateway] tab and verify the Gateway field is blank. If there are IP
addresses listed in the Gateway section, highlight each one and click [Remove] until the
section is empty.
7. Click the [OK] button to close the TCP/IP Properties window.
8. On the Network Properties Window, click the [OK] button to save these new changes.
NOTE: Windows may ask you for the original Windows installation disk or additional files.
Check for the files at c:\windows\options\cabs, or insert your Windows CD-ROM into your
CD-ROM drive and check the correct file location, for example, D:\win98, D:\win9x. (assume
“D” is your CD-ROM drive).
9. Windows may prompt you to restart the PC. If so, click the [Yes] button. If Windows does
not prompt you to restart your computer, do so anyways to ensure your settings.
4.2 | Configuring Windows 2000
1. Access your Network settings by clicking [Start], choose [Settings], and then select [Control
Panel]
2. In the Control Panel, locate and double-click the [Network and Dial-up Connections] icon
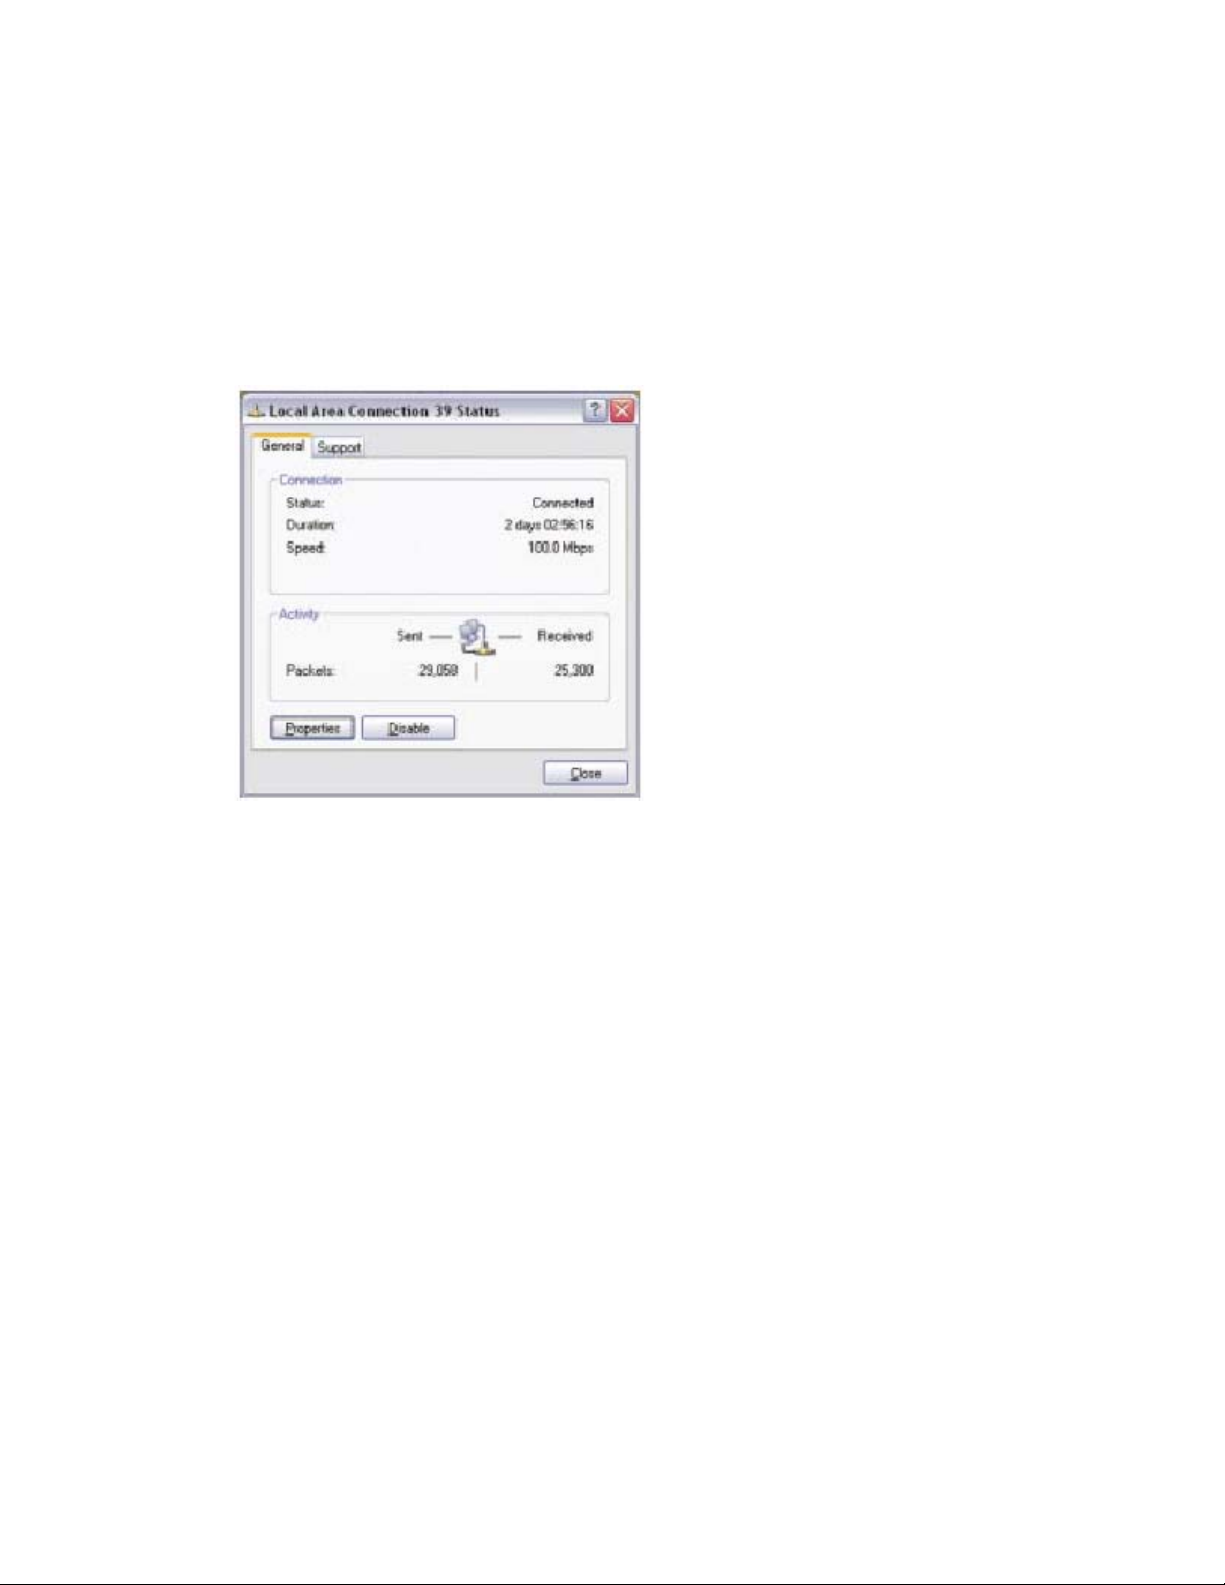
3. Locate and double-click the [Local Area Connection] icon for the Ethernet adapter that is
connected to the Barricade. When the Status dialog box window opens, click the [Properties]
button.
4. On the [Local Area Connection] Properties box, verify the box next to Internet Protocol
(TCP/IP) is checked. Then highlight the Internet Protocol (TCP/IP), and click the Properties
button.
5. Select Obtain an IP address automatically to configure your computer for DHCP. Click the
[OK] button to save this change and close the Properties window.
6. Click the [OK] button again to save these new changes.
7. Reboot your PC.
10
Page 11
7004VBR – Manual
4.3 | Configuring Windows XP
The following instructions assume you are running Windows XP with the default interface. If you are
using the Classic interface (where the icons and menus look like previous Windows versions), please
follow the instructions for Windows 2000 outlined above.
1. Access your Network settings by clicking [Start], choose [Control Panel], select [Network and
Internet Connections] and then click on the [Network Connections] icon.
2. Locate and double-click the Local Area Connection icon for the Ethernet adapter that is
connected to the Barricade Router. Next, click the [Properties] button.
3. On the [Local Area Connection] Properties box, verify the box next to Internet Protocol
(TCP/IP) is checked. Then highlight the Internet Protocol (TCP/IP), and click the Properties
button.
4. Select Obtain an IP address automatically to configure your computer for DHCP. Click the
[OK] button to save this change and close the Properties window.
5. Click the [OK] button again to save these new changes.
6. Reboot your PC.
4.4 | Configuring a Macintosh Computer
You may find that the instructions here do not exactly match your screen. This is because these
steps and screenshots were created using Mac OS 8.5. Mac OS 7.x and above are all very similar, but
may not be identical to Mac OS 8.5.
1. Pull down the Apple Menu. Click [Control Panel] and select TCP/IP.
2. In the TCP/IP dialog box, make sure that [Ethernet] is selected in the [Connect Via:] field.
If [Using DHCP Server] is already selected in the [Configure] field, your computer is already
configured for DHCP. Close the TCP/IP dialog box, and skip to Step 2 Disable HTTP Proxy
(bottom of this page).
3. All the information that you need to record is on the [TCP/IP] dialog box. Use the space
below to record the information.
4. Select [Using DHCP Server] in the [Configure] field and close the window.
5. Another box will appear asking whether you want to save your TCP/IP settings. Click [Save].
11
Page 12
7004VBR – Manual
CHAPTER 5 | Configuring the Barricade
After you have configured TCP/IP on a client computer, use a web browser to configure the
Barricade™ Broadband Router. The Barricade can be configured by any Java-supported browser
including Internet Explorer 4.0 or above, or Netscape Navigator 4.7 or above. Using the web
management interface, you may configure the Barricade and view statistics to monitor network
activity.
NOTE: Before you attempt to configure your router, if you have access to the Internet
please visit www.smc.com
Before you attempt to log into the Barricade’s Web-based Administration, please verify the following:
1. Your browser is configured properly. (see below)
2. Disable any firewall or security software that may be running.
3. Confirm that you have a good “link” LED where your computer is plugged into the Barricade.
If you don’t have a “link” light, try another cable until you get a good link.
5.1 | Browser Configuration
Confirm your browser is configured for a direct connection to the Internet using the Ethernet cable that
is installed in the computer. This is configured through the options/preference section of your browser.
5.2 | Disable Proxy Connection
You will also need to verify that the “HTTP Proxy” feature of your web browser is disabled. This is so
that your web browser will be able to view the Barricade configuration pages. The following steps are
for Internet Explorer and for Netscape. Determine which browser you use and follow the appropriate
steps.
Internet Explorer (5 or above)
1. Open Internet Explorer. Click [Tools], and then select [Internet Options].
2. In the [Internet Options] window, click the [Connections] tab.
3. Click the [LAN Settings] button.
4. Clear all the check boxes and click [OK] to save these LAN settings changes.
5. Click [OK] again to close the [Internet Options] window.
Netscape (4 or above)
1. Open Netscape. Click [Edit], and then select [Preferences].
2. In the [Preferences] window, under [Category], double-click [Advanced], then select the
[Proxies] option.
3. Check [Direct connection to the Internet].
4. Click the [OK] button to save the changes.
and download the latest firmware update.
12
Page 13

7004VBR – Manual
5.3 | Accessing the Barricade Management
To access the Barricade’s web-based management screens, follow the steps below:
1. Launch your web-browser.
NOTE: Your computer does not have to be ONLINE to configure the Barricade Router.
2. In the Address Bar, type: http://192.168.2.1
3. When the Barricade’s Login screen appears, enter the default password, and click the [Login]
button to access the router.
NOTE: The Barricade default password is “smcadmin”. The password is case sensitive.
4. Once you have logged into the Barricade web-based admin screens, you have 2 options
which are outlined in Chapter 6 | Navigating the Web-based Administration
13
Page 14

7004VBR – Manual
CHAPTER 6 | Navigating the Web-based Administration
The Barricade’s management interface features a Setup Wizard and an Advanced Setup section. Use
the Setup Wizard if you want to quickly setup the Barricade for use with a cable modem or DSL
modem. Advanced setup supports more advanced functions like hacker attack detection, IP and MAC
address filtering, intrusion detection, virtual server setup, virtual DMZ hosts, as well as other
advanced functions.
6.1 | Making Configuration Changes
Configurable parameters have a dialog box or a drop-down list. Once a configuration change has
been made on a page, be sure to click the “Apply” or “Next” button at the bottom of the page to
enable the new setting.
Note: To ensure proper screen refresh after a command entry, be sure that Internet Explorer 5.0 is
configured as follows: Under the menu “Tools/Internet Options/General/Temporary Internet
Files/Settings,” the setting for “Check for newer versions of stored pages” should be “Every visit to
the page.”
14
Page 15

7004VBR – Manual
6.1 | Setup Wizard
Below is an outline of each option available from the Setup Wizard section. This wizard takes 3 steps
to complete an ISP configuration.
6.1.1 | Step One: Time Zone
The first step is to configure the Time Zone you are located in. This setting is used for accurate
timing of client filtering and log events.
6.1.2 | Step Two: Broadband Type
Select the type of broadband connection you have.
• Cable Modem
Your ISP may have given you a host name. If so, enter it into this field.
• Fixed-IP xDSL
Some xDSL Internet Service Providers may assign a fixed (static) IP address for your
gateway. If you have been provided with this information, choose this option and enter the
assigned IP address, subnet mask, gateway IP, and DNS IP addresses for the Barricade.
15
Page 16

7004VBR – Manual
• PPPoE
Enter the PPPoE user name and password assigned by your Service Provider. The Service
Name is normally optional, but may be required by some service providers. Leave the
Maximum Transmission Unit (MTU) on the default value (1492) unless you have a particular
reason to change it. Enter a Maximum Idle Time (in minutes) to define a maximum period of
time for which the Internet connection is maintained during inactivity. If the connection is
inactive for longer than the Maximum Idle Time, it will be dropped. Enable the Autoreconnect option to automatically re-establish the connection as soon as you attempt to
access the Internet again.
• PPTP
Point-to-Point Tunneling Protocol is a common connection method used for xDSL connections
in Europe.
• BigPond®
The BigPond Internet service is used in Australia.
6.1.2 | Step Three: Finish Configuration
Once you have configured your type of ISP connection, simply click the [Finish] button and the
Barricade will automatically configure your Internet connection.
16
Page 17

7004VBR – Manual
6.2 | Advanced Setup
Below is an outline of the Advanced Setup section. This section is used to manually configure your
ISP connection and also define the advanced system parameters, manage and control the Barricade
and its ports, or monitor network conditions.
6.2.1 | System
This section is used to configure the local time zone, password for administrator access, and the IP
address of a PC that will be allowed to manage the Barricade remotely.
• Time Zone
Use this option to configure the time zone for the Barricade. This information is used for log
entries and client access control.
There are 3 options to configure the Router’s internal clock:
o Using preset or custom NTP servers
o Using your computer system’s clock
o Manually configure the Time and Date
17
Page 18

• Password Settings
Use this menu to restrict access based on a password. By default, the password is
“smcadmin”.
NOTE: Passwords can contain up to 9 alphanumeric characters and are case sensitive.
7004VBR – Manual
• Remote Management
This feature allows a remote PC to configure, manage, and monitor the Barricade using a
standard web browser.
1. Check “Enable”
2. Set the “Allow Access” policy to one of the 2 options:
o Any IP Address – you can remotely managed the Barricade from any IP address
on the WAN side.
o Single IP – you can only remotely managed the Barricade from this IP address on
the WAN side.
o IP Range – you can remotely managed the Barricade from any IP address in this
range.
18
Page 19

7004VBR – Manual
3. Set the Remote Management Port to the port through which you want to remotely
access the Barricade.
NOTE: Do not set this for a port that is already in use. For example, if you are running
a web server on port 80, you can’t set the remote admin port to 80.
19
Page 20

7004VBR – Manual
6.2.2 | WAN
Specify the WAN connection type provided by your Internet Service Provider, then click “More
Configuration” to enter detailed configuration parameters for the selected connection type.
• Dynamic IP
The Host Name is optional, but it may be required by some ISPs. The default MAC address is
set to the WAN’s physical interface on the Barricade. Use this address when registering for
Internet service, and do not change it unless required by your ISP. If your ISP used the MAC
address of an Ethernet card as an identifier when first setting up your broadband account,
connect only the PC with the registered MAC address to the Barricade and click the “Clone
MAC Address” button. This will replace the current Barricade MAC address with the already
registered Ethernet card MAC address.
If you are unsure of which PC did the broadband technician originally set up, call your ISP
and request they register a new MAC address for your account. Register using the
Barricade’s MAC address.
20
Page 21

7004VBR – Manual
• PPPoE
Enter the PPPoE user name and password assigned by your Service Provider. The Service
Name is normally optional, but may be required by some service providers. The MTU
(Maximum Transmission Unit) governs the maximum size of the data packets. Leave this on
the default value (1492) unless you have a particular reason to change it.
Enter a Maximum Idle Time (in minutes) to define a maximum period of time for which the
Internet connection is maintained during inactivity. If the connection is inactive for longer
than the Maximum Idle Time, it will be dropped. Enable the Auto-reconnect option to
automatically re-establish the connection when an application attempts to access the
Internet again.
• PPTP
Point-to-Point Tunneling Protocol (PPTP) allows the secure remote access over the Internet
by simply dialing in a local point provided by an ISP. Using the above screen allows client PCs
to establish a normal PPTP session and provides hassle-free configuration of the PPTP client
on each client PC.
21
Page 22

• Static IP Address
If your Internet Service Provider has assigned a fixed IP address to you, enter the assigned
address and subnet mask for the Barricade, and then enter the gateway address of your ISP.
You may need a fixed address if you want to provide Internet services, such as a web server,
or FTP server.
• BigPond®
Use this section to configure the built-in client.
7004VBR – Manual
22
Page 23

7004VBR – Manual
• DNS
Domain Name Servers map numerical IP addresses to the equivalent domain name (e.g.,
www.smc.com). Your ISP should provide the IP address of one or more domain name
servers. Enter those addresses on this screen.
6.2.3 | LAN
From this section, you can configure the TCP/IP configuration for the Barricade LAN interface and
DHCP clients.
• LAN IP
Use the LAN menu to configure the LAN IP address for the Barricade and to enable the DHCP
server for dynamic client addresses allocation. Set a period for the lease time if required. For
home networks, this may be set to “Forever”, which means there is no time limit on the IP
address lease.
• IP Address Pool
A dynamic IP start address may be specified by the user, e.g. 192.168.2.100 (default value).
In this example, the IP addresses run from 192.168.2.100 to 192.168.2.199 which will be
part of the dynamic IP address pool. IP addresses from 192.168.2.2 to 192.168.2.99, and
192.168.2.200 to 192.168.2.254 will be available as static IP addresses.
NOTE: Do not include the address of the Barricade in the DHCP client address pool.
23
Page 24

7004VBR – Manual
6.2.4 | NAT
From this section, you can configure the Virtual Server and Special Application features that provide
control over the port openings in the router’s firewall. This section can be used to support several
Internet based applications such as VPN connections.
• Virtual Server
You can configure the Barricade as a virtual server. Remote users accessing services such as
the Web or FTP at your local site via public IP addresses can be automatically redirected to
local servers configured with private IP addresses. To provide the most flexibility, the
Barricade can support either a single port (80) or a range of ports (80-100). The traffic type
can also be defined as TCP, UDP, or both (UDP and TCP).
Some of the more common ports include: HTTP: 80, FTP: 21, Telnet: 23 and POP3: 110.
24
Page 25

7004VBR – Manual
• Special Applications
Some applications, such as Internet gaming, videoconferencing, Internet telephony require
multiple connections. These applications cannot work with Network Address Translation
(NAT) enabled. If you need to run applications that require multiple connections, use the
following screen to specify the additional public ports to be opened for each application.
Specify the port or port range normally associated with an application in the “Trigger Port”
field, select the protocol type as TCP or UDP, and then enter the public ports and data type
associated with the trigger port to open them for inbound traffic.
The maximum range that you can use for all NAT ports is 0 to 65535.
6.2.5 | Firewall
The firewall does not significantly affect system performance, so we advise enabling it to protect your
network users. To enable the Stateful Packet Inspection (SPI) firewall, click on “Advanced” under the
Firewall section and select “Enable” and click the “Apply” button.
The Barricade SPI firewall can provide the access control of connected client PCs, block common
hacker attacks, including IP Spoofing, Land Attack, Ping of Death, IP with zero length, Smurf Attack,
UDP Port Loopback, Snork Attack, TCP Null Scan, and TCP SYN Flooding.
• Parental Control
Using this option allows you to specify different privileges for the client PCs. This is an
excellent tool to control a child’s access to specific content and/or general internet access for
a specific time and/or date.
To setup a Parental Control Rule: Click on “Click here to configure a new Parental
Control Rule” link. This will take you to the Rule Setup section.
25
Page 26

7004VBR – Manual
Rule Description: Set a Rule Description so you know what this rule applies to. Ex. Jon’s
Internet Access.
DHCP Option: Apply this rule to a specific IP Address or range of IP’s on your network. You
can use the DHCP client list to quickly add IP addresses that were provided
via DHCP connections.
Schedule Rule: Set the time and date this rule is active. You can have this rule be active
all the time or configure it to only be active on set days and times.
You can pick the dates you want this rule to be active by checking the box
next to the date.
For time, set the start time you want the Rule to active, and then set how
long you want the rule to run.
26
Page 27

7004VBR – Manual
• MAC Filtering
The MAC Filtering feature of the Barricade allows you to control access to your network
based on the MAC (Media Access Control) Address of the client machine. This ID is unique to
each network adapter.
You can configure that MAC address to be allowed to access your network, or to deny access
to the network.
This tool will also allow you to MAP DHCP IP Addresses to certain MAC Addresses. This tool
works well in conjunction with the Parental Control rules to provide maximum control.
27
Page 28

• Website Blocking
The Website Blocking feature of the Barricade limits access to website domains (i.e.
www.somesite.com
keyword in the URL. This feature is an ideal way to protect your family members from
questionable content on the Internet
) or by using keywords which will block any websites that have that
7004VBR – Manual
• Advanced Settings
This section allows you to configure several advanced features for the Barricade Firewall.
The following features can be set on this page:
o Advanced Firewall Protection: Enable/Disable SPI section of firewall.
28
Page 29

7004VBR – Manual
o Discard Ping from WAN: When this feature is enabled, any host on the WAN
cannot ping this product. This helps avoid unnecessary attacks from the WAN side
because your connection is invisible. It is recommended that you enable this option
for security.
o VPN Pass-through: Enable this option if you are using a PPTP, L2TP or IPSec VPN
connection.
o Email Alert: Configure this option if you want the Barricade to email when hackers
attempt to attack your network to a specific email address. You will need to
configure your email address, username and password, as well as a SMTP server to
send the mail through.
• DMZ (Demilitarized Zone)
If you have a client PC that cannot run an Internet application properly from behind the
firewall, then you can open the client PC up to unrestricted two-way Internet access. Enter
the LAN IP address of a DMZ host and click “Enable”.
NOTE: Adding a client to the DMZ (Demilitarized Zone) may expose your local network to a
variety of security risks. Only use this option as a last resort.
6.2.6 | DDNS (Dynamic DNS)
The Barricade has an integrated Dynamic DNS feature that provides users on the Internet a method
to tie their domain name(s) to computers or servers. DDNS allows your domain name to follow your
IP address automatically by having your DNS records changed when your IP address changes.
The section also has a “Server Configuration” section that automatically opens the port options
checked in the Virtual Server section. Simply enter in the IP Address of your server, such as a web
server, and then click on the port option HTTP Port 80 so users can access your server from the WAN
connection (Internet).
6.2.7 | UPnP
The Barricade supports UPnP (Universal Plug and Play), a networking architecture that provides
compatibility amongst networking equipment. This feature allows an UPnP based operating system,
like Windows XP to automatically communicate with the Barricade and open the required services
when needed.
29
Page 30

7004VBR – Manual
6.2.8 | Tools
Use the “Tools” menu to backup the current configuration, restore a previously saved configuration,
restore factory settings, update firmware, and reset the Barricade.
• Configuration Tools
o Backup
Backup saves the Barricade’s configuration to a file.
o Restore
To restore settings from a saved backup configuration file.
o Restore to factory defaults
Restores the Barricade settings back to the factory default settings.
• Firmware Upgrade
This tool permits easy downloading of the latest Firmware. Download the upgrade file from
the SMC website (www.smc.com) and save it to your hard drive. Browse for the file and then
click “Apply”. Check the Status page Information section to confirm that the upgrade process
was successful.
• Reboot
Click “Apply” to reboot the Barricade. The reset will be complete when the power LED stops
blinking.
Note: Some options, when enabled, will require you to reboot the router. You can use this
option to perform that function.
6.2.9 | Status
The Status screen displays WAN/LAN connection status, firmware, and hardware version numbers,
illegal attempts to access your network, as well as information on DHCP clients connected to your
network.
The following items are included on this screen:
1. INTERNET
Displays WAN connection type and status.
2. GATEWAY
Displays system IP settings, as well as DHCP and Firewall status.
30
Page 31

3. INFORMATION
Displays the number of attached clients, the firmware versions, and the physical MAC
address for each media interface, as well as the hardware version and serial number.
4. Security Log
Displays illegal attempts to access your network.
a. Save Click on this button to save a security log file.
b. Clear Click on this button to delete the access log.
c. Refresh Click on this button to refresh the screen.
5. DHCP Client Log
Displays information on all DHCP clients on your network.
For additional information on the 7004VBR, please visit www.smc.com
7004VBR – Manual
.
31
Page 32

7004VBR – Manual
APPENDIX A | Troubleshooting
The information outlined in this section describes some useful steps for getting your computer and
Barricade router online.
A.1 | Verify you are connected to the Barricade Router
If you are unable to access the Barricade’s web-based administration pages, then you may not be
properly connected or configured. The screen shots in this section were taken on a Windows 2000
machine, but the same steps will apply to Windows 95/98/Me/XP.
To determine your TCP/IP configuration status, please follow the steps below:
1. Click [Start] then choose [Run]
2. Type “cmd” or “command” (without the quotes) to open a DOS prompt.
3. In the DOS window, type “ipconfig” and verify the information that is displayed.
4. If you computer is setup for DHCP, then your TCP/IP configuration should be similar to the
information displayed:
• IP Address: 192.168.2.X (x is number between 100 and 199)
• Subnet: 255.255.255.0
• Gateway: 192.168.2.1
If you have an IP address that starts with 169.254.XXX.XXX then see section A.2.
If you have another IP address configured, see section A.3.
A.2 | I am getting an IP Address that starts with 169.254.XXX.XXX
If you are getting this IP Address, then you need to check that you are properly connected to the
Barricade Router.
Confirm that you have a good link light on the Barricade’s port to which this computer is connected.
If not, please try another cable.
If you have a good link light, please open up a DOS window as described in section A.1 and type
“ipconfig /renew” (without the quotes)
If you are still unable to get an IP Address from the Barricade, reinstall your network adapter. Please
refer to your adapter manual for instructions.
A.3 | I have another IP Address displayed
32
Page 33

7004VBR – Manual
If you have another IP address listed, then the PC may not be configured for a DHCP connection.
Please refer to Chapter 4 | Configure your Computer for information.
Once you have confirmed your computer is configured for DHCP, then please follow the steps below.
1. Open a DOS window as described above.
2. Type “ipconfig /release” (without the quotes)
3. Then type “ipconfig /renew” (without the quotes)
Once you are able to get a valid IP address from the Barricade Router, then you can now access
the web-based Administration pages.
If you still are not getting an IP address from the Barricade, please reset the router as outlined in
Chapter 2 and follow the steps outlined in this appendix again.
If you still cannot access the router once you have reset it, please contact SMC Technical
Support.
33
Page 34

7004VBR – Manual
A.4 | I have a Dynamic IP connection and I can’t get online
Most cable companies use a Dynamic IP configuration to provide Internet access. If you have this
type of connection, and are unable to get connected, please follow the steps outlined below:
1. Unplug the power from your Cable or DSL modem for 2 mins.
2. Confirm that your Barricade router is configured for a Dynamic IP configuration
3. Plug the power back into your Modem.
4. Wait for your Modem to connect to the network, and then click on the status page of the
router to confirm that you are online.
The reason this process works is because certain broadband connections require a MAC address to
gain network access. This MAC address can be changed by following the above process to re-set the
approved MAC address to the MAC address of the Barricade router.
34
Page 35

7004VBR – Manual
APPENDIX B | Technical Specifications
Below is an outline of the Technical Specifications for the Barricade 4-Port Cable/DSL Broadband
Router (SMC7004VBR)
LAN Interface
4 - RJ-45 10/100Mbps Auto MDI/MDI-X ports
WAN Interface
10/100, 1 RJ-45 port
Management
Web management
Advanced Features
Dynamic IP Address Configuration – DHCP, DNS
Firewall – Client privileges, hacker prevention and logging
Virtual Private Network – PPTP, L2TP, IPSec pass-through
Universal Plug and Play
Dynamic DNS Service
Indicator Panel
Power
WAN (Link, Activity)
Link/Act (Link, Activity)
10/100M (on is 100Mpbs / off is 10Mbps)
USE The INFOT FROM 7004VBR Datatsheet
Dimensions
?
Weight
?
Input Power
?
Maximum Current
?
Power Consumption
?
Heat Dissipation
?
35
Page 36

Internet Standards
ARP (RFC 826), IP (RFC 791), ICMP (RFC 792), UDP (RFC 768),
TCP (RFC 793), Telnet (RFC 854-859), MD5 (RFC 1321), BOOTP
Extension (RFC 1497), PPP LCP Extension (RFC 1570), PPPoE
(RFC 2516), NAT (RFC 1631), PPP (RFC 1661), HTML (RFC 1866),
HTTP (RFC 1945), CHAP (RFC 1944), DHCP (RFC 2131), PPTP
(RFC 2637)
Temperature
Operating 32 to 104°F (0 to 40°C)
Storage -40 to 158°F (-40 to 70°C)
Humidity
5% to 95% (non-condensing)
Compliances
CE Mark
Emissions
FCC Class B
Industry Canada Class B
EN55022 (CISPR 22) Class B
Immunity
EN 61000-3-2/3
EN 61000-4-2/3/4/5/6/8/11
Safety
UL 1950
EN60950 (TÜV)
CSA 22.2 No. 950
7004VBR – Manual
36
Page 37

TECHNICAL SUPPORT
PHONE
From U.S.A. and Canada (24 hours a day, 7 days a week)
From Europe (8:00 AM - 5:30 PM UK Time)
INTERNET
E-mail addresses:
Driver updates:
World Wide Web:
• (800) SMC-4-YOU
• (949) 679-8000
• Fax: (949) 679-1481
• 44 (0) 118 974 8700
• Fax: 44 (0) 118 974 8701
• techsupport@smc.com
• european.techsupport@smc-europe.com
• http://www.smc.com/index.cfm?action=tech_support_drivers_downloads
• http://www.smc.com/
• http://www.smc-europe.com/
7004VBR – Manual
37
Page 38

7004VBR – Manual
FOR TECHNICAL SUPPORT, CALL:
From U.S.A. and Canada (24 hours a day, 7 days a week)
(800) SMC-4-YOU; Ph: (949) 679-8000; Fax: (949) 679-1481
From Europe (8:00 AM - 5:30 PM UK Time)
44 (0) 118 974 8700; Fax: 44 (0) 118 974 8701
INTERNET
E-mail addresses:
- techsupport@smc.com
- european.techsupport@smc-europe.com
Driver updates:
- http://www.smc.com/index.cfm?action=tech_support_drivers_downloads
World Wide Web:
- http://www.smc.com/
- http://www.smc-europe.com/
U.S.A. and Canada:
Spain:
UK:
France:
Italy:
Benelux:
Central Europe:
Switzerland:
Nordic:
Northern Europe:
Eastern Europe:
Sub Saharan Africa:
North Africa:
Russia:
PRC:
Taiwan:
Asia Pacific:
Korea:
Japan:
Australia:
India:
(800) SMC-4-YOU
34-93-477-4935
44 (0) 118 974 8700
33 (0) 41 38 32 32
39 02 739 12 33
31 33 455 72 88
49 (0) 89 92861-0
41 (0) 1 9409971
46 (0) 868 70700
44 (0) 118 974 8700
34 -93-477-4920
27-11 314 1133
34 93 477 4920
7 (095) 290 29 96
86-10-6235-4958
886-2-2659-9669
(65) 238 6556
82-2-553-0860
81-3-5645-5715
61-2-8875-7887
91-22-8204437
Fax (949) 679-1481
Fax 34-93-477-3774
Fax 44 (0) 118 974 8701
Fax 33 (0) 41 38 01 58
Fax 39 02 739 14 17
Fax 31 33 455 73 30
Fax 49 (0) 89 92861-230
Fax 41 (0) 1 9409972
Fax 46 (0) 887 62 62
Fax 44 (0) 118 974 8701
Fax 34 93 477 3774
Fax 27-11 314 9133
Fax 34 93 477 3774
Fax 7 (095) 290 29 96
Fax 86-10-6235-4962
Fax 886-2-2659-9666
Fax (65) 238 6466
Fax 82-2-553-7202
Fax 81-3-5645-5716
Fax 61-2-8875-7777
Fax 91-22-8204443
If you are looking for further contact information, please visit www.smc.com or www.smc-europe.com
SMC Networks, Inc.
38 Tesla
Irvine, CA
92618
38
SMC7004VBR
 Loading...