

SMC Networks SMC2030W-H Quick Start Manual

SMC2030W-H Security Camera
Quick Start Guide
V 2.0
SMC Networks
1
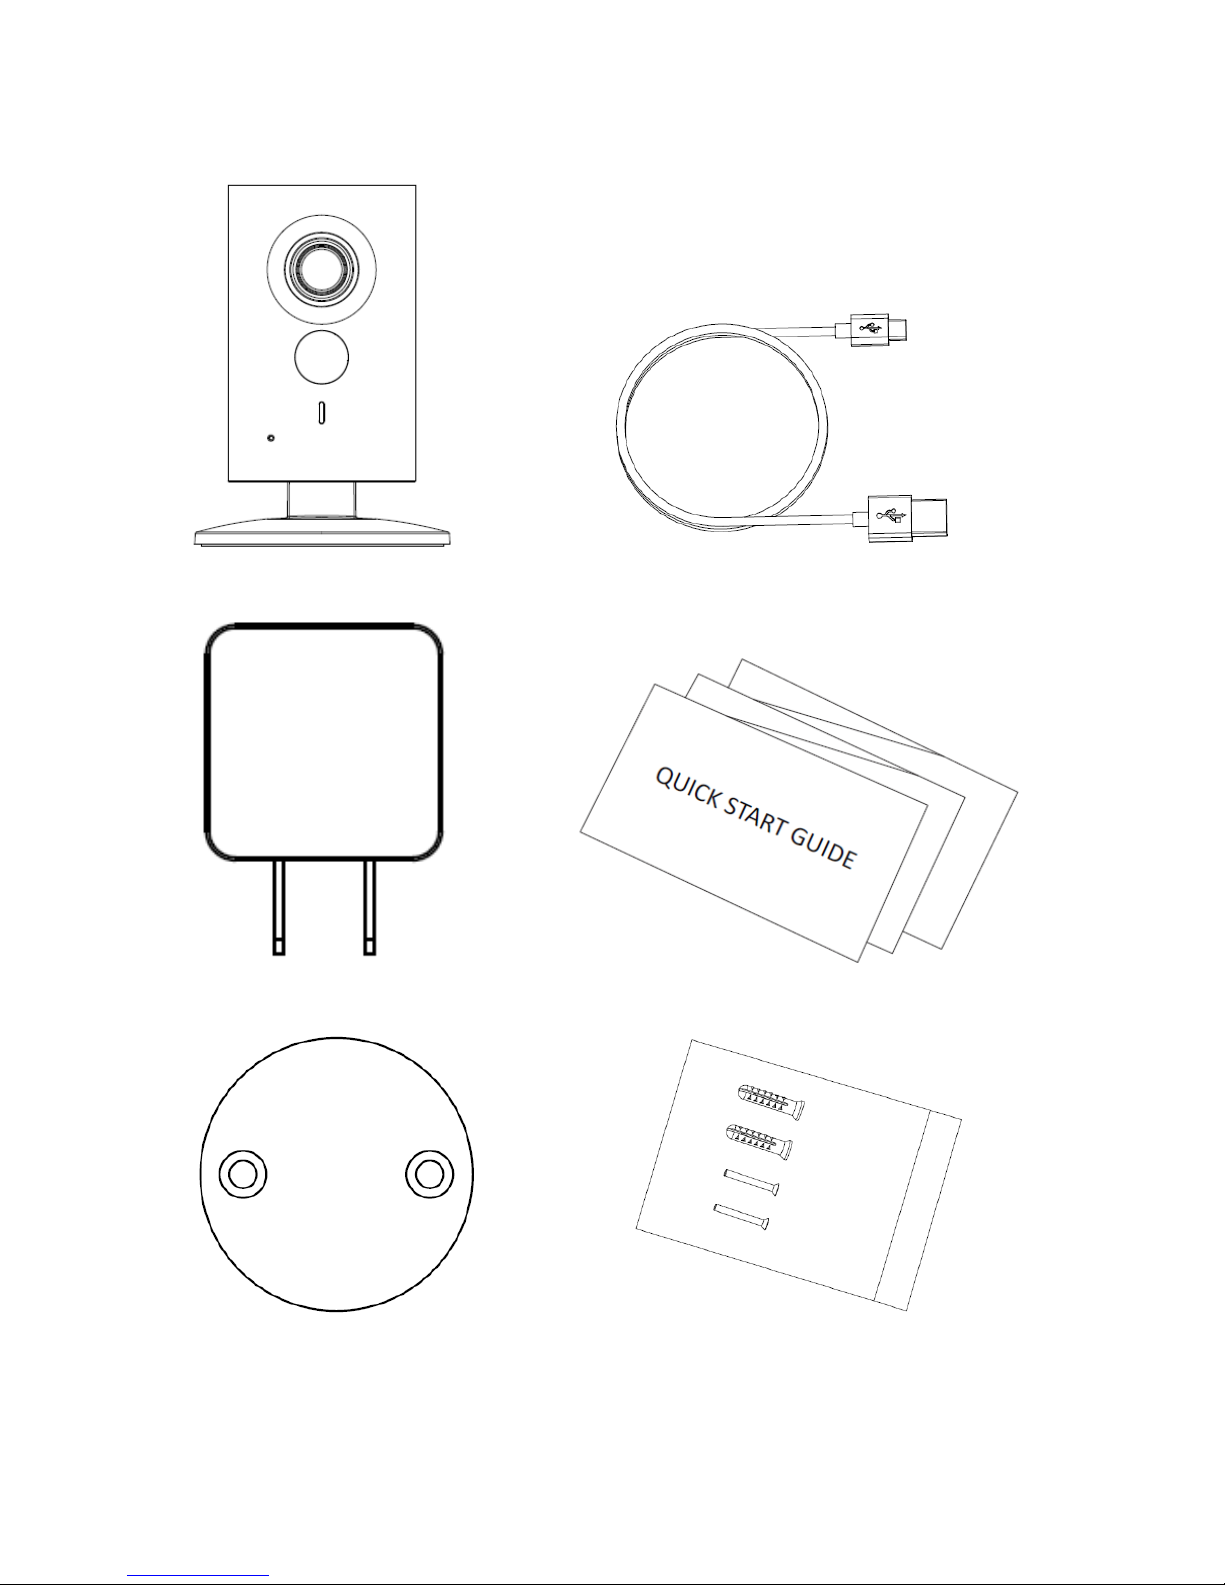
1 Packing List
Device × 1 USB ×1
Power Adapter ×1 QSG ×1
Quick Installation Board ×1 Screw Package ×1
2
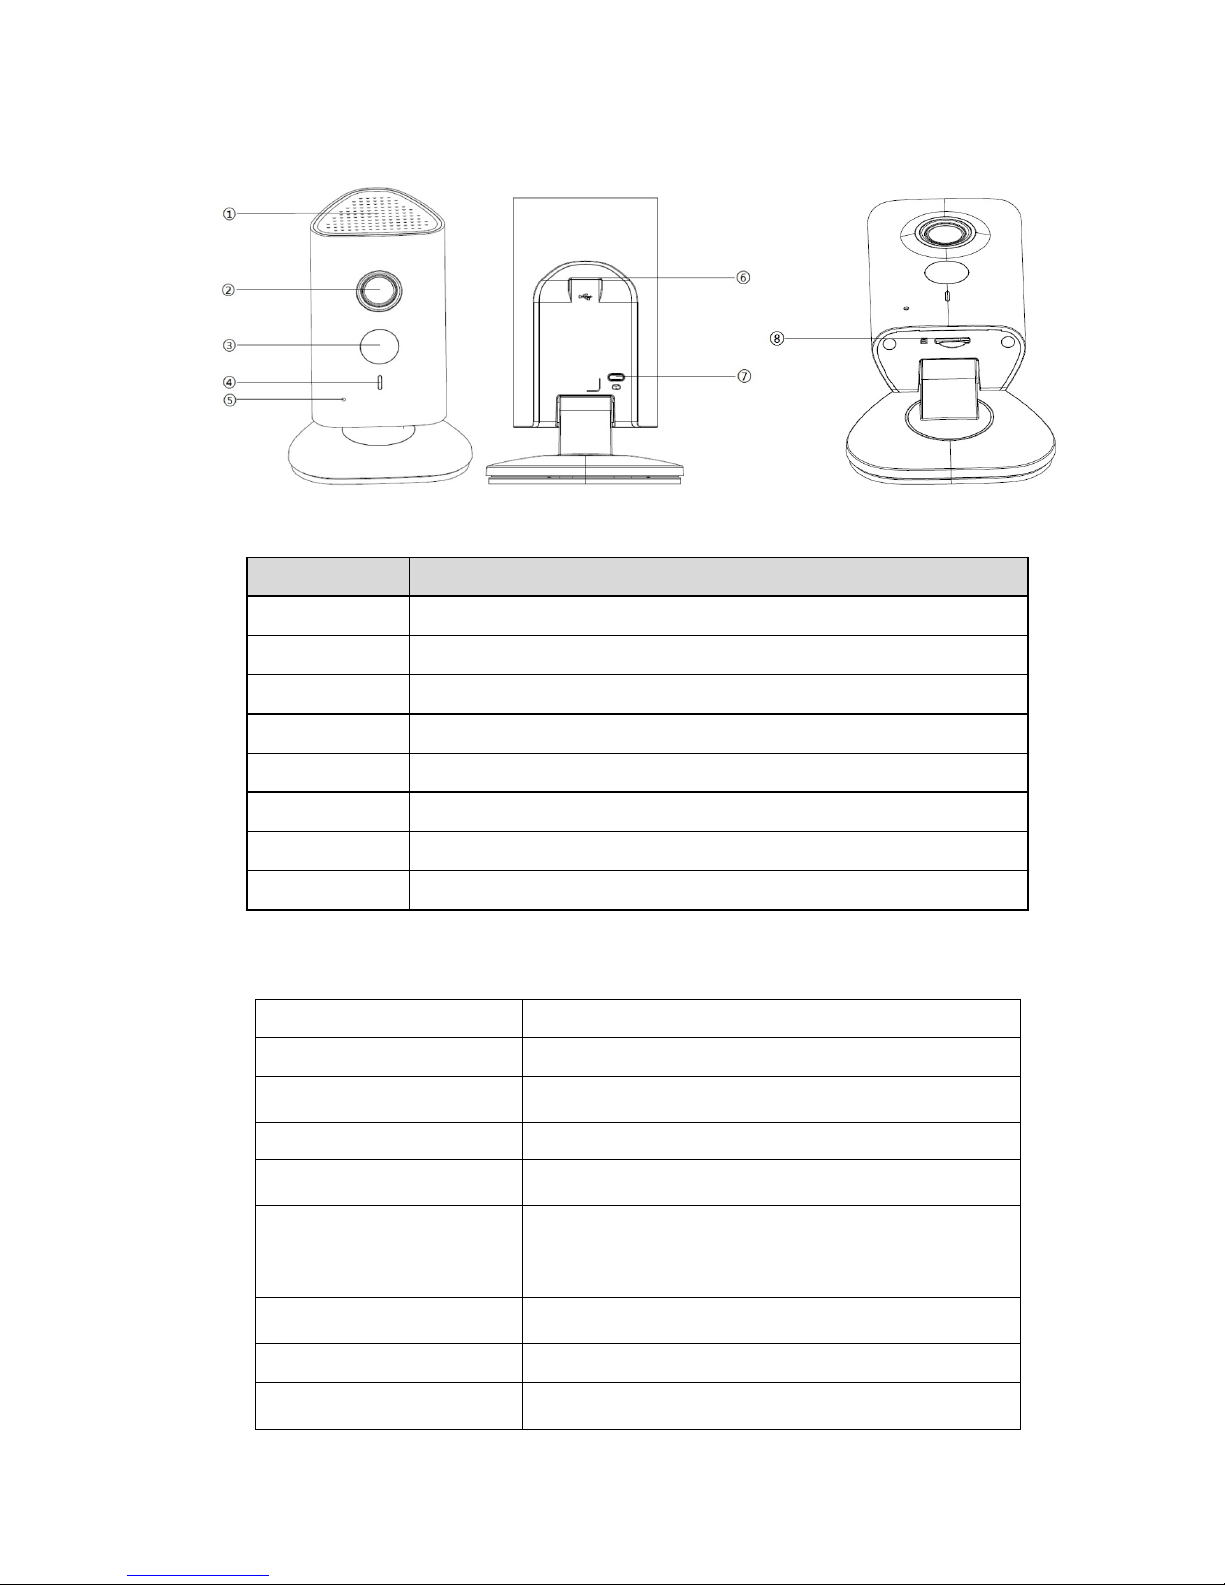
2 Product Appearance
Figure 2-1 Figure 2-2 Figure 2-3
Table 2-1
Note:
If you ever need to reset the camera, press Reset button for 8 seconds.
Indicator light status
Device status
Red light on
Booting
Green light slow flashing
Booting completed and is waiting for WiFi
configuration.
Green light quick flashing
WiFi configuration in progress
Green light on
WiFi connection succeeded and the camera is
operating in a normal condition.
Orange light on
WiFi connection succeeded but the camera is waiting
for confirmation from the server. If the light stays
orange for longer than 2 minutes, check your Internet
connection.
Red and green lights flash
alternately
Device firmware is being upgraded.
Red light slow flashing
Lost WiFi connection
Red light quick flashing
Device malfunction, failed to boot, alarm, or SD card
malfunction.
Table 2-2
ITEM
Name
1
Speaker
2
Lens
3
IR LED
4
Indicator light
5
Microphone
6
USB power supply
7
Reset button
8
Micro SD Card Slot
3
3 Setting Up Camera With Secure Watch Mobile App
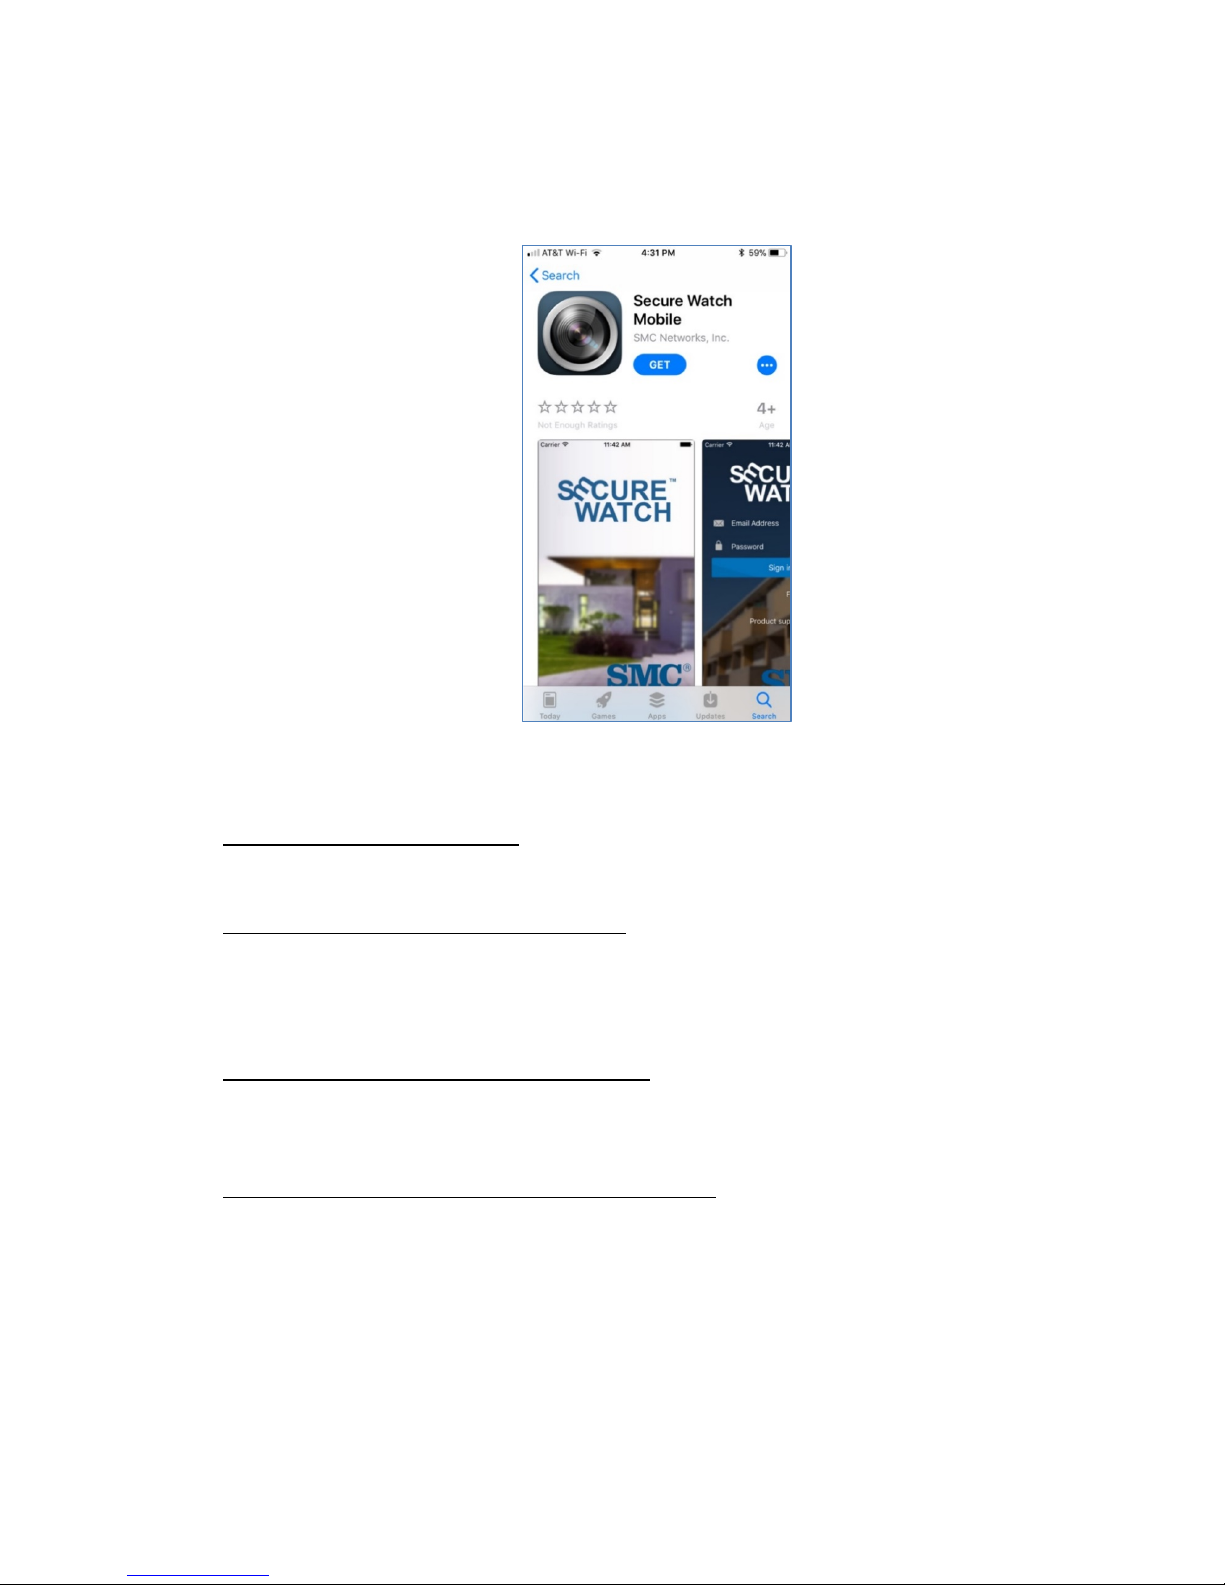
1. Search for the "Secure Watch Mobile" App in the Apple App Store (iOS) or Google Play Store
(Android). Download and install the app to your smartphone.
2. Before you begin, make sure that the camera is in a new condition. If the unit had been previously
registered with SMC Secure Watch service, you will need to perform a ‘remove camera’ operation
in the smartphone app’s camera setting page. For details, refer to the App user manual
(http://na.smc.com/downloads).
3. You must connect your smartphone to a 2.4 GHz WiFi network as this camera model only supports
2.4. GHz WiFi.
4. Power on the camera with its power adapter. Wait two minutes for the camera to become ready.
When the camera is ready, the LED flashes green slowly, indicating the camera is waiting for a WiFi
connection to be established. If the LED does not flash green slowly, reset the camera by pressing
the reset button on the back of the unit for more than eight (8) seconds until the LED color is solid
red and then wait until the LED flashes green slowly. This may take about 30 seconds.
5. Connect your smartphone to your WiFi network. During this installation stage, make sure that your
smartphone is connected to the WiFi network with the same network name (SSID) that you wish to
use for connecting the camera. For later normal use, you can use any WiFi network freely from your
smartphone. (Note: we will now use the Apple iOS App version for the remainder of this guide.)
6. Open the Secure Watch Mobile App on your smartphone. If you do not have an account, tap <Create
Account> to create a new account. After creating a user account, you must confirm it from your
associated email account. Enter the user account ID (the email address) and the password you
provided and tap <Sign In> to login.
 Loading...