

SMC Networks SMC7908VoWBRA, 7908VOWBRA - annexe 6, 7908VOWBRB - annexe 1, SMC7908VoWBRB Configuration Manual
Page 1
The VoIP Configuration Guide assumes your Internet is already set up. For instructions on setting up your Internet
c
onnection please refer to the Quick Installation Guide (QIG) provided.
1. The first step is to verify your VoIP service provider has provided all the required configuration settings. The following
table lists the mandatory settings required for successful configuration. To obtain these settings please contact your
VoIP service provider.
Parameters Example
Username myusername
Password mypassword
Phone number 123456
SIP Domain domain.com
Realm realm.com
SIP Proxy Server address sip.domain.com
Proxy Port 5060
SIP Registrar Server address sip.domain.com
Registrar Port 5060
Preferred Codec G.729
Tip: Commonly the SIP Proxy and SIP Registrar Server Address and Port are the same. If you only have the Address and
Port settings for the SIP Proxy you can try using the same Address and Port for the SIP Registrar. If registration fails
you will need to verify the SIP Registrar settings with your VoIP service provider.
2. Logon to the Web Management Interface and click on “Advanced Setup”. From the “Advanced Setup” screen click on
menu “VoIP”, then submenu “VoIP Account”. You are now ready to enter the configuration settings provided by your
VoIP service provider.
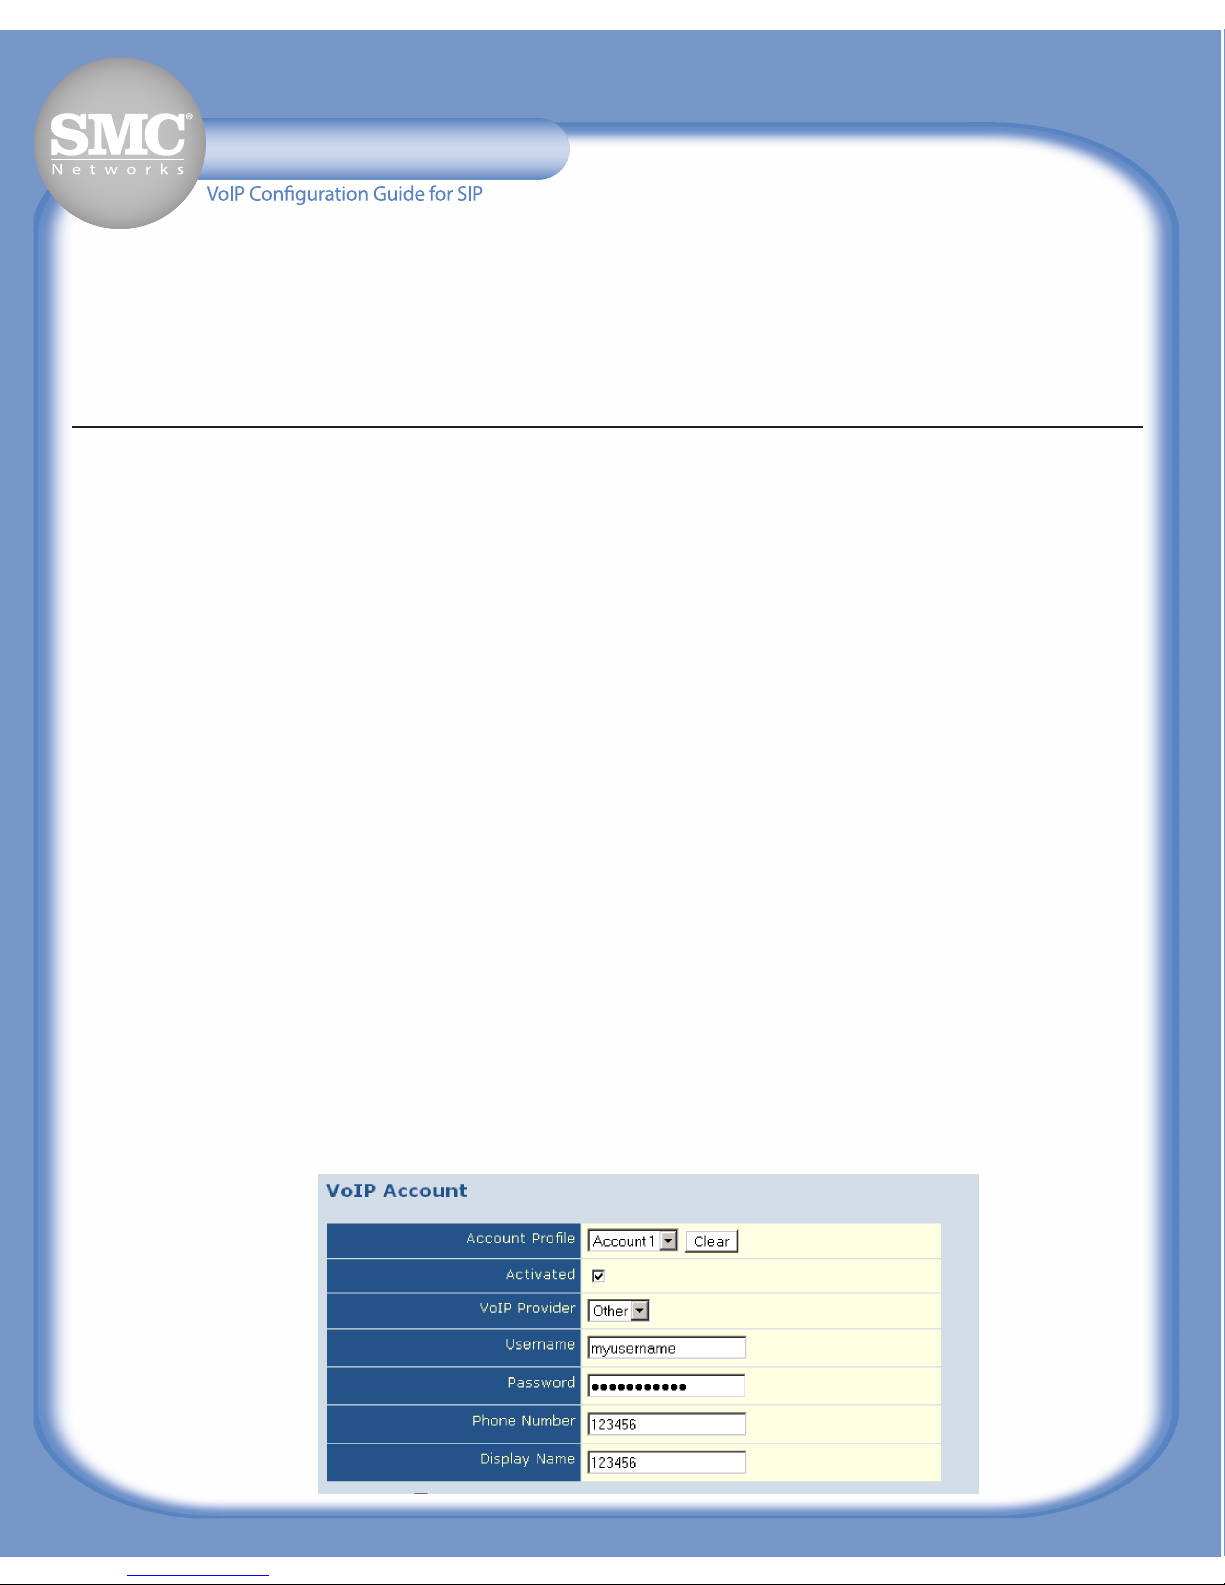
3. Select “Account 1” for “Account Profile” and tick the “Activated” tick box to activate the account. Un-ticking this box will
disable the account.
Note: You can configure up to 4 VoIP accounts. This is done by selecting account profiles 1-4 and entering the VoIP
configuration settings.
4. Select your VoIP service provider from the “VoIP Provider” drop down list. This will automatically configure the SIP
Domain, Realm, Proxy Address, Proxy Port, Registrar Address and Registrar Port settings. If your VoIP service provider
is not listed select “Other”.
5
.
Input the Username, Password and Phone Number provided. For the “Display Name” enter your phone number. This is
the number that will be displayed when you make a call.
Tip: To hide your phone number, enter “Anonymous” in “Display Name”.
SMC7908VoWBRA/BSMC7908VoWBRA/B
SMC7908VoWBRA/B
Page 2
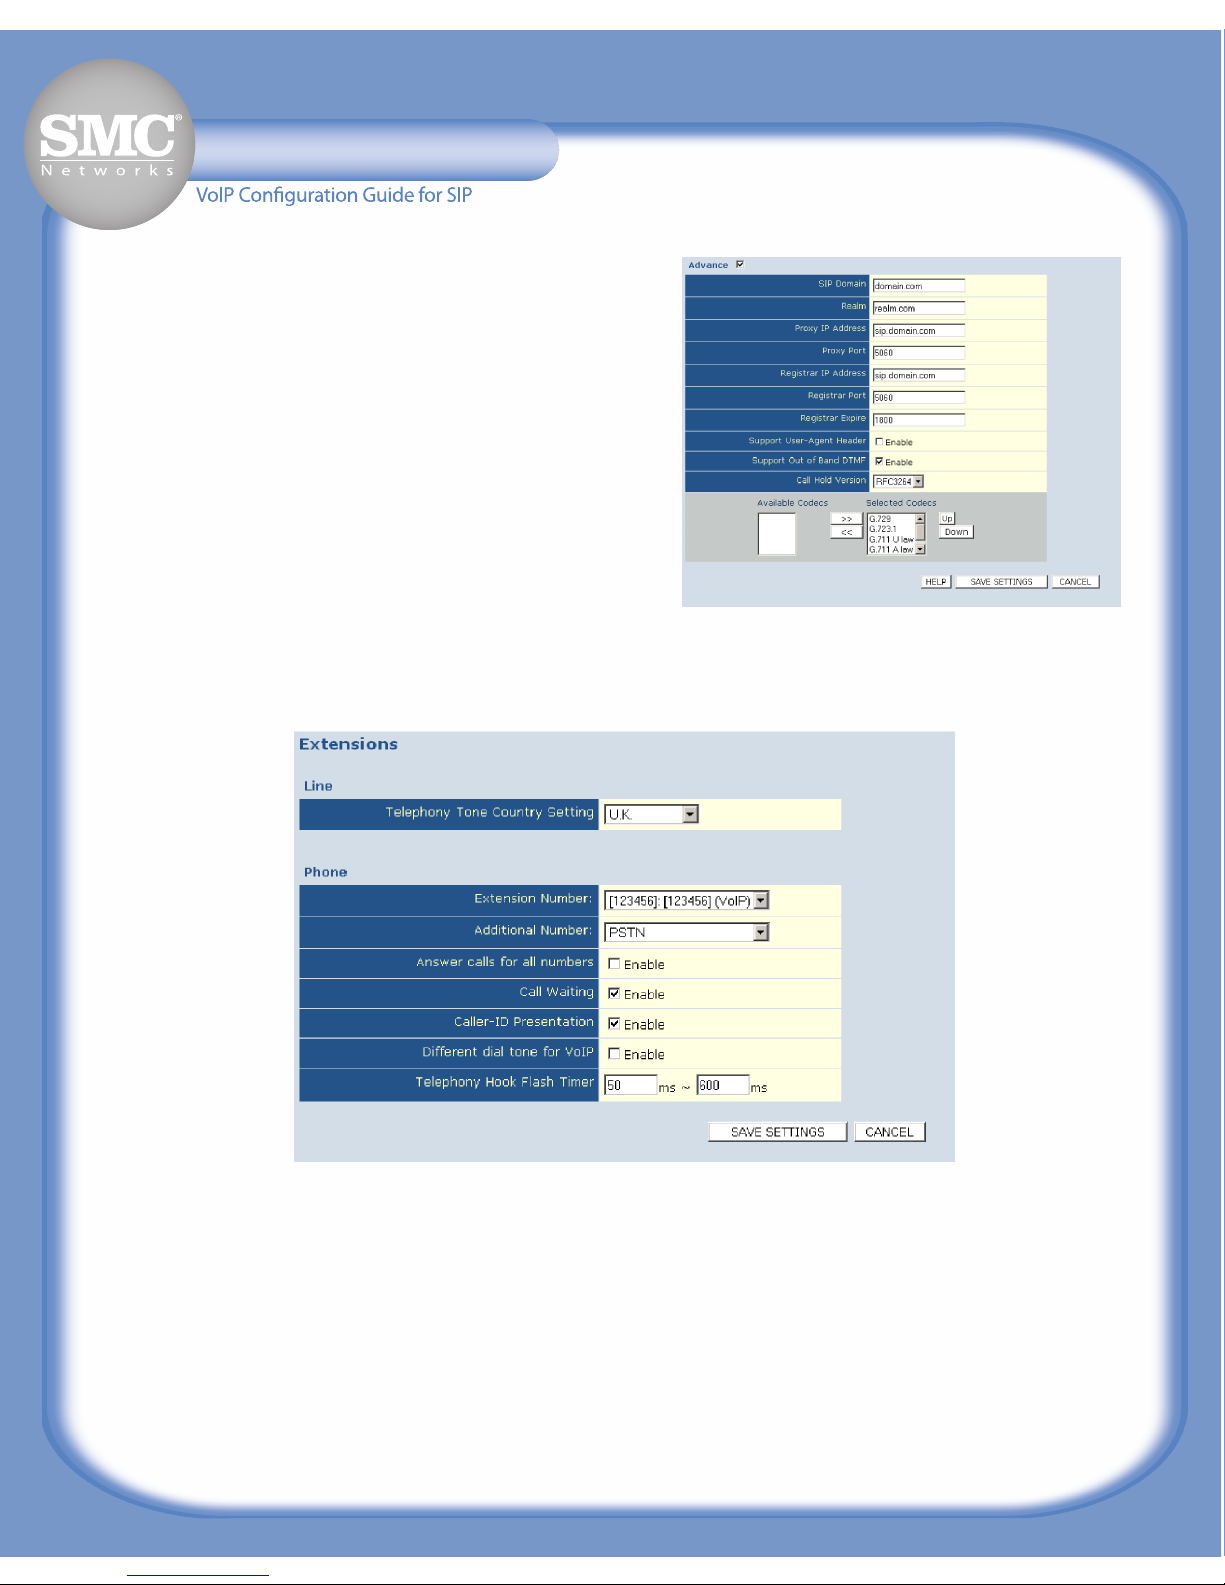
6. If your VoIP provider was not listed in Step 4, manually input
t
he SIP Domain, Realm, Proxy Address, Proxy Port, Registrar
Address and Registrar Port provided. Otherwise skip this Step.
7. Select the preferred Codec from the “Selected Codecs” list.
The “Up” and “Down” buttons are used to change the Codec
priority. The preferred Codec goes at the top. Click “Save
Settings” button to save configuration.
8. Click submenu “VoIP Extensions” and select your country from the “Telephony Tone Country Setting” drop down list.
Click “Save Settings” button to save configuration.
9
. The basic setup is now complete. Click submenu “VoIP Status and Call logs” to verify the SIP registration status.
If registration status is “Success” you are ready to make phone calls. If registration status is “Fail” check the following:
• Check the Internet connection is working.
•
Check you have entered your VoIP configuration settings correctly.
• Contact your VoIP service provider to verify your configuration settings are correct and to verify their Server is
working.
For troubleshooting tips refer to the troubleshooting section in the Manual and QIG. For detailed information on configurable
settings refer to the Manual.
SMC7908VoWBRA/BSMC7908VoWBRA/B
SMC7908VoWBRA/B
 Loading...