

Page 1

USER GUIDE
SMCDSP200 /
SMCDSP205
TigerVoIP™
Desktop SIP Phone
Page 2

1/29/2008 VoIP Phone Administration Guide
MAG-07010 Rev. C
SMC’s Limited WARRANTY
Limited Warranty S tatement: SMC Networks, Inc. ("SMC") warrants its products to be free from defects in
workmanship and materials, under normal use and service, for the applicable warranty term. All SMC products
carry a standard 90-day limited warranty from the date of purchase from SMC or its Authorized Reseller. SMC
may, at its own discretion, repair or replace any product not operating as warranted with a similar or functionally
equivalent product, during the applicable warranty term. SMC will endeavor to repair or replace any product
returned under warranty within 30 days of receipt of the product.
The standard limited warranty can be upgraded to a Limited Lifetime* warranty by registering new products
within 30 days of purchase from SMC or its Authorized Reseller. Registration can be accomplished via the
enclosed product registration card or online via the SMC web site. Failure to register will not affect the standard
limited warranty. The Limited Lifetime warranty covers a product during the Life of that Product, which is defined
as the period of time during which the product is an 'Active' SMC product. A product is considered to be 'Active'
while it is listed on the current SMC price list. As new technologies emerge, older technologies become obsolete
and SMC will, at its discretion, replace an older product in its product line with one that incorporates these newer
technologies. At that point, the obsolete product is discontinued and is no longer an 'Active' SMC product.
All products that are replaced become the property of SMC. Replacement products may be either new or
reconditioned. Any replaced or repaired product carries either a 30-day limited warranty or the remainder of the
initial warranty, whichever is longer. SMC is not responsible for any custom software or firmware, configuration
information, or memory data of Customer contained in, stored on, or integrated with any products returned to
SMC pursuant to any warranty. Products returned to SMC should have any customer-installed accessory or
add-on components, such as expansion modules, removed prior to returning the product for replacement. SMC
is not responsible for these items if they are returned with the product.
Customers must contact SMC for a Return Material Authorization number prior to returning any product to SMC.
Proof of purchase may be required. Any product returned to SMC without a valid Return Material Authorization
(RMA) number clearly marked on the outside of the package will be returned to customer at customer's expense.
For warranty claims within North America, please call our toll-free customer support number at (800) 762-4968.
Customers are responsible for all shipping charges from their facility to SMC. SMC is responsible for return
shipping charges from SMC to customer.
WARRANTIES EXCLUSIVE: IF AN SMC PRODUCT DOES NOT OPERATE AS WARRANTED ABOVE,
CUSTOMER'S SOLE REMEDY SHALL BE REPAIR OR REPLACEMENT OF THE PRODUCT IN QUESTION,
AT SMC'S OPTION. THE FOREGOING WARRANTIES AND REMEDIES ARE EXCLUSIVE AND ARE IN LIEU
OF ALL OTHER WARRANTIES OR CONDITIONS, EXPRESS OR IMPLIED, EITHER IN FACT OR BY
i
Page 3

1/29/2008 VoIP Phone Administration Guide
MAG-07010 Rev. C
OPERATION OF LAW, STATUTORY OR OTHERWISE, INCLUDING WARRANTIES OR CONDITIONS OF
MERCHANTABILITY AND FITNESS FOR A PARTICULAR PURPOSE. SMC NEITHER ASSUMES NOR
AUTHORIZES ANY OTHER PERSON TO ASSUME FOR IT ANY OTHER LIABILITY IN CONNECTION WITH
THE SALE, INSTALLATION, MAINTENANCE OR USE OF ITS PRODUCTS. SMC SHALL NOT BE LIABLE
UNDER THIS WARRANTY IF ITS TESTING AND EXAMINATION DISCLOSE THE ALLEGED DEFECT IN THE
PRODUCT DOES NOT EXIST OR WAS CAUSED BY CUSTOMER'S OR ANY THIRD PERSON'S MISUSE,
NEGLECT, IMPROPER INSTALLATION OR TESTING, UNAUTHORIZED ATTEMPTS TO REPAIR, OR ANY
OTHER CAUSE BEYOND THE RANGE OF THE INTENDED USE, OR BY ACCIDENT, FIRE, LIGHTNING, OR
OTHER HAZARD.
LIMITATION OF LIABILITY: IN NO EVENT, WHETHER BASED IN CONTRACT OR TORT (INCLUDING
NEGLIGENCE), SHALL SMC BE LIABLE FOR INCIDENTAL, CONSEQUENTIAL, INDIRECT, SPECIAL, OR
PUNITIVE DAMAGES OF ANY KIND, OR FOR LOSS OF REVENUE, LOSS OF BUSINESS, OR OTHER
FINANCIAL LOSS ARISING OUT OF OR IN CONNECTION WITH THE SALE, INSTALLATION,
MAINTENANCE, USE, PERFORMANCE, FAILURE, OR INTERRUPTION OF ITS PRODUCTS, EVEN IF SMC
OR ITS AUTHORIZED RESELLER HAS BEEN ADVISED OF THE POSSIBILITY OF SUCH DAMAGES.
SOME STATES DO NOT ALLOW THE EXCLUSION OF IMPLIED WARRANTIES OR THE LIMITATION OF
INCIDENTAL OR CONSEQUENTIAL DAMAGES FOR CONSUMER PRODUCTS, SO THE ABOVE
LIMITATIONS AND EXCLUSIONS MAY NOT APPLY TO YOU. THIS WARRANTY GIVES YOU SPECIFIC
LEGAL RIGHTS, WHICH MAY VARY FROM STATE TO STATE. NOTHING IN THIS WARRANTY SHALL BE
TAKEN TO AFFECT YOUR STATUTORY RIGHTS.
* SMC will provide warranty service for one year following discontinuance from the active SMC price list. Under
the limited lifetime warranty, internal and external power supplies, fans, and cables are covered by a standard
one-year warranty from date of purchase.
SMC Networks, Inc. 20 Mason Irvine, CA 92618
ii
Page 4

1/29/2008 VoIP Phone Administration Guide
MAG-07010 Rev. C
COMPLIANCES
Federal Communication Commission Interference St atement
This device complies with Part 15 of the FCC Rules. Operation is subject to the following two conditions: (1) This
device may not cause harmful interference, and (2) this device must accept any interference received, including
interference that may cause undesired operation.
This equipment has been tested and found to comply with the limits for a Class B digital device, pursuant to Part
15 of the FCC Rules. These limits are designed to provide reasonable protection against harmful interference in
a residential installation. This equipment generates, uses and can radiate radio frequency energy and, if not
installed and used in accordance with instructions, may cause harmful interference to radio communications.
However, there is no guarantee that the interference will not occur in a particular installation. If this equipment
does cause harmful interference to radio or television reception, which can be determined by turning the
equipment off and on, the user is encouraged to try to correct the interference by one or more of the following
measures:
• Reorient the receiving antenna
• Increase the separation between the equipment and receiver
• Connect the equipment into an outlet on a circuit different from that to which the receiver is connected
• Consult the dealer or an experienced radio/TV technician for help
FCC Caution: Any changes or modifications not expressly approved by the party responsible for compliance
could void the user's authority to operate this equipment.
Note: In order to maintain compliance with the limits of a Class B digital device, you are required to use a quality
interface cable when connecting to this device. You may use unshielded twisted-pair (UTP) for RJ-45
connections - Category 3 or better for 10 Mbps connections, Category 5 or better for 100 Mbps connections.
iii
Page 5

1/29/2008 VoIP Phone Administration Guide
MAG-07010 Rev. C
EC Declaration of Conformity
SMC contact for these products in Europe is:
SMC Networks Europe,
Edificio Conata II,
Calle Fructuós Gelabert 6-8, 2o, 4a,
08970 - Sant Joan Despí, Barcelona, Spain.
This information technology equipment complies with the requirements of the Council Directive 89/336/EEC on
the Approximation of the laws of the Member States relating to Electromagnetic Compatibility and 73/23/EEC for
electrical equipment used within certain voltage limits and the Amendment Directive 93/68/EEC. For the
evaluation of the compliance with these Directives, the following standards were applied.
Emission
Immunity:
LVD:
• EN 55022:1998 +A1:2000 +A2:2003, Class B
• EN 61000-3-2:2000, Class A
• EN 61000-3-3:1995 +A1:2001
• EN 55024:1998 +A1:2001 +A2:2003
• EN 61000-4-2: 1995 + A1: 1998 + A2:2000
• EN 61000-4-3: 2002 + A1:2002
• EN 61000-4-4: 1995 + A1:2000 + A2:2100
• EN 61000-4-5: 1995 + A1:2000
• EN 61000-4-6: 1996 + A1:2000
• EN 61000-4-8: 1993 + A1:2000
• EN 61000-4-11: 1994 + A1:2000
• EN 60950-1:2001
Warning: Do not plug a phone jack connector in the RJ-45 port. This may damage this device. Les raccordeurs
ne sont pas utilisé pour le systéme téléphonique!
he official EC-Declaration of Conformity can be found under the corresponding product section on the web
T
http://www.smc.com.
iv
Page 6

1/29/2008 VoIP Phone Administration Guide
Table of Contents
1
Introduction....................................................................................................................................................... 1
1.1 Hardware Overview ...................................................................................................................... 1
1.2 Feature Overview ......................................................................................................................... 1
2 Keypad interface for IP Phone demo system................................................................................................... 3
2.1 Keypad description ....................................................................................................................... 3
2.2 Recording ..................................................................................................................................... 4
2.3 Keypad Function and setting List ................................................................................................. 4
2.3.1 Phone Book ......................................................................................................................... 4
2.3.2 Call History........................................................................................................................... 4
2.3.3 Phone Setting ...................................................................................................................... 5
2.3.4 Network................................................................................................................................ 6
2.3.5 SIP Settings ......................................................................................................................... 7
MAG-07010 Rev. C
2.3.6 NAT Traversal ...................................................................................................................... 7
2.3.7 Administrator........................................................................................................................ 8
2.3.8 Sys. Authority ....................................................................................................................... 8
3 Setup the VoIP Phone via a Web Browser....................................................................................................... 9
3.1 Login ............................................................................................................................................. 9
3.2 System Information for the IP PHONE ......................................................................................... 9
3.3 Phone Book ................................................................................................................................ 10
3.3.1 Phone Book ....................................................................................................................... 10
3.3.2 Speed Dial List....................................................................................................................11
3.4 Phone Setting ..............................................................................................................................11
3.4.1 Forward Settings................................................................................................................12
3.4.2 SNTP Settings.................................................................................................................... 13
3.4.3 Volume Settings.................................................................................................................13
3.4.4 Ringer Settings .................................................................................................................. 14
3.4.5 DND Settings ..................................................................................................................... 14
3.4.6 Dial Plan Setting ................................................................................................................ 15
3.4.7 Call Waiting Settings.......................................................................................................... 17
3.4.8 Soft-key Settings................................................................................................................ 17
3.4.9 Hot Line Settings................................................................................................................ 17
3.4.10 Alarm Settings.................................................................................................................... 18
v
Page 7

1/29/2008 VoIP Phone Administration Guide
3.4.11
Daylight Settings ................................................................................................................ 18
3.5 Network....................................................................................................................................... 19
3.5.1 Network Status................................................................................................................... 19
3.5.2 WAN Settings..................................................................................................................... 19
3.5.3 LAN Settings ...................................................................................................................... 20
3.5.4 DDNS Settings...................................................................................................................21
3.5.5 VLAN Settings.................................................................................................................... 22
3.5.6 DMZ Setting ....................................................................................................................... 23
3.5.7 Virtual Server ..................................................................................................................... 23
3.5.8 PPTP Settings.................................................................................................................... 24
3.6 SIP Settings ................................................................................................................................ 25
3.6.1 Service Domain..................................................................................................................25
3.6.2 Port Settings ...................................................................................................................... 27
MAG-07010 Rev. C
3.6.3 Codec Settings................................................................................................................... 27
3.6.4 Codec ID Settings .............................................................................................................. 28
3.6.5 DTMF Settings ...................................................................................................................28
3.6.6 RPort Function ................................................................................................................... 29
3.6.7 Other Settings .................................................................................................................... 29
3.7 NAT Trans................................................................................................................................... 30
3.8 Others ......................................................................................................................................... 30
3.8.1 MAC Clone Setting ............................................................................................................ 30
3.8.2 Tones Settings ................................................................................................................... 31
3.8.3 Advanced Settings ............................................................................................................. 31
3.9 System Auth................................................................................................................................ 32
3.10 Save Changes ............................................................................................................................ 32
3.11 Update ........................................................................................................................................ 33
3.11.1 Update Firmware ............................................................................................................... 33
3.11.2 Auto Update Settings ......................................................................................................... 33
3.11.3 Restore Default Settings .................................................................................................... 34
3.12 Reboot ........................................................................................................................................ 34
4 Automatic Client Configurations with SMC IP PBX........................................................................................ 35
5 Appendix: Specifications ................................................................................................................................ 36
vi
Page 8

1/29/2008 VoIP Phone Administration Guide
MAG-07010 Rev. C
1 Introduction
This administration guide is for the VoIP Phone, SMCDSP-200 & SMCDSP-205. This administration guide
explains the keypad instructions, web configuration and command line configuration for the SMC IP Phones.
Before using each device, some setup processes are required to make the VoIP Phone work properly. Please
refer to the Setup Menu for further information.
1.1 Hardware Overview
The SMC IP Phones have the following interfaces for Networking. SMCDSP-200 supports POE that can connect
to POE switch and use the power of POE switch.
Two RJ-45 networking interfaces; these two interfaces support 10/100Mps Fast Ethernet. You can connect one
RJ-45 Fast Ethernet port to the ADSL or Switch, and connect the other one to your computer.
Dimension: approximately 18 x 20 x 8 cm
Weight: approximately 220g
Operating temperature: 0-50°C
Adapter: Input:100-240V, 50-60Hz
Output via general adapter: 6V, 1A
Output via Power over Ethernet on WAN port: Typical 5V, 1.2A (7012P only)
FCC Class B
CE, 89/336/EEC
LVD: 73/23/EEC
RoHS compliant
Warning: AC Input out of defined range will cause phone malfunction or damage.
1.2 Feature Overview
Network Interface
․ Two RJ45 10/100 Base-T
Ethernet ports
Display
․ 16 characters x 2 lines
․ Backlit, grayscale
SIP
․ SIP v2 (RFC 3261)
1
․ SIP RPORT(RFC 3581)
․ Many other SIP protocols
․ Support 3 SIP accounts
․ SIP server redundancy
Page 9

1/29/2008 VoIP Phone Administration Guide
MAG-07010 Rev. C
Call Features
․ Call Hold
․ Call Waiting
․ Call Forward
․ Unconditional forward
․ Busy forward
․ Unavailable forward
․ Call Transfer
․ Blind transfer
․ Attended transfer(Ring and
Consult transfer)
․ 3-way Conference
․ Call Park/Call Pickup**
․ On-demand Call
Recording**
․ Hotline
Phone Functions
․ Feature keys
․ Phone Book
․ Redial
․ Do not disturb (DND)
․ Hold
․ Transfer
․ Conference
․ Forward
․ Voice Message
․ Speaker phone
․ Volume Adjustment
․ Call Recording
․ Mute
․ Phone Book (140sets)
․ Speed Dials (8 sets)
․ Call History (64 sets)
․ Caller ID Display
․ Speaker Phone
․ Multi-user(Up to 3)
․ Mimic second dial tone
․ Incoming call indicator
․ MWI/VMWI
․ Provide 4 different ringtones
․ Selectable ringtones
․ Caller ID ringtones
․ Programmable tone
․ Volume/Input gain
adjustment
․ Dial plan setting
․ Dial without waiting
DTMF
․ In-band DTMF
․ RFC2833( Out-of-band
DTMF)
․
SIP INFO
Codecs
․ G.711 μ-law/A-law
․ G.723.1 6.3k/5.3k bit/s
․ G.726 16k/24k/32k/40k bit/s
․ G.729A 8k bit/s
․ G.729A/B
․ GSM
Administration
․ Web-based configuration
․ Direct keypad configuration
․ Auto Provisioning on boot**
․ Automatic firmware
upgrade**
․ Firmware upgrade via web
․ Diagnostics (Syslog support)
Voice Quality
․ G.168 LEC (Line Echo
Canceller)
․ AEC (Acoustic Echo
Canceller)
․ VAD (Voice Activity
Detection)
․ CNG (Comfort Noise
Generator
․ Packet loss compensation
․ Adaptive jitter buffer
Networking
․ IP assignments:
․ Static IP
․ DHCP
․ PPPoE
․ STUN for NAT traversal
․ MAC clone
․ SNTP client
․ Bridge/NAT mode on LAN
․ DHCP server on NAT mode
for LAN
․ DDNS
․ Virtual Server
Security
․ HTTP 1.1 basic/digest
authentication for web setup
․ MD5 for SIP authentication
(RFC 2069/RFC 2617)
QoS
․ IEEE 802.1Q VLAN
․ ToS fi e ld
2
Page 10

1/29/2008 VoIP Phone Administration Guide
․
2 Keypad interface for IP Phone demo system
2.1 Keypad description
Key Name Description
MAG-07010 Rev. C
1
2 “2”, “a”, “b”, “c”, “A”, “B”, “C”
3 “3”, “d”, “e”, ”f”, “D”, “E”, “F”
4 “4”, “g”, “h”, “I”, “G”, “H”, “I”
5 “5”, “j”, “k”, “l”, “J”, “K”, “L”
6 “6”, “m”, “n”, “o”, “M”, “N”, “O”
7 “7”, “p”, “q”, “r”, “s”, “P”, “Q”, “R”, ‘S”
8 “8”, “t”, “u”, “v”, “T”, “U”, “V”
9 “9”, “w”, “x”, “y”, “z”, “W”, “X”, “Y”, “Z”
0 “0”, “space”
* “*”, “•”, “:”, “@”
# Start dialing process
4-way
“1” , “-“, “
Press to scroll through lists and menus on the display.
٫”, “!”, “?”
Navigation Keys
MENU Press to access the menu options or cancel your selection and go back to the previous
level.
ENTER Press to enter a menu or confirm a selection.
PHONE BOOK Press to access the personal phonebook directory.
REDIAL Press to call the last number dialed.
DND Press to block all incoming calls.
HOLD Press to put an active call on hold.
TRANSFER Press to transfer an active call to another VoIP phone on the system.
CONFERENCE Press to activate the three-way conference call.
3
Page 11

1/29/2008 VoIP Phone Administration Guide
FWD Press to forward all incoming calls to another phone on the system.
DELETE Press to erase the number you dialed when making a call.
M1~M8 Press any of the keys to speed dial the preset contact number.
MUTE Press to Mute the call.
REC Press REC button to record the conversation, please refer to section 2.2 for further
details.
VOICE MSG Press to listen to voice mail messages.
SPEAKER Press to activate the speakerphone to allow handsfree conversations.
MAG-07010 Rev. C
VOLUMN
Control Key
Press to increase or decrease the volume of the ringer tone, handset, or the volume of
the current call using the speakerphone.
2.2 Recording
The recording function is for users who want to record their conversations during the calls. The user only
needs to press “REC” button to start recording and press again to stop it. The voice file will be saved in the
user’s voice mail system. The Message Waiting Indicator on IP phones will be lit to inform the user.
To listen to the recording, make a call to the user’s voice mail system, press “1” to hear the new messages
of the recording.
2.3 Keypad Function and setting List
2.3.1 Phone Book
Name Description
Search Search Phone Book.
Add Entry Add new phone number to phone book.
Speed Dial Add speed dial phone number to speed dial list.
Erase All Erase all phone number from Phone Book.
2.3.2 Call History
Name Description
4
Page 12

1/29/2008 VoIP Phone Administration Guide
Incoming Calls Show all incoming call.
Dialed Numbers Show all dialed call.
Erase Record Delete call history.
All: Delete all call history.
Incoming: Delete all incoming call.
Dialed: Delete all dialed out call.
2.3.3 Phone Setting
Name Description
MAG-07010 Rev. C
Call Forward
Do Not Disturb
Date/Time
All Fwd.
Busy Fwd.
No Answer Fwd.
Ring Timeout Set the Ring times to start the no answer forward function, ex:
Always Block all phone calls.
By Period Block all phone calls at a certain period of time.
Period Time Set the start time and end time to Block Setting.
Activation Set the Alarm Enabled or Disabled. Alarm Setting
Alarm time Set the time for alarming.
Date and Time Setting.
Activation: To Enable/Disable this function.
Number: Forward to a Speed Dial Number.
Activation: To Enable/Disable this function.
Number: Forward to a Speed Dial Number.
Activation: To Enable/Disable this function.
Number: Forward to a Speed Dial Number.
2 means after 2 rings then forward to the dedicated number.
Date & Time Set the IP Phone Date and Time.
Time Format To set the time as 12-hour or 24-hour clock.
SNTP Setting
SNTP Enabled / Disable SNTP.
Primary SNTP Set Primary SNTP server IP address.
Secondary SNTP Set Secondary SNTP server IP address.
Time Zone Set Time zone.
Sync. Time Set adjustment time period.
5
Page 13

1/29/2008 VoIP Phone Administration Guide
MAG-07010 Rev. C
Volume & Gain
Auto Dial Set Auto Dial time from 1~5 seconds.
Call Waiting Set enable to be informed there is a new incoming call. User can set the function to
Direct Dial Set enable to be able to dial the phone numbers in Phone Book by pressing
Handset Volume Set Handset volume from 0~15 (max.) for you to hear.
Speaker Volume Set Speaker phone volume from 0~15 (max.) for you to hear.
Handset Gain Set Handset Gain from 0~15 (max.) for the other site to hear.
Speaker Gain Set Speaker phone Gain from 0~15 (max.) for the other site to
hear.
Ringer Volume Ringer volume setting from 0~15 (max.). Ringer
General Ringer Ringer tone selection from 1~4.
disable.
“**+position”.
2.3.4 Network
Name Description
WAN Setup
VLAN
IP Type
Set Fixed IP
Set PPPoE
Bridge Set LAN as bridging mode LAN Setup
NAT Set LAN as NAT mode
Primary DNS First DNS address DNS
Secondary DNS Second DNS address
Activation Activate or disable the VLAN.
Fixed IP: self configure the IP address.
DHCP: to get IP address through DHCP.
PPPoE: to get IP address through PPPoE.
IP Address: the IP address of the IP phone.
Subnet Mask: configure subnet mask.
Default Gateway: the gateway address
User Name: user name of PPPoE
Password: password of PPPoE
VID Set VID from 2 to 4094.
Priority Set the priority from 0 to 7.
CFI 0~1
6
Page 14

1/29/2008 VoIP Phone Administration Guide
Status Show WAN, LAN IP address and MAC address.
MAG-07010 Rev. C
2.3.5 SIP Settings
If you want to use keypad to set the SIP setting, you have to go to item 8 Sys. Authority to input the password, or
you can not change the SIP setting.
Name Description
Service domain First/Second/Third
Realm
Codec
Codec Type The codec type includes G.711 uLaw, G.711 aLaw, G.723,
VAD Voice Active Detection Enable/Disable.
Outband DTMF Enable/Disable outband DTMF. RTP Setting
The realms include following information. You can press “1*#”,
“2*#”, and ”3*#” to change among these three SIP realms.
Activation: to Activate or stop the realm.
User name: the SIP’s user name.
Display name: the SIP’s display name.
Register name: the SIP’s registered name.
Register password: the SIP’s password.
Proxy server: the address of SIP proxy.
Domain server: the address of domain server.
Outbound proxy: the address of outbound proxy.
G.729, G.726-16, G.726-24, G.726-32, and G.726-40.
Duplicate RTP
RPort Setting RPort Enabled/Disabled
Hold by RFC Enable/Disable Holding the calls, according to RFC3261.
Status Show the SIP Proxy register status. You can use UP/Down key to check each Realm’s
status.
No duplicate: do not resend the voice packages.
One duplicate: resend voice packages one time.
Two duplicate: resend voice packages two times.
2.3.6 NAT Traversal
If you want to use keypad to set the NAT Traversal settings, you have to go to item 8 Sys. Authority to input the
password, or you can not change the NAT Traversal settings.
7
Page 15

1/29/2008 VoIP Phone Administration Guide
Name Description
STUN Enable/Disable STUN. STUN setting
STUN server The address of STUN server
MAG-07010 Rev. C
2.3.7 Administrator
If you want to use keypad to set the Administrator setting, you have to go to item 8 Sys. Authority to input the
password, or you can not change the Administrator setting.
Name Description
Upgrade System
Set To Default You can restore to the default setting.
Change Pwd. Press ENTER and press a new password to replace the original password with the new
Version This will show the system’s firmware version.
Vendor ID To see the vendor ID of the IP Phone. The vendor ID of SMCDSP-200 is dsp200 and
Watch Dog You can use this to enable Watch Dog function to do the debugging.
Restart You can use this function to restart your IP Phone.
This function must work with the SMC IP-PBX.
Upgrade Now Select to direct connect to IP PBX to check if there is any
upgrade version. If there is a newer version, the IP phone will
upgrade the system automatically.
Schedule State Select to see the current status and scheduling time.
one.
SMCDSP-205 is dsp205.
2.3.8 Sys. Authority
To do the SIP setting, NAT traversal and Administrator from Keypad, you need to input the password first. Default
is “9876”.
8
Page 16

1/29/2008 VoIP Phone Administration Guide
MAG-07010 Rev. C
3 Setup the VoIP Phone via a Web Browser
Default the IP Phone’s Bridge is enabled, WAN port is in DHCP Client Mode. LAN port is the same as WAN.
Connect the IP Phone to DHCP server, and the server will assign an IP address to the phone. Check the IP
address and add the port number “:9999” at the end of the IP address to access the web browser.
Note: When selecting DHCP Client and cannot detecting the IP, the IP Phone will provide a default IP,
192.168.2.25.
Note: It is highly recommended to use Internet Explorer 6.0 for web configurations.
3.1 Login
Please input the username and password into the blank field. The default setting is:
1. For the Administrator, the username is: admin; and the password is: smcadmin. If you use the account login,
you can configure the setting.
2. For a normal user, the username is: user; and the password is: test. If you use the account login, but you
can not configure the SIP setting.
Click Login to move into the VOIP PHONE web based management information page.
Any changes in the Web Management interface except for Phone Book require clicking Submit in that page, and
then go to the Save Change page and click Save. The system will restart, and all the settings can work properly.
Note: The GUI will automatically log out after 5 minutes, if you do not do any action.
3.2 System Information for the IP PHONE
When you login to the web page, you can see the current system information of the IP phone, like Firmware
Version and Vendor ID in this page.
Also you can see the function lists in the left side. You can use mouse to click the function you want to set up.
9
Page 17

1/29/2008 VoIP Phone Administration Guide
MAG-07010 Rev. C
3.3 Phone Book
The Phone Book contains Phone Book and Speed Dial Settings. You can setup the Phone Book and Speed Dial
numbers. The Phone Book can store 140 phone numbers and the Speed Dial can store 8 phone numbers. If you
want to use Speed Dial you just dial the speed dial number then press “#”.
3.3.1 Phone Book
In the Phone Book function, you can add/delete the phone number in the phone book list. You can add a
maximum of 140 entries to the phone book.
If you need to add a phone number into the phone book, you need to enter the position, the name, the phone
10
Page 18

1/29/2008 VoIP Phone Administration Guide
number
If you want to delete a phone number, you can select the phone number you want to delete then click Delete
Selected.
If you want to delete all phone numbers, you can click Delete All.
1
and ringer type for the number. When you have finished a new phone number click Add Phone.
MAG-07010 Rev. C
3.3.2 Speed Dial List
In Speed Dial List function, you can add/delete a Speed Dial number. You can input a maximum of 8 entries into
the speed dial list.
If you need to add a phone number into the Speed Dial list, you need to input the position, the name, and the
phone number (by URL type). When you have finished a new phone list, just click Add Phone.
If you want to delete a phone number, you can select the phone number you want to delete then click Delete
Selected.
If you want to delete all phone numbers, you can click Delete All.
3.4 Phone Setting
Phone Setting contains Call Forward, SNTP Settings, Volume Settings, Ringer Settings, DND Settings, Dial Plan
1
The format of th e phone number here can either be phone numbers or SIP URL format. General phone numbers will
work in most cases if VOIP phone is deployed under IP PBX environment. For direct IP dialing, a SIP URL format can be
also used.
11
Page 19

1/29/2008 VoIP Phone Administration Guide
Settings, Call Waiting Settings, Soft-key Setting functions, Hot Line Settings, Alarm Settings and Daylight
Settings.
MAG-07010 Rev. C
3.4.1 Forward Settings
You can setup the phone number you want to forward in this page. There are three type of Forward mode. You
can choose All Forward, Busy Forward, and No Answer Forward by clicking the icon.
3.4.1.1 All Forward
All incoming calls will forward to the number you select. You can input the name and the phone number in the
field accordingly. If you select this function, then all the incoming call will directly forward to the speed dial
number you choose.
3.4.1.2 Busy Forward
If you are on the phone, the new incoming call will forward to the number you select. You can input the name and
the phone number in the URL/Phone No. box.
3.4.1.3 No Answer Forward
If you can not answer the phone, the incoming call will forward to the number you select. You can input the name
and the phone number in the URL/Phone No. box. Also you have to set the No Answer Fwd Tim e Out ringing
time for the system to start to forward the call to the number you select.
When you have finished the settings, click Submit. Go to the Save Change page and click Save to reflect the
changes.
12
Page 20

1/29/2008 VoIP Phone Administration Guide
MAG-07010 Rev. C
3.4.2 SNTP Settings
You can setup the primary and second SNTP Server IP Address, to get the date/time information. Also you can
base it on your location to set the Time Zone, and how long it needs to synchronize again. When you have
finished the settings, click Submit. Go to the Save Change page and click Save to reflect the changes.
3.4.3 Volume Settings
You can setup the Handset Volume, Speaker Volume, Ringer Volume, the Handset Gain, and Speaker Gain.
Handset Volume is to set the volume you hear from the handset.
Speaker Volume is to set the volume you hear from the speaker phone.
Ringer Volume is to set the ringer volume.
Handset Gain is to set the volume send out from the handset.
Speaker Gain is to set the volume send out from the micro phone.
When finished the settings, click Submit. Go to the Save Change page and click Save to reflect the changes.
13
Page 21

1/29/2008 VoIP Phone Administration Guide
MAG-07010 Rev. C
3.4.4 Ringer Settings
You can select the melody for the incoming calls.
Ring Tone By Caller ID Matching Digits: Enter a digit for the number of caller ID digits. If the total digit of the
phone number is larger or equal to the digit, the ringer type hunts for the phone number that matches digits at the
end, and the melody of that phone number will ring. If the total digit of the phone number is smaller than the digit,
it will hunt for the exact match phone number and ring the ringer type of the phone number.
Note: The order of the phone number in the Phone Book page matters the hunting sequential.
General Ringer Type: Select general ring tone for the incoming calls.
When you finished the setting, click Submit. Go to the Save Changes page and click Save to reflect the
changes.
3.4.5 DND Settings
You can setup the DND (Do-not-disturb) Setting to keep the phone silent. You can choose DND Always or DND
Period.
DND Always: All incoming call will be blocked until you disable this feature.
14
Page 22

1/29/2008 VoIP Phone Administration Guide
DND Period: Set a time period and the phone will be blocked during the time period. If the “From” time is larger
than the “To” time, the Block time will from Day 1 to Day 2.
Blacklist Rule: Enter a rule
When you have finished the settings, click Submit. Go to the Save Change page and click Save to reflect the
changes.
2
to block calls that fit the rule.
MAG-07010 Rev. C
3.4.6 Dial Plan Setting
This function is when you input the phone number by the keypad but you don’t need to press “#”. After the time
out period the system will dial directly.
3.4.6.1 Symbol explanation:
Drop Prefix: The default is No for adding the prefix to the dial plan in Replace Rule. Click Yes to delete the
prefix of the dial plan in Replace Rule.
Replace Rule 1~4: Enter rule for matching.
2
For how to configure the rule, please refer to 3.4.6 Dial Plan Setting
x or X 0,1,2,3,4,5,6,7,8,9
+ or
Example:
15
Page 23

1/29/2008 VoIP Phone Administration Guide
Drop Prefix Replace Rule Description
No 002 8613+8662 When the dialed number begins with
“8613” or “8662”, the number will be
added “002” to call out.
No 002 12 When the dialed number begins with
“12”, the number will be added “002” to
call out.
No 002 5xxx When the dialed number begins with “5”,
and has total of four digits, the number
will be add “002” to call out.
Yes 002 003+004+005 When the dialed number begins with
“003”, “004” or “005”, the number will be
dropped “003”, “004” or “005”, and then
add “002” to call out.
MAG-07010 Rev. C
Yes 002 55xxxx When the dialed number begins with “55”
and has total of six digits, the number will
be dropped “55”, and add “002” to call
out.
Dial Now: Type a number or dial pattern. When the dialed number matches the pattern, the phone will directly
send out the number. Note that the first digit cannot set “0”.
Second Dial Tone: Press the entered number to hear the second dial tone.
Auto Dial Time: The default is 5 seconds. Enter a time in sec for auto dial after the time is up.
Use # As Send Key: The default is Yes. Click No to disable send key function, and the dialed number will not
send out until Auto Dial Time is finished.
Use * For IP Dialing: The default is Yes. Click No to see “*” (star) as it is instead of “.” (dot) when pressing * on
the VoIP phone keypad.
Note: The * key represents different characters such as “*” and “.”. The configuration here changes the priority of
the appearance of these characters. If clicking Yes, the “.” Will show first, and “*” second, this is optimal if
IP dialing is often used. If clicking No, then “*” will show first while pressing star key.
When you have finished the settings, click Submit. Go to the Save Change page and click Save to reflect the
changes.
16
Page 24

1/29/2008 VoIP Phone Administration Guide
MAG-07010 Rev. C
3.4.7 Call Waiting Settings
If the user doesn’t want to be informed there is a new incoming call, the user can set the function to off. When
you have finished the settings, click Submit. Go to the Save Change page and click Save to reflect the changes.
3.4.8 Soft-key Settings
The SMC IP Phone supports soft-key settings for voice messages. You can press SPEAKER, and then VOICE
MSG on the IP phone to dial out the entered number in order to get into the voice mail service.
Voice mail key: enter a serial of number for listening to the voice messages.
When you have finished the settings, click Submit. Go to the Save Change page and click Save to reflect the
changes.
Direct Phone Book Dial: Click On to be able to dial the phone numbers in Phone Book by pressing
“**+position”.
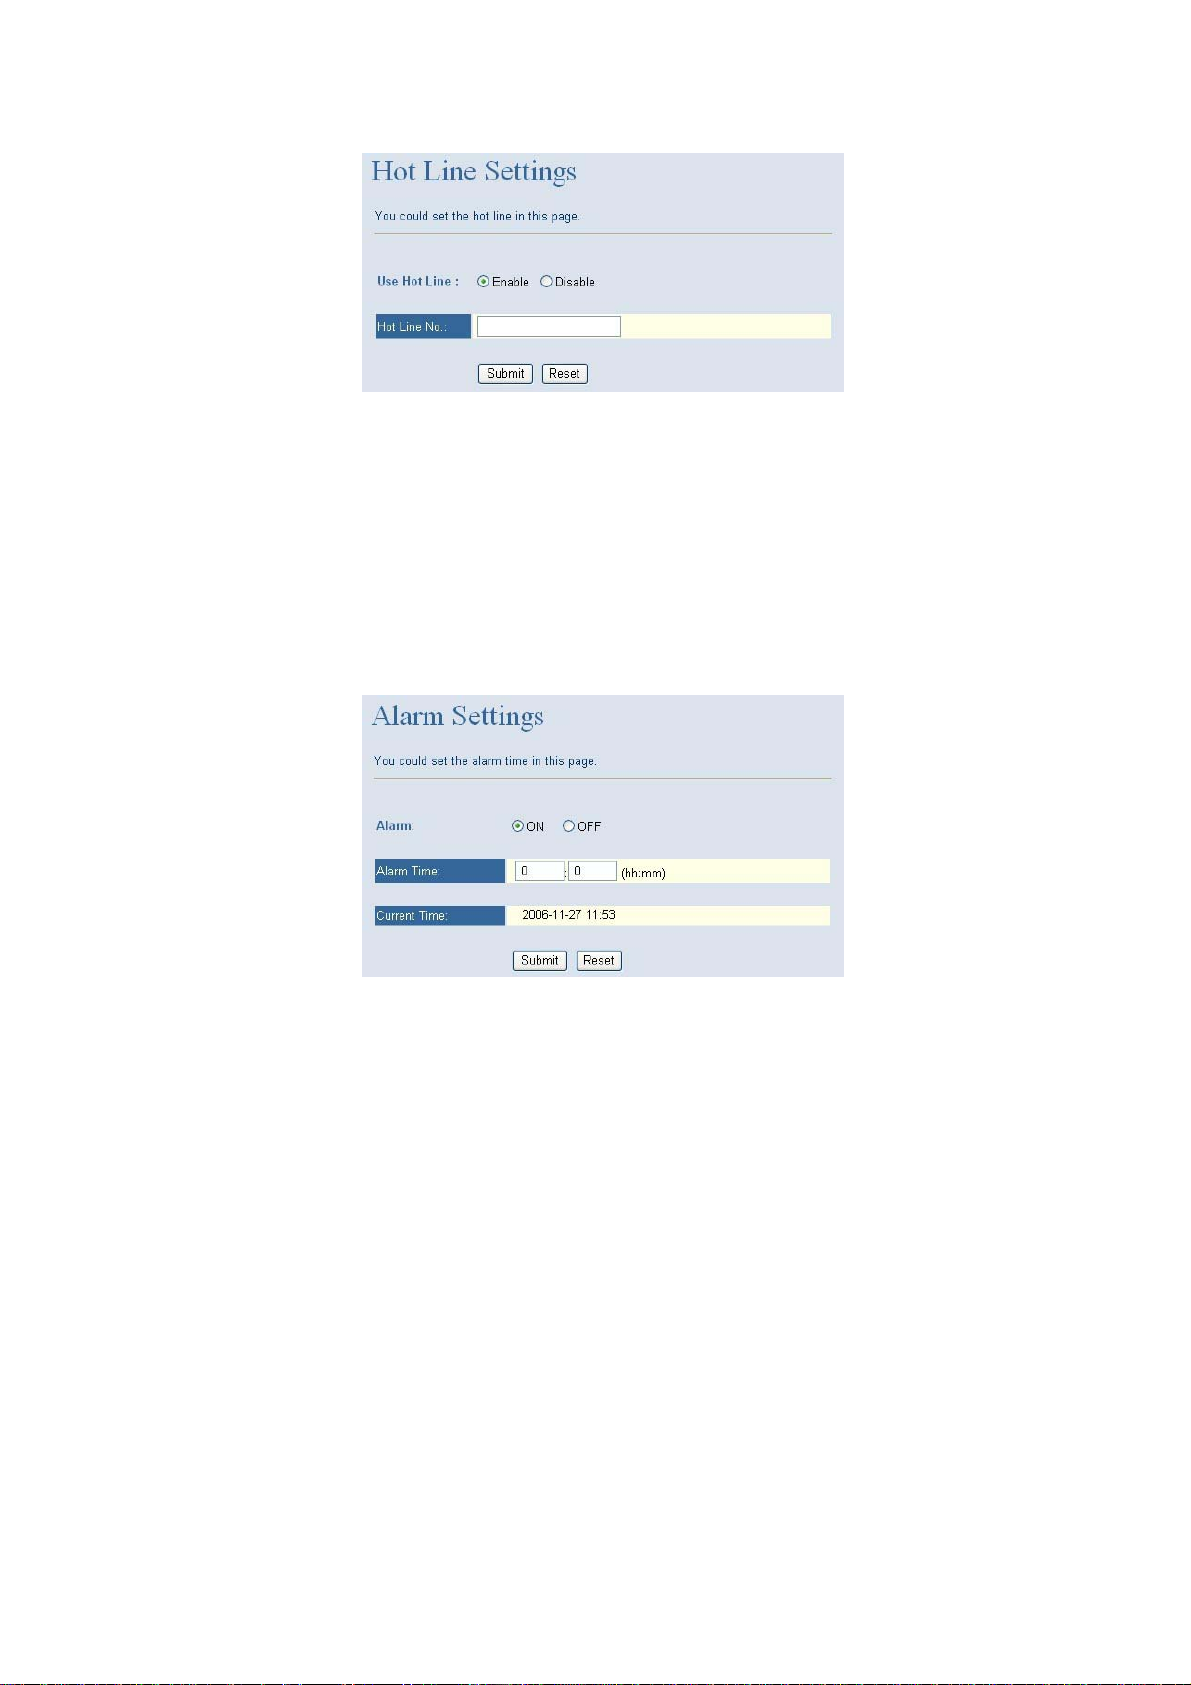
3.4.9 Hot Line Settings
Hot line setting is a special line for the IP Phone. When you enable the function, the phone will directly dial out
the number once the phone is picked up.
17
Page 25
1/29/2008 VoIP Phone Administration Guide
Hot Line Number: Enter a phone number as a special line.
When you have finished the settings, click Submit. Go to the Save Change page and click Save to reflect the
changes.
MAG-07010 Rev. C
3.4.10 Alarm Settings
Alarm Settings is to inform a user at a certain time. Click ON and then enter the time for ringing.
Alarm Time: enter a time for reminding.
Current Time: display the current time of the IP phone.
When you have finished the settings, click Submit. Go to the Save Change page and click Save to reflect the
changes.
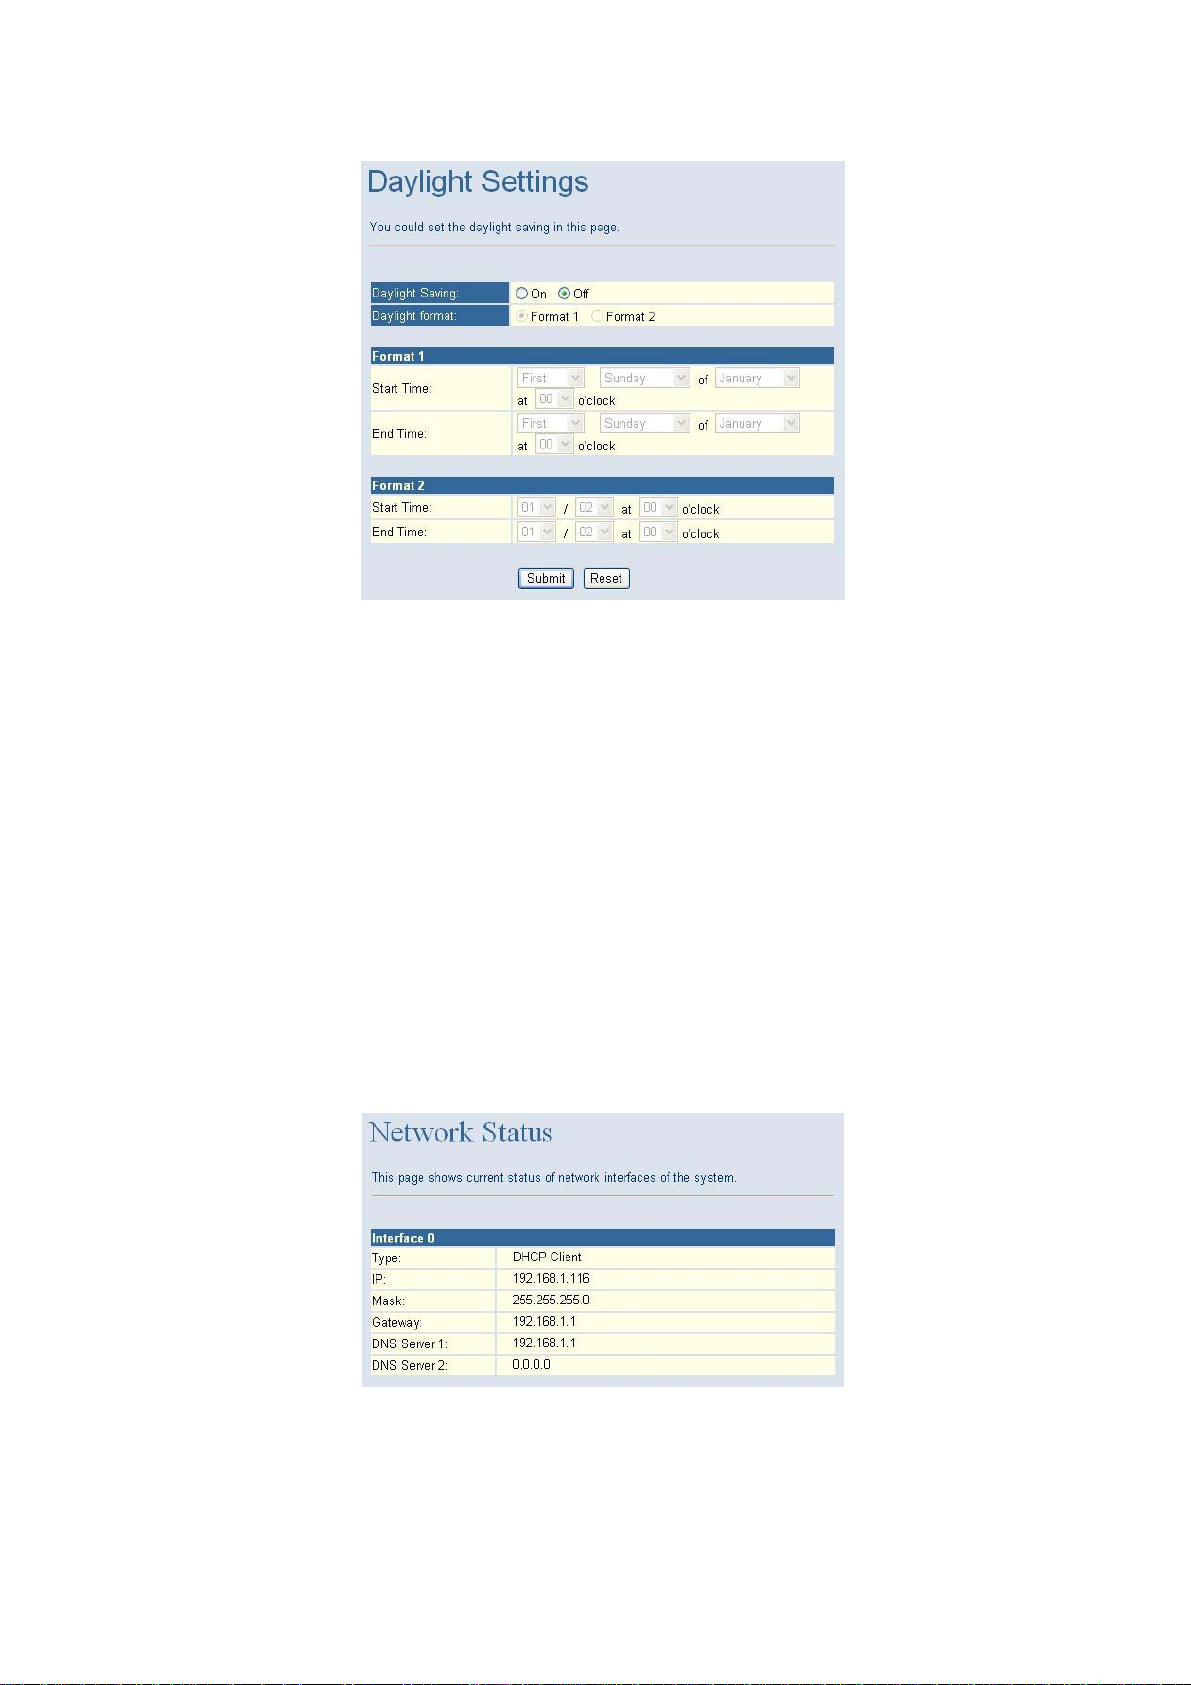
3.4.11 Daylight Settings
If the country has daylight saving time, you can configure the time in this page.
18
Page 26
1/29/2008 VoIP Phone Administration Guide
Click On, select Format 1 or Format 2, and configure the start/end time to enable daylight saving at the
configured period of time.
MAG-07010 Rev. C
When you finished the setting, click Submit. Go to the Save Changes page and click Save to reflect the
changes.
3.5 Network
In Network, you can check the Network status, configure the WAN Settings, LAN Settings, DDNS settings, VLAN
Settings, DMZ Settings, Virtual Server and PPTP Settings.
3.5.1 Network Status
You can check the current Network settings in this page.
3.5.2 WAN Settings
In this page, you can configure the IP Phone’s WAN port setting. The WAN port is for you to connect to the ADSL
19
Page 27

1/29/2008 VoIP Phone Administration Guide
Router, or Broadband Router. Also, you can use PPPoE to get the WAN IP address from your ISP.
MAG-07010 Rev. C
The default setting is Bridge mode. If you don’t need to use the Bridge mode, you can change to NAT mode.
The WAN port default is DHCP Client mode. You can change the setting to Fixed IP mode, or PPPoE mode.
If you change the WAN port’s setting to Fix IP mode, then you have to make sure the IP address, Net Mask,
Gateway, and DNS setting are suitable in your current network environment.
If you change the WAN port’s setting to PPPoE mode, you have to input a correct username/password to get the
IP address from your Internet Service Provider.
When you have finished the settings, click Submit. Go to the Save Change page and click Save to reflect the
changes.
Note: When selecting DHCP Client and cannot detecting the IP, the IP Phone will provide a default IP,
192.168.2.25.
3.5.3 LAN Settings
In this page, you can configure the IP Phone LAN port’s setting.
20
Page 28

1/29/2008 VoIP Phone Administration Guide
The LAN settings’ default does not effect as Bridge mode is enabled. To configure LAN settings, go to Network
-> WA N Settings, and click NAT under LAN Mode.
MAG-07010 Rev. C
You can connect your PC to the LAN port, set your PC as DHCP Client mode, and then you can get IP address
from the Phone.
When you have finished the settings, click Submit. Go to the Save Change page and click Save to reflect the
changes.
3.5.4 DDNS Settings
You can configure the DDNS setting in this page. You need to have the DDNS account and input the information
properly. You can have a DDNS account with a public IP address then others can call you via the DDNS account.
But now most of the VoIP applications work with a SIP Proxy Server. When you have finished the settings, click
Submit. Go to the Save Change page and click Save to reflect the changes.
21
Page 29

1/29/2008 VoIP Phone Administration Guide
MAG-07010 Rev. C
3.5.5 VLAN Settings
You can set the VLAN setting to set the packets related to the IP Phone.
There are two kind of destination packets will come from the TA’s WAN port, one kind of packets will go to the TA,
and the other will go through the LAN port to the PC.
VLAN Packets: if you enable the first VLAN Packets and set the VID, User Priority, and CFI, all the incoming
packets will check with the IP Address and the VID.
VID: You can follow your service provider or Network settings to set your VID.
User Priority: Defines user priority, giving eight priority levels. IEEE 802.1P defines the operation for these 3
user priority bits. Usually this will be defined by your service provider.
CFI: Canonical Format Indicator is always set to zero for Ethernet switches. CFI is used for compatibility reasons
between Ethernet type networks and Token Ring type networks. If a frame received at an Ethernet port has a CFI
set to 1, then that frame should not be forwarded as it is to an untagged port.
When you enable the first VLAN Packets and set the VID, User Priority, and CFI, all the incoming packets with
22
Page 30

1/29/2008 VoIP Phone Administration Guide
the Phones IP address and the same VID will be accepted by the Phone. If the incoming packets with the
Phones IP address but the different VID then the packets will be discard by the Phone. The Other incoming
packets with different IP address will go through the LAN port to the PC.
When you have finished the settings, click Submit. Go to the Save Change page and click Save to reflect the
changes.
MAG-07010 Rev. C
3.5.6 DMZ Setting
You can enable the DMZ Setting of the IP phone. Click On, and enter an IP address of the PC in DMZ Host IP.
When you have finished the settings, click Submit. Go to the Save Change page and click Save to reflect the
changes.
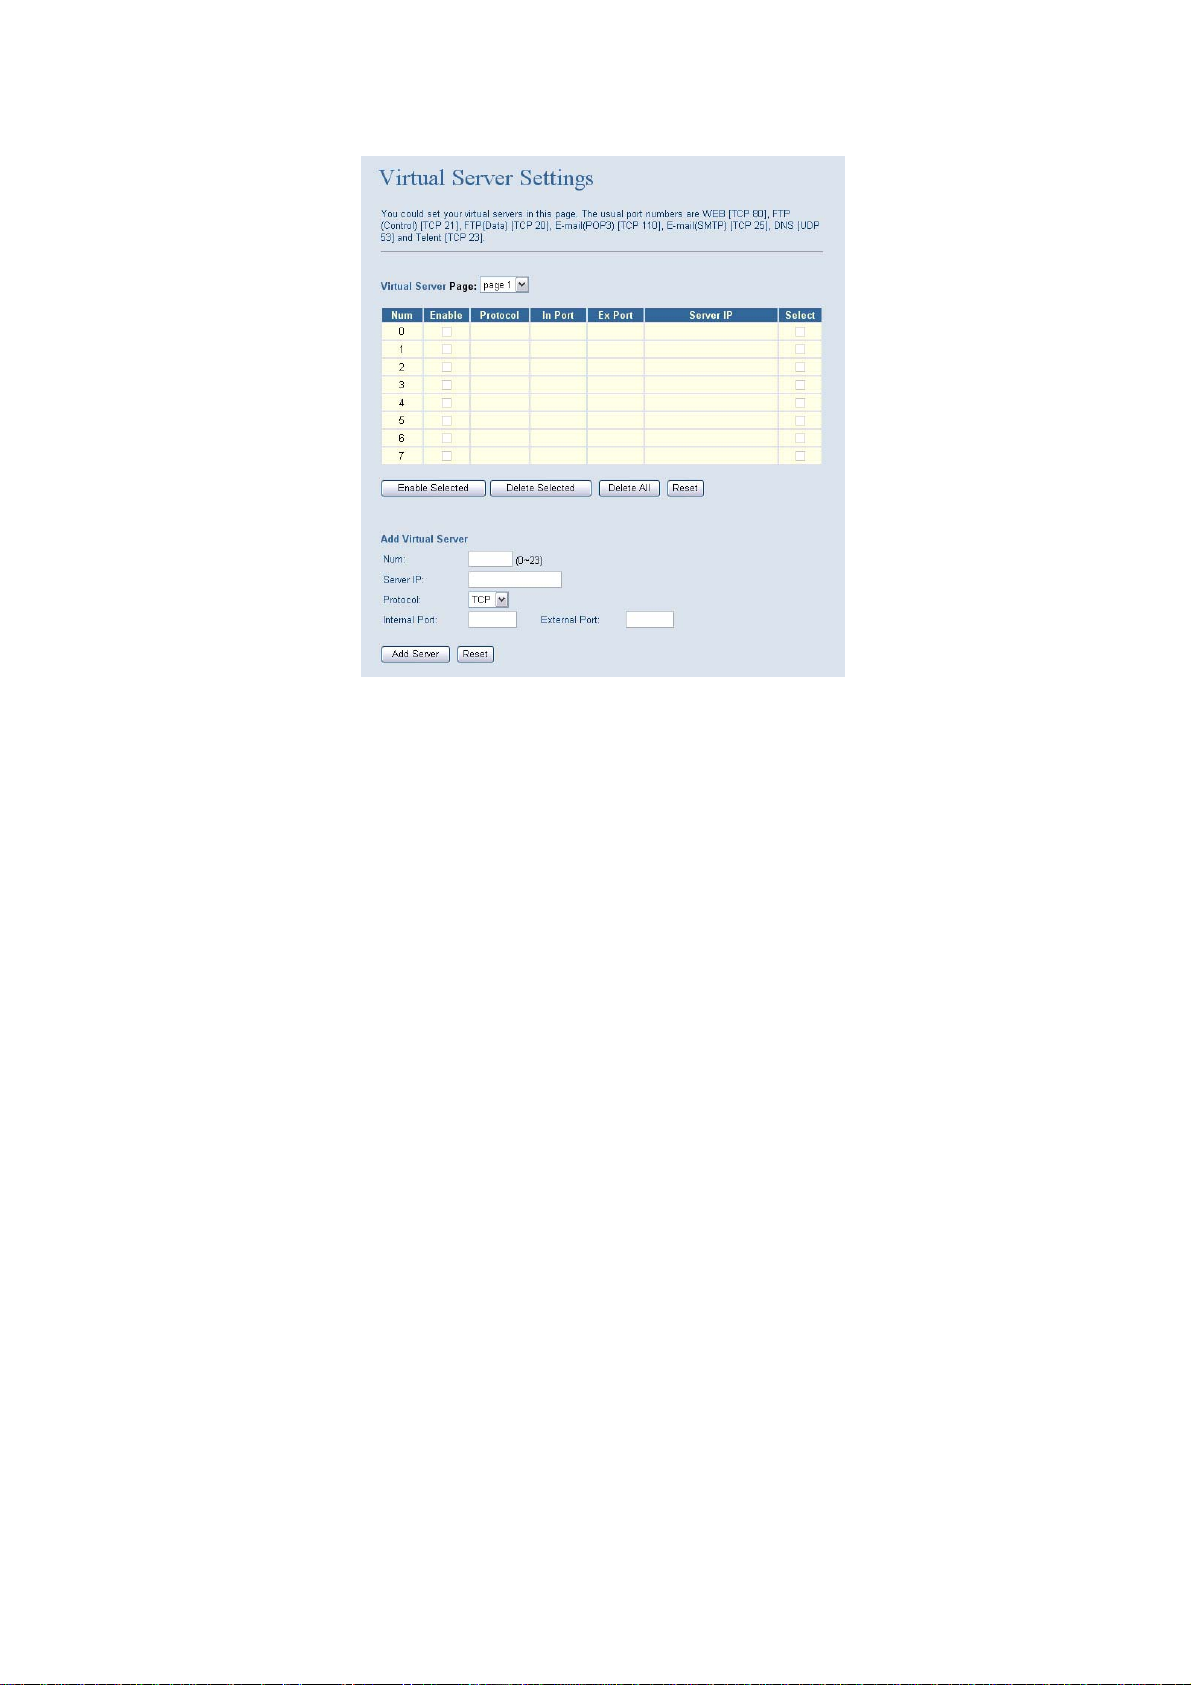
3.5.7 Virtual Server
The SMC IP Phone supports configuring a virtual server function.
23
Page 31
1/29/2008 VoIP Phone Administration Guide
MAG-07010 Rev. C
If you need to add a virtual server into the Virtual Server list, you need to enter the num, server IP,
internal/external port, and select a protocol. When you have finished a new phone list, just click Add Server.
If you want to enable a virtual server, you can select the virtual server you want to enable, and then click Enable
Selected.
If you want to delete a virtual server, you can select the virtual server you want to delete, and then click Delete
Selected.
If you want to delete all virtual servers, you can click Delete All.
When you have finished the settings, click Submit. Go to the Save Change page and click Save to reflect the
changes.
3.5.8 PPTP Settings
PPTP is one kind of VPN. Remote users can use local telephone number and network through ISP. Click On and
type the server, user name and password of PPTP to enable the function. When you finished the settings, click
Submit. Go to the Save Changes page and click Save to reflect the changes.
24
Page 32

1/29/2008 VoIP Phone Administration Guide
Note: You need to configure LAN Mode as NAT in WAN Settings page to enable this function.
MAG-07010 Rev. C
3.6 SIP Settings
In SIP Settings, you can setup the Service Domain, Port Settings, Codec Settings, Codec ID Settings, RTP
Setting, RPort Setting and Other Settings. If the VoIP service is provided by an ISP, you need to setup the related
information correctly then you can register to the SIP Proxy Server correctly.
3.6.1 Service Domain
In the Service Domain Function, you need to input the account and the related information in this page. Please
refer to your ISP provider or Network Administrator. You can register three SIP accounts in the VoIP Phone.
25
Page 33

1/29/2008 VoIP Phone Administration Guide
MAG-07010 Rev. C
First you need click On in Active to enable the Service Domain, and you can input the following items:
Display Name: you can input the name you want to display.
User Name: you need to input the User Name you get from your ISP or Administrator.
Register Name: you need to input the Register Name get from your ISP or Administrator.
Register Password: you need to input the Register Password get from your ISP or Administrator.
Domain Server: you need to input the Domain Server get from your ISP or Administrator.
Note: The default SIP port of the Domain Server is 5060. If you want to change the SIP port, specify the port
here.
Example: 192.168.1.100 (Assume Domain server SIP port = 5060)
192.168.1.100:5678 (change the SIP port to 5678)
26
Page 34

1/29/2008 VoIP Phone Administration Guide
Proxy Server: you need to input the Proxy Server get from your ISP or Administrator.
Outbound Proxy: you need to input the Outbound Proxy get from your ISP or Administrator. If your ISP does not
provide the information, then you can skip this item.
Subscribe for MWI: you can click ON for the IP phone to ask for MWI periodically.
You can see the Register Status in the Status item. If the item shows “Registered”, then your VoIP Phone is
registered to the ISP or Network, you can make a phone call directly.
If you have more than one SIP account, you can follow the steps to register to the other ISP.
When you have finished the settings, click Submit. Go to the Save Change page and click Save to reflect the
changes.
MAG-07010 Rev. C
3.6.2 Port Settings
You can setup the SIP and RTP port numbers in this page. Each ISP provider will have different SIP/RTP port
settings. When you have finished the settings, click Submit. Go to the Save Change page and click Save to
reflect the changes.
3.6.3 Codec Settings
You can setup the Codec priority, RTP packet length, and VAD function in this page. You need to follow the ISP
or Administrator suggestions to setup these items. When you have finished the settings, click Submit. Go to the
Save Change page and click Save to reflect the changes.
27
Page 35

1/29/2008 VoIP Phone Administration Guide
MAG-07010 Rev. C
3.6.4 Codec ID Settings
You can set the Codec ID to meet the other device’s requirement. When you have finished the settings, click
Submit. Go to the Save Change page and click Save to reflect the changes.
3.6.5 DTMF Settings
You can setup the RFC2833 Out-Band DTMF, Inband DTMF and Send DTMF SIP Info in this page. To change
this setting, please follow your ISP or Administrator information. When you have finished the settings, click
Submit. Go to the Save Change page and click Save to reflect the changes.
28
Page 36

1/29/2008 VoIP Phone Administration Guide
MAG-07010 Rev. C
3.6.6 RPort Function
You can setup the RPort On (Enable/Off (Disable) in this page. To change this setting, please follow your ISP
information. When you have finished the settings, click Submit. Go to the Save Change page and click Save to
reflect the changes.
3.6.7 Other Settings
You can setup the Hold by RFC, Voice/SIP QoS and SIP Expire Time in this page. To change these settings
please follow your ISP information. The QoS setting is to set the voice packets’ priority. The Voice QoS is to set
the priority of RTP packets and SIP QoS field is for SIP signaling message priority. If you set the value higher
than 0, then the voice packets will get the higher priority to the Internet. Note that the QoS function still needs to
cooperate with the other Internet devices you connect to. When you have finished the settings, click Submit. Go
to the Save Change page and click Save to reflect the changes.
29
Page 37

1/29/2008 VoIP Phone Administration Guide
MAG-07010 Rev. C
3.7 NAT Trans
In NAT Trans, you can setup the STUN3. These functions can help your VoIP Phone work properly behind a NAT
device.
STUN Setting: you can setup the STUN Enable/Disable and STUN Server IP address in this page. This function
can help your VoIP Phone working properly behind NAT. To change these settings please following your ISP
information. When you have finished the settings, click Submit. Go to the Save Change page and click Save to
reflect the changes.
3.8 Others
In Others, you can setup MAC Clone Setting, Tones Settings and Advanced Settings.
3.8.1 MAC Clone Setting
When connecting to ISP via PPPoE, the MAC Clone function can copy the PC’s MAC address to IP.
Method: you can manually entered a MAC address or let the IP phone automatically detect the PC’s MAC.
3
STUN (Simple Traversal of UDP (User Datagram Protocol) through NATs (Network Address Tr anslators) is a
network protocol allowing a client behind a NAT (or multiple NATs) to find out its public address, the type of NAT it is
behind and the internet side port associated by the NAT with a particular local port. This information is used to set up UDP
communication between two hosts that are both behi n d NA T rout ers. The protocol is defined in RFC 3489.
30
Page 38

1/29/2008 VoIP Phone Administration Guide
MAC Address: When you choose Manual, enter a MAC address for the WAN port.
When you have finished the settings, click Submit. Go to the Save Change page and click Save to reflect the
changes.
MAG-07010 Rev. C
3.8.2 Tones Settings
Tones Settings function let’s you configure the tones of various sounds.
When you have finished the settings, click Submit. Go to the Save Change page and click Save to reflect the
changes.
3.8.3 Advanced Settings
You can configure some more advanced settings such as ICMP Not Echo, Send Anonymous CID, Send Flash
Event, PPPoE Retry Period, System Log Server and System Log Type in this page.
31
Page 39

1/29/2008 VoIP Phone Administration Guide
ICMP Not Echo: setup the ICMP echo Enable/Disable. This function can disable echo when someone pings this
device, it can avoid a hacker trying to attack the device.
Send Anonymous CID: click Yes for the IP phone not to send the phones caller ID out.
Send Flash Event: click DTMF EVENT or SIP INFO for the flash event.
PPPoE Retry Period: Type the time in second for PPPoE to redial, if connection is failed.
System Log Server: Type a server’s IP address for saving system log. Syslog is a standard for forwarding log
messages in an IP network and is typically used for management and debugging. It is supported by wide variety
of devices and receivers across multiple platform. For technical details, refer to RFC3164.
System Log Type: Select types of log for saving. The phone offers different debugging levels, each levels
contains different sets of debugging messages to send.
When you have finished the settings, click Submit. Go to the Save Change page and click Save to reflect the
changes.
MAG-07010 Rev. C
3.9 System Auth
In System Authority, you can change password of the current user.
3.10 Save Changes
In Save Change, you can save the changes you have done. If you want to use new settings in the VoIP Phone,
you have to click Save. After you click Save, the VoIP Phone will automatically restart and the new settings will
take effect.
32
Page 40

1/29/2008 VoIP Phone Administration Guide
MAG-07010 Rev. C
3.11 Update
In Update, you can update the VoIP Phone’s firmware to the new one or perform a factory reset to reset the VoIP
Phone back to default settings.
3.11.1 Update Firmware
In New Firmware function you can update new firmware via HTTP. You can upgrade the firmware from your local
PC or TFTP.
Update from Local PC:
Click Browse at the right the File Location to select a firmware or you can type the correct path and the
filename in File Location blank.
Select the correct file you want to download to the VoIP Phone, and then click Update.
Update from TFTP:
Enter the address of the TFTP server, and then click Update.
Note: Do not change the firmware file name, otherwise the system will reject it.
Note: For TFTP server must contain updatelist.dat which reveals the intended update filename.
3.11.2 Auto Update Settings
SMC IP Phones provide an automatic update function. Once enabled, the phone will check the updates at the
time in order to have the latest version of firmware. Note that the function must be in DHCP Client mode.
33
Page 41

1/29/2008 VoIP Phone Administration Guide
Note: Please check if the IP PBX supports the function.
Scheduling Auto Update: click Yes to enable the function.
Scheduling (Date): enter a duration in days for the phone to check the firmware.
Scheduling (Time): select a period of time for updates.
MAG-07010 Rev. C
Immediate Update: When the IP phone detects there is newer version of firmware, you can select either to send
out a notification only or directly update to the newer version.
3.11.3 Restore Default Settings
In Default Settings, you can restore the VoIP Phone to factory default in this page. You can just click Restore,
and the VoIP Phone will restore to default and automatically restart again.
3.12 Reboot
The Reboot function is to restart the VoIP Phone. If you want to restart the VoIP Phone, you can just click Reboot,
and then the VoIP Phone will restart automatically.
34
Page 42

1/29/2008 VoIP Phone Administration Guide
MAG-07010 Rev. C
4 Automatic Client Configurations with SMC IP PBX
Auto Client Configuration (ACC) function can be used to download the original configurations stored in the SMC
IP-PBX. This is very useful for the administrator who needs to setup large amounts of VoIP phones. The
administrator can set a new user account in the IP PBX web page. Once the VoIP phone is connected to the IP
PBX, it automatically downloads a predefined configuration setting from SMC IP-PBX. ACC function is enabled
in the IP Phone default settings. The vendor ID of SMCDSP-200 is dsp200 and SMCDSP-205 is dsp205.
35
Page 43

1/29/2008 VoIP Phone Administration Guide
5 Appendix: Specifications
MAG-07010 Rev. C
Network Protocol
․ SIP v1 (RFC2543), v2 (RFC3261)
․ IP/TCP/UDP/RTP/RTCP
․ IP/ICMP/ARP/RARP/SNTP
․ FTP/ DNS/ TFTP/ DHCP/ PPPoE Client
․ HTTP /NAT/ DHCP server
Tone
․ Ring Tone
․ Ring Back Tone
․ Dial Tone
․ Busy Tone
․ Programming Tone
Phone Functions
․ Volume Adjustment
․ Speed Dial
․ Phone Book
․ Flash
․ CNG: Comfortable noise generator
․ LEC: Line echo canceller
․ Packet Loss Compensation
․ Adaptive Jitter Buffer Security
Security
․ HTTP 1.1 basic /digest authentication for web
setup
․ MD5 for SIP authentication (RFC 2069/RFC
2617)
Qos
․ IEEE 802.1q VLAN
․ ToS field
Call Function
․ Call Holding
․ Call Waiting
․ Call Forwarding
․ Caller Transferring
․ Speaker Phone
․ Call History
․ Caller ID
․ Voice Message / Incoming Call Indicator
Codec
․ G.711: 64k bit/s (PCM)
․ G.723: 6.3k / 5.3k bit/s
․ G.726: 16k / 24k/ 32k/ 40k bit/s (ADPCM)
․ G.729A: 8k bit/s (CS-ACELP)
․ G.729B: adds VAD & CNG to G.729
IP Assignment
․ Static IP
․ DHCP
․ PPPoE
SIP Server
․ Registrar Server (three SIP account)
Voice Quality
․ Call Blocking
․ Call Redial
․ Three-way conference
NA T Transversal
․ STUN
․ Outbound Proxy
Configuration
․ Web browser
․ TFTP
․ Keypad
DTMF Function
․ In-band DTMF
․ Out-of-band DTMF
․ SIP information
Firmware Upgrade
․ TFTP
․ HTTP
․ VAD: Voice activity detection
36
Page 44

TECHNICAL SUPPORT
From U.S.A. and Canada (24 hours a day, 7 days a week)
Phn: 800-SMC-4-YOU / 949-679-8000
Fax: 949-502-3400
ENGLISH
Technical Support information available at www.smc.com
FRENCH
Informations Support Technique sur www.smc.com
DEUTSCH
Technischer Support und weitere Information unter www.smc.com
SPANISH
En www.smc.com Ud. podrá encontrar la información relativa a
servicios de soporte técnico
DUTCH
Technische ondersteuningsinformatie beschikbaar op www.smc.com
PORTUGUES
Informações sobre Suporte Técnico em www.smc.com
SWEDISH
Information om Teknisk Support fi nns tillgängligt på www.smc.com
SMCDSP200 /
SMCDSP205
INTERNET
E-mail address: techsupport@smc.com
Driver updates
http://www.smc.com/index.cfm?action=tech_support_drivers_downloads
World Wide Web
http://www.smc.com/
20 Mason • Irvine, CA 92618, US • Tel: 949-679-8000 • WWW.SMC.COM
 Loading...