


Copyright
Information furnished by SMC Networks, Inc. (SMC) is believed to be accurate and
reliable. However, no responsibility is assumed by SMC for its use, nor for any
infringements of patents or other rights of third parties which may result from its use. No
license is granted by implication or otherwise under any patent or patent rights of SMC.
SMC reserves the right to change specifications at any time without notice.
Copyright © 2004 by
SMC Networks, Inc.
38 Tesla
Irvine, CA 92618
All rights reserved.
Trademarks:
SMC is a registered trademark; and Barricade is a trademark of SMC Networks, Inc.
Other product and company names are trademarks or registered trademarks of their
respective holders.

COMPLIANCES
Federal Communication Commission Interference Statement
This equipment has been tested and found to comply with the limits for a Class B digital
device, pursuant to Part 15 of the FCC Rules. These limits are designed to provide
reasonable protection against harmful interference in a residential installation. This
equipment generates, uses and can radiate radio frequency energy and, if not installed
and used in accordance with the instructions, may cause harmful interference to radio
communications. However, there is no guarantee that interference will not occur in a
particular installation. If this equipment does cause harmful interference to radio or
television reception, which can be determined by turning the equipment off and on, the
user is encouraged to try to correct the interference by one of the following measures:
• Reorient or relocate the receiving antenna
• Increase the separation between the equipment and receiver
• Connect the equipment into an outlet on a circuit different from that to which the
receiver is connected
• Consult the dealer or an experienced radio/TV technician for help
FCC Caution: Any changes or modifications not expressly approved by the party
responsible for compliance could void the user's authority to operate this equipment. This
device complies with Part 15 of the FCC Rules. Operation is subject to the following two
conditions: (1) This device may not cause harmful interference, and (2) this device must
accept any interference received, including interference that may cause undesired
operation.
IMPORTANT NOTE:
FCC Radiation Exposure Statement
This equipment complies with FCC radiation exposure limits set forth for an uncontrolled
environment. This equipment should be installed and operated with a minimum distance
of 20 centimeters (8 inches) between the radiator and your body. This transmitter must
not be co-located or operating in conjunction with any other antenna or transmitter.
Wireless 2.4 GHz Band Statements:
As the SMC-BT10 Wireless Bluetooth USB Adapter can operate in the 2400-2483 MHz
frequency band it is limited by the FCC, Industry Canada and some other countries to
indoor use only so as to reduce the potential for harmful interference to co-channel
Mobile Satellite systems.
The term “IC:” before the radio certification number only signifies that Industry Canada
technical specifications were met.
Industry Canada – Class B
This digital apparatus does not exceed the Class B limits for radio noise emissions from
digital apparatus as set out in the interference-causing equipment standard entitled
“Digital Apparatus,” ICES-003 of Industry Canada.
Cet appareil numérique respecte les limites de bruits radioélectriques applicables aux
appareils numériques de Classe B prescrites dans la norme sur le matérial brouilleur:
“Appareils Numériques,” NMB-003 édictée par l’Industrie.

EC Declaration of Conformity
This device complies with the essential requirements of the R&TTE Directive 1999/5/EC.
The following references have been applied in order to prove presumption of compliance
with the R&TTE Directive 1999/5/EC:
- EN 60950 (2000)
Safety of Information Technology Equipment.
- Council recommendation 1999/519/EC of 12 July 1999, limitations of exposure of the
general public to electromagnetic fields (0 Hz to 300 GHz).
- EN 300 328-1 (2001-12), EN 300 328-2 (2001-12)
- Technical requirements for 2.4 GHz radio equipment.
- EN 301 489-1 (2000-08), EN 301 489-17 (2000-09)
EMC requirements for radio equipment.
Council recommendation 1999/519/EC of 12 July 1999, limitations of exposure of the
general public to electromagnetic fields (0 Hz to 300 GHz)
English Hereby, SMC Networks, declares that this Radio LAN device is in
compliance with the essential requirements and other relevant
provisions of Directive 1999/5/EC. The official EC-Declaration of
Conformity can be found under the corresponding product section on
the web http://www.smc.com
Dutch Hierbij verklaart SMC Networks dat het toestel Radio LAN device in
overeenstemming is met de essentiële eisen en de andere relevante
bepalingen van richtlijn 1999/5/EG. Het officiële ECgelijkvormigheidattest kan men vinden op de internetsite
http://www.smc.com
French Par la présente SMC Networks déclare que l'appareil Radio LAN device
est conforme aux exigences essentielles et aux autres dispositions
pertinentes de la directive 1999/5/CE. La déclaration de conformité
officielle peut être trouvée sur notre site internet
http://www.smc.com
German Hiermit erklärt SMC Networks, dass sich dieses Wireless LAN Gerät in
Übereinstimmung mit den grundlegenden Anforderungen und den
anderen relevanten Vorschriften der Richtlinie 1999/5/EG befindet.
Die offizielle EC-Declaration of Conformity finden Sie im Internet
unter http://www.smc.com
Produktkategorie.
onder de betrokken productcategorie.
dans la rubrique Produits.
.
unter der entsprechenden
Spanish Por medio de la presente SMC Networks declara que el Radio LAN
device cumple con los requisitos esenciales y cualesquiera otras
disposiciones aplicables o exigibles de la Directiva 1999/5/CE. The
official EC-Declaration of Conformity can be found under the
corresponding product section on the web http://www.smc.com
.

Countries of Operation & Conditions of Use in EC/ EFTA member states
English This device is a 2.4 GHz wireless LAN transceiver, intended for indoor
home and office use in all notified EC and EFTA member states. In
accordance with article 6.4 of the R&TTE Directive 1999/5/EC the
following EC/ EFTA member states have been notified:
Austria, Belgium, Denmark, Finland, France, Germany, Italy,
Luxembourg, Netherlands, Norway, Spain, Sweden, Switzerland,
United Kingdom, Portugal, Greece, Ireland, Iceland
Requirements for outdoor operation, like license requirements and
allowed channels of operation apply in some countries. Please contact
your local regulation authority or SMC Networks for details on current
restrictions for outdoor use.
Dutch Dit toestel is een 2.4 Ghz draadloze Lan transceiver, bestemd voor
gebruik binnen huis en kantoor in alle geïnformeerde lidstaten van de
EC en de EFTA.
In overeenstemming met artikel 6.4 van de R&T TE Directive
1999/5/EC zijn de volgende EC/EFTA lidstaten verwittigd:
België, Denemarken, Duitsland, Finland, Frankrijk,Griekenland,
Ierland, IJsland, Italië, Luxemburg, Nederland,
Noorwegen,Oostenrijk, Portugal, Spanje , Verenigd Koninkrijk,
Zweden, Zwitserland.
Benodigdheden voor gebruik buiten, zoals gebruiksvergunningen en
toegelaten werkkanalen zijn van toepassing in sommige landen.
Gelieve uw lokale instantie of SMC Networks te contacteren voor
details op huidige beperkingen voor gebruik in buitenlucht.
French Ce produit est un appareil radio LAN transceiver de 2.4 GHz destiné
aux PME et à l’utilisation domestique dans tous les pays certifiés
conformes aux conditions de l’EU et de l’EFTA. En accord avec l’article
6.4 de la R&TTE directive 1999/5/EC, the membres de la EU et de
l’EFTA sont les suivants :
Autriche, Belgique, Danemark, finalnde, France, Allemagne, Italie,
Luxembourg, Pays-Bas, Norvège, Espagne, Suède, Suisse, RoyaumeUni, Portugal, Grèce, Irelande, Icelande.
Des conditions sont appliquées à certains pays pour l’utilisation en
extérieur, tels que des licences spécífiques et des canaux d’opération.
Veuillez contacter votre autorité locale ou SMC Networks pour plus de
détails quant aux restrictions actuelles concernant l’utilisation en
extérieur.
German Dieses Wireless LAN Gerät arbeitet im 2.4 GHz Frequenzband und ist
für den Einsatz im Innenbereich in den benachrichtigten EC/ EFTA
Mitgliedstaaten geeignet. In Übereinstimmung mit Artikel 6.4 der
R&TTE Direktive 1999/5/EC wurden folgende Mitgliedstaaten
benachrichtigt:
Österreich, Belgien, Dänemark, Finland, Frankreich, Deutschland,
Italien, Luxemburg, Niederlande, Norwegen, Spanien, Schweden,
Schweiz, Großbritannien, Portugal, Griechenland, Irland, Island.

Für den Einsatz im Aussenbereich sind in einigen Ländern Lizenzen
erforderlich oder die Anzahl der Kanäle ist eingeschränkt. Bitte
kontaktieren Sie Ihre Regulierungsbehörde oder SMC Networks für die
aktuellen Einschränkungen beim Einsatz im Aussenbereich.
Spanish Este aparato es un transmisor inalámbrico de 2.4 GHz, previsto para
el uso interior en domicilios y Pymes en todos los Estados de la CE y
la EFTA notificados. De acuerdo con el artículo 6.4 de la Directiva
R&TTE 1999/5/EC los siguientes estados de la CE y de la EFTA han
sido notificados:
Austria, Bélgica, Dinamarca, Finlandia, Francia, Alemania, Italia,
Luxemburgo, Países Bajos, Noruega, España, Suecia, Suiza, Reino
Unido, Portugal, Grecia, Irlanda, Islandia.
Los requisitos para su uso exterior, como requerimiento de licencia y
canales de operación permitidos se aplican en algunos países. Por
favor contacte la autoridad reguladora local o SMC Networks para
más detalles en relación con las restricciones actuales para uso
exterior.
SMC Contact for this device in Europe is:
SMC Networks Europe,
Edificio Conata II,
Calle Fructuos Gelabert 6-8, 2, 4ª,
08970 – Sant Joan Despi,
Barcelona, Spain
Wichtige Sicherheitshinweise (Germany)
1. Bitte lesen Sie diese Hinweise sorgfältig durch.
2. Heben Sie diese Anleitung für den späteren Gebrauch auf.
3. Vor jedem Reinigen ist das Gerät vom Stromnetz zu trennen. Verwenden Sie keine
Flüssigoder Aerosolreiniger. Am besten eignet sich ein angefeuchtetes Tuch zur
Reinigung.
4. Die Netzanschlu ßsteckdose soll nahe dem Gerät angebracht und leicht zugänglich sein.
5. Das Gerät ist vor Feuchtigkeit zu schützen.
6. Bei der Aufstellung des Gerätes ist auf sicheren Stand zu achten. Ein Kippen oder
Fallen könnte Beschädigungen hervorrufen.
7. Die Belüftungsöffnungen dienen der Luftzirkulation, die das Gerät vor Überhitzung
schützt. Sorgen Sie dafür, daß diese Öffnungen nicht abgedeckt werden.
8. Beachten Sie beim Anschluß an das Stromnetz die Anschlußwerte.
9. Verlegen Sie die Netzanschlußleitung so, daß niemand darüber fallen kann. Es sollte
auch nichts auf der Leitung abgestellt werden.
10. Alle Hinweise und Warnungen, die sich am Gerät befinden, sind zu beachten.
11. Wird das Gerät über einen längeren Zeitraum nicht benutzt, sollten Sie es vom
Stromnetz trennen. Somit wird im Falle einer Überspannung eine Beschädigung
vermieden.
12.Durch die Lüftungsöffnungen dürfen niemals Gegenstände oder Flüssigkeiten in das
Gerät gelangen. Dies könnte einen Brand bzw. elektrischen Schlag auslösen.

13. Öffnen sie niemals das Gerät. Das Gerät darf aus Gründen der elektrischen Sicherheit
nur von authorisiertem Servicepersonal geöffnet werden.

Contents
1
BlueSoleil™ Introduction......................................................................... 10
2 BlueSoleil™ Graphical User Interface ...................................................... 11
2.1 Start BlueSoleil™ .................................................................................... 11
2.2 Exit BlueSoleil™ ...................................................................................... 11
2.3 BlueSoleil™ Main Window ......................................................................... 12
2.3.1 My Device Icon .................................................................................................................................12
2.3.2 Remote Bluetooth Device Icons ........................................................................................................13
2.3.3 Bluetooth Service Icons ....................................................................................................................14
2.4 Service Window ...................................................................................... 15
2.4.1 My Service Icons ...............................................................................................................................17
3 Personal Area Networking....................................................................... 19
3.1 Introduction ........................................................................................... 19
3.2 Connect Two Computers .......................................................................... 19
3.3 Computer with PAN acting as a TCP/IP Gateway .......................................... 25
3.3.1 Connect to the Internet using ICS.....................................................................................................26
3.3.2 Settings on the PAN server ...............................................................................................................27
3.4 PAN Configuration ................................................................................... 29
3.4.1 My PAN Service ................................................................................................................................29
4 Dial-Up Networking................................................................................. 30
4.1 Introduction ........................................................................................... 30
4.2 Connect to a Dial-up Gateway from a Computer .......................................... 30
5 Bluetooth Serial Port............................................................................... 34
5.1 Introduction ........................................................................................... 34
5.2 Connect Two Computers .......................................................................... 34
5.3 Use SPP to Print a Document .................................................................... 37
5.4 SPP Configuration.................................................................................... 39
5.4.1 My SPP Service .................................................................................................................................39
6 Bluetooth File Transfer............................................................................ 40
6.1 Introduction ........................................................................................... 40
6.2 Transfer files to/from a Computer.............................................................. 40
6.3 FTP Configuration.................................................................................... 46
6.3.1 My FTP Service.................................................................................................................................46
7 LAN Access ............................................................................................. 47
7.1 Introduction ........................................................................................... 47
7.2 Access a Local Area Network (LAN)............................................................ 47
8 Object Push ............................................................................................ 53
8.1 Introduction ........................................................................................... 53
8.2 Transfer Objects from a Computer to a Bluetooth Cellular Phone .................... 53
8.3 Transfer Objects from a Bluetooth Cellular Phone to a Computer .................... 58
8.4 Transfer Objects between Two Computers .................................................. 62
8.5 Configure OPP Service ............................................................................. 63
8.5.1 My OPP Service ................................................................................................................................63
9 Synchronization ...................................................................................... 64
9.1 Introduction ........................................................................................... 64

9.2 Exchange PIM Data with a Cellular Phone.................................................... 64
9.3 Set up SYNC Connection between Two Computers........................................ 66
9.4 Synchronization Configuration ................................................................... 70
9.4.1 My Synchronization Service............................................................................................................. 70
10 Hardcopy Cable Replacement ...............................................................71
10.1 Introduction......................................................................................... 71
10.2 Print a Document Using a Bluetooth Printer .............................................. 71
11 Human Interface Device .......................................................................74
11.1 Introduction......................................................................................... 74
11.2 Connect a Computer to a Bluetooth Mouse ............................................... 74
11.3 Connect a Computer to a Bluetooth Keyboard ........................................... 77
12 Connection Shortcut .............................................................................80
12.1 Introduction......................................................................................... 80
12.2 How to use Connection Shortcut ............................................................. 80
13 Bluetooth Glossary ...............................................................................83

1 BlueSoleil™ Introduction
BlueSoleil™ is a Windows-based Bluetooth Wireless software suite from IVT. It is fully
compliant to the latest Bluetooth SIG specifications. BlueSoleil™ incorporates Bluetooth
and computer technologies to enable users to wirelessly access computing devices, form
networks, and exchange information.
BlueSoleil™ V1.4.9 includes nine Bluetooth profiles. The following table indicates which of
these profiles is available for client and server devices.
Profile Description Client Server
PAN Personal Area Networking √ √
SPP Serial Port √ √
DUN Dial-Up Networking √
LAP LAN Access √ √
FTP File Transfer √ √
HID Human Interface Device √
HCRP Hardcopy Cable Replacement √
OPP Object Push √ √
SYNC Synchronization √ √
BIP Basic Imaging √ √
AV AV √ √
HS Headset √ √
FAX FAX √
BlueSoleil™ supports more than ten Bluetooth chip-sets and HCI interfaces including USB,
UART, PCMCIA and Compact Flash.
IVT BlueSoleil™ supports:
♦ Windows 2000/XP
♦ Windows 98SE/Me
This manual describes how to use BlueSoleil™:
♦ How to start and exit BlueSoleil™.
♦ How to navigate the Main Window and Service Window.
♦ How to use the Bluetooth profiles.
2 BlueSoleil™ Graphical User Interface
2.1 Start BlueSoleil™
After installing BlueSoleil™, there are two ways to start the program:
1. A BlueSoleil™ shortcut icon on the Windows desktop.
2. An IVT BlueSoleil™ program group entry in the Windows’ Start | Programs menu.
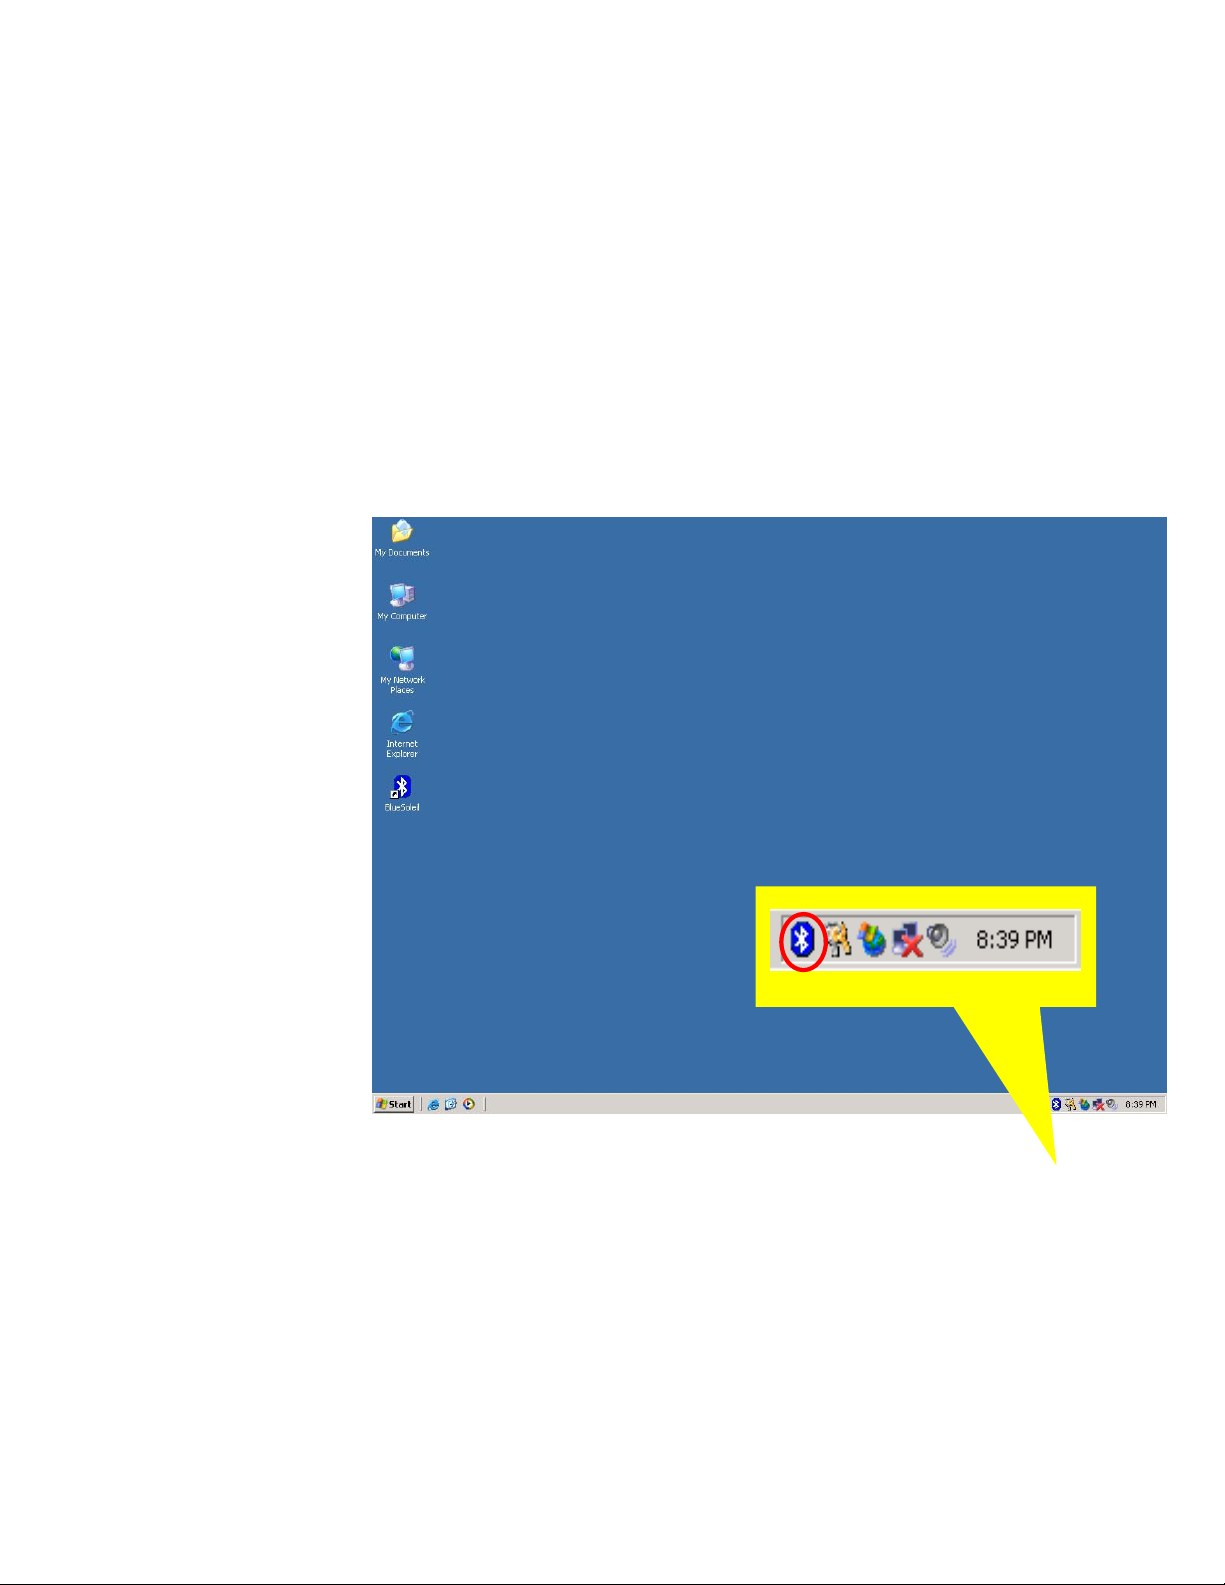
Double-click the BlueSoleil™ shortcut icon on the desktop or click the BlueSoleil™ menu
item on the Start | Programs | IVT BlueSoleil™ menu to start the BlueSoleil™
software.
The BlueSoleil™ icon will be displayed at the bottom right corner of the Windows desktop
(Figure 2.1).
Figure 2.1: BlueSoleil™ icon
The BlueSoleil™ Main Window pops up as shown in Figure 2.2.
2.2 Exit BlueSoleil™
To exit BlueSoleil™, right-click the BlueSoleil™ icon at the bottom right corner of the
Windows task bar and select Exit on the pop-up menu.
Note: Selecting the Close button at the top right corner of the BlueSoleil™ window only
hides the BlueSoleil™ window.
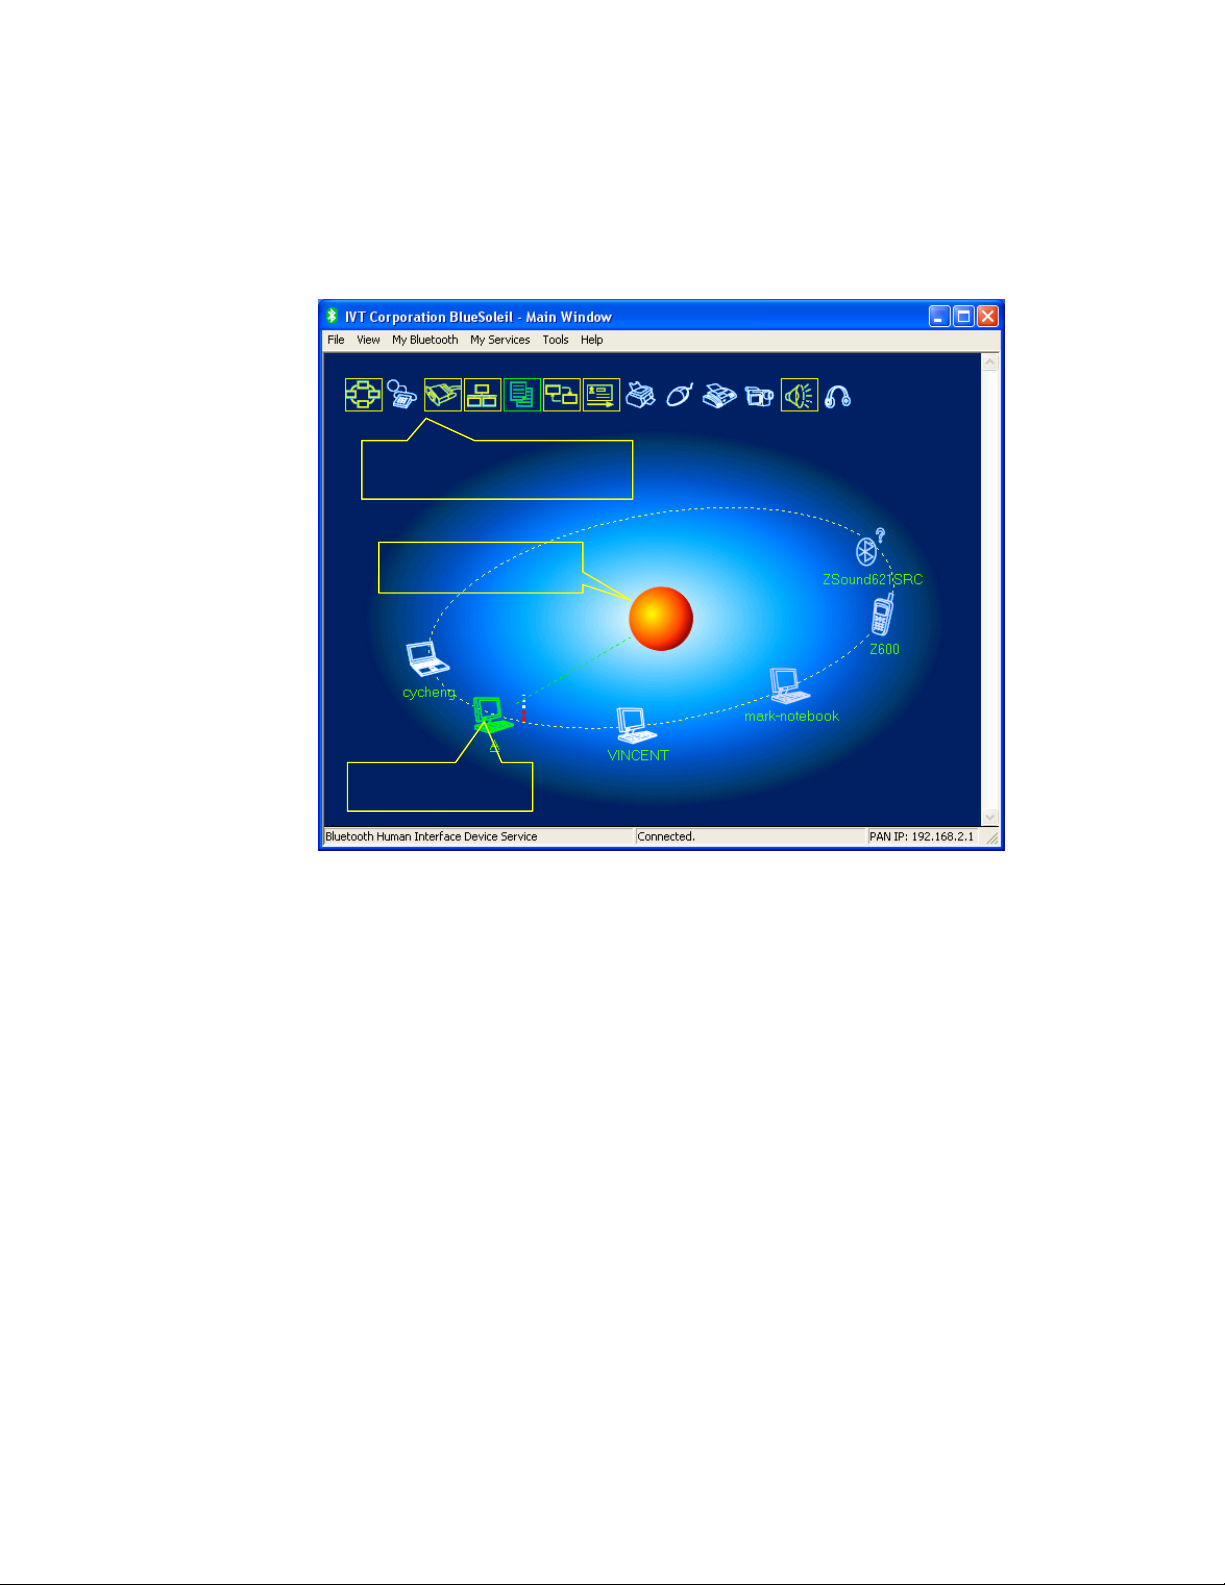
2.3 BlueSoleil™ Main Window
The BlueSoleil™ Main Window displays all surrounding Bluetooth devices. From the
BlueSoleil™ Main Window users can search for surrounding Bluetooth devices and can
execute connect/ disconnect functions.
Remote Device Service
Local Device lcon
Figure 2.2: BlueSoleil™ Main Window
The main elements in the BlueSoleil™ Main Window are:
♦ My Device Icon
♦ Remote Bluetooth Device Icons
♦ Bluetooth Service Icons
2.3.1 My Device Icon
This icon represents the client computer. It is called the ‘My Device icon’ or ‘center ball’
in this document.
Functions:
3. Hover the mouse over the My Device icon to display the client Bluetooth device name
and address.
4. Double-click to start/ stop searching for surrounding Bluetooth devices.
5. Right-click to display the pop-up menu with related operations.
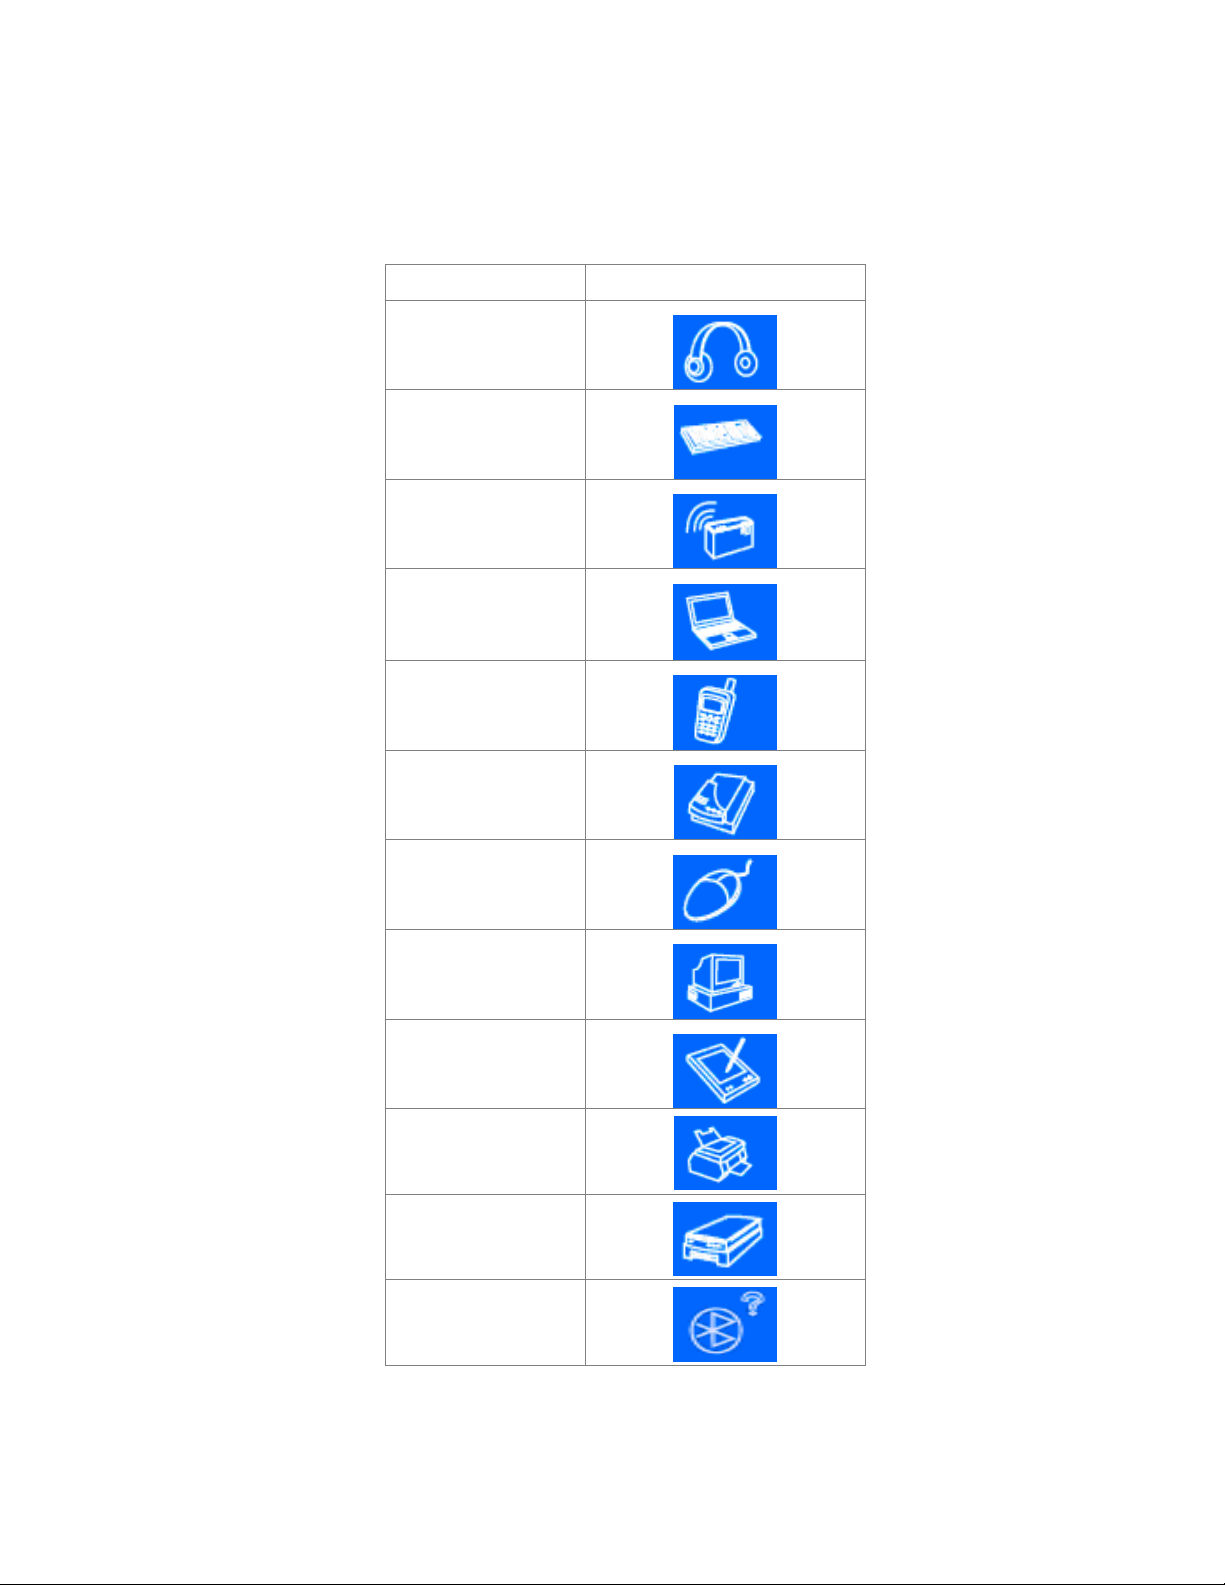
2.3.2 Remote Bluetooth Device Icons
The icons in the table below represent the remote Bluetooth devices.
Device Type Icon
Headset
Keyboard
LAN Access Point
Laptop
Mobile
Modem
Mouse
Personal Computer
PDA
Printer
Scanner
Unknown device
The following colors are used to indicate the status of the remote Bluetooth device:
♦ White (Idle)
This is the normal status of the device.
♦ Yellow (Selected)
The device has been selected by the user.
♦ Green (Connected)
The device has been connected.
Functions:
6. Single-click to select.
7. Double-click to get the services remote Bluetooth device supports.
8. Right-click to display the pop-up menu with related operations.
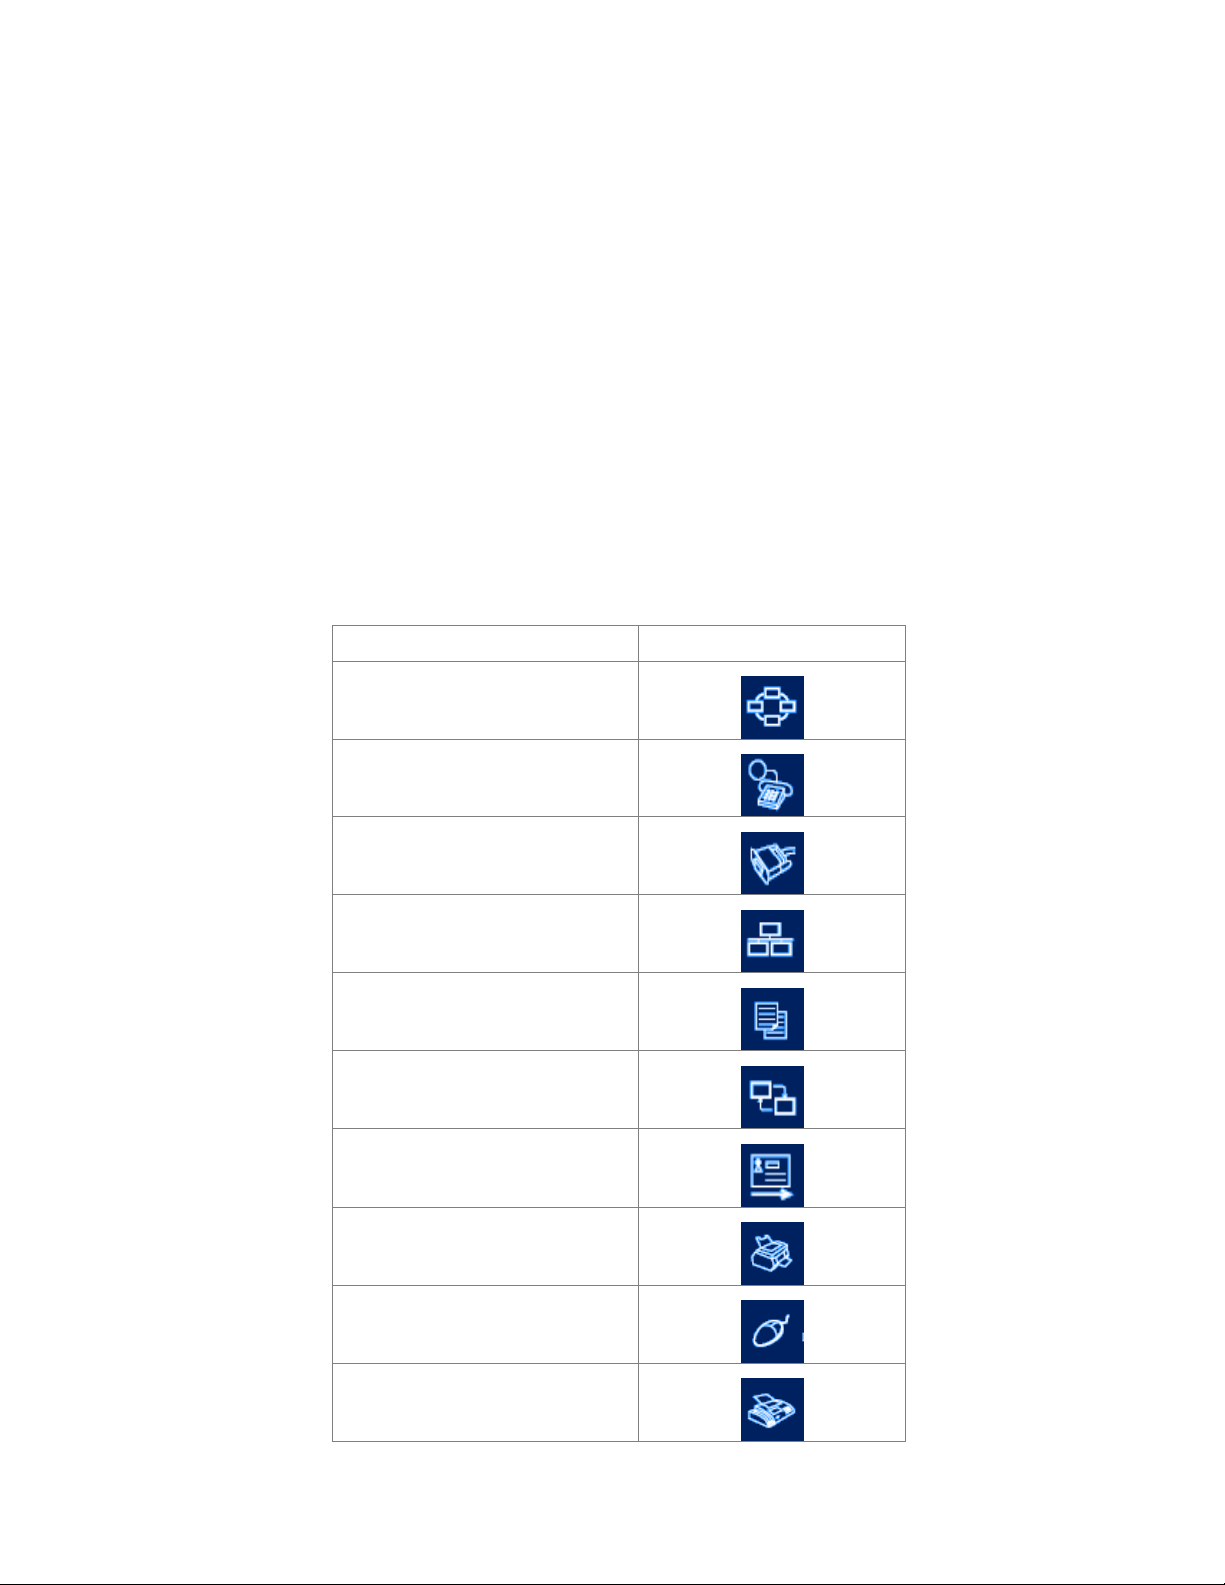
2.3.3 Bluetooth Service Icons
The Bluetooth Service Icons represent the Bluetooth services supported by the remote
device.
Bluetooth Service Icon
Personal Area Networking
Dial-up Networking
Serial Port
LAN Access
File Transfer
Information Synchronization
Object Push
Printer
Human Interface Device
FAX
Basic lmaging
AV
Headset
The following colors are used to indicate the status of the Bluetooth service:
♦ White (Idle)
This is the normal status.
♦ Pink (Available)
The Bluetooth service is available for the selected device.
♦ Yellow (Selected)
The service icon has been selected by the user.
♦ Green (Connected)
The service is connected.
Functions:
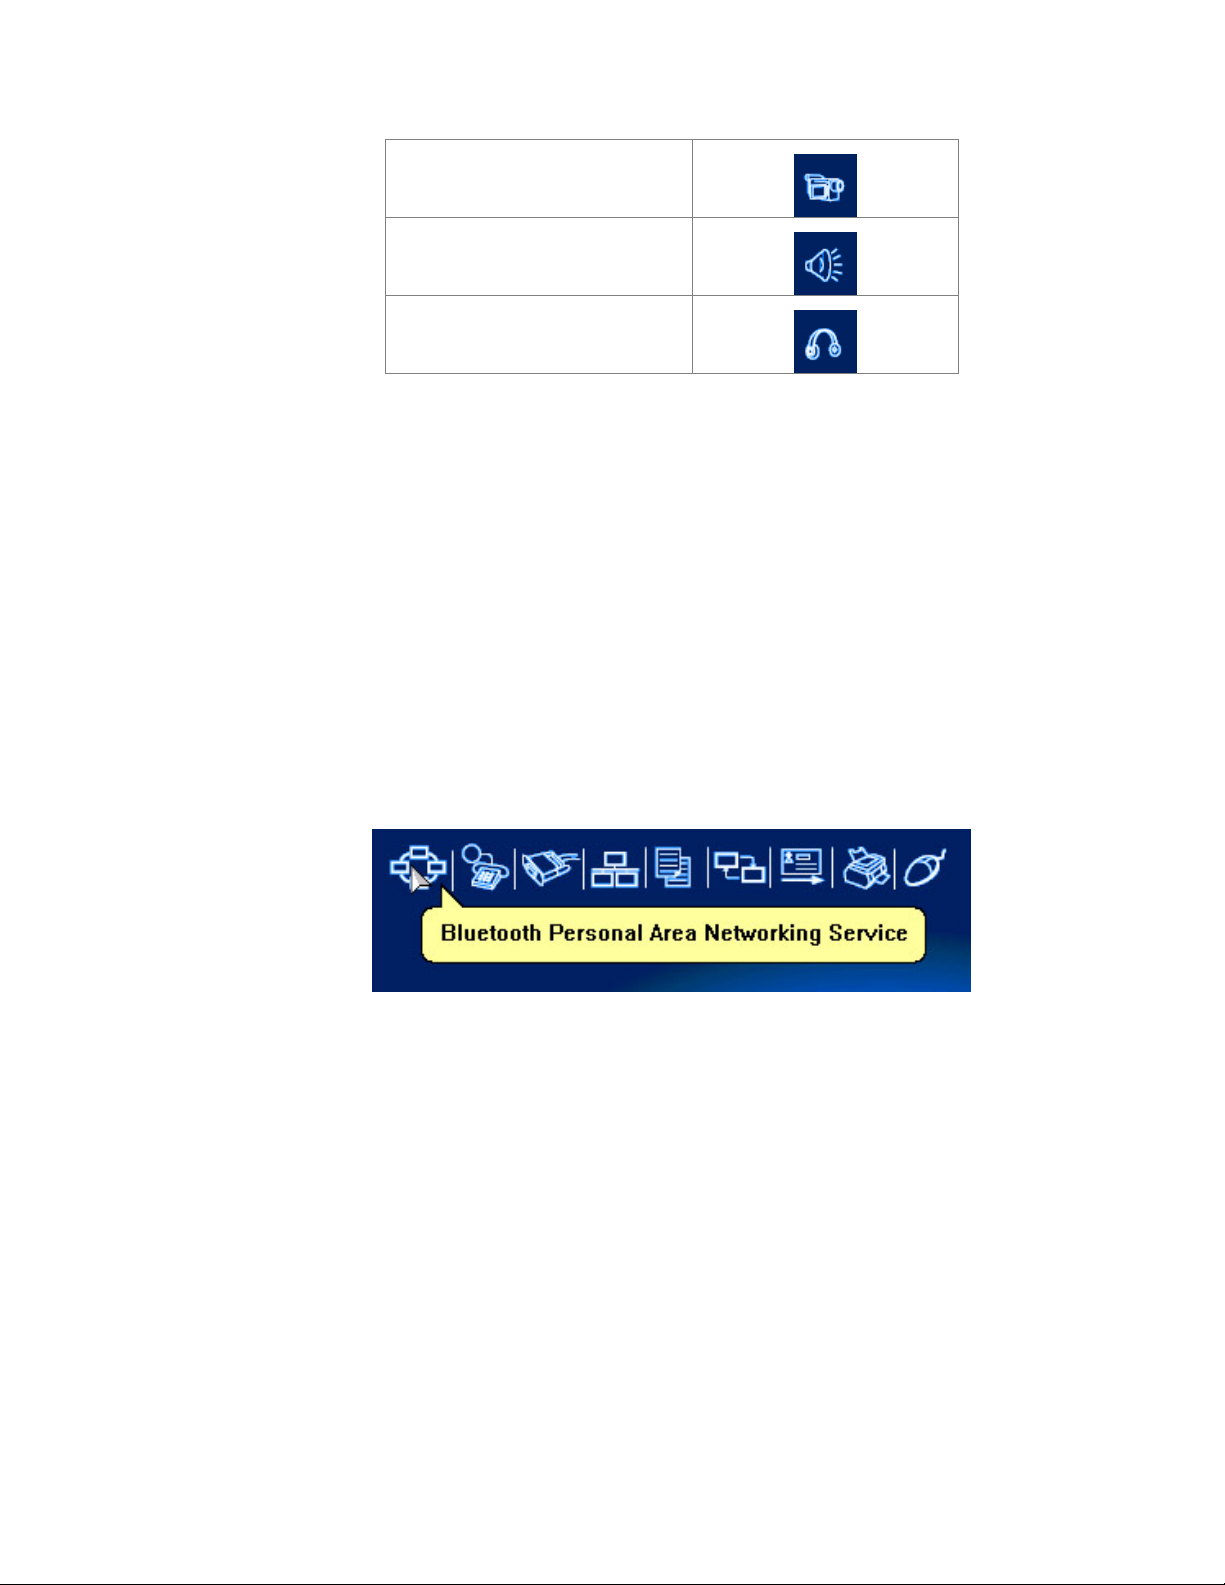
9. Hover the mouse over the icon to display the service name.
10. Single-click to select the service.
11. Double-click to connect.
12. Click to display the pop-up menu with related operations.
Figure 2.3: Bluetooth PAN Service Icon
2.4 Service Window
Select menu View | Service Window and the Service Window appears.
This window displays the Bluetooth services the ‘my Bluetooth device’ provides to remote
Bluetooth devices. These services are called ‘my Bluetooth services’.
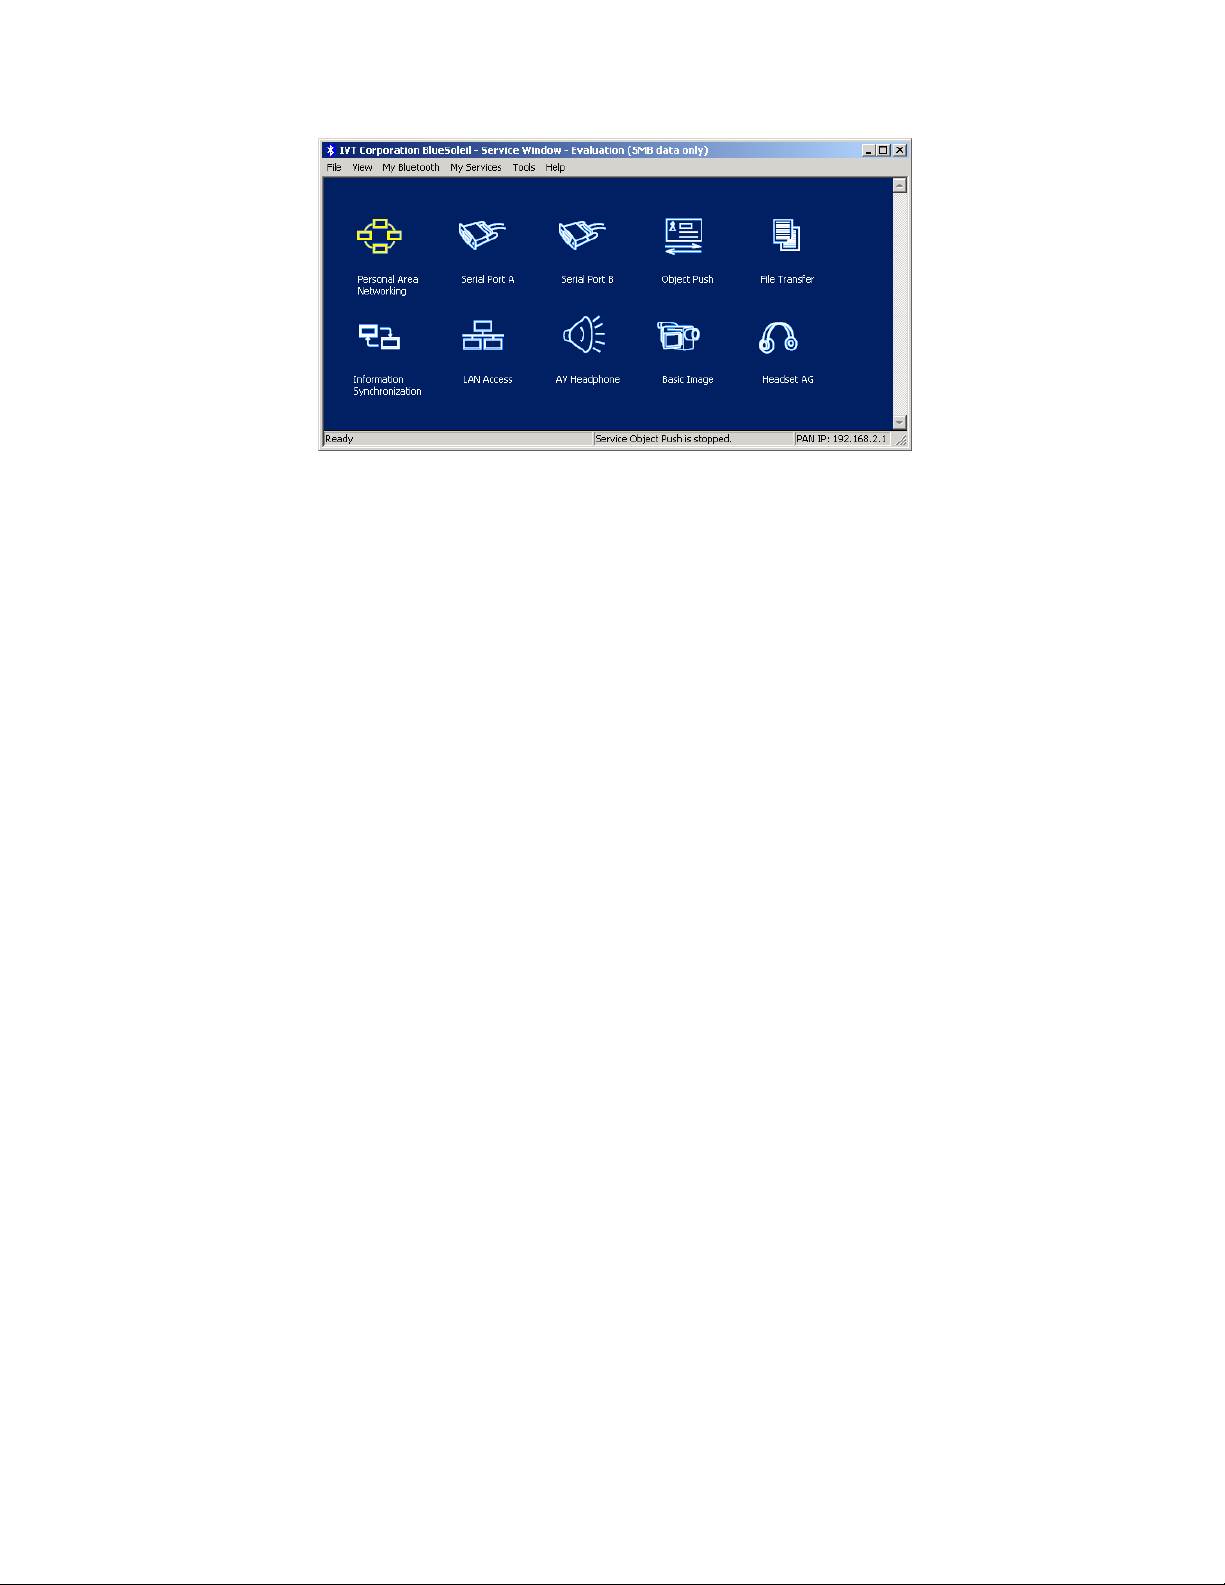
Main Elements:
♦ My Service Icons
Figure 2.4: BlueSoleil™ Service Window
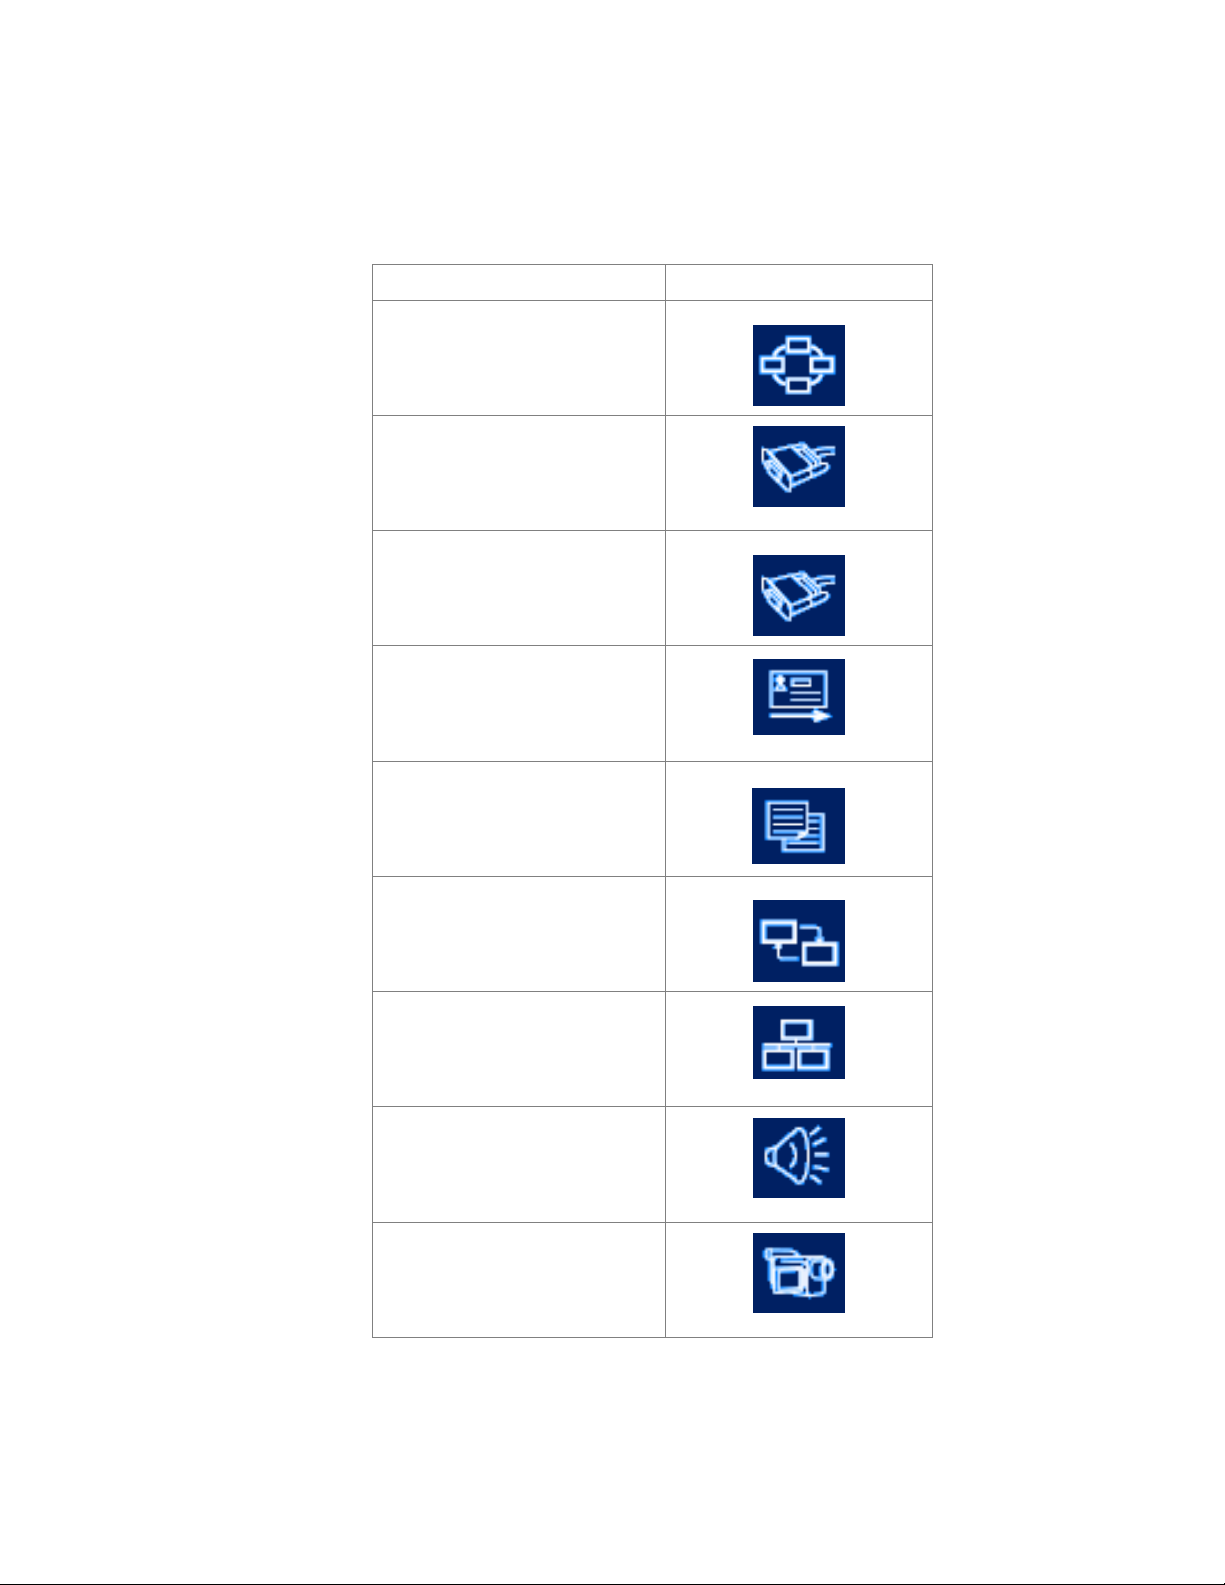
2.4.1 My Service Icons
These icons represent ‘my Bluetooth services’.
My Bluetooth Service Icon
Personal Area Networking
Serial Port A
Serial Port B
Object Push
File Transfer
Information Synchronization
LAN Access
AV Headset
Basic Image

Headset AG
The following colors indicate the status of the Bluetooth service:
♦ White (Idle)
Normal status.
♦ Pink (Started)
My Bluetooth service is started.
♦ Green (Connected)
A remote device has connected to my Bluetooth service.
Functions:
13. Single-click to select.
14. Double-click to start/stop a service.
15. Right-click to display the pop-up menu with related operations.

3 Personal Area Networking
3.1 Introduction
The Bluetooth Personal Area Networking (PAN) is a Bluetooth application, which enables
devices to form an ad-hoc network or to access a remote network through a network
access point.
The PAN application can be used in the following scenarios:
♦ Two or more computers (or PDAs) can be connected through PAN and can
visit each other using Windows Network Places or any application based on
TCP/IP.
♦ A computer (or PDA) can access a Local Area Network or the Internet
through a PAN Network Access Point (NAP) bridge.
♦ A computer with PAN installed acts as a TCP/IP gateway.
Each of these scenarios is now covered in more detail.
3.2 Connect Two Computers
This section outlines the steps involved in connecting two computers, Computer A and
Computer B.
Computer A: Computer B:
Notebook/ Laptop PIII, 800MHz, 128M Desktop, PIII, 600MHz, 128M
A Bluetooth USB dongle A Bluetooth USB dongle
Windows 2000 Windows 2000
IVT BlueSoleil™ IVT BlueSoleil™
Step 1: Insert Bluetooth USB dongles in both computers.
Step 2: Start BlueSoleil™ in both computers.
Step 3: Set device name of each computer to anything you want. Here they
are named Computer A and Computer B.
♦ In the BlueSoleil™ Main Window of Computer A, click Tools |
My Bluetooth Device. Enter ‘Computer A’ in the device name
field in the My Bluetooth Device window.
♦ Repeat for Computer B.
Step 4: Set the Security Level.
♦ Click Tools | Configurations | Security, the Security
Configuration panel pops up.
♦ On the Security Configuration panel, select High in Security
Level.
Note: If you check the Fixed Passkey and input a Bluetooth passkey, this passkey will
be used as the default passkey. The other computer will then have to provide the same
passkey during the connection procedure if it wants to connect to this computer.
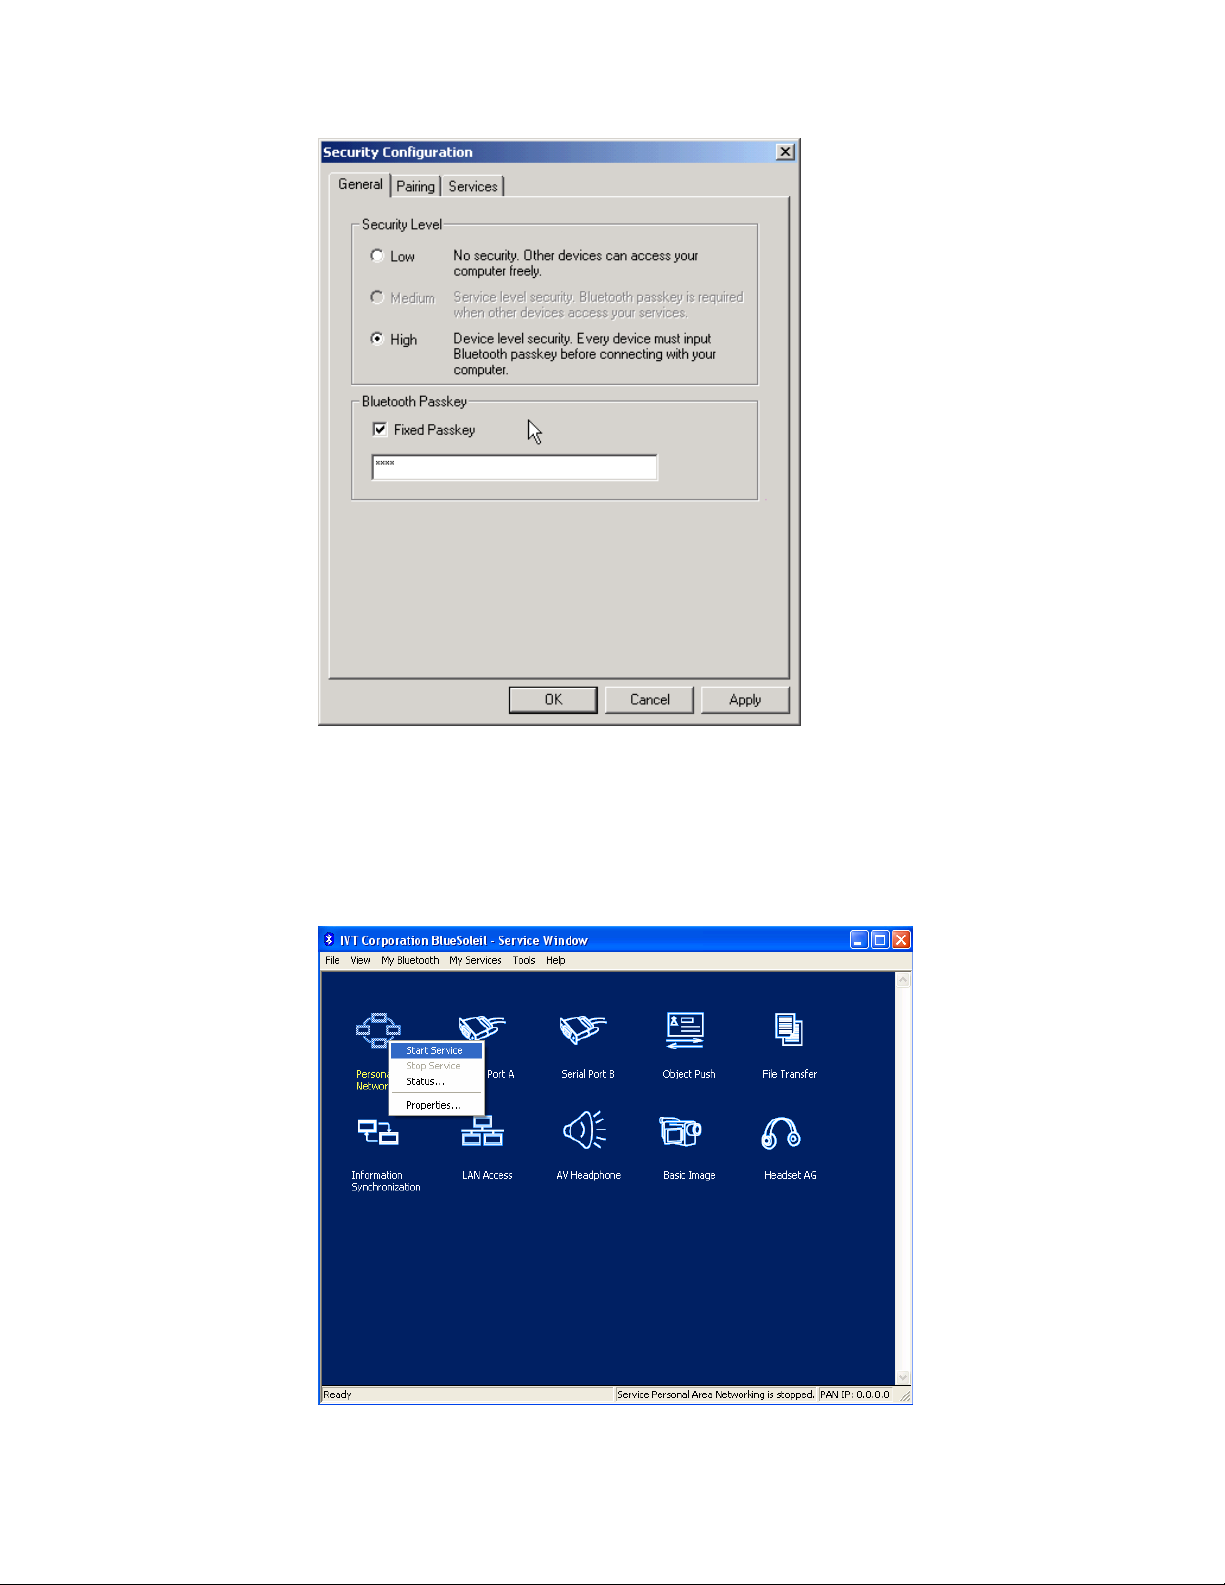
Figure 3.1: Security Configuration
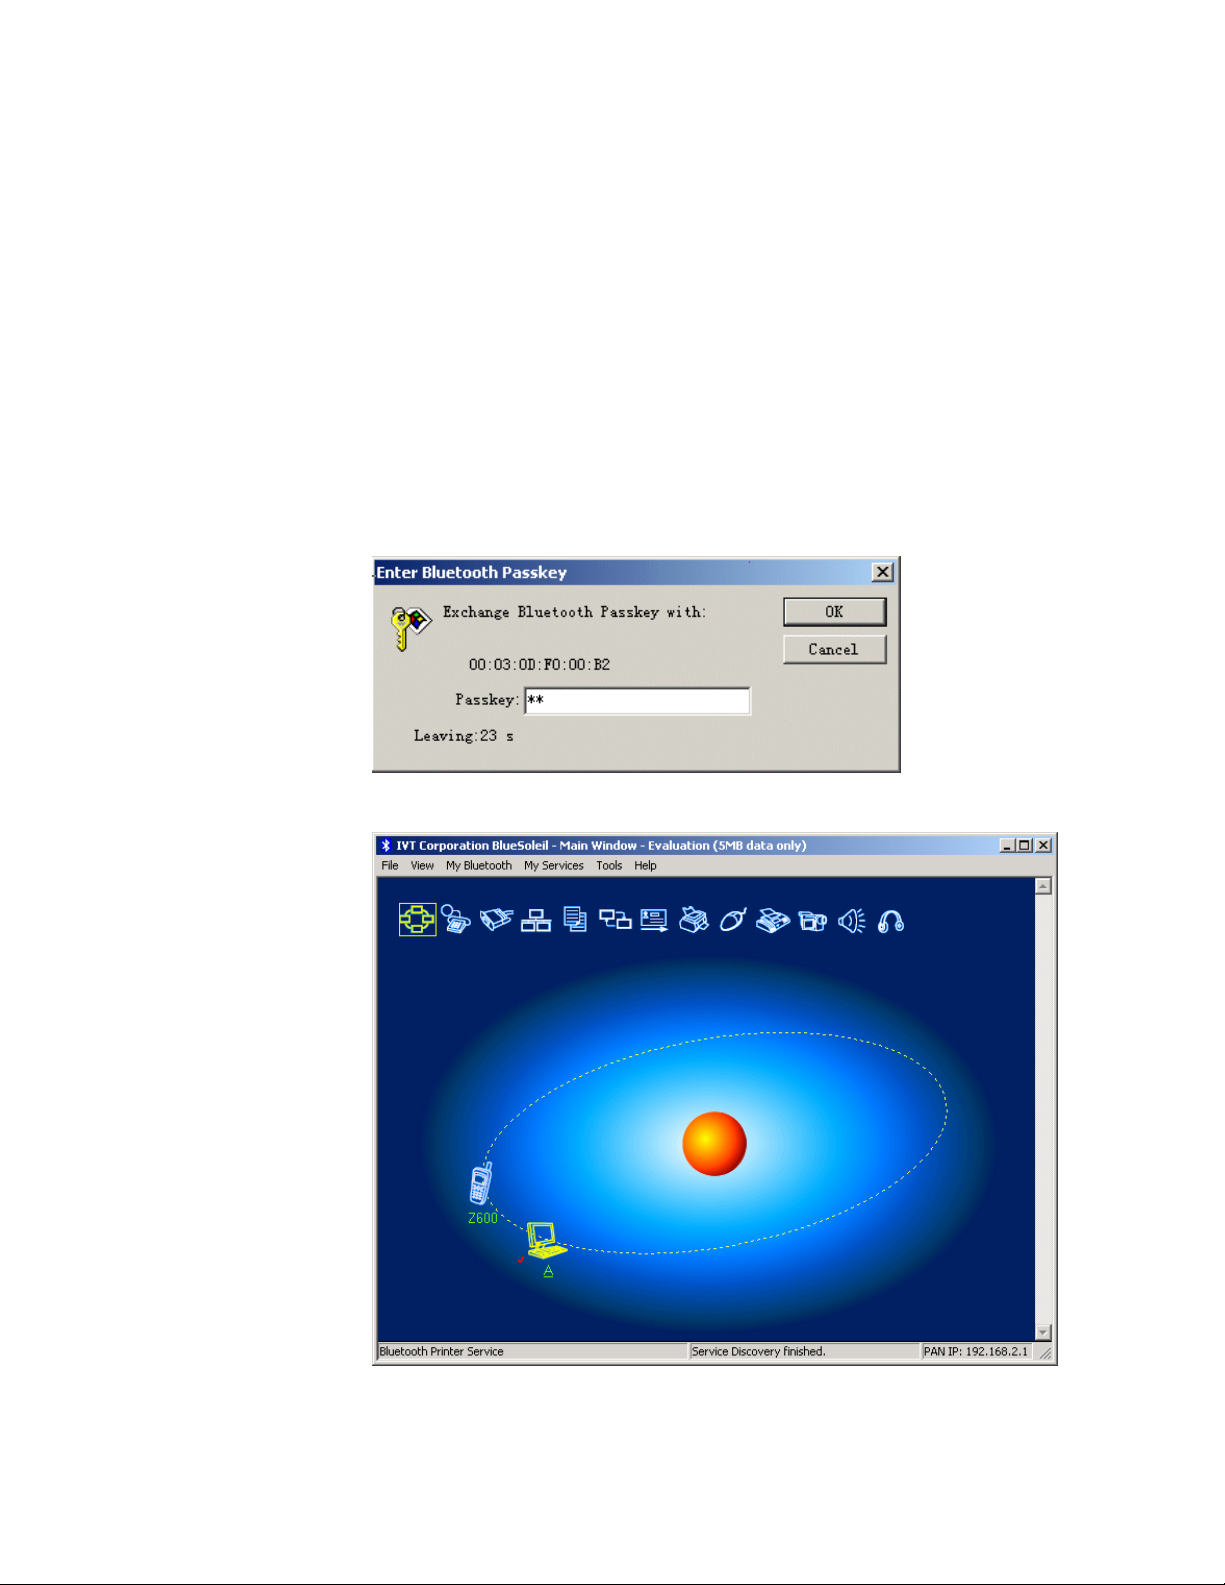
Step 5: Start the PAN service on Computer A.
♦ In the BlueSoleil™ Main Window, click View | Service
Window.
♦ In the Service Window, right-click the Personal Area Networking
icon. Choose Start Service. (Figure 3.2)
Figure 3.2: Start PAN Service on Computer A
Step 6: Search for Computer A on Computer B.
♦ Double-click the My Device Icon (center ball). The surrounding
discovered Bluetooth devices appear.
♦ Check to see if Computer A appears. If it does not appear,
double-click the My Device Icon again. Repeat the operation
until you find Computer A.
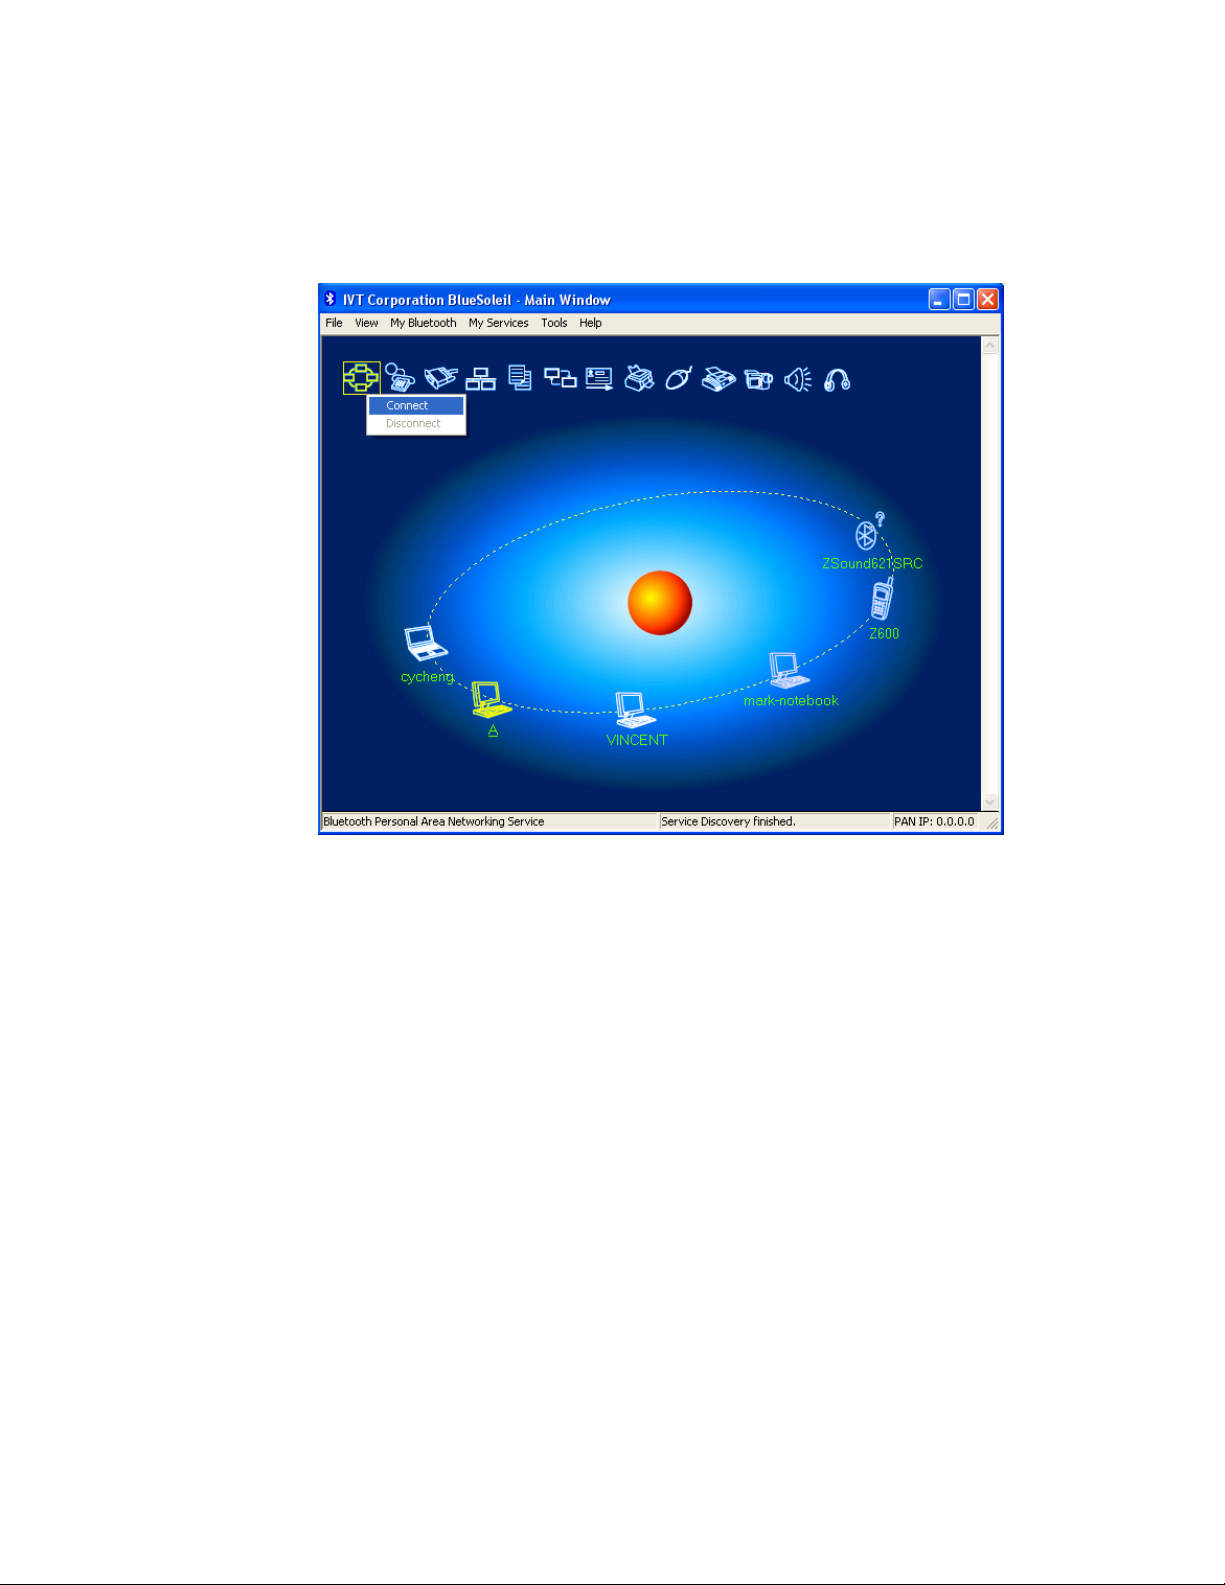
Step 7: Find the PAN service on Computer A.
♦ Double-click the Computer A device icon on Computer B.
♦ Enter the Bluetooth passkey (if security is set to High on either
side) to start the authenticating process. The Enter Bluetooth
Passkey window pops up on Computer A. Input any characters
or numbers, e.g. “12”. The Enter Bluetooth Passkey window
pops up on Computer B. Input exactly the same characters or
numbers as you input for Computer A, e.g. “12”. (Figure 3.3)
♦ Once authentication is complete, the PAN service is found.
Figure 3.3: Input passkey
Figure 3.4: PAN service is found
Step 8: Connect to Computer A.
♦ Right-click the PAN service icon; select Connect on the pop-up
menu. (Figure 3.5)
♦ The connection is established successfully (Figure 3.6). Wait
until the valid IP address is shown on the bottom right status
bar on both Computer A and Computer B.
Figure 3.5: Connect to PAN Service
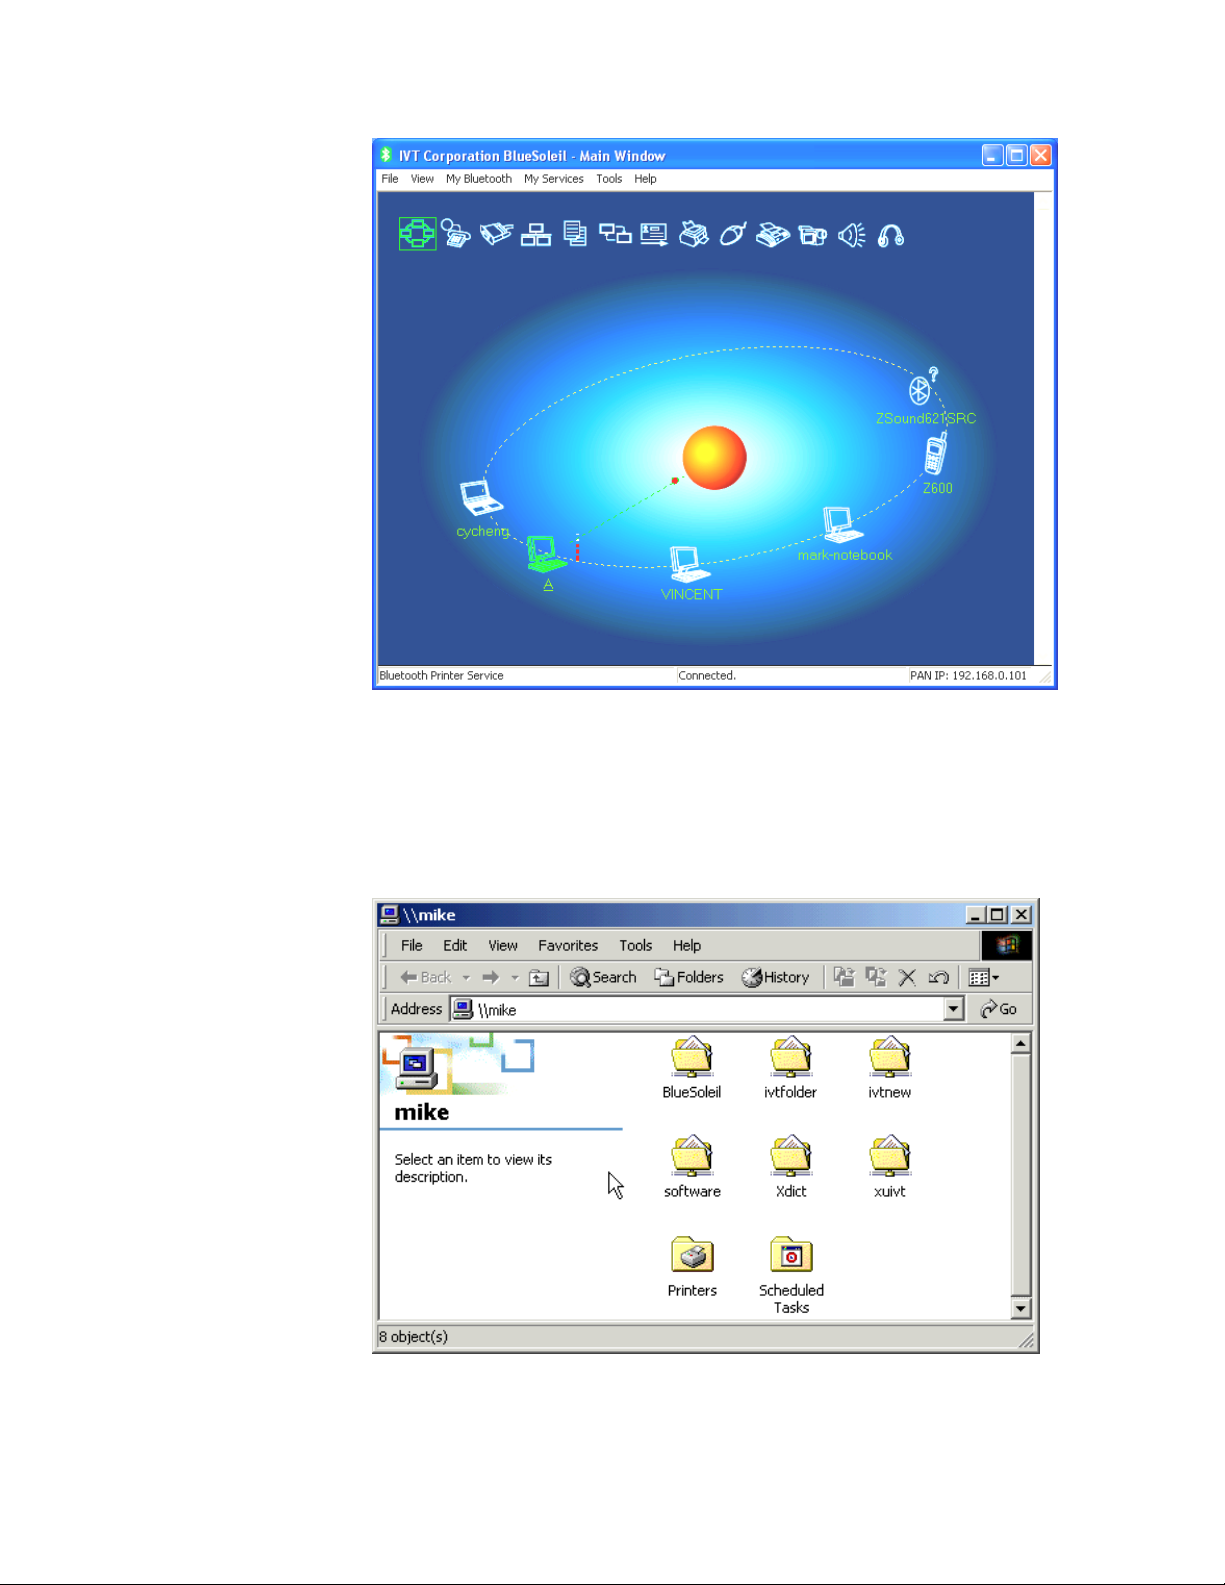
Figure 3.6: Connection is established successfully.
Step 9: Computer A and Computer B are now connected. On Computer B,
go to Windows | My Network Places to find Computer A and
copy files. Figure 3.7 shows where to input Computer A’s name. In
Figure 3.7, Computer A is named ‘mike’.
Figure 3.7: Find Computer A in My Network Places
Step 10: To disconnect the PAN connection, disconnect from either Computer
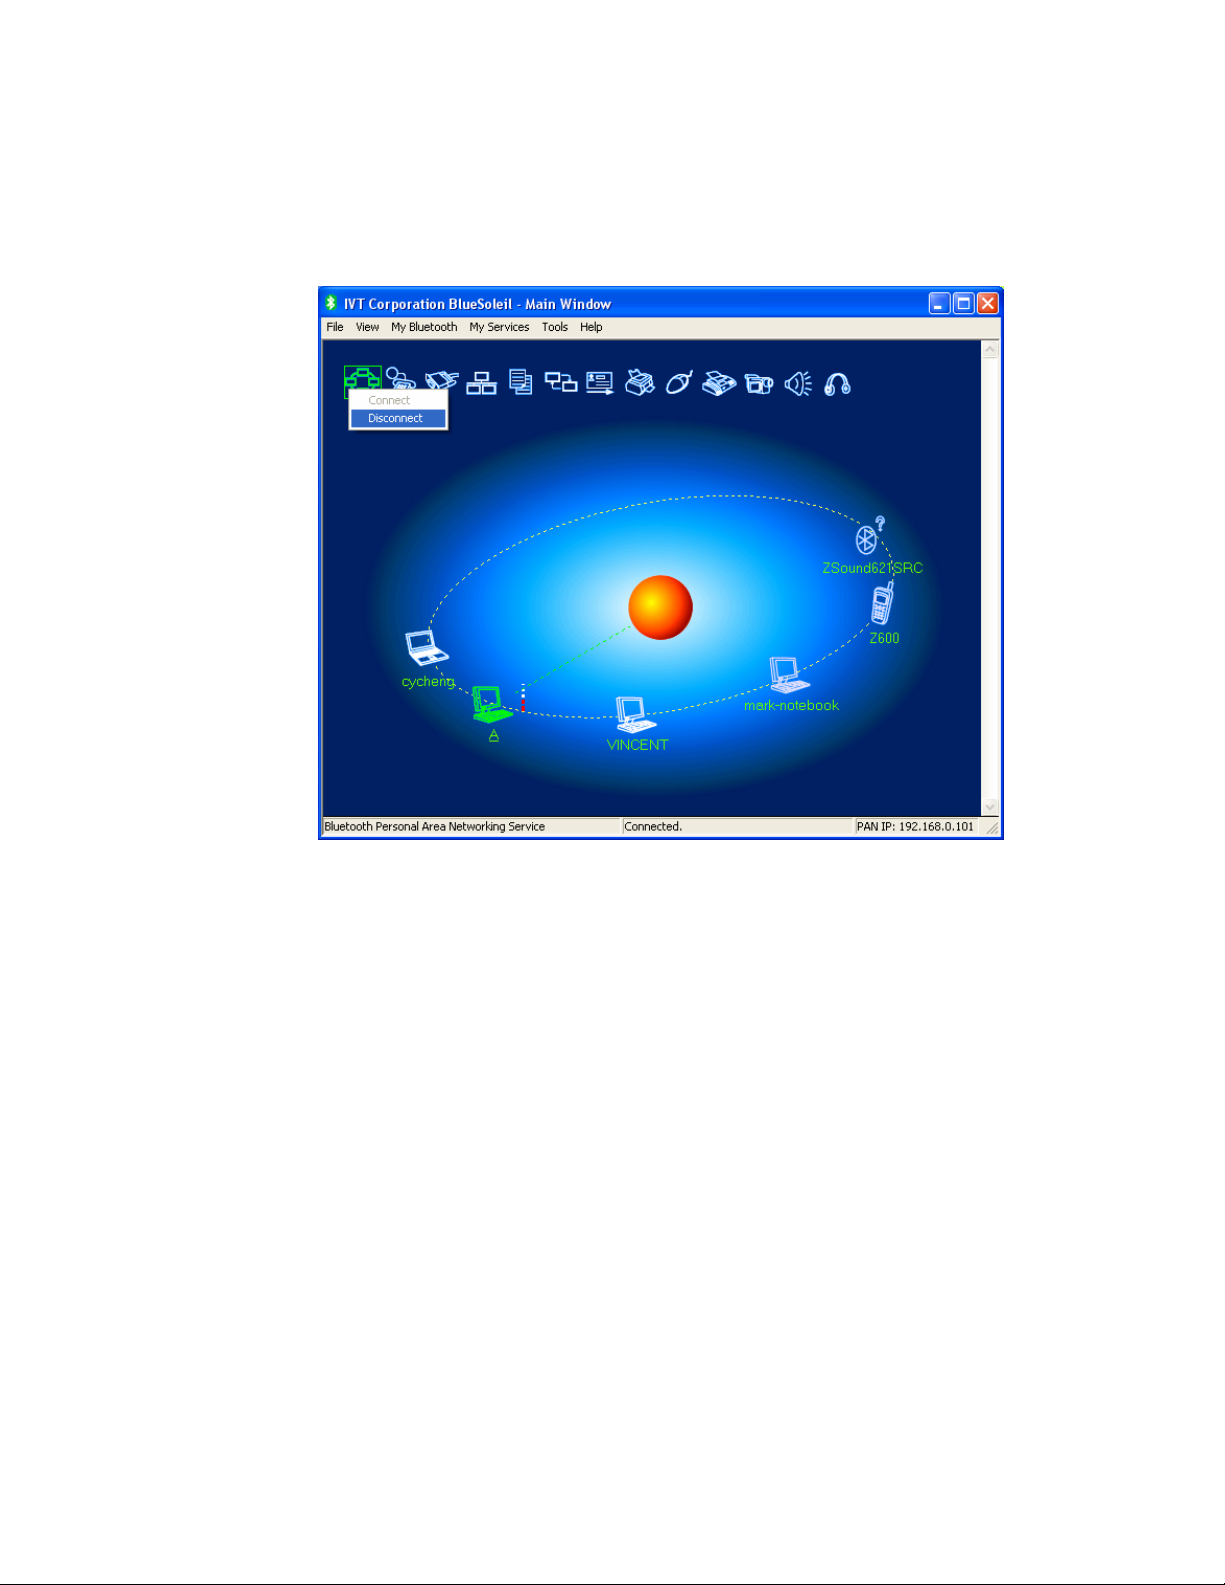
A or from Computer B.
♦ On Computer B, right-click on the PAN service icon and choose
Disconnect. (Figure 3.8)
♦ On Computer A, right-click on the PAN service icon and choose
Stop Service. (Figure 3.9)
Figure 3.8: Disconnect the PAN service from Computer B
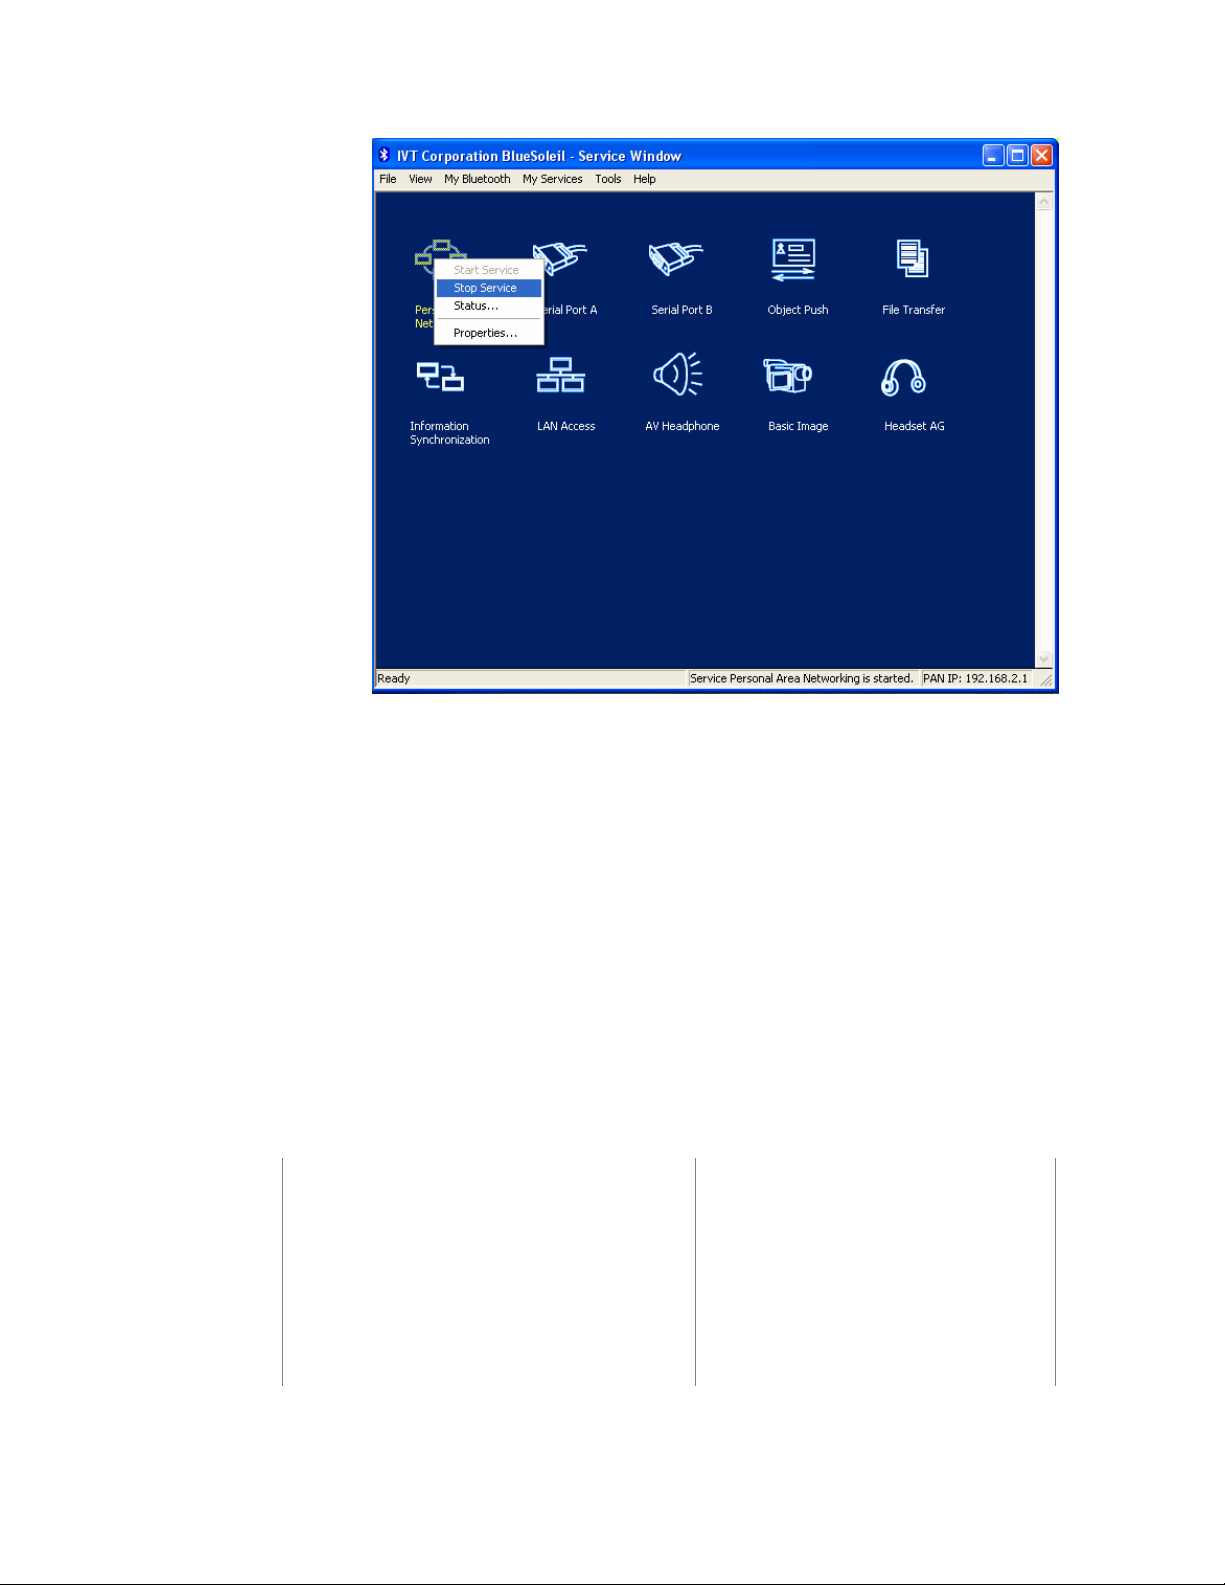
Figure 3.9: Stop the PAN service on Computer A
Advanced Usage:
♦ Computer A is now the center node. Other computers, for example,
Computers C, D and E, can connect to Computer A with BlueSoleil™ following
the same steps as those for Computer B.
♦ Computer A, B, C, D and E can access each other using the Windows
Network Places. This forms a Bluetooth ad-hoc networking environment.
Note: Computer A can currently only support up to 7 connections.
Also it takes about 1 minute before an IP address can be obtained on the client side
(Computer B) unless a DHCP server is running on the server side (Computer A).
3.3 Computer with PAN acting as a TCP/IP Gateway
The following sections outline how to enable Computer B to access the Internet through
Computer A.
Computer A: Computer B:
Notebook/ Laptop, PIII, 800MHz, 128M Desktop, PIII, 600MHz, 128M
A Bluetooth USB dongle A Bluetooth USB dongle
Windows 2000 Windows 2000
IVT BlueSoleil™ IVT BlueSoleil™
Network Adapter connecting to the
Internet

Step 1: Enable Internet access sharing on Computer A.
♦ See “Section 3.2: Connect Two Computers”, and complete Steps
1 to 7.
♦ Refer to steps outlined in “Section 3.4.1 Connect to the Internet
using ICS”, to set up Internet sharing.
Step 2: Computer B can now access the Internet.
Advanced Usage:
♦ Computer A is now the center node of the network. Other computers with
BlueSoleil™ installed, for example, Computers C, D and E, can connect to
Computer A following the same steps as those for Computer B.
♦ Computers A, B, C, D and E can access each other using the Windows My
Network Places and form a Bluetooth ad-hoc networking. Computers B, C,
D and E can then access the Internet through Computer A.
Note: Computer A can currently only support up to 7 connections. Also it takes about 1
minute before an IP address can be obtained, unless Computer A is connected to a DHCP
server.
3.3.1 Connect to the Internet using ICS
The PAN server can share a network connection with PAN clients with Windows ICS. ICS
(Internet Connection Sharing) uses NAT (Network Address Translation) to share a
network connection. PAN clients use internal network addresses (192.168.0.x). ICS is
suitable for both dial-up and LAN connections.
For more detailed information about ICS and NAT, please refer to the Microsoft Windows
help topic “Internet Connection Sharing”.
3.3.2 Settings on the PAN server
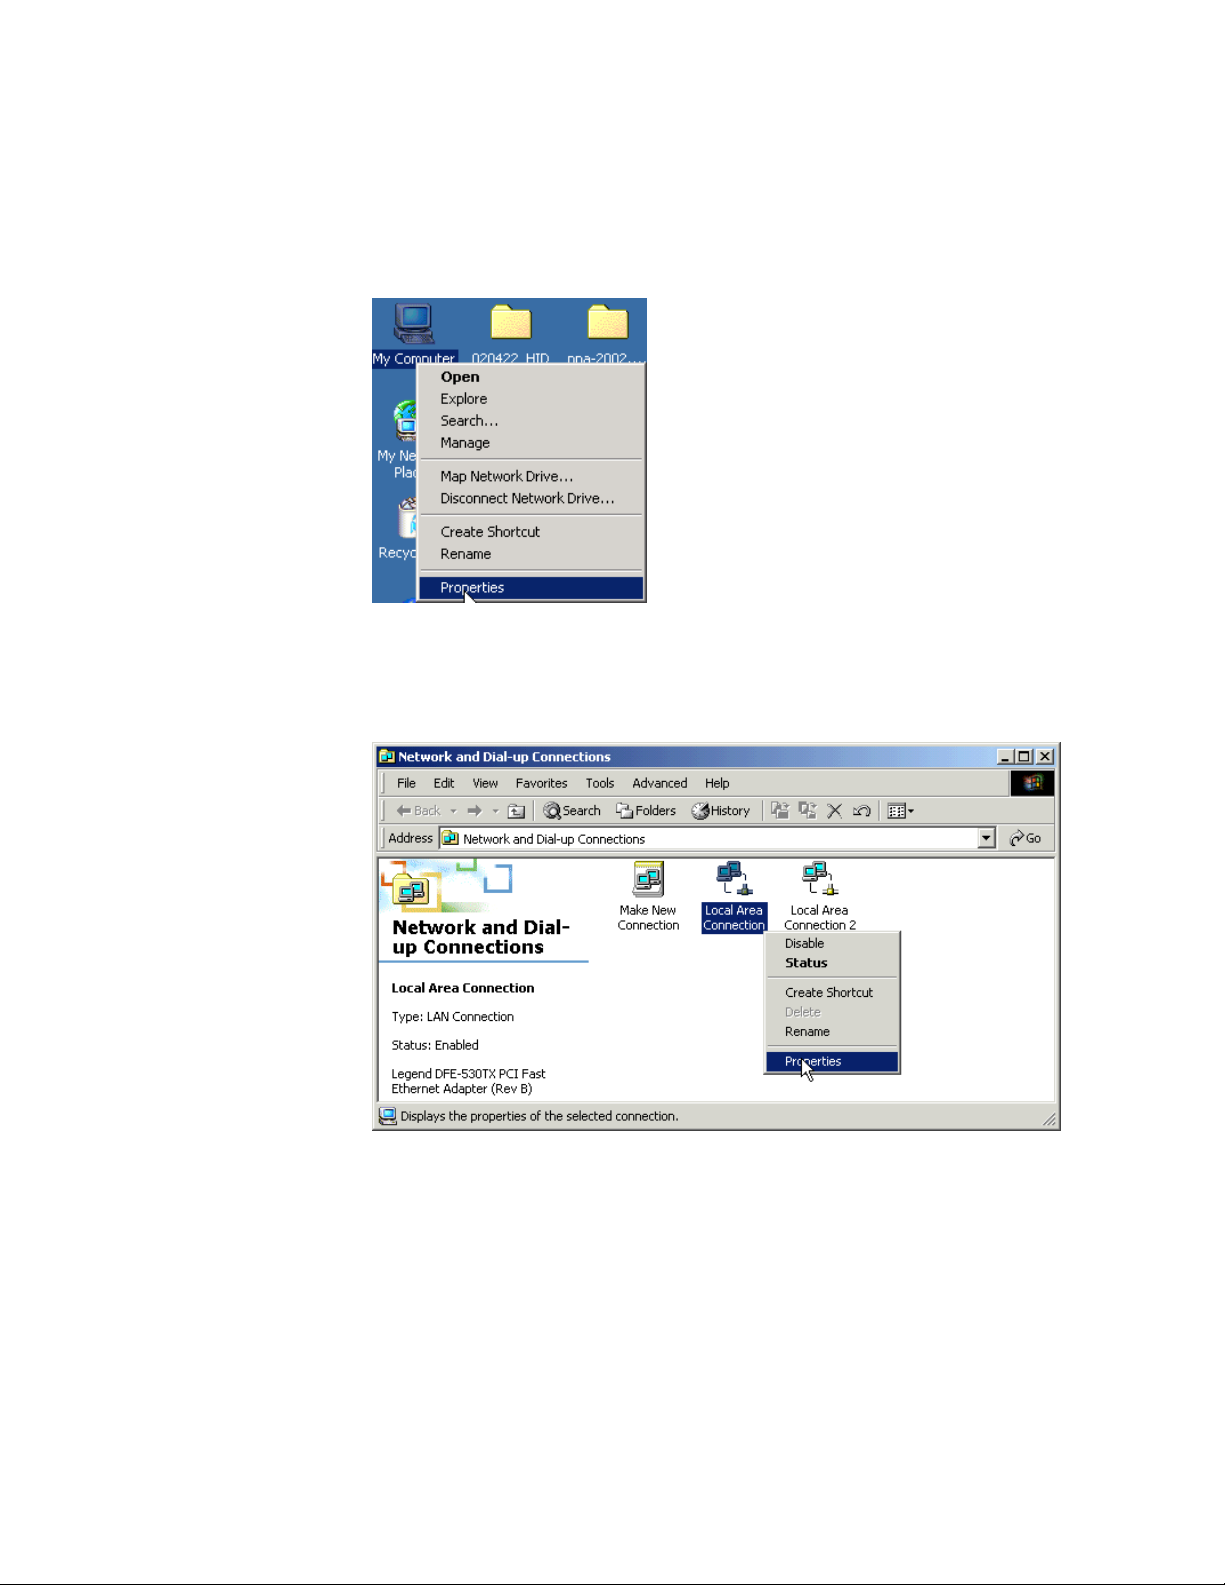
Step 1: Right-click the My Network Places icon and select Properties.
(Figure 3.10)
Figure 3.10: Select Properties on My Network Places
Step 2: Right-click the connection through which you access the Internet,
and then select Properties. (Error! Reference source not
found.)
Figure 3.11: Click the connection through which you access the Internet
Step 3: On the Sharing tab, select the Enable Internet Connection
Sharing check box. Figure 3.12 shows how to enable Internet
Connection Sharing for a local area connection on Windows 2000.
Figure 3.13 shows how to enable Internet Connection Sharing for a
dial-up connection on Windows 2000.
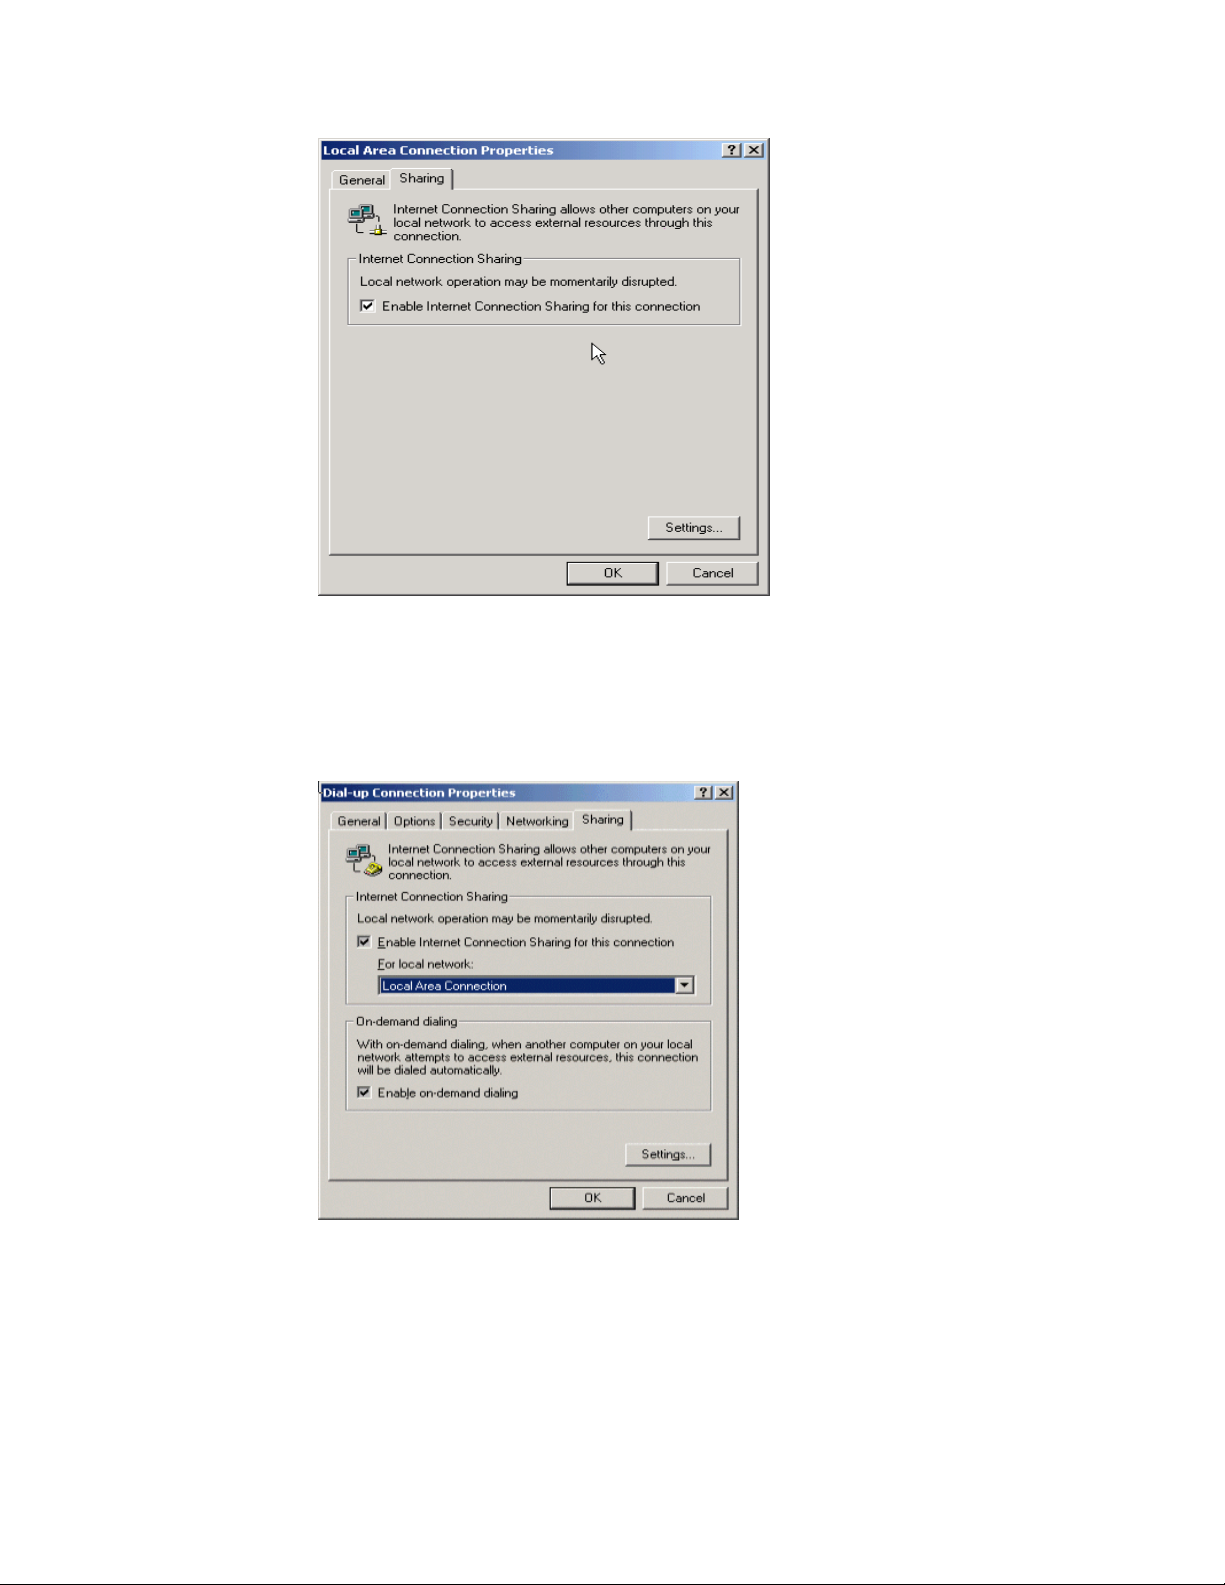
Figure 3.12: Internet Connection Sharing for a Local Area Connection
on Windows 2000
Step 4: If this connection is a dial-up one, and you want automatic dialing
when another computer in your home network attempts to access
external resources, then check the Enable on-demand dialing
check box. Click OK.
Figure 3.13: Internet Connection Sharing for a Dial-up Connection on
Windows 2000
Step 5: A message window appears as shown in Figure 3.14. Click Yes. The
IP address of the BT network adapter is changed to 192.168.0.1
and a DHCP server is started on BT network adapter.

Figure 3.14: Confirm Enabling Internet Connection Sharing
Note: The Internet Connection Sharing wizard will set the IP address of the BT network
adapter to 192.168.0.1, and a DHCP server will be run on Computer A. PAN clients in the
Bluetooth network can be set statically or dynamically to any IP address in the range
192.168.0.2 to 192.168.0.253.
3.4 PAN Configuration
3.4.1 My PAN Service
In the BlueSoleil™ Service Window, right-click the Personal Area Networking icon. On the
pop-up menu, select Properties to configure my PAN service. (Figure 3.15)
Setting Items:
♦ Auto start this service when my Bluetooth starts
Check this option to automatically start my PAN service the every time
BlueSoleil™ is started.
Figure 3.15: Service Configuration

4 Dial-Up Networking
4.1 Introduction
The Bluetooth Dial-up Networking (DUN) service allows a Bluetooth-enabled client to
access the Internet wirelessly through a modem on another Bluetooth device or a cellular
phone. The other Bluetooth device or the cellular phone is called the gateway (server) as
it provides access to the public network.
The DUN profile can be used in the following scenario:
♦ A Bluetooth computer accesses the Internet through a Bluetooth cellular
phone or Bluetooth modem.
4.2 Connect to a Dial-up Gateway from a Computer
This section outlines the steps involved in a computer (client) accessing the Internet
through a Bluetooth cellular phone.
Computer A: Bluetooth Cellular Phone:
Notebook/ Laptop, PIII, 800MHz, 128M Sony Ericsson T68 cellular phone
A Bluetooth USB dongle
Windows XP
IVT BlueSoleil™
Step 1: Insert the Bluetooth USB dongle in the computer.
Step 2: Start BlueSoleil™ in the computer.
Step 3: Set device name of the computer to anything you want. Here it is
named Computer A.
♦ In the BlueSoleil™ Main Window of Computer A, click Tools |
My Bluetooth Device. Enter ‘Computer A’ in the device name
field in the My Bluetooth Device window.
Step 4: Set the Sony Ericsson T68 to be discoverable so that Computer A
can find the T68.
♦ Press the Menu button on the T68 and scroll until you reach the
Connect menu option, select Connect and scroll until you find
Bluetooth. Select this option and scroll until you see
Discoverable. Press the Yes button to confirm the selection.
♦ The T68 will now enable itself to receive connection requests
from other devices.
Step 5: Add Computer A to the paired device list in the T68.
♦ Press the Menu button on the T68 and scroll until you reach the
Connect menu option, select Connect and scroll until you find
Bluetooth. Select this option and scroll until you see Discover.
Press the Yes button to confirm the selection.
♦ The T68 will now start searching devices. Once the T68 finds
“ComputerA” on the screen, select it by pressing the Yes
button. The Add to paired device? message appears on the

screen. Press Yes to confirm you want to initialize pairing.
♦ The T68 will ask for the Bluetooth passkey. You can input any
number, for example, “1”.
♦ On the BlueSoleil™ side, the Enter Bluetooth Passkey window
pops up requesting the Bluetooth passkey. Input the same
Bluetooth passkey you have input in the T68 and click OK.
♦ Once the pairing process is successfully complete, the T68
device icon is displayed in the Main Window of Computer A. At
the meanwhile, the following dialog pops up asking you whether
Create a Shortcut on the windows desktop. If you choose
yes, a shortcut icon called DUN will occur on the desktop,
otherwise the icon will not occur.
♦
♦ This is the icon on the desktop:
♦
Step 6: Search for Bluetooth devices in Computer A until you find the T68.
Step 7: In the Main Window of Computer A, double click the T68 device to
find its DUN service. If found, the DUN service icon in the Main
Window will turn pink.
Step 8: In the Main Window of Computer A, double click the DUN service
icon to connect to the DUN service on the T68.
Step 9: Once the two computers are connected, the Bluetooth Dial-up
Networking (DUN) service icon in the Main Window will turn from
pink to green.

Figure 4.1: Connect BlueSoleil™ DUN Connection
Step 10: The Connect BlueSoleil™ DUN Connection window appears
(Figure 4.1).
♦ Input a valid username, password and the Internet Service
Provider’s (ISP’s) phone number, then click the Dial button.
♦ If the dial-up is successful, a small icon appears on the bottom
right hand of the Windows taskbar, indicating that the dial up
connection is successfully established.
♦ If the dial-up fails, the Bluetooth connection between the two
computers will be disconnected. In this case, to reconnect to the
T68’s DUN service, repeat Steps 8-9 above.
Step 11: Once the dial-up connection is established, users can browse web
sites or access other Internet services from Computer A.
Step 12: There are three methods to disconnect the dial-up connection:
♦ Method 1. Double-click the dial-up connection icon on the
bottom right of the Windows taskbar. The BlueSoleil™ DUN
Connection Status window appears. Click the Disconnect
button to disconnect the dial-up connection (Figure 4.2).
♦ Method 2. Right-click the Bluetooth Dial-up Networking icon
in the Main Window, and then click the Disconnect menu item
on the pop-up menu.
♦ Method 3. Right-click the T68 device in the Main Window and
select Disconnect | Bluetooth Dial-Up Networking.

Figure 4.2: BlueSoleil™ DUN Connection Status window

5 Bluetooth Serial Port
5.1 Introduction
The Bluetooth Serial Port (SPP) provides a virtual serial port via Bluetooth as an
alternative to a hardwired serial cable between a computer and device. Any program that
uses a standard serial port can use the Bluetooth serial port without any change.
The SPP profile can be used in the following scenarios:
♦ Connecting two computers through a Bluetooth serial port.
♦ Using SPP to print a document.
♦ Connecting a computer to any other device that supports SPP through a
Bluetooth serial port.
5.2 Connect Two Computers
This section outlines the steps involved in connecting two computers, Computer A and
Computer B using the Bluetooth Serial Port application.
Computer A: Computer B:
Notebook/ Laptop, PIII, 800MHz, 128M Desktop, PIII, 600MHz, 128M
A Bluetooth USB dongle A Bluetooth USB dongle
Windows 2000 Windows 2000
IVT BlueSoleil™ IVT BlueSoleil™
Step 1: Insert the Bluetooth USB dongles into each computer.
Step 2: Start BlueSoleil™ in each computer.
Step 3: Set the device name of the each computer to anything you want.
Here they are named Computer A and Computer B.
♦ In the BlueSoleil™ Main Window of Computer A, click Tools |
My Bluetooth Device. Enter ‘Computer A’ in the device name
field in the My Bluetooth Device window.
♦ Repeat for Computer B.
Step 4: Set the security level to Low on Computer A and Computer B. (Use
the Tools | Configurations | Security menu).
Step 5: Start the SPP service on Computer A.
♦ In the BlueSoleil™ Main Window, click View | Service
Window. In the Service Window, right-click the Serial Port icon.
Select Start Service on the pop up menu. (Figure 5.1)

Figure 5.1: Start the SPP Service
Step 6: Connect Computer B to Computer A.
♦ On Computer B double click the ‘My Device icon’ until you find
the device, Computer A.
♦ Double-click the Computer A device to find its SPP service
(Figure 5.2). The Bluetooth Serial Port service icon turns pink.
♦ Right-click the Bluetooth Serial Port service icon and select
Connect. (Figure 5.3)

Figure 5.2: Double-click the Computer A device icon
Figure 5.3: Choose Connect
♦ The connection is established successfully as shown in Figure
5.4. Wait for 10 seconds until the serial port number is shown
on the right bottom status bar on Computer B. (Figure 5.5)

Figure 5.4: The connection is established successfully
Figure 5.5: The serial port number is shown
5.3 Use SPP to Print a Document
This section outlines the steps involved in connecting a computer to a Bluetooth Printer
Adapter using SPP.
Computer A: Bluetooth Printer Adapter B:
Notebook/Laptop, PIII, 800MHz, 128M HP Printer
A Bluetooth USB dongle Bluetooth Printer Adapter
Windows 2000
IVT BlueSoleil™
Step 1: Insert the Bluetooth USB dongle into the computer.
Step 2: Start BlueSoleil™ in the computer.
Step 3: Set the device name of the computer to anything you want; here it
is named Computer A.
♦ In the BlueSoleil™ Main Window of Computer A, click Tools |
My Bluetooth Device. Enter ‘Computer A’ in the device name
field in the My Bluetooth Device window.
Step 4: Set the security level to Low in Computer A. (Use the Tools |

Configurations | Security menu).
Step 5: Connect Computer A to the Bluetooth Printer Adapter B using SPP.
♦ Go to Computer A; double click the My Device icon’ until you
find the device Bluetooth Printer Adapter B.
♦ Double-click the Bluetooth Printer Adapter B device to find it’s
SPP service.
♦ Double-click the SPP service icon to start connecting SPP.
Step 6: Change the printer settings to use the connected Bluetooth serial
port.
Step 7: Print a document.

5.4 SPP Configuration
5.4.1 My SPP Service
In the BlueSoleil™ Service Window, right-click the Serial Port icon. On the pop-up menu,
select Properties to configure the ‘my SPP service’.
Setting Items:
♦ Auto start this service when my Bluetooth starts
Check this option to automatically start my Bluetooth SPP service every time
BlueSoleil™ is started. (Figure 5.6)
Figure 5.6: SPP Service Configuration.

6 Bluetooth File Transfer
6.1 Introduction
The File Transfer profile (FTP) supports the file transfer usage model, which offers the
ability to transfer files from one Bluetooth device to another.
The FTP profile can be used in the following scenarios:
♦ A computer can transfer files to/from another computer.
♦ A computer can transfer files to/from a PDA.
6.2 Transfer files to/from a Computer
This section outlines the steps involved in Computer A transferring files to/ from
Computer B.
Computer A: Computer B
Notebook/ Laptop, PIII, 800MHz, 128M Desktop, PIII, 600MHz, 128M
A Bluetooth USB dongle A Bluetooth USB dongle
Windows 2000 Windows 2000
IVT BlueSoleil™ IVT BlueSoleil™
Step 1: Insert the Bluetooth USB dongles into each computer.
Step 2: Start BlueSoleil™ in each computer.
Step 3: Set device name of each computer to anything you want. Here they
are named Computer A and Computer B,
♦ In the BlueSoleil™ Main Window of Computer A, click Tools |
My Bluetooth Device. Enter ‘Computer A’ in the device name
field in the My Bluetooth Device window.
♦ Repeat for Computer B.
Step 4: Configure the FTP service on Computer A.
♦ In the Service Window, right-click the File Transfer icon. Select
Properties on the pop-up menu. (Figure 6.1)
♦ The Service Configuration window pops up. (Figure 6.2)

Figure 6.1: Service Window
Figure 6.2: The Service Configuration window
♦ In the Share this folder field input the folder that you want to
share with other computers via Bluetooth. Click the button
under Share this folder and a new window Set FTP Server
Root Folder pops up. (Figure 6.3). Select the shared folder in
the Look in box and click the Select button. (Figure 6.4)
♦ For Share Permissions, select Read and Write so that other

computers can copy or delete files\ directories to this directory.
Note: Do not share your Windows system directory in Read and Write mode. Other
users may delete important Windows’ files.
Figure 6.3: Set FTP Server Root Folder
Figure 6.4: Select the shared folder
Step 5: Search for Computer A on Computer B.
♦ Double-click the My Device icon until you find the device
Computer A.
Step 6: Find the FTP service on Computer A.
♦ Double-click the Computer A device icon on Computer B.
(Figure 6.5)
♦ Enter the Bluetooth passkey (if security is set to High on either
side) to start authentication.
♦ Once authentication is complete, the FTP service is found.

Figure 6.5: Double-click the Computer A device icon
Step 7: Connect to Computer A.
♦ Right-click the FTP service icon; select Connect on the pop-up
menu. The connection is now established (Figure 6.6). The
remote folder is displayed in a Windows Explorer folder window
(Figure 6.7).
Figure 6.6: The connection is successfully established

Figure 6.7: The remote folder is displayed
Step 8: Copy files and directories.
♦ From Computer B to Computer A – upload
Select files\ directories on Computer B and drag files into the
Remote Shared Folder. (Figure 6.8)
♦ From Computer A to Computer B – download
Select files\ directories from the Remote Shared Folder and drag
files into the desktop or a folder on Computer B. (Figure 6.9)
Figure 6.8: Upload files to Computer A

Figure 6.9: Download files from Computer A

6.3 FTP Configuration
6.3.1 My FTP Service
In the BlueSoleil™ Service Window, right-click the File Transfer icon. On the pop-up
menu, select Properties to configure the ‘my FTP service’.
Setting Items:
♦ Auto starts this service when my Bluetooth starts
Check this box to automatically start the File Transfer service every time
BlueSoleil™ is started.
♦ Root Directory
This sets the root directory that you want to share with other computers
using Bluetooth.
♦ Access Permissions
This sets the access permission remote computers have to the shared root
directory.
Figure 6.10: Configure FTP service

7 LAN Access
7.1 Introduction
The Bluetooth LAN Access Profile (LAP) allows Bluetooth-enabled devices to access the
services of a LAN using Point-to-Point Protocol. In this usage model, multiple data
terminals use a LAN access point as a wireless connection to a Local Area Network (LAN).
Once connected, data terminals operate as if they are connected to the LAN via dial-up
networking and can access all the services provided by the LAN.
The LAN application can be used in the following scenarios:
♦ A computer (or PDA) accesses a Local Area Network via a LAP Server.
♦ A computer (or PDA) accesses a Local Area Network via a LAN access point.
Note: Before using the LAN Access Profile in Windows98/Me, ensure that a Dial-up
Adapter and Windows’s component direct cable are already installed on the computer.
(See “Section Error! Reference source not found.: Error! Reference source not
found.”). Moreover, every operating system should have an installation of NetBEUI
protocol; otherwise, it cannot use computer name to visit other computer.
7.2 Access a Local Area Network (LAN)
This section outlines the steps involved in connecting to a Local Area Network using the
LAP application.
Computer A: Computer B:
Notebook/ Laptop, PIII, 800MHz, 128M Desktop, PIII, 600MHz, 128M
A Bluetooth USB dongle A Bluetooth USB dongle
Windows 2000 Windows 2000
IVT BlueSoleil™ IVT BlueSoleil™
Step 1: Insert Bluetooth USB dongles into both computers.
Step 2: Start BlueSoleil™ in both computers.
Step 3: Set the device name of each computer to anything you want. Here
they are named Computer A and Computer B.
♦ In the BlueSoleil™ Main Window of Computer A, click Tools |
My Bluetooth Device. Enter ‘Computer A’ in the device name
field in the My Bluetooth Device window.
♦ Repeat for Computer B.
Step 4: Set the security level to Low on both Computer A and Computer B.
(Use the Tools | Configurations | Security menu).
Step 5: Start the LAP service on Computer A.
♦ In the Service Window, right-click the LAN Access icon. Select
Start Service on the pop-up menu (Figure 7.1).

Figure 7.1: Select Start Service
Step 6: Make incoming connection on Computer A
♦ Right-click on My Network Places; select Properties. (Figure
7.2)
♦ On the Network and Dial-up Connections panel, right-click
the Incoming Connection icon, and then select Properties on
the pop up menu. (Figure 7.3)
Figure 7.2: Right-click My Network Places

Figure 7.3: Select Properties on the pop up menu
♦ Click Networking on the Incoming Connections Properties
pop-up window. (Figure 7.4)
♦ Choose Internet Protocol (TCP/IP) and click Properties.
(Figure 7.5)
Figure 7.4: Incoming Connections Properties

Figure 7.5: Choose Internet Protocol (TCP/IP)
♦ Select Specify TCP/IP addresses, and input the two IP
addresses. The subnet mask of the two IP addresses should be
the same as the subnet of the LAN Computer A belongs to.
(Figure 7.6)
Figure 7.6: Input the IP addresses
Step 7: Search for Computer A on Computer B.
♦ Double-click the My Device icon on Computer B until you find
the device icon Computer A.
Step 8: Find the LAP service of Computer A.
♦ Double-click the Computer A device icon on Computer B (Figure
7.7).

Figure 7.7: Double-click the Computer A device icon
Step 9: Connect to Computer A.
♦ Right-click the LAP service icon; select Connect on the pop-up
menu. (Figure 7.8)
Figure 7.8: Select Connect
♦ The Connect BlueSoleil™ LAP Connection window pops up.

Input a username and password. (Figure 7.9)
♦ The connection is then established. (Figure 7.10)
Figure 7.9: Input Username and Password
Figure 7.10: Successful connection to LAP

Step 10: Computer B can now access the LAN via Computer A.
8 Object Push
8.1 Introduction
The Bluetooth Object Push profile (OPP) is an application that offers a way to send and
receive Personal Information Management (PIM) data objects from one Bluetooth device
to another Bluetooth device.
The objects Object Push supports are:
♦ Business cards (*.vcf)
♦ Calendar entries (*.vcs)
♦ Notes (*.vnt)
♦ Messages (*.vmg)
The OPP profile can be used in the following scenarios:
♦ Connecting a computer to a Bluetooth cellular phone (or PDA), and
transferring objects from the computer to the cellular phone (or PDA).
♦ Connecting a computer to a Bluetooth cellular phone (or PDA), and
transferring objects from the cellular phone (or PDA) to the computer.
♦ Connecting two computers and transferring objects between them.
8.2 Transfer Objects from a Computer to a Bluetooth
Cellular Phone
This section outlines the steps involved in transferring OPP objects from a Computer to a
Bluetooth cellular phone.
Computer A: Bluetooth Cellular Phone:
Notebook/Laptop, PIII, 800MHz, 128M Sony Ericsson T68
A Bluetooth USB dongle
Windows 2000
IVT BlueSoleil™
Step 1: Insert the Bluetooth USB dongle into the computer.
Step 2: Start BlueSoleil™ in the computer.
Step 3: Set the device name of the Computer A to anything you want. Here
it is named Computer A.
♦ In the BlueSoleil™ Main Window of Computer A, click Tools |
My Bluetooth. Enter ‘Computer A’ in the device name field in
the My Bluetooth Device window.
Step 4: Configure the business card of Computer A.
♦ Open the Service Configuration window and select the Object
Push page. In the BlueSoleil™ Main Window, click My Services

(Figure 8.1).
♦ Check the boxes, Send Business Card on Request, Accept
Business Card, Accept Calendar Items, Accept Email Messages
and Accept Notes.
♦ To set ‘my business card’, click the box Send My Business
Card (*.VCF). This opens the Open File window. Select a VCF
file as your own business card and click the Open button. Click
the OK button on the Service Configuration window. If you do
not set a business card, the program will generate a business
card file automatically using your computer name. (Figure 8.2)
Figure 8.1: Service Configuration
Figure 8.2: Open File
Step 5: To obtain a VCF card file from MS Outlook.

♦ Open MS Outlook, and select the Contacts item in Outlook
Shortcuts. (Figure 8.3)
Figure 8.3: MS Outlook main window
♦ If there are no contacts entered, the following message appears
on the main window “There are no items to show in this
view. Double-click here to create a new Contact.” Double-
click and a pop-up window appears. (Figure 8.4)
Figure 8.4: Create a new contact
♦ Enter your Contact information. Click File | Save as and a
Save As window pops up. Select the name of the file and the

directory where you want to save the file. Select the vCard
Files (*.vcf) item in the Save as type box. Click the Save
button. (Figure 8.5)
Figure 8.5: Save new Contact
Step 6: Set the T68 to be discoverable.
♦ Press the Menu button on the T68 to find the menu list, and
then select the Connect item. Press the Yes key to enter the
Connect menu, and then select the Bluetooth item. Then
select the Discoverable item.
Step 7: Search for Bluetooth devices in BlueSoleil™ on Computer A until it
finds the T68 (or input the T68 device address directly).
Step 8: Double-click the T68 device to find its OPP service:
♦ If your security attribute is set to High, the Enter Bluetooth
Passkey window pops up (Figure 8.6).
♦ Enter a passkey of your choice, such as “1”, and click the OK
button.
Figure 8.6: Enter the passkey
♦ A message appears on the T68 to ask whether you want to Add
to paired device ? Press the Yes key, enter “1” and then press
Yes again.
♦ A message Pairing pops up. If pairing is successful, the
message Pairing succeeded appears. If pairing is

unsuccessful, the message Pairing failed. Please try again.
Retry? In this case press Yes to retry or No to cancel.
♦ If the pairing succeeds, you will see the services of the T68
include the OPP service. (Figure 8.7) If you have never created
a shortcut DUN, the following dialog pops up asking you
whether Create a Shortcut on the windows desktop. If you
choose yes, a shortcut icon called DUN will occur on the
desktop, otherwise the icon will not occur. For details, please
refer to the related part of DUN.
Figure 8.7: Find the services
Step 9: To send or get objects data, right-click the OPP service icon. There
are four options (Figure 8.8) on the pop-up menu:
♦ Send My Card: Click this menu item, and a business card from
Computer A is sent to the T68.
♦ Get Card: Click this menu item to receive a business card from
the T68. Open the folder inbox to check if you have received
the card.
(Note: Open the My Documents folder on the computer and
find a new folder called BlueSoleil. Open this folder to find the
subfolders inbox and outbox. Inbox is used to deposit the
objects received from other Bluetooth devices. Outbox is used
to deposit the objects you want to send to other Bluetooth
devices.)
♦ Send Objects: Click this menu item to send an object in
Computer A to the T68 (there are four types of object: *.vcf,
*.vcs, *.vmg, *.vnt). Select the objects that you want to send in
the window that pops up and click Open.
♦ Exchange cards: Click this menu item to exchange business
cards between Computer A and the T68.

Figure 8.8: Four types of operation
8.3 Transfer Objects from a Bluetooth Cellular Phone to
a Computer
This section outlines the steps involved in transferring OPP objects from a Bluetooth
cellular phone to a computer.
Computer A: Bluetooth Cellular Phone:
Notebook/Laptop, PIII, 800MHz, 128M Sony Ericsson T68
A Bluetooth USB dongle
Windows 2000
IVT BlueSoleil™
Step 1: Insert the Bluetooth USB dongle into the computer.
Step 2: Start BlueSoleil™ in the computer.
Step 3: Set the device name of the computer to anything you want. Here it
is named Computer A.
♦ In the BlueSoleil™ Main Window of Computer A, click Tools |
My Bluetooth Device. Enter ‘Computer A’ in the device name
field in the My Bluetooth Device window.
Step 4: Configure the OPP service attribute of Computer A, and start the
OPP service.
♦ In the BlueSoleil™ Main Window, click My Services|
Properties… (Figure 8.9).

♦ The Service Configuration window pops up. Select the Object
Push item. Configure My Business Card (See “Section 8.2:
Transfer Objects from a Computer to a Bluetooth Cellular
Phone”, Step 4) and configure other OPP service attributes for
Computer A.
Figure 8.9: Configure the OPP service
♦ In the BlueSoleil™ Main Window, select View | Service
Window.
♦ Right-click the Object Push icon, and select Start Service
(Figure 8.10).

Figure 8.10: Select the Start Service
Step 5: Discover and pair Computer A on the T68.
♦ Select Menu | Connect | Bluetooth | Discover on the T68. A
list of the surrounding devices appears. Select ‘Computer A’.
♦ When the Add to paired device devices? message appears,
press the Yes key and enter a passkey, for example “1”. Use
the same passkey on BlueSoleil™ as used on the T68. If you
have never created a shortcut DUN, the following dialog pops
up asking you whether Create a Shortcut on the windows
desktop. If you choose yes, a shortcut icon called DUN will
occur on the desktop, otherwise the icon will not occur. For
details, please refer to the related part of DUN.
Step 6: Start the OPP operation.
♦ Select Menu | Phone book | Business cards on the T68.
♦ To send “my card” from the T68.
From the Business cards menu, select Send my own and
then select Via Bluetooth. The T68 searches the surrounding
Bluetooth devices. To send the business card from the T68 to
Computer A, select ‘Computer A’ on the T68 screen.
♦ To select an object and send it.
From the Business cards menu, select Send contact and then
select Via Bluetooth. The T68 asks you to select the object
that you want to send. Select an object and send it as specified
above.
♦ To receive a business card.
From the Business cards menu, select Receive and then
select Via Bluetooth. The T68 is now in discoverable status,

and you can send an object to it from other Bluetooth devices.
♦ To send all business cards.
From the Business cards menu, select Send all and then
select Via Bluetooth. Select the destination device Computer
A. The T68 then sends all its *.vcf files to Computer A.

8.4 Transfer Objects between Two Computers
This section outlines the steps involved in transferring OPP objects between two
Computers (Computer A and Computer B).
Computer A: Computer B:
Notebook/Laptop, PIII, 800MHz, 128M Desktop, PIII, 600MHz, 128M
A Bluetooth USB dongle A Bluetooth USB dongle
Windows 2000 Windows 2000
IVT BlueSoleil™ IVT BlueSoleil™
Step 1: Insert Bluetooth USB dongles in both computers.
Step 2: Start BlueSoleil™ in both computers.
Step 3: Set device name of each computer to anything you want. Here
they are named Computer A and Computer B.
♦ In the BlueSoleil™ Main Window of Computer A, click Tools |
My Bluetooth Device. Enter ‘Computer A’ in the device name
field in the My Bluetooth Device window.
♦ Repeat for Computer B.
Step 4: Start the OPP service on Computer B (See “Section 8.3: Transfer
Objects from a Bluetooth Cellular Phone to a Computer, Step 4) to
provide the OPP service for Computer A.
Step 5: Search for Bluetooth devices in Computer A until it finds Computer
B.
Step 6: Double-click on the Computer B device icon to find it’s OPP service.
Step 7: Perform an OPP operation. (See “Section 8.3: Transfer Objects from
a Bluetooth Cellular Phone to a Computer”, Step 5)

8.5 Configure OPP Service
8.5.1 My OPP Service
In the BlueSoleil™ Service Window, right-click the Object Push icon. To configure ‘my
OPP service’, select Properties on the pop-up menu.
Setting Items:
♦ Auto start this service when my Bluetooth starts
Select this item if you want to automatically start the OPP service every time
BlueSoleil™ starts.
♦ My Business Card (*.vcf)
You must select your own business card (*.vcf file) every time you start
BlueSoleil™. If you forget to do this, BlueSoleil™ creates a *.vcf file using
your computer name and regards this file as your own business card.
♦ Send Business Card on Request
Select this item to allow other users to receive your business card.
♦ Receive Business Card
There are four possible items here. Each item represents one type of object.
You may select the object types that you want to accept.
- Accept Business Card to accept business cards (*.vcf)
- Accept Calendar Items to accept calendar items (*.vcs)
- Accept Email Messages to accept email messages (*.vmg)
- Accept Notes to accept notes (*.vnt)
Figure 8.11: Configure OPP service

9 Synchronization
9.1 Introduction
Using Bluetooth Synchronization (SYNC), Bluetooth devices can synchronize messages,
notes, calendars and cards with each other.
The objects Synchronization (SYNC) supports are:
♦ Business cards (*.vcf)
♦ Calendar entries (*.vcs)
♦ Notes (*.vnt)
♦ Messages (*.vmg)
The SYNC application is typically used in the following scenarios:
♦ A computer exchanging PIM (Personal Information Management) data with a
cellular phone or PDA.
♦ Two computers exchanging PIM data with each other.
9.2 Exchange PIM Data with a Cellular Phone
This section outlines the steps involved in connecting a computer to a Bluetooth cellular
phone. The cellular phone works as a server that provides the SYNC service.
Computer A: Bluetooth Cellular Phone:
Notebook/Laptop, PIII, 800MHz, 128M Sony Ericsson T68
A Bluetooth USB dongle
Windows 2000
IVT BlueSoleil™
Step 1: Insert the Bluetooth USB dongle into the computer.
Step 2: Start BlueSoleil™ in the computer.
Step 3: Set the device name of the computer to anything you want. Here it
is named Computer A.
♦ In the BlueSoleil™ Main Window of Computer A, click Tools |
My Bluetooth Device. Enter ‘Computer A’ in the device name
field in the My Bluetooth Device window.
Step 4: Set the security level to Low on Computer A. (Use the Tools |
Configurations | Security menu).

Step 5: Configure the T68.
♦ Set T68 to be discoverable.
Press the Menu button on the T68 and select Connect |
Bluetooth | Discoverable. Press Yes to confirm the selection.
♦ To confirm Pairing.
Press the Menu button on the T68 and select Connect |
Bluetooth | Discover. The T68 searches for Bluetooth devices
and displays the devices found on screen. Select a device
where BlueSoleil™ is running. Then select Add to paired
device? to confirm pairing.
♦ The T68 requests a passkey. Input any number (for example
“1”). In the BlueSoleil™ application a window pops up asking for
the passkey (Figure 2.1). Input the same passkey as in the T68
(for example, “1”) and click OK. If you have never created a
shortcut DUN, the following dialog pops up asking you whether
Create a Shortcut on the windows desktop. If you choose
yes, a shortcut icon called DUN will occur on the desktop,
otherwise the icon will not occur. For details, please refer to the
related part of DUN.
Figure 9.1: Input the passkey
Step 6: Start synchronization.
♦ Now use the computer running BlueSoleil™ to start the
synchronization. (See “Section 8.3: Transfer Objects from a
Bluetooth Cellular Phone to a Computer”, Step 6).

9.3 Set up SYNC Connection between Two Computers
This section outlines the steps involved in setting up a SYNC connection between two
computers, Computer A and Computer B. Computer A works as a server that provides
the BlueSoleil™ SYNC service. Computer B works as a client that uses the SYNC service
provided by Computer A.
Computer A: Computer B:
Notebook/Laptop, PIII, 800MHz, 128M Desktop, PIII, 600MHz, 128M
A Bluetooth USB dongle A Bluetooth USB dongle
Windows 2000 Windows 2000
IVT BlueSoleil™ IVT BlueSoleil™
Step 1: Insert the Bluetooth USB dongles into each computer.
Step 2: Start BlueSoleil™ in each computer.
Step 3: Set the device name of the each computer to anything you want.
Here they are named Computer A and Computer B.
♦ In the BlueSoleil™ Main Window of Computer A, click Tools |
My Bluetooth Device. Enter ‘Computer A’ in the device name
field in the My Bluetooth Device window.
♦ Repeat for Computer B.
Step 4: Set the security level to low on Computer A and Computer B. (Use
the Tools | Configurations | Security menu).
Step 5:
Start the BlueSoleil™ SYNC service on Computer A. Before starting
the SYNC Server, it may need to be configured. To configure the
server, follow the steps below:
♦ In the Main Window click View | Service Window
♦ In the Service Window, right-click the Information
Synchronization icon. Select Properties on the pop up menu as
shown in Figure 9.2.
♦ Set the option you require, and then click OK. (Figure 9.3)

Figure 9.2: Select Properties on the Information Synchronization icon
Figure 9.3: Service Configuration

Figure 9.4: Select Start Service
Step 6: Start the SYNC client on Computer B.
♦ Search the Bluetooth device and find the SYNC service. In the
Main Window, click the My Device icon, and wait for a few
seconds. When all device icons have appeared, click the
Bluetooth device named Computer A. (Figure 9.5)
Figure 9.5: Click the Bluetooth device

♦ Double-click the Bluetooth Information Synchronization service
icon. The color of the SYNC service icon changes to green
(Figure 9.6), indicating the connection is successfully
established.
Advanced Usage:
♦ Before synchronization select the data type that you want to exchange.
Leave the checkbox unchecked to disable the object type that you do not
support.
Figure 9.6: Connection is established successfully
♦ The SYNC clients can now start synchronization. Press the green
button to begin synchronization. (Figure 9.7).
Figure 9.7: Press the green button

♦ During synchronization push the red button if you want to stop the
synchronization.
♦ Click the yellow explore button to check the information data after
synchronization.
9.4 Synchronization Configuration
9.4.1 My Synchronization Service
In the BlueSoleil™ Service Window, right-click the Information Synchronization icon. To
configure the synchronization service select Properties on the pop-up menu. (Figure 9.8)
Setting Items:
♦ Auto start this service when my Bluetooth starts
Check this item to start my synchronization service automatically every time
BlueSoleil™ is started.
♦ Options
This service supports options for vCard, vCalendar, vMessage and vNote data
types. You can select the data type you want to support.
Figure 9.8: Service Configuration

10 Hardcopy Cable Replacement
10.1 Introduction
The Bluetooth Hardcopy Cable Replacement profile (HCRP) provides services to replace
the cable between a host and peripheral device with a Bluetooth link. The most common
devices using these services are laptops and desktop computers, however other devices
are not excluded.
The HCRP profile can be used in the following scenario:
♦ Print a document using a Bluetooth Printer.
10.2 Print a Document Using a Bluetooth Printer
This section outlines how to print a document from Computer A (client) using a Bluetooth
Printer (server)
Computer A: Bluetooth Printer B:
Notebook/Laptop, PIII, 800MHz, 128M Bluetooth Printer
A Bluetooth USB dongle
Windows 2000
IVT BlueSoleil™
Step 1: Insert the Bluetooth USB dongle into the computer.
Step 2: Start BlueSoleil™ in the computer.
Step 3: Set device name of the computer to anything you want. Here it is
named Computer A.
♦ In the BlueSoleil™ Main Window of Computer A, click Tools | My
Bluetooth Device. Enter ‘Computer A’ in the device name field
in the My Bluetooth Device window.
Step 4: Turn on the Bluetooth printer to provide the HCRP service for
Computer A.
Step 5: Search for Bluetooth devices on Computer A
In the Main Window, double click the ‘My Device icon’. Wait a few
seconds. The discovered surrounding devices appear.
Step 6: Search the HCRP services of Printer B.
Double-click the printer named ‘Printer’. The HCRP service icon turns
red.
Step 7: Connect the two devices.
♦ Double-click the HCRP service icon to connect Computer A and
the Bluetooth printer.
Step 8:
The connection is established.
♦ After the connection setup is completed, a dashed line between
the My Device icon (or ‘center ball’) and the Bluetooth Printer
icon appears and the HCRP service icon turns green. (Figure
10.3)

♦ If there is no driver installed for the Bluetooth printer, then
BlueSoleil™ displays a message asking the user to install a driver
for the Bluetooth Printer, see the Windows system icons in the
bottom right hand corner of the Windows desktop. (Figure 10.1)
Install the driver for the printer on Computer A and set its port
to COMx.
♦ If there is already a driver installed for the Bluetooth printer, a
message appears indicating that the Bluetooth printer is ready
(Figure 10.2). BlueSoleil™ sets the Bluetooth printer’s port to
COMx (e.g. COM3). If there are several drivers for the Bluetooth
printer installed on Computer A, BlueSoleil™ automatically sets
one of them as the Bluetooth printer.
Figure 10.1: Bluetooth Printer Driver is not installed
Figure 10.2: Bluetooth Printer Driver is ready
Step 9: Print documents.
♦ Computer A and Bluetooth Printer B are now connected. On
Computer A, open the document that you want to print. Select
File |Print. Then select the Bluetooth printer and print.
Step 10: Disconnect the Bluetooth Printer.
♦ Right-click the HCRP service icon; select Disconnect on the
pop up menu. (Figure 10.3)

Figure 10.3: Disconnect from the Bluetooth Printer

11 Human Interface Device
11.1 Introduction
A typical Bluetooth Human Interface Devices (HID) is a Bluetooth-enabled mouse,
keyboard or joystick. The HID service allows wireless communication to Bluetooth HID
devices.
The HID profile can be used in the following scenarios:
♦ Connecting a computer to a Bluetooth Mouse.
♦ Connecting a computer to a Bluetooth Keyboard.
11.2 Connect a Computer to a Bluetooth Mouse
This section outlines how to connect a computer (Computer A) to a mouse (Bluetooth
Mouse B).
Computer A: Bluetooth Mouse B:
Desktop, PIII, 800MHz, 128M Bluetooth wireless mouse
A Bluetooth USB dongle
Windows 2000
IVT BlueSoleil™
Step 1: Insert the Bluetooth USB dongle into the computer.
Step 2: Start BlueSoleil™ in the computer and set the security level to low
using the Tools | Configurations | Security menu.
Step 3: Set the device name of the computer to anything you want. Here it
is named Computer A.
♦ In the BlueSoleil™ Main Window of Computer A, click Tools |
My Bluetooth Device. Enter ‘Computer A’ in the device name
field in the My Bluetooth Device window.
Step 4: Power on the Bluetooth mouse. (Bluetooth Mouse B)
Step 5: Search for Bluetooth devices in Computer A until you find Bluetooth
Mouse B. In the Main Window, double-click the My Device icon
(‘center ball’). Wait a few seconds. The discovered surrounding
devices appear.
Step 6: Double-click the Bluetooth Mouse B device icon to find it’s HID
service. If found, the HID service icon turns red. (Figure 11.1)

Figure 11.1: Find Bluetooth mouse and its service
Step 7: Double-click the HID service icon to connect to Mouse B. After the
connection is successfully set-up, a dashed line appears between
the center ball and the Mouse B icon. The HID service icon turns
green (Figure 11.2).
Figure 11.2: Connect to Bluetooth mouse
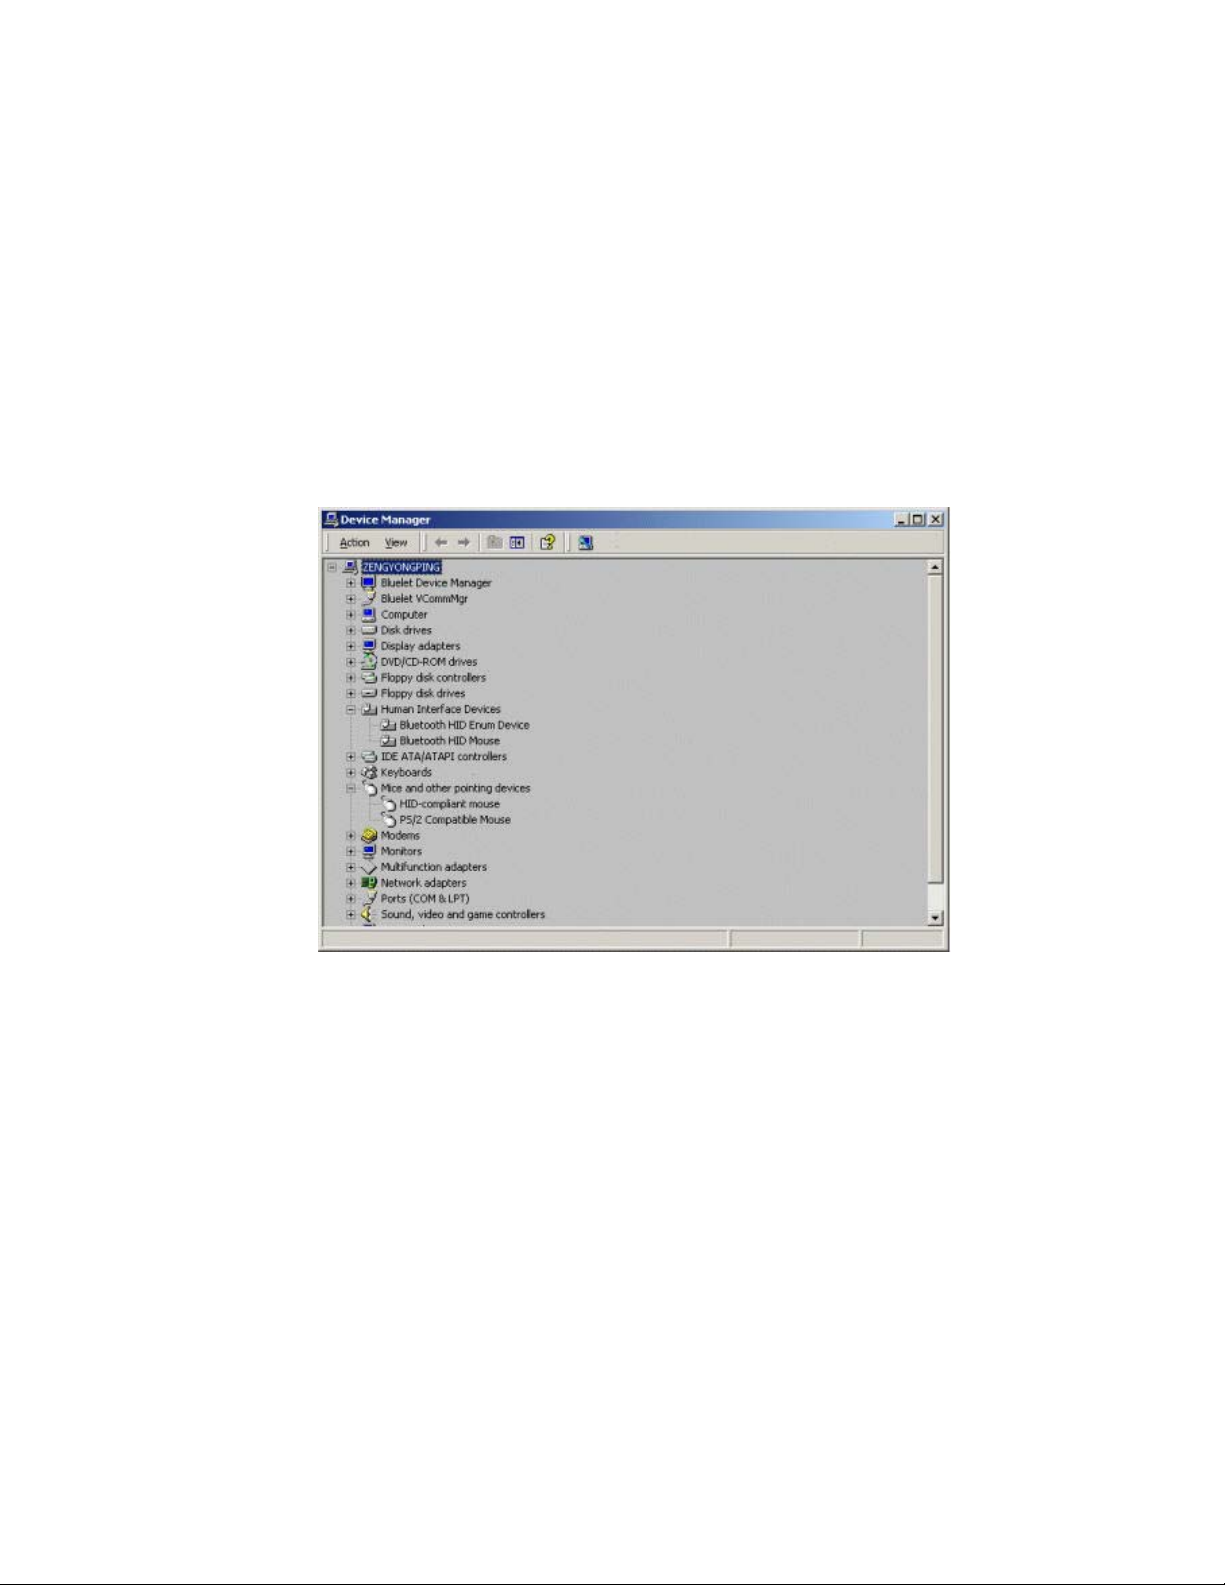
Step 8: Install drivers for Bluetooth mouse.
♦ If this is the first time Computer A has connected to a Bluetooth
mouse, wait for a few seconds to allow Windows to install
drivers for a Bluetooth mouse.
♦ You will see two new devices in Computer A: Bluetooth HID
Mouse in ‘Human Interface Devices’ class and HID-compliant
mouse in ‘Mice and other pointing devices’ class. (Figure 11.3)
Step 9: Now the Bluetooth mouse is ready to use. You can use it as a
legacy PS/2 or serial mouse.
Step 10: To disconnect Mouse B.
♦ Right-click the HID service icon in the Main Window and click
Disconnect. Alternatively right-click Mouse B in the Main
Window and select Disconnect | Human Interface Device.
Figure 11.3: New HID mouse device in Device Manager

11.3 Connect a Computer to a Bluetooth Keyboard
This section outlines how to connect a computer (Computer A) to a keyboard (Bluetooth
Keyboard B).
Computer A: Bluetooth Keyboard B:
Desktop, PIII, 800MHz, 128M Bluetooth wireless keyboard
A Bluetooth USB dongle
Windows 2000
IVT BlueSoleil™
Step 1: Insert the Bluetooth USB dongle into the computer.
Step 2: Start BlueSoleil™ in the computer and set the security level to low
using the Tools | Configurations | Security menu.
Step 3: Set device name of the computer to anything you want. Here it is
named Computer A.
♦ In the BlueSoleil™ Main Window of Computer A, click Tools |
My Bluetooth Device. Enter ‘Computer A’ in the device name
field in the My Bluetooth Device window.
Step 4: Power on the Bluetooth keyboard. (Bluetooth Keyboard B)
Step 5: Search for Bluetooth devices in Computer A until you find Bluetooth
Keyboard B. In the Main Window, double click the ‘My Device icon’
(center ball). Wait a few seconds. The discovered surrounding
devices appear.
Step 6: Double-click the Bluetooth Keyboard B device icon to find it’s HID
service. If found, the HID service icon turns red (Figure 11.4).
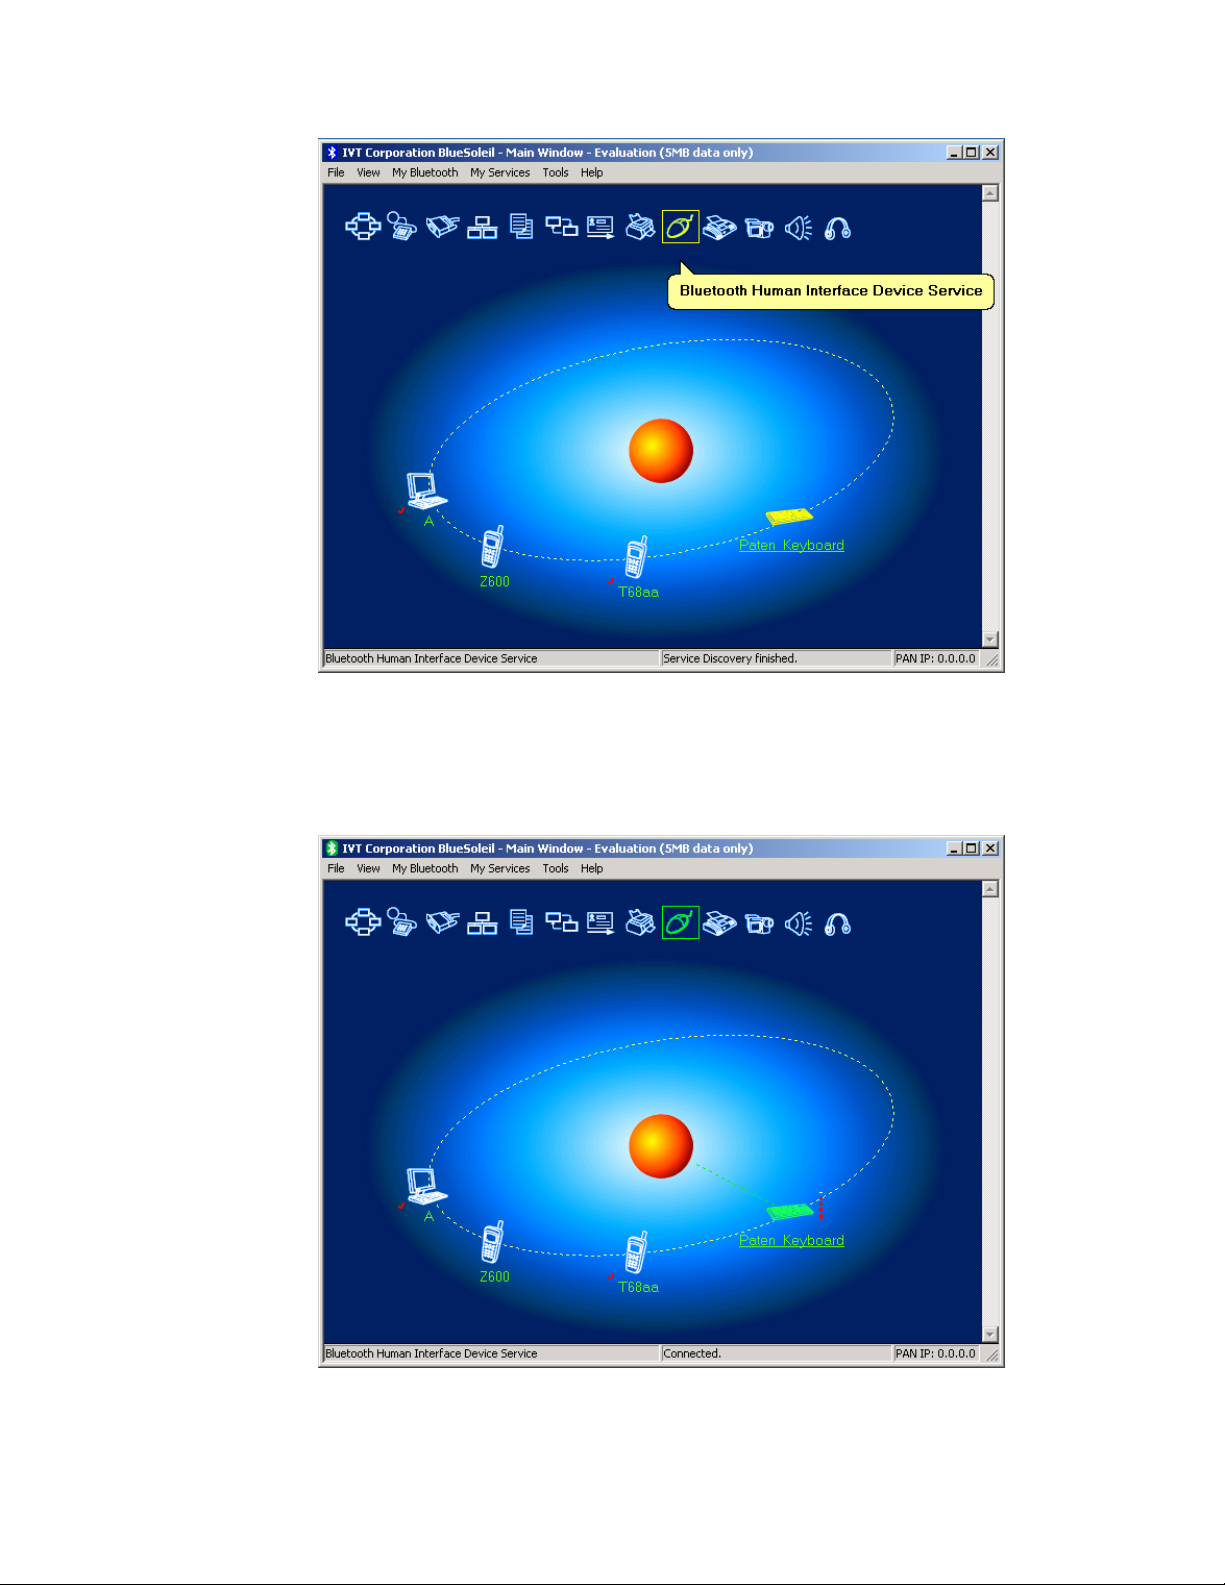
Figure 11.4: Find Bluetooth keyboard and its service
Step 7: Double-click the HID service icon to connect to Keyboard B. After
the connection is successfully set-up, a dashed line appears
between the center ball and the Keyboard B icon. The HID service
icon turns green (Figure 11.5).
Figure 11.5: Connect to Bluetooth keyboard
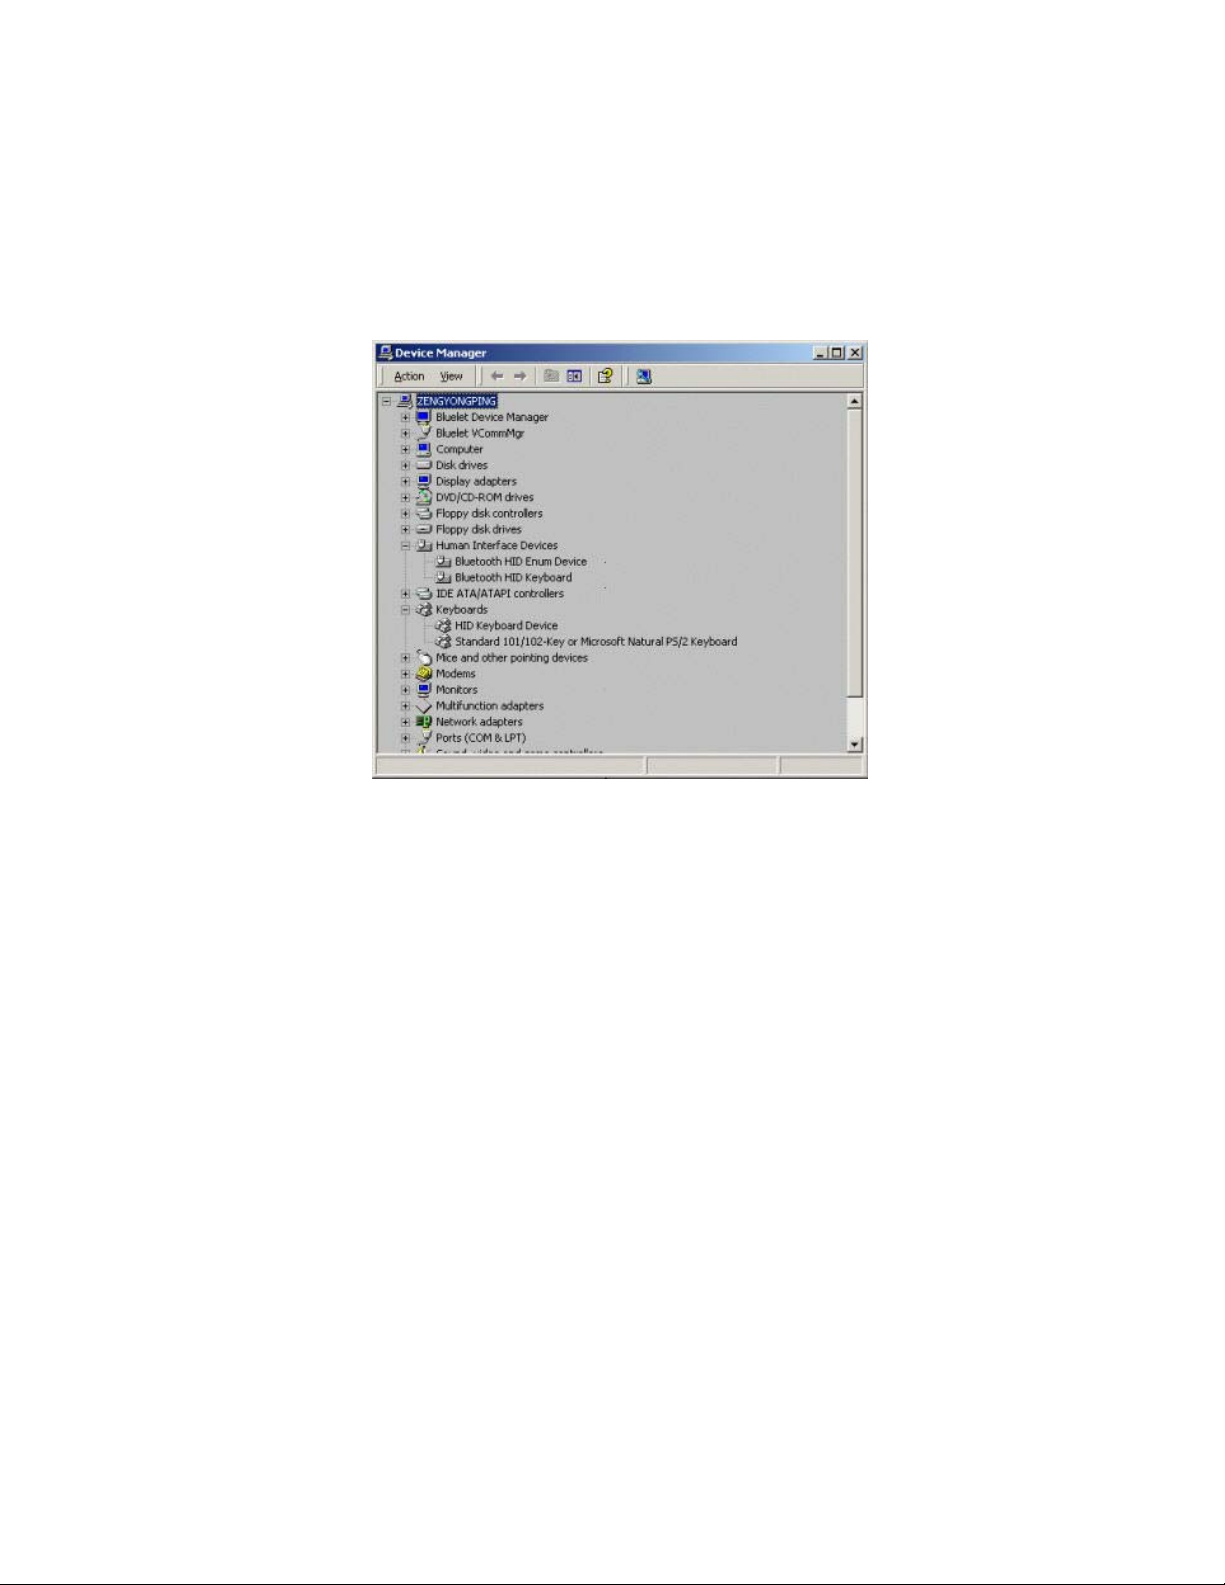
Step 8: Install drivers for the Bluetooth keyboard.
♦ If this is the first time Computer A has connected to a Bluetooth
keyboard, wait for a few seconds to allow Windows install
drivers for a Bluetooth keyboard.
♦ You will see two new devices in Computer A: Bluetooth HID
Keyboard in ‘Human Interface Devices’ class and HID
Keyboard Device in ‘Keyboards’ class. (Figure 11.6)
Figure 11.6: New HID keyboard device in Device Manager
Step 9: Now the Bluetooth keyboard is ready to use. You can use it as a
legacy PS/2 keyboard.
Step 10: To disconnect Keyboard B.
♦ Right-click the HID service icon in the Main Window and click
Disconnect. Alternatively right-click Keyboard B in the Main
Window and select Disconnect | Human Interface Device.

12 Connection Shortcut
12.1 Introduction
Connection shortcut profile is used to save time used in searching for devices and
browsing services. Once a connection has been established, it can be saved as a shortcut.
The shortcut is then used to re-establish the connection, without having to search for the
remote Bluetooth device and required Bluetooth service.
12.2 How to use Connection Shortcut
This section outlines how to save a Bluetooth PAN connection as a connection shortcut.
Computer A: Computer B:
Notebook, Laptop, PIII, 800MHz, 128M Desktop, PIII, 800MHz, 128M
A Bluetooth USB dongle A Bluetooth USB dongle
Windows 2000 Windows 2000
IVT BlueSoleil™ IVT BlueSoleil™
Step 1: Establish a PAN connection.
Step 2: Save the Bluetooth Personal Area Neworking Service shortcut on
Computer B.
♦ Right-click the Computer A device icon and select Save
Connection as Shortcut | Bluetooth Personal Area
Networking Service. (Figure 12.1)
Figure 12.1: Save Bluetooth Personal Area Neworking Service as
connection shortcut
Step 3: Close BlueSoleil™ on Computer B by selecting File | Exit in the
BlueSoleil™ Main Window.
Step 4: Re-start BlueSoleil™ on Computer B.

Step 5: In the BlueSoleil™ Main Window, click Tools | My Bluetooth
Shortcuts. The Bluetooth Shortcuts window pops up. (Figure
12.2)
Figure 12.2: Bluetooth Shortcuts window
Step 6: Check the Auto Start box and click Connect. (Figure 12.3)
Figure 12.3: Bluetooth Shortcuts
Step 7: Once the connection is successfully established, click OK in the
Bluetooth Shortcuts window. (Figure 12.4)

Figure 12.4: Click OK on Bluetooth Shortcuts
Step 8: Start to use the PAN service provided by Computer A.

13 Bluetooth Glossary
Bluetooth Authentication Bluetooth authentication is the procedure to verify
whether another Bluetooth enabled device has the right to access your computer. During
this procedure, a Bluetooth passkey is requested on both sides of the connection. If the
passkeys are the same, the authentication procedure is a success and the connection can
be setup. If the passkeys are different, then authentication fails and a connection cannot
be established.
Bluetooth Authorization Bluetooth authorization is the procedure to verify whether
you are going to allow (authorize) other Bluetooth enabled devices to use Bluetooth
services on your Bluetooth enabled device. Every Bluetooth service in your BlueSoleil™
has an authorization setting. The authorization devices list for each service records the
devices that have been authorized for that service. The user can change the
authorization status for each device.
Bluetooth Connection A Bluetooth connection refers to the Bluetooth link that can be
set up between two Bluetooth devices. Connected Bluetooth devices have a server/ client
relationship. One Bluetooth device provides services and another Bluetooth device uses
these Bluetooth services.
Bluetooth Connection Shortcut Connection shortcut is used to save time used in
searching for devices and browsing services. Once a connection has been established, it
can be saved as a shortcut. The shortcut is then used to re-establish the connection,
without having to search for the remote Bluetooth device and required Bluetooth service.
Bluetooth Device Bluetooth Devices can refer to either of the following:
(1) When referring to the local device configuration, a Bluetooth Device is the local
Bluetooth hardware, e.g. USB dongle, UART device, PCMCIA card or BCSP device.
(2) When referring to the Bluetooth application, the Bluetooth device is the Bluetooth
system as a whole, e.g. a Bluetooth modem, Bluetooth mobiles or a Bluetooth PDA. A
computer together with the BlueSoleil™ and the Bluetooth dongle would also be
addressed as a remote Bluetooth device by other Bluetooth devices.
Bluetooth Device Address A unique 48-bit address that distinguishes different
Bluetooth transceivers. Every Bluetooth device has a unique address so that other
devices can find it and communicate with it. The address appears in the form of
00:03:20:00:0D:0A.
Bluetooth Device Class According to the Bluetooth standard, every Bluetooth device
is assigned a device type, which is represented in the Bluetooth device class. The
Bluetooth device class is three bytes in length in the form of 04:01:00. On the computer
side, the class may be Server, Desktop or Laptop. Users will be asked to select it during
first time set-up.
Bluetooth Device Inquiry To use Bluetooth, the user has to first find the remote
device. The searching procedure is called device inquiry. There are two kinds of inquiry
procedure; General Inquiry and Limited Inquiry. General Inquiry will find all the
Bluetooth devices in ‘general discoverable mode’ and ‘limited discoverable mode’. Limited
Inquiry will find only the devices in ‘limited discoverable mode’.
Bluetooth Dial-up Networking This is the implementation of the Bluetooth Dial-up
Networking profile (DUN). Using DUN, Bluetooth devices can dial-up to the Internet via a
Bluetooth modem or a Bluetooth mobile phone.
Bluetooth FAX This is the implementation of the Bluetooth FAX profile (FAX). Using
FAX, Bluetooth devices can send a FAX via a Bluetooth mobile.

Bluetooth File Transfer This is the implementation of the Bluetooth File Transfer
profile (FTP). Bluetooth File Transfer enables the transfer files between Bluetooth devices.
Bluetooth HCRP This is the implementation of the Bluetooth Hardcopy Cable
Replacement profile (HCRP). HCRP provides services to replace the cables between hosts
and peripheral devices with a Bluetooth link. HCRP is mainly used for wireless printing.
Bluetooth Information Synchronization This is the implementation of the Bluetooth
Synchronization profile (SYNC). Using Synchronization, Bluetooth devices can
synchronize messages, notes, calendars and cards with each other.
Bluetooth LAN Access This is the implementation of the Bluetooth LAN Access profile
(LAP). Using LAP, Bluetooth devices can access Local Area Network via LAN access
points.
Bluetooth Object Push This is the implementation of the Bluetooth Object Push profile
(OPP). Using OPP, Bluetooth devices can transfer messages, notes, calendars and cards
with each other.
Bluetooth Passkey In the Bluetooth authentication procedure, a Bluetooth passkey is
requested on both connection sides. The same Bluetooth passkey should be input on
both sides. If the passkeys are the same, the authentication procedure is successful and
connections can be setup. If the passkeys are different, the connection and
authentication will fail.
Bluetooth Peripheral Device This is the implementation of the Bluetooth Human
Interface Device profile (HID). By using HID, Bluetooth peripheral input devices such as a
Bluetooth mouse or keyboard, can remotely interface with the host computer.
Bluetooth Personal Area Networking This is the implementation of the Bluetooth
Personal Area Networking profile (PAN). Using PAN, Bluetooth devices can connect to
each other to form ad-hoc networks. They can form a TCP/IP network or connect to a
Local Area Network and the Internet.
Bluetooth Printer This is the implementation of the Bluetooth Hard-copy Cable
Replacement profile (HCRP) as a printer. Bluetooth Printer allows Bluetooth devices to
wirelessly print documents to a Bluetooth printer.
Bluetooth Security Bluetooth security is an important part of the Bluetooth wireless
communication technology. Bluetooth security enables illegal access to your computer to
be rejected. There are three levels of security: Low, Medium and High. In Low level,
there is no security check. In Medium level, remote Bluetooth devices can browse your
services. Security is set on every service. The service can be set to request or not to
request for authentication and authorization. If you request for authentication, the
remote device will be asked to enter the same passkey as the one in your computer.
Otherwise, the Bluetooth passkey is not requested. If authorization is set, the remote
device has to be in the authorized devices list.
Bluetooth Service A Bluetooth device may offer certain functions for other Bluetooth
devices to use. These functions are called Bluetooth services. For example, a Bluetooth
mobile phone can offer four services, which include synchronization, dial-up networking,
file transfer and serial port. In BlueSoleil™, all services need to be started manually
before use..
Bluetooth Service Browse A remote Bluetooth device can provide one or more
Bluetooth services. To use the services that the remote device provides, the user has to
first find the services. This is called service browse.
Bluetooth Serial Port This is the implementation of the Bluetooth Serial Port profile
(SPP). SPP emulates a serial port over Bluetooth, for the Bluetooth device.

Bonding Bonding is the creation of a relationship between two devices, which are
known to each other prior to the bonding procedure. A user initiates the bonding
procedure and enters a passkey to create a bond between two devices. This differs from
the authentication procedure where the user is requested to enter a passkey during the
establishment of the link.
Connectable Bluetooth devices can be connectable or non-connectable. When the
device is connectable, other devices can connect to it.
DHCP The Dynamic Host Configuration Protocol (DHCP) is an Internet protocol for
automating the configuration of computers that use TCP/IP.
Bluetooth Dongle A Bluetooth device which can be added onto a computer or notebook
to make it Bluetooth enabled, A Bluetooth dongle is typically a USB device.
General Discoverable Bluetooth devices have three modes: General discoverable,
Limited discoverable and Non-discoverable mode. A Bluetooth device will respond to a
General Inquiry if it is in general discoverable or limited discoverable mode.
HID A Human Interface device such as a keyboard or mouse.
ICS (Internet Connection Sharing) For more detailed information about ICS, please
refer to the Microsoft Windows help topic: Internet Connection Sharing.
Limited Discoverable Bluetooth devices have three modes: General discoverable,
Limited discoverable and Non-discoverable mode. In Limited discoverable mode, a
Bluetooth device will only respond to a Limited Inquiry.
LAN A LAN is a Local Area Network.
LAN Access Point One of entities defined in the LA profiles, the LAN Access Point acts
like a router between a Bluetooth piconet and an external network.
NAT Network Address Translation (NAT) is used to re-map IP numbers from one range
to another range of network addresses.
Non-Connectable A Bluetooth devices can be connectable or non-connectable. When
it is non-connectable, other devices cannot connect to it. This is used in BlueSoleil™ only
when the user does not want another device to connect to their computer.
Non-discoverable Bluetooth devices have three modes: General discoverable, Limited
discoverable and Non-discoverable mode. In Non-discoverable mode, a Bluetooth device
will not respond to any inquiry, so another Bluetooth device will not be able to find it.
Non-pairable A Bluetooth device can be pairable or non-pairable. When it is nonpairable, it will not accept a bonding request from other devices.
Pairable A Bluetooth device can be pairable or non-pairable. When it is pairable, it will
accept a bonding request from other devices. After the bonding process is finished
successfully, two devices are paired. They now form a trusted relationship. There is no
need to exchange Bluetooth Passkeys the next time they connect.
Piconet A collection of devices connected via Bluetooth wireless technology in an ad
hoc fashion. A piconet starts with two connected devices, such as a portable PC and an
Access Point, and may expand to eight connected devices. All Bluetooth devices are peer
units and have identical implementations. However, when establishing a piconet, one unit
will act as a master and the other(s) as slave(s) for the duration of the piconet
connection. All devices have the same physical channel utilizing the same Frequencyhopping sequence, defined by the master device clock and the Bluetooth Device Address.
PIM Personal Information Management.

Radio Signal Strength Bluetooth operates on the 2.4G ISM band. The radio signal is
stronger when the remote device is closer or the remote device has a higher radio output.
The radio signal is weak when the remote device is distant or the remote device has a
weak radio output. The strength of the remote device's radio signal affects the quality of
the communication of the two Bluetooth devices. When the radio signal is weak, the
Bluetooth data transfer speed is slow. However, if the two devices are too close and the
radio signal is too strong, the Bluetooth data transfer speed is also slow because the
"sound" is too loud to "hear". The radio signal strength is always referred to as RSSI in
Bluetooth.
Remote Bluetooth Device My Bluetooth device sees all other Bluetooth enabled
devices as remote Bluetooth devices. For example, a Bluetooth modem, Bluetooth
mobiles or a Bluetooth PDA .
Start Bluetooth Service Start the selected Bluetooth service. Only after the service is
started, can other devices browse the service and connect to it.
Stop Bluetooth Service Stop the selected Bluetooth service. After the service is
stopped, other devices cannot browse the service or connect to it. The existing
connection will be disconnected.

Specification
Standard
Bluetooth V1.2
Interface
USB (Type A)
Link Mode
ACL, eSCO (Extended Synchronous Connection-Oriented)
Data Rate
Asynchronous:723.2kbps/57.6kbps
Synchronous:433.9kbps/433.9kbps
Frequency Band
ISM 2.4GHz
Compatible OS
Microsoft Windows 98 SE/2000//ME/XP, Mac OS v10.2 and higher
Bluetooth Software support
PAN, DUN, SPP, LAN, FTP, Synchronization, OBEX, HCRP, HID, FAX, BIP, AV, HS
Receiver Signal Range
Better than –76dBm @0.1%BER
RF Output Power
-6~+4dBm (Max +6 dBm)
Operation current
< 80mA(max)
Operating Distance
Up to 10 meters
Operation Temperature
-40~+85 Degree C
Storage Temperature
-40 to +105 Degree C
Modulation
GFSK(Gaussian Frequency Shift Keying)
USB Specification
USB Ver 2.0
Spectrum
AFH (Adaptive Frequency Hopping)
Security Provided
Pairing, Encryption, Authentication
Dimension
46mm x 19mm x 10mm

FOR TECHNICAL SUPPORT, CALL:
From U.S.A. and Canada (24 hours a day, 7 days a week)
(800) SMC-4-YOU; Phn: (949) 679-8000; Fax: (949) 679-1481
From Europe : Contact details can be found on
www.smc-europe.com or www.smc.com
INTERNET
E-mail addresses:
techsupport@smc.com
european.techsupport@smc-europe.com
Driver updates:
http://www.smc.com/index.cfm?action=tech_support_drivers_downloads
World Wide Web:
http://www.smc.com/
http://www.smc-europe.com/
For Literature or Advertising Response, Call:
U.S.A. and Canada: (800) SMC-4-YOU Fax (949) 679-1481
Spain: 34-91-352-00-40 Fax 34-93-477-3774
UK: 44 (0) 1932 866553 Fax 44 (0) 118 974 8701
France: 33 (0) 41 38 32 32 Fax 33 (0) 41 38 01 58
Italy: 39 (0) 3355708602 Fax 39 02 739 14 17
Benelux: 31 33 455 72 88 Fax 31 33 455 73 30
Central Europe: 49 (0) 89 92861-0 Fax 49 (0) 89 92861-230
Nordic: 46 (0) 868 70700 Fax 46 (0) 887 62 62
Eastern Europe: 34 -93-477-4920 Fax 34 93 477 3774
Sub Saharan Africa: 216-712-36616 Fax 216-71751415
North West Africa: 34 93 477 4920 Fax 34 93 477 3774
CIS: 7 (095) 7893573 Fax 7 (095) 789 357
PRC: 86-10-6235-4958 Fax 86-10-6235-4962
Taiwan: 886-2-87978006 Fax 886-2-87976288
Asia Pacific: (65) 238 6556 Fax (65) 238 6466
Korea: 82-2-553-0860 Fax 82-2-553-7202
Japan: 81-45-224-2332 Fax 81-45-224-2331
Australia:
61-2-8875-7887 Fax 61-2-8875-7777
India: 91-22-8204437 Fax 91-22-8204443
If you are looking for further contact information, please
visit www.smc.com or www.smc-europe.com.
Model Number: SMC-BT10
38 Tesla
Irvine, CA 92618
Phone: (949) 679-8000
 Loading...