

Page 1
We will be pleased to help you with further questions:
smb Seilspielgeräte GmbH Berlin in Hoppegarten Fon. +49 (0) 3342 50837-20 info@smb.berlin
Technikerstraße 6/8 Fax. +49 (0) 3342 50837-80 www.smb.berlin
DE-15366 Hoppegarten
05.06.2018
Page 1 of 4
Installation instructions EN 1176-1 tuev-sued.de/
Maintenance instructions EN 1176-1 ps-zert
Content
1 General 2
2 Ground Composition 2
3 Provided Tools for Installation: 2
4 Assembly 3
5 Jumping Mat Installation/Removal 3
6 Maintenance Instructions EN 1176-1 4
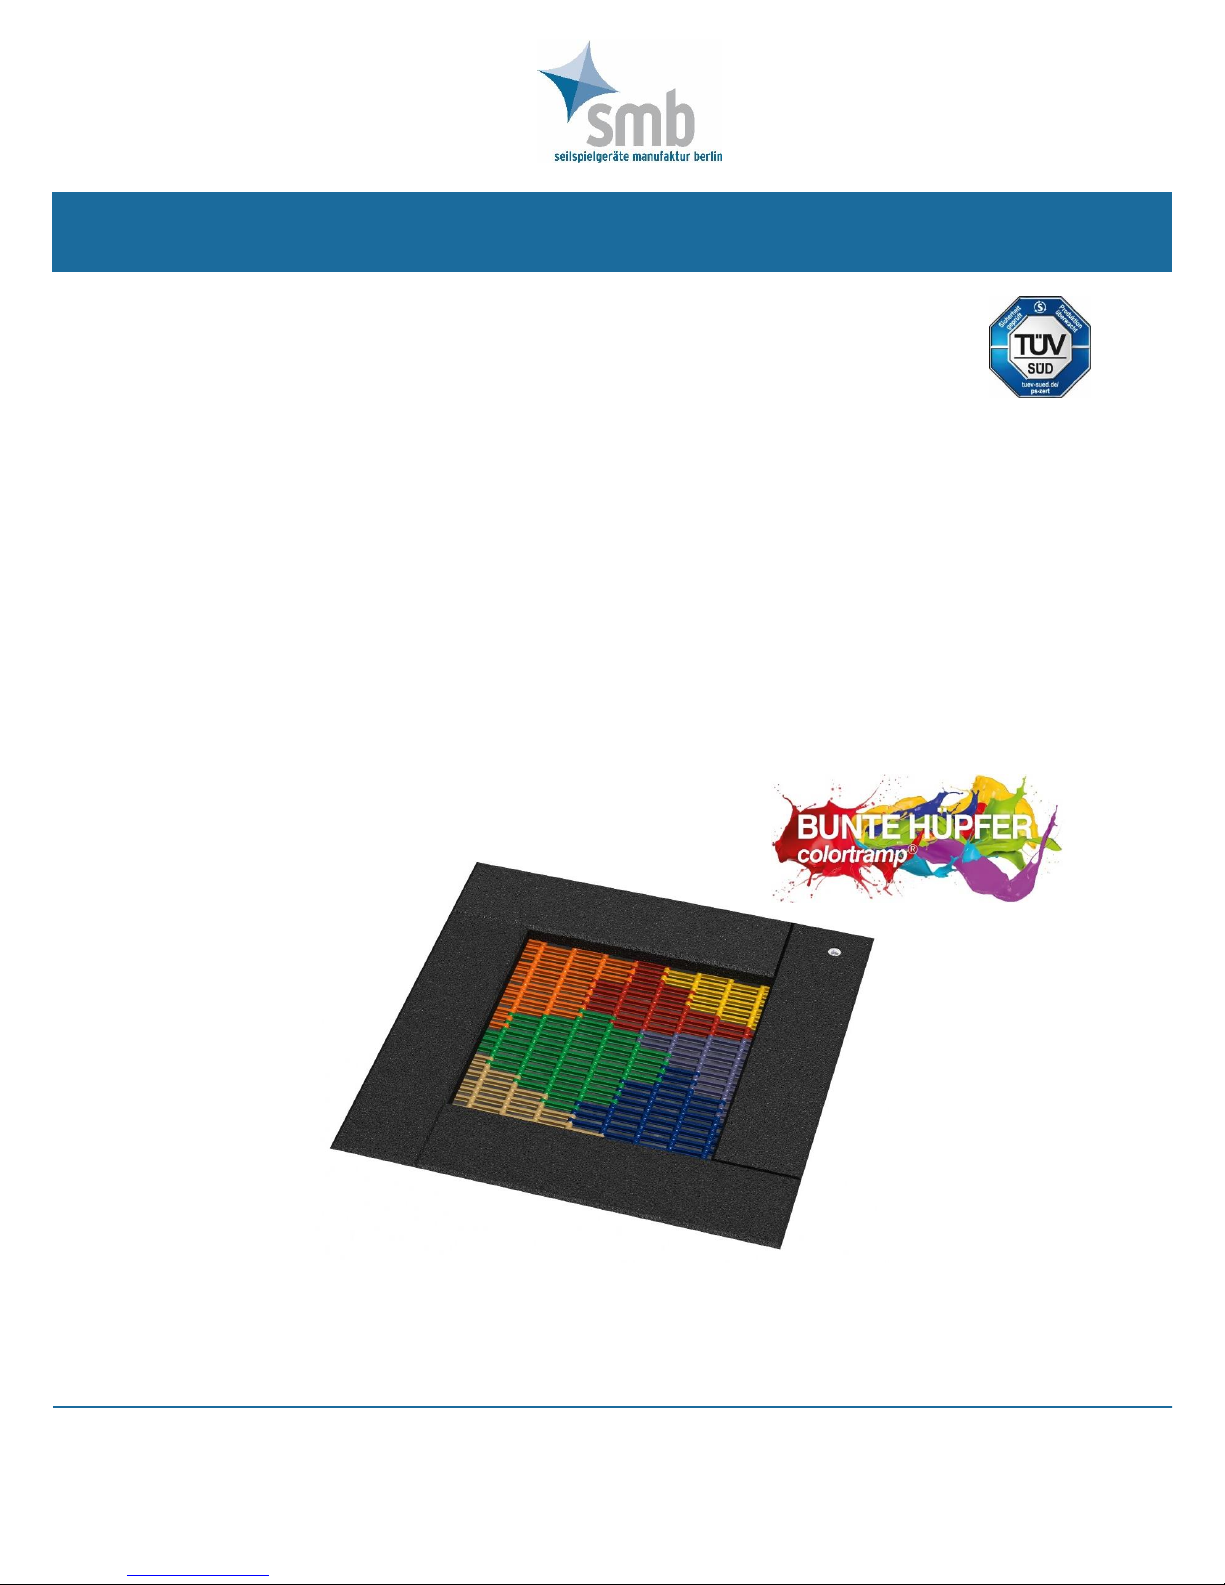
Fig. 1 - TRAMPOLINE „S“ EXAMPLE – MULTICOLOR art.no.:7240032
No. 7210001
Technical Information – TRAMPOLINE „S“
Page 2

TECHNICAL INFORMATION
TRAMPOLINE „S“
We will be pleased to help you with further questions:
smb Seilspielgeräte GmbH Berlin in Hoppegarten Fon. +49 (0) 3342 50837-20 info@smb.berlin
Technikerstraße 6/8 Fax. +49 (0) 3342 50837-80 www.smb.berlin
DE-15366 Hoppegarten
05.06.2018
Page 2 of 4
1 General
The work described must be carried out by qualified personnel.
Due to the heavy weight of the completed trampoline, no further anchorage is necessary.
The trampoline is designed to be built level with the ground.
Dimensions
Overall size 1.25 x 1.25 m
Minimum space 3.75 x 3.75 m
Jumping area 0.75 x 0.75m
Clearance 1.50 m
Max. free drop height: 0.90 m
Age suitability
3 years and older
Number of users
1 person
2 Ground Composition
Please refer to DIN EN 1176-1 for ground conditions in the play area.
We recommend a floor surfacing with shock-absorbing qualities like grass or synthetic surfaces. Loose
material like sand, bark mulch or wood chips is not optimal, as the pieces can fall into the trampoline and
thereby reduce play value.
3 Provided Tools for Installation:
4 pieces Carrying Iron
1 piece Rope with Hook: Tool to assemble and/or remove jumping mats
Page 3

TECHNICAL INFORMATION
TRAMPOLINE „S“
We will be pleased to help you with further questions:
smb Seilspielgeräte GmbH Berlin in Hoppegarten Fon. +49 (0) 3342 50837-20 info@smb.berlin
Technikerstraße 6/8 Fax. +49 (0) 3342 50837-80 www.smb.berlin
DE-15366 Hoppegarten
05.06.2018
Page 3 of 4
4 Assembly
The trampoline is placed after the ground has been
excavated (450 mm deep, size according to
number of trampolines) and a level horizontal
surface has been created.
If bad soil conditions prevail (e.g. loamy soil), it
is favourable to insert a drainage layer.
The frame features boreholes which are sealed
with caps. Carrying irons can be inserted into these
holes.
It must be ensured that the framework is lying
snugly and does not wobble. This can be checked
simply by standing on it. After placement, the play
level around the trampoline has to be refilled
appropriately.
5 Jumping Mat Installation/Removal
The trampoline is supplied with a jumping mat, which is suspended in the frame. The jumping mat must only
be removed in case of damage or when cleaning the trampoline.
Reaching from the top and using the provided tool, the springs can be loosened from the suspended mat (Fig.
3). To do this, the hook has to be inserted into the spring eye and then pulled carefully, gripping the rope, until
the connection opens. The same procedure has to be repeated for all springs.
Fig. 3
Fig. 2
Page 4

TECHNICAL INFORMATION
TRAMPOLINE „S“
We will be pleased to help you with further questions:
smb Seilspielgeräte GmbH Berlin in Hoppegarten Fon. +49 (0) 3342 50837-20 info@smb.berlin
Technikerstraße 6/8 Fax. +49 (0) 3342 50837-80 www.smb.berlin
DE-15366 Hoppegarten
05.06.2018
Page 4 of 4
Jumping Mat Orientation
The jumping mat flanks which are equipped with chain links (see Fig. 2) have to face the frame’s sides which
feature boreholes (see Fig. 2).
Brief Instruction: Jumping Mat Installation
• Tighten the spring (using the provided tool)
• Clip the spring into the corresponding link
• Release the spring
6 Maintenance Instructions EN 1176-1
Routine Visual Inspection
The frequency of this inspection depends on local conditions (high/low usage, vandalism, weather influence).
Operational Inspection (Every 6 Months)
• Check unit for general damage or wear and tear.
• Check condition of the jumping mat, spring suspensions and protective panels.
Main Inspection
The trampoline framework consists of galvanised sheets, 3 mm thick. Due to this fact, a main inspection,
which then includes checking the framework for corrosion, only needs to be carried out every two years.
Type Plate Location
The type plate is located in one of the rubber tiles, which are glued on the trampoline steel frame. On the type
plate you will find details to the manufacturer, the DIN-Norm, a serial number and also a QR-Code for
furthermore information.
Tighten the spring
(using the provided tool)
Clip the spring into the
corresponding link
Release the spring
 Loading...