

SMAX Technology SIU7117 Quick Installation Manual
3M IP Camera Bullet
Quick Installation Guide
Thank you for purchasing this product!
Before you use this product, please check the package
contents. If any item is missing, contact your dealer of
purchase to claim for missing item(s).
Package Contents
No.
Description
Q’ty
1 Network IP Camera 1
2 DC power adapter 1
3 Sun Shield 1
4 Screw 2
5 Bracket 1
6 User manual CDROM 1
7 Quick installation guide 1
1
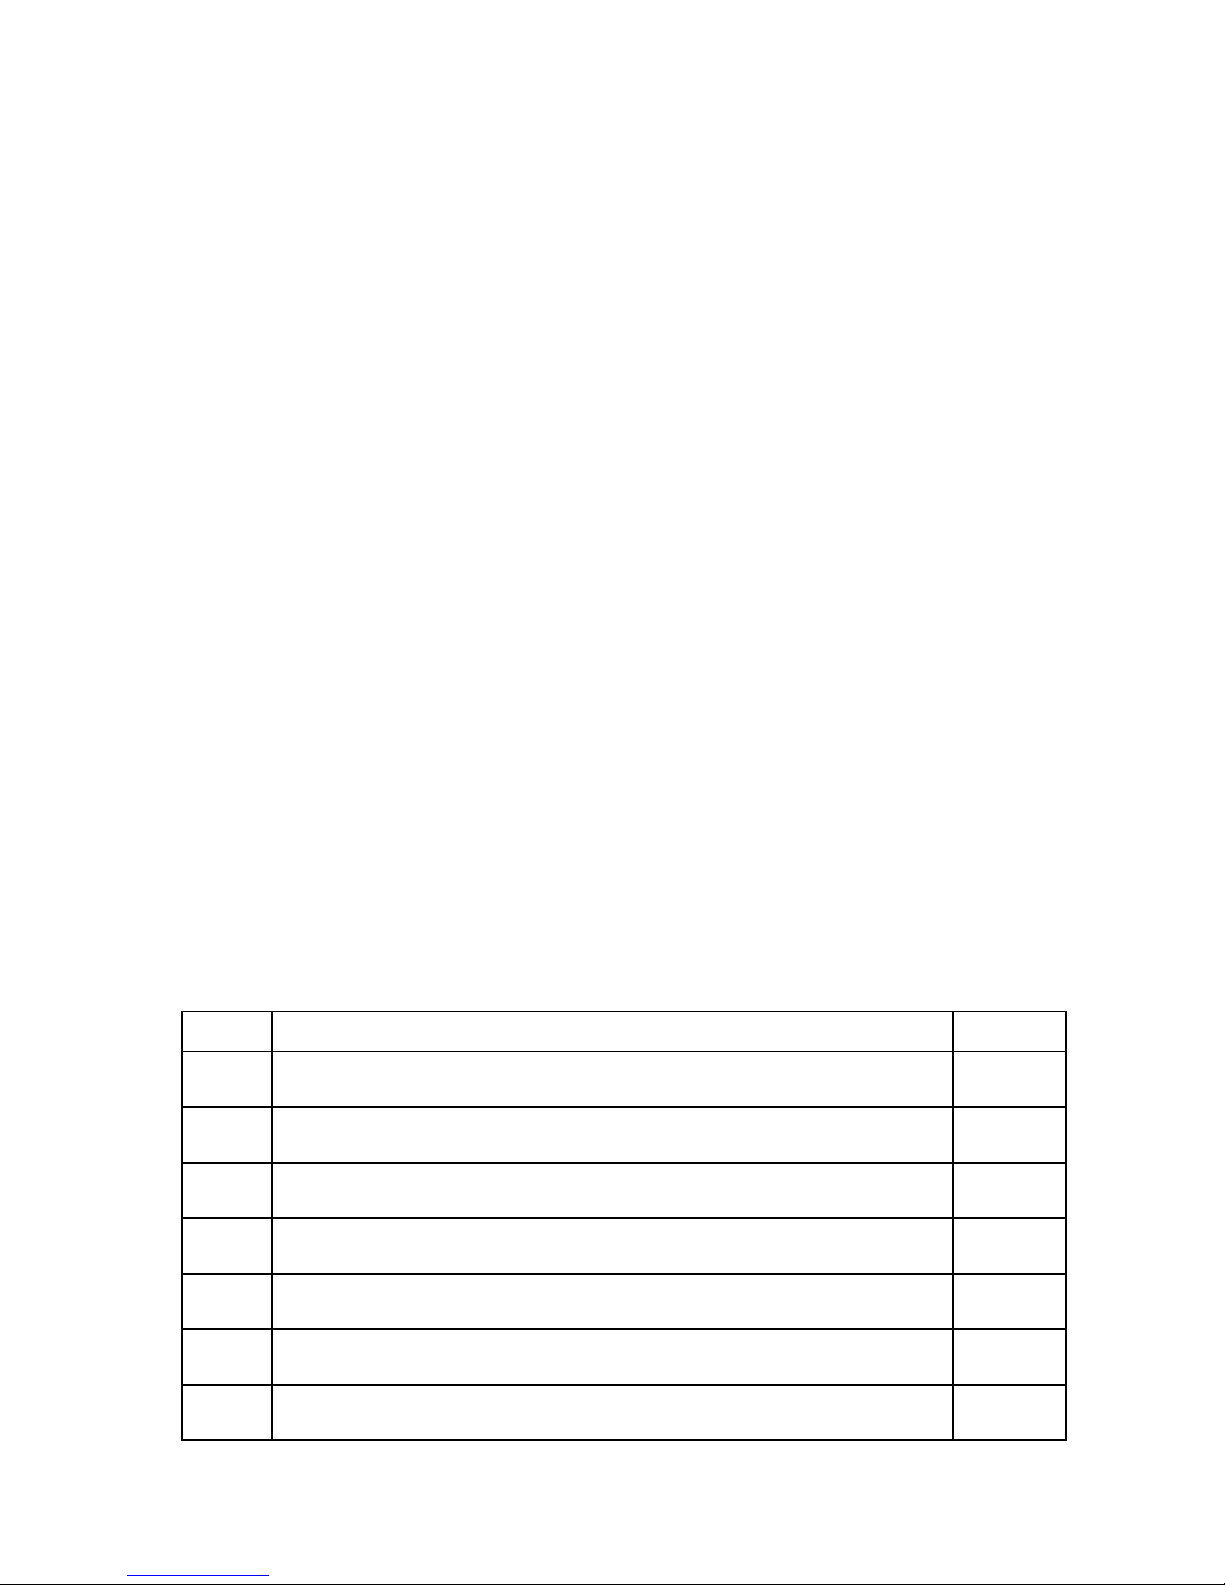
Familiar with the IP Camera
[DI/DO Pin assignment]
No.
Description
1
- : RS485+ : RS485+
1 : DO
2 : GND
3 : DI
2 DC12Volt/2A input
3 Reset Button
4 Audio output
5 Audio input
6
Network, RJ45 connector (support POE 802.3af)
2 LED indicator, orange: power, green: network
7 TV output, BNC connector
※
Please check the I/O cable attached index before insert or
release any wire.
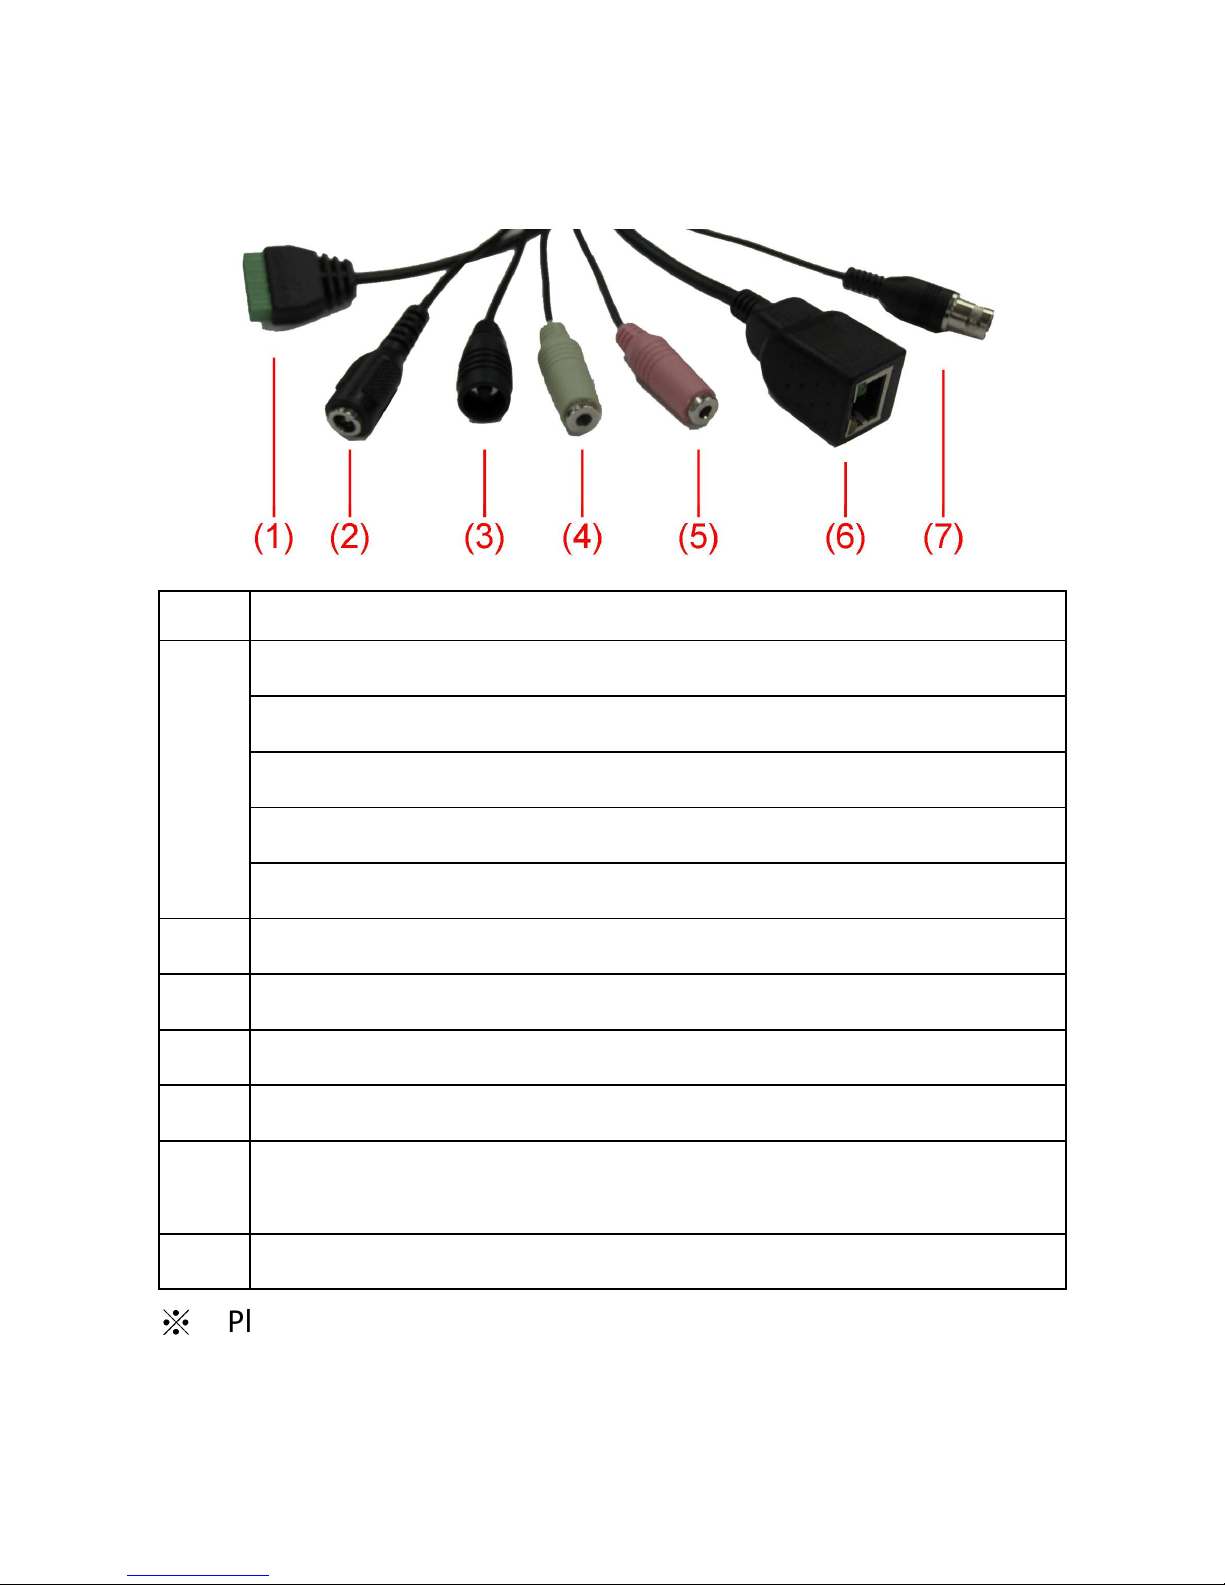
2
[Front site]
No.
Description
1
IR-LED: Used for illumination
assistance under night mode
2
Day/night sensor: Used for
day/night detection and IR-LED
ON/OFF control
3 Lens: Fixed focal length.
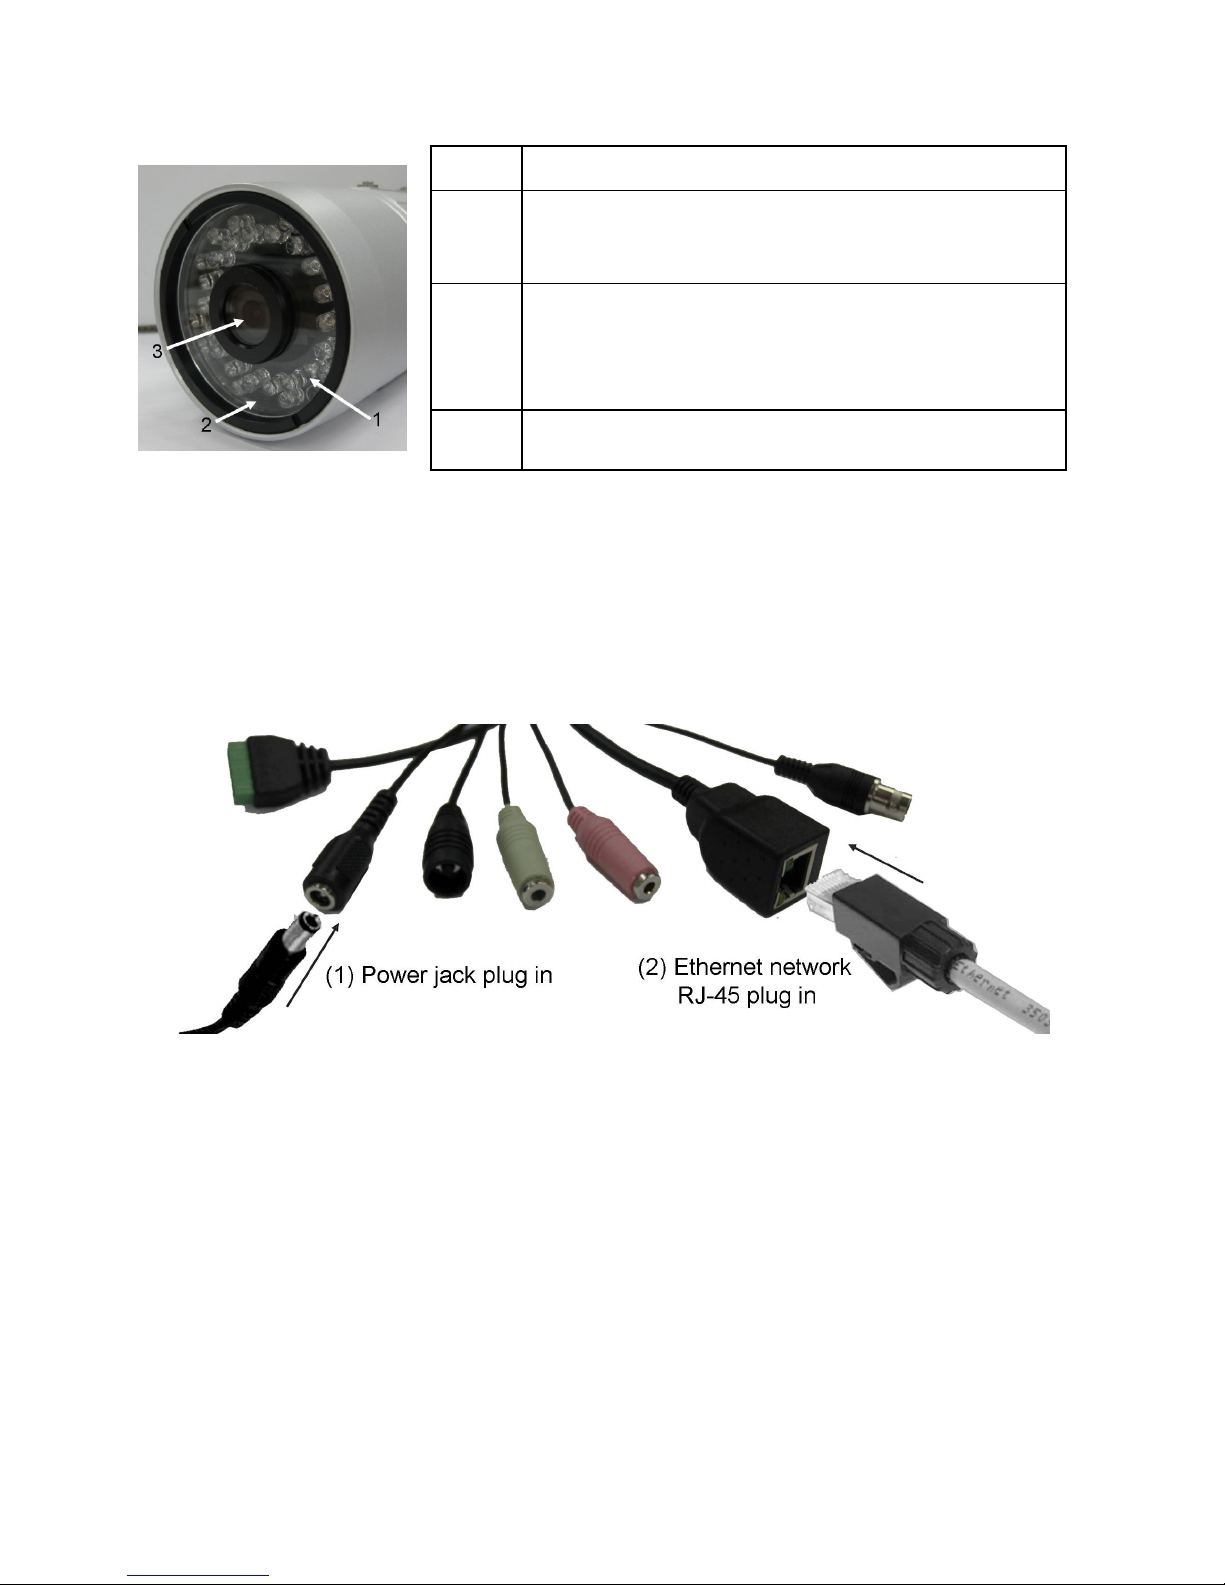
Hardware verification
1. Connect Ethernet cable to LAN port.
2. Connect DC power cable to IP Camera’s DC power connector.
3. Plug DC power adapter to power outlet on the wall.
If everything’s ok, you should see the left LED light on LAN port
light up. If not, please recheck every step and try again, or ask
your dealer of purchase for help.
 Loading...