

Page 1

SMARTVIEW
Model TX
USER'S MANUAL
Copyright © 1994, 1999 by Pulse Data International Limited,
Christchurch, New Zealand. All rights reserved. No part of this
publication may be reproduced or distributed in any form or by
any means, or stored in a database or retrieval system, without
the prior written permission of Pulse Data International Limited.
Every effort has been made to ensure that the information
contained in this publication is correct at the time of issue.
Neither Pulse Data International Limited, nor its agents, assume
any responsibility for errors or omissions. Nor is any liability
assumed for damages resulting from the use of the information
contained herein.
1 Expo Place
P.O. Box 3044, Christchurch, New
Zealand
Telephone +64 3 3844555
Fax +64 3 3844933
E-mail
[email protected]
Internet www.pulsedata.com
1-i
PULSE DATA
INTERNATIONAL LIMITED
Page 2

IMPORTANT SAFETY INSTRUCTIONS
1) Follow all warnings, cautions and instruction
marked on the product.
2) The power supply cord serves as a disconnect
device for pluggable equipment, the
socket-outlet shall be installed near the
equipment and shall be easily accessible.
3) This product is equipped with a 3-wire
grounding type plug, a plug having a third
(grounding) pin. This plug will only fit into a
grounding-type power outlet. This is a safety
feature. If you are unable to insert the plug into
the outlet, contact your electrician to replace
your obsolete outlet. Do not defeat the purpose
of the grounding-type plug.
4) This product should be operated from the type
of power indicated on the marking label. If you
are not sure of the type of power available,
consult your dealer or local power company.
5) Do not attempt to service this product yourself,
as opening or removing covers may expose you
to dangerous voltage points or other risks.
1-ii
Page 3

FCC WARNING (USA only)
This equipment generates and uses radio frequency
energy and if not installed and used properly, in
accordance with the manufacturer's instruction,
may cause interference to radio and television
reception. It has been type tested and found to
comply with the limits for a Class B digital device in
accordance with Subpart B of Part 15 of FCC Rules
and Regulations, which are designed to provide
reasonable protection against such interference in a
residential installation. However, there is no
guarantee that interference will not occur in a
particular installation. If this equipment does cause
interference to radio or television reception, which
can be determined by turning the equipment off and
on, the user is encouraged to try to correct the
Refer all servicing to qualified service
personnel.
SUSCEPTIBILITY TO INTERFERENCE
There may be temporary degradation of the image
when the SmartView is subjected to a strong
radio-frequency field, electro-static discharge or
transient electrical noise.
1-iii
Page 4

interference by one or more of the following
measures:
(1) Reorient the receiving antenna.
(2) Relocate the equipment with respect to receiver.
(3) Move the equipment away from the receiver.
(4) Plug the equipment into a different outlet so
that the equipment and receiver are on
different branch circuits.
If necessary, the user should consult the dealer or
an experienced radio/television technician for
additional suggestions. The user may find the
booklet prepared by the Federal Communication
Commission helpful: "How to Identify the Resolve
Radio-TV Interference Problems". This booklet is
available from the U.S. Government Printing
Office, Washington, DC 20402. Stock No.
004-000-00345-4.
Shielded cables and certified Class B peripherals
must be used on this product. Using unshielded
cables or uncertified peripherals may result in this
unit not complying with FCC Rules Part 15.
Changes or modifications not expressly approved by
the manufacturer could void the user's authority to
operate this equipment.
NOTICE FOR CANADA
1-iv
Page 5

This Class B digital apparatus meets all
requirements of the Canadian Interference-Causing
Equipment regulations.
1-v
Page 6

TABLE OF CONTENTS
1-86. RETURNING FOR SERVICE ..........
1-7If the image is gray, or low contrast ...
1-7If the image is unclear ................
1-7If there is no picture ..................
1-75. TROUBLE SHOOTING ................
1-6Reading Table Controls ..............
1-54. READING A DOCUMENT .............
1-5Adjusting the Magnification range ....
1-5The "Text/Photo" Switch ..............
1-4The "Picture" Knob ...................
1-3Line Marker ...........................
1-3Size and Focus .......................
1-33. CONTROLS ..........................
1-12. SETTING UP .........................
1-11. INTRODUCTION .....................
1-vi
Page 7
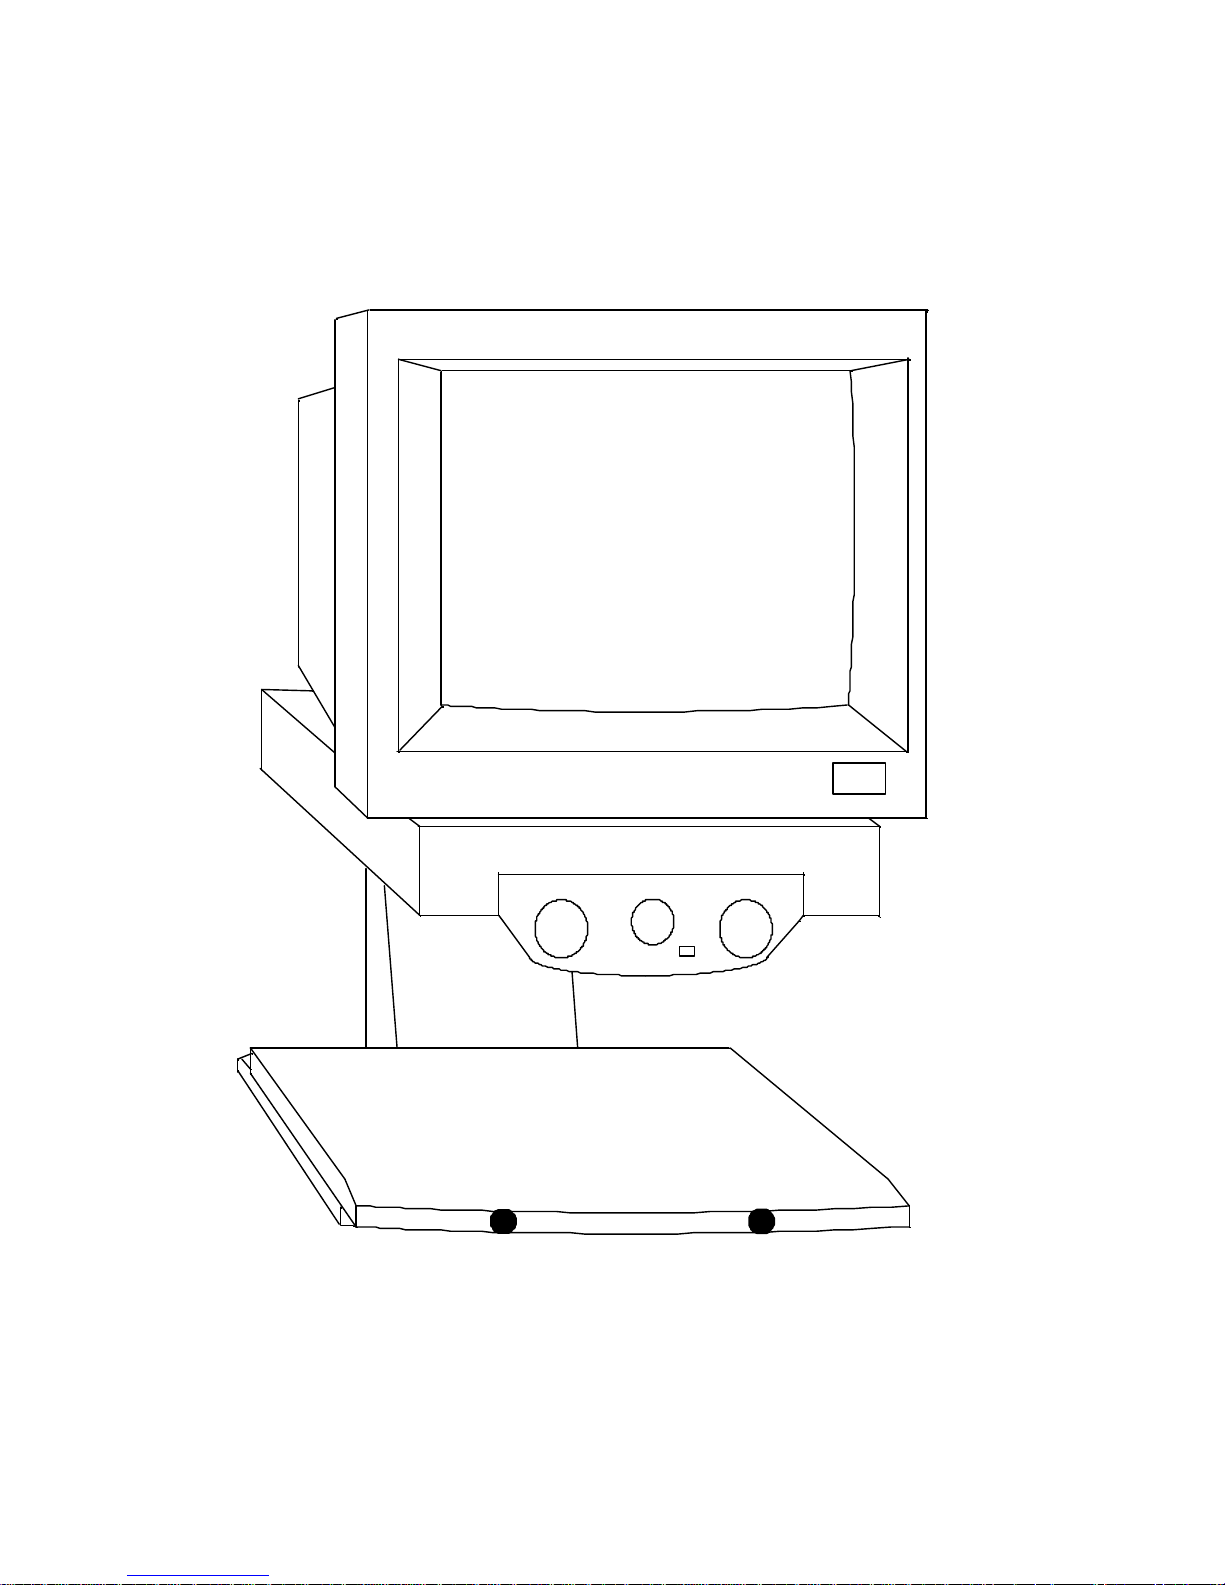
SMARTVIEW
1-vii
Page 8

1. INTRODUCTION
SmartView is an electronic magnifying system. It
will enlarge printed material, handwriting or
photographs placed on the moveable table. The
controls are simple and easy to use.
This manual describes the following SmartView
model: TX (monochrome).
2. SETTING UP
You will require a television set with an A/V video
input socket. The TV may be an NTSC type, or a
multi-standard set capable of operating on the
NTSC standard. A 14 inch (356 mm) set may be
placed on top of the reader unit. A larger TV
should be placed beside the reader or on a suitable
platform.
Locate the AC power cable supplied with the
SmartView and plug it into the socket labeled
"INPUT POWER" on the back of the reader unit.
Plug the other end into a wall socket.
Locate the video cable which is provided. Plug one
end into the RCA socket on the back of the reader
unit, labeled "MONO VIDEO OUTPUT". Plug the
other end into the A/V input of the TV. Plug the TV
1-2
Page 9
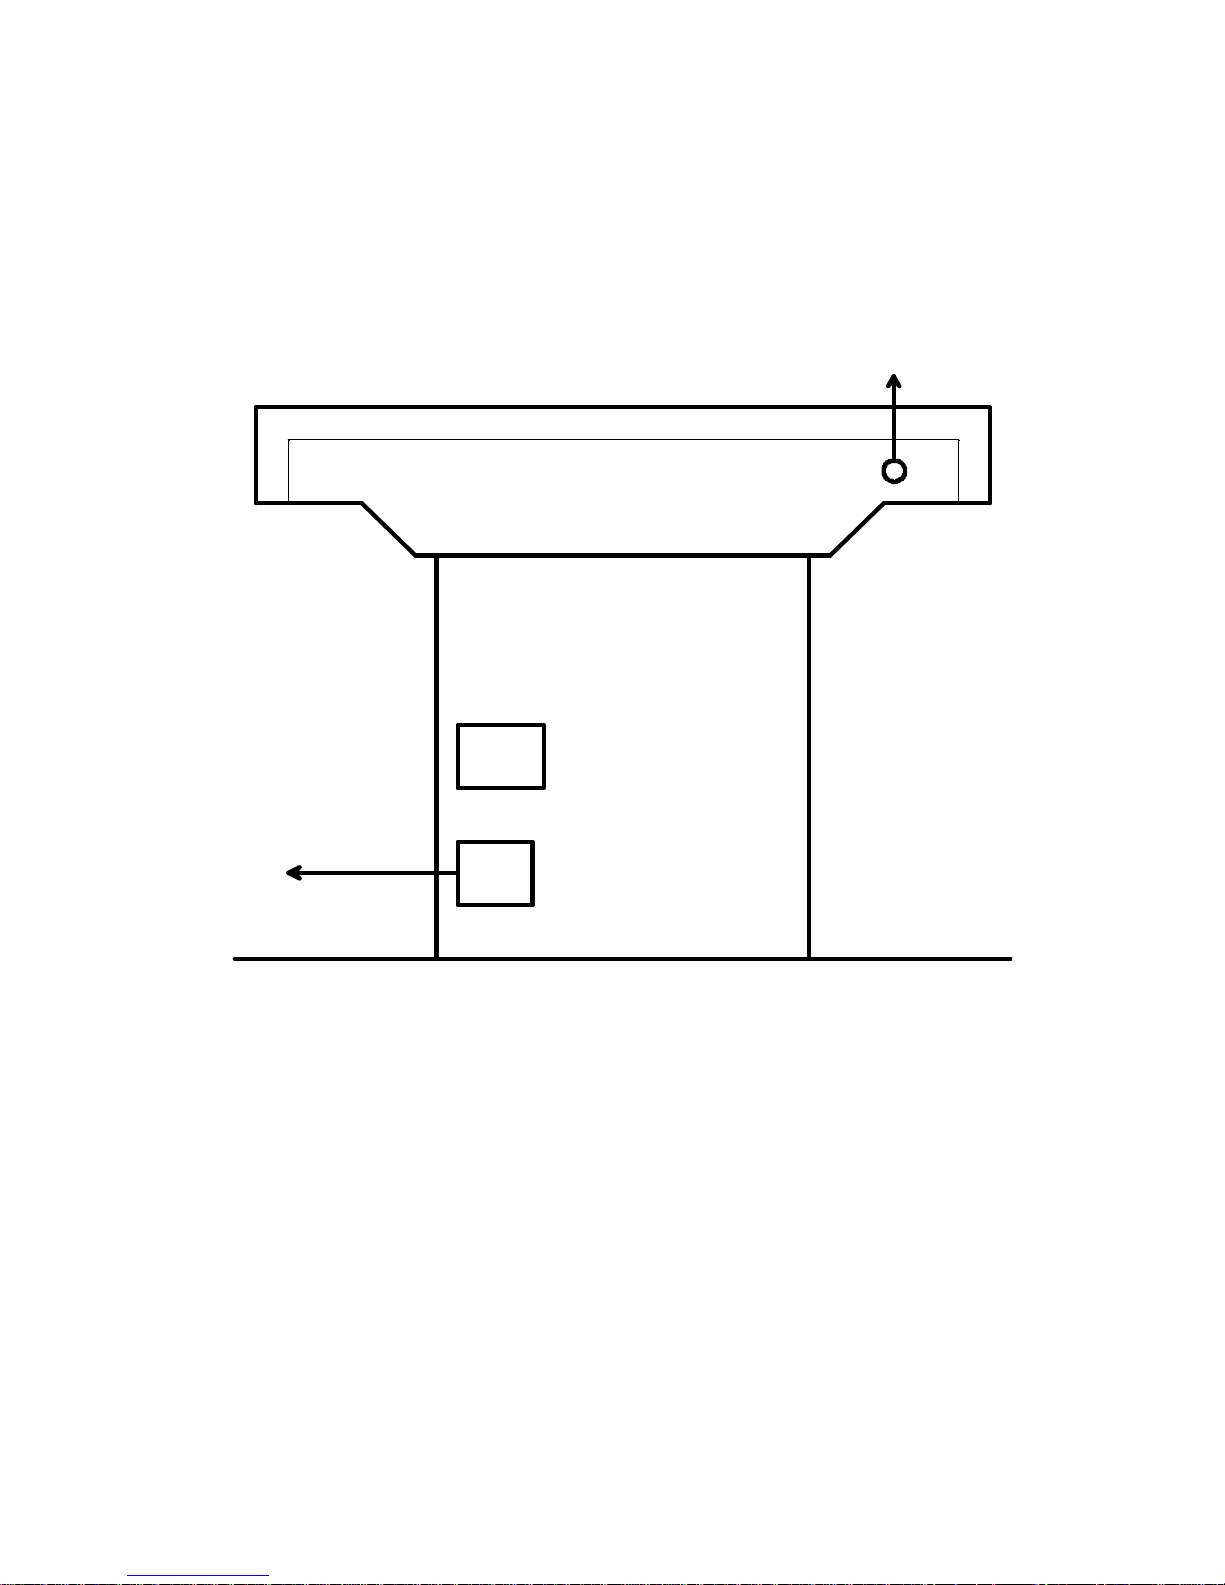
into a wall socket, switch on and select the A/V
channel on the TV.
TO AC
WALL
SOCKET
TO TV
A/V INPUT
SmartView rear panel
Switch on SmartView with the on-off switch on the
right-hand side of the main pillar. The fluorescent
lamps over the reading table will light up.
Put some suitable material, such as this manual, on
the SmartView reading table under the lamps. An
image should be seen on the TV screen. You may
1-3
Page 10
wish to increase the brightness and contrast with
the TV controls.
3. CONTROLS
Size and Focus
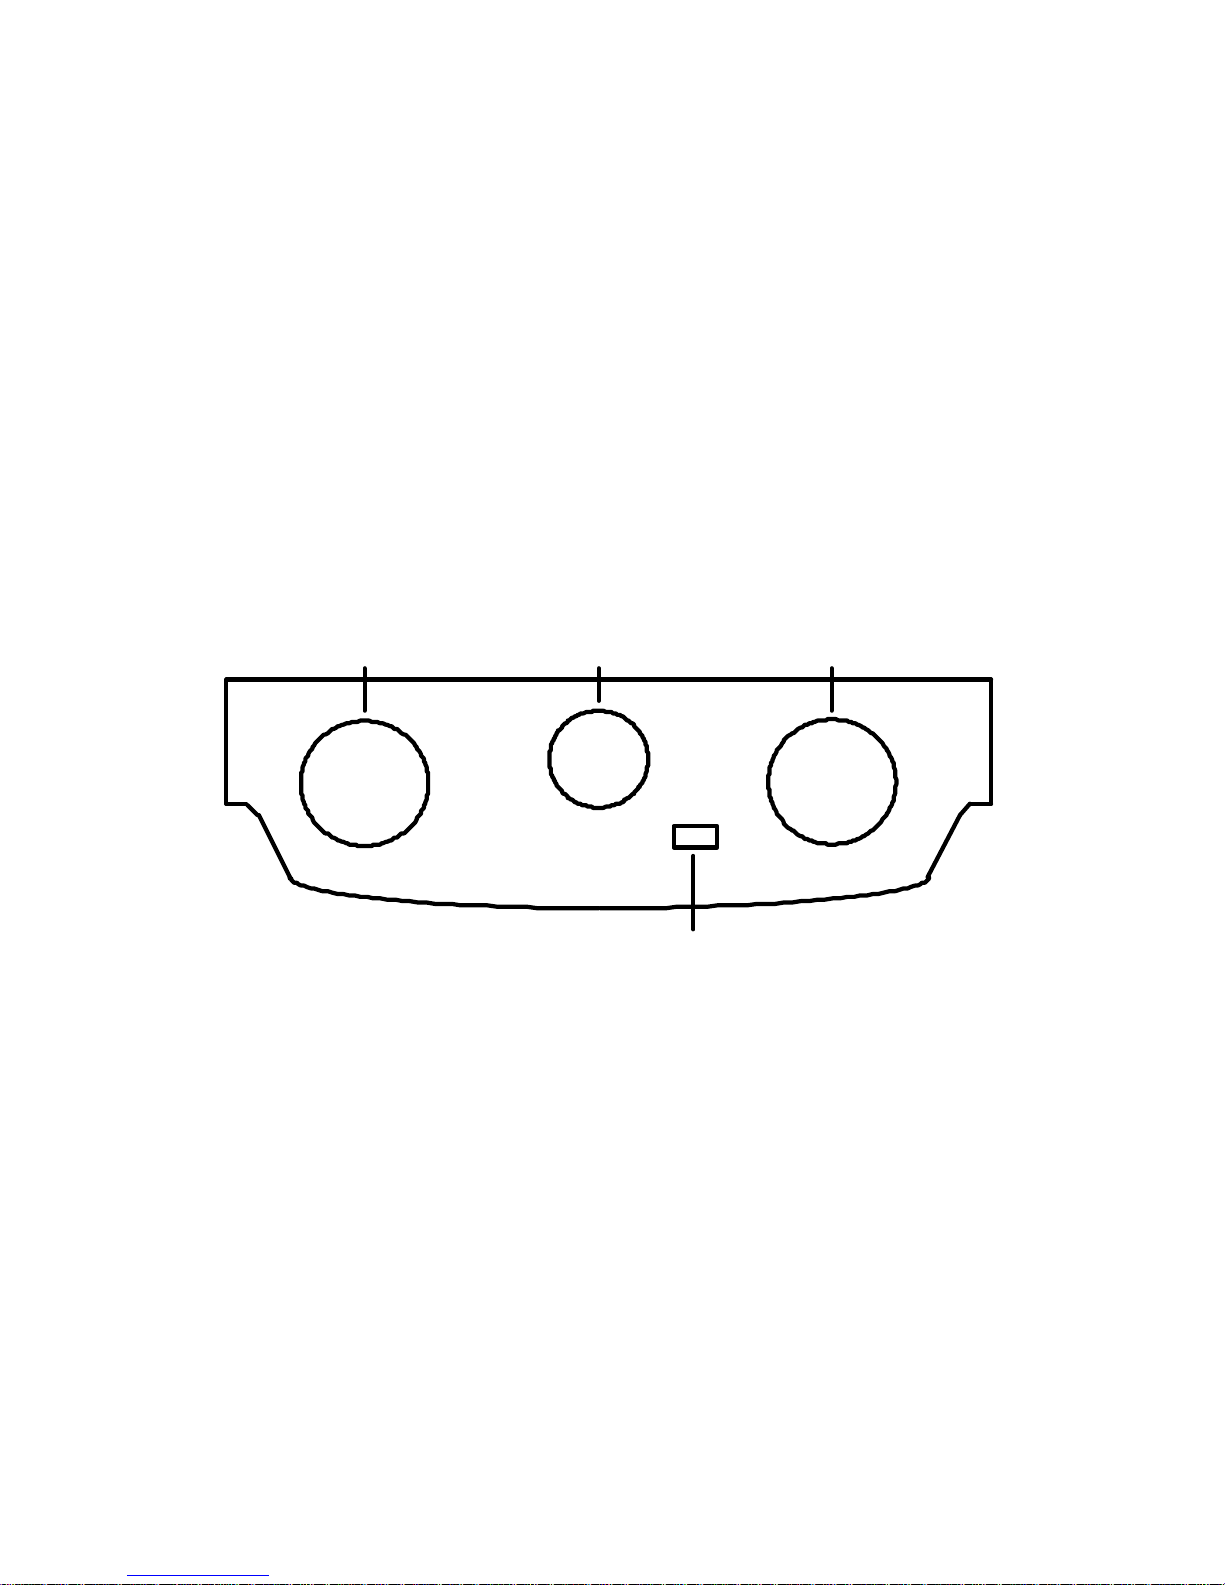
There are two large knobs on the front of the unit.
The right-hand one adjusts the FOCUS, while the
left-hand SIZE knob changes the magnification.
SIZE PICTURE FOCUS
TEXT - PHOTO
To get started, place a page of text on the table, and
turn the right-hand FOCUS knob until the image on
the display is correctly focused. Turn the left-hand
SIZE knob fully anti-clockwise, for maximum
magnification, and re-adjust the FOCUS knob.
Then use the SIZE knob to set the magnification you
want.
1-4
Page 11

Line Marker
A line marker is a horizontal line which can be
made to appear approximately a third of the way up
the screen.
It can be used as a reading guide by positioning the
reading table so that the line marker is just above
or just below the line of text being read. The line
marker is switched on using the "Picture" knob.
The "Picture" Knob
The smaller knob, between the Size and Focus
controls, is labeled PICTURE. It changes the
contrast of the display ONLY if the "Text/Photo"
switch (see below) is in the "Text" position.
Turn the PICTURE knob fully clockwise to enhance
the contrast of the material you are reading, which
can make it much easier to read. When the knob is
turned fully clockwise the line marker will appear.
1-5
Page 12

If you prefer not to use the line marker then turn
the PICTURE knob one turn anticlockwise.
Normal text is black-on-white. If you prefer to read
white-on-black, turn the PICTURE knob fully anticlockwise. When the knob is turned fully
anticlockwise the line marker will appear. If you
prefer not to use the line marker then turn the
PICTURE knob one turn clockwise.
When viewing a picture with half-tones, use an
intermediate position of the PICTURE control to
reproduce shades of light and dark.
The "Text/Photo" Switch
To view a photograph, move the "Text/Photo"
switch (near the FOCUS knob) to the right-hand
"Photo" position. This sets a contrast level suitable
for photographs, regardless of the PICTURE knob.
Adjusting the Magnification range
The magnification range can be changed. To do
this, locate the ZOOM RANGE knob underneath
the reader unit, between the fluorescent lamps. This
knob should not be tightened except for transit; if
necessary, slacken the knob by turning it
anti-clockwise as viewed from underneath.
1-6
Page 13

For the smallest possible magnification, slide the
knob fully towards the back of the unit. For the
greatest possible magnification, slide it to the front.
4. READING A DOCUMENT
To read a document, set the Size control for the
smallest magnification that allows characters to be
comfortably and clearly seen. This will allow the
best reading speed. As you read, move the reading
table to the left, so the text moves across the screen
at a comfortable speed.
If you are reading a thick object such as a book or a
bottle label, you may have to re-adjust the Focus
control to compensate for the extra height.
Reading Table Controls
Margin stops allow you to return quickly to the left
and right edges of the text. To set the left margin,
position the table so that the left margin of the text
is on the screen. Slacken the left-hand margin knob
at the front of the reading table, slide the knob as
far as it will go to the right, and then tighten the
knob. Use a similar procedure for the other margin
stop.
If you are not using the margin stops, move them to
their outermost positions. You can stop the
1-7
Page 14

sideways movement of the table by moving the
margin stops fully inwards and tightening them.
The reading table is designed to move freely from
side to side. There is a little friction in the up and
down direction to prevent your wandering off the
line of text. This friction can be changed by
tightening or loosening the knob on the right-hand
side of the reading table. You may clamp the table
to prevent forward and backward movement by
tightening the knob fully.
5. TROUBLE SHOOTING
If there is no picture
Check that the AC cables are plugged in properly.
Ensure that the power is switched on at the wall
socket, and that the switch on the SmartView is
turned on. The power indicator on the TV set
should be glowing, and the fluorescent lamps should
be alight.
Check that the video cable from the back of the
reader unit to the TV is plugged in properly.
Ensure that the Brightness and Contrast controls on
the TV are turned up.
Ensure that the A/V channel is selected.
1-8
Page 15

If the image is unclear
Adjust the Focus knob.
If the image is gray, or low contrast
Ensure that the Text/Photo switch is set to "Text".
Turn the Picture knob to increase contrast. Check
that both the fluorescent lamps are fully alight.
6. RETURNING FOR SERVICE
If you have a problem with SmartView, call your
service agent and discuss the fault (have your
SmartView nearby). If the problem cannot be fixed
by phone, send the SmartView to the service agent,
with a letter detailing the problem. To avoid
damage in transit, use the original packaging, lock
the reading table in position, and tighten the Zoom
Range knob. Make sure that your insurance policy
covers SmartView before you send it.
Any Smartview part found defective through
normal use within the warranty period will be
repaired or replaced free of charge. The owner is
responsible for freight and insurance charges
incurred in returning the equipment to the service
agent. Return freight on equipment repaired under
warranty will be covered by the service agent.
1-9
Page 16

1-10
 Loading...