

Page 1
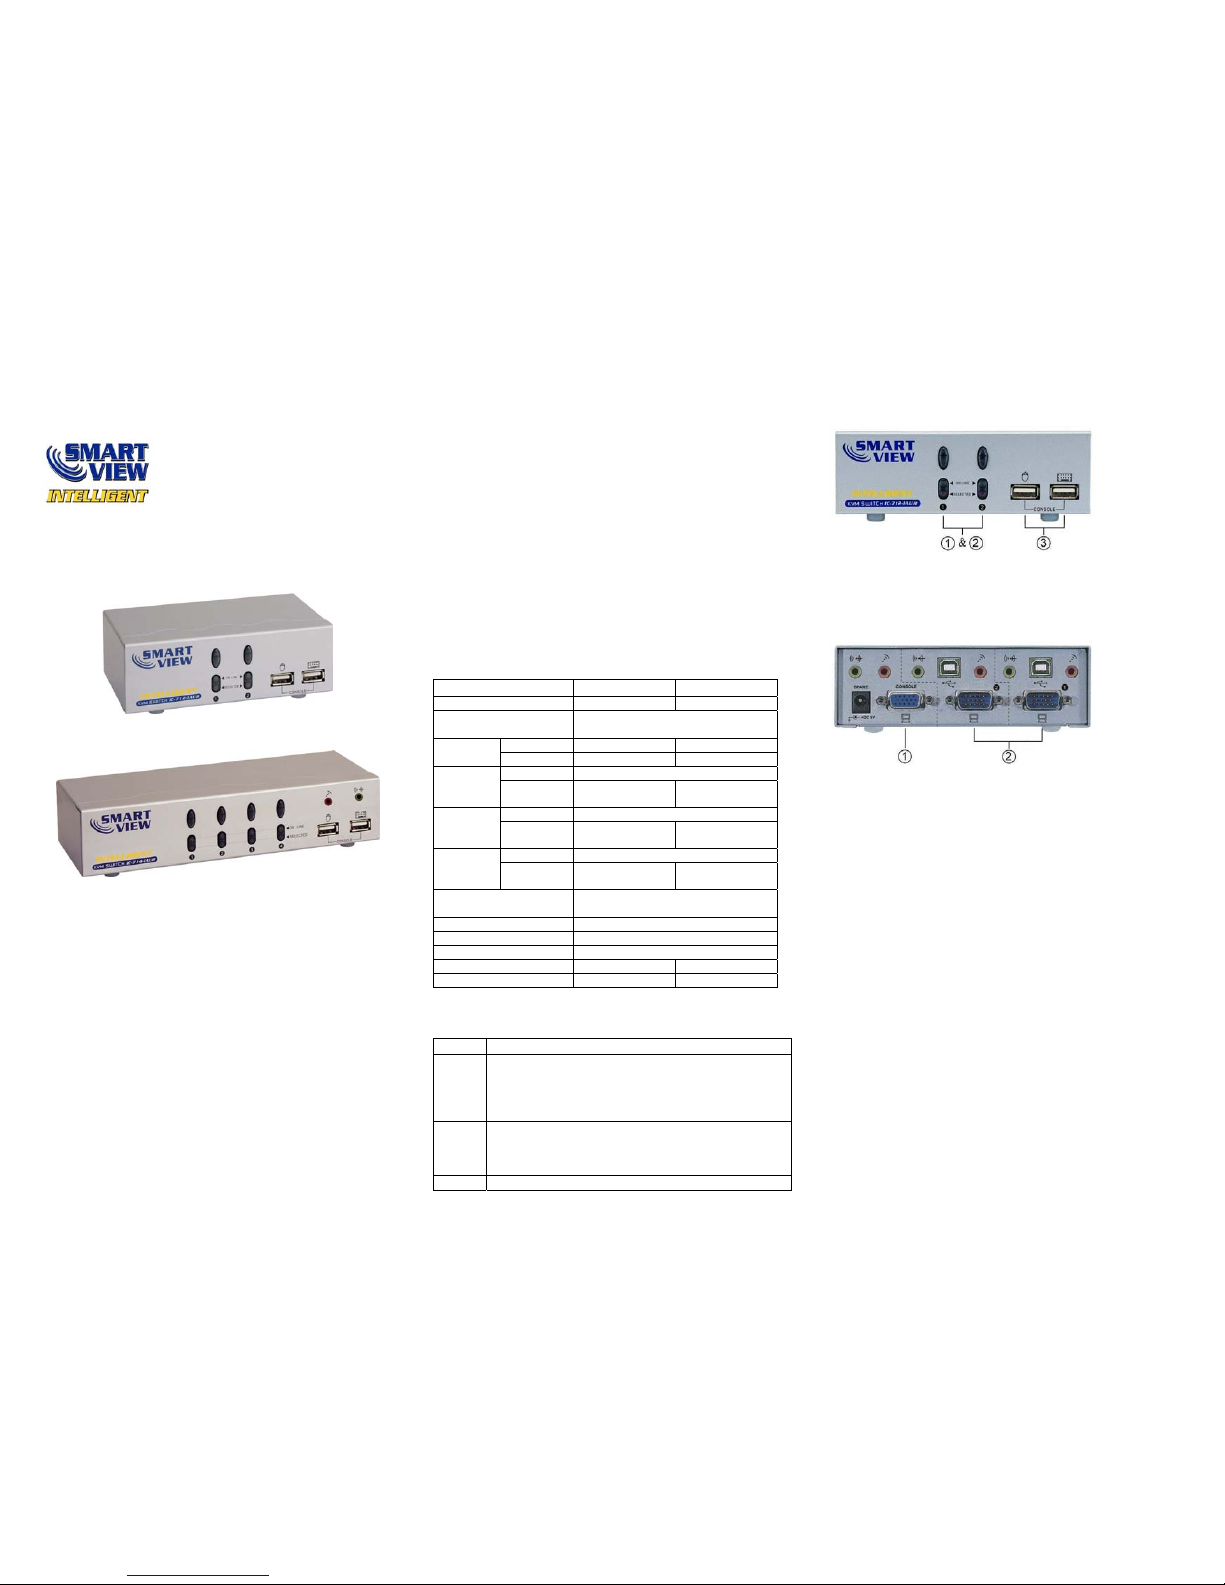
KVM
SWITCH
(IC-712-IAUR)
(IC-714-IAUR)
USER MANUAL V1.0
IC-712-IAUR
IC-714-IAUR
Package Contents –
1 Smart View IC-712-IAUR or IC-714-IAUR KVM
Switch
1 User Manual
Please contact your vendor if anything is missed.
Features
Controls PCs with one USB keyboard, USB mouse and
monitor respectively
Supports USB 1.0, 1.1, 2.0 specification compliant and
supports UHCI, OHCI & EHCI host controller
Supports USB Boot protocol & Wakeup Devices
Supports speaker & microphone
Supports the Windows, Linux and Macintosh
Supports Microsoft IntelliPoint 5.0 drivers & Logitech
SetPoint Driver (Except MX5500, Logic)
Superior video quality - Up to 1920 x 1440, DDC, DDC2,
DDC2B, DDC2AB, 200MHz
3 ways for PC selection -- Push-button switch or hot key
or mouse clicking
Easy to install--No software required
Hot Pluggable
Specifications
Function IC-712-IAUR IC-714-IAUR
PC Connectors 2 4
Port Selection
Push-button Switch / Hot Key
/ Mouse Clicking
On Line 2 4
LEDs
Selected 2 4
Console Port 2x USB A-Type Connector
-Keyboard,
Mouse
CPU Port 2x USB B-Type 4x USB B-Type
Console Port 1x HD-15 Female (Std. VGA/SVGA)
Connector
-Monitor
CPU Port
2x HD-15 Male
(Std. VGA/SVGA)
4x HD-15 Male
(Std. VGA/SVGA)
Console Port 1 x Audio, Microphone Connector
-Audio,Mic.
(Jack)
CPU Port 2 x Audio, Mic. 4 x Audio, Mic.
VGA Resolution
1920x1440 (Max.), DDC, DDC2,
DDC2B, DDC2AB, 200MHz
Power Adapter DC 9V 300mA (Min.) spare
Scan Interval 5 sec ~ 30 sec
Housing Metal
Weight 469 g 660 g
Dimensions (LxWxH) 130x76x42 mm 200x76X42 mm
Hardware Requirements
Required specifications
Console
One highest resolution VGA, SVGA or Multisync monitor
One USB mouse
One USB keyboard
One pair of speakers.
One microphone.
PC
One VGA, SVGA or Multisync card
One USB port
One audio jack port.
One microphone port.
Cable Smart View custom cables or equivalent
-1-
Appearance
Front View
1. Push -button Switches (Manual type)
2. Port LEDs
3. Con sole Keyboard and Mouse Connectors
Rear View
1. Console Monitor, Speaker and Microphone
Connectors
2. CPU Port Connectors
Installation
Before the installation, make sure the peripherals of all
PCs are grounded properly and turned off.
1. Connect the monitor, keyboard and mouse with the
Console Port Connectors.
2. Use the recommended extension cables to connect
the PCs with the CPU Ports of KVM Switch.
3. Turn on the PCs.
-2-
Page 2
Operation
1. The function of LED display:
LED DISPLAY DESCRIPTION
Light off PC power off
Green light on PC power on and connected
Green light on & Red light
flashing
PC power on, connected and
selected
Note: It occurs occasionally that the green light of LED display is
on and the red light of LED display keeps flashing after
shutting down the PC because of the PC default. The
condition will not affect the regular operation of KVM
switch.
2. 3 ways for PC selection – Push-button switch, hot key or
mouse clicking
2-1 Push-button switch (Manual Type)
Press the button on front panel to switch the CPU ports.
The red light of LED indicates which PC is selected.
2-2 Mouse clicking
Item Operation Function
IC-712-IAUR
[Middle button] + [Left Button] or
[Middle button] + [Right Button]
Access between
two PCs.
IC-714-IAUR [Middle button] + [Left Button]
Switch to the
previous PC.
IC-714-IAUR [Middle button] + [Right Button]
Switch to the next
PC.
Note: 2-Key Mouse is NOT applicable.
2-3 Hot Key option
Hot Key Navigation allows you to select PC from the
keyboard directly.
Options for Hot Key Navigation:
Select PC by Hot Key
Command mode
Auto scan mode
Beep sound on/off option: Press [Right Shift] key
twice to turn on or off the beep sound when needed.
Select PC by Hot Key:
Press either left or right [Ctrl] key twice.
Item Hot Key Operation Function
IC-712-IAUR
[L Ctrl] + [L Ctrl] or
[R Ctrl] + [R Ctrl]
Access between two PCs.
IC-714-IAUR [L Ctrl] + [L Ctrl] Switch to the previous PC.
IC-714-IAUR [R Ctrl] + [R Ctrl] Switch to the next PC.
Command Mode:
Press [Num Lock] key twice, and the 3 keys [Num Lock],
[Caps Lock] and [Scroll Lock] will flash to access the
Command Mode.
a). Directly press the function key [F1] ~ [F2] for
IC-712-IAUR or [F1] ~ [F4] for IC-714-IAUR to select PC.
-3-
b). Press [Left Ctrl] key to disable [Ctrl] and [Shift] hot key
function.
c). Press [Right Ctrl] key to enable [Ctrl] and [Shift] hot key
function.
d). Press [Left Shift] key to turn off the beep sound.
e). Press [Right Shift] key to turn on the beep sound.
f). Press [Left Win] key or mouse [Middle button] + [Left
Button] to disable Mouse clicking function.
g). Press [Right Win] key or mouse [Middle button] + [Right
Button] to enable Mouse clicking function.
h). Press [Left Alt] key to disable Auto skip function.
i). Press [Right Alt] key to enable Auto skip function.
j). Press [Esc] or [Enter] key to quit the mode.
Note:
[Ctrl] Hot Key function – Selecting PC ports.
[Shift] Hot Key function – Beep sound on/off.
Auto Scan Mode:
Press [Scroll Lock] key twice to activate the Auto Scan Mode.
The time scale of Auto Scan ranges from 5 to 30 seconds,
and it can be recognized by the lights of the 3 keys [Num
Lock], [Caps Lock] and [Scroll Lock] as the timetable below.
a). Press the right number key [+] to increase time scale.
b). Press the right number key [-] to decrease time scale.
c). Press [Esc] key to quit the mode.
Note: Light(s) corresponding timetable
Seconds Num Lock Caps Lock Scroll Lock
5 seconds Off Off On
10 seconds On Off Off
15 seconds On Off On
20 seconds Off On Off
25 seconds Off On On
30 seconds On On Off
3. The boot-up default of Smart View KVM Switch is
connected to your first activated PC.
4. When the PC is shut down under the function of “Auto
skips over the power-off PC”, it cannot be turned on again
by keyboard.
Troubleshooting
Make sure the cables are qualified and positioned.
Q1 :
The keyboard does not respond accurately.
A1a:
Re-install the keyboard. Unplug the keyboard from the
Console Port and plug it back again.
A1b: Re-install the Smart View KVM Switch. Shut down the
PCs, unplug the cables from the Smart View KVM
Switch and wait for five seconds. Then plug the cables
back and activate the PCs.
A1c: When under Auto Scan Mode, please press [Esc] key
to escape.
-4-
A1d: PCs can’t supply the power to Smart View KVM
Switch. Please attach a power adapter of DC9V
300mA with positive central polarity.
A1e: Try another keyboard.
Q2 :
The mouse does not respond accurately.
A2a: Re-install the mouse. Unplug the mouse from the
Console Port and plug it back again.
A2b: Re-install the Smart View KVM Switch. Shut down
the PCs, unplug the cables from the Smart View
KVM Switch, and wait for five seconds. Then plug
the cables back and activate the PCs.
A2c: PCs can’t supply the power to Smart View KVM
Switch. Please attach a power adapter of DC9V
300mA with positive central polarity.
A2d: Try another mouse.
Q3:
The mouse is out of control.
A3: The characteristic of the mouse is inefficient. Try
another superior mouse and plug it back again. Start
the operation after hearing the beep sound.
Q4:
There is the video problem.
A4a: The setting of resolution or bandwidth is over high.
Smart View KVM Switch supports the VGA, SVGA,
Multisync and XGA (interlaced) with the resolution up
to 1920 x 1440 Hz. The maximum bandwidth is 200
MHz.
A4b: The cable is unqualified. Please use the superior
cables of Smart View cables series.
Q5:
A5:
Why the green light of LED display is on and red
light keeps flashing after shutting down the PC?
The condition is normal and caused from the PC
default. The condition will not affect the regular
operation of Smart View KVM switch.
© C&C TECHNIC TAIWAN CO., LTD. All rights reserved.
Trademarks:
All the companies, brand names, and product names
referred to this manual are the trademarks or
registered trademarks belonging to their respective
companies.
-5-
 Loading...