

Page 1
Using SMART Slate
SMART Slate
WS200
Introduction
Teachers and students can use the SMART Slate to control computer
applications and make notes on a SMART Board™ interactive
whiteboard, SMART Podium interactive pen display or any computerprojected image from anywhere in the classroom. Wireless technology
allows teachers to present from up to 30 feet (9.1 meters) away, and it
allows students to give feedback or solve a problem using the slate from
their desks.
In this lesson you will learn:
• About SMART Slate features
• How to connect the SMART Slate
• How to use the SMART Slate
• How to check the battery charge
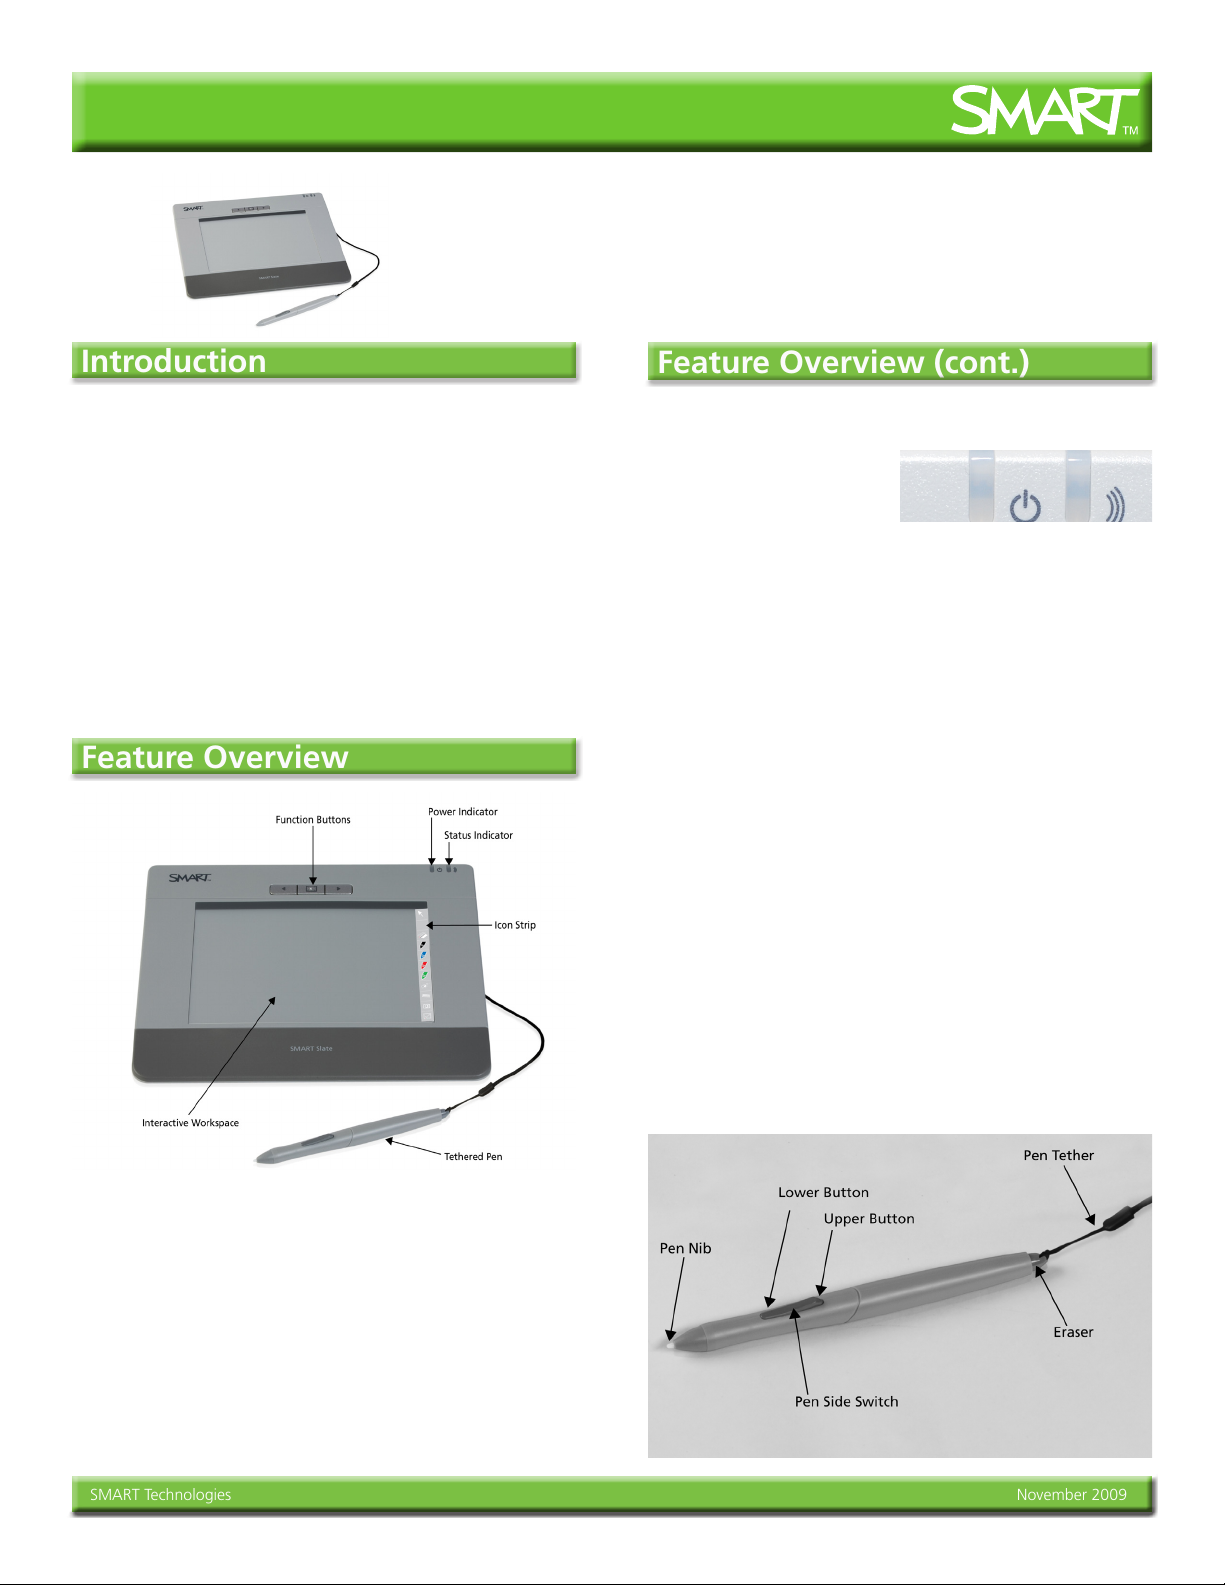
Feature Overview
Feature Overview (cont.)
icon strip with the tethered pen to change digital ink colors and access
frequently used features.
Power and Status Indicators
The power indicator shows the
current power state and the
charge status of the wireless slate.
• If the power indicator glows green, the battery is fully
charged, or the wireless slate is connected to your computer
with the USB cable
• If the power indicator glows amber or red, the battery
charge is low. Connect the USB cable to your computer to
recharge the wireless slate.
The status indicator shows the wireless connection status of the slate,
and whether the pen is interacting with the display.
• If the status indicator glows pale green, the wireless slate is
connected to your computer
• If the status indicator glows dark green, the pen is
interacting with the workspace
• If the status indicator blinks green, the slate is searching for
your computer
• If the status indicator glows amber, there is no
wireless connection
Tethered Pen
The tethered pen is your mouse. Use the tethered pen on the interactive
workspace to control and manipulate items on your screen, and write
and erase digital ink. Use the pen side switch to perform two
programmable, frequently used functions. Store the pen in the
compartment on top of the wireless slate.
Interactive Workspace
The interactive workspace integrates with your computer and
SMART Board software to create an interactive environment. Control your
computer with the tethered pen and write over any application with
digital ink.
Function Buttons
Three customizable function buttons provide shortcuts to frequently used
SMART Notebook and SMART Board software tools, or convenient access
to the previous or next page in a SMART Notebook le.
Underlay Icon Strip
The printed desktop underlay is located under a thin layer of transparent
lm above the interactive workspace. Lift the transparent lm to insert
a printed desktop underlay image. Press the icons on the customizable
SMART Technologies November 2009
Page 2
Using SMART Slate
Connecting the SMART Slate
The SMART Slate uses Bluetooth® wireless technology to communicate
with your computer. The rst time you use the SMART Slate, or if
you accidentally disconnect the slate, you’ll need to establish the
wireless connection.
To establish the wireless connection
1. Slide the power switch on the top-right corner of the
SMART Slate to the ON position, and then press the
Connect button on the underside of the slate. The status
indicator ashes green.
2. Double-click the Bluetooth icon in
the notication area. The My
Bluetooth Places window appears.
3. Click Add a Bluetooth Device.
The Bluetooth Setup Wizard window appears. Click Next.
4. Click SMART Slate WS200, and then click
Next. The Conrmation Required
window appears.
5. Click the Bluetooth Security Code Required
pop-up in the notication
area. The Bluetooth
Security Code Request
window appears.
Using the SMART Slate (cont.)
• To left-click, press the pen to the workspace
• To double-click, quickly tap the interactive workspace twice
in the same location with the pen
• To right-click, press the Right-Click button on the icon strip
or the upper pen button, and then press the pen to the
display. Subsequent pen presses will register as left-clicks.
• Press any of the three customizable function buttons on the
slate to perform the dened action or open the congured
application
• Press an icon strip icon with the pen. The cursor changes to
the tool you select. Touch the pen to the workspace to use
the selected tool.
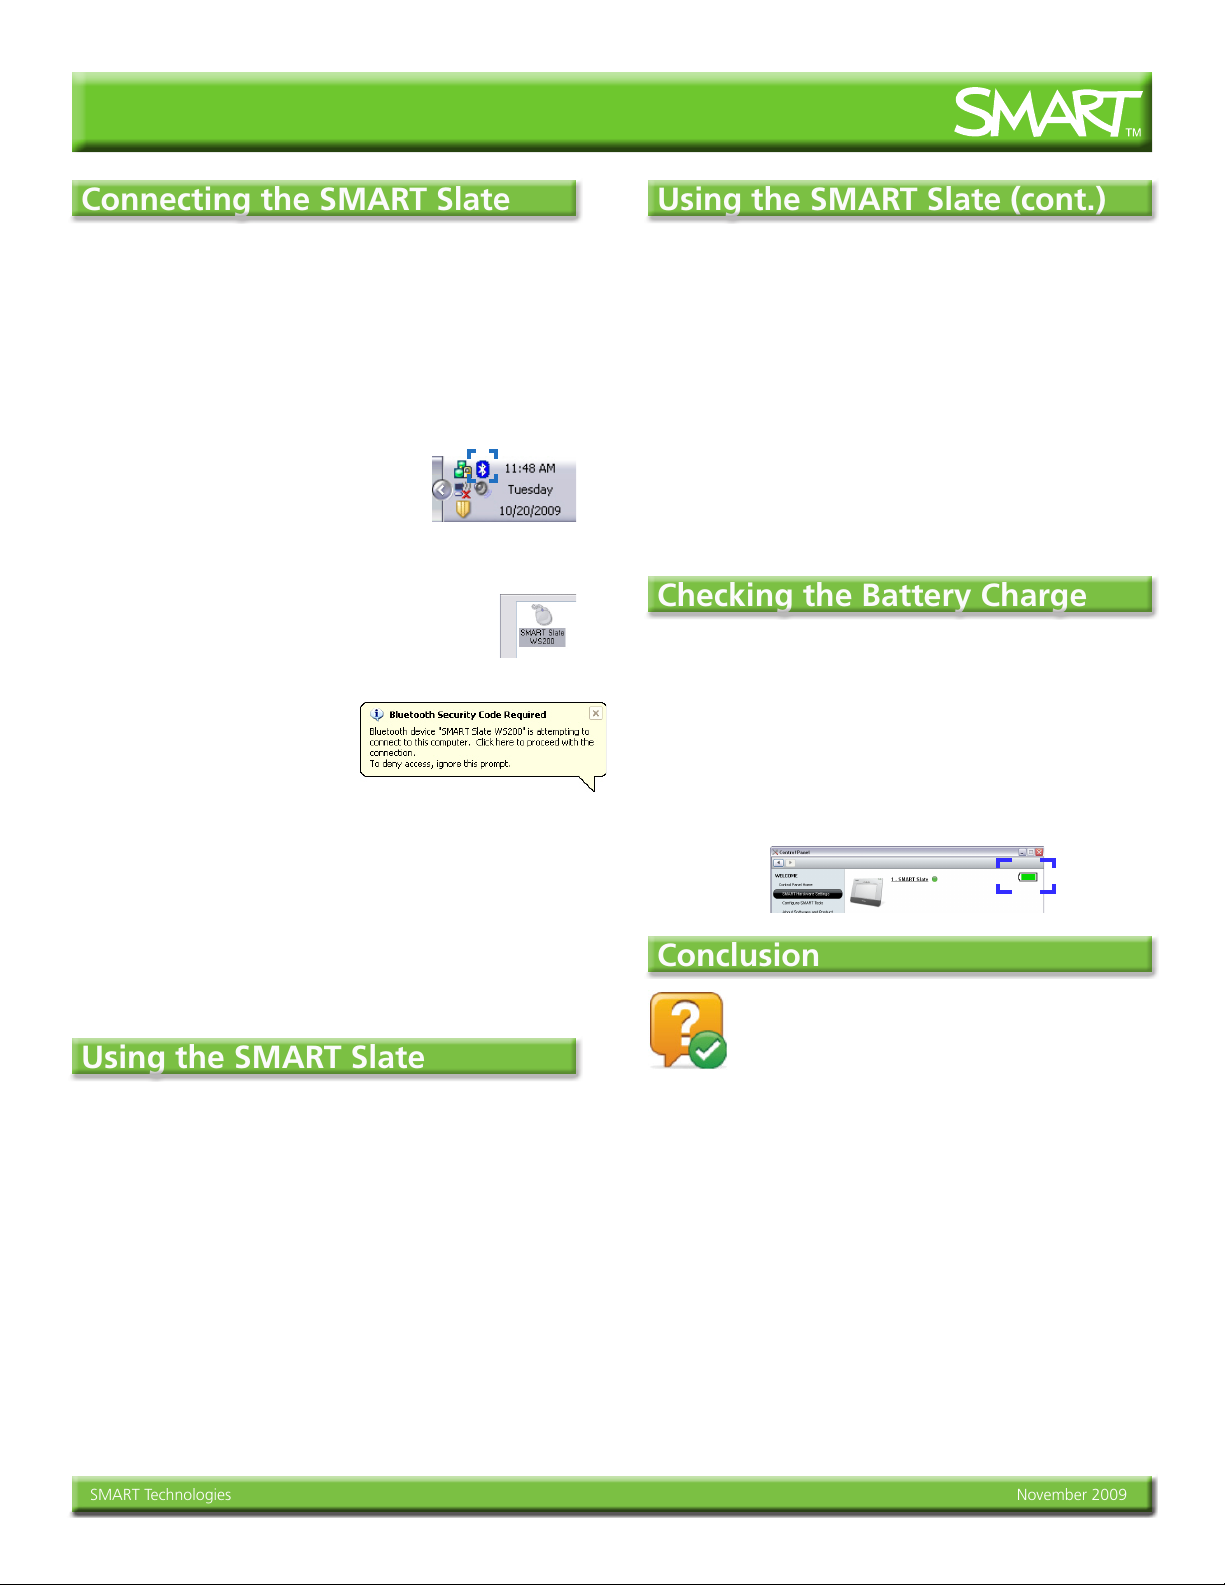
Checking the Battery Charge
You can check the battery charge in the SMART Notebook control panel.
To check the battery charge
1. Press the SMART Board icon in the notication area
2. Select Control Panel. The SMART Notebook Control
Panel appears.
3. Press SMART Hardware Settings. The battery charge
6. Type 0000, and then click OK
7. Use the SMART Slate pen to press the
When the SMART Slate is connected to your computer, the status
indicator on the slate glows pale green and the Bluetooth icon in the
notication area glows green. After you create a connection between
your slate and your computer, your slate automatically connects with your
computer when you turn on the slate.
Click here: XX button
Conclusion
Using the SMART Slate
The pen is your mouse when you’re using the SMART Slate. To see where
your cursor is on the screen, hover the pen about 1/4” (0.5 cm) above
the workspace. Interact with computer applications by pressing the pen
to the workspace. You can also access additional tools and features using
the icon strip or by pressing one of the three programmable function
buttons on the slate.
It’s easy to start using the SMART Slate:
• To write over the desktop with digital ink, pick up the pen,
select a digital ink color on the icon strip, press and hold the
lower pen button and use the pen to write on the interactive
workspace
• To erase your digital ink notes, press the Eraser tool button
on the icon strip, or use the eraser-end of the pen, and move
the pen in a smooth motion over the interactive workspace
• Release the lower pen button, or press the Cursor button on
the icon strip to return the pen to mouse mode
SMART Technologies November 2009
applications and make notes on the SMART Board interactive whiteboard,
SMART Podium interactive pen display or any computer-projected image,
from anywhere in the classroom. You can customize function and pen
buttons and underlay icon strips to suit your needs, and deliver engaging,
collaborative lessons that are interactive and accessible.
Let’s review what you’ve learned:
• SMART Slate features
• How to connect the SMART Slate
• How to use the SMART Slate
• How to check the battery charge
© 2009 SMART Technologies ULC. All rights reserved. SMART Board, Notebook, smarttech and the SMART logo are trademarks of
SMART Technologies ULC in the U.S. and/or other countries. Bluetooth is a trademark owned by Bluetooth SIG, Inc. and is used by
SMART Technologies ULC under license. All other third-party product and company names are for identication purposes only and
may be trademarks of their respective owners. Printed in Canada 11/2009.
status appears in the upper-right corner.
You can use the SMART Slate to control computer
 Loading...