

Page 1
PLEASE THINK BEFORE YOU PRINT
SMART Sync™ 2010
User’s Guide
Windows® Operating Systems
Page 2

Trademark Notice
SMART Sync, SMART Board, SMART Notebook, SMART Classroom Suite, smarttech and the SMART logo are
trademarks or registered trademarks of SMART Technologies ULC in the U.S. and/or other countries. Microsoft, Windows,
Windows Vista
trademarks of Microsoft Corporation in the United States and/or other countries.All other third-party product and company
names are mentioned for identification purposes only and may be trademarks of their respective owners.
Copyright Notice
©2010 SMART Technologies ULC. All rights reserved. No part of this publication may be reproduced, transmitted,
transcribed, stored in a retrieval system or translated into any language in any form by any means without the prior written
consent of SMART Technologies ULC. Information in this manual is subject to change without notice and does not
represent a commitment on the part of SMART.
Patents pending.
04/2010
, Windows Media, DirectX, Internet Explorer, Excel and PowerPoint are either registered trademarks or
Page 3

Contents
Getting Started 1
Starting SMART Sync 2
Connecting to Students 3
Transferring Students to Your Class 5
Working with Teacher IDs and Classes 5
Navigating the User Interface 6
Customizing the User Interface 10
Working with Thumbnails 11
Working with Groups 13
Exiting SMART Sync 15
Observing and Controlling Students 17
Observing the Class 17
Observing a Student’s Desktop 20
Controlling a Student’s Desktop 22
Writing Over a Desktop 24
Capturing an Image of a Student’s Desktop 25
Locking Student Desktops 26
Disconnecting Students 27
Shutting Down, Logging Off and Restarting Students’ Computers 29
Broadcasting and Communicating 31
Broadcasting 32
Sending an Announcement 36
Conducting a Poll 37
Sharing Media 37
Sharing a Web Page 40
Organizing Collaboration 43
Starting Collaborative Assignments 43
Completing Collaborative Assignments 44
Monitoring Collaborative Assignments 46
Viewing Completed Assignments 47
Answering Questions 49
Viewing and Answering Questions 49
Deleting a Question without Answering 50
Saving the Question History 51
Page 4

i i
| C O N T E N T S
Clearing the Question History 51
Chatting 53
Chatting with Students 53
Saving the Chat History 55
Clearing the Chat History 55
Enabling and Disabling Student Chat 56
Sending and Receiving Files 59
Sending Files to Students 59
Receiving Files from a Student 61
Clearing Files from the File List 61
Controlling Access to Applications 63
Creating and Using Application Blocking Rules 63
Starting and Closing Applications 68
Controlling Access to the Internet 73
Blocking Internet Access 73
Creating and Using Internet Blocking Rules 74
Working with Other Teachers and Teacher Aides 79
Controlling Teacher Aides 79
Disconnecting Teacher Aides 80
Joining a Class as a Teacher Aide 80
Configuring SMART Sync Teacher 83
Setting the Language 84
Connecting to SMART Sync Class List Server 85
Setting the Lock-Out Message 87
Setting the Optimization Preferences 88
Setting the Control Preferences 89
Setting the Broadcast Preferences 90
Setting the Digital Ink’s Appearance 91
Setting the File Transfer Preferences 92
Setting a User Authentication Password 93
Setting the Advanced Preferences 94
Setting the Logging Preferences 99
Sending Feedback to SMART 101
Customer Support 103
Online Information and Support 103
Training 103
Technical Support 103
General Inquires 104
Page 5

i i i
| C O N T E N T S
Registration 104
Index 105
Page 6

Page 7

Chapter 1
Getting Started
Starting SMART Sync 2
Connecting to Students 3
Transferring Students to Your Class 5
Working with Teacher IDs and Classes 5
Navigating the User Interface 6
Views 7
Main Toolbar and Menus 8
Group Tabs 8
Students List 9
Customizing the User Interface 10
Showing or Hiding Toolbars 10
Setting the Selection Method 10
Working with Thumbnails 11
Rearranging Thumbnails 11
Resizing Thumbnails 12
Changing Thumbnail Information 12
Working with Groups 13
Changing the Type of Class 13
Creating, Editing and Deleting Groups 14
Exiting SMART Sync 15
With SMART Sync™ classroom management software, you can manage your
classroom and communicate with your students without leaving your computer.
SMART Sync lets you observe and control your students’ computers using the
Thumbnails view, which displays real-time images of your students’ computer desktops.
You can customize this view’s appearance. In addition to viewing the desktops, you can
capture snapshots of students’ screens, take control of students’ desktops, temporarily
lock students’ computers, remotely shut down students’ computers, block Internet
access and block the use of specific applications.
You can also use SMART Sync to communicate with your entire class, a group of
students or an individual student. You can broadcast your desktop, conduct polls, send
Page 8
2
| C H A P T E R 1 – G E T T I N G S T A R T E D
messages to students and receive replies, send files to your students, organize student
collaboration and more.
If you’re using SMART Sync with a SMART Board™ interactive whiteboard, you can
write notes using a pen tray pen and your students will see your notes on their desktops.
If you’re working at a computer, you can write notes using the tools in SMART Sync.
Starting SMART Sync
When you first start SMART Sync, you create a teacher ID and class. Students can then
connect to the class (see Connecting to Students on next page).
Every class is unique. The only similarity between two classes may be the room in
which they’re taught. Everything else may be different, including the students, the
seating plan and more.
Teachers and classes can be administered, which means they’re centrally defined in a
SMART School file (see Connecting to SMART Sync Class List Server on page 85), or
non-administered, which means they’re defined in your computer's installation of
SMART Sync.
l If you select a non-administered class when you start SMART Sync, you can
save changes to your class at any time.
l If you select an administered class, you can’t save changes to the original file, but
you can save it with a new name.
N O T E
(Administered) appears beside administered classes in the Welcome to SMART
Sync dialog box.
To create a new teacher ID 1. Double-click the SMART Sync Teacher 2010 icon on your desktop.
The SMART Sync window and the Welcome to SMART Sync dialog box appear.
2. Type the teacher ID in the Teacher box.
N O T E
The teacher ID can’t contain the following characters: \ / : * ? < > | "
3. Click OK.
A message appears, asking if you want to create a new teacher ID.
Page 9

3
| C H A P T E R 1 – G E T T I N G S T A R T E D
4. Click Yes.
SMART Sync displays the Thumbnails view and the All Computers tab.
5. Connect to students (see Connecting to Students below), and then save the class
(see Working with Teacher IDs and Classes on page 5).
To select an existing
teacher ID
1. Double-click the SMART Sync Teacher 2010 icon on your desktop.
The SMART Sync window and the Welcome to SMART Sync dialog box appears.
2. Select a teacher ID from the Teacher drop-down list.
3. Select an existing class in the Class list.
OR
Select New Class in the Class list to create a new class.
4. Click OK.
SMART Sync displays the Thumbnails view and the All Computers tab.
5. Connect to students (see Connecting to Students below).
If you created a new class in step 3, save it (see Working with Teacher IDs and
Classes on page 5).
Connecting to Students
You or your system administrator can install SMART Sync Student on students’
computers in one of two modes:
Mode Description
Visible The user interface is visible to students.
Hidden The user interface is hidden from students.
Page 10

4
| C H A P T E R 1 – G E T T I N G S T A R T E D
You or your system administrator then selects a connection option depending on the
chosen mode:
Connection Option Description Visible
Mode
Allows the student to
select from a list of
available teachers
Students must manually connect
to the correct teacher ID.
T I P
Yes No
If teacher discovery is
available, students can
view the IDs of teachers
currently logged on to
SMART Sync Teacher in
a drop-down list (see page
85).
Automatically
connects with this
Students automatically connect
to a teacherID.
Yes Yes
Teacher ID
Automatically
connects with this
hostname or IP
address
Students automatically connect
to a teacher through the host
name or IP address. (Host names
and IPaddresses identify
Yes Yes
computers on a network.)
Uses this Class List
Server hostname or IP
address
You connect to your students
based on the information in a
SMART School file (see
Yes Yes
Connecting to SMART Sync
Class List Server on page 85).
For information on creating and
maintaining SMART School files,
see document 144150.
Hidden
Mode
N O T E
l If a student with a version of SMART Sync Student that is incompatible
with your version of SMART Sync Teacher attempts to connect to your
class, warning messages appear on the student’s screen and your screen.
l In Hidden mode, students can’t ask questions, initiate chat, send files or
complete other tasks requiring the SMART Sync Student user interface.
Page 11
5
| C H A P T E R 1 – G E T T I N G S T A R T E D
Transferring Students to Your Class
If you connect to students through SMART Sync Class List Server, you can transfer
students connected to other teachers’ classes to your class.
N O T E
This feature is only available if you use SMART Sync Class List Server and if
one or more other teachers currently have a class running on SMART Sync Class
List Server.
To transfer students to
your class
1. Select Connection > Get Missing Students from Other Teachers.
The SMART Sync – Class List Connection dialog box appears. This dialog box
shows all students connected to other teachers through SMART Sync Class List
Server and the teachers they’re connected to.
2. Select the check boxes of the students you want to transfer to your class.
T I P
You can select all students in the list by clicking Select All.
3. Click Transfer.
SMART Sync transfers the selected students to your class.
Working with Teacher IDs and Classes
You can change to a different teacher ID or select another class at any time, and the
customized profile loads automatically.
If additional students join your class or you reorganize your groups, you may want to
save the current class.
To change the teacher ID
or class
1. Select File > Change Teacher or Class.
The Teacher and Class Selection dialog box appears, displaying your current
teacher ID.
Page 12

6
| C H A P T E R 1 – G E T T I N G S T A R T E D
2. Select the teacher ID you want from the list.
OR
Clear the current teacher ID and enter another one.
3. Select the class you want.
4. Click OK.
The SMART Sync title bar changes to reflect the teacher ID and class.
Students connected to the previous teacher ID receive a message asking them if
they want to switch to the new teacher ID. They must click Yes to connect to the
new teacher ID.
To save a
non-administered class
To save an administered
class or to save a class
with a new name
Select File > Save Class.
1. Select File > Save Class As.
A dialog box appears.
2. Type a new class name, and then click Save.
Navigating the User Interface
The SMART Sync user interface consists of four components:
l Views
l Main toolbar and menu
l Group tabs
l Students list
Page 13
7
| C H A P T E R 1 – G E T T I N G S T A R T E D
Views
Each view contains a subset of the features in SMART Sync:
View Description
Thumbnails When you start SMART Sync, you see thumbnails (miniature
images) of the connected students’ desktops. These thumbnails
change in real time (though slightly delayed) with every instance of
student input. You can customize the appearance of the Thumbnails
view by editing thumbnail names, changing thumbnail sizes and
rearranging the thumbnails.
In the Thumbnails view, you can:
l
Observe the class
l
Observe and take control of a student’s desktop
l
Broadcast your desktop
l
Broadcast a student’s desktop
l
Capture an image of a student’s desktop
l
Share media files
l
Share a web page
l
Shut down, log off or restart a student’s computer
Collaboration Using the Collaboration view, you can organize and monitor
collaborative assignments. You can separate your class into groups
of two or three, distribute an assignment for them to complete as a
group and view their progress.
Questions Using the Questions view, you can view, respond to and save your
students’ questions.
Chat Using SMART Sync, you can chat with your whole class, a specific
group or selected students. The Chat view displays all the chat
messages, including messages between students.
In the Chat view, you can:
l
Chat with the entire class or selected groups
l
Control student chat
l
Save the current chat session as a text file
l
Clear the chat history
Page 14
8
| C H A P T E R 1 – G E T T I N G S T A R T E D
View Description
File Transfer Using the File Transfer view, you can send files to your class, to a
group or to selected students and receive files from them. The view is
divided into Sent Files, which lists the files you’ve sent to students,
and Received Files, which lists the files you’ve received from
students.
In the File Transfer view, you can also:
l
Cancel a file transfer
l
Open a sent file
l
Open a received file
l
Clear a file from the list
Applications Using the Applications view, you can block applications on your
students’ computers, giving you complete control over the
applications your students can use. You can also remotely start and
close applications on your students’ computers.
Internet Using the Internet view, you can block students from using specified
websites and pages.
N O T E
In all views, you can lock student desktops, block Internet access, send an
announcement and conduct a poll.
Main Toolbar and Menus
Although you can access some buttons and menu options in any view, some buttons
and menu options are specific to a particular view. For example, the
Shut Down button appears only in the Thumbnails view.
When you select a view, the toolbar buttons and menu options change to the buttons and
options appropriate for that view.
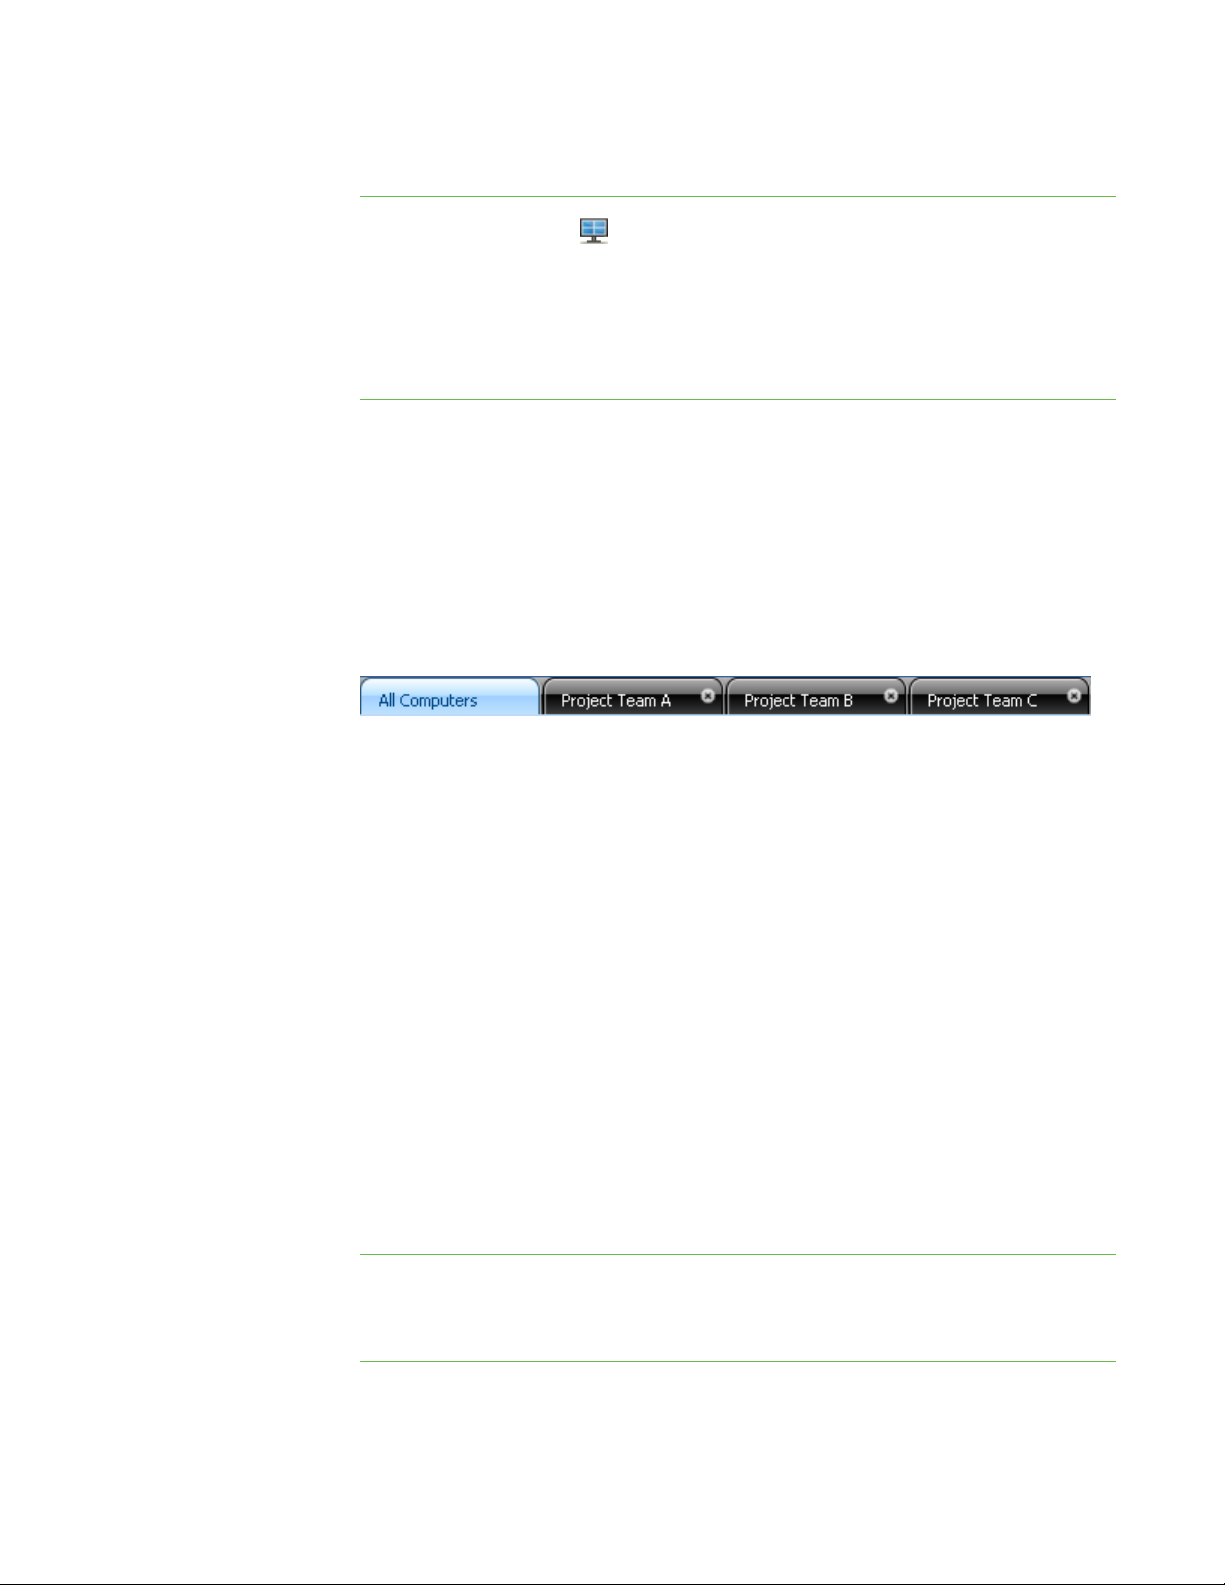
Group Tabs
If you want to interact with some students but not with the entire class, you can create
groups. Each time you create a group, SMART Sync creates a tab for the new group
(see Working with Groups on page 13).
Depending on your viewing options, the main tab is named All Computers or
All Students.
Page 15
9
| C H A P T E R 1 – G E T T I N G S T A R T E D
Students List
The students list appears on the right side of the interface when you’re in the Questions,
Chat, File Transfer, Applications or Internet view.
N O T E
The Thumbnails view and the Collaboration view don’t include the students list.
You can get the same information from the students’ thumbnails.
The students list includes:
l All the currently connected students (if you’re viewing the All Students or All
Computers tab).
l All the currently connected students in a group (if you’re viewing a group’s tab).
When you select one or more students in the students list, you can interact with the
selected students using SMART Sync features, including locking students’ desktops,
broadcasting, chatting, sending and receiving files, conducting polls and more.
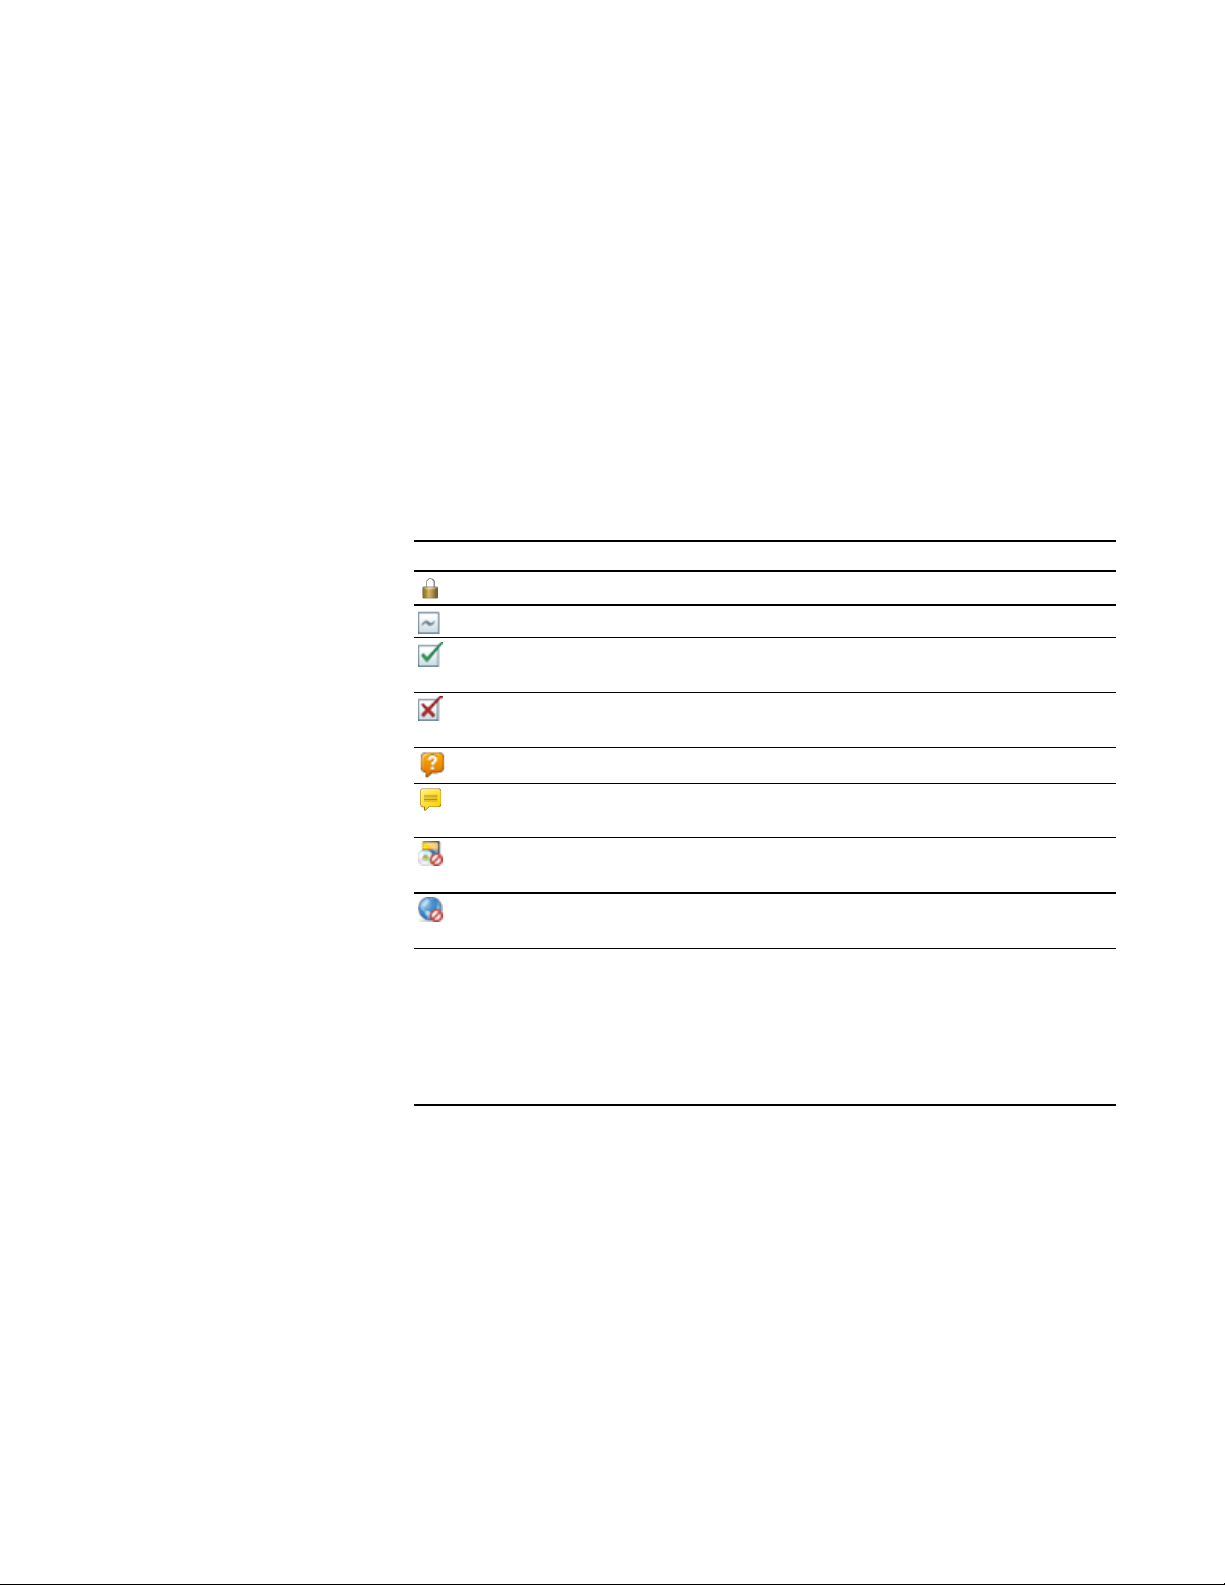
The symbol next to each student’s name indicates the student’s status. The symbols
appear below in order of most important status (Disconnected) to the least important
(Connected).
Symbol Status Description
Disconnected The student is disconnected.
Locked Out The student is locked out.
Vote The student has yet to respond to a vote.
Vote Yes The student has responded affirmatively to a
vote.
Vote No The student has responded negatively to a vote.
Question The student has asked a question.
Chat The student has received a new chat message.
Application Block The student is blocked from using one or more
applications.
Internet Block The student is blocked from using the Internet.
Connected The student is connected.
When more than one status applies to a student, the most important symbol appears.
For example, if a student is both connected and locked out, the Locked Out symbol
displays beside the student’s name.
Page 16

1 0
| C H A P T E R 1 – G E T T I N G S T A R T E D
Customizing the User Interface
You can customize SMART Sync’s user interface following the instructions in this
section.
Showing or Hiding Toolbars
You can show or hide the toolbars to customize the SMART Sync interface.
To show or hide the
main toolbar
To show or hide the
Views icons
Select View > Toolbars > Main.
Select View > Toolbars > View.
Setting the Selection Method
You can change SMART Sync’s selection method to suit your preferences. The two
available methods are Standard and Sticky.
In Standard selection:
l If you click two items, you select only the second item.
l If you hold the CTRL key and click two items, you select both items.
l If you hold the SHIFT key and click two items, you select both items and every
item between the two.
In Sticky selection:
l If you click two items, you select both items.
l If you click a selected item, you clear the selection.
l Holding the CTRL or SHIFT keys has no effect.
T I P
If you’re using a SMART Board interactive whiteboard, it’s easier to select and
clear selections using the Sticky selection method.
Page 17
1 1
| C H A P T E R 1 – G E T T I N G S T A R T E D
To set the selection
method to Standard
To set the selection
method to Sticky
Select Options > Selection Types > Standard Selection.
Select Options > Selection Types > Sticky Selection.
Working with Thumbnails
You can rearrange, resize and change the information of the thumbnails in the
Thumbnails view.
Rearranging Thumbnails
By default, the student thumbnails are arranged alphabetically in the Thumbnails view.
However, you can rearrange the thumbnails in any way you like. For example, you can
rearrange them to reflect the room’s seating plan for all students or groups.
To rearrange thumbnails
in a customized order
To rearrange thumbnails
alphabetically
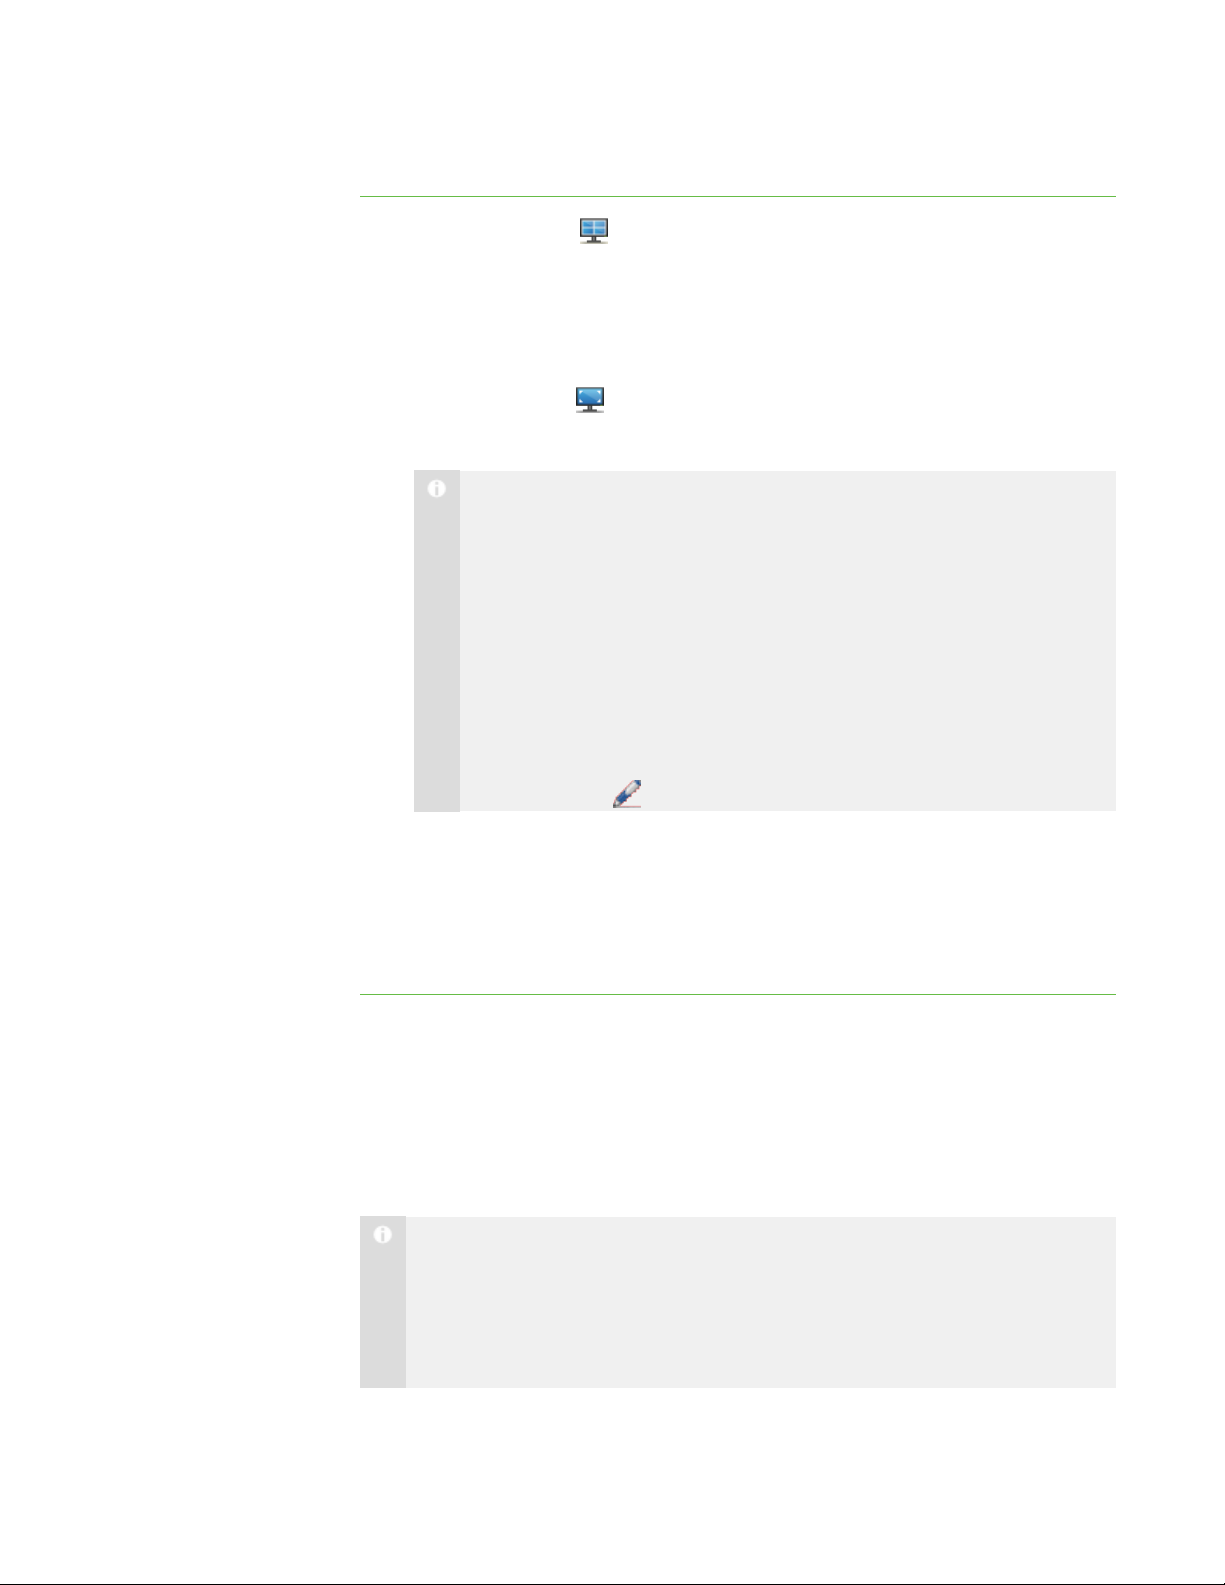
1.
Click Thumbnails .
The Thumbnails view appears.
2. Click All Computers or All Students to rearrange the thumbnails for the class.
OR
Click a group’s tab to rearrange the thumbnails for the group.
3. Make sure View > Thumbnail Arrangement > Align to Grid isn’t selected, and
then click and drag the thumbnails vertically or horizontally.
N O T E
If a new student joins the class or group, that student’s thumbnail appears
at the end of the thumbnail arrangement.
1.
Click Thumbnails .
The Thumbnails view appears.
2. Click All Computers or All Students to rearrange the thumbnails for the class.
OR
Click a group’s tab to rearrange the thumbnails for the group.
Page 18
1 2
| C H A P T E R 1 – G E T T I N G S T A R T E D
3. Select View > Thumbnail Arrangement > Alphabetical Ordering.
The thumbnails are rearranged in alphabetical order starting at the upper left
corner.
N O T E
If a new student joins the class or group, that student’s thumbnail appears
in alphabetical order in the thumbnail arrangement.
Resizing Thumbnails
There are advantages and disadvantages to increasing the size of the thumbnails. If you
make them larger, it’s easier to see details, but you have to scroll to view some of the
thumbnails. If you make them smaller, you can view more of them without having to
scroll, but it’s difficult to see details.
To resize thumbnails 1.
2. Select View > Thumbnail Size, and then select one of the following options:
Changing Thumbnail Information
When you’re monitoring a class or group in the Thumbnails view, you can display the
student’s logon ID, student ID or name below each thumbnail.
Click Thumbnails .
The Thumbnails view appears.
o
Very Large (two thumbnails wide)
o
Large (three thumbnails wide)
o
Medium (four thumbnails wide)
o
Small (five thumbnails wide)
o
Very Small (six thumbnails wide)
o
Best Fit (automatically adjusts the thumbnail display to the best
arrangement)
The Collaboration view also displays this information.
Page 19
1 3
| C H A P T E R 1 – G E T T I N G S T A R T E D
To change thumbnail
information
1.
Click Thumbnails .
The Thumbnails view appears.
2. Select View > Thumbnail Name/Description.
3. Select Logon ID, Student ID or Student Name.
Working with Groups
If you want to interact with some students but not the entire class, you can create
groups.
When you create a group, SMART Sync creates a tab for the group. Depending on your
viewing options, the default group tab is named All Computers or All Students.
When you select a group’s tab, you can interact with the members of that group. For
example, you can lock the group’s desktops, broadcast your desktop to the group, chat
with the group, send a file to the group, conduct a poll of the group and more.
To change from a lab
to a class
To change from a class
to a lab
By creating groups, you can tailor specific actions to a certain section of the class. For
example, you can create a group made up of students who are easily distracted, and
then monitor the computer screens of that group.
You can also edit the members of existing groups and delete groups that you no longer
need.
Changing the Type of Class
Depending on your viewing options, the default group tab is named All Computers or All
Students. The All Computers group includes every computer in your lab and names the
thumbnails using the computer name. The All Students group includes every student in
your class and names the thumbnails using the student ID.
Select View > View Class As > Student Class List.
Select View > View Class As > Computer Lab.
Page 20

1 4
| C H A P T E R 1 – G E T T I N G S T A R T E D
Creating, Editing and Deleting Groups
To create a group
1. Select Edit > Add Group.
The New Group dialog box appears.
2. Type a name for the group in the Group name box.
3. Optionally, select the Allow students to join this group on their own check
box to allow students to join or leave this group.
N O T E
If you don’t select this check box, only you can add or remove students
from the group.
4. Click OK.
The group appears as a new tab in the main SMART Sync window.
To edit a group 1. Select the group’s tab.
2. Select Edit > Modify Group.
The Edit New Group dialog box appears.
3. Optionally, change the name of the group in the Name box.
4. Optionally, add students to or remove them from the group:
o
To add a student, select the student’s name in the Students list, and then
click Add.
o
To remove a student, select the student’s name in the Group Members list,
and then click Remove.
5. Optionally, select the Allow students to join this group on their own check
box to allow students to join or leave this group.
N O T E
If you don’t select this check box, only you can add or remove students
from the group.
6. Click OK.
Page 21

1 5
| C H A P T E R 1 – G E T T I N G S T A R T E D
To delete a group
To interact with a group or
all students
1. Select the group’s tab.
2. Select Edit > Remove Group.
A warning message appears.
3. Click Yes.
Click a group’s tab to interact with the group.
OR
Click the All Computers or All Students tab to interact with all students.
Exiting SMART Sync
Before you exit SMART Sync, consider the following:
l If you exit while a file transfer is in progress, the file transfer is canceled.
l If you want to continue to use SMART Sync but you want to change to a different
teacher ID, you don’t need to exit SMART Sync.
To exit SMART Sync Select File > Exit.
Page 22

Page 23

Chapter 2
Observing and Controlling Students
Observing the Class 17
Observing a Student’s Desktop 20
Controlling a Student’s Desktop 22
Writing Over a Desktop 24
Capturing an Image of a Student’s Desktop 25
Locking Student Desktops 26
Disconnecting Students 27
Disconnecting Students 27
Controlling Student Disconnection 28
Shutting Down, Logging Off and Restarting Students’ Computers 29
You can view a window or full screen image of a student’s desktop, take sole control of a
student’s desktop or share control with the student. You can also observe and control
your entire class using locks, shutdowns and more.
Observing the Class
You can view images of your students’ screens using the Thumbnails view, enabling you
to determine at a glance whether everyone is focused on the assigned task.
When you’re observing a class or group you can:
l Lock student desktops (see page 26)
l Block student access to the Internet (see page 73)
l Conduct a poll (see page 37)
l View and answer your students’ questions (see page 49)
l Broadcast your desktop (see page 32)
Page 24

1 8
| C H A P T E R 2 – O B S E R V I N G A N D C O N T R O L L I N G S T U D E N T S
l Share media files (see page 37)
l Shut down, log off or restart student computers (see page 29)
To observe the class 1.
Click Thumbnails .
The Thumbnails view appears.
Page 25
1 9
| C H A P T E R 2 – O B S E R V I N G A N D C O N T R O L L I N G S T U D E N T S
2. Click All Computers or All Students to monitor all students.
OR
Click a group’s tab to monitor only students in the group.
The Thumbnails view displays the thumbnails of the class or the selected group.
The symbol in the top left corner of each thumbnail indicates the student’s status.
When more than one status applies to a student, the symbol with the greatest
importance is displayed. For example, if a student is both blocked from using the
Internet and locked out, the Locked Out symbol is displayed. The symbols appear
below in order of most important (Locked Out) to least important
(Active Application).
Symbol Status Description
Locked Out The student is locked out.
Vote The student has yet to respond to a vote.
Vote Yes The student has responded affirmatively to
a vote.
Vote No The student has responded negatively to a
vote.
Question The student has asked a question.
Chat The student has received a new chat
message.
Application Block The student is blocked from using one or
more applications.
Internet Block The student is blocked from using the
Internet.
Active Application If none of the situations above are true,
then the icon for the student’s active
application is displayed as a symbol. For
example, if the student is using Microsoft®
Word, then the Microsoft Word icon is
displayed.
Page 26
2 0
| C H A P T E R 2 – O B S E R V I N G A N D C O N T R O L L I N G S T U D E N T S
The Thumbnails view displays all thumbnails in a 4:3 ratio to make it easier for you
to view and organize the thumbnails. If necessary, this view also adds borders to
the image to ensure the thumbnail isn’t distorted by a change in ratio.
Observing a Student’s Desktop
You can view a student’s desktop in Window mode (the student’s desktop appears in a
resizable window, with the Thumbnails view open at the same time) or Full Screen mode
(the student’s desktop fills your screen). Window mode lets you switch between the live
image of your student’s desktop and the other parts of SMART Sync, such as the Chat,
Quiz and File Transfer views.
When you’re monitoring an individual student, you can also take control of the student’s
desktop, broadcast the student’s desktop to the class, capture an image of the student’s
desktop and write notes over the student’s desktop.
N O T E
If a student’s computer disconnects from your computer while you’re observing
the student’s desktop, “No Response” appears over the thumbnail. When the
student’s computer reconnects, the message disappears and you can resume
observing the desktop.
T I P
If a student uses dual monitors, you can view both displays. Either scroll to see
an individual display or scale the displays to view them both in one window.
Page 27

2 1
| C H A P T E R 2 – O B S E R V I N G A N D C O N T R O L L I N G S T U D E N T S
To view a student’s
desktop in Window mode
1.
Click Thumbnails .
The Thumbnails view appears.
2. Double-click the student’s thumbnail.
The student’s desktop appears in Window mode.
N O T E
While viewing the student’s desktop in Window mode, you can:
o
Click Control to take control of the student’s desktop (see page
22).
o
Click Broadcast to broadcast the student’s desktop (see page
33).
o
Click Capture to capture an image of the student’s desktop (see
page 25).
o
Click Pen to write on the student’s desktop (see page 24).
3.
Click Stop to stop viewing the student’s desktop.
Page 28
2 2
| C H A P T E R 2 – O B S E R V I N G A N D C O N T R O L L I N G S T U D E N T S
To view a student’s
desktop in Full Screen
mode
1.
Click Thumbnails .
The Thumbnails view appears.
2. Double-click the student’s thumbnail.
The student’s desktop appears in Window mode.
3.
Click Full Screen .
The student’s desktop appears in Full Screen mode with a toolbar.
N O T E
While viewing the student’s desktop in Full Screen mode, you can:
o
Select Menu > Control to take control of the student’s desktop (see
page 22).
o
Select Menu >Broadcast to broadcast the student’s desktop (see
page 33).
o
Select Menu >Capture to capture an image of the student’s
desktop (see page 25).
o
Click Pen to write on the student’s desktop (see page 24).
4. Select Menu > Stop Observing to stop viewing the student’s desktop.
OR
Select Menu > View in Window Mode to continue viewing the student’s
desktop, but in Window mode.
Controlling a Student’s Desktop
When you’re observing a student, you can take sole control or share control of the
student’s desktop. Any changes you make when you take sole control of the student’s
desktop are visible to the student in real time.
N O T E
If a student’s computer disconnects from your computer while you’re controlling
the student’s desktop, “No Response” appears over the thumbnail. When the
student’s computer reconnects, the message disappears and you can resume
controlling the desktop.
Page 29

2 3
| C H A P T E R 2 – O B S E R V I N G A N D C O N T R O L L I N G S T U D E N T S
To control a student’s
desktop in Window mode
1.
Click Thumbnails .
The Thumbnails view appears.
2.
Select the student’s thumbnail, and then click Control .
The student’s desktop appears in Window mode.
N O T E
While controlling the student’s desktop in Window mode, you can:
o
Click Observe to stop controlling the student’s desktop but
continue viewing it (see page 20).
o
Click Broadcast to broadcast the student’s desktop (see page
33).
o
Click Capture to capture an image of the student’s desktop (see
page 25).
o
Click Pen to write on the student’s desktop (see page 24).
3.
Click Stop to stop controlling the student’s desktop.
To control a student’s
desktop in Full Screen
mode
1.
Click Thumbnails .
The Thumbnails view appears.
2.
Select the student’s thumbnail, and then click Control .
The student’s desktop appears in Window mode.
Page 30
2 4
| C H A P T E R 2 – O B S E R V I N G A N D C O N T R O L L I N G S T U D E N T S
3.
Click Full Screen .
The student’s desktop appears in Full Screen mode with a toolbar.
N O T E
While controlling the student’s desktop in Full Screen mode, you can:
o
Select Menu > Observe to stop controlling the student’s desktop,
but to continue viewing it (see page 20).
o
Select Menu >Broadcast to broadcast the student’s desktop (see
page 33).
o
Select Menu >Capture to capture an image of the student’s
desktop (see page 25).
o
Click Pen to write on the student’s desktop (see page 24).
4. Select Menu > Stop Controlling to stop controlling the student’s desktop.
OR
Select Menu > View in Window Mode to continue controlling the student’s
desktop, but in Window mode.
Writing Over a Desktop
If you’re observing or controlling a student’s desktop, you can write over that student’s
desktop. Your notes are visible only on that student’s desktop.
l If you’re working on a SMART Board interactive whiteboard, you can write notes
using a pen tray pen.
You can change the appearance of the digital ink using the options in Floating
Tools.
l If you’re working at your computer, you can write notes using the toolbar.
You can change the digital ink’s width, color and transparency in SMART Sync’s
preferences.
The digital ink is temporary and the underlying application is unaffected by your notes. If
you want to save your notes, capture the screen before you clear the digital ink.
Page 31

2 5
| C H A P T E R 2 – O B S E R V I N G A N D C O N T R O L L I N G S T U D E N T S
To write over a student’s
desktop using an
interactive whiteboard
To write over a student’s
desktop using the toolbar
1. Observe or take control of a student’s desktop (see Observing a Student’s
Desktop on page 20 or Controlling a Student’s Desktop on page 22).
2. Pick up a pen tray pen and write on the interactive whiteboard.
3. Put the pen tray pen back in its slot when you’re finished.
When you next make contact with the interactive whiteboard, your notes
disappear.
1. Observe or take control of a student’s desktop (see Observing a Student’s
Desktop on page 20 or Controlling a Student’s Desktop on page 22).
2.
Click Pen .
3. Click and drag your mouse across your desktop to write in digital ink.
4.
Click Select when you’re finished.
Your notes disappear.
To capture an image of a
student’s desktop
Capturing an Image of a Student’s Desktop
When you’re observing a student, you can capture an image of the student’s desktop and
save it as a graphics file for your records.
1.
Click Thumbnails .
The Thumbnails view appears.
2. Select the thumbnail of the student whose desktop you want to capture.
3.
Click Capture .
The Save As dialog box appears.
4. Type a new name for the file in the File name box if you don’t want to use the
default file name.
N O T E
The default file name contains the student’s name, followed by the date
and the time of the screen capture.
Page 32

2 6
| C H A P T E R 2 – O B S E R V I N G A N D C O N T R O L L I N G S T U D E N T S
5. Select a new graphics file type in the Save as type drop-down list if you don’t want
to use the default graphics file type.
N O T E
The default graphics file type is JPEG.
6. Browse to the folder where you want to save the file if you don’t want to save it in
the default folder.
N O T E
The default folder is My Documents in the Windows® XP and Windows 7
operating systems or Documents in the Windows Vista® operating
system.
7. Click Save.
To view the screen capture 1. Browse to the folder where you saved the graphics file.
2. Double-click the graphics file.
Locking Student Desktops
You can get the attention of your class, a group or an individual student by temporarily
locking their mouse devices, keyboards and desktops and presenting them with a simple
message.
The default message is “Eyes to the front, please.” However, you can customize this
message (see Setting the Lock-Out Message on page 87).
When you lock students’ computers, you don’t delete any of their work. When you
remove the lock, the students’ desktop views and control are completely restored.
N O T E
If a student’s computer disconnects from your computer while the student’s
desktop is locked, “No Response” appears over the thumbnail. When the
student’s computer reconnects, the message disappears and the student’s
desktop is locked again.
To lock student desktops 1.
Click Thumbnails .
The Thumbnails view appears.
Page 33

2 7
| C H A P T E R 2 – O B S E R V I N G A N D C O N T R O L L I N G S T U D E N T S
2. Click All Computers or All Students to lock all students’ desktops.
OR
Click a group’s tab to lock only the desktops of students in the group.
OR
Select a student’s thumbnail to lock only the desktop of that student.
3.
Click Lock .
A lock symbol appears over the locked desktops in the Thumbnails view. Lock
symbols also appear in locked students thumbnails.
The lock-out message appears on the selected students’ desktops.
N O T E
To cancel the lock, click Lock .
Disconnecting Students
At the end of a class, some students may leave without disconnecting from SMART
Sync. You can remotely disconnect a student, and you can also control the student’s
ability to disconnect. For example, you can prevent students from logging out or avoiding
your surveillance.
Disconnecting Students
You remotely disconnect students in the Thumbnails view.
To disconnect a student 1.
2. Select the thumbnail of the student you want to disconnect.
3. Select Connection > Disconnect Students.
Click Thumbnails .
The Thumbnails view appears.
A message appears asking you for confirmation.
Page 34

2 8
| C H A P T E R 2 – O B S E R V I N G A N D C O N T R O L L I N G S T U D E N T S
4. Click Yes.
SMART Sync disconnects the student’s computer from SMART Sync Teacher
and a No Response message appears over the student’s thumbnail.
N O T E S
o
If you connected to students using a class list, you can also
disconnect a student, reconnect a student or remove the thumbnail.
o
To disconnect a student, right-click his or her thumbnail, and
then select Disconnect.
o
To reconnect a student, right-click his or her thumbnail, and
then select Reconnect.
o
To remove a thumbnail from the Thumbnails view, right-click
the thumbnail, and then select Remove. This doesn’t remove
the student from a group or the class, but does help to tidy the
view.
To disable student
disconnection
To enable student
disconnection
o
Depending upon how the class was created, you may be able to
refresh the screen by selecting View > Refresh, or by pressing F5.
Controlling Student Disconnection
You can control a student’s ability to disconnect. For example, you can prevent students
from logging out or avoiding your surveillance.
If a student clicks the SMART Sync icon in the notification area and you’ve removed the
ability to disconnect, the student:
l Can’t select Exit
l Can select Connect, but can’t connect to a different teacher in the Connect to
Teacher dialog box
Select Options > Allow Students to Disconnect.
Select Options > Allow Students to Disconnect.
When a student disconnects from SMART Sync, a No Response message appears
over the student’s thumbnail.
Page 35

2 9
| C H A P T E R 2 – O B S E R V I N G A N D C O N T R O L L I N G S T U D E N T S
Shutting Down, Logging Off and Restarting Students’ Computers
Students may leave their computers in a variety of states at the end of the day. Some
students may log off and shut down, and others may leave their applications running.
You can remotely shut down, log off or restart the computers of your entire class, a group
or a selected student.
C A U T I O N
Shutting down, logging off or restarting a computer can result in the loss of
unsaved data. Advise students to save their work before you perform any of
these actions.
To shut down, log off or
restart students’
computers
1.
Click Thumbnails .
The Thumbnails view appears.
2. Click All Computers or All Students to shut down, log off or restart all students’
computers.
OR
Click a group’s tab to shut down, log off or restart the computers of only students
in the group.
OR
Select a student’s thumbnail to shut down, log off or restart that student’s
computer.
3.
Click Shut Down .
The Shut Down Students dialog box appears.
4. Select Shut down from the drop-down list.
OR
Select Log off from the drop-down list.
OR
Select Restart from the drop-down list.
5. Click OK.
Page 36

Page 37

Chapter 3
Broadcasting and Communicating
Broadcasting 32
Broadcasting Your Desktop 32
Broadcasting a Student’s Desktop 33
Giving Control to a Student During a Broadcast 34
Writing Over a Broadcast 35
Sending an Announcement 36
Conducting a Poll 37
Sharing Media 37
Sharing a Media File 38
Playing the Media File 39
Sharing a Web Page 40
SMART Sync makes it easy for you to interact with your students. Whether you need to
communicate with the entire class, a group or an individual student, you can use a
variety of methods:
l Broadcast your desktop
l Broadcast a student’s desktop
l Pass control of a broadcast to a student
l Write notes over a student’s desktop
l Send an announcement
l Conduct a poll
l Share media
l Share a web page
Page 38

3 2
| C H A P T E R 3 – B R O A D C A S T I N G AN D C O M M U N I C A T I N G
Broadcasting
You can broadcast your desktop to the entire class or to a group. You can also broadcast
a student’s desktop or give control of the broadcast to a student.
N O T E
If you want to broadcast video or media files, disable the mirror driver in the
advanced preferences (see Setting the Advanced Preferences on page 95) or
click the Show Media button (see Sharing Media on page 37).
Broadcasting Your Desktop
You can broadcast your desktop to the entire class or select students in either Full
Screen or Window mode. In Full Screen mode, your broadcast fills the students’
screens, and they can’t view or use other applications during the broadcast. In Window
mode, your desktop appears in a window on the students’ desktops and they can switch
between this window and other applications.
To broadcast your desktop 1.
2. Click All Computers or All Students to broadcast to all students.
3.
Click Thumbnails .
The Thumbnails view appears.
OR
Click a group’s tab to broadcast to only students in the group.
OR
Select students’ thumbnails to broadcast to only those students.
Click Broadcast .
A message appears, asking if you want to broadcast your desktop.
Page 39

3 3
| C H A P T E R 3 – B R O A D C A S T I N G AN D C O M M U N I C A T I N G
4. Click Yes.
Your desktop appears on the selected students’ computers. The My Desktop
toolbar appears on your computer.
N O T E S
o
Your desktop is surrounded by a blue border for the duration of the
broadcast.
o
If you’re broadcasting from a SMART Board interactive whiteboard,
you can write using a pen tray pen and your notes appear on the
students’ desktops. You can also write over the students’ desktops
using the My Desktop toolbar (see Writing Over a Broadcast on page
35).
5. Select Menu > Stop Broadcasting when you’re finished.
To broadcast a student’s
desktop
Broadcasting a Student’s Desktop
You can broadcast a student’s desktop to the entire class or to a group. You can take
control of the student’s mouse and keyboard, share control with the student or let the
student keep control.
You can broadcast in either Full Screen or Window mode. In Full Screen mode, your
broadcast fills the students’ screens, and they can’t view or use other applications during
the broadcast. In Window mode, your desktop appears in a window on the students’
desktops and they can switch between this window and other applications.
1.
Click Thumbnails .
The Thumbnails view appears.
2. Select the thumbnail of the student whose desktop you want to broadcast.
3.
Click Broadcast .
A message appears, asking to broadcast the selected desktop.
Page 40

3 4
| C H A P T E R 3 – B R O A D C A S T I N G AN D C O M M U N I C A T I N G
4. Click Yes.
The student’s desktop appears on your computer and the other students’
computers.
N O T E
o
The student’s desktop is surrounded by a blue border for the duration
of the broadcast.
o
While broadcasting the student’s desktop, you can:
o
Click Observe to stop the broadcast, but continue to view
the student’s desktop (see page 20).
o
Click Control to stop the broadcast and take control of the
student’s desktop (see page 22).
o
Click Capture to capture an image of the student’s
desktop (see page 25).
To give control to a
student during a broadcast
o
Click Pen to write on the student’s desktop (see page 35).
5.
Click Stop when you’re finished.
Giving Control to a Student During a Broadcast
You can give temporary control of your desktop to a student during the broadcast.
1. Broadcast your desktop or a student’s desktop (see Broadcasting Your Desktop
on page 32 or Broadcasting a Student’s Desktop on previous page).
The desktop appears on the students’ monitors and the My Desktop toolbar
appears on your desktop.
2. Select Menu > Pass the Chalk.
The Pass the Chalk to dialog box appears. The alphabetical list of students
includes every student who’s receiving your broadcast.
Page 41

3 5
| C H A P T E R 3 – B R O A D C A S T I N G AN D C O M M U N I C A T I N G
3. Select a student, type a message, and then click Pass the Chalk.
Your message appears on the student’s screen. When the student clicks OK, he
or she has control of your desktop. The desktop’s border changes from blue to red.
N O T E
If you give control to one of your students, you can still use your mouse
and keyboard. If both you and the student use the mouse or keyboard at
the same time, your actions take precedence over the student’s.
In addition, if you broadcast a student’s computer and the student’s
computer is running the Windows Vista operating system, the student
whose display is being broadcasted always shares control, regardless of
your broadcast preferences.
4. Select Menu > End Pass the Chalk.
5. Select Menu > Stop Broadcasting.
To write over a broadcast
using an interactive
whiteboard
Writing Over a Broadcast
During a broadcast, you can write over your desktop and the digital ink is displayed on
the desktops of everyone receiving your broadcast. This is a good way to direct your
students’ attention and make helpful notes for them.
l If you’re working on a SMART Board interactive whiteboard, you can write notes
using a pen tray pen. You can change the appearance of the digital ink using the
options in Floating Tools.
l If you’re working at your desktop, you can write notes using the My Desktop
toolbar. You can change the digital ink’s width, color and transparency in SMART
Sync’s preferences.
1. Broadcast your desktop or a student’s desktop (see Broadcasting Your Desktop
on page 32 or Broadcasting a Student’s Desktop on page 33).
2. Pick up a pen tray pen and write on the interactive whiteboard.
3. Put the pen tray pen back in its slot when you’re finished.
When you next make contact with the interactive whiteboard, your notes
disappear.
Page 42

3 6
| C H A P T E R 3 – B R O A D C A S T I N G AN D C O M M U N I C A T I N G
To write over a broadcast
using the My Desktop
toolbar
1. Broadcast your desktop or a student’s desktop (see Broadcasting Your Desktop
on page 32 or Broadcasting a Student’s Desktop on page 33).
2.
Click Pen on the My Desktop toolbar.
3. Click and drag your mouse across your desktop to write in digital ink.
4.
Click Select when you’re finished.
Your notes disappear.
Sending an Announcement
You can send an announcement to your whole class or a specific group.
N O T E
Alternatively, you can chat with your whole class or a specific group (see
Chatting on page 53).
To send an announcement
1. Click All Computers or All Students to send the announcement to all students.
OR
Click a group’s tab to send the announcement to only students in the group.
OR
Select students’ names in the students list to send the announcement to only
those students.
2.
Click Announce .
The Announce dialog box appears.
3. Type a message in the Announcement box, and then click OK.
Your message appears on the students’ screens.
Page 43

3 7
| C H A P T E R 3 – B R O A D C A S T I N G AN D C O M M U N I C A T I N G
Conducting a Poll
You can send a Yes/No question to your class or a group for them to vote on. SMART
Sync tallies the responses and displays the result of the vote at the bottom of the
window.
To conduct a poll 1. Click All Computers or All Students to conduct a poll of all students.
OR
Click a group’s tab to conduct a poll of only students in the group.
2.
Click Vote .
The Vote dialog box appears.
3. Type the question.
4. Click OK.
A Quick Response for Vote dialog box appears on each student’s computer.
Students select Yes or No, and then click Submit.
A response symbol appears over each thumbnail in the Thumbnails view of
SMART Sync Teacher. The three response symbols are as follows:
o
Student has yet to respond
o
Student voted Yes
o
Student voted No
N O T E
The same symbols appear beside the students’ names in the students list.
The result of the poll appears at the bottom of SMART Sync Teacher.
5.
Click Vote , and then click Yes to clear the votes when you’re finished.
Sharing Media
You can play media files on your computer and broadcast them to the entire class, a
group, or an individual student.
Page 44
3 8
| C H A P T E R 3 – B R O A D C A S T I N G AN D C O M M U N I C A T I N G
I M P O R T A N T
Do not share media and send files at the same time.
N O T E S
l If you want to share media files, disable the mirror driver (see Setting the
Advanced Preferences on page 95).
l If you want to share a Windows Media® (.wmv) file with a student, the
student’s computer must have Windows Media Player 7 or later and
DirectX® 9.0 or later.
Sharing a Media File
To share a media file
1.
Click Thumbnails .
The Thumbnails view appears.
2. Click All Computers or All Students to share media with all students.
OR
Click a group’s tab to share media with only students in the group.
3.
Click Show Media .
The Send Media File dialog box appears.
4. Browse to and select the media file you want to play, and then click Send.
The Sending Media dialog box appears. This dialog box displays the estimated
time it will take to send this file to the selected students. When all students have
received the media file, it starts playing automatically.
N O T E
All of the media file controls, such as the Play and Stop buttons, are
disabled until all the students have received the file.
T I P
If you decide you don’t want to play the media file (for example, if the
estimated time is too long or you decide to play a different media file), click
Cancel. When the message appears asking for confirmation, click Yes.
Page 45

3 9
| C H A P T E R 3 – B R O A D C A S T I N G AN D C O M M U N I C A T I N G
5.
Click Play .
The media file plays.
N O T E
While playing the media file, you can pause or stop as well as change the
display mode (see below).
6. Select File > Open to leave the media window open and play a different media
file.
OR
Select File > Exit to close the media window.
Playing the Media File
While playing the media file, you can do the following:
l
Click Pause to pause the media file.
N O T E
If you click Pause and then click Play, the media file restarts from the point
at which you paused it.
l
Click Stop to stop the media file.
N O T E
If you click Stop and then click Play, the media file restarts from the
beginning.
l Select View > 50%, View > 100% or View > 200% to change the size of the
media window.
l
Click Full Screen to display the media file in Full Screen mode.
T I P S
o
If you want to prevent students from using other applications during
the broadcast of the media file, display the media file in Full Screen
mode.
o
When you play the media file in Full Screen mode, the Playing Media
toolbar appears. You can use this toolbar to play , pause and
stop the file as well as return to Window mode .
Page 46

4 0
| C H A P T E R 3 – B R O A D C A S T I N G AN D C O M M U N I C A T I N G
When you click one of the above buttons or menu options, the action affects the display
on both your computer and the students’ computers.
Sharing a Web Page
You can remotely start Internet Explorer® Internet browser and open a specific web page
on the desktops of your whole class, a group or selected students.
You can also launch a web page on your students’ computers using the SMART Sync
toolbar in Internet Explorer.
N O T E
Using this method, you automatically display the web page on the desktops of all
your students. You can’t display it solely for a group or individual students.
To share a web page 1.
2. Click All Computers or All Students to share the web page with all students.
3.
4. Type the web page’s address in the box.
5. Click Send WWW.
Click Thumbnails .
The Thumbnails view appears.
OR
Click a group’s tab to share the web page with only students in the group.
OR
Select students’ thumbnails to share the web page with only those students.
Click Send Web .
The Internet Share Web Address dialog box appears.
Internet Explorer starts and opens the web page on both your desktop and the
desktops of the selected students.
Page 47

4 1
| C H A P T E R 3 – B R O A D C A S T I N G AN D C O M M U N I C A T I N G
To share a web page using
the SMART Sync toolbar
1. Open Internet Explorer Internet browser.
2. Browse to the web page you want to display to your students.
3. If you haven’t done so already, select View > Toolbar > SMART Sync to display
the SMART Sync toolbar.
4.
Click Send to Students .
Page 48

Page 49

Chapter 4
Organizing Collaboration
Starting Collaborative Assignments 43
Completing Collaborative Assignments 44
Monitoring Collaborative Assignments 46
Viewing Completed Assignments 47
Using SMART Sync, you can separate your class into groups of two or three students,
distribute an assignment for them to complete collaboratively and monitor their progress.
After they complete the task individually, the students in each group can compare their
answers, agree upon their group’s collective response and then send this to you for
review.
Starting Collaborative Assignments
You can distribute an assignment to your class for them to complete in groups of two or
three.
To start collaborative
assignments
1.
Click Collaboration .
The Collaboration view appears.
2. Select Two students per group or Three students per group to set the size of
the groups.
3. Click Browse.
The Open dialog box appears.
4. Browse to and select the collaborative assignment file, and then click Open.
Page 50

4 4
| C H A P T E R 4 – O R G A N I Z I N G C O L L A B O R A T I O N
5. For each additional document you want to include with the assignment as a
resource file, click Add, browse to and select the file, and then click Open.
N O T E
If you want to remove a previously included resource file, select the file and
click Remove.
6. Select the Allow students to chat check box to allow students to chat using
SMART Sync while they’re working on the assignment.
OR
Clear the Allow students to chat check box to prevent student chat.
7.
Click Start .
The Collaboration sidebar appears on the right side of each student’s desktop.
This sidebar enables the student to open the assignment, open the additional
resource documents, view work completed by other group members and send the
group’s final response back to you.
T I P
You can monitor the progress of each group (see Monitoring Collaborative
Assignments on page 46).
After all the groups complete the assignment, the Collaboration Complete screen
appears and enables you to view the assignments (see Viewing Completed
Assignments on page 47).
Completing Collaborative Assignments
After your students receive the collaborative assignment, they can complete the task
individually, compare answers with other students in their group, agree upon their group’s
collective response and then send this to you for review.
The Collaboration sidebar appears on the right side of each student’s desktop. This
sidebar enables the student to open resource documents, view the status of their group
members’ work, view work completed by other group members, and submit a final group
response.
Page 51

4 5
| C H A P T E R 4 – O R G A N I Z I N G C O L L A B O R A T I O N
N O T E
If students have SMART Notebook™ SE collaborative learning software 1.6 or
later on their computers, all collaborative files open in new tabs in SMART
Notebook SE and students' work is saved to their binders automatically.
Each group includes one student responsible for submitting the group’s final response.
SMART Sync selects this student randomly.
The following procedure must be completed by the students on their computers. It is
provided here to allow you to respond to any students who are unsure of how to proceed.
To complete collaborative
assignments
1. Read the instructions in the Collaboration Individual Work window, and then click
OK.
The assignment appears in the appropriate application. The Collaboration sidebar
also appears on the right side of the screen.
2. Complete the assignment.
T I P
To view a resource file while completing the assignment, click its name
below Resources in the Collaboration sidebar.
3. Click Hand In in the Collaboration sidebar.
4. Click Yes to confirm you want to hand in your assignment.
The collaboration sidebar displays the status of your group members’ work:
o
If a student hasn’t completed the work, the Collaboration sidebar displays
Work not handed in below the student’s name. If you hover your mouse
over a thumbnail, a larger view of the student’s screen appears. If you
double-click a thumbnail, a full screen view of the student’s screen appears.
o
If a student has completed the work, the Collaboration sidebar displays
Work handed in below the student’s name. If all the students in the group
have submitted their assignment, you can click Work handed in to display
that student’s work.
When every student in your group has handed in their assignments, the
Collaboration Group Work window appears with instructions on what you need to
do.
5. Read the instructions, and then click OK.
Page 52

4 6
| C H A P T E R 4 – O R G A N I Z I N G C O L L A B O R A T I O N
6. If you aren’t responsible for submitting the group’s final response, you can see the
group leader’s screen. Work with your group until your group leader has completed
an answer on behalf of the group. When you’re happy with his or her answer,
select the Ready to hand in check box in the Collaboration sidebar.
OR
If you are responsible for submitting the group’s final response, the other members
of your group can see your screen. Work with your group until you complete an
answer. When a group member is happy with your answer, Ready to hand in
appears below his or her name in the Collaboration sidebar. When all group
members are happy with your answer, click Hand In in the Collaboration sidebar.
You can’t click Hand In until every member of your group agrees to it. Click Yes to
confirm.
The Collaboration Complete window appears, confirming that you’ve submitted
your assignment.
7. Click OK.
To monitor collaborative
assignments
Monitoring Collaborative Assignments
After your students receive the collaborative assignment, you can monitor their progress.
1.
Click Collaboration .
The Collaboration view appears.
Page 53

4 7
| C H A P T E R 4 – O R G A N I Z I N G C O L L A B O R A T I O N
2. Click All Computers or All Students to monitor the class.
OR
Click a group’s tab to monitor the group.
The Collaboration view displays the thumbnails of the class or the selected group.
This view also lists the assignment document and resource files you distributed
with the collaborative assignment.
N O T E S
o
You can customize the view’s appearance by resizing the
thumbnails (see Resizing Thumbnails on page 12).
o
When a student completes the task individually and submits it to the
other members of the group, a link to this file appears below that
student’s thumbnail. To view this file, click the link.
o
When a group sends you their final, collaborative response, the
Group Work status changes from Incomplete to the file name. You
can click the file name to open and view the completed file.
o
If all students in a group disconnect from the class, SMART Sync
Teacher is unable to select a group leader, an error occurs while
transferring files to the group or an unknown error occurs, an
appropriate message appears in the group’s section of the
Collaboration view.
o
After all the groups complete the assignment, the Collaboration
Complete screen appears and enables you to view the assignments
(see Viewing Completed Assignments below).
Viewing Completed Assignments
After all the groups complete the collaboration assignment, the Collaboration Complete
screen appears. This screen displays the location of the completed assignments and
provides links to these locations.
If you don't want to wait for all the groups to complete the assignment, you can click
Stop to stop the collaborative assignment.
Page 54

4 8
| C H A P T E R 4 – O R G A N I Z I N G C O L L A B O R A T I O N
To view a group’s
collaborative response
To return to the default
Collaboration view screen
Click the appropriate link below Session deliverables are located in.
Click Set up collaboration work details.
Page 55

Chapter 5
Answering Questions
Viewing and Answering Questions 49
Deleting a Question without Answering 50
Saving the Question History 51
Clearing the Question History 51
If SMART Sync Student was installed in Visible mode, students can send questions to
you and you can respond to each question.
Viewing and Answering Questions
When students ask questions through SMART Sync Student, a Question symbol
and the number of currently unanswered questions appear in the bottom right corner of
SMART Sync Teacher.
To view and answer a
student’s question
View and answer questions in the Questions view.
1.
Click Questions .
The Questions view appears.
2.
Select a question, and then click Answer .
3. Type your reply in the Message box.
Page 56

5 0
| C H A P T E R 5 – A N S W E R I N G QU E S T I O N S
4.
Click Send to send your response to the student who sent you the question.
OR
Click Send to All to send your response to the entire class.
Your response appears in the History area of the Questions view.
Your response also appears on the Teacher tab in the students’ SMART Sync
Student Chat dialog box.
N O T E
Students can reply to your response. Similarly, you can continue to send
messages to students by typing text in the Message box and pressing
ENTER.
5.
Click Finished when you’re finished.
N O T E
Deleting a Question without Answering
You can delete a student’s question without answering it.
To delete a specific
question
To delete all questions 1.
1.
2.
2.
Students can still view your responses, but if they want to communicate
with you further, they must create new questions.
Click Questions .
The Questions view appears.
Select the question, and then click Delete .
Click Questions .
The Questions view appears.
Click Delete All Questions .
Page 57
5 1
| C H A P T E R 5 – A N S W E R I N G QU E S T I O N S
Saving the Question History
The students’ questions and your responses appear in the History area of the Questions
view. You can save the history as a text file.
To save the question
history
To clear the question
history
1.
Click Questions .
The Questions view appears.
2.
Click Save .
The Save As dialog box appears.
3. Browse to the folder where you want to save the file.
4. Type a name for the file in the File name box.
5. Click Save.
Clearing the Question History
You can also remove previous questions and responses by clearing the history.
1.
Click Questions .
The Questions view appears.
2.
Click Clear History .
A message appears asking you for confirmation.
3. Click Yes.
Page 58

Page 59

Chapter 6
Chatting
Chatting with Students 53
Saving the Chat History 55
Clearing the Chat History 55
Enabling and Disabling Student Chat 56
SMART Sync allows you to chat with your whole class or a specific group. By restricting
your comments to a group, you don’t distract students with messages that don’t apply to
them. You can also send a private message to selected students.
You can view all chat messages, including the ones between students, in the History
area of the Chat view. Students can view messages sent to the entire class as well as
messages sent to the groups they’re members of.
Chatting with Students
You can chat with students in the Chat view in SMART Sync Teacher.
N O T E
If SMART Sync Student is in Hidden mode, students can’t initiate chat even if
you allow it. However, they can respond to chat if you initiate it.
T I P
Use SMART Sync’s announcement feature instead of the chat feature to send a
message to selected students (see Sending an Announcement on page 36).
Page 60

5 4
| C H A P T E R 6 – C H A T T I N G
To chat with students
1.
Click Chat .
The Chat view appears.
2. Click All Computers or All Students to chat with all students.
OR
Click a group’s tab to chat with only students in the group.
3. Type a message in the Message box, and then click Send.
Your message appears in the History area of the Chat view.
Your message also appears in the equivalent tab of the students’ SMART Sync
Student Chat dialog box.
N O T E S
o
Each student’s SMART Sync Student Chat dialog box has a tab for
every group the student is a member of.
o
Students can’t view a group’s chat history if they’re not in that group.
o
If your students haven’t opened their SMART Sync Student Chat
dialog boxes, tell them to double-click the SMART Sync icon in the
notification area, and then click Chat.
4. Enable student chat (see Enabling and Disabling Student Chat on page 56).
N O T E
If you don’t enable student chat, students can’t reply to your message.
When a student creates a new message in the SMART Sync Student Chat dialog
box, the message appears in SMART Sync Teacher in the History area of the
Chat view. If the student sends a message to a specific group, the message
appears in SMART Sync Teacher on the equivalent group tab.
5. Continue to add new messages and view your students’ replies.
6. Disable student chat when you’re finished (see Enabling and Disabling Student
Chat on page 56).
Page 61

5 5
| C H A P T E R 6 – C H A T T I N G
Saving the Chat History
During your chat, you can save the chat history as a text file.
N O T E
Only teachers can save the chat history.
T I P
You can also copy the chat history by selecting text and pressing CTRL+C.
To save the chat history 1.
2. Click the group’s tab with the chat history you want to view and save.
3.
4. Browse to the folder where you want to save the file.
5. Type a name in the File name box.
6. Click Save.
Clearing the Chat History
You can clear chat history for the current group tab.
To clear the chat history 1.
Click Chat .
The Chat view appears.
Click Save .
The Save As dialog box appears.
Click Chat .
The Chat view appears.
2. Click All Computers or All Students to clear the chat history for all students.
OR
Click a group’s tab to clear the chat history for only the students in that group.
Page 62

5 6
| C H A P T E R 6 – C H A T T I N G
3.
Click Clear .
A message appears asking for confirmation.
4. Click Yes.
Enabling and Disabling Student Chat
You can allows students in either the whole class or a group to chat with each other,
even when you’re not contributing to the messages.
T I P
You can enable student chat for one group and disable it for another.
N O T E
To enable student chat 1.
2. Click All Computers or All Students to enable chat for all students.
3. Select the Allow Students to Chat check box.
To disable student chat 1.
2. Click All Computers or All Students to disable chat for all students.
If SMART Sync Student is in Hidden mode, students can’t initiate chat even if
you allow it. However, they can respond to chat if you initiate it.
Click Chat .
The Chat view appears.
OR
Click a group’s tab to enable chat for only students in the group.
Click Chat .
The Chat view appears.
OR
Click a group’s tab to disable chat for only students in the group.
Page 63

5 7
| C H A P T E R 6 – C H A T T I N G
3. Clear the Allow Students to Chat check box.
N O T E
If you disable student chat, your students can still view the chat history,
but can’t add new messages. To prevent students from viewing the chat
history, clear it (see Clearing the Chat History on page 55).
Page 64

Page 65

Chapter 7
Sending and Receiving Files
Sending Files to Students 59
Receiving Files from a Student 61
Clearing Files from the File List 61
You can easily send files to your class using SMART Sync and, if SMART Sync Student
was installed on your students’ computers in Visible mode, they can send files to you.
The File Transfer view lists all of the files you send or receive.
N O T E
If you send a file to one student, the file transfer goes very quickly. However, if
you send a file to many students at once, the transfer takes longer and students
won’t necessarily receive the file at the same time. Transfer speed is affected by:
Sending Files to Students
You can use SMART Sync to send files to students.
To send a file 1.
l The variability of the student computers (for example, a mix of slow and
fast computers)
l The amount of other network traffic
l The speed of the network
I M P O R T A N T
Do not share media and send files at the same time.
Click File Transfer .
The File Transfer view appears.
Page 66

6 0
| C H A P T E R 7 – S E N D I N G A N D R E C E I V I N G F I L E S
2. Click All Computers or All Students to send the file to all students.
OR
Click a group’s tab to send the file to only students in the group.
OR
Select students’ names in the students list to send the file to only those students.
3.
Click Send File .
The Send File dialog box appears.
4. Browse to and select the file you want to send, and then click Send.
When the file transfer begins, the file name appears in the Sent Files list. When
the transfer is complete, the status changes from the percentage transferred to
Complete.
N O T E S
To open a sent file 1.
2. Click All Computers or All Students if you sent the file to all students.
3. Select the file.
4.
o
If you want to cancel a file transfer that’s in progress, select the file
in the Sent Files list, and then click Cancel . No portion of the file
is transferred and the file is removed from the Sent Files list.
o
If a student disconnects while a file transfer is in progress, SMART
Sync sends the file to the student after he or she reconnects.
Click File Transfer .
The File Transfer view appears.
OR
Click a group’s tab if you sent the file to only students in the group.
Click Open File .
Page 67

6 1
| C H A P T E R 7 – S E N D I N G A N D R E C E I V I N G F I L E S
Receiving Files from a Student
You can use SMART Sync to receive files from students.
To check for sent files
from students
To open a file 1.
1.
Click File Transfer .
The File Transfer view appears.
2. Click All Computers or All Students to check for files sent by all students.
OR
Click a group’s tab to check for files sent by only students in the group.
N O T E
If you close SMART Sync while a file transfer is in progress, the transfer is
canceled.
Click File Transfer .
The File Transfer view appears.
2. Select the file you want to open.
3.
Click Open File .
To clear a file from
the file list
Clearing Files from the File List
You can clear an individual file or all files from the File Transfer view.
N O T E
When you clear files from the File Transfer view, you’re not deleting the files.
1.
Click File Transfer .
The File Transfer view appears.
Page 68

6 2
| C H A P T E R 7 – S E N D I N G A N D R E C E I V I N G F I L E S
2. Select the file you want to clear.
C A U T I O N
A confirmation message does not appear. Ensure you have selected the
correct file before you perform the next step.
3.
Click Clear .
To clear all files 1.
2. Click All Computers or All Students.
3. Ensure no files are selected in the file list.
4.
5. Click Yes.
Click File Transfer .
The File Transfer view appears.
Click Clear .
A message appears asking for confirmation.
Page 69

Chapter 8
Controlling Access to Applications
Creating and Using Application Blocking Rules 63
Creating Application Blocking Rules 64
Sharing Application Blocking Rules 66
Activating and Deactivating Application Blocking Rules 67
Starting and Closing Applications 68
Starting an Application on Students’ Computers 69
Closing an Application on Students’ Computers 70
You can block your students’ access to specific applications using customized
application blocking rules.
In addition, you can start and close applications on students’ computers from your
computer.
Creating and Using Application Blocking Rules
You can set up application blocking rules as either:
l A list of restricted applications (which blocks students from opening any
application on the list)
l A list of approved applications (which blocks students from opening any
application that’s not on the list)
Page 70

6 4
| C H A P T E R 8 – C O N T R O L L I N G A C C E S S T O A P P L I C A T I O N S
SMART Sync comes with six application blocking rules:
Name Description
Block Internet Explorer Blocks the web browser
Block Windows Games Blocks Windows games, such as Solitaire
Block Windows Media
Player
Block All Except Internet
Browser
Block All Except
Microsoft Office
Block All Except
SMART Notebook SE
Blocks Windows Media Player
Blocks all applications except the web browser
Blocks all applications except the Microsoft Office
applications (Word, Excel®, PowerPoint® and so on)
Blocks all applications except SMART Notebook SE
(This rule is useful if you’re using SMART Sync as part of
SMART Classroom Suite™ interactive learning software.)
Creating Application Blocking Rules
You can create application blocking rules in SMART Sync Teacher. Alternatively, you
can load rules created by other teachers (see Sharing Application Blocking Rules on
page 66) or use rules created by an administrator or teacher in SMART Sync
Administrator Tool.
To create a rule
1.
Click Applications .
The Applications view appears.
2.
Click Add New .
The New Application Blocking Rule dialog box appears.
3. Type a name for the rule in the Enter Block Rule Name box.
4. Click Block the following applications to allow all applications except those
you include in the rule.
OR
Click Block all except the following applications to block all applications
except those you include in the rule.
Page 71

6 5
| C H A P T E R 8 – C O N T R O L L I N G A C C E S S T O A P P L I C A T I O N S
5. Select an application you want to add to the rule in the List of Applications, and
then click Add.
T I P S
o
If you added an application to the rule by accident, you can remove it
by selecting it and then clicking Remove.
o
An application must be installed on your computer to appear in the
List of Applications. The exception to this rule is SMART Notebook
SE, which doesn’t need to be installed on your computer to appear in
this list.
o
If you want to add an application to the rule that’s not included in the
List of Applications, click Browse, browse to and select the
application, and then click Open. Select the application from the
List of Applications, and then click Add.
o
If you want to add an application to the rule that’s neither included in
the list of applications nor installed on your computer, click New
App. Type the product name and the file name, and then click OK.
Select the application from the List of Applications, and then click
Add.
6. Repeat step 5 for each application you want to add to the rule.
7. Click OK.
To edit a rule 1.
2. Select the rule.
3.
4. Edit the rule’s name in the Enter Block Rule Name box.
5. Click Block the following applications to allow all applications except those
Click Applications .
The Applications view appears.
Click Edit .
The Edit Application Block Rule dialog box appears.
you include in the rule.
OR
Click Block all except the following applications to block all applications
except those you include in the rule.
Page 72

6 6
| C H A P T E R 8 – C O N T R O L L I N G A C C E S S T O A P P L I C A T I O N S
6. Select an application you want to add to the rule in the List of Applications, and
then click Add.
OR
Select an application you want to remove from the rule, and then click Remove.
T I P S
o
An application must be installed on your computer to appear in the
List of Applications. The exception to this rule is SMART Notebook
SE, which doesn’t need to be installed on your computer to appear in
this list.
o
If you want to add an application to the rule that’s not included in the
List of Applications, click Browse, browse to and select the
application, and then click Open. Select the application from the
List of Applications, and then click Add.
o
If you want to add an application to the rule that’s neither included in
the list of applications nor installed on your computer, click New
App. Type the product name and the file name, and then click OK.
Select the application from the List of Applications, and then click
Add.
7. Repeat step 6 for each application you want to add to or remove from the rule.
8. Click OK.
To delete a rule 1.
2. Select the rule.
3.
4. Click Yes.
Sharing Application Blocking Rules
You can save application blocking rules in SYNCRULES files and share those files with
other teachers. The other teachers can then load the SYNCRULES file to use your rules
in their copies of SMART Sync Teacher. Similarly, you can load SYNCRULES files from
other teachers to use their rules.
Click Applications .
The Applications view appears.
Click Delete .
A message appears asking you to confirm the deletion.
Page 73

6 7
| C H A P T E R 8 – C O N T R O L L I N G A C C E S S T O A P P L I C A T I O N S
To save your rules as a
SYNCRULES file
To load a SYNCRULES
file
1.
Click Application .
The Application view appears.
2. Select Actions > Save Rules.
The Save As dialog box appears.
3. Browse to the location where you want to save the file.
4. Type a name for the file in the File name box.
5. Click Save.
1.
Click Application .
The Application view appears.
2. Select Actions > Load Rules.
The Open dialog box appears.
3. Browse to and select the SYNCRULES file.
4. Click Open.
Activating and Deactivating Application Blocking Rules
After creating or loading an application blocking rule, you can activate it to control
students' access to applications.
To activate a rule 1.
2. Click All Computers or All Students to activate the rule for all students.
3. Select the rule.
Click Applications .
The Applications view appears.
OR
Click a group’s tab to activate the rule for only students in the group.
Page 74

6 8
| C H A P T E R 8 – C O N T R O L L I N G A C C E S S T O A P P L I C A T I O N S
4.
Click Apply .
C A U T I O N
o
If you activate a rule that blocks specific applications and allows all
others, a message appears asking for confirmation. Click Block
Applications. If one of the selected students is running a restricted
application, the application closes automatically and any unsaved
work is lost. Advise students to save their work before you complete
this step. If one of the students tries to open a blocked application, a
message appears, advising the student that the application is
restricted.
o
If you activate a rule that allows specific applications and blocks all
others, the rule activates without asking for confirmation. If one of
the selected students is already running a blocked application, the
application does not close. If one of the students tries to open a
blocked application, a message appears, advising the student that
the application is restricted.
To deactivate a rule 1.
2. Click All Computers or All Students to deactivate the rule for all students.
3. Select the rule.
4.
The Application Block symbol appears beside the selected students in the
students list.
Click Applications .
The Applications view appears.
OR
Click a group’s tab to deactivate the rule for only students in the group.
OR
Select students’ names in the students list to deactivate the rule for only those
students.
Click Apply .
Starting and Closing Applications
With SMART Sync, you can remotely start or close an application on every student’s
computer.
Page 75

6 9
| C H A P T E R 8 – C O N T R O L L I N G A C C E S S T O A P P L I C A T I O N S
Starting an Application on Students’ Computers
You can remotely start an application on every student’s computer. For example, you
can start an application on every student’s computer before class starts, so everyone
sits down to the same program.
T I P
If SMART Classroom Suite™ interactive learning software is installed on your
students’ computers, you can start SMART Notebook SE even if it isn’t installed
on your computer.
To start an application on
students’ computers
1.
Click Applications .
The Applications view appears.
2. Click All Computers or All Students to start an application for all students.
OR
Click a group’s tab to start an application for only students in the group.
3.
Click Launch .
The Launch Applications dialog box appears.
4. Select an application, and then click Launch.
N O T E
With the exception of SMART Notebook SE, an application must be
installed on your computer to appear in the Launch Applications dialog box.
The application starts on the selected students’ computers.
o
If the application starts successfully on all the selected students’
computers, a message appears indicating that the application launched
successfully. Click OK to clear the message.
o
If the application isn’t installed on a selected student’s computer, a
message appears indicating that the application failed to launch on that
student’s computer. Click OK to clear the message.
5. Repeat step 4 for each application you want to start on the students’ computers.
6. Click OK.
Page 76

7 0
| C H A P T E R 8 – C O N T R O L L I N G A C C E S S T O A P P L I C A T I O N S
Closing an Application on Students’ Computers
You can remotely close an application on every student’s computer.
C A U T I O N
If you remotely close a student’s application, the application closes immediately
and any unsaved work is lost. Advise students to save their work before
completing the following procedure.
T I P
If SMART Classroom Suite is installed on your students’ computers, you can
close SMART Notebook SE even if it isn’t installed on your computer.
To close an application on
students’ computers
1.
Click Applications .
The Applications view appears.
2. Click All Computers or All Students to close an application for all students.
OR
Click a group’s tab to close an application for only students in the group.
3.
Click Close .
The Close application remotely dialog box appears.
4. Select an application, and then click Close.
N O T E
With the exception of SMART Notebook SE, an application must be
installed on your computer to appear in the Close application remotely
dialog box.
The application closes on the selected students’ computers.
o
If the application closes successfully on all the selected students’
computers, a message appears indicating that the application closed
successfully. Click OK to clear the message.
o
If the application isn’t open on a selected student’s computer, a message
appears indicating that the application failed to close on that student’s
computer. Click OK to clear the message.
Page 77

7 1
| C H A P T E R 8 – C O N T R O L L I N G A C C E S S T O A P P L I C A T I O N S
5. Repeat step 4 for each application you want to close on the students’ computers.
6. Click OK.
Page 78

Page 79
Chapter 9
Controlling Access to the Internet
Blocking Internet Access 73
Creating and Using Internet Blocking Rules 74
Creating Internet Blocking Rules 74
Sharing Internet Blocking Rules 76
Activating and Deactivating Internet Blocking Rules 76
You can control students’ access to the Internet either by blocking access to the entire
Internet or by allowing or blocking access to specific web pages through Internet
blocking rules.
Blocking Internet Access
You can block your students’ access to the entire Internet.
N O T E
When a blocked student starts Internet Explorer Internet browser, a message
appears indicating that access to the Internet is restricted. When a blocked
student starts any other Internet browser, the pointer displays as an hourglass,
and a connection timed out message may appear.
To block Internet access 1. Click All Computers or All Students to apply the block to all students.
OR
Click a group’s tab to apply the block to only students in the group.
2.
Click Internet Block .
To remove the block
Click Internet Block .
Page 80

7 4
| C H A P T E R 9 – C O N T R O L L I N G A C C E S S T O T H E I N T E R N E T
Creating and Using Internet Blocking Rules
If you don’t want to block your students’ access to the entire Internet, you can still block
your students’ access to specific web pages using Internet blocking rules. Each Internet
blocking rule consists of either:
l A list of restricted web pages (which blocks students from opening any web page
on the list), or
l A list of approved web pages (which blocks students from opening any web page
that’s not on the list).
N O T E
SMART Sync comes with a default Internet blocking rule that allows you to block
all web pages.
To create a rule
Creating Internet Blocking Rules
You can create Internet blocking rules in SMART Sync Teacher. Alternatively, you can
load rules created by other teachers (see Sharing Internet Blocking Rules on page 76) or
use rules created by an administrator or teacher in SMART Sync Administrator Tool.
1.
Click Internet .
The Internet view appears.
2.
Click Add New .
The Internet Blocking Rule dialog box appears.
3. Type a name for the rule in the Rule name box.
4. Click Block the following websites to allow all websites except those you
include in the rule.
OR
Click Block everything except the following websites to block all websites
except those you include in the rule.
Page 81

7 5
| C H A P T E R 9 – C O N T R O L L I N G A C C E S S T O T H E I N T E R N E T
5. Click Add, type the address of a website you want to add to the rule in the
Website box (for example, www.example.com), and then click OK.
T I P
If you added a website to the rule by accident, you can remove it by
selecting it and then clicking Remove.
6. Repeat step 5 for each website you want to add to the rule.
7. Click OK.
To edit a rule 1.
2. Select the rule.
3.
4. Edit the rule’s name in the Rule name box.
5. Click Block the following websites to allow all websites except those you
6. Click Add, type the address of a website you want to add to the rule in the
Click Internet .
The Internet view appears.
Click Edit .
The Internet Blocking Rule dialog box appears.
include in the rule.
OR
Click Block everything except the following websites to block all websites
except those you include in the rule.
Website box (for example, www.example.com), and then click OK.
OR
Select a website you want to remove from the rule, and then click Remove.
7. Repeat step 6 for each website you want to add to or remove from the rule.
8. Click OK.
To delete a rule 1.
2. Select the rule.
3.
Click Internet .
The Internet view appears.
Click Delete .
Page 82

7 6
| C H A P T E R 9 – C O N T R O L L I N G A C C E S S T O T H E I N T E R N E T
Sharing Internet Blocking Rules
You can save Internet blocking rules in SYNCRULES files and share those files with
other teachers. The other teachers can then load the SYNCRULES file to use your rules
in their copies of SMART Sync Teacher. Similarly, you can load SYNCRULES files from
other teachers to use their rules.
To save your rules as a
SYNCRULES file
To load a SYNCRULES
file
1.
Click Internet .
The Internet view appears.
2. Select Actions > Save Rules.
The Save As dialog box appears.
3. Browse to the location where you want to save the file.
4. Type a name for the file in the File name box.
5. Click Save.
1.
Click Internet .
The Internet view appears.
2. Select Actions > Load Rules.
The Open dialog box appears.
3. Browse to and select the SYNCRULES file.
4. Click Open.
Activating and Deactivating Internet Blocking Rules
After creating or loading an Internet blocking rule, you can activate it to control students’
access to the Internet.
To activate a rule 1.
2. Click All Computers or All Students to activate the rule for all students.
Click Internet .
The Internet view appears.
OR
Click a group’s tab to activate the rule for only students in the group.
Page 83

7 7
| C H A P T E R 9 – C O N T R O L L I N G A C C E S S T O T H E I N T E R N E T
3. Select the rule.
4.
Click Apply .
The Internet Block symbol appears beside the selected students in the
students list.
To deactivate a rule 1.
2. Click All Computers or All Students to deactivate the rule for all students.
3. Select the rule.
4.
Click Internet .
The Internet view appears.
OR
Click a group’s tab to deactivate the rule for only students in the group.
OR
Select students’ names in the students list to deactivate the rule for only those
students.
Click Apply .
Page 84

Page 85

Chapter 10
Working with Other Teachers and Teacher Aides
Controlling Teacher Aides 79
Allowing Teacher Aides 79
Responding to a Teacher Aide’s Request to Join 80
Disconnecting Teacher Aides 80
Joining a Class as a Teacher Aide 80
As the teacher, you can use SMART Sync to monitor, communicate with and control
your class. You can also allow colleagues limited access to SMART Sync so that they
can monitor your class. SMART Sync refers to these additional teachers as teacher
aides. They can access the thumbnail view and monitor the whole class, a group or an
individual student. However, teacher aides can monitor your class only if you permit it.
You have total control over who can access your class.
At any time, you can view which teacher aides have joined your class. You can also
withdraw a teacher aide’s access to your class.
Controlling Teacher Aides
You can allow up to five teacher aides at a time.
Teacher aides can monitor classes, groups and students, but they can’t use the more
advanced features of SMART Sync, such as taking control of a student’s desktop,
locking out students, blocking applications and Internet access, and so on.
Allowing Teacher Aides
If you think you might accept a join request from a teacher aide, select Options > Allow
Teacher Aides. This activates the teacher aides feature, but you can still prevent
specific teacher aides from joining your class by declining their request to join.
Page 86

8 0
| C H A P T E R 1 0 – W O R K I N G W I T H O T H E R T E A C H E R S A N D T E A C H E R
A I D E S
If you don’t want any teacher aides to join your class, clear Options > Allow Teacher
Aides. If a teacher aide tries to join your class while your settings don’t allow teacher
aides, the teacher aide receives a message advising them they can’t join your class.
Responding to a Teacher Aide’s Request to Join
If a teacher aide tries to join your class and your Allow Teacher Aides option is
selected, the Teacher Aide Join Request dialog box appears.
l To allow the teacher aide to join your class, click Allow. The Thumbnails view for
your class appears on the teacher aide’s screen.
l To prevent the teacher aide from joining your class, click Decline. If you decline a
teacher aide’s join request, the teacher aide receives a message advising them
that the request was declined.
You can view which teacher aides have joined your class and, if you want, disconnect a
teacher aide from your class (see Disconnecting Teacher Aides below).
To disconnect a
teacher aide
Disconnecting Teacher Aides
You can allow colleagues limited access to SMART Sync so they can monitor your
class. SMART Sync refers to these additional teachers as teacher aides. However,
teacher aides can monitor your class only if you permit it.
You can view which teacher aides have joined your class and disconnect a teacher aide.
1. Select Connection > View Connected Teacher’s Aide.
The View Teacher Aides dialog box appears.
2. Select the teacher aide and click Disconnect.
3. Click OK.
Joining a Class as a Teacher Aide
You can join another teacher’s class and monitor the desktops of all the students, of a
group or of an individual student in that teacher’s class. SMART Sync refers to additional
teachers as teacher aides.
Page 87

8 1
| C H A P T E R 1 0 – W O R K I N G W I T H O T H E R T E A C H E R S A N D T E A C H E R
A I D E S
As a teacher aide, you can access the Thumbnails view and monitor students. However,
you can’t use the more advanced features of SMART Sync, such as taking control of a
student’s desktop, locking out students, blocking applications, and so on.
To join a class as a teacher aide, you must request and receive permission from the
teacher. If the teacher hasn’t selected the Allow Teacher Aides option (see Controlling
Teacher Aides on page 79), a message appears that advises you that you can’t join this
class.
N O T E
You must install SMART Sync on your computer to observe a class as a teacher
aide. However, you don’t require an additional license for this installation.
You can leave a class at any time.
To join a class as a
teacher aide
1. Select Connection > Teacher’s Aide > Join a class.
The Join a Teacher’s Class dialog box appears.
2. Select the Teacher ID for the class you want to join.
OR
Select Connect via host name or IP address box, enter the host name or IP
address, and then click Join.
The Teacher Aide Join Request dialog box appears on the teacher’s desktop. This
dialog box informs the teacher that you want to join their class and gives them the
option to accept or decline your request.
If the teacher declines, a message appears that advises you that your request was
declined.
OR
If the teacher accepts, you join the class as a teacher aide. The Thumbnails view
for the class appears on your desktop.
N O T E S
o
If the teacher allows you access to his or her class, he or she can
disconnect you from the class.
o
You may still not be able to view the class if the teacher has set an
authentication password on the class.
Page 88

8 2
| C H A P T E R 1 0 – W O R K I N G W I T H O T H E R T E A C H E R S A N D T E A C H E R
A I D E S
To leave a class
Select Connection > Teacher’s Aide > Disconnect from class.
Page 89

Chapter 11
Configuring SMART Sync Teacher
Setting the Language 84
Connecting to SMART Sync Class List Server 85
Setting the Lock-Out Message 87
Setting the Optimization Preferences 88
Setting the Control Preferences 89
Setting the Broadcast Preferences 90
Setting the Digital Ink’s Appearance 91
Setting the File Transfer Preferences 92
Setting a User Authentication Password 93
Setting the Advanced Preferences 94
Setting the Advanced Preferences 95
Selecting Network Adapters 98
Setting the Logging Preferences 99
You can customize the following features for the current teacher:
l Language
l SMART Sync Class List Server connection
l Lock-out message
l Optimization preferences
l Control preferences
l Broadcast preferences
l Digital ink’s appearance
l File transfer preferences
l User authentication password
Page 90

8 4
| C H A P T E R 1 1 – C O N F I G U R I N G S M A R T S Y N C T E A C H E R
l Advanced preferences (including thumbnail frame rate, multicast, unicast, screen
capture and network adapter settings)
l Logging
Setting the Language
The SMART Language Setup utility allows you to set the language for a select SMART
program or all SMART programs installed on your computer.
To set the language 1. Select Options > Language Setup.
The Language Setup dialog box appears.
2. Select All Listed Applications to set the language for all SMART programs on
your computer.
OR
To install language
updates
Select a specific SMART program to set the language for only that program.
3. Select the appropriate language in the Language drop-down list.
4. Click OK.
1. Select Options > Language Setup.
The Language Setup dialog box appears.
2. Click Update Languages.
3. Click Check for updates.
A list of languages with available updates appears.
4. Select the check boxes of the languages you want to update, and then click
Install.
Your computer downloads and installs the languages, and then a message
appears.
5. Click OK, and then click Close.
6. Click OK.
Page 91

8 5
| C H A P T E R 1 1 – C O N F I G U R I N G S M A R T S Y N C T E A C H E R
Connecting to SMART Sync Class List Server
If you or your system administrator has installed SMART Sync Class List Server as
documented in the SMART Sync 2010 System Administrator’s Guide
(document 144150), you can connect SMART Sync Teacher to it to do one of the
following:
l Maintain information about your school’s students, teachers, classes and
computer labs, as well as rules you can apply to block student access to
applications and websites, in a central location that’s accessible to multiple
teachers in your school.
l Allow students to connect to you by selecting your ID from a drop-down list in
SMART Sync Student when you’re logged on to SMART Sync Teacher. (This
feature is referred to as “teacher discovery.”)
To use SMART Sync Class
List Server for
administered class lists
N O T E S
l If you use SMART Sync Class List Server for the first option, you or your
system administrator must install SMART Sync Administrator Tool and
create a SMART School file. If you use SMART Sync Class List Server for
the second option, you don’t need to complete those additional steps.
l If multicasting is enabled on your school’s network, teacher discovery is
available by default. You don’t need to use SMART Sync Class List Server
to allow teacher discovery in this situation.
1. Select Options > Preferences.
The Preferences dialog box appears.
2. Click the General tab.
3. Select the Use Class List Server check box.
4. Select To use administered class lists.
5. Click Browse.
The Open dialog box appears.
Page 92

8 6
| C H A P T E R 1 1 – C O N F I G U R I N G S M A R T S Y N C T E A C H E R
6. Browse to and select the SMART School file.
N O T E
Your system administrator can provide you with the path to the SMART
School file.
7. Click Open.
The Open dialog box closes, and the path to the SMART School file appears in the
School File Location box.
8. Click OK.
9. Close and restart SMART Sync Teacher.
The next time you start SMART Sync Teacher, the Welcome to SMART Sync –
Teacher and Class Selection dialog box includes teachers and classes from the
SMART School file.
To use SMART Sync Class
List Server for teacher
discovery
N O T E
(Administered) appears beside classes from the SMART School file in the
Welcome to SMART Sync – Teacher and Class Selection dialog box.
1. Select Options > Preferences.
The Preferences dialog box appears.
2. Click the General tab.
3. Select the Use Class List Server check box.
4. Select To assist with teacher discovery.
5. Type the SMART Sync Class List Server host name or IP address (including the
port number) in the text box.
N O T E
Your system administrator can provide you with the host name or IP
address. The default port number for SMART Sync Class List Server is
46200. However, your system administrator can change it (see Changing
the Port Number).
6. Click OK.
Page 93

8 7
| C H A P T E R 1 1 – C O N F I G U R I N G S M A R T S Y N C T E A C H E R
Setting the Lock-Out Message
You can get your students’ attention by locking students’ desktops and presenting them
with a simple message (see Locking Student Desktops on page 26). The default
message is “Eyes to the front, please”, but you can change this message.
To set the lock-out
message
To return the lock-out
message to its default
settings
1. Select Options > Preferences.
The Preferences dialog box appears.
2. Click the Lock Screen tab.
3. Type a message in the Lock-out message box.
4. Click the button next to Text, select a color, and then click OK to change the text
color.
5. Click the button next to Background, select a color, and then click OK to change
the background color.
6. Click OK.
1. Select Options > Preferences.
The Preferences dialog box appears.
2. Click the Lock Screen tab.
3. Click Defaults.
4. Click OK.
Page 94

8 8
| C H A P T E R 1 1 – C O N F I G U R I N G S M A R T S Y N C T E A C H E R
Setting the Optimization Preferences
When you observe, control or broadcast a student’s desktop, SMART Sync displays the
student’s desktop on your screen at a specific image quality and frame rate for optimal
network performance. You can adjust the image quality and frame rate for your network:
Level Description
1 (recommended) Decreases frame rate to 4 seconds per frame (if needed) without
affecting image quality
2 Decreases frame rate, and then decreases image quality
3 Decreases frame rate and image quality evenly
4 Decreases image quality, and then decreases frame rate
5 Decreases image quality to 50% (if needed) without affecting
frame rate
To adjust the optimal
image quality
and frame rate
To use the highest
possible image quality
and frame rate
Alternatively, you can choose to display the student’s desktop as the highest possible
image quality and frame rate.
1. Select Options > Preferences.
The Preferences dialog box appears.
2. Click the Optimization tab.
3. Select the Optimize network performance during Observe, Control, and
Broadcast check box.
4. Move the slider left to increase image quality while reducing the frame rate.
OR
Move the slider right to decrease image quality while increasing the frame rate.
5. Click OK.
1. Select Options > Preferences.
The Preferences dialog box appears.
2. Click the Optimization tab.
3. Clear the Optimize network performance during Observe, Control, and
Broadcast check box.
4. Click OK.
Page 95

8 9
| C H A P T E R 1 1 – C O N F I G U R I N G S M A R T S Y N C T E A C H E R
To return the optimization
preferences to their default
settings
1. Select Options > Preferences.
The Preferences dialog box appears.
2. Click the Optimization tab.
3. Click Defaults.
4. Click OK.
Setting the Control Preferences
By default, you have sole control of the student’s desktop. However, you can share
control with the student. If you share control, both you and the student can control the
student’s desktop. However, if both of you are trying to control the desktop at the same
time, your actions take precedence over the student’s.
N O T E S
l If you make a change the control preferences while you’re already
controlling a student’s desktop, the change takes effect immediately. For
example, if you have sole control of a student’s desktop and you change
the setting to Shared, you immediately share control of the student’s
desktop with the student.
To share control of a
student’s desktop
l If you take control of a student’s computer and it’s running the Windows
Vista operating system, the control of the computer is always shared
regardless of how you set the control preferences. When both you and the
student try to control the computer, the student’s actions take precedence.
1. Select Options > Preferences.
The Preferences dialog box appears.
2. Click the Control tab.
3. Select Shared.
4. Click OK.
Page 96

9 0
| C H A P T E R 1 1 – C O N F I G U R I N G S M A R T S Y N C T E A C H E R
To not share control of a
student’s desktop
To return the control
preferences to their default
settings
1. Select Options > Preferences.
The Preferences dialog box appears.
2. Click the Control tab.
3. Select Teacher-only.
4. Click OK.
1. Select Options > Preferences.
The Preferences dialog box appears.
2. Click the Control tab.
3. Click Defaults.
4. Click OK.
Setting the Broadcast Preferences
You can determine how your desktop appears on students’ screens and who controls the
mouse and keyboard of a student’s desktop during broadcasting.
To set preferences for
when you broadcast your
desktop
1. Select Options > Preferences.
The Preferences dialog box appears.
2. Click the Broadcast tab.
3. Select Full Screen to broadcast your desktop in Full Screen mode by default.
OR
Select Window to broadcast your desktop in Window mode by default.
T I P
Full screen mode is best if you don’t want students to view other
applications while you broadcast your desktop.
4. Select the Zoom the window to best fit check box to resize the broadcasted
desktop to best fit students’ screens.
Page 97

9 1
| C H A P T E R 1 1 – C O N F I G U R I N G S M A R T S Y N C T E A C H E R
5. Click OK.
To set preferences for
when you broadcast a
student’s desktop
1. Select Options > Preferences.
The Preferences dialog box appears.
2. Click the Broadcast tab.
3. Select Teacher-only if you want exclusive control of the mouse or keyboard
during the broadcast.
OR
Select Student-only if you want the student to have exclusive control of the
mouse or keyboard during the broadcast.
OR
Select Shared to share control of the mouse and keyboard during the broadcast.
(Your actions take precedence over the student’s.)
N O T E
If you broacast a student’s computer and it’s running the Windows Vista
operating system, the control of the computer is always shared regardless
of how you set the broadcast preferences. When both you and the student
try to control the computer, the student’s actions take precedence.
To return the broadcast
preferences to their default
settings
4. Click OK.
1. Select Options > Preferences.
The Preferences dialog box appears.
2. Click the Broadcast tab.
3. Click Defaults.
4. Click OK.
Setting the Digital Ink’s Appearance
You can change the width, color and transparency of the digital ink.
Page 98

9 2
| C H A P T E R 1 1 – C O N F I G U R I N G S M A R T S Y N C T E A C H E R
N O T E
If you’re working on a SMART Board interactive whiteboard, you can write notes
using a pen tray pen. You can change the appearance of the digital ink using the
options in SMART Notebook.
To set the digital ink’s
appearance
To return the digital ink to
its default settings
1. Select Options > Preferences.
The Preferences dialog box appears.
2. Click the Annotation Pen tab.
3. Type a width value between 1 and 32 pixels in the Width box.
4. Click the Color box, select a color, and then click OK.
5. Select the Highlighter check box to make the digital ink more transparent.
6. Click OK.
1. Select Options > Preferences.
The Preferences dialog box appears.
2. Click the Annotation Pen tab.
3. Click Defaults.
4. Click OK.
To set the file transfer
preferences
Setting the File Transfer Preferences
You can set preferences to customize the behavior of sent and received files. You can
use preferences to:
l Open sent files automatically
l Change the file location of received files
l Change the organization of received files
1. Select Options > Preferences.
The Preferences dialog box appears.
2. Click the File Transfer tab.
Page 99

9 3
| C H A P T E R 1 1 – C O N F I G U R I N G S M A R T S Y N C T E A C H E R
3. If you want the files that you send to open automatically, select the Automatically
open files on student’s computers check box. Otherwise, clear this check box.
4. If you want to change the default file location of received files, select Custom
folder. Click Browse, navigate to and select the folder you want, and then click
OK.
5. If you want to organize received files by date, select the Organize the stored
files by their submission date check box.
6. Click OK.
To return the file transfer
preferences to their default
settings
1. Select Options > Preferences.
The Preferences dialog box appears.
2. Click the File Transfer tab.
3. Click Defaults.
4. Click OK.
Setting a User Authentication Password
You can enable password protection on the connections between the teacher and the
students. To enable password protection:
l On the teacher’s computer, set the password using the SMART Sync Teacher
preferences.
l On the student’s computer, set the password using the SMART Sync Student
Configuration Tool (see document 144150).
If you set a password on a student’s computer, the student can connect only to a teacher
who has the same password.
To create a user
authentication password
on the teacher’s computer
N O T E
If a student has no password, the student can connect to any teacher.
1. Select Options > Preferences.
The Preferences dialog box appears.
2. Click the Security tab.
Page 100

9 4
| C H A P T E R 1 1 – C O N F I G U R I N G S M A R T S Y N C T E A C H E R
3. Select the Use password check box.
The Create Password dialog box appears.
4. Type the password.
5. Type the password again to confirm it.
6. Click OK.
To change a user
authentication password
on the teacher’s computer
To remove a user
authentication password
on the teacher’s computer
1. Select Options > Preferences.
The Preferences dialog box appears.
2. Click the Security tab.
3. Select the Use password check box.
The Change Password dialog box appears.
4. Type the old password.
5. Type the new password.
6. Type the new password again to confirm it.
7. Click OK.
1. Select Options > Preferences.
The Preferences dialog box appears.
2. Click the Security tab.
3. Clear the Use password check box.
The Change Password dialog box appears.
4. Type the old password.
5. Click OK.
Setting the Advanced Preferences
In the Advanced tab of the Preference dialog box, you can set advanced preferences and
select network adapters.
 Loading...