

Page 1

LightRaise™ 40wi Quick Reference Guide
The LightRaise 40wi is a wall-mounted interactive projector that
enables you to write and draw over any application in digital ink
and perform regular mouse functions with its interactive pen.
The interactive pen functions like a point and click mouse. You use
the pen tip to interact with the projected image at close range,
and you can use the Left-Click button to interact from a distance.
The projector includes a built-in 10W speaker, and easily connects
with DVD players, cameras or game consoles. You can switch
between different media using the projector remote control.
The projector system includes:
• A LightRaise 40wi projector (with a built-in 10W speaker), an
interactive pen, a remote control and a pen holder
• Supplied cables: USB (Type A to B), VGA video, 3.5mm audio
and a USB charging cable (Type A to mini-B)
• SMART Notebook™ collaborative learning software
What do you need to get started?
• A Windows® or Mac® OS computer that meets the minimum
system requirements for SMART software and has a full
speed USB port (USB 1.1 or higher)
• A broadband Internet connection to access the SMART
Exchange™ website
Connectingacomputer
To use all the features of the interactive projector,
your computer must have SMART Notebook software
or SMART Product Drivers installed. SMART Notebook
software is included with the projector and you can
download SMART Product Drivers for free.
1. Connect the projector’s USB, VGA and 3.5mm
stereo cable to your computer
2. Turn on the computer. Laptops may require a keyboard
short-cut to initiate video out.
3. Turn on the interactive projector. If necessary, cycle the
projector’s input to VGA 1 by pressing the Input button on
the remote control.
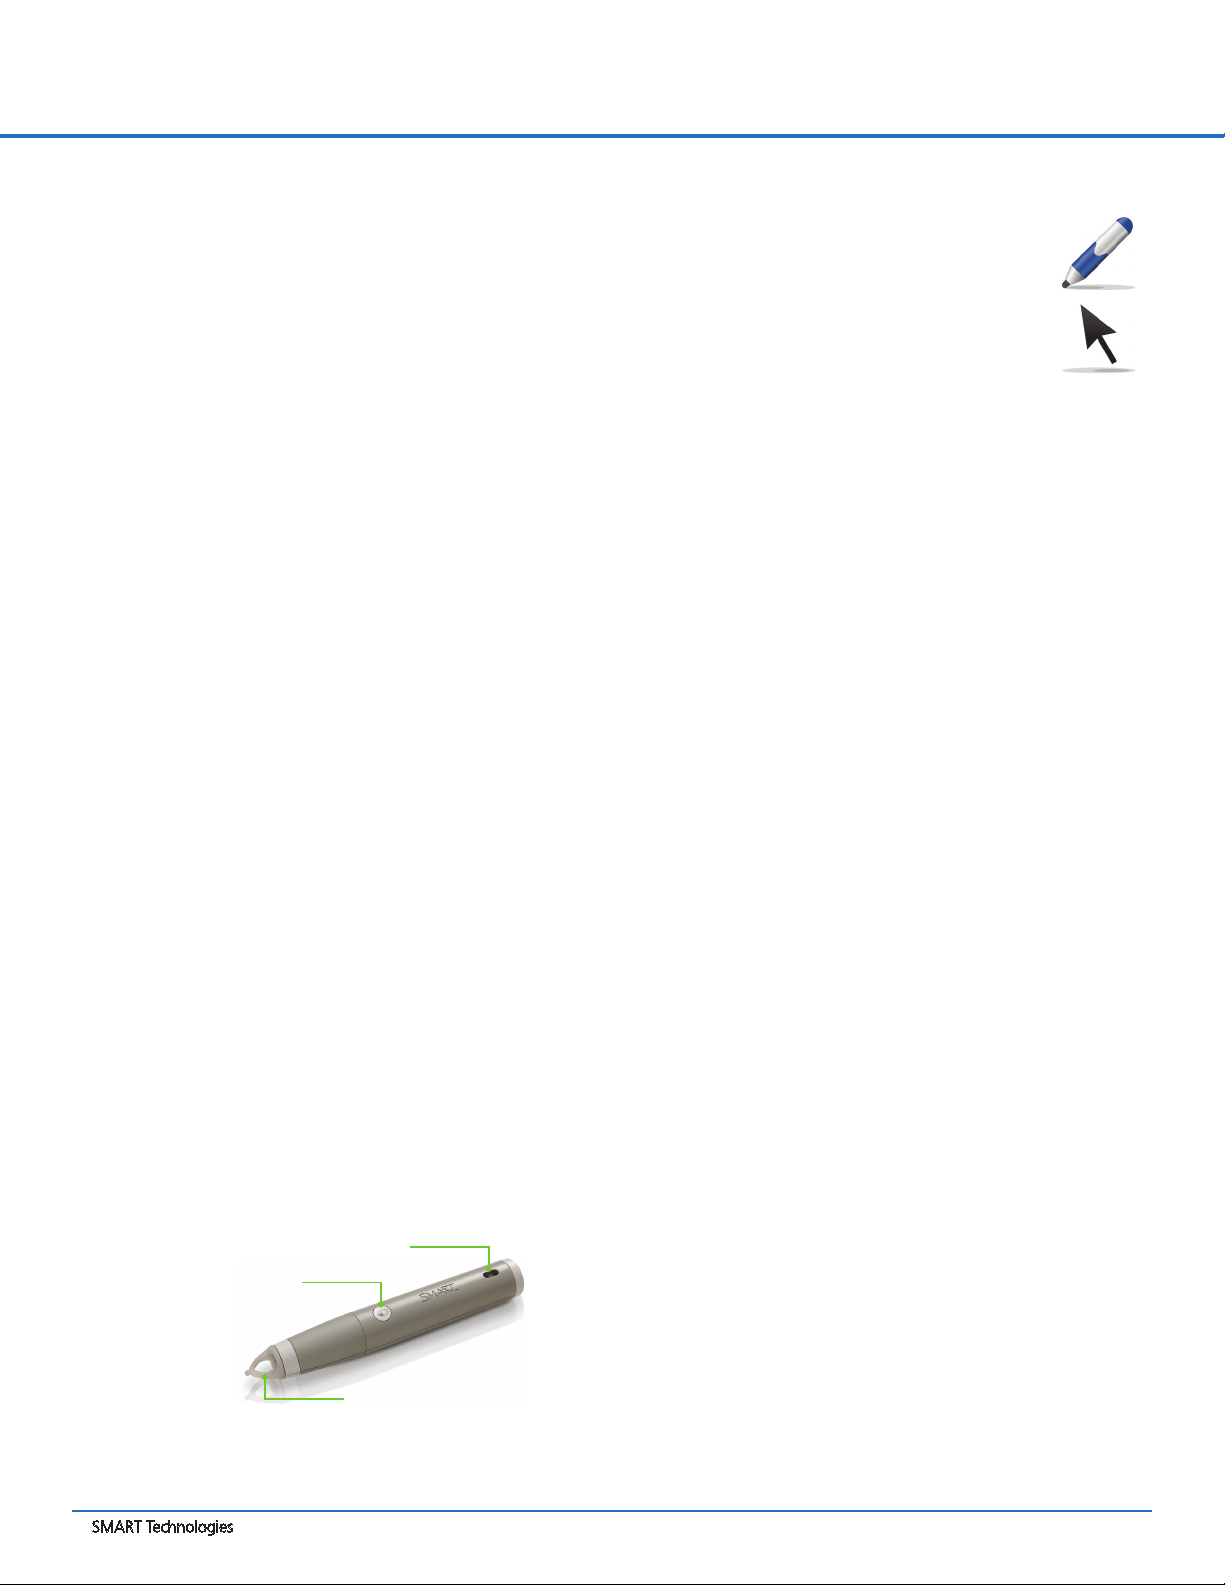
4. Turn on the interactive pen. The interactive pen’s on/off
switch is located along the pen handle.
On/off
Usingtheremotecontrol
The remote control enables you to access on-screen projector
menus and change projector settings.
Turningontheprojector
Turn the projector on or set it to standby by pressing the Power
button on the remote control, or by pressing the Power button on
the bottom of the projector. You may not see an image for up to
60 seconds because the projector needs to warm its lamp.
The power button on the projector also serves as a status light.
Status light conditions include:
• Solid amber – standby (off)
• Solid green – on
• Flashing amber – shutdown in progress
• Flashing green – start up in progress
SMART Technologies
Select a video and
Input
audio input source
Menu
Show or hide the
projector menus
Hide
Freeze, hide or
display the image
Mode
Select a display mode
Power
Turn on the projector or
put it into Standby mode
Enter
Accept the selected
mode or option
Arrows
Change the menu selections
and adjustments
Volume
Increase / decrease audio levels
Mute
Mute audio levels
June 2012
Page 2
LightRaise 40wi Quick Reference Guide
Usingtheinteractivepen
When you point the pen towards the projected image, you can
interact with the computer desktop and any application just as you
would using a computer mouse. You can also use the pen to write
and draw in digital ink.
• Click by touching the pen nib to the projection surface
• Click at a distance with the pen’s Left-Click button
• To right-click, hold down the pen nib or Left-Click button
for more than three seconds
Pen modes
You can operate the interactive pen in either Whiteboard or
Presenter mode. In Whiteboard mode, you interact by touching
the pen nib to the projection surface. In Presenter mode, an
on-screen cursor indicates where the pen is pointing, and you
interact from a distance using the pen’s Left-Click button.
To switch modes, use the remote control:
1. Open the projector Settings menu by pressing Menu
2. Using the Arrow and Enter buttons, navigate to System
Functionality under the Interactive Pen submenu.
Press Enter to toggle between Presenter and Whiteboard
mode.
3. Close the Settings menu by pressing Menu again
Status LEDs
Two LEDs on the pen display the pen’s connection and battery
status:
Tips
Digital ink
The projector’s digital ink features are SMART software
features. To switch between regular mouse and digital
ink functionality, select the appropriate tool from the
tool palette in SMART Notebook, or from the floating
SMART tools palette when using any other application.
Operating distance
A comfortable distance for reliable pen use ranges from 5 to 15'
(1.5 to 5 m). Be aware that as distance increases pen movement is
more difficult to control.
Shadows
Objects or shadows in the projection area prevent the pen from
reading the projected image. When interacting at close range,
minimize shadows by positioning yourself at an arm’s length with
the pen at a 90° angle.
Line of sight
To use the pen from a distance, stand in a location that has a
clean line of sight. Any obstruction will result in lost connectivity.
You can observe the pen’s connection by its status lights – flashing
green for connected and flashing amber for unconnected.
Cursor control
The interactive pen will compete with your computer’s mouse or
laptop trackpad for cursor control. If you need to use your mouse,
turn the interactive pen away from the screen until its amber LED
begins flashing.
• Flashing green – normal connected state
• Flashing amber – the pen cannot see the projected image
• Slow flashing amber – battery requires charging
Battery
The interactive pen uses a rechargeable lithium-ion battery that
can be fully charged in 2.5 hours for 20 hours of use. You can
recharge the battery by connecting the pen to an active USB port
with the supplied USB charging cable.
NOTE: The pen’s amber LED remains solid while charging.
LEDs
Left-Click button
Nib
© 2012 SMART Technologies. All rights reserved. LightRaise, SMART Notebook, SMART Exchange, smarttech, the SMART logo and all taglines are trademarks or registered trademarks of SMART Technologies in the U.S. and/or other countries. All third-party
product and company names may be trademarks of their respective owners. Printed in Canada 06/2012.
SMART Technologies
Primary display
The projector uses the primary display of the connected computer
(labeled monitor 1), and doesn’t support use on any secondary
display (monitor 2). Use your computer’s control panel to
designate your primary display. To ensure image quality, match
your computer video resolution to the interactive projector’s 16:10
aspect ratio image – WXGA 1280 × 800.
June 2012
 Loading...